> ## Documentation Index
> Fetch the complete documentation index at: https://razorpay-881012b3.mintlify.site/llms.txt
> Use this file to discover all available pages before exploring further.
# 1. Build Integration
> Steps to integrate the Merchant Onboarding UI with your website or app.
Available in
🇮🇳 India
Complete these steps to integrate with the Merchant Onboarding UI components and ensure a seamless flow:
1. [Embed the Merchant Onboarding UI link in your website/app.](#1-embed-merchant-onboarding-ui-link-in-your)
2. [Configure the UI appearance on the Razorpay Dashboard.](#2-configure-onboarding-ui-theme-on-razorpay-dashboard)
## 1. Embed Merchant Onboarding UI Link in Your Website/App
1. Embed `https://easy.razorpay.com/sub-merchant` on your platform to redirect your merchants to the Razorpay onboarding page.
2. Pass the `partnerId`, `phoneNumber` and `redirectUrl` parameters in the request while redirecting merchants to Razorpay.
`partnerId` *mandatory*
: `string` The Razorpay partner MID. For example, `BouVWhEiuKOvfc`.
`phoneNumber` *optional*
: `string` The phone number of the merchant to be onboarded. For example, `+919988998899`.
`redirectUrl` *mandatory*
: `string` The URL that the merchant should be redirected to after completing the onboarding.
### Sample URL
Here is a sample URL after adding the parameters: `https://easy.razorpay.com/sub-merchant?partnerId=ABC45&phoneNumber=XXXXXXXXXX&redirectUrl=https://google.com`
## 2. Configure Onboarding UI Theme on Razorpay Dashboard
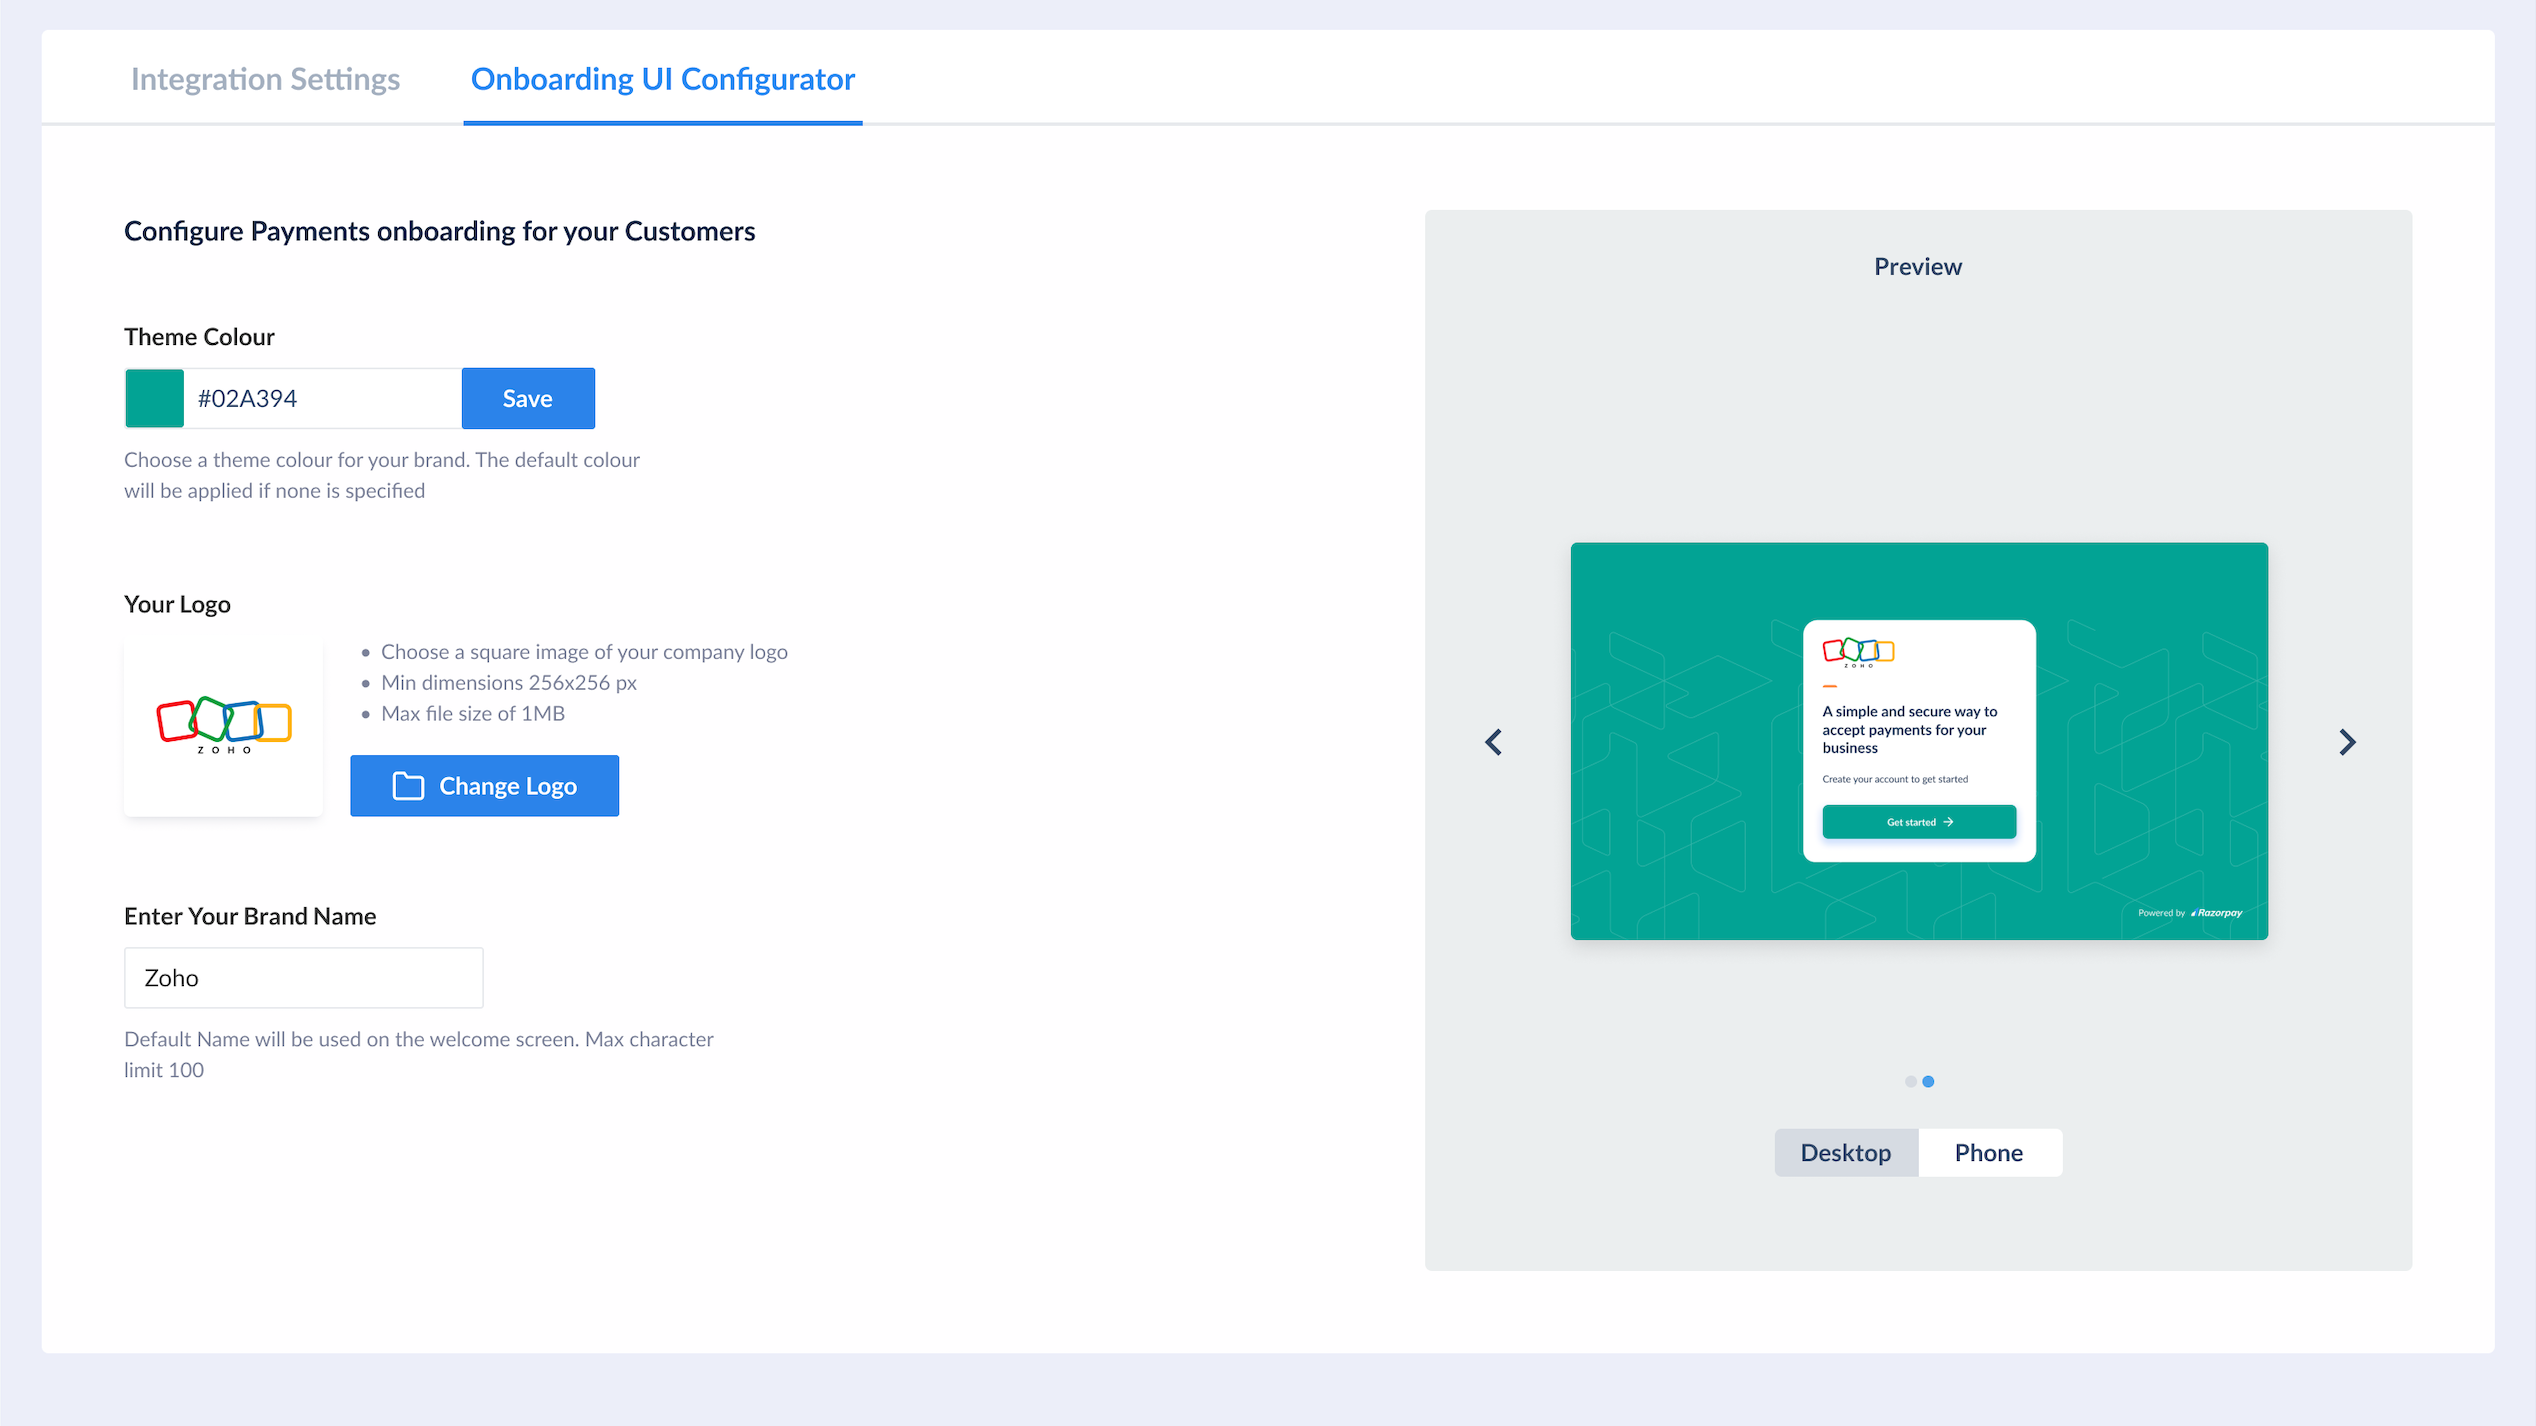
Configure the theme colour and logo as per your platform theme to provide a seamless onboarding experience for your sub-merchants.
Follow these steps:
1. Log in to the Dashboard.
2. Navigate to **Partners** → **Settings** → **Configuration**.
3. Provide the following details:
* Theme Color: Enter your brand theme colour's HEX value. For example, "#3399cc". This is the primary colour for the onboarding flow UI.
* Your Logo: Click **Upload File** to add your brand logo. Ensure the file meets these requirements:
* Height: Width ratio should be 1:1 (square shape).
* Maximum file size: 1 MB.
* Maximum dimension: 256x256px.
* Enter Your Brand Name: Enter the name that should be shown on the onboarding flow UI. The maximum character limit is 100.
4. Check the preview of the onboarding UI on the right (desktop and phone) and click **Save**.
 ## Next Step
[2. Test Integration](/docs/partners/aggregators/onboarding-ui/test-integration)
## Next Step
[2. Test Integration](/docs/partners/aggregators/onboarding-ui/test-integration)