> ## Documentation Index
> Fetch the complete documentation index at: https://razorpay-881012b3.mintlify.site/llms.txt
> Use this file to discover all available pages before exploring further.
# Test Integration
> Test your Razorpay OAuth integration by creating test application and authorising it.
Available in
🇮🇳 India
You can test the full Razorpay OAuth flow by creating a sample application to obtain access to the sub-merchant's data securely. Below are the steps to grant access to your application for your account:
1. [Create the test application on Dashboard](#1-create-the-test-application).
2. [Preview the OAuth page and authorise the test application](#2-preview-oauth-page-and-authorise-test-application).
## 1. Create The Test Application
To create the test application:
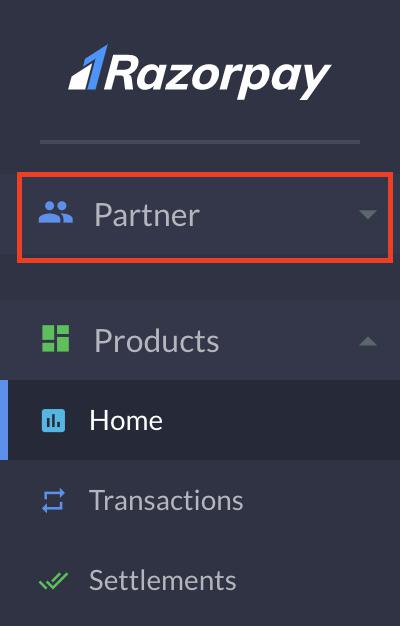
1. On your Dashboard, click **Partner**.
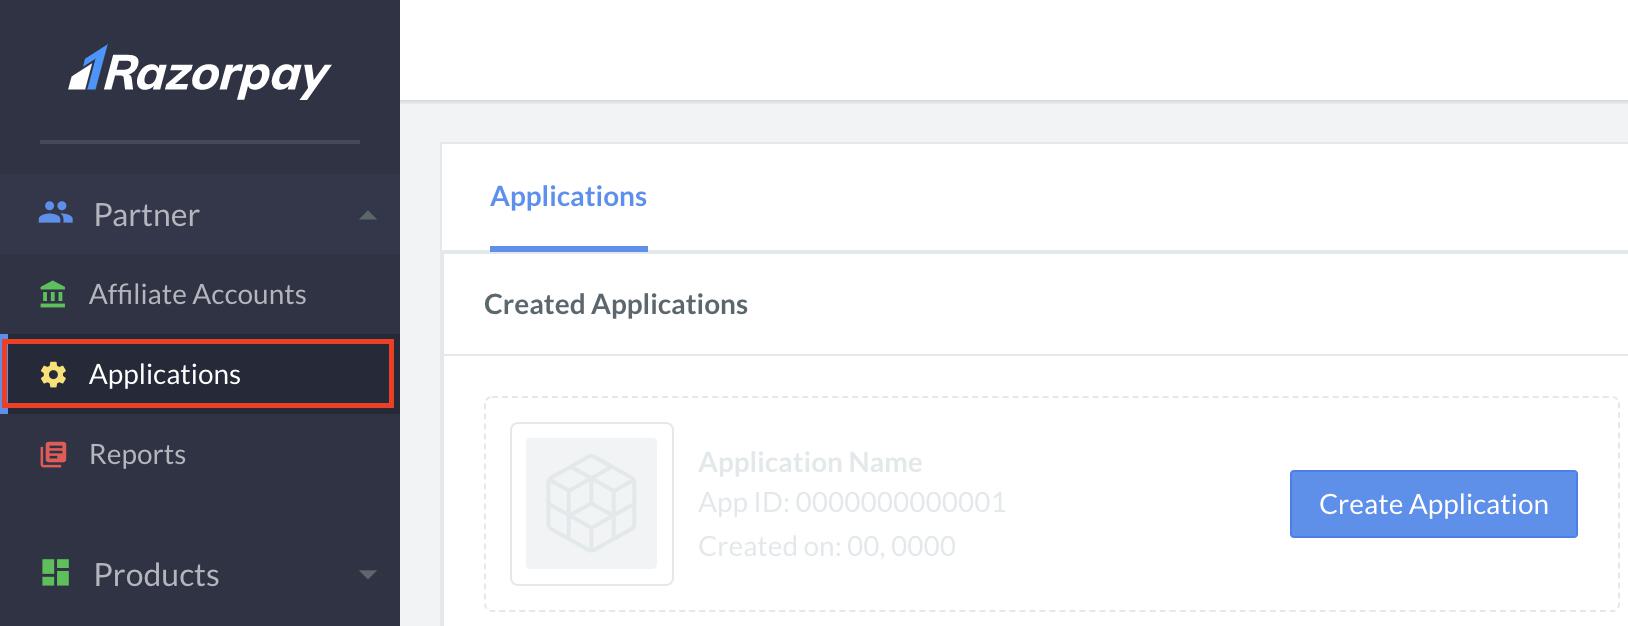
 2. Click **Applications** to open the Applications tab. This tab displays a list of created applications.
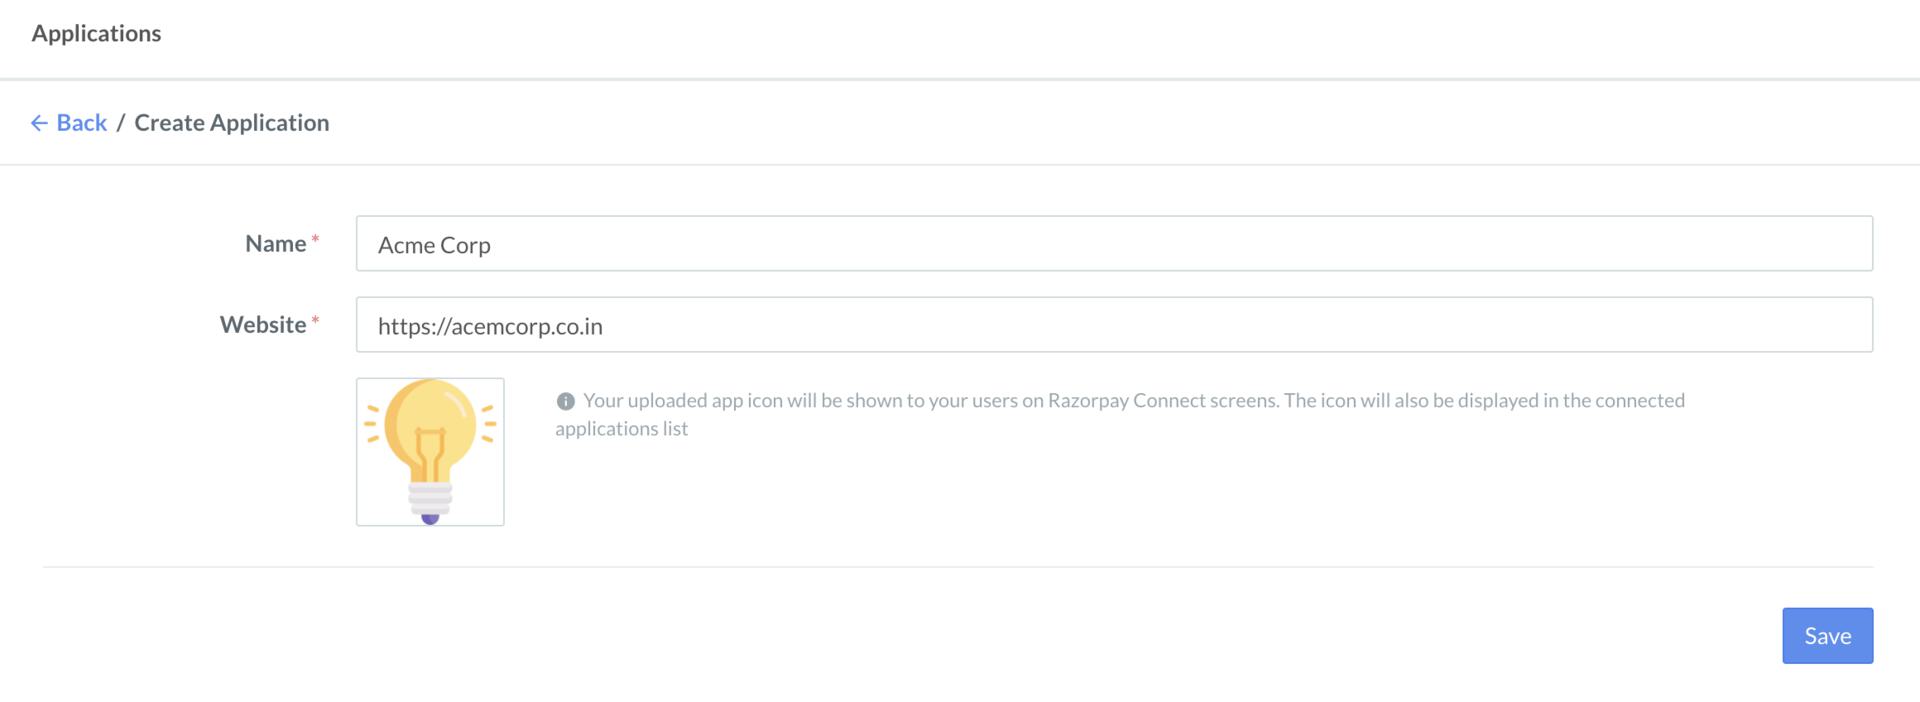
 3. Click **Create Application** and provide these details:
1. Enter the **Name** of your application. For example, "Acme Corp". This would appear on Razorpay's authorisation page.
2. Enter the **Website** URL of the application.
3. Click **Upload App Icon** to upload the app's logo. Razorpay displays this icon to your users on the Razorpay Connect screens. It is also displayed in the Connected Applications list.
**Handy Tips**
Upload only square images as the App Icon.
4. Click **Save**.
3. Click **Create Application** and provide these details:
1. Enter the **Name** of your application. For example, "Acme Corp". This would appear on Razorpay's authorisation page.
2. Enter the **Website** URL of the application.
3. Click **Upload App Icon** to upload the app's logo. Razorpay displays this icon to your users on the Razorpay Connect screens. It is also displayed in the Connected Applications list.
**Handy Tips**
Upload only square images as the App Icon.
4. Click **Save**.
 * Razorpay creates an application that appears on the list of created applications. The **Edit Application** page shows the application settings for both **Development** and **Production** clients.
* **Client ID** and **Client Secret** are predefined for both Development and Production clients. Use them to make request calls to Razorpay servers.
* Razorpay creates an application that appears on the list of created applications. The **Edit Application** page shows the application settings for both **Development** and **Production** clients.
* **Client ID** and **Client Secret** are predefined for both Development and Production clients. Use them to make request calls to Razorpay servers.
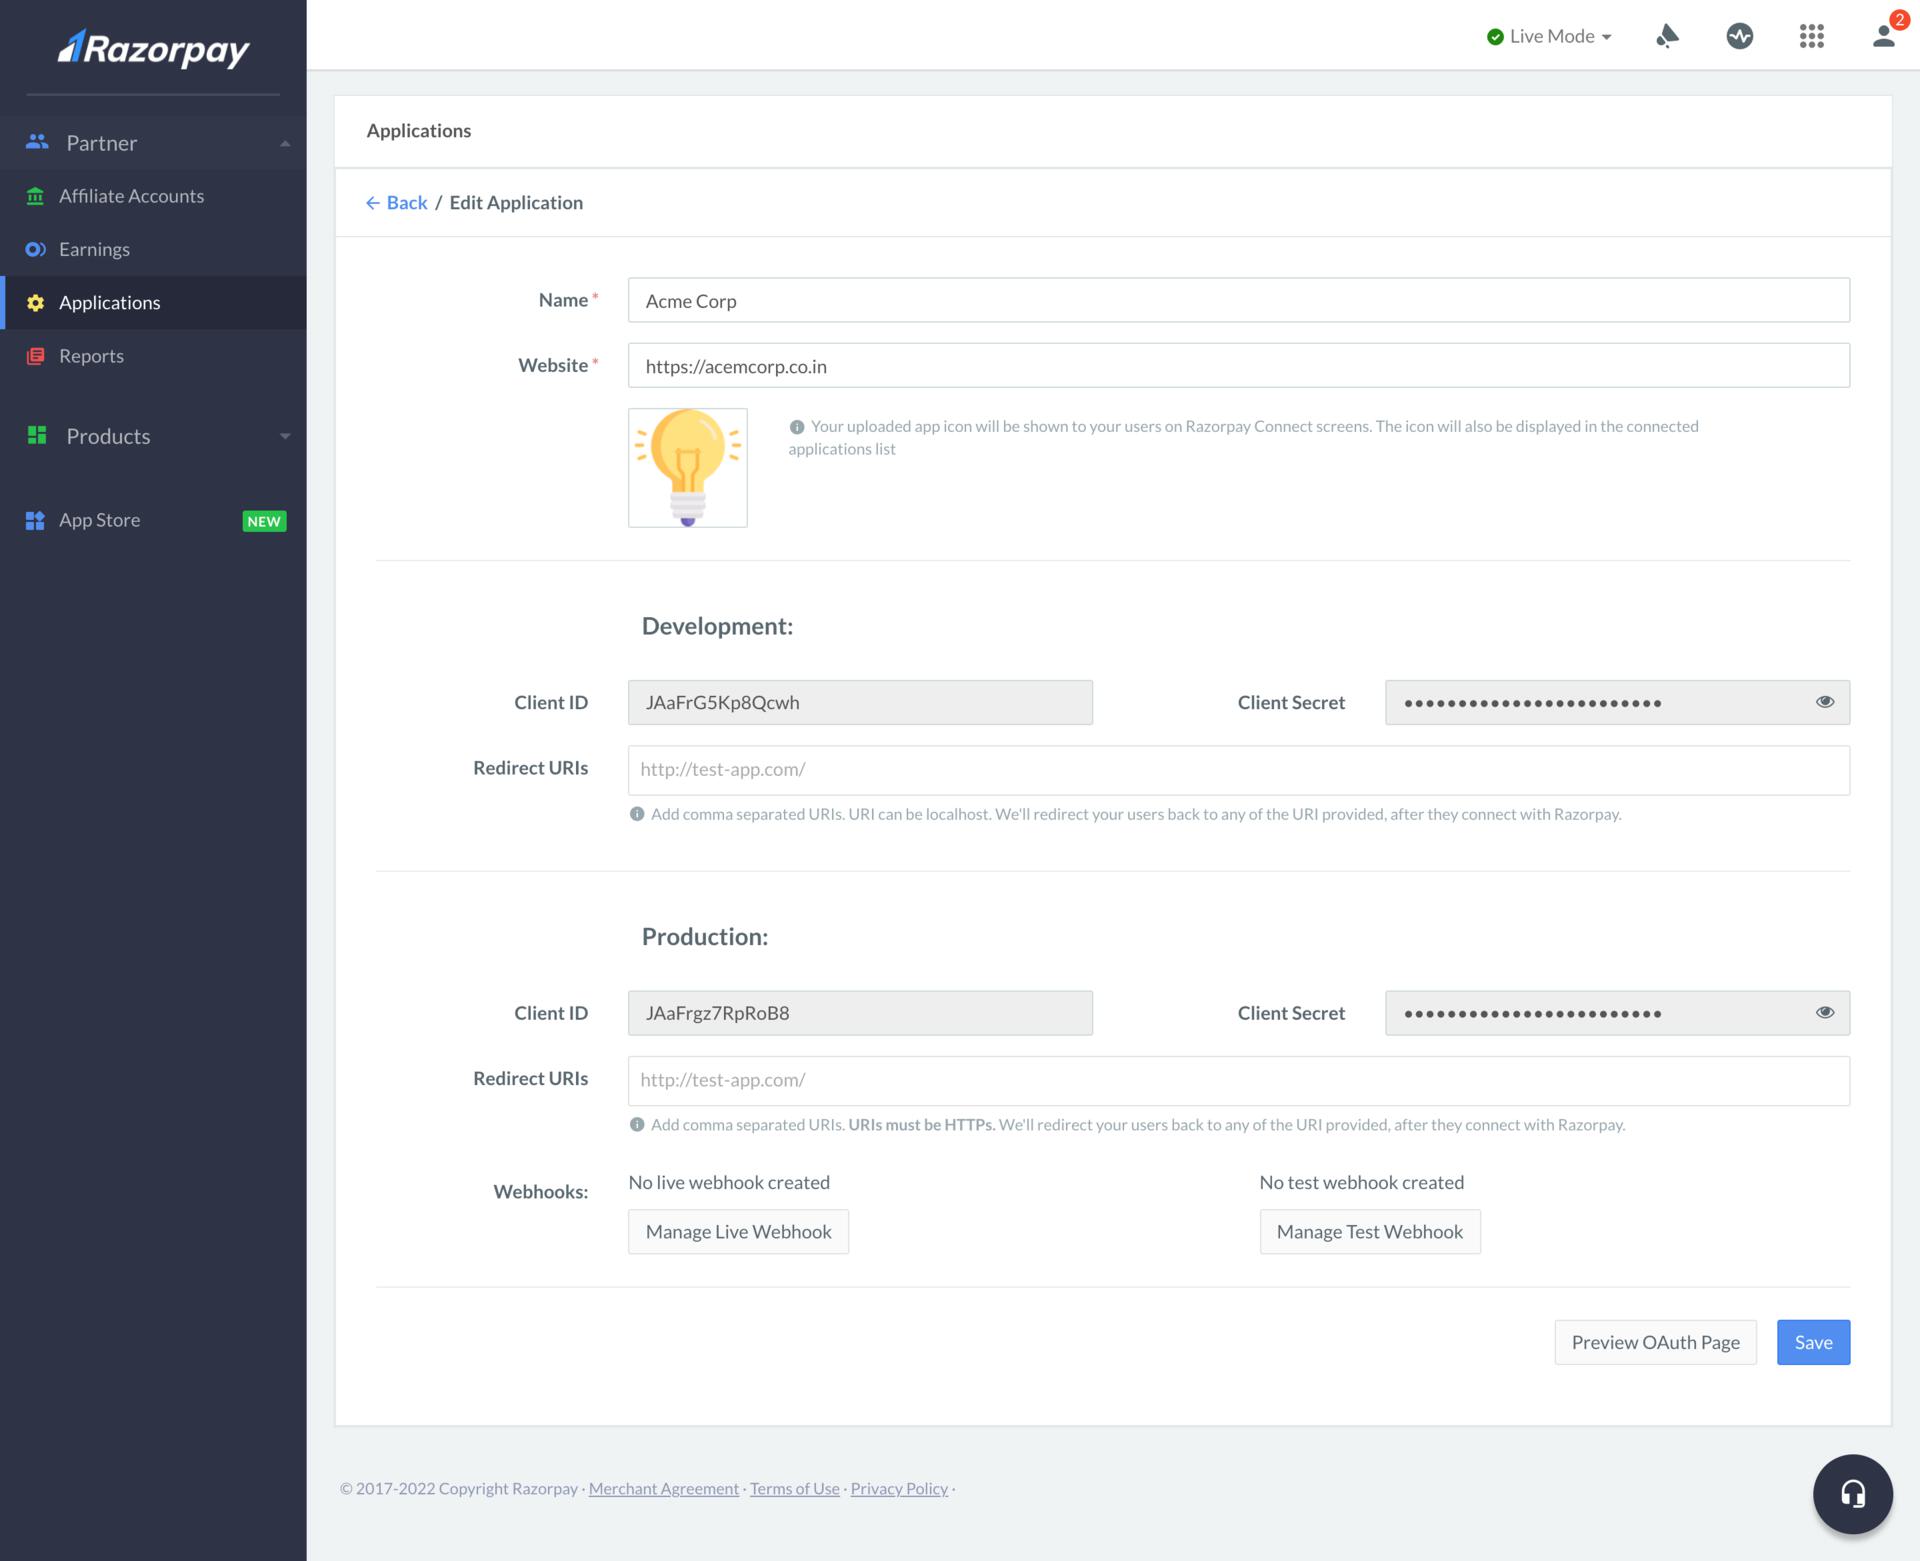 4. Enter the Redirect URIs in comma-separated format.
**Handy Tips**
For production clients, only URLs with `https` are supported. For example, `https://acmecorp.com`.
5. Click **Save**.
## 2. Preview OAuth Page and Authorise Test Application
Follow these steps:
1. Click **Preview OAuth Page**. Razorpay redirects you to the authorisation page, where you can authorise or decline access to your test application for your account.
**Handy Tips**
For development clients, we support `https://localhost` as a `redirect_uri` on **Preview**. However, you can replace it with any valid URLs specified in the **Development** client settings and reload the page.
4. Enter the Redirect URIs in comma-separated format.
**Handy Tips**
For production clients, only URLs with `https` are supported. For example, `https://acmecorp.com`.
5. Click **Save**.
## 2. Preview OAuth Page and Authorise Test Application
Follow these steps:
1. Click **Preview OAuth Page**. Razorpay redirects you to the authorisation page, where you can authorise or decline access to your test application for your account.
**Handy Tips**
For development clients, we support `https://localhost` as a `redirect_uri` on **Preview**. However, you can replace it with any valid URLs specified in the **Development** client settings and reload the page.
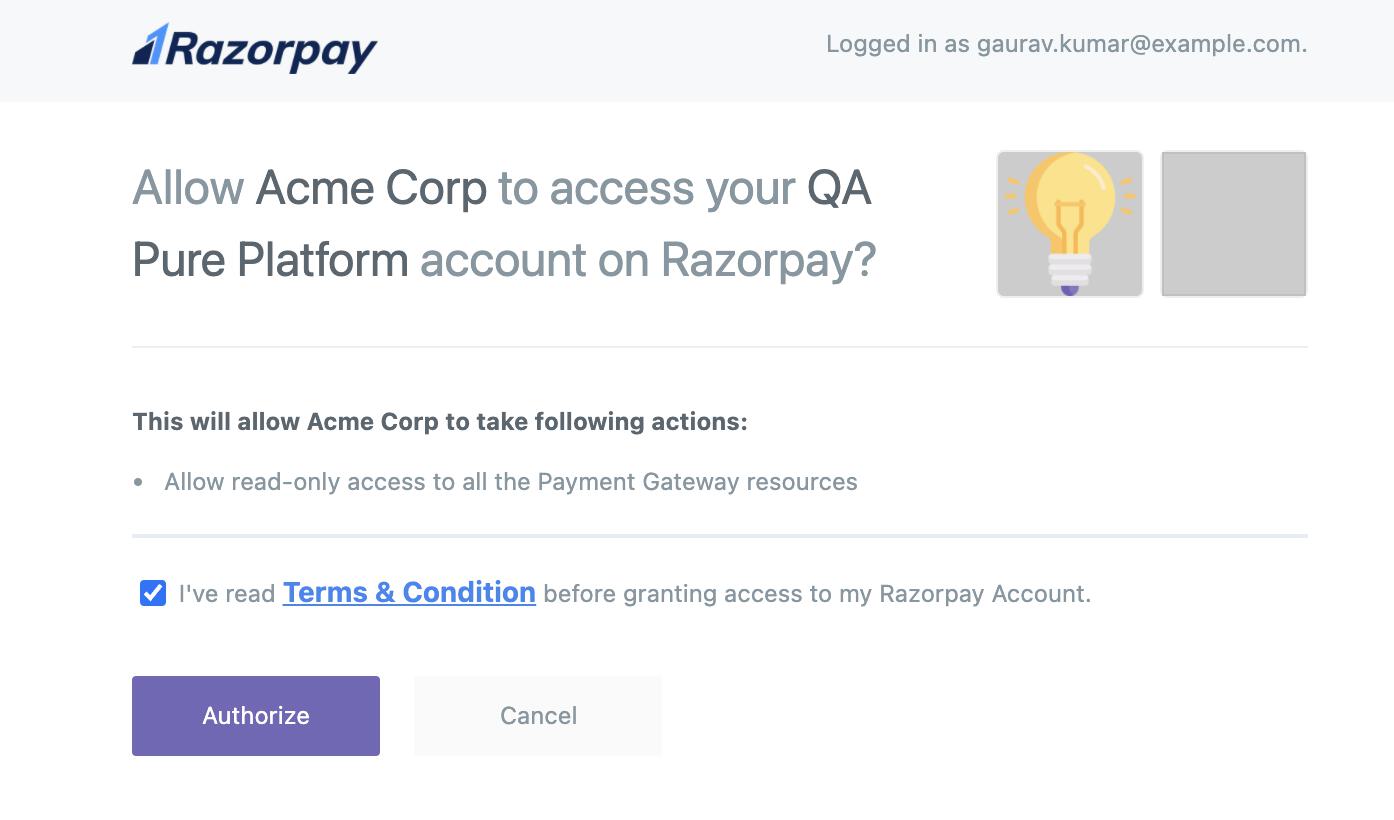 2. Click **Authorize**. Razorpay redirects you to the `redirect_uri` sent in the request URL, along with the auth code.
3. Copy the auth `code` from the URL and use it to obtain the new [access token](/docs/partners/technology-partners/onboard-businesses/integrate-oauth/integration-steps#2-2-get-access-token).
**Handy Tips**
While making the API request, pass `mode=test`. This will fetch you an access token for the test mode. Although the default is **Live** mode, testing with a live token would not help much unless your account is activated.
For both production and development clients, you can control the accessibility of the application using the `scope` parameter.
* `read_write` (`scope=read_write`) would grant edit access to the application.
* `read_only` (`scope=read_only`) would allow only view access.
* `rx_read_only` would grant view access to all RazorpayX resources. That is, all `GET` API requests. This means you can only view the payouts, contacts and so on.
* `rx_read_write` would allow read and write access to all RazorpayX resources on the API. This means you can view and create payouts, contacts and so on.
* `rx_partner_read_write` would grant access to fetch payouts, contacts, fund accounts, transactions, as well as approve or reject a payout.
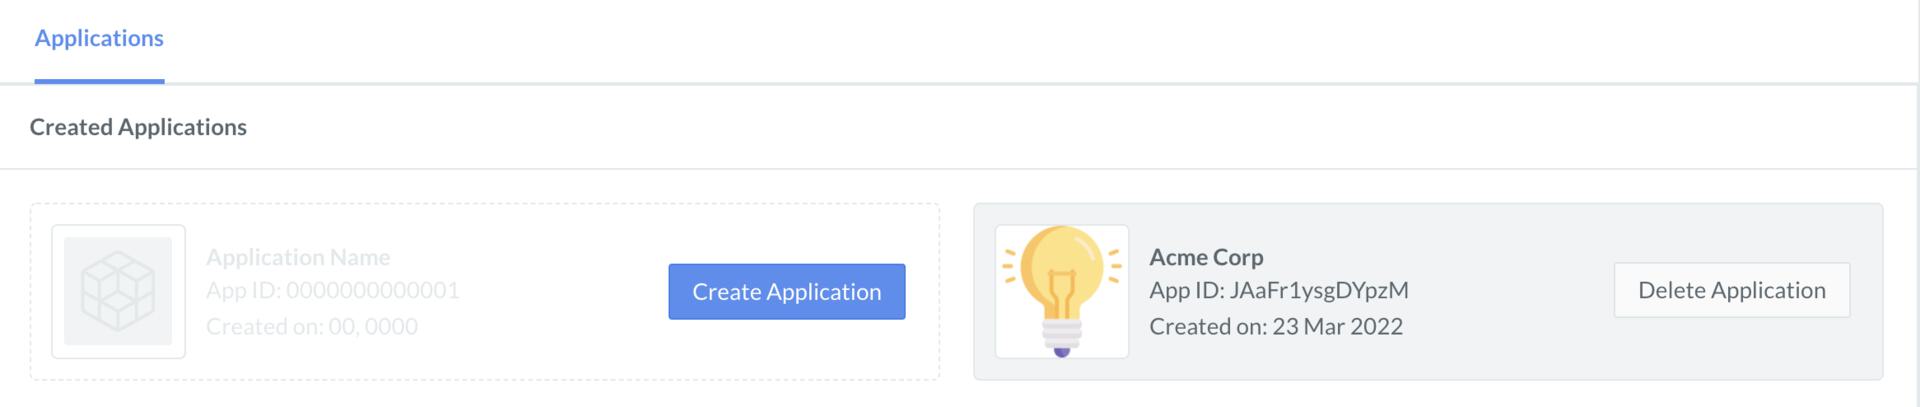
Your test application appears on the **Created Applications** list on the sub-merchant's Dashboard.
2. Click **Authorize**. Razorpay redirects you to the `redirect_uri` sent in the request URL, along with the auth code.
3. Copy the auth `code` from the URL and use it to obtain the new [access token](/docs/partners/technology-partners/onboard-businesses/integrate-oauth/integration-steps#2-2-get-access-token).
**Handy Tips**
While making the API request, pass `mode=test`. This will fetch you an access token for the test mode. Although the default is **Live** mode, testing with a live token would not help much unless your account is activated.
For both production and development clients, you can control the accessibility of the application using the `scope` parameter.
* `read_write` (`scope=read_write`) would grant edit access to the application.
* `read_only` (`scope=read_only`) would allow only view access.
* `rx_read_only` would grant view access to all RazorpayX resources. That is, all `GET` API requests. This means you can only view the payouts, contacts and so on.
* `rx_read_write` would allow read and write access to all RazorpayX resources on the API. This means you can view and create payouts, contacts and so on.
* `rx_partner_read_write` would grant access to fetch payouts, contacts, fund accounts, transactions, as well as approve or reject a payout.
Your test application appears on the **Created Applications** list on the sub-merchant's Dashboard.
 ## Next Step
[3. Go-live Checklist](/docs/partners/technology-partners/onboard-businesses/integrate-oauth/go-live-checklist)
## Next Step
[3. Go-live Checklist](/docs/partners/technology-partners/onboard-businesses/integrate-oauth/go-live-checklist)