> ## Documentation Index
> Fetch the complete documentation index at: https://razorpay-881012b3.mintlify.site/llms.txt
> Use this file to discover all available pages before exploring further.

# FIRS Automated Process

> Know about FIRS certificate, why you need it and how to obtain it from the Razorpay Dashboard.

<div style={{display:"flex",flexWrap:"wrap",alignItems:"center",gap:"0.35rem 0.9rem",border:"1px solid rgba(128,128,128,0.28)",borderRadius:"0.5rem",padding:"0.45rem 0.75rem",margin:"0 0 1.25rem",fontSize:"0.875rem"}}>
  <span style={{fontWeight:600}}>Available in</span>
  <span>🇮🇳 India</span>
</div>

FIRS Certificate is a document that acts as evidence that you have received funds from a foreign country. The document is recognised as proof in scenarios such as getting GST refunds, claiming drawbacks from the government, or being required by beneficiary banks for compliance purposes. You can now generate FIRS from the Dashboard.

<AccordionGroup>
  <Accordion title="Why do you need FIRS Certificate">
    FIRS certificate contains important information about inward remittance, such as:

    * Sender details
    * Converted amount details
    * Amount of foreign currency
    * UTR and account number
    * Date of certificate issuance
  </Accordion>
</AccordionGroup>

<Warning>
  **Watch Out!**

  It is important to update your Purpose code to generate FIRS Certificates.
</Warning>

## Purpose Code Update

Follow the steps to update your purpose code:

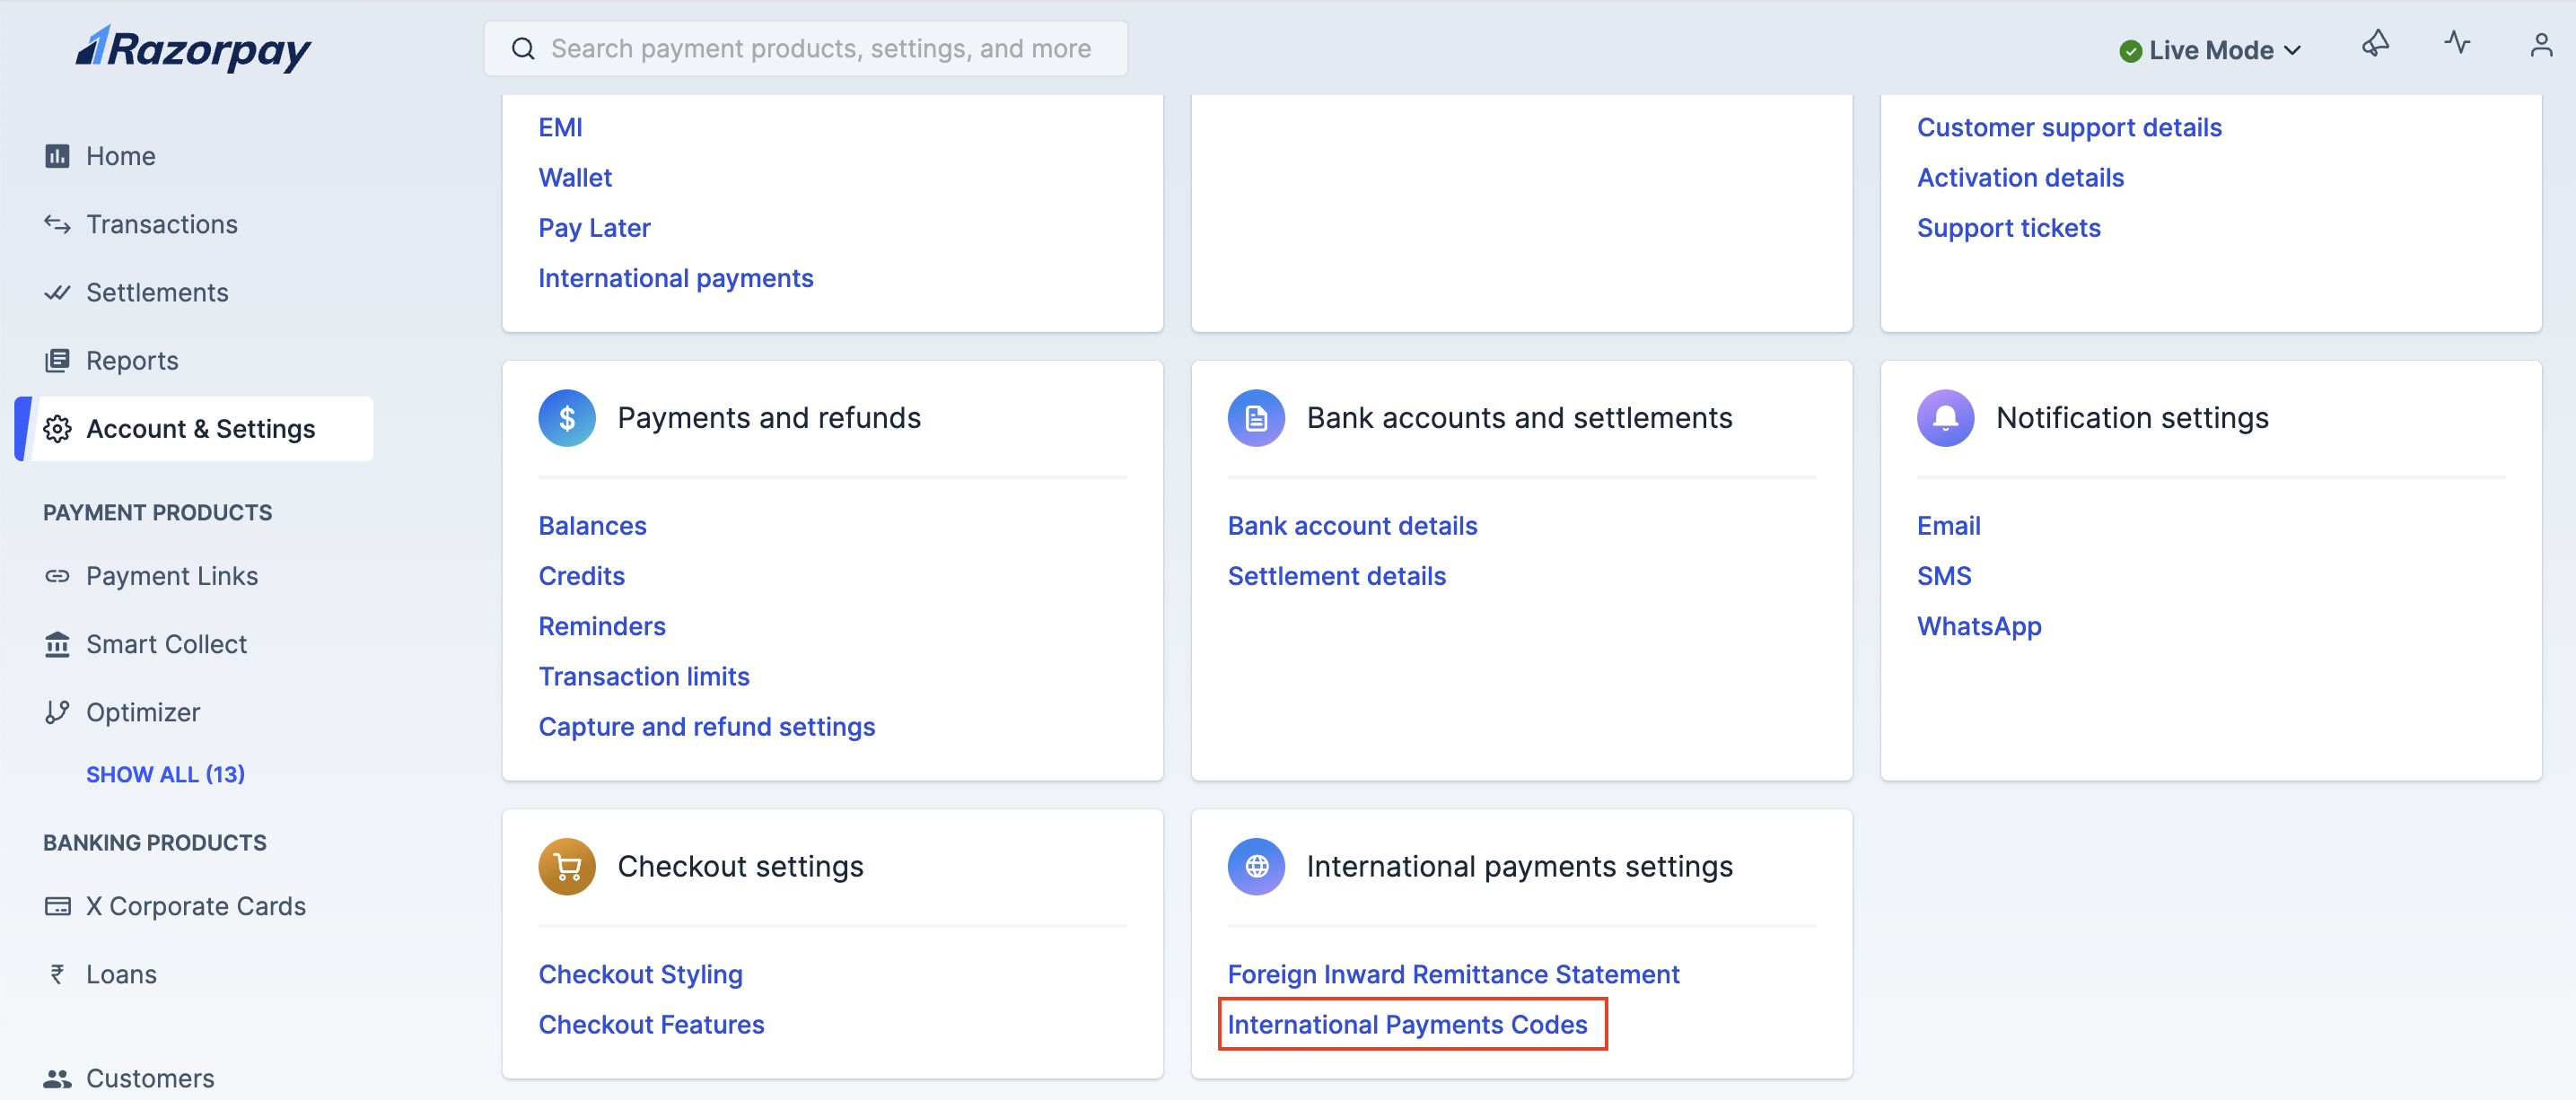
1. Log in to the Dashboard and navigate to **Accounts & Settings**.

2. Click **International Payment Codes** under **International payment settings**.
   <img src="https://razorpay.com/docs/build/browser/assets/images/firs-purpose-code-update-new.jpg" alt="International payment codes" width="800" />

3. Update your purpose code under the **International Payment Codes** section.
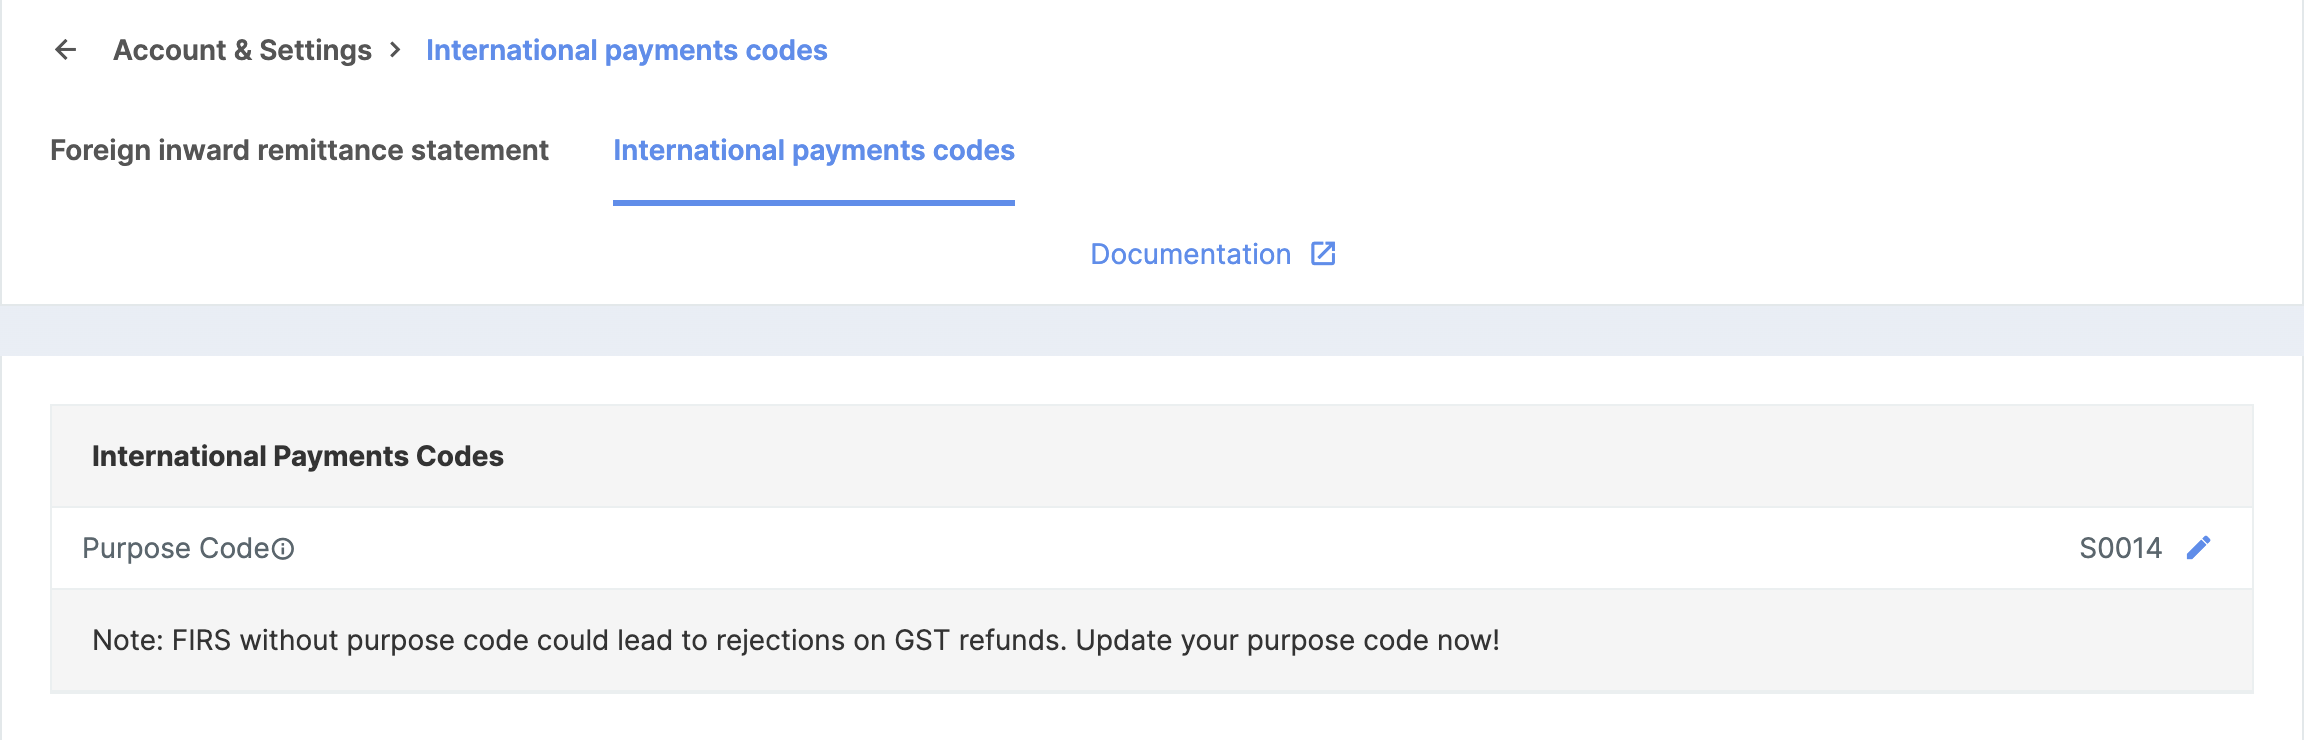
   <img src="https://razorpay.com/docs/build/browser/assets/images/firs-purpose-code-update2-new.jpg" alt="Purpose code update" width="800" />

<Info>
  **Handy Tips**

  If you do not find your Transaction Purpose Code in the [Transaction Code list](https://razorpay.com/docs/build/browser/assets/images/transaction_purpose_codes.xlsx), contact the [Razorpay Support team](https://razorpay.com/support/) from your Dashboard.
</Info>

4. The Razorpay Activation/Operations team checks whether the selected **Purpose Code** is correct.

## Generate FIRS Certificate

All new and existing users accepting international payments can easily obtain the FIRS certificate on the Dashboard in a downloadable format.

To generate FIRS certificate:

1. Log in to the Dashboard and navigate to **Account & Settings**.
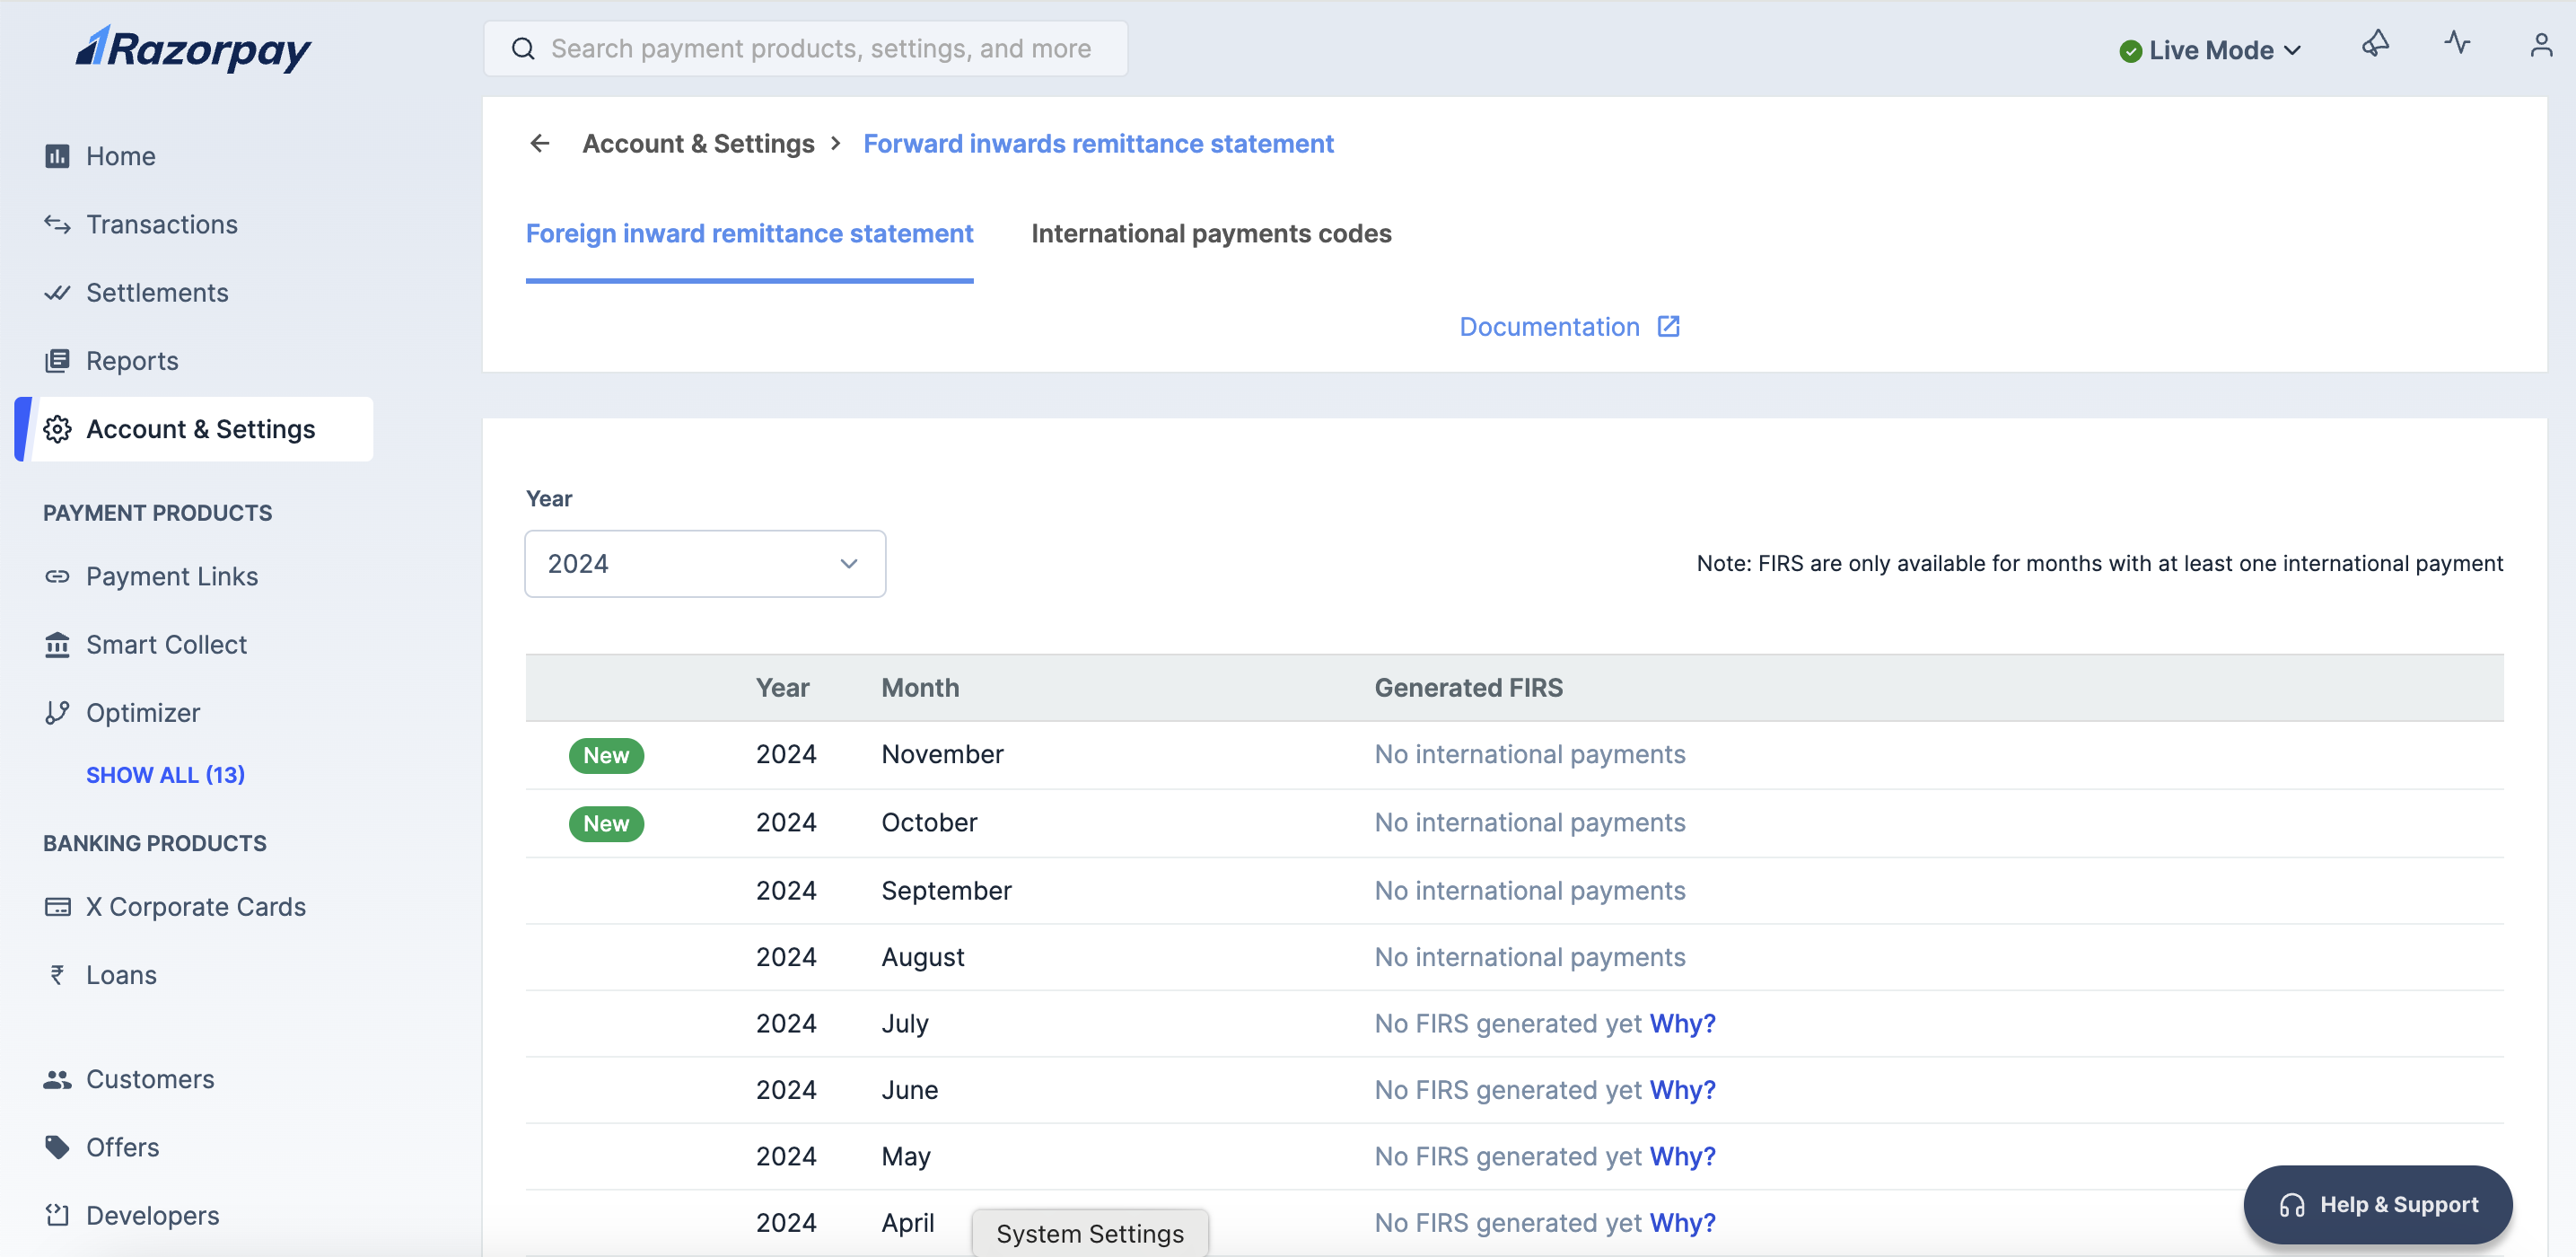
2. Under **International payment settings** click **Foreign inward remittance statement (FIRS)**.
3. You can view a list of FIRS certificates based on your monthly transactions in a downloadable format.
   <img src="https://razorpay.com/docs/build/browser/assets/images/pay-ip-firs-view-new.jpg" alt="List of FIRS certificates" width="800" />
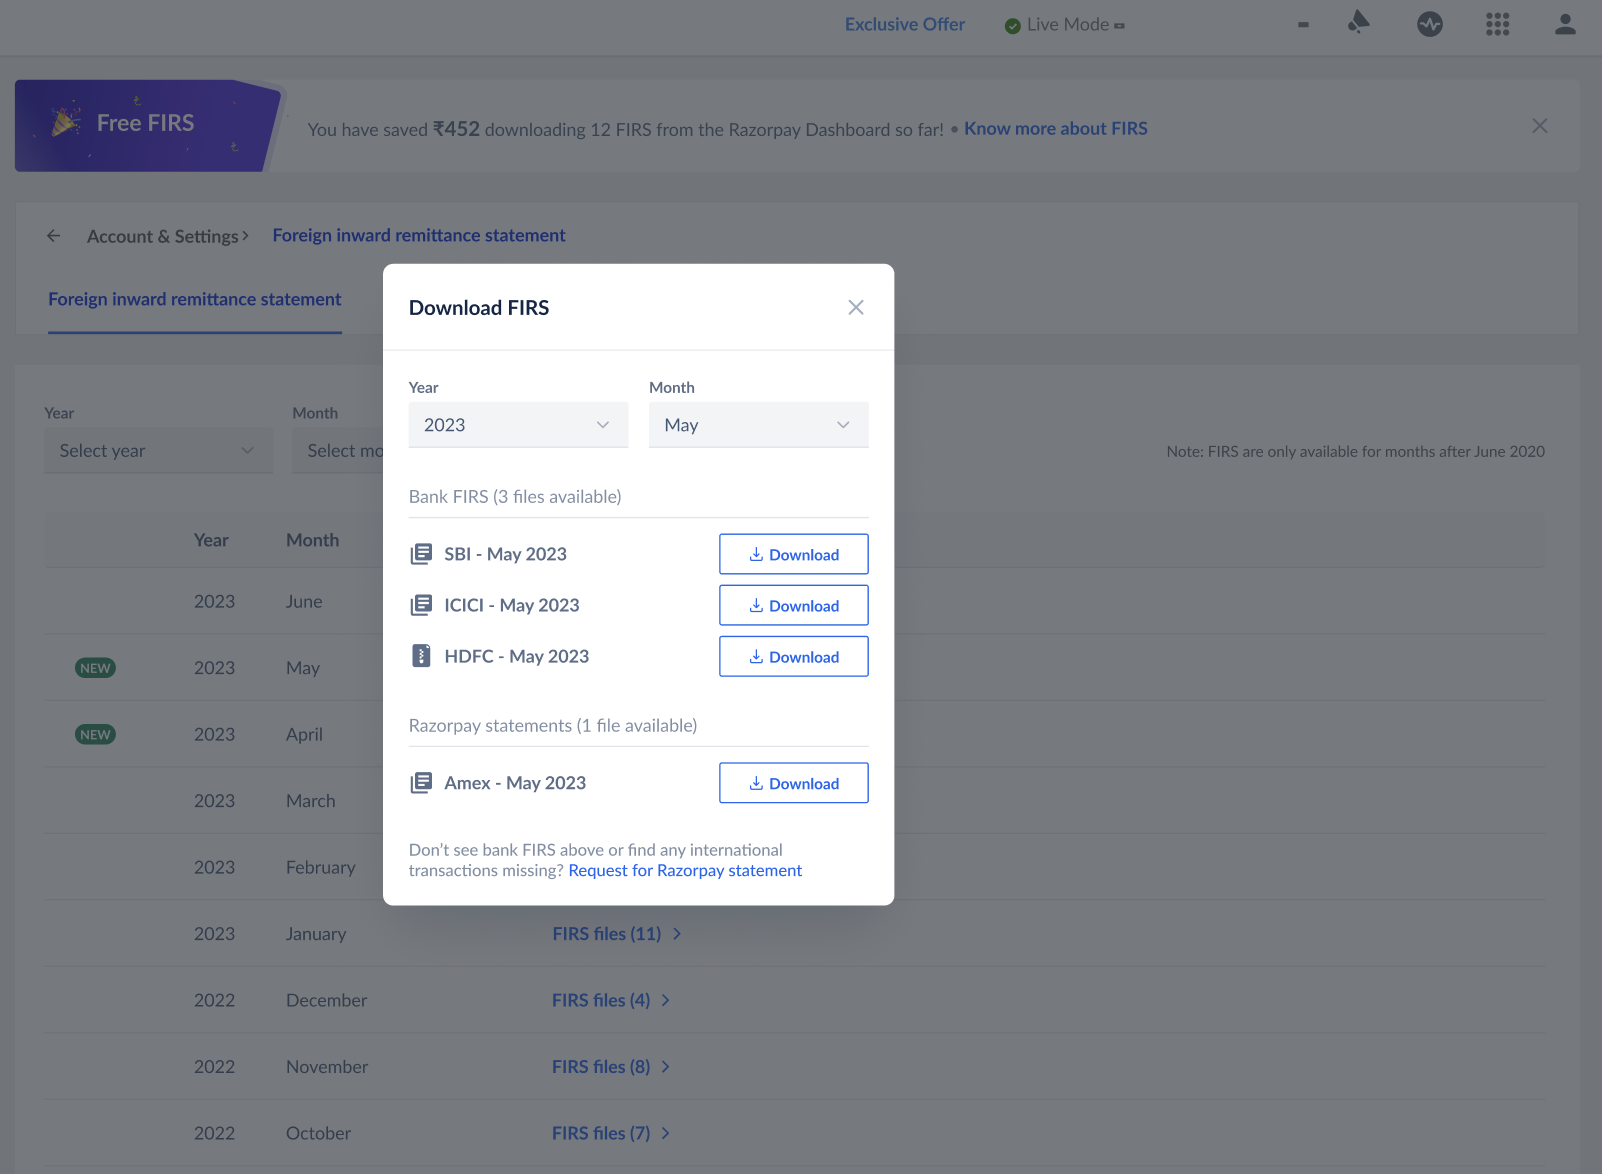
4. There are two sections.
   * The FIRS certificates provided by the bank.
   * Razorpay-generated statements.
<Info>
  **Handy Tips**

  Razorpay-generated statements act as an alternative to FIRS certificates provided by banks.
</Info>

<img src="https://razorpay.com/docs/build/browser/assets/images/pay-ip-firs6.jpg" alt="List of FIRS certificates downloadable format" width="300" />

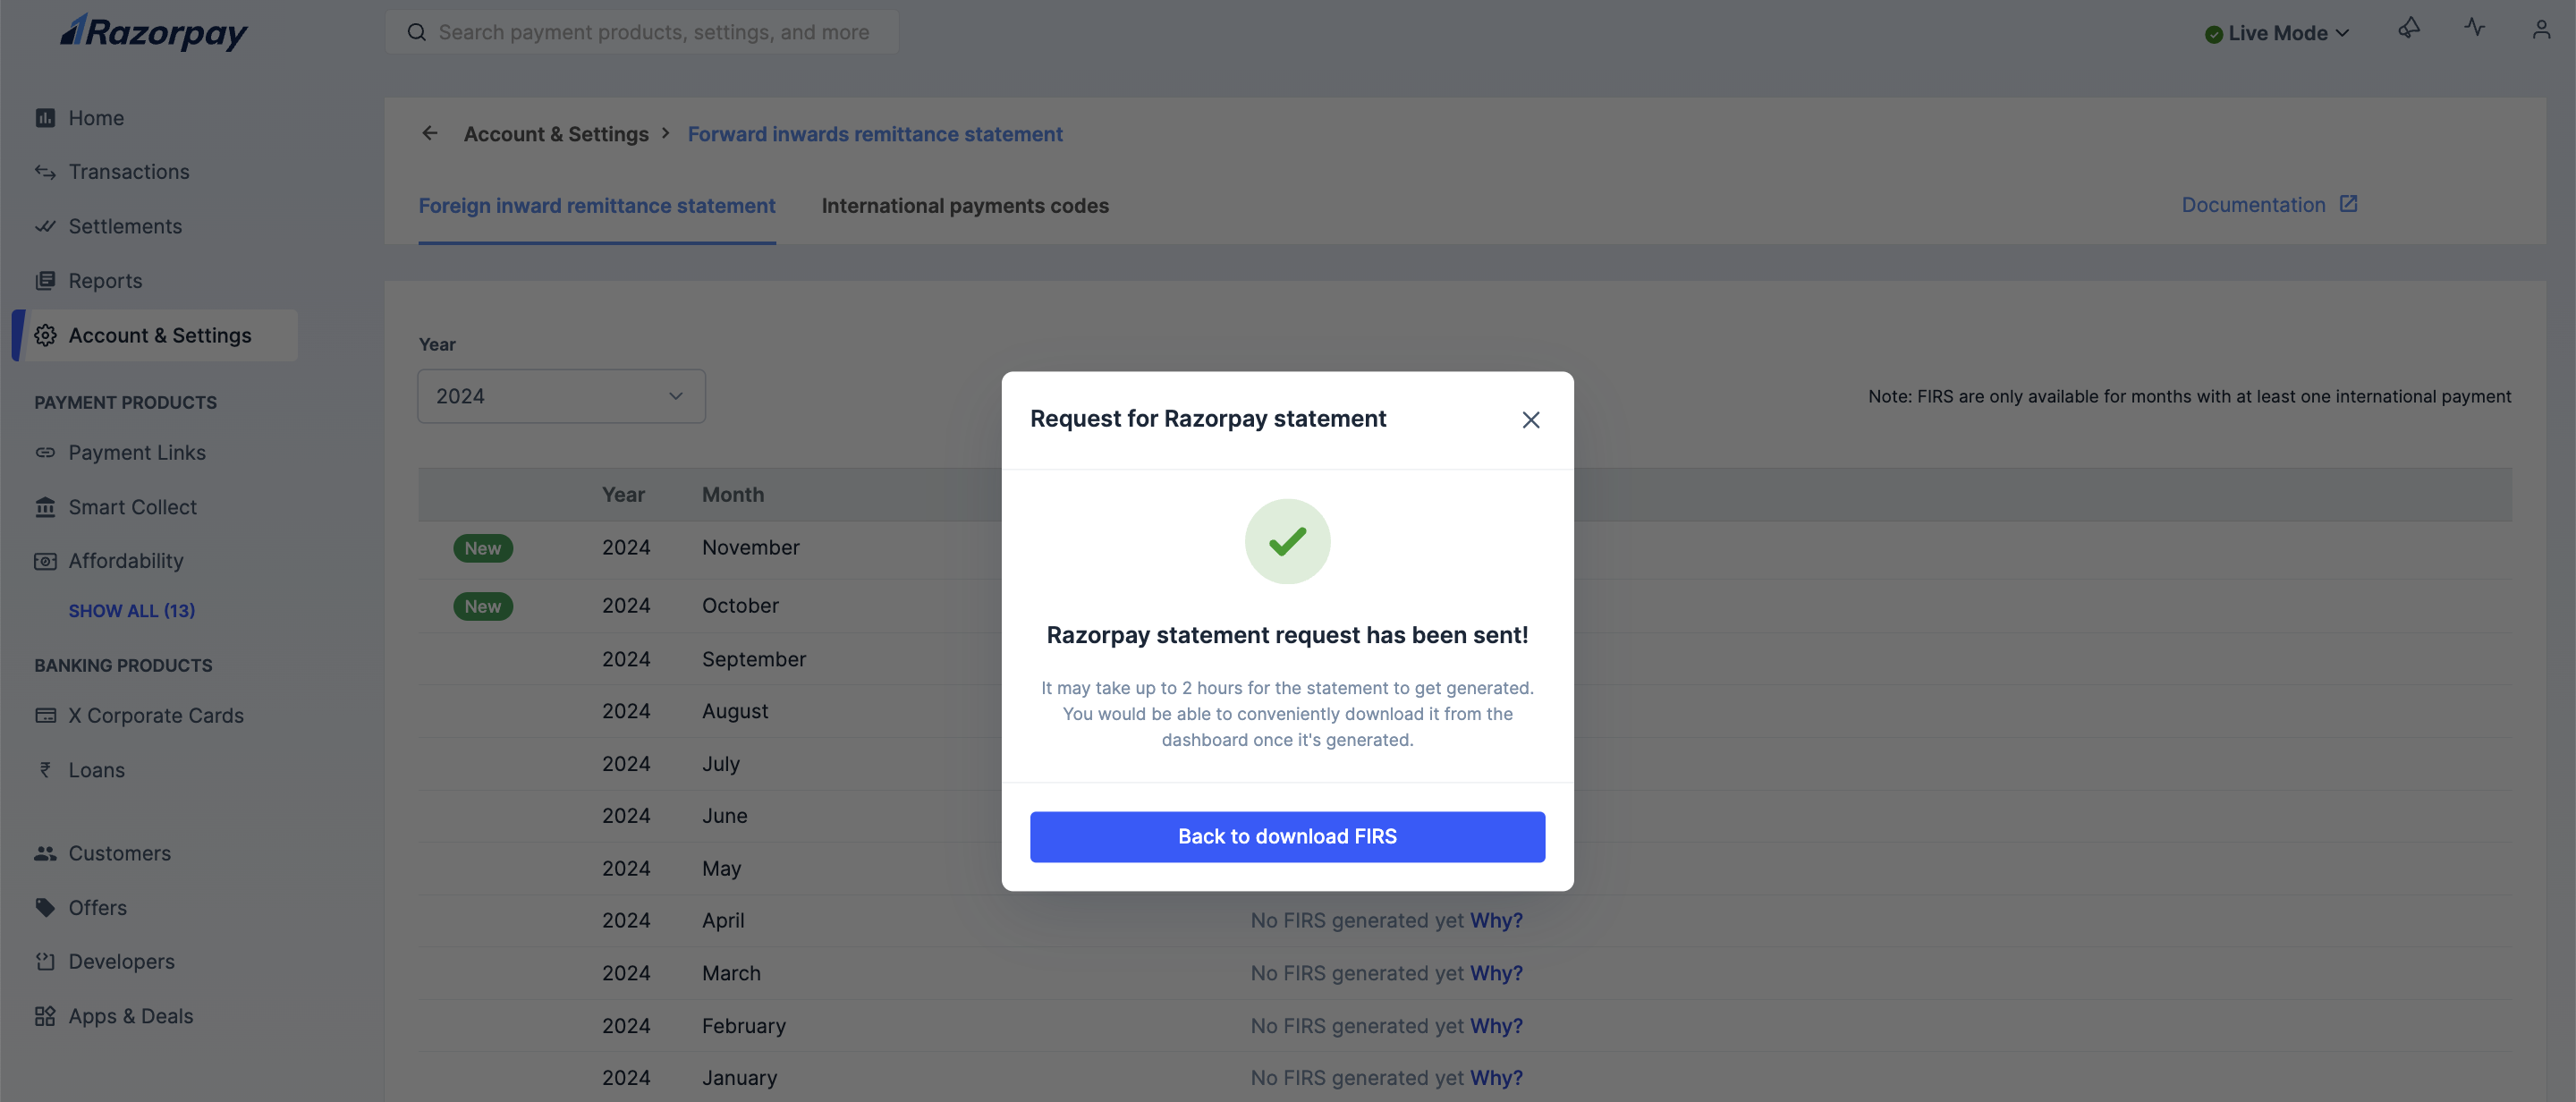
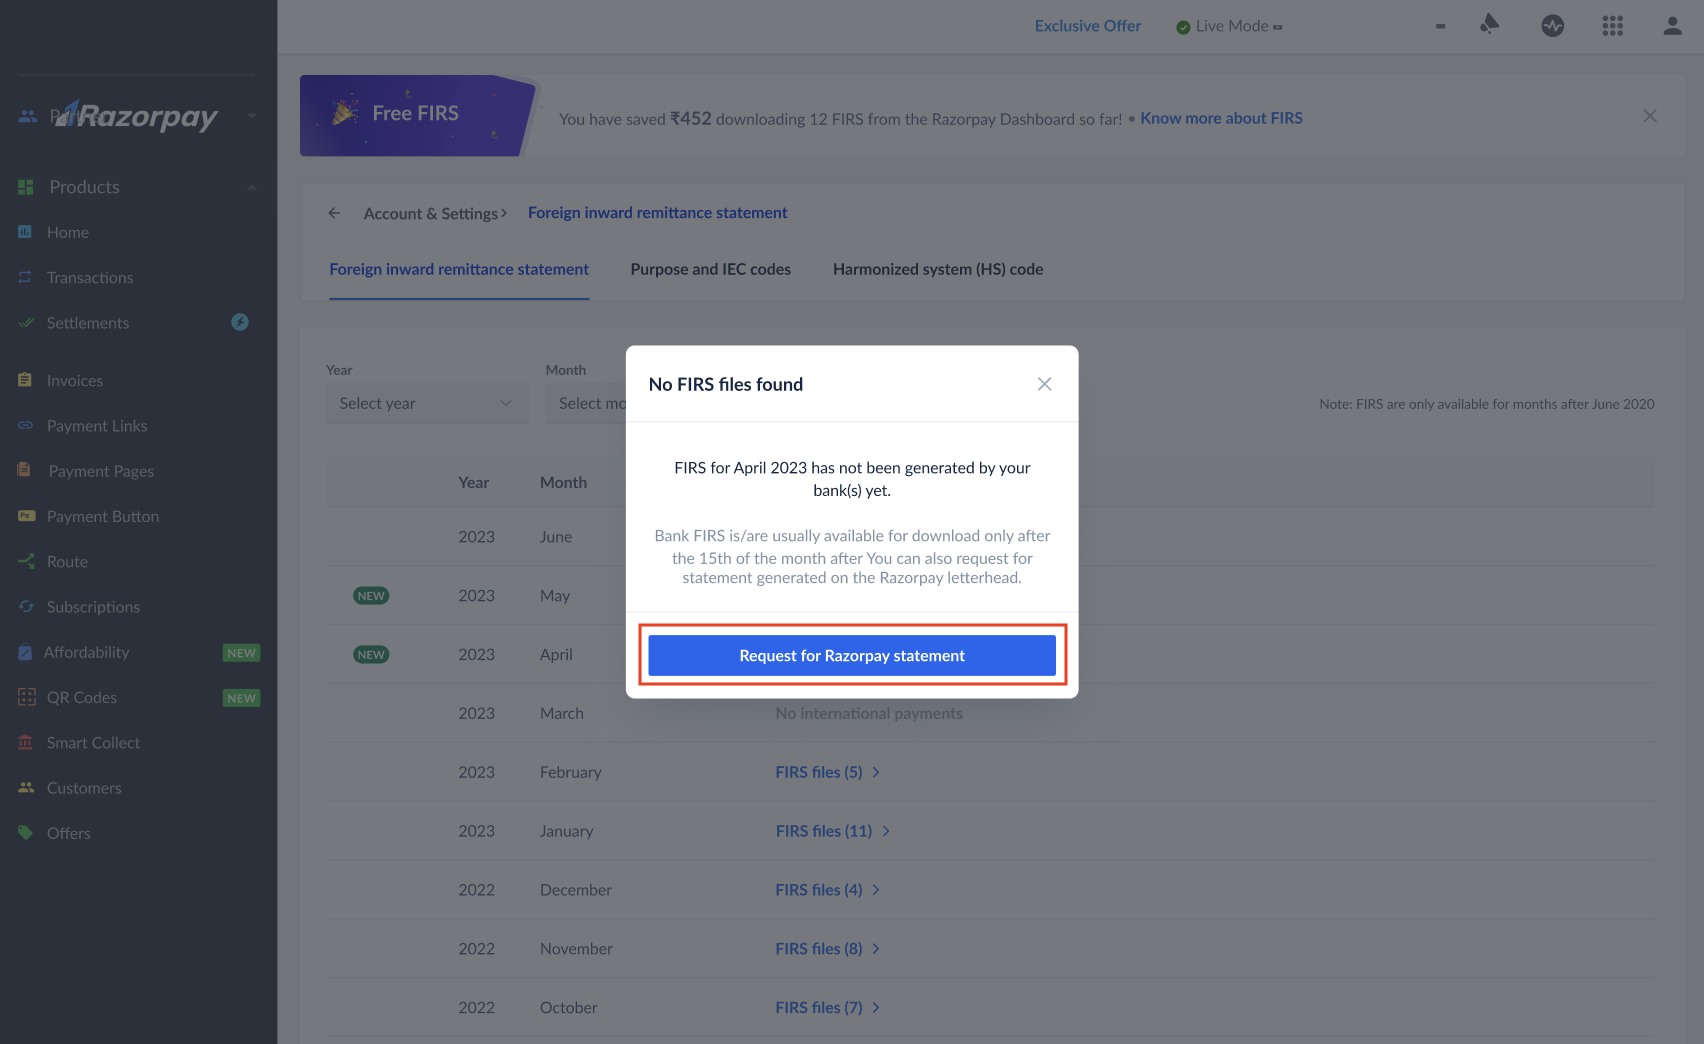
If the FIRS is not generated from the bank or you need a consolidated list of FIRS, click on **Request for Razorpay Statement**. You can view or download the FIRS certificate from your Dashboard.
<img src="https://razorpay.com/docs/build/browser/assets/images/pay-no-firs.jpg" alt="FIRS request screen" width="300" />

<Info>
  **Handy Tips**

  Generating reports can take up to 1 hour.

  <img src="https://razorpay.com/docs/build/browser/assets/images/pay-firs-request-new.jpg" alt="FIRS request sent screen" width="800" />
</Info>