> ## Documentation Index
> Fetch the complete documentation index at: https://razorpay-881012b3.mintlify.site/llms.txt
> Use this file to discover all available pages before exploring further.

# Integrate Magic Checkout with Shiprocket

> Integrate Shiprocket with Razorpay Magic Checkout to easily fetch delivery status details.

<div style={{display:"flex",flexWrap:"wrap",alignItems:"center",gap:"0.35rem 0.9rem",border:"1px solid rgba(128,128,128,0.28)",borderRadius:"0.5rem",padding:"0.45rem 0.75rem",margin:"0 0 1.25rem",fontSize:"0.875rem"}}>
  <span style={{fontWeight:600}}>Available in</span>
  <span>🇮🇳 India</span>
</div>

Shiprocket is India's leading logistics software, offering automated shipping solutions.

## Integration Steps

<AccordionGroup>
  <Accordion title="Configure Settings on Shiprocket Dashboard">
    <Info>
      **Handy Tips**

      This step is required only if you are generating the API credentials for the first time. If you have already generated the API credentials, please skip this step.
    </Info>

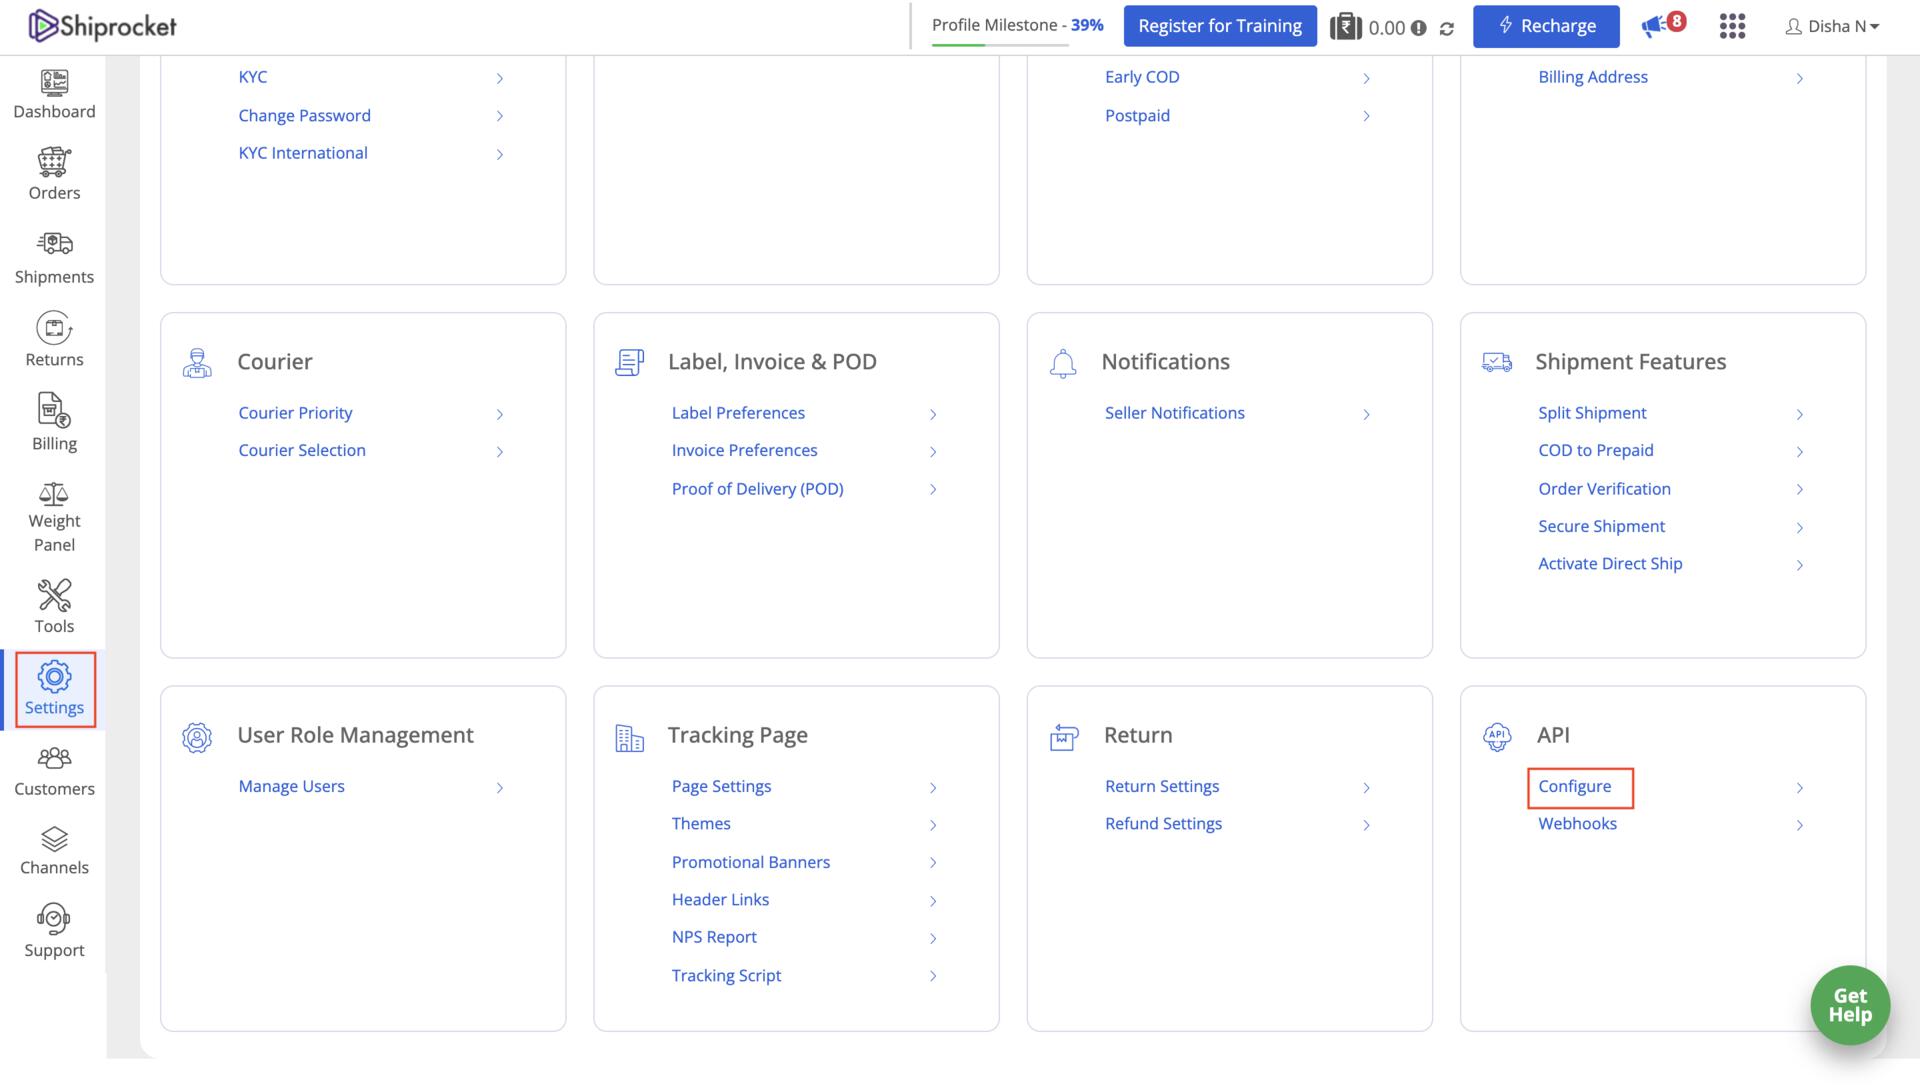
    1. Log in to the [Shiprocket Dashboard](https://app.shiprocket.in/login) and navigate to **Settings** → **API** on the bottom right.
    2. Click **Configure**.
           <img src="https://razorpay.com/docs/build/browser/assets/images/magic-checkout-shiprocket-login.jpg" alt="Navigate to Configure section on the Shiprocket Dashboard." width="800" />
    3. In the **API User** section, click **Create an API User**.
    4. Enter your **Email ID** and **password**.
    5. Click **Generate API Credential**.
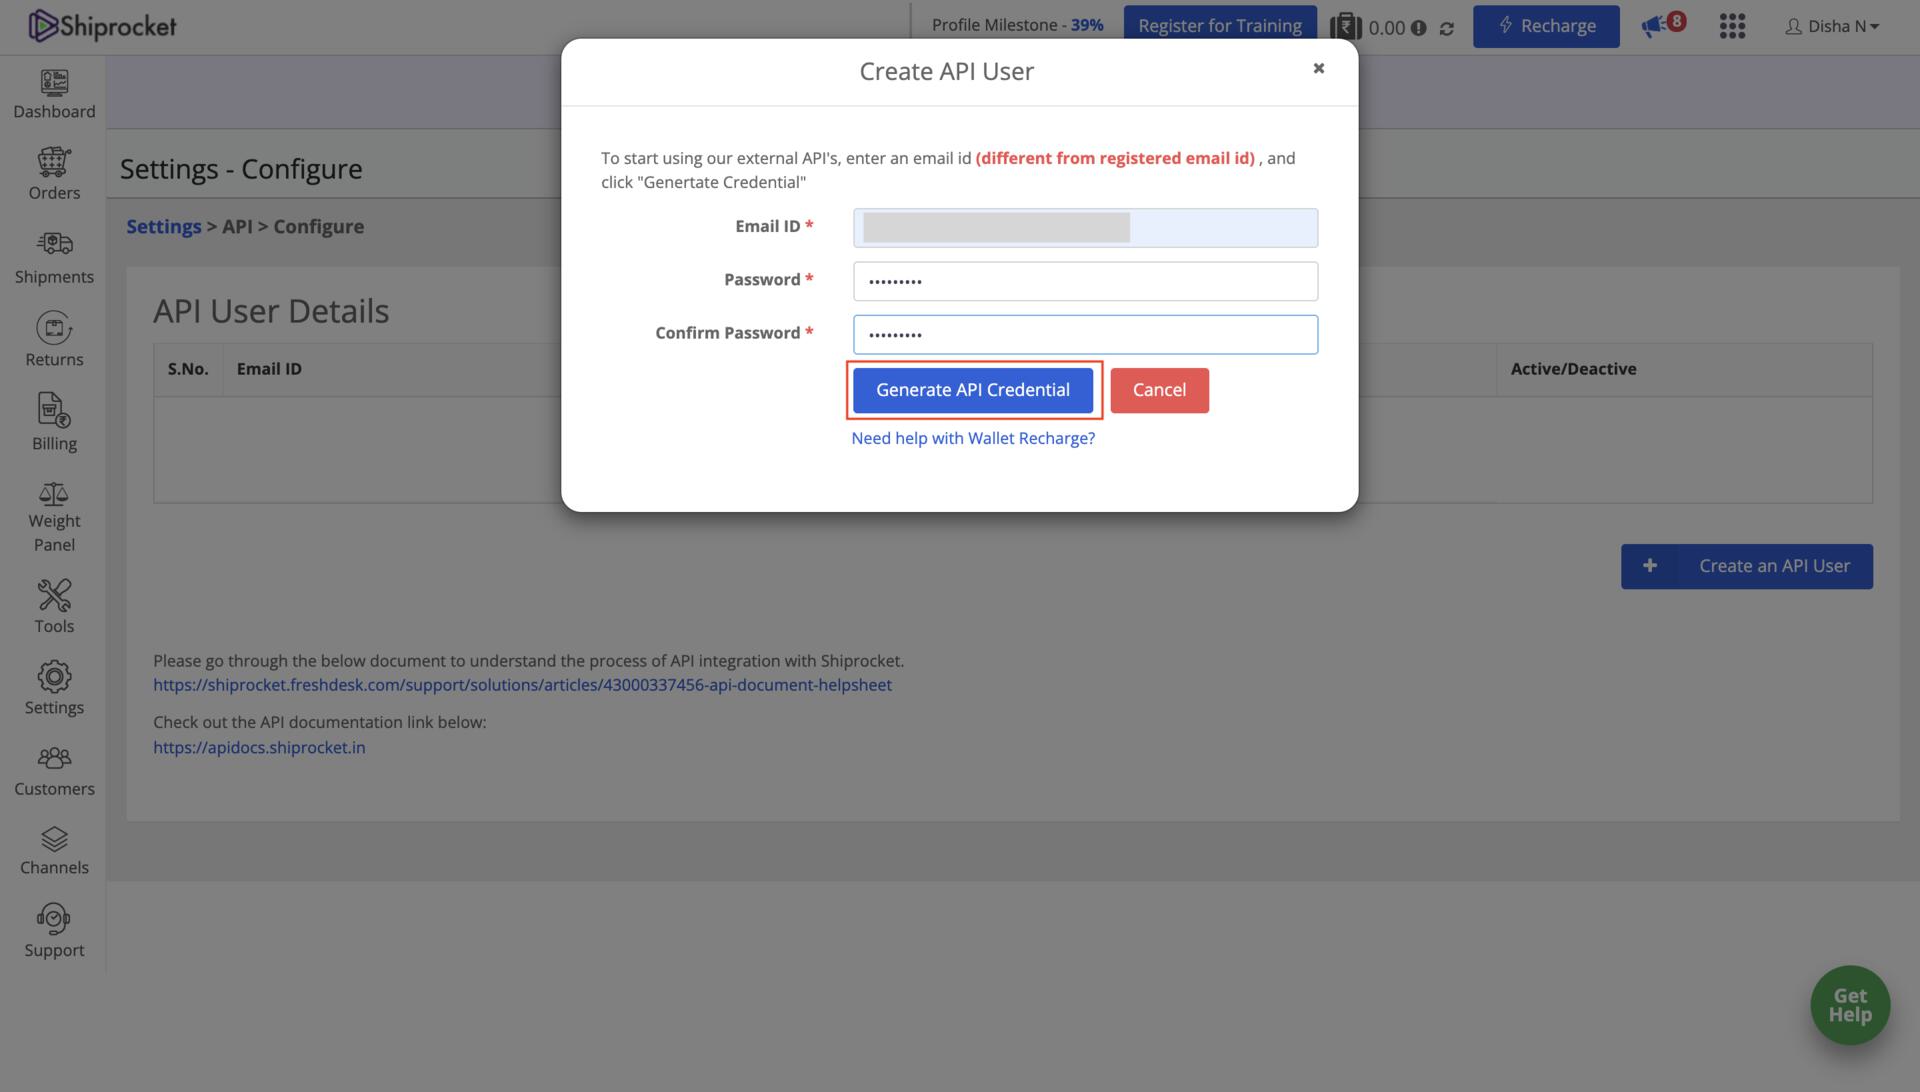
           <img src="https://razorpay.com/docs/build/browser/assets/images/magic-checkout-shiprocket-api.jpg" alt="Enter the credentials and generate the API keys" width="800" />
  </Accordion>

  <Accordion title="Enable Shiprocket on Razorpay Dashboard">
    1. Log in to the Dashboard and navigate to **Magic Checkout**.
    2. Select the platform of your e-commerce website, enter the relevant details and click **Next**.
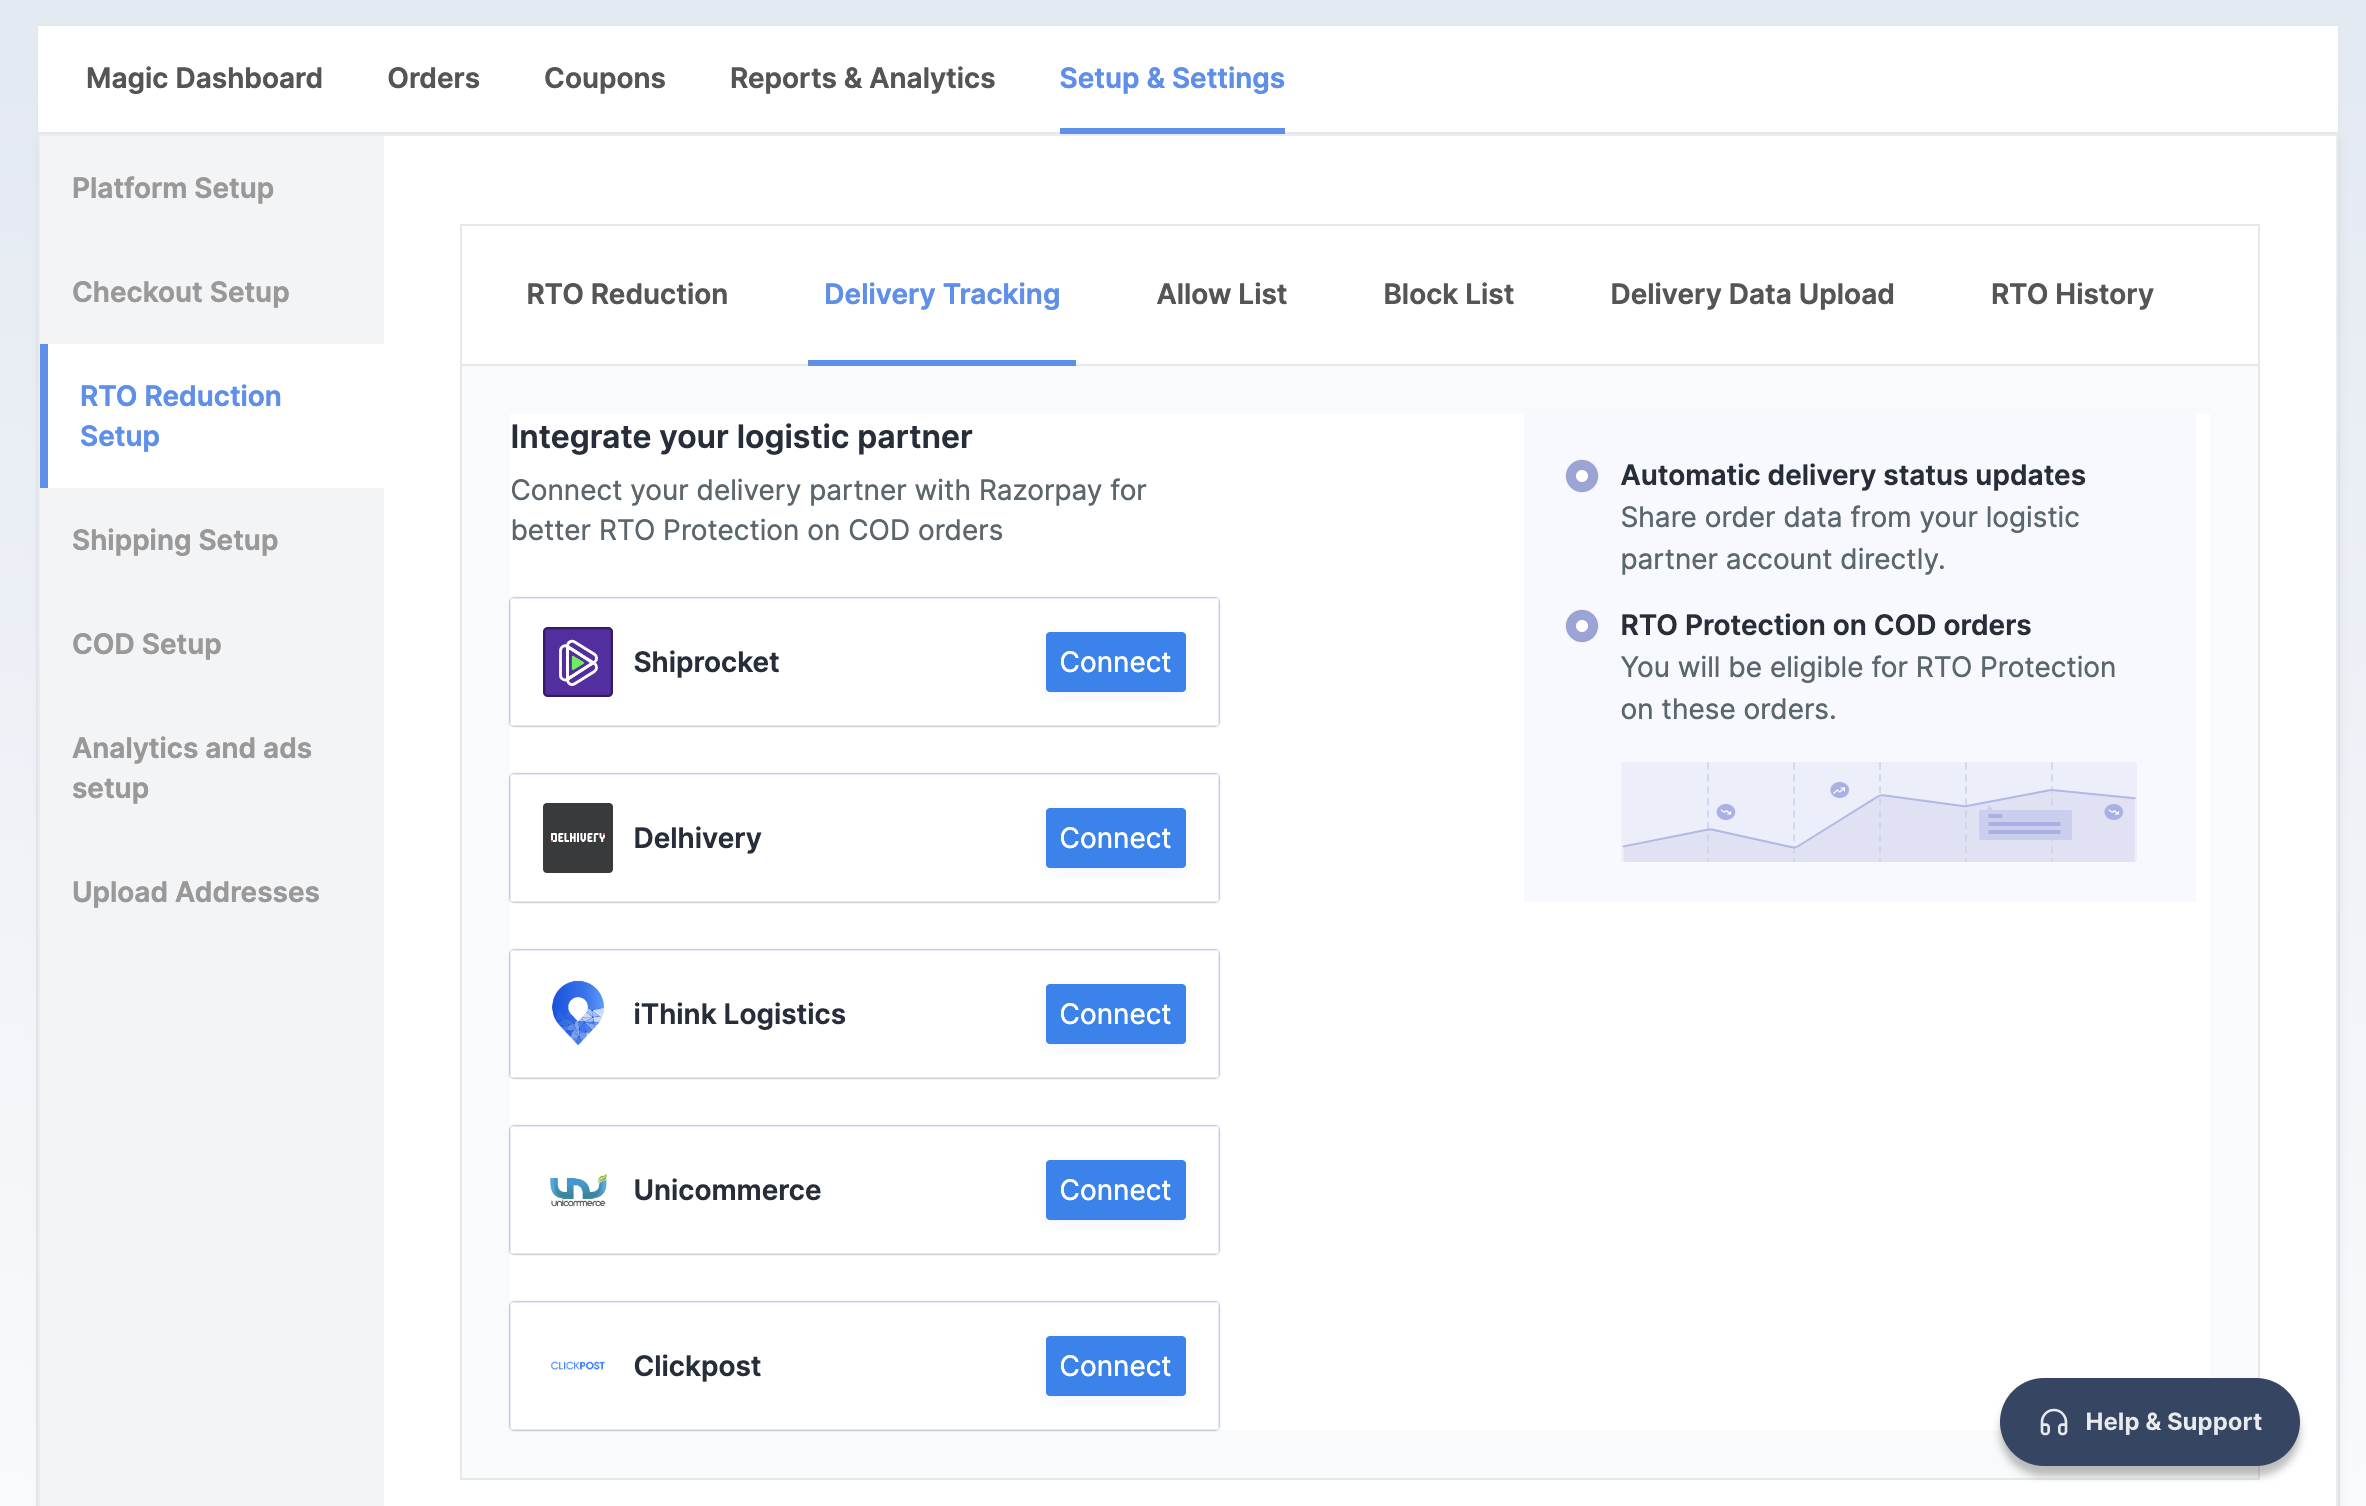
    3. In the **RTO Reduction Setup** section, navigate to the → **Delivery Tracking** tab.
    4. Click **Connect** next to **Shiprocket**.
           <img src="https://razorpay.com/docs/build/browser/assets/images/magic-logistics-connect.jpg" alt="Connect Magic Checkout with Shiprocket" width="800" />
    5. Enter your **API User Email ID** and **API User Password** generated on the Shiprocket Dashboard.
    6. Click **Connect to Shiprocket**.
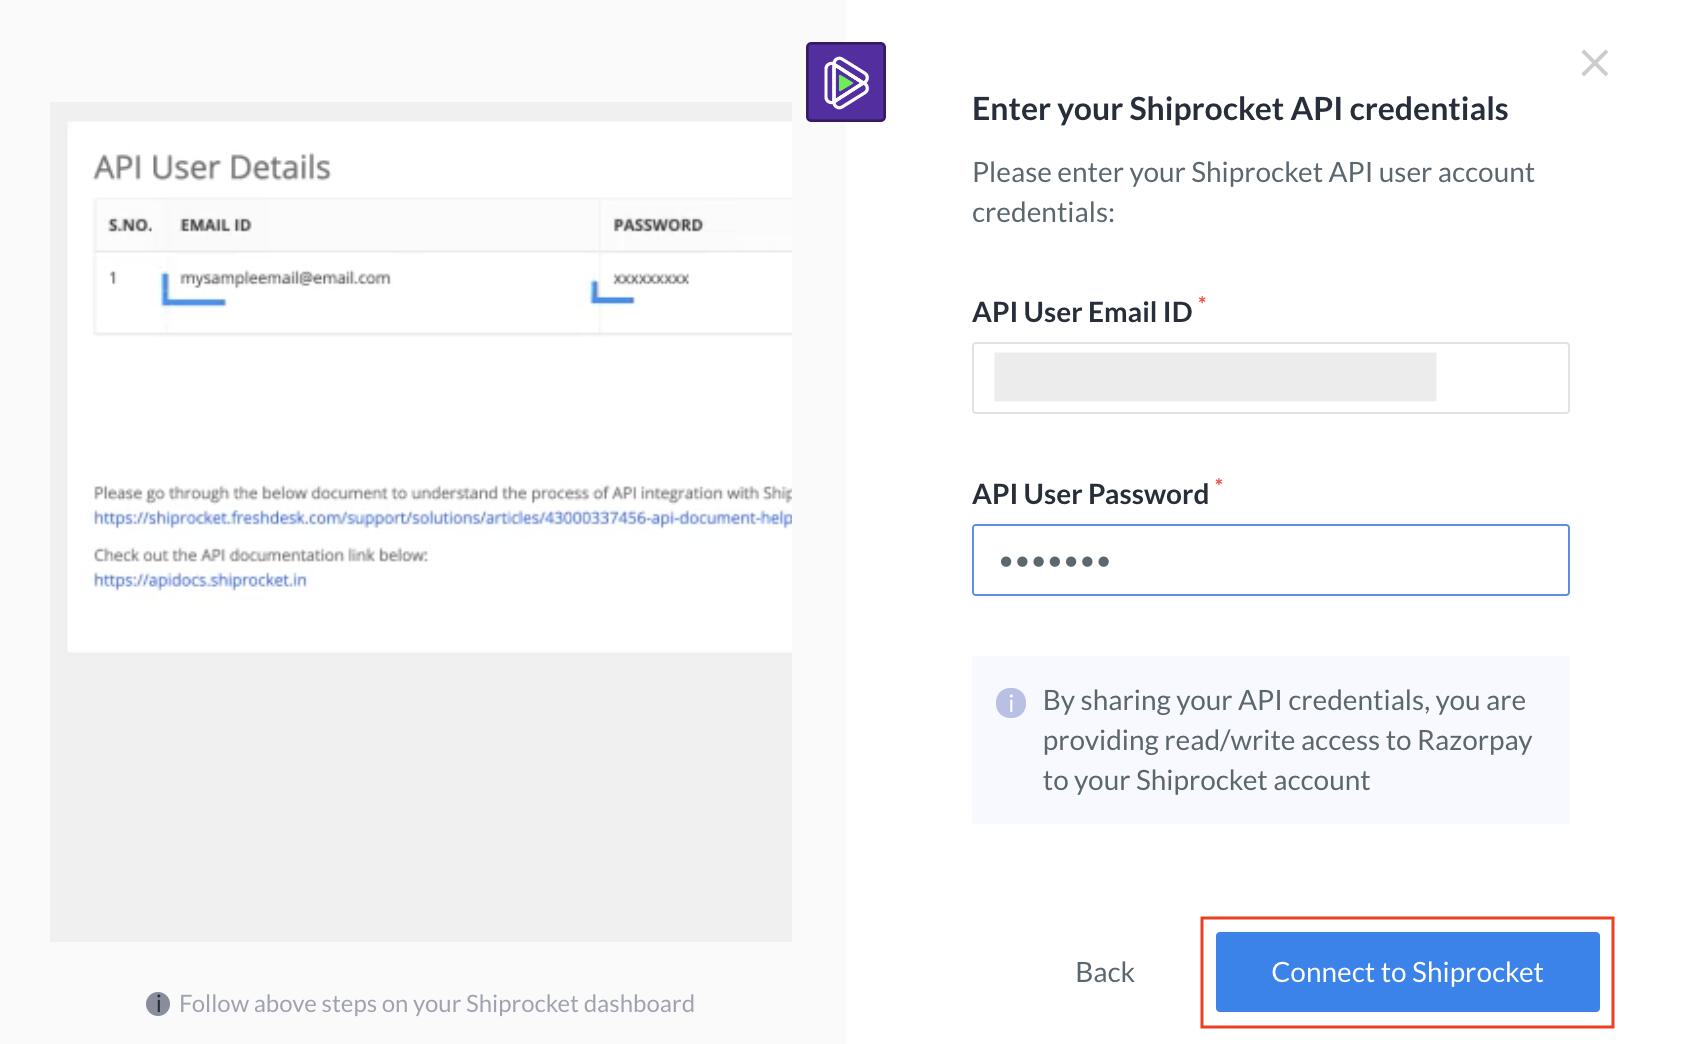
           <img src="https://razorpay.com/docs/build/browser/assets/images/magic-checkout-shiprocket-credentials.jpg" alt="Enter your API keys" width="800" />

    You have successfully integrated Magic Checkout with Shiprocket. In case you want to disconnect Shiprocket, click **Disconnect**.
  </Accordion>
</AccordionGroup>

<Info>
  **Handy Tips**

  For Shiprocket integration issues, contact Shiprocket support directly as it is a third-party platform.
</Info>