> ## Documentation Index
> Fetch the complete documentation index at: https://razorpay-881012b3.mintlify.site/llms.txt
> Use this file to discover all available pages before exploring further.
# Payment Pages on Mobile App
> Create Razorpay Payment Pages with ready-to-use templates and collect payments using the Razorpay Payments Mobile App.
Available in
🇮🇳 India
You can use Payment Pages to build webpages with customised content, ready-to-use templates, rich-text support, media support and social media sharing options. Share the Payment Page link with your customers and start accepting payments instantly.
Create Razorpay Payment Pages with ready-to-use templates and collect payments.
## Create Payment Page
Follow these steps to create a Payment Page:
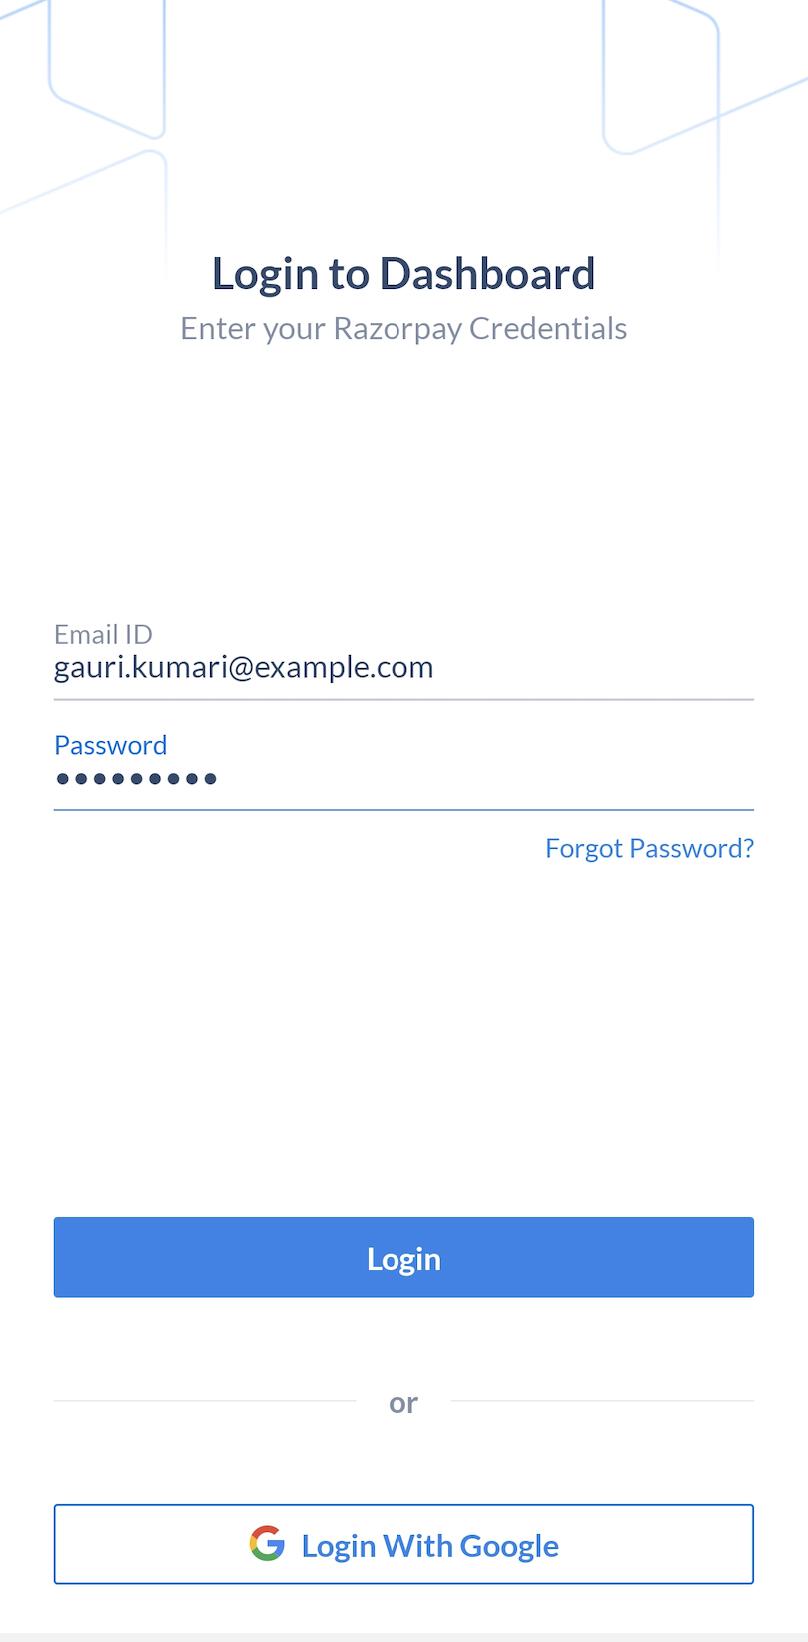
1. Log in with your Dashboard credentials.
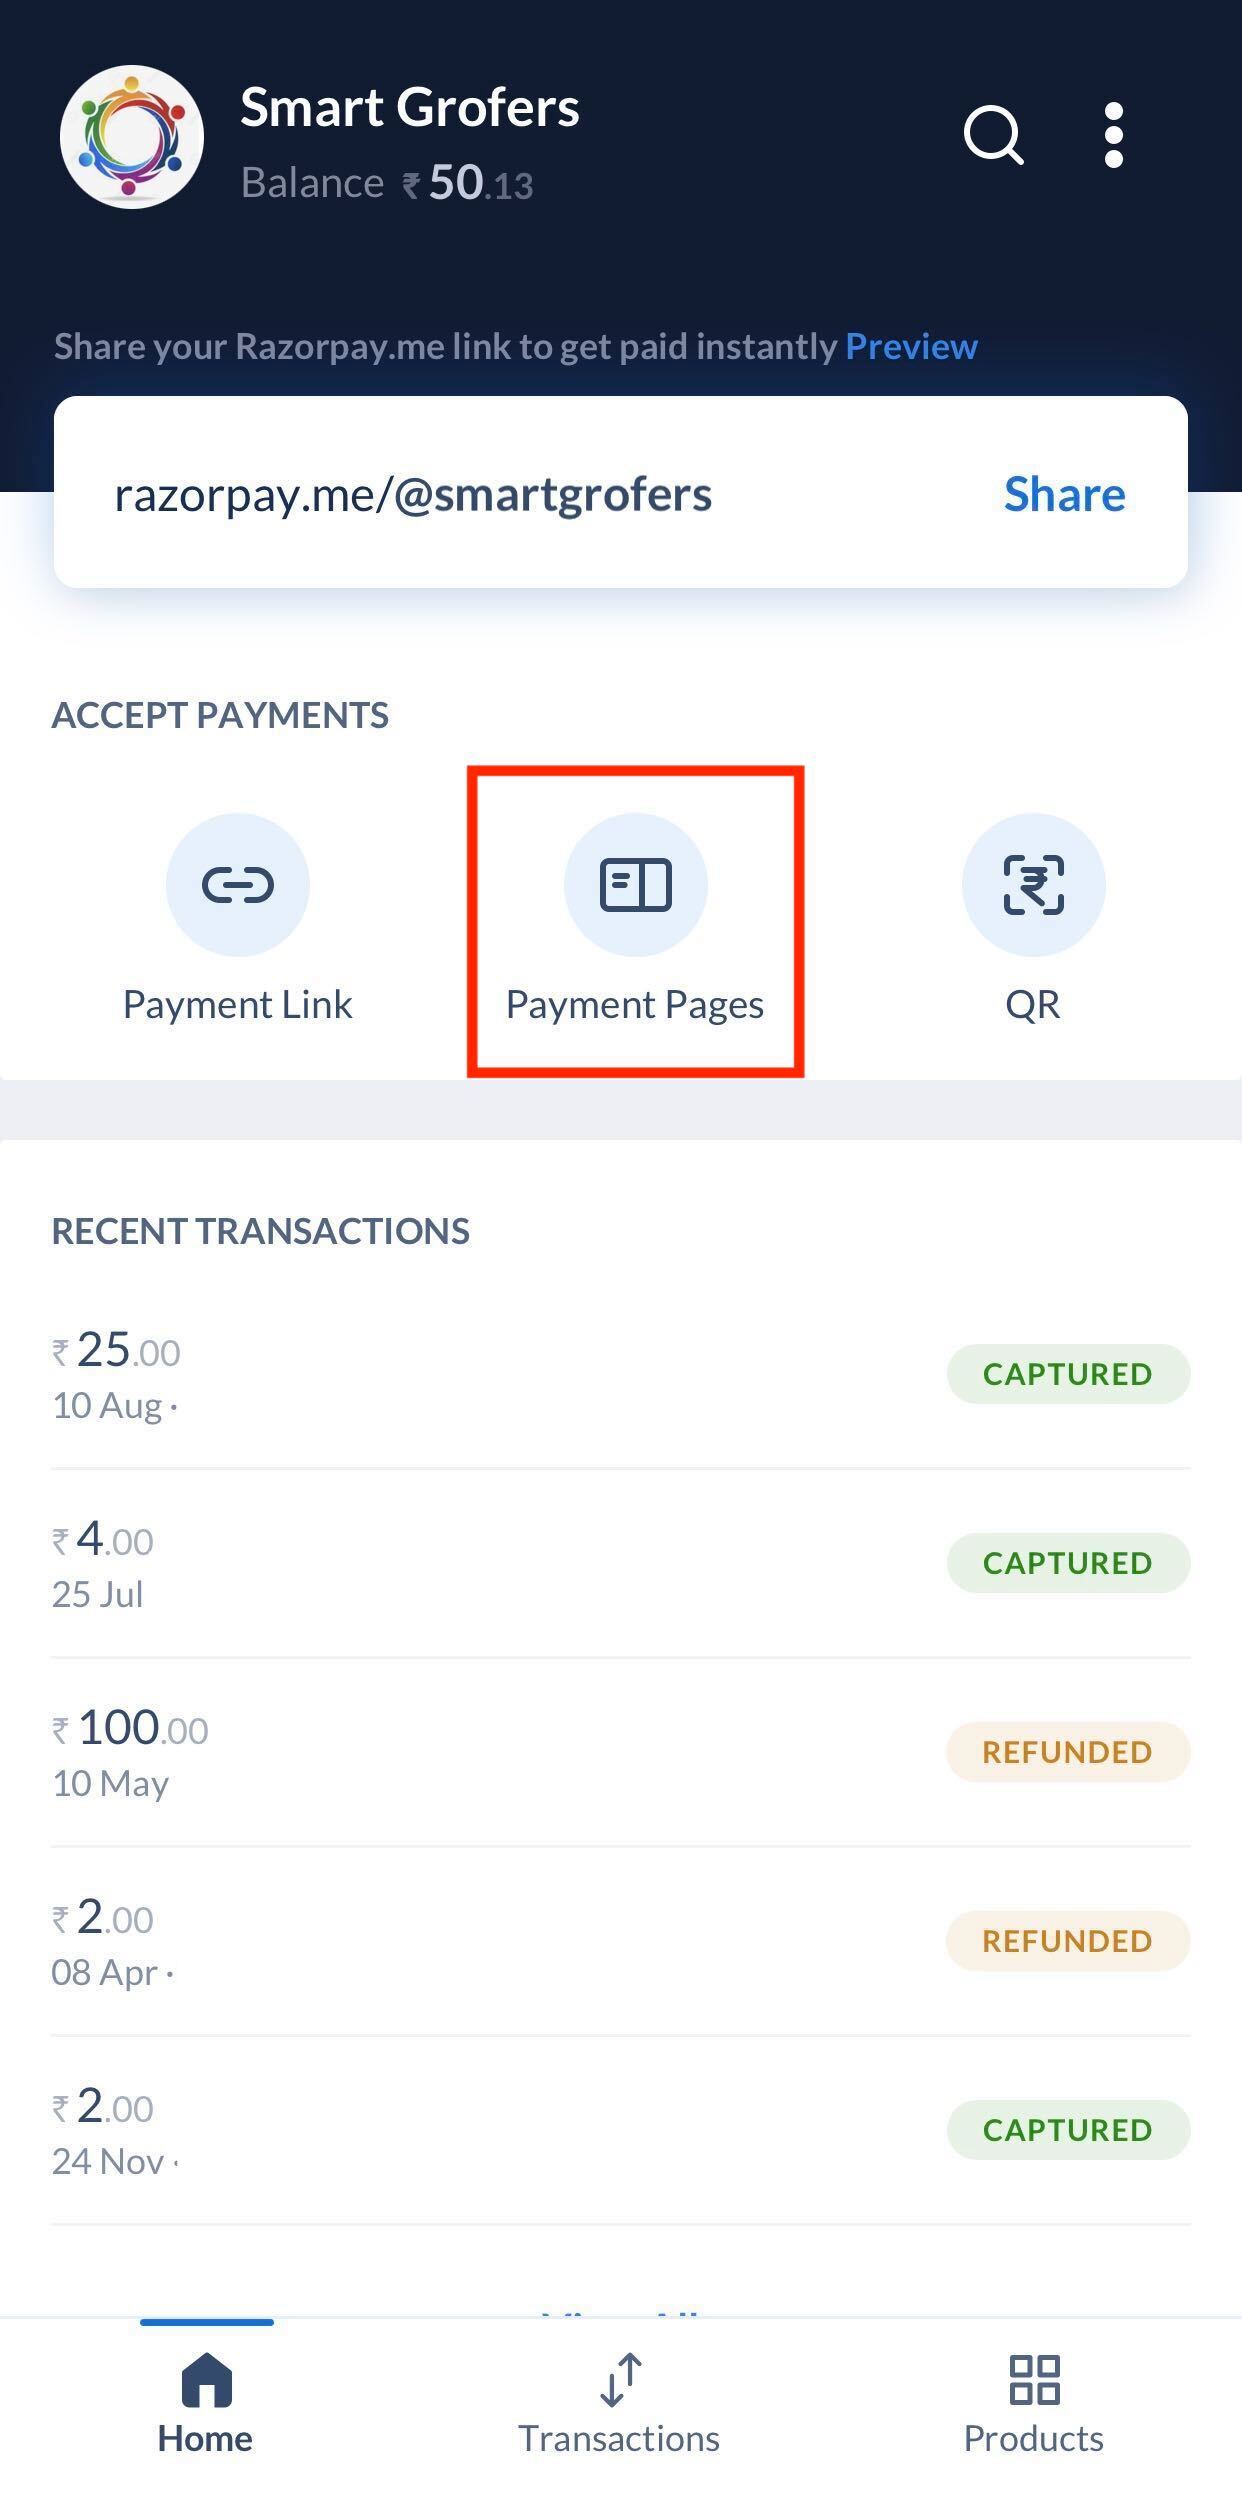
 2. Tap **Payment Pages** under the **Accept Payments** section.
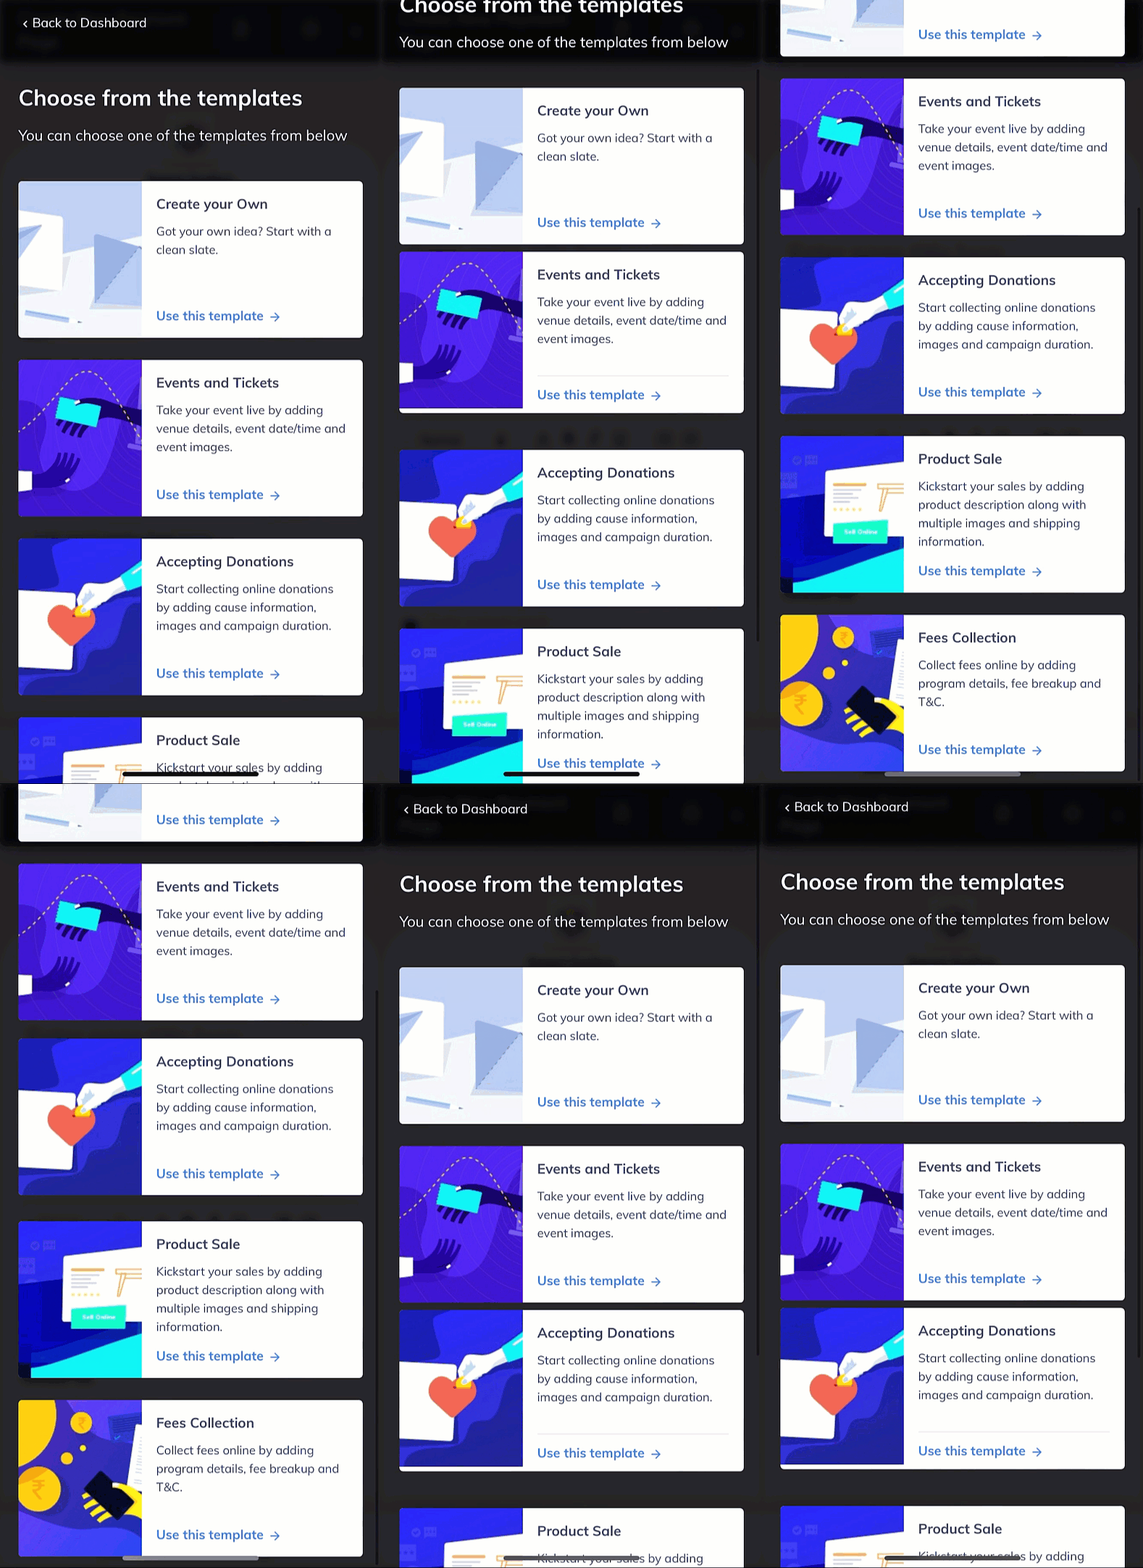
 3. Tap **+ Create Payment Page** and select the template of your choice.
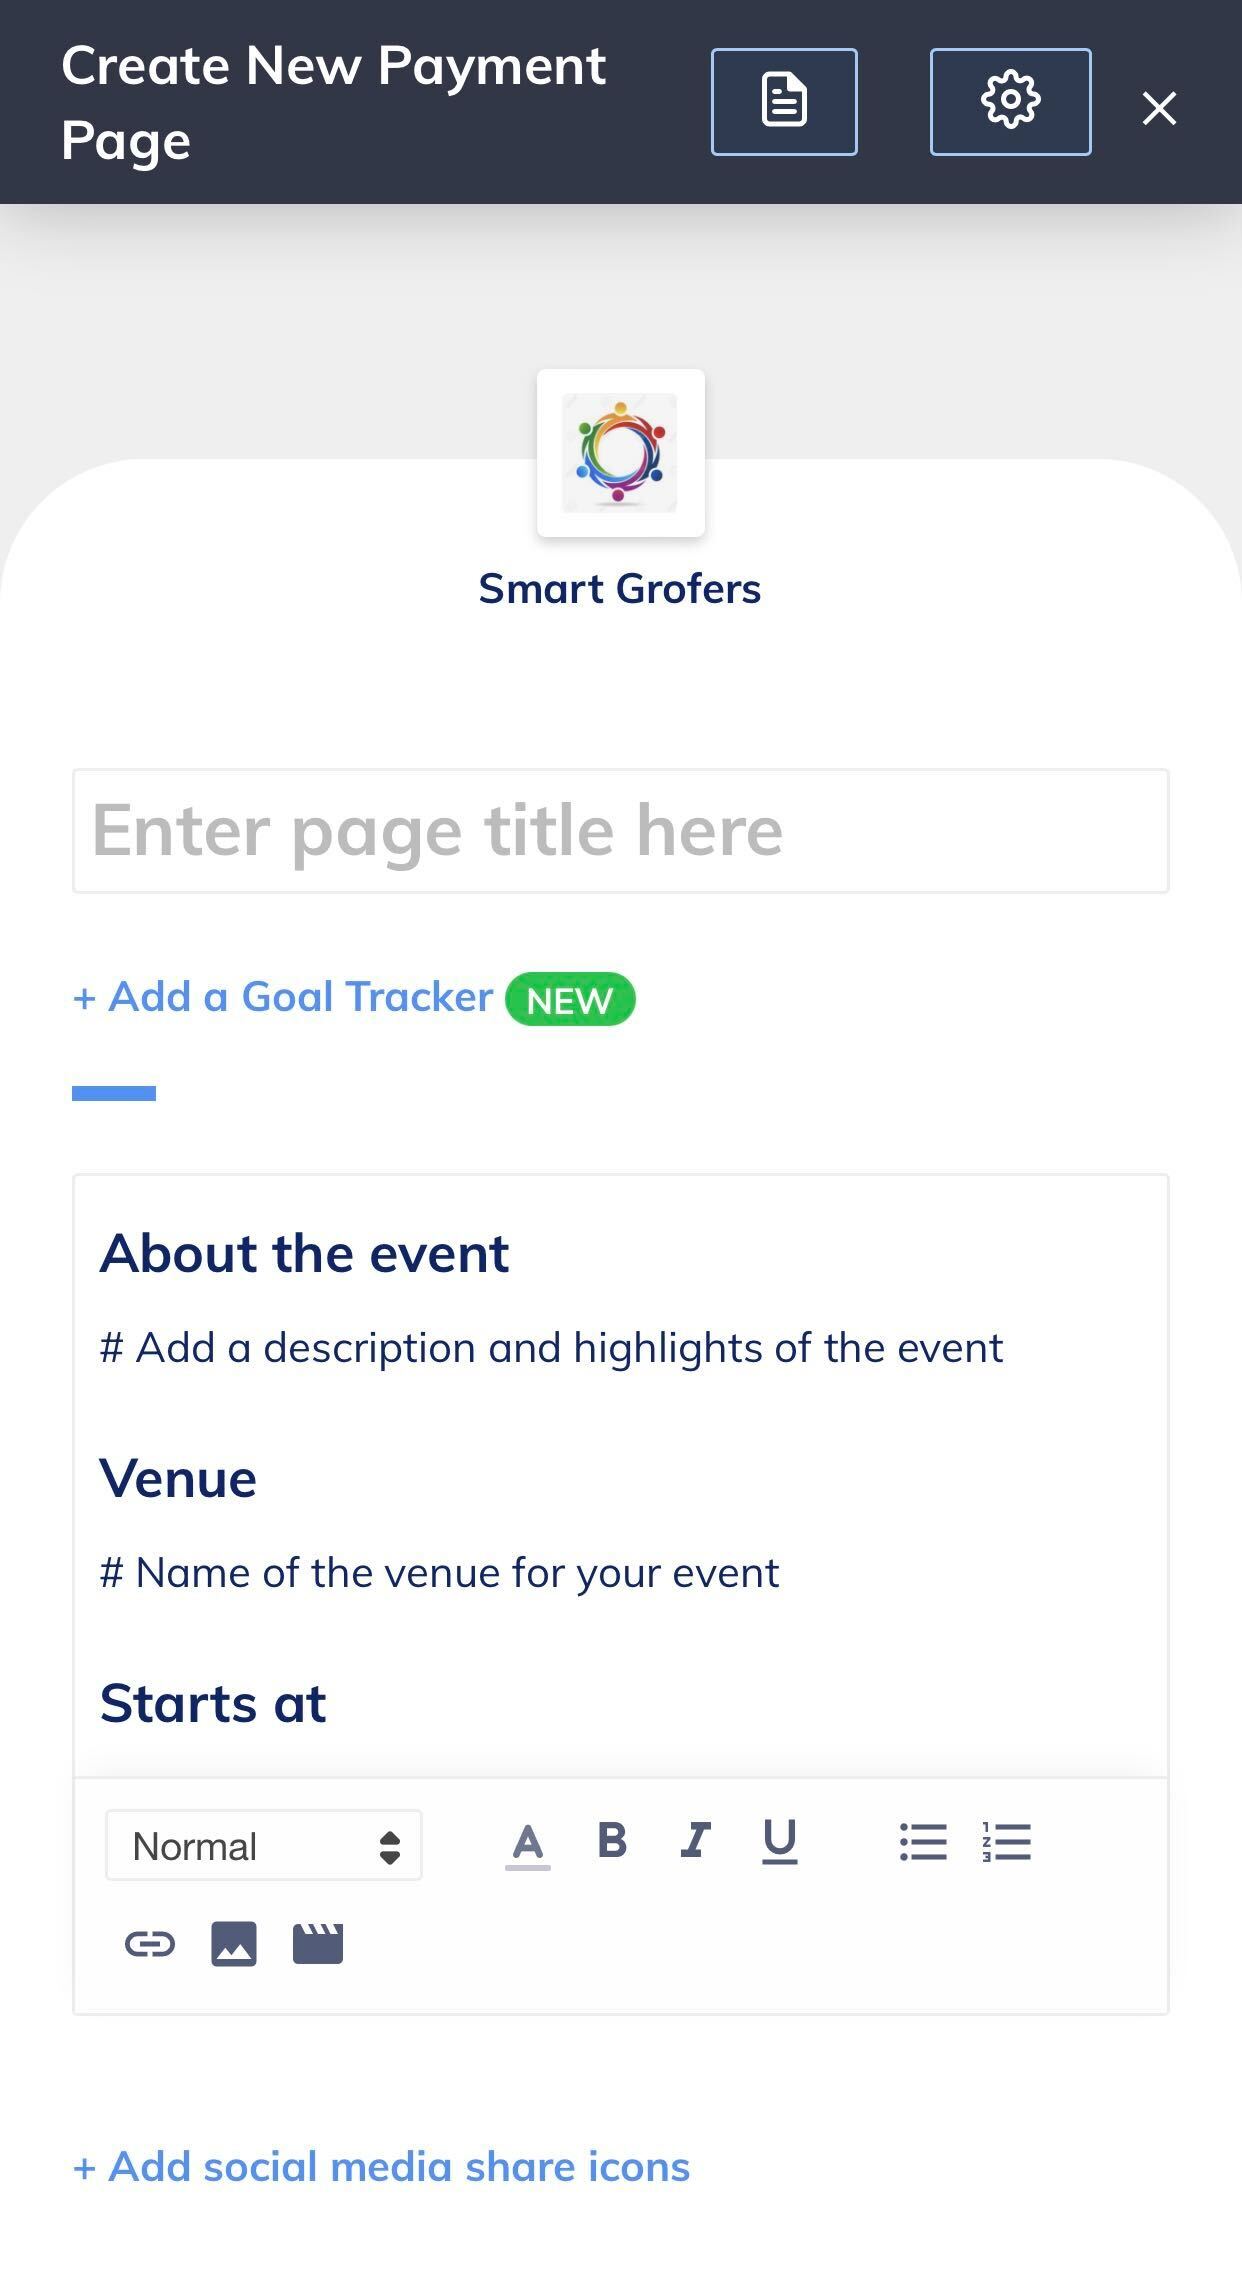
 4. Add business details such as page title, description, contact information and so on. Know more about how to add [business details](/docs/payments/payment-pages/create#add-business-details).
5. You can also add a goal tracker to track your goals. To add a goal tracker, tap **+ Add a Goal Tracker**. Know more about how to [configure a goal tracker](/docs/payments/payment-pages/goal-tracker).
4. Add business details such as page title, description, contact information and so on. Know more about how to add [business details](/docs/payments/payment-pages/create#add-business-details).
5. You can also add a goal tracker to track your goals. To add a goal tracker, tap **+ Add a Goal Tracker**. Know more about how to [configure a goal tracker](/docs/payments/payment-pages/goal-tracker).
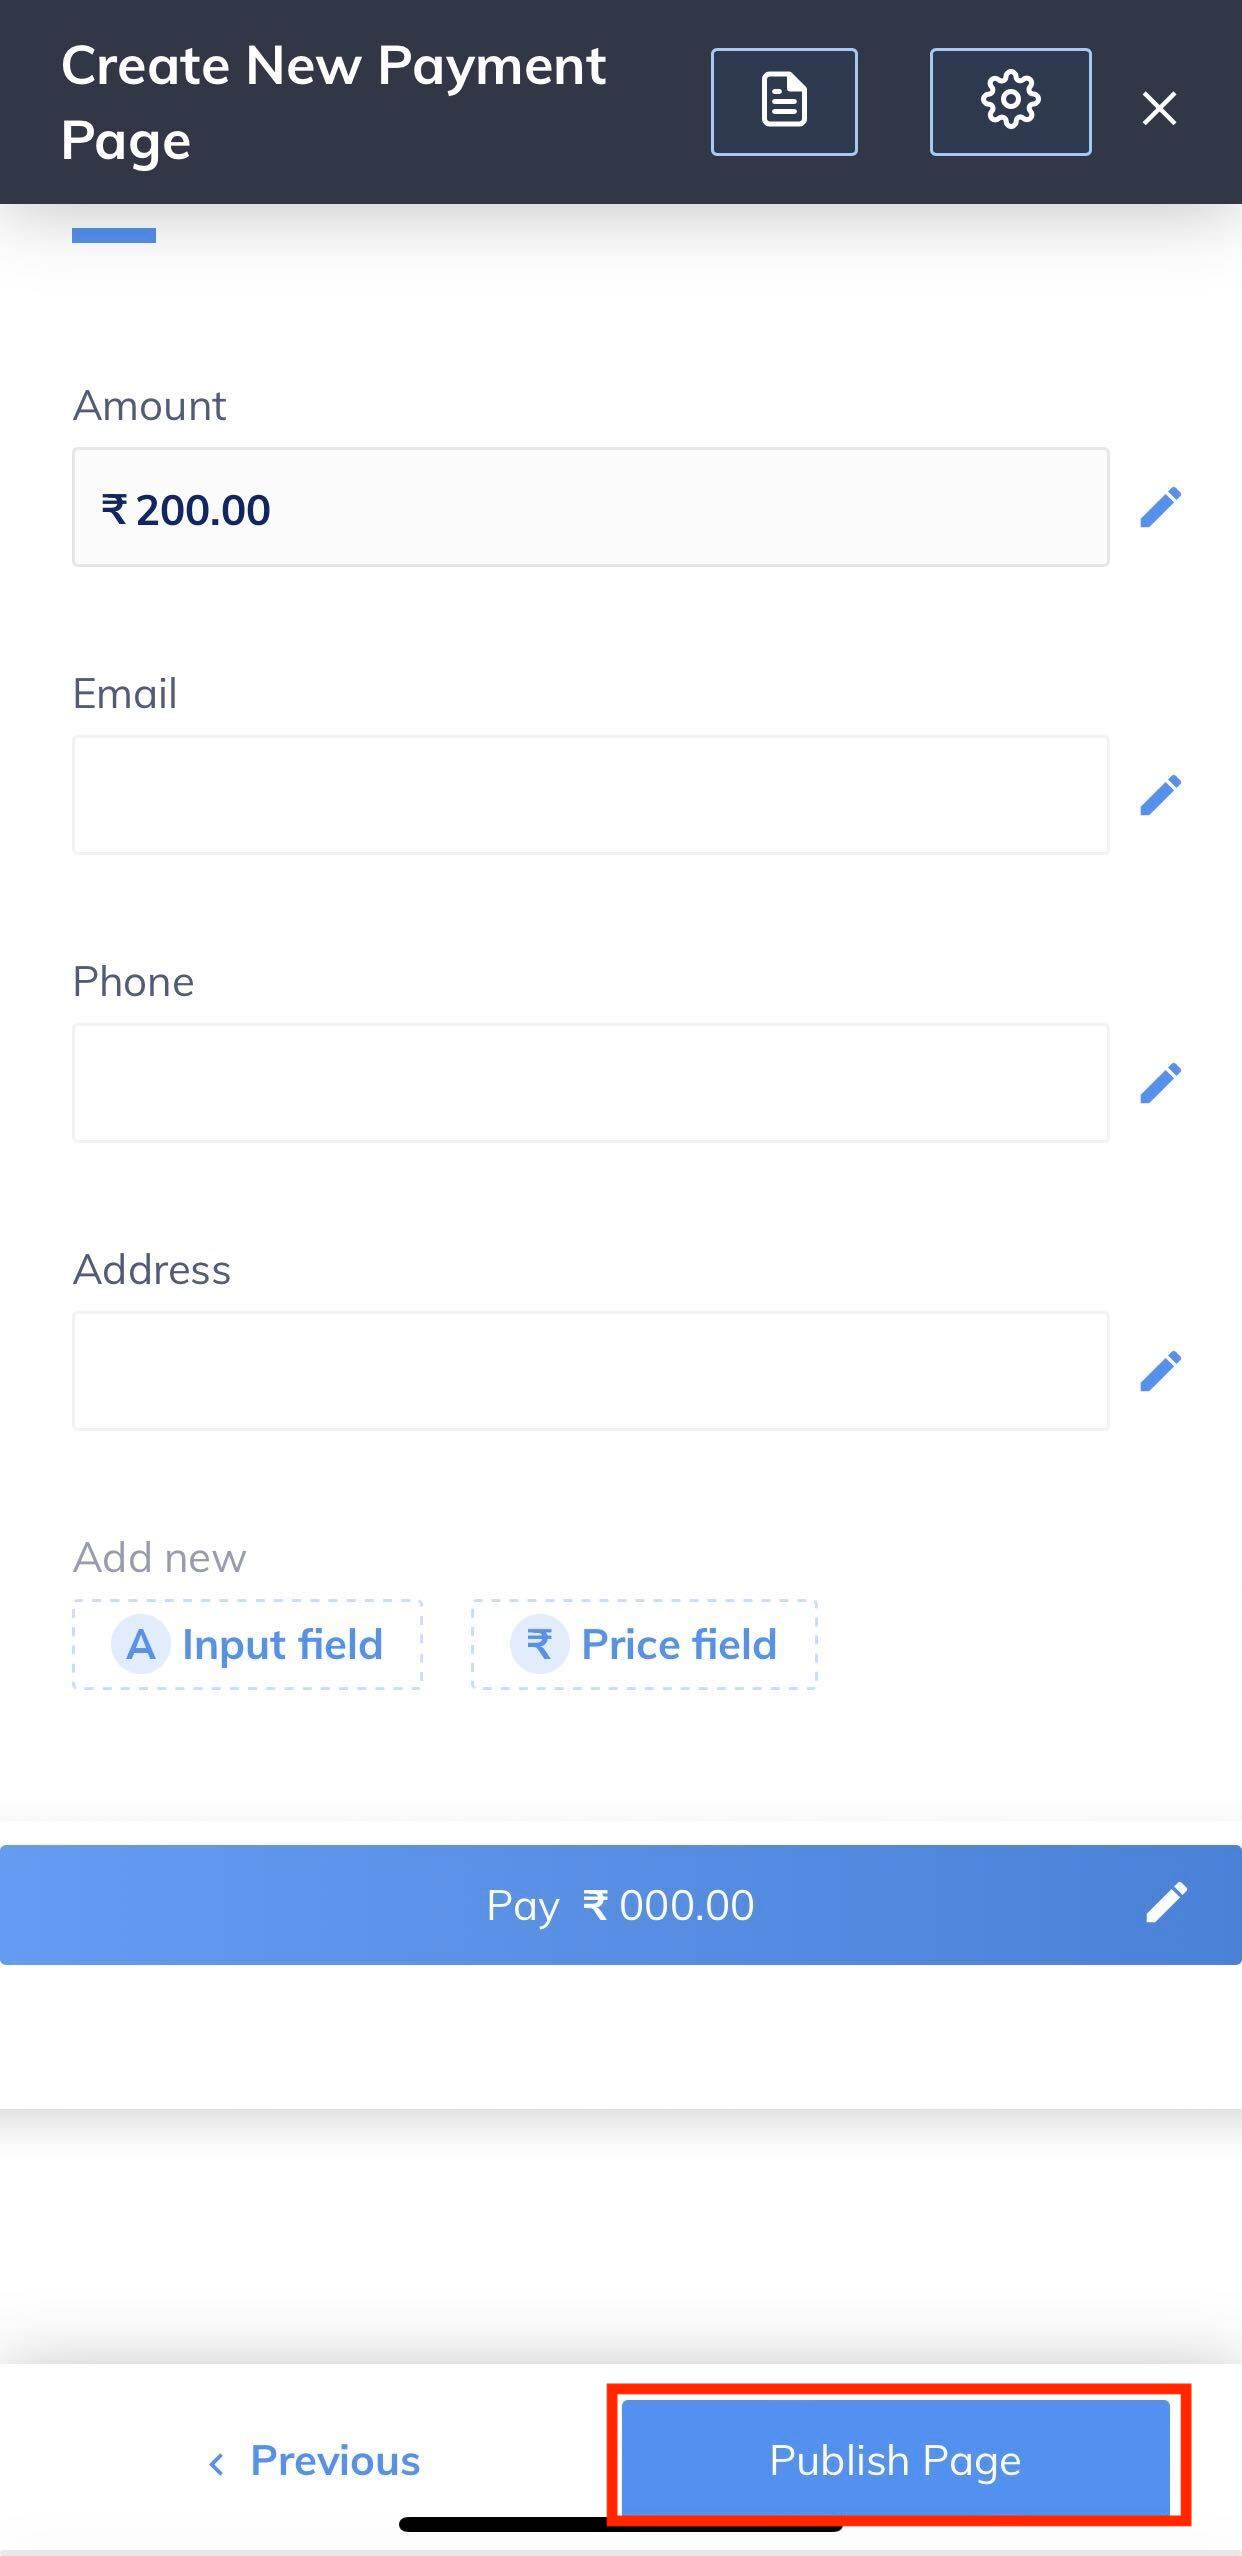
 6. Add payment details such as price field, email, phone number and so on. Know more about how to add [payment details](/docs/payments/payment-pages/create#add-payment-details). Tap **Publish Page**.
 ## Share Payment Pages
You can share the Payment Pages using:
* SMS and Email
* Facebook, Instagram, WhatsApp and more.
## Edit Payment Page
Follow these steps to edit a Payment Page:
1. Under the **Accept Payments** section, tap **Payment Pages** and scroll down to the list of Payment Pages.
## Share Payment Pages
You can share the Payment Pages using:
* SMS and Email
* Facebook, Instagram, WhatsApp and more.
## Edit Payment Page
Follow these steps to edit a Payment Page:
1. Under the **Accept Payments** section, tap **Payment Pages** and scroll down to the list of Payment Pages.
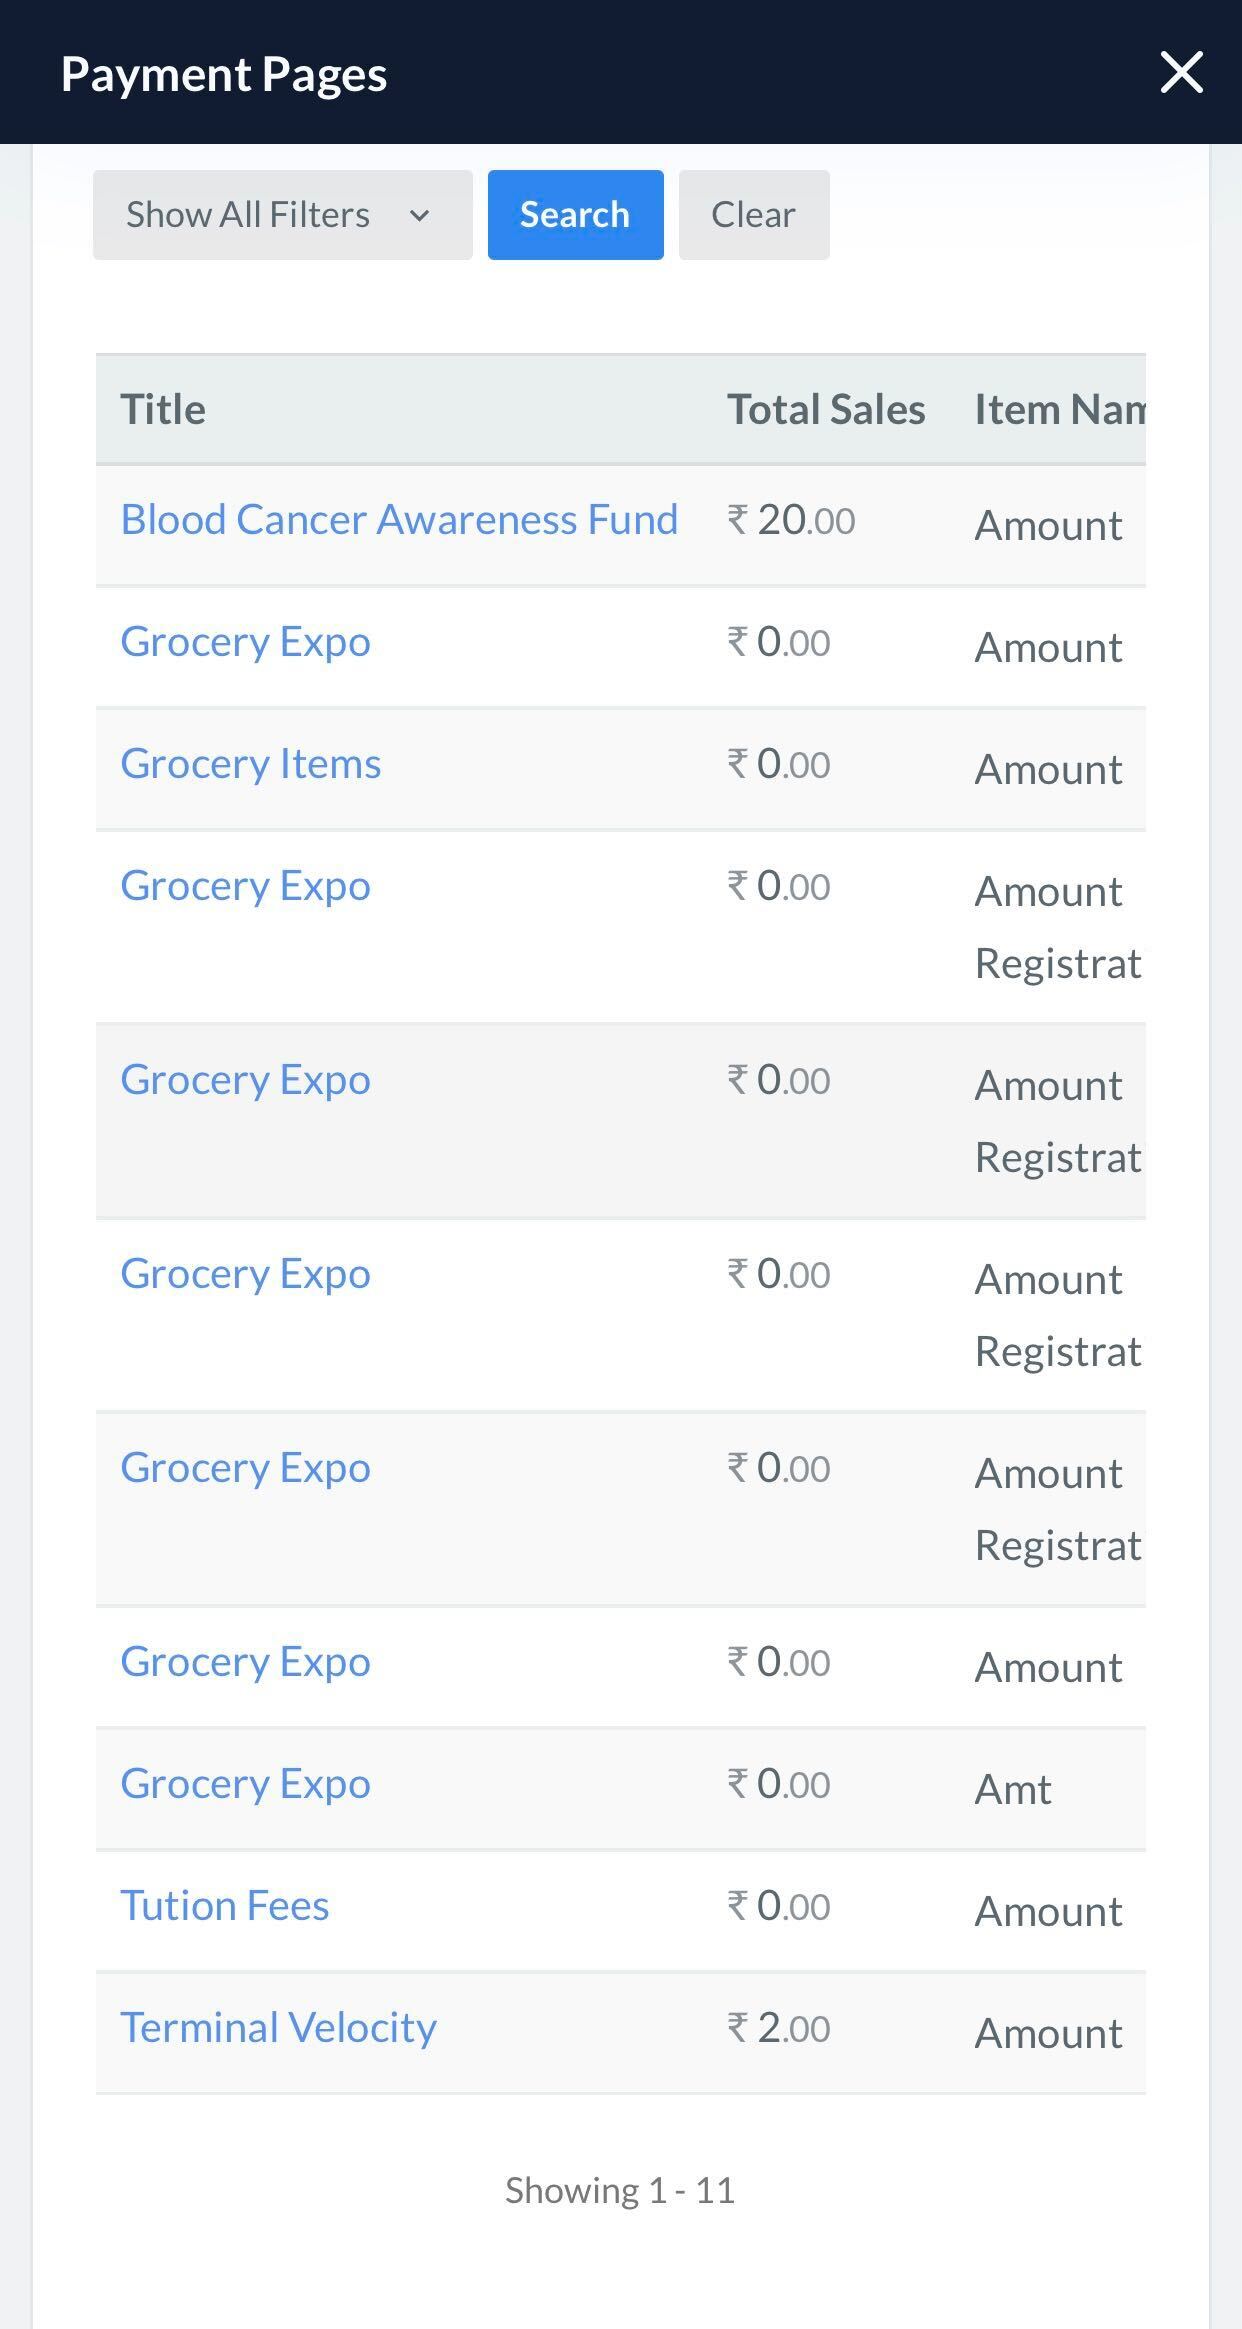 2. Tap on the payment page you wish to edit.
3. Tap **Edit Page**.
2. Tap on the payment page you wish to edit.
3. Tap **Edit Page**.
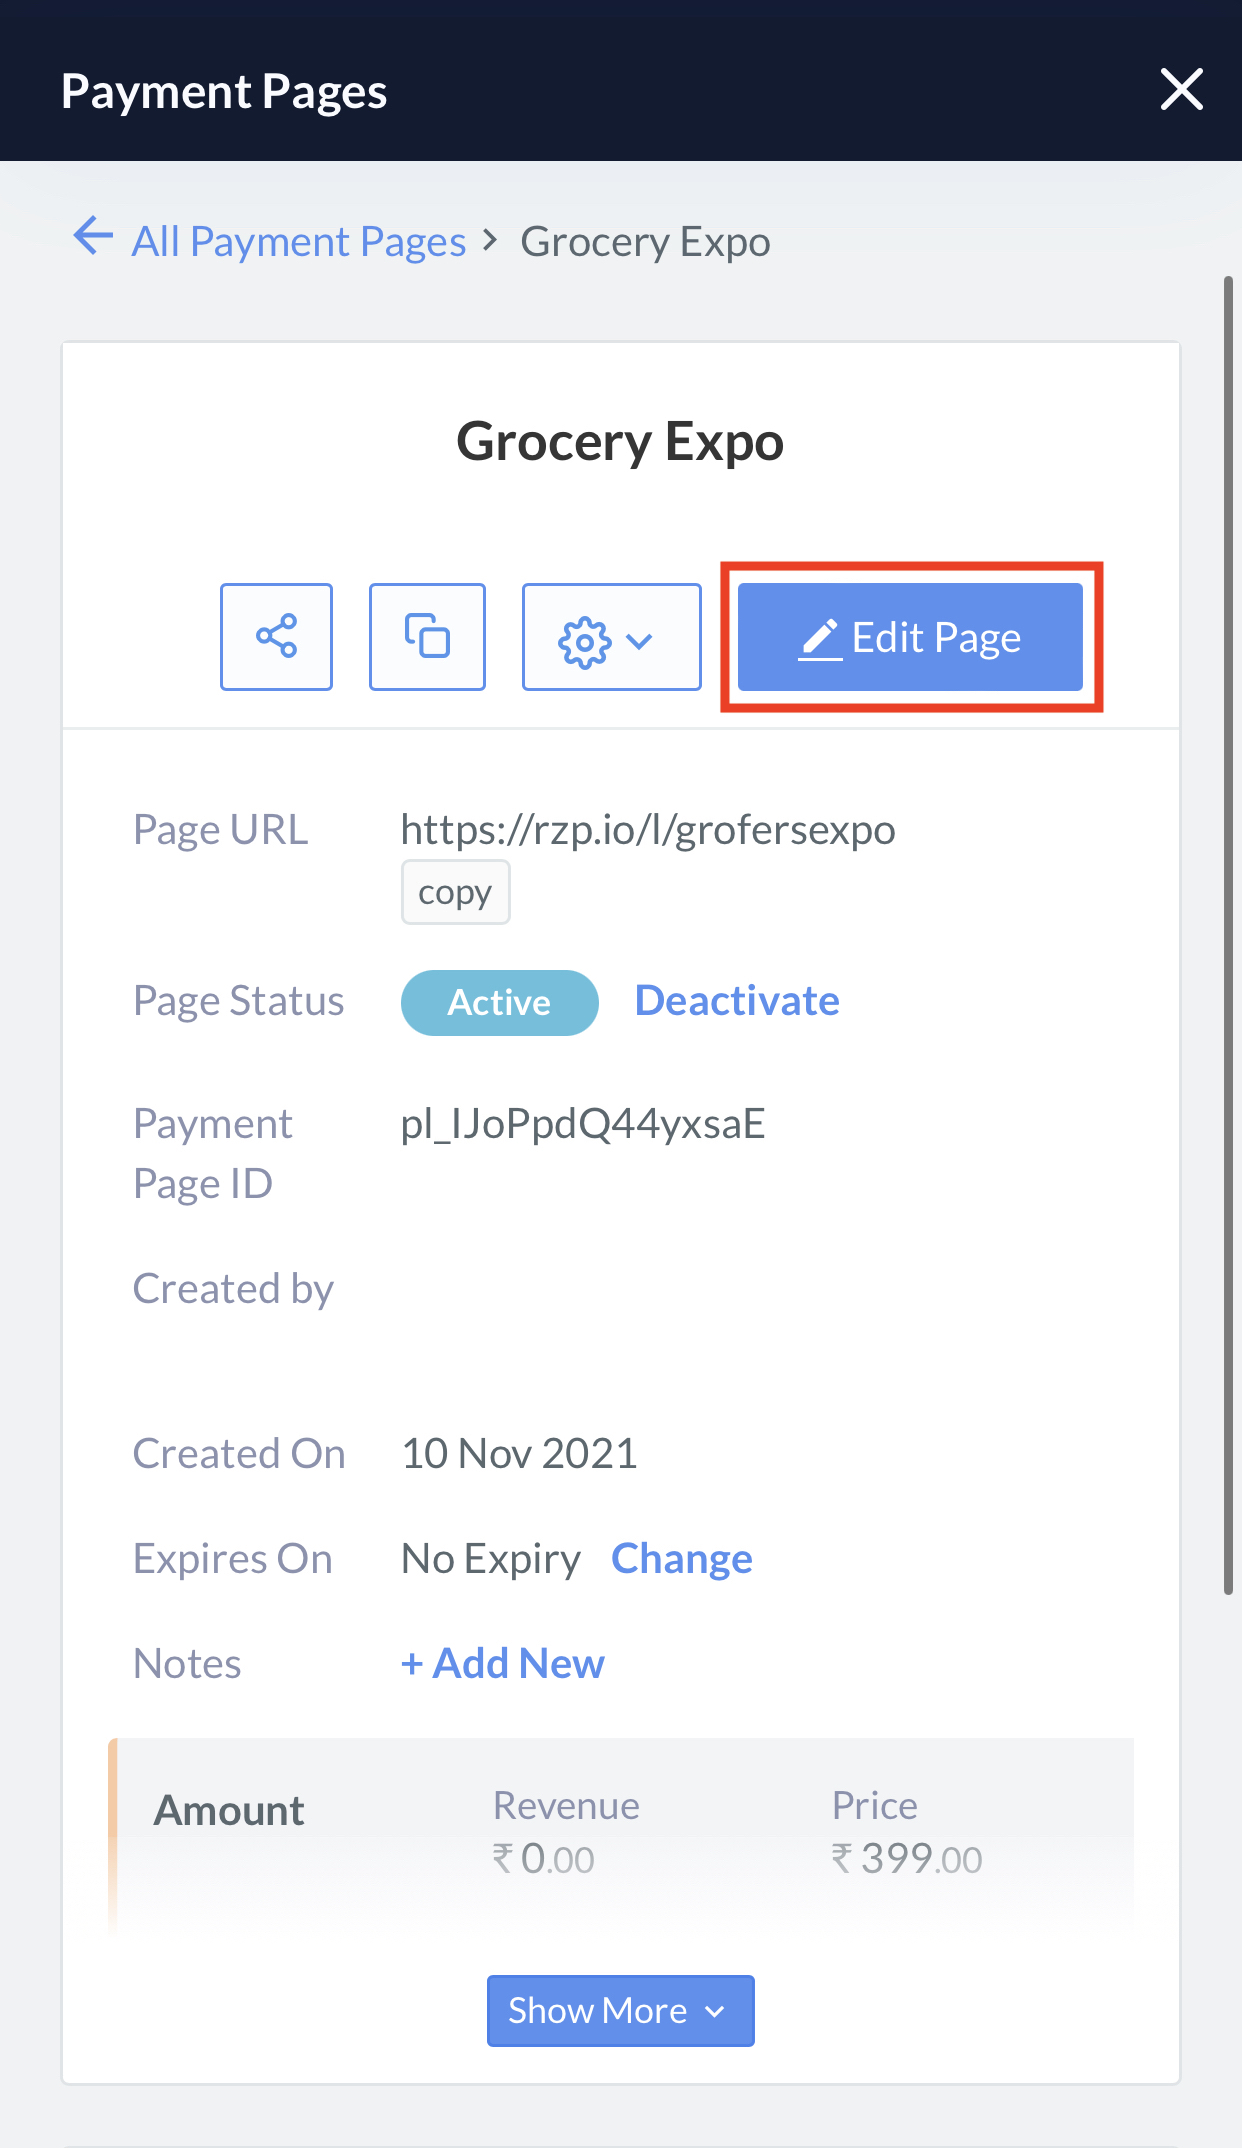 4. The page appears in edit mode. You can now edit any of the fields to update the details, including the price fields.
## Deactivate Payment Page
Follow these steps to deactivate a Payment Page:
1. Under the **Accept Payments** section, tap **Payment Pages** and scroll down to the list of Payment Pages.
2. Tap on the payment page you wish to deactivate.
3. Tap **Deactivate**.
4. The page appears in edit mode. You can now edit any of the fields to update the details, including the price fields.
## Deactivate Payment Page
Follow these steps to deactivate a Payment Page:
1. Under the **Accept Payments** section, tap **Payment Pages** and scroll down to the list of Payment Pages.
2. Tap on the payment page you wish to deactivate.
3. Tap **Deactivate**.
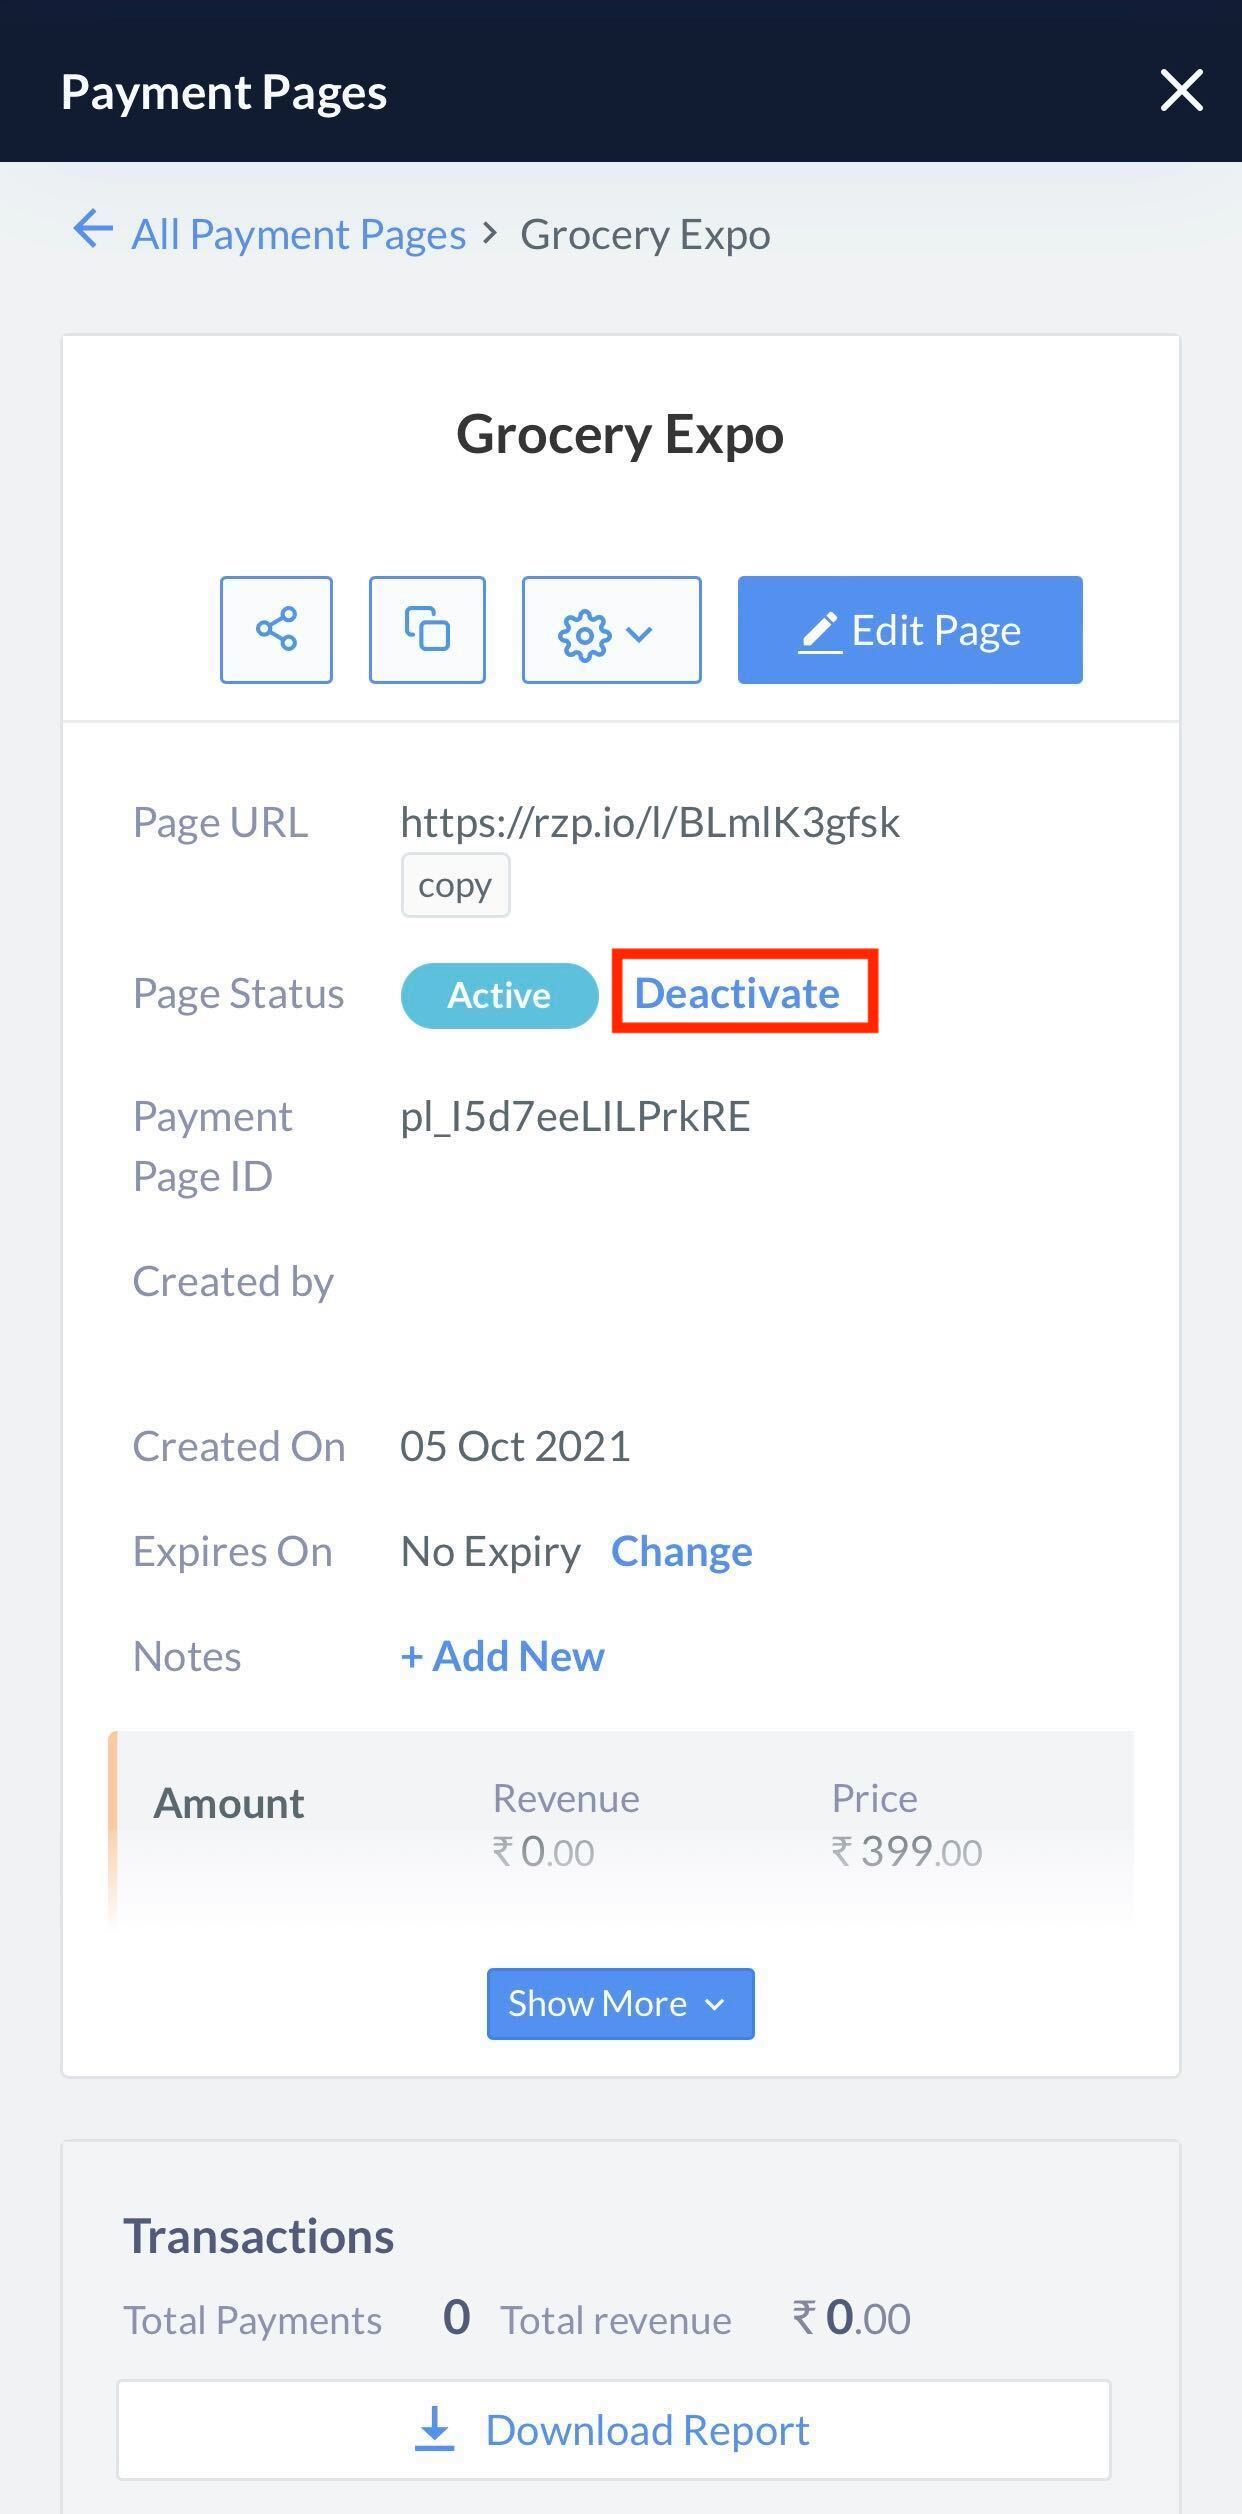 4. Tap **Yes, deactivate** to confirm.
## Payment Page States
The table below lists the various states in the Payment Page life cycle and briefly describes each.
| Status | Description |
| -------- | ----------------------------------------------------------------------------------------------------------- |
| Active | Indicates the Payment Page is created and saved. You can accept payments using this page and edit the page. |
| Inactive | Indicates the Payment Page is deactivated or has expired. You cannot accept payments using this page. |
### Related Information
* [Payment Pages](/docs/payments/payment-pages)
* [Razorpay Mobile App](/docs/payments/mobile-app)
* [Create and Send Payment Links](/docs/payments/mobile-app/accept-payments/payment-links)
4. Tap **Yes, deactivate** to confirm.
## Payment Page States
The table below lists the various states in the Payment Page life cycle and briefly describes each.
| Status | Description |
| -------- | ----------------------------------------------------------------------------------------------------------- |
| Active | Indicates the Payment Page is created and saved. You can accept payments using this page and edit the page. |
| Inactive | Indicates the Payment Page is deactivated or has expired. You cannot accept payments using this page. |
### Related Information
* [Payment Pages](/docs/payments/payment-pages)
* [Razorpay Mobile App](/docs/payments/mobile-app)
* [Create and Send Payment Links](/docs/payments/mobile-app/accept-payments/payment-links)