> ## Documentation Index
> Fetch the complete documentation index at: https://razorpay-881012b3.mintlify.site/llms.txt
> Use this file to discover all available pages before exploring further.
# Webstore on Mobile App
> Create Razorpay Webstore and collect payments using the Razorpay Payments Mobile App.
Available in
🇮🇳 India
You can build a Webstore from your Razorpay Payments Mobile App to list all your products on a single storefront and start accepting customer payments. This method does not require any code or API integration.
## Steps
To create a Webstore on the Razorpay Payments Mobile App, you must complete the following steps.
* [Steps](#steps)
* [Step 1: Add Product Details](#step-1-add-product-details)
* [Step 2: Add Business Details](#step-2-add-business-details)
* [Step 3: Configure Store Settings](#step-3-configure-store-settings)
* [Step 4: Share and Start Accepting Payments](#step-4-share-and-start-accepting-payments)
* [Edit Webstore](#edit-webstore)
* [Deactivate Webstore](#deactivate-webstore)
* [Related Information](#related-information)
### Step 1: Add Product Details
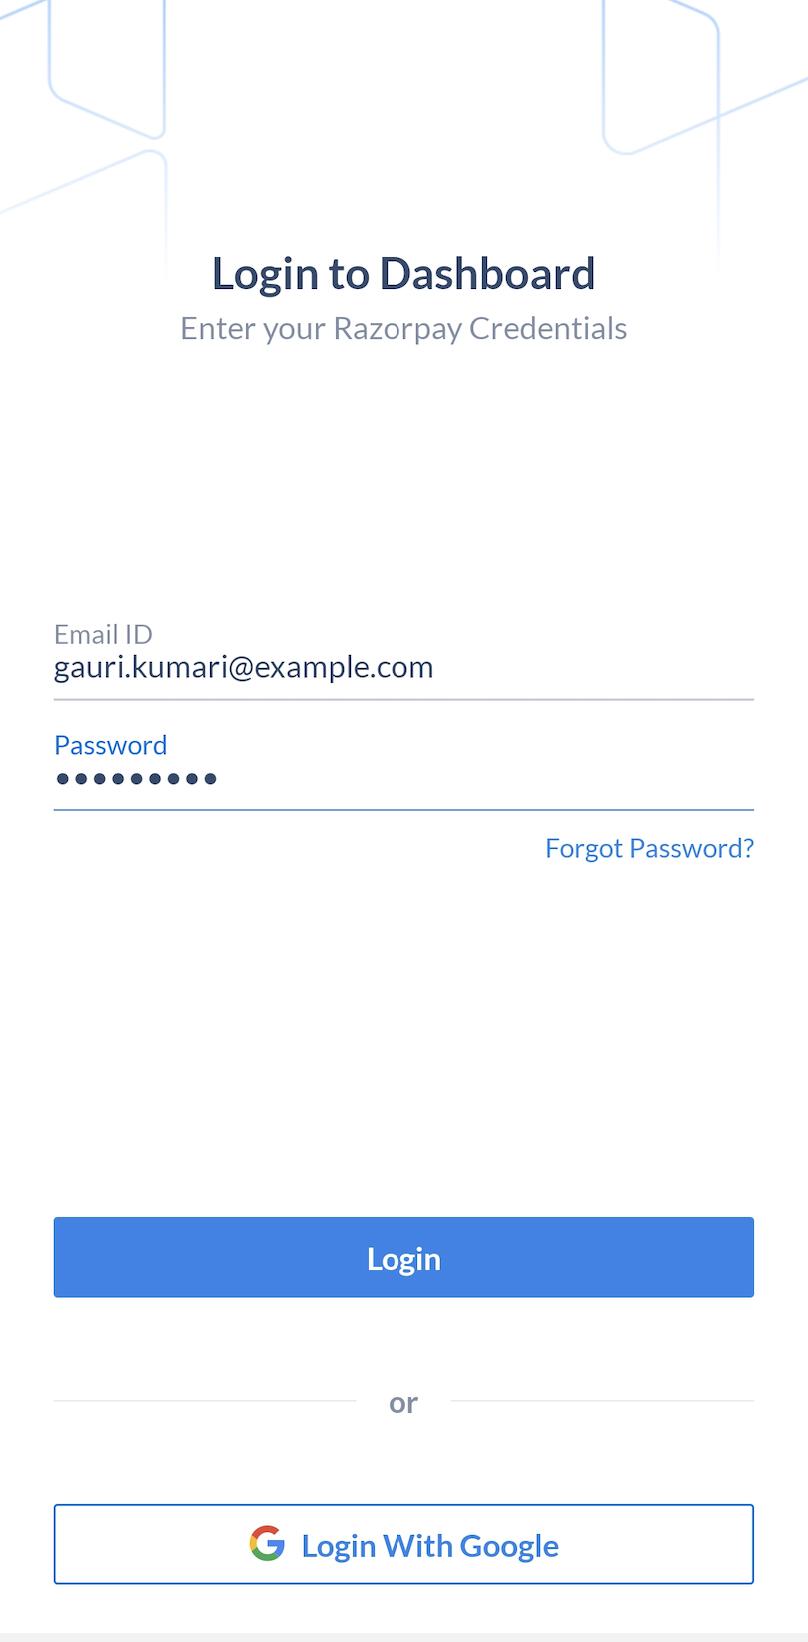
1. Log in with your Dashboard credentials.
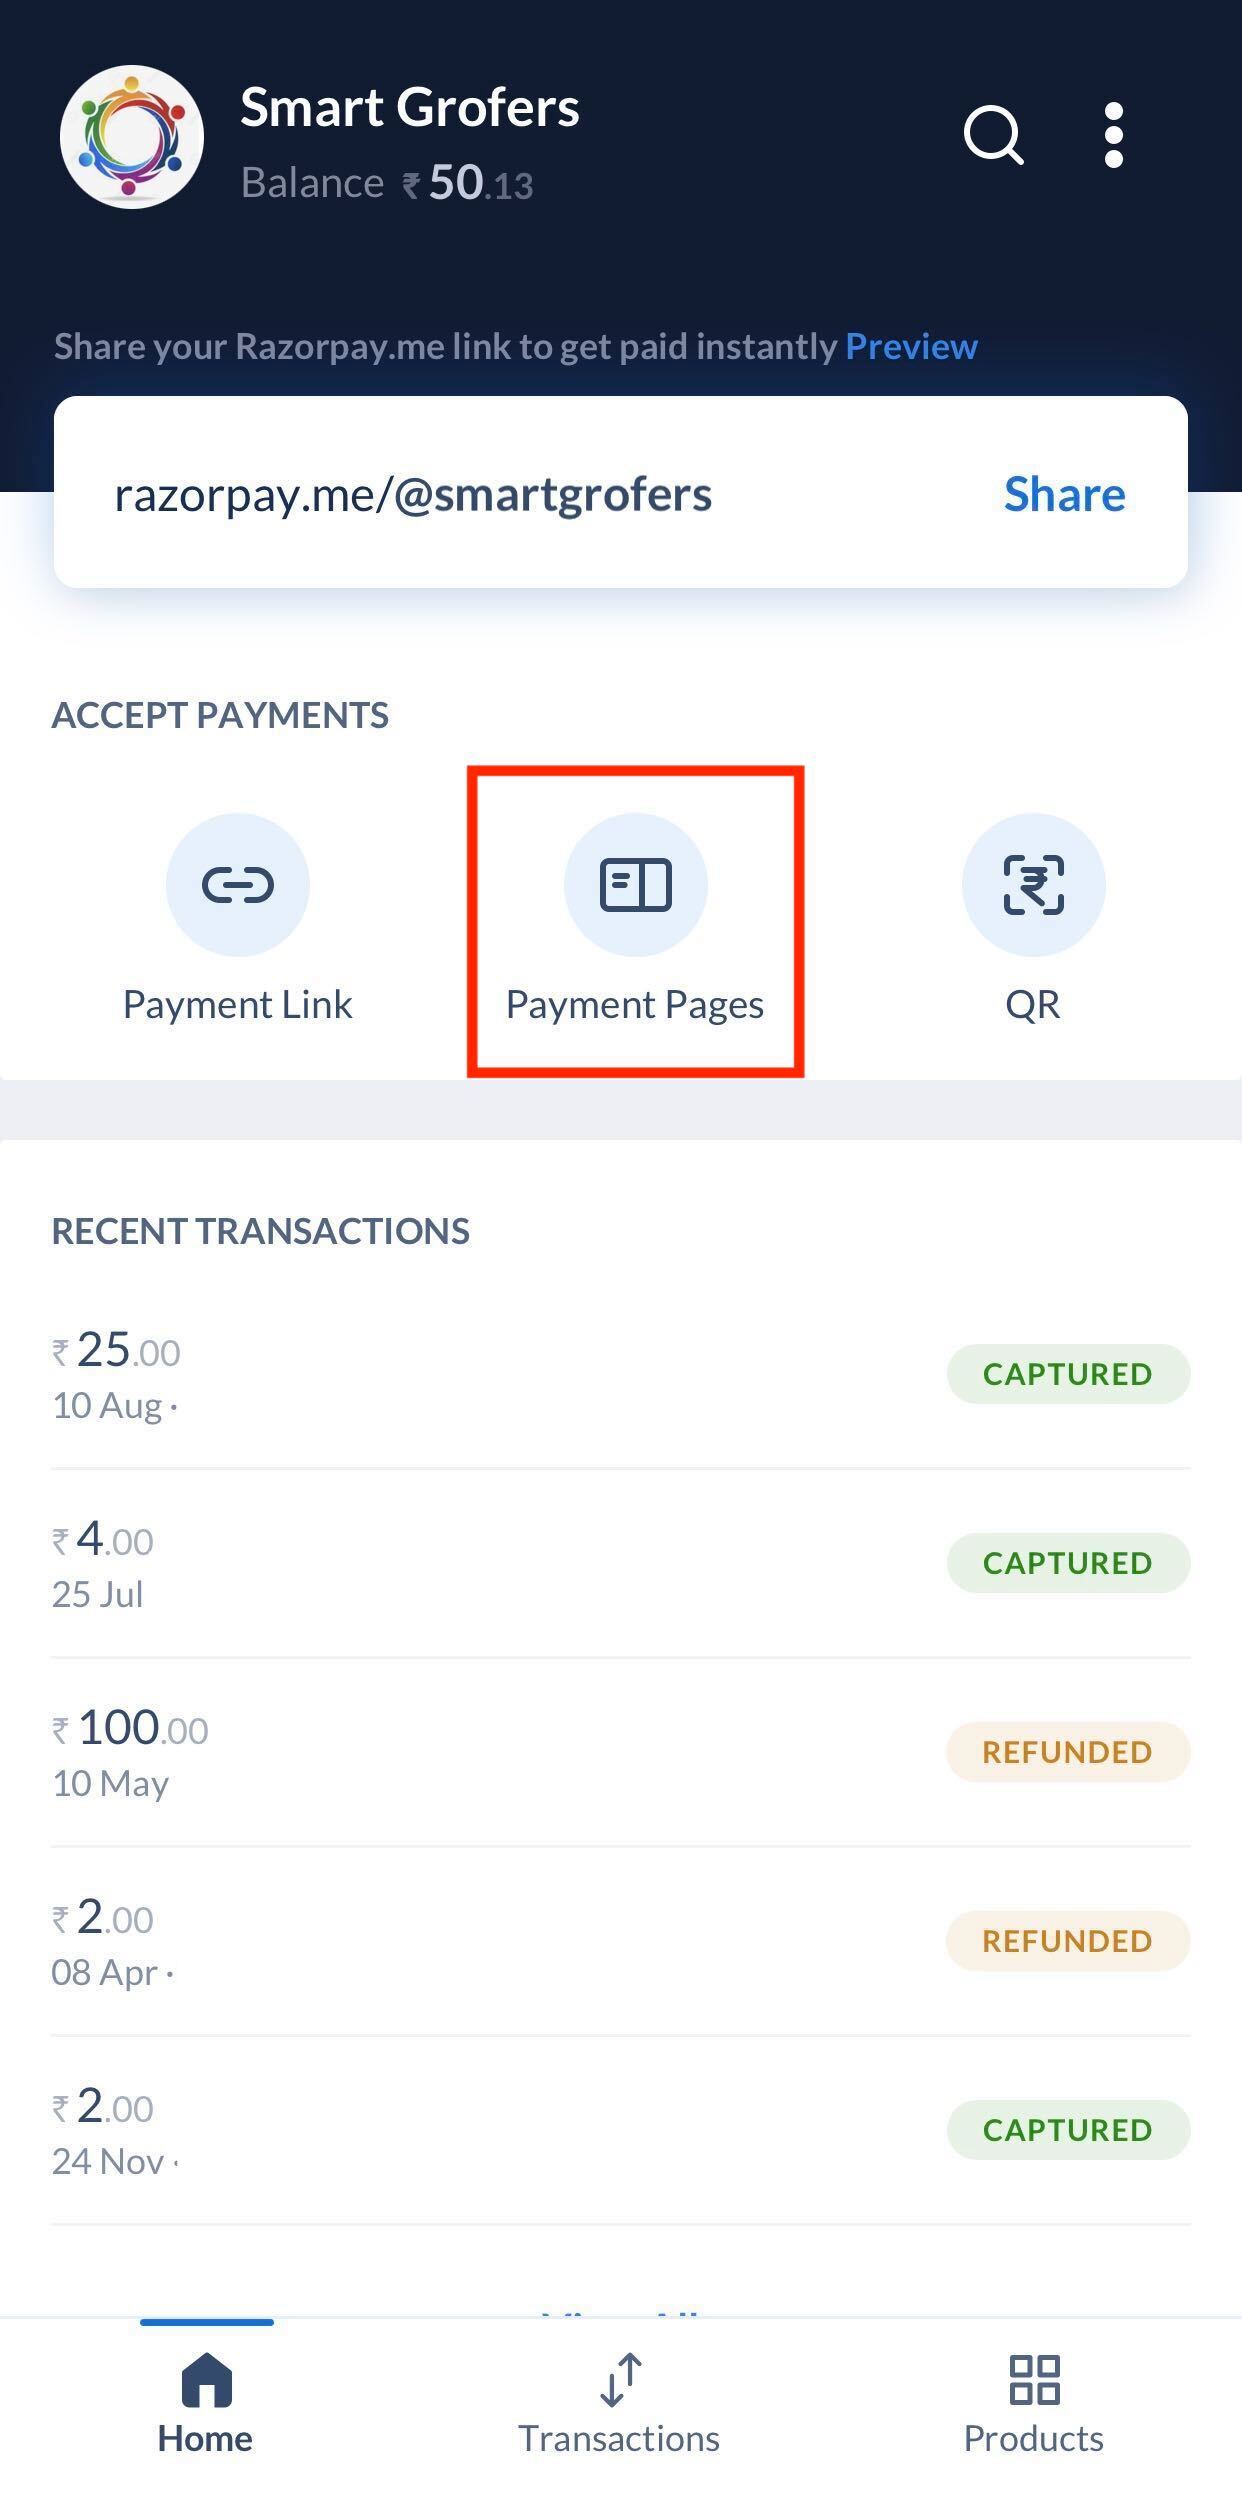
 2. Tap **Payment Pages** under the **ACCEPT PAYMENTS** section and tap **+ Create Payment Page**.
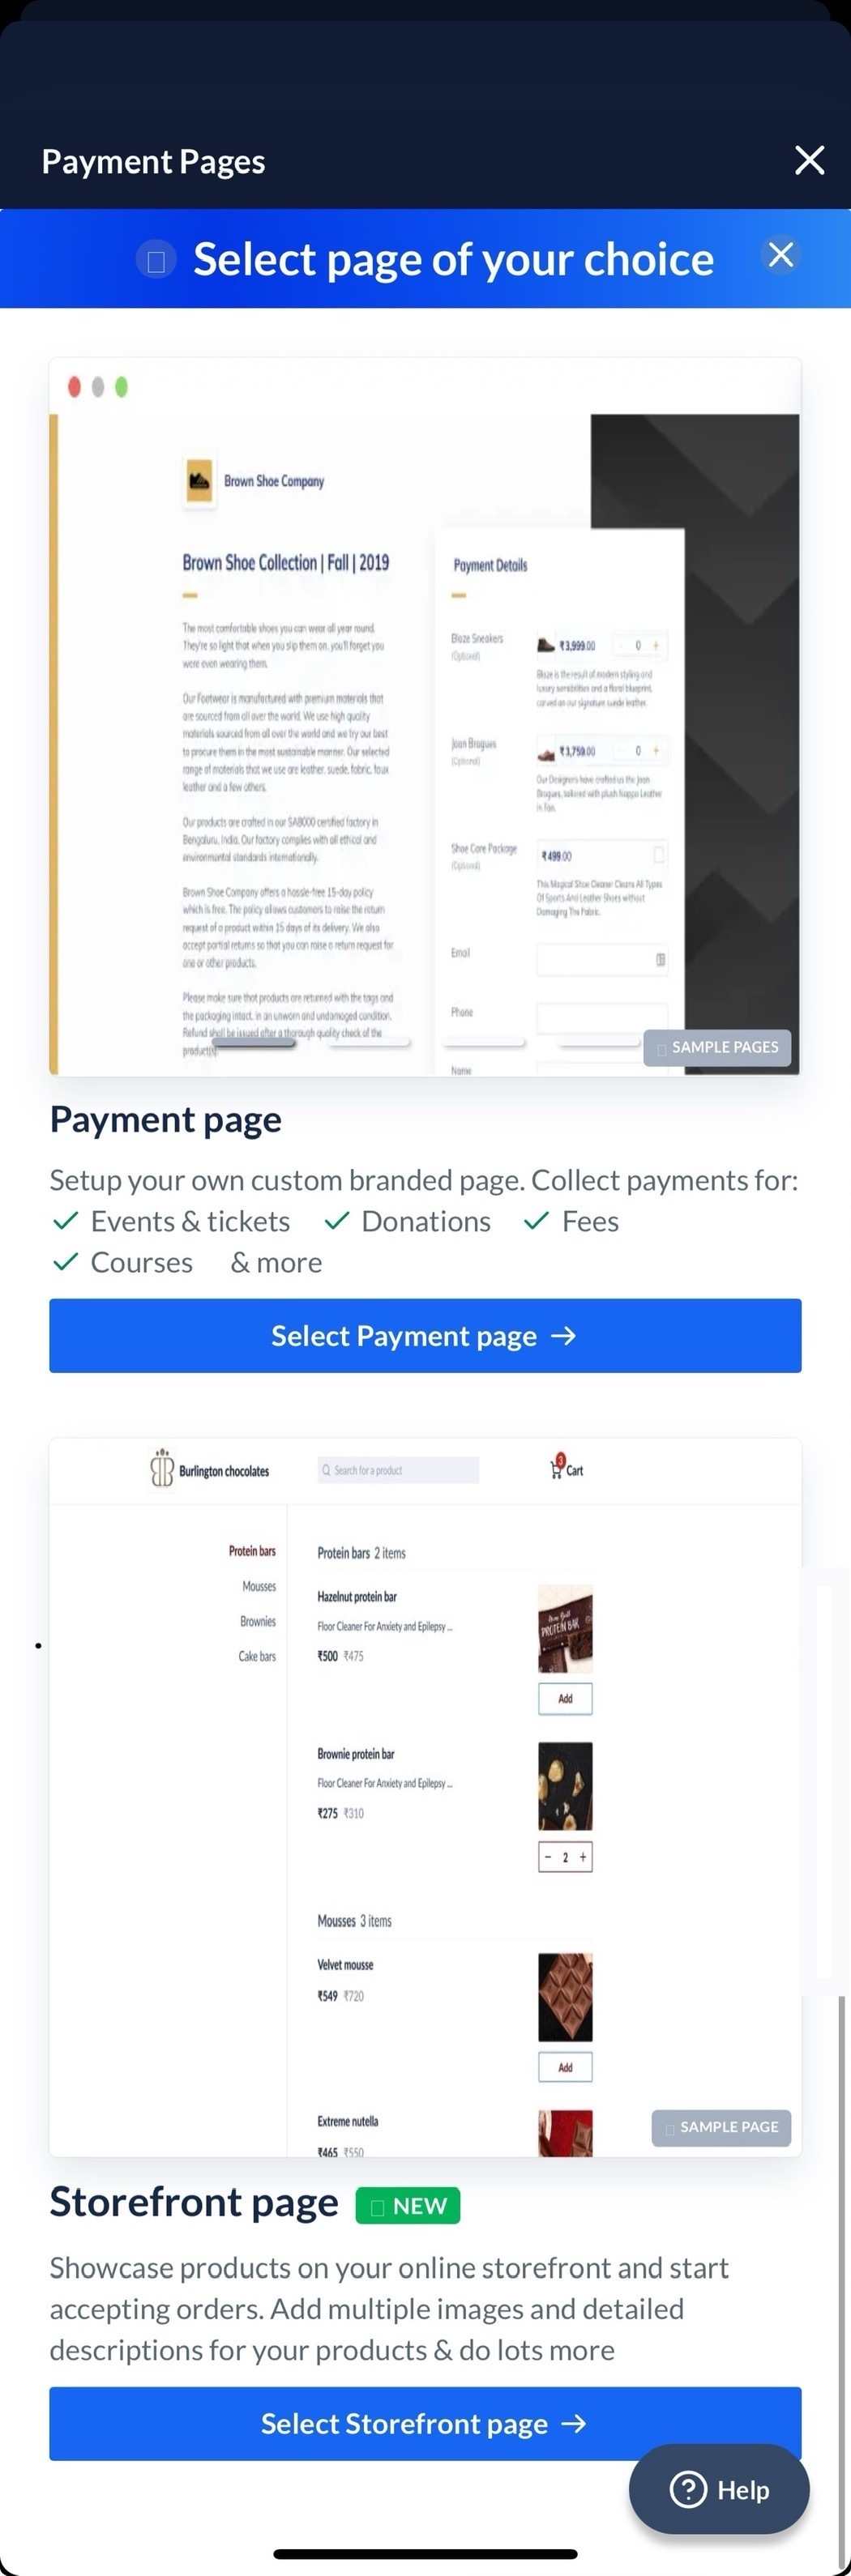
 3. Tap **Select Webstore**.
 4. Tap **Add products to this page** and then tap **+ Add a new product**.
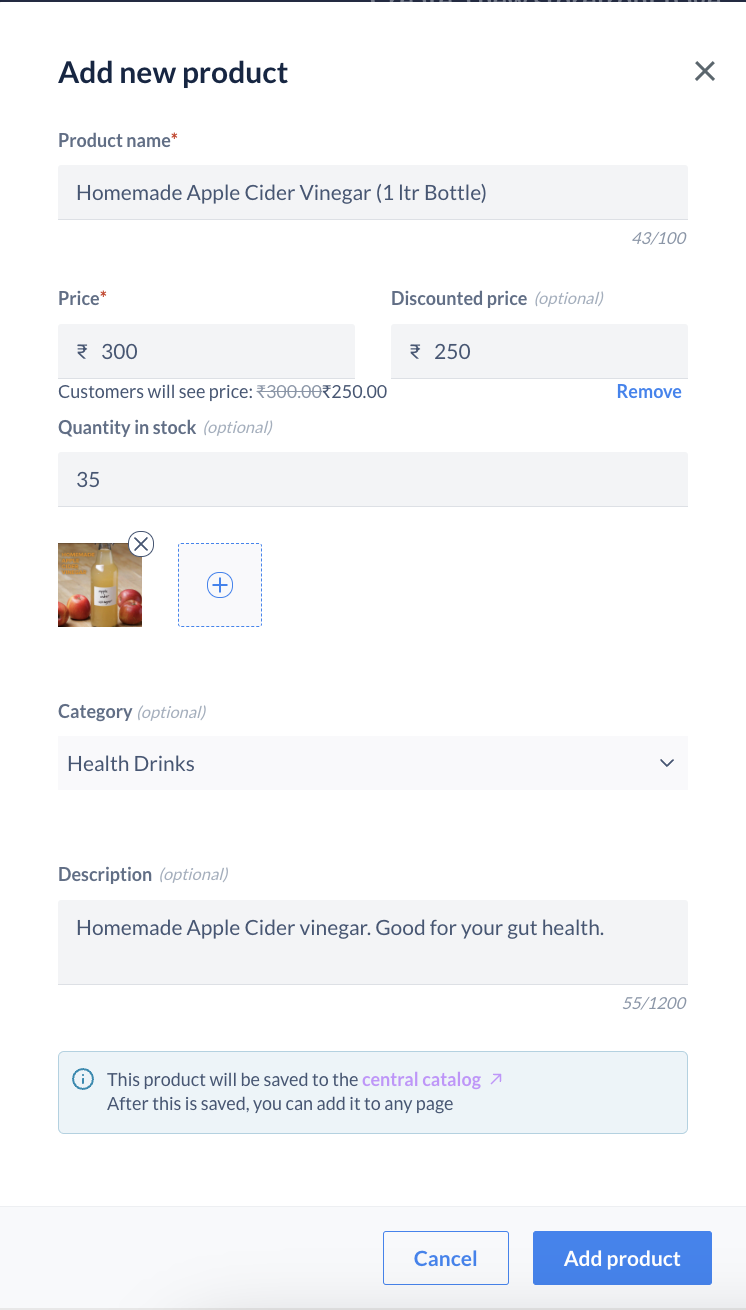
5. Add a **Product name**.
**Product name Character Limit**
The Product name cannot exceed 100 characters.
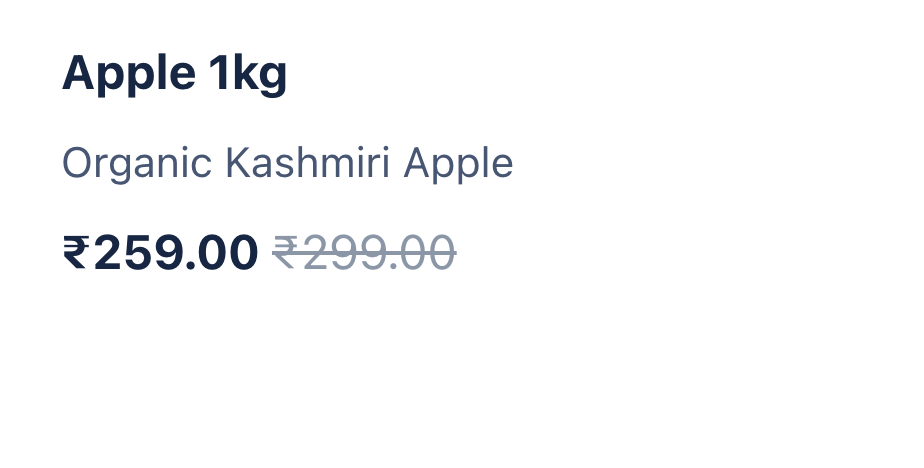
6. Add the **Price** of your product. In addition, you can add a **Discounted price**, which will serve as the final listed price for the product. Customers will see the following.
4. Tap **Add products to this page** and then tap **+ Add a new product**.
5. Add a **Product name**.
**Product name Character Limit**
The Product name cannot exceed 100 characters.
6. Add the **Price** of your product. In addition, you can add a **Discounted price**, which will serve as the final listed price for the product. Customers will see the following.
 7. Add **Quantity in stock** if you have a limited quantity.
8. Tap **Upload product images** to upload an image of your product. You can upload up to five product images.
9. You can also add your product to a Category:
1. Click on the Category drop-down and click **+Create new category**.
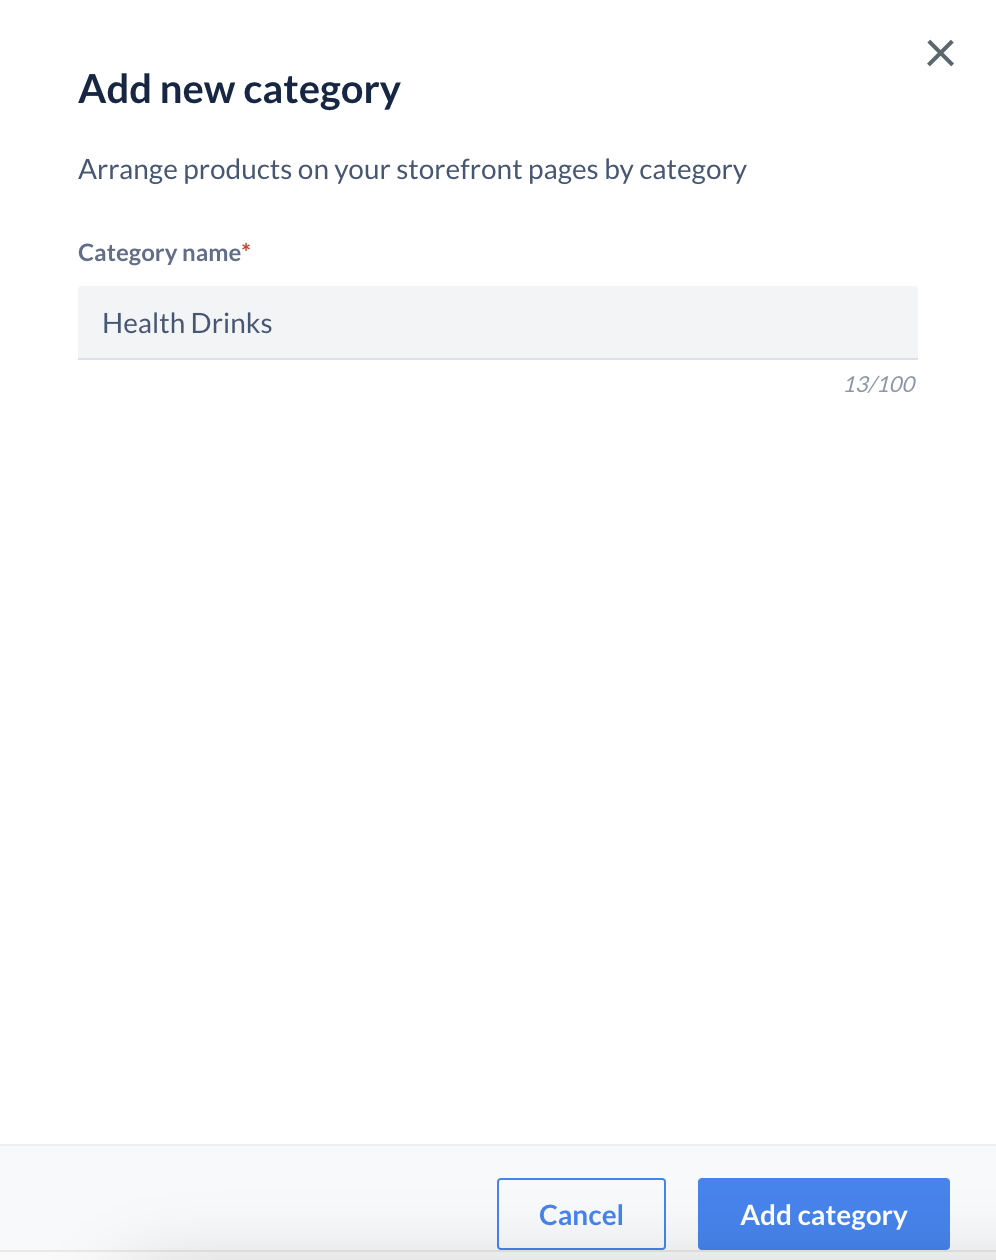
2. Add a category name and click **Add category**.
**Category name Character Limit**
The Category name cannot exceed 100 characters.
7. Add **Quantity in stock** if you have a limited quantity.
8. Tap **Upload product images** to upload an image of your product. You can upload up to five product images.
9. You can also add your product to a Category:
1. Click on the Category drop-down and click **+Create new category**.
2. Add a category name and click **Add category**.
**Category name Character Limit**
The Category name cannot exceed 100 characters.
 10. Add a brief description for your product if needed and click **Add product**.
 ### Step 2: Add Business Details
Follow the steps given below to add your business details.
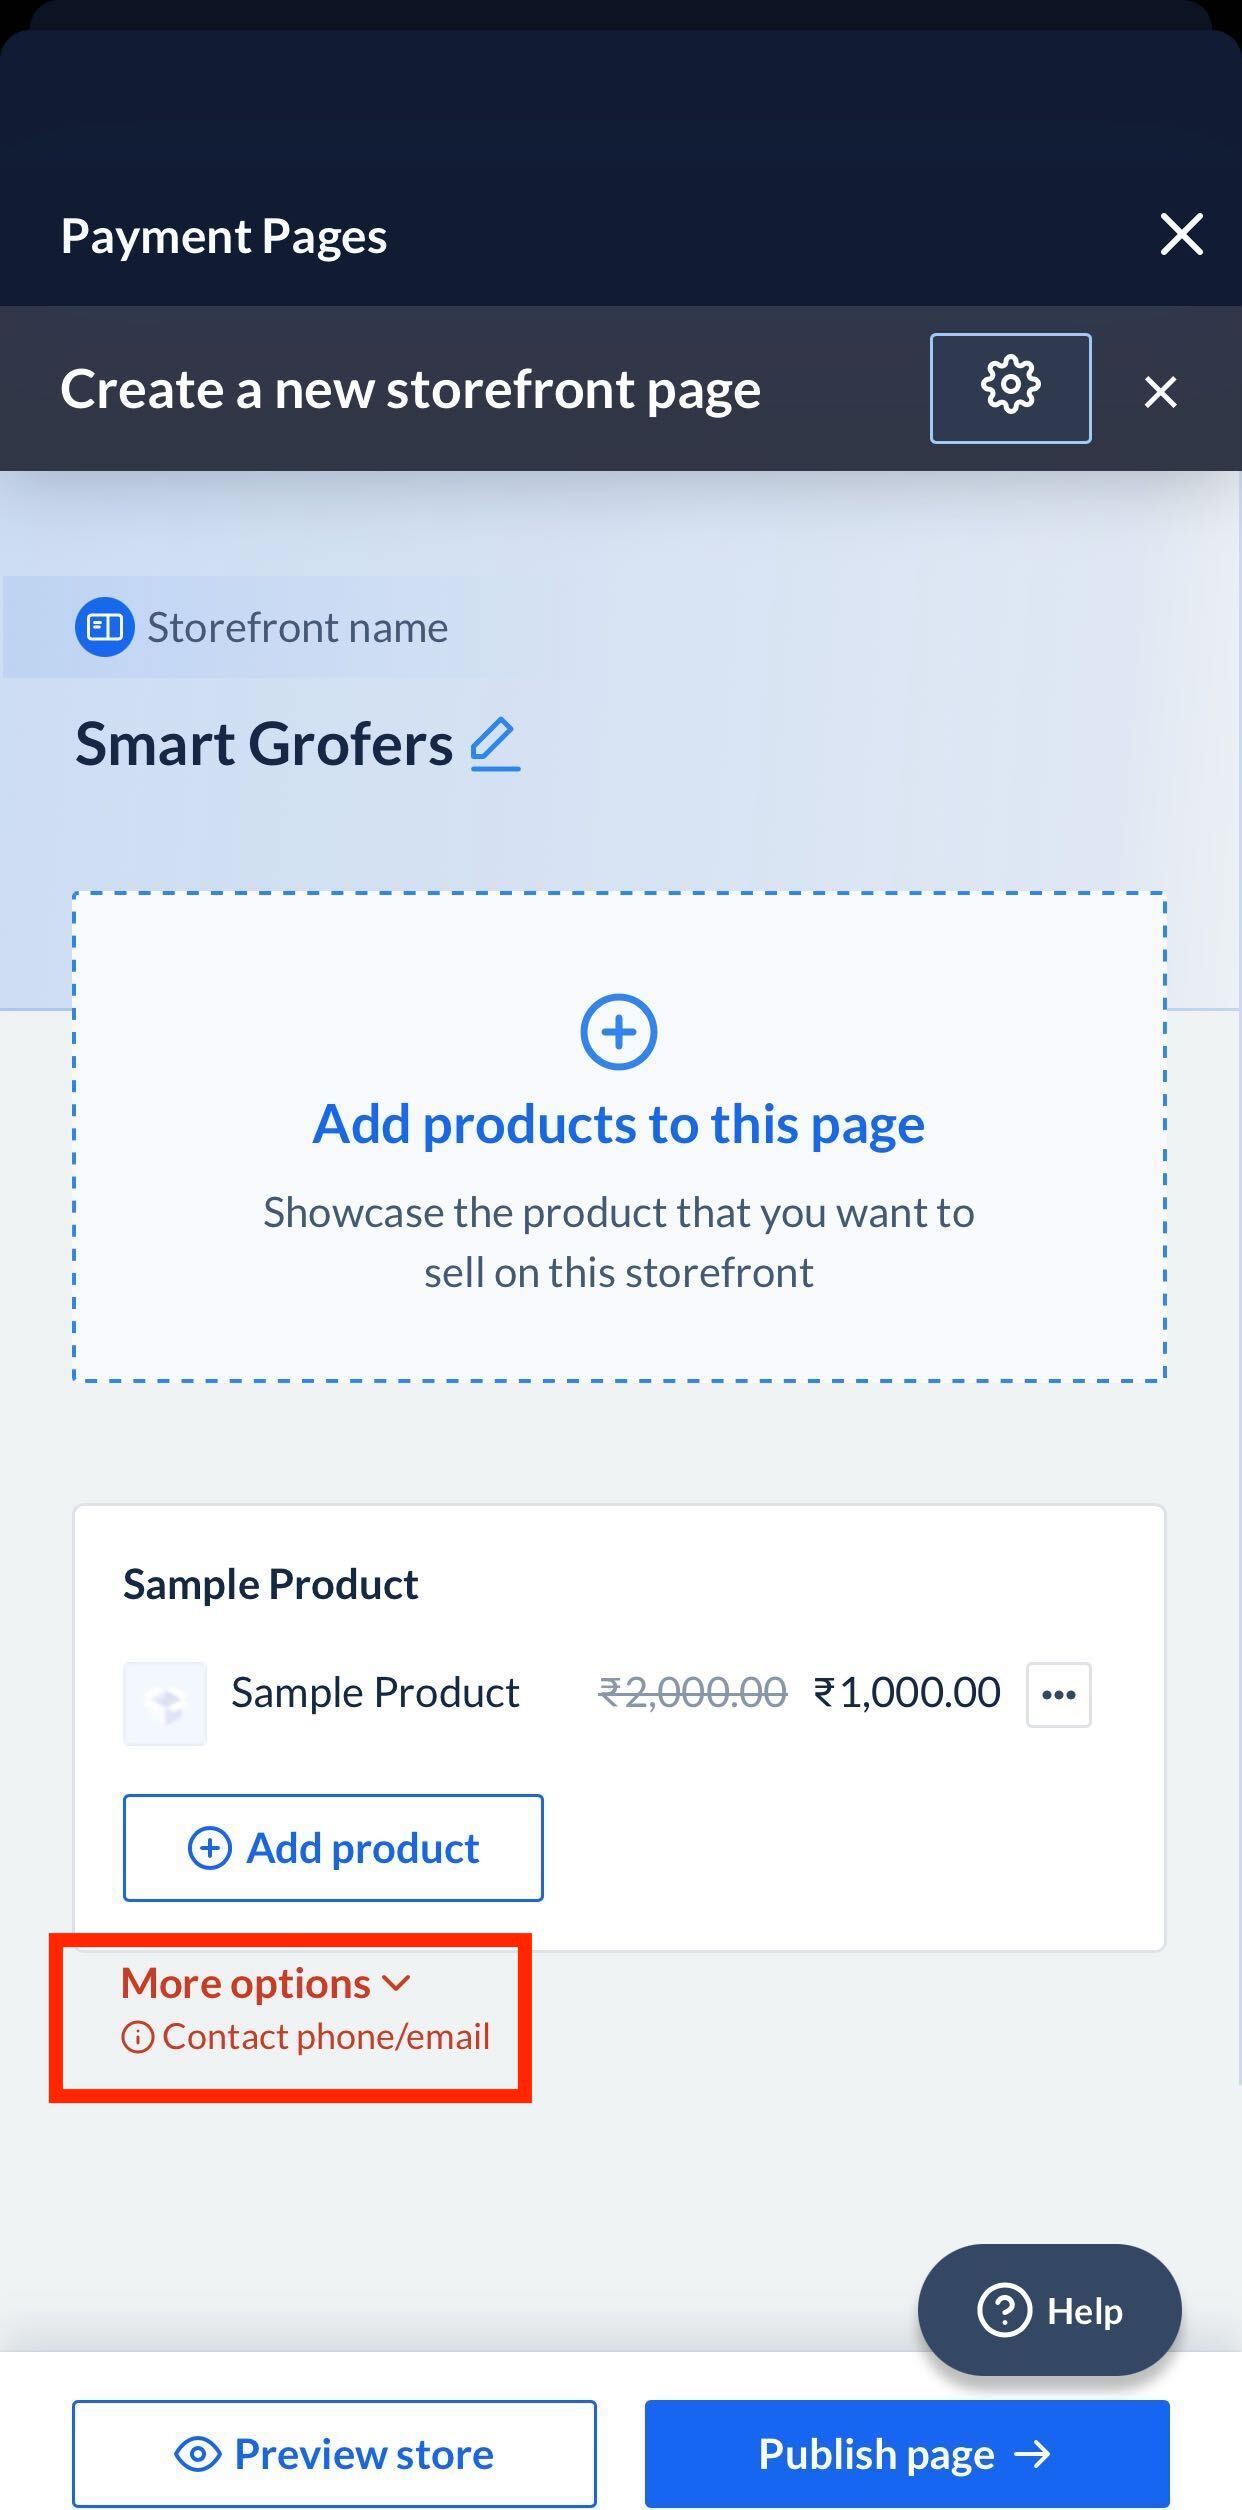
1. Click on the **More options** section.
### Step 2: Add Business Details
Follow the steps given below to add your business details.
1. Click on the **More options** section.
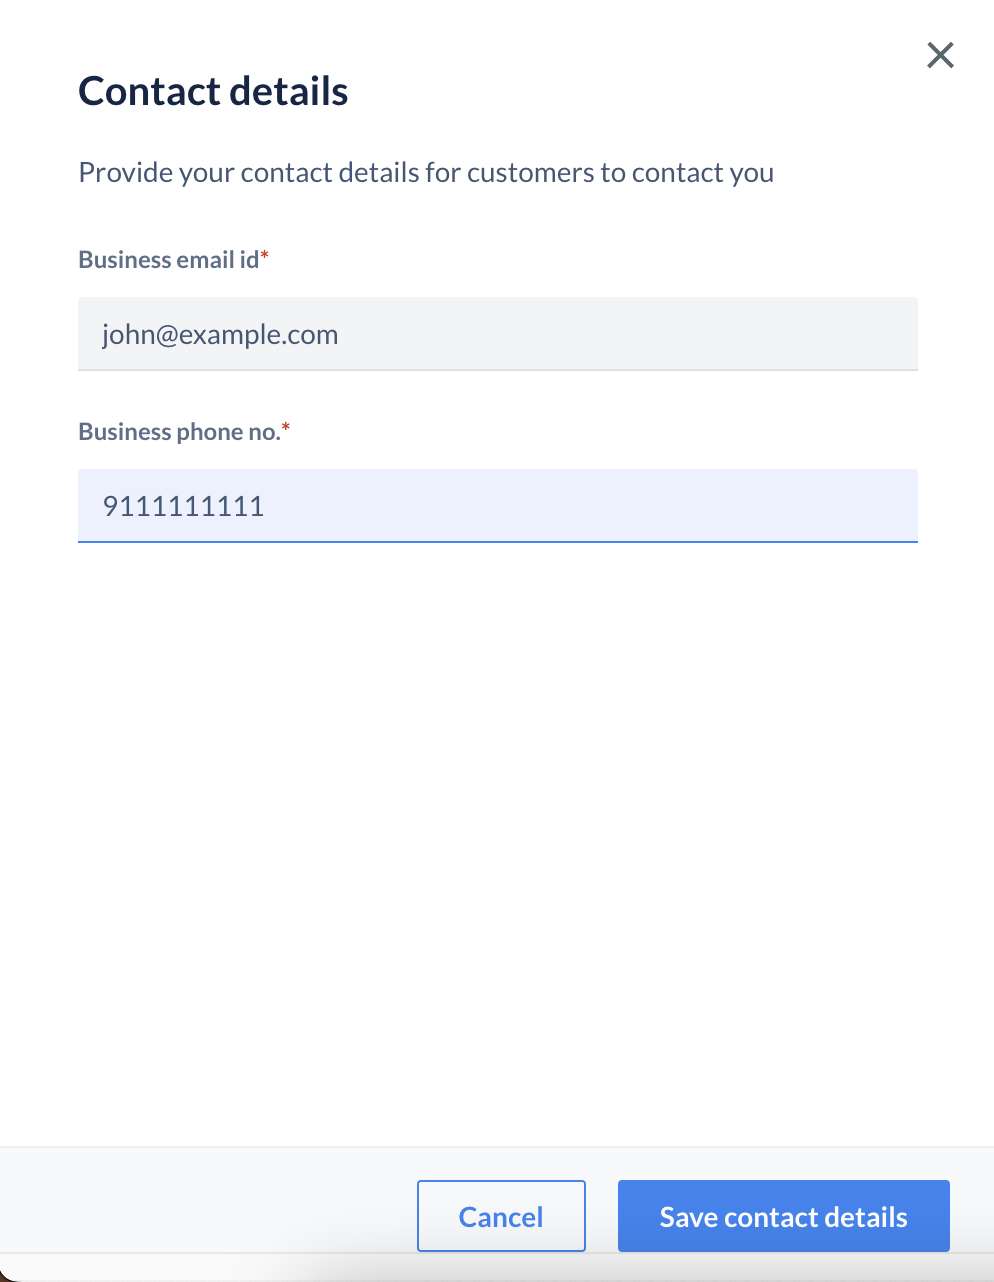
 2. Enter you **Business email id**.
3. Enter your **Business phone no.** and click **Save contact details**.
2. Enter you **Business email id**.
3. Enter your **Business phone no.** and click **Save contact details**.
 ### Step 3: Configure Store Settings
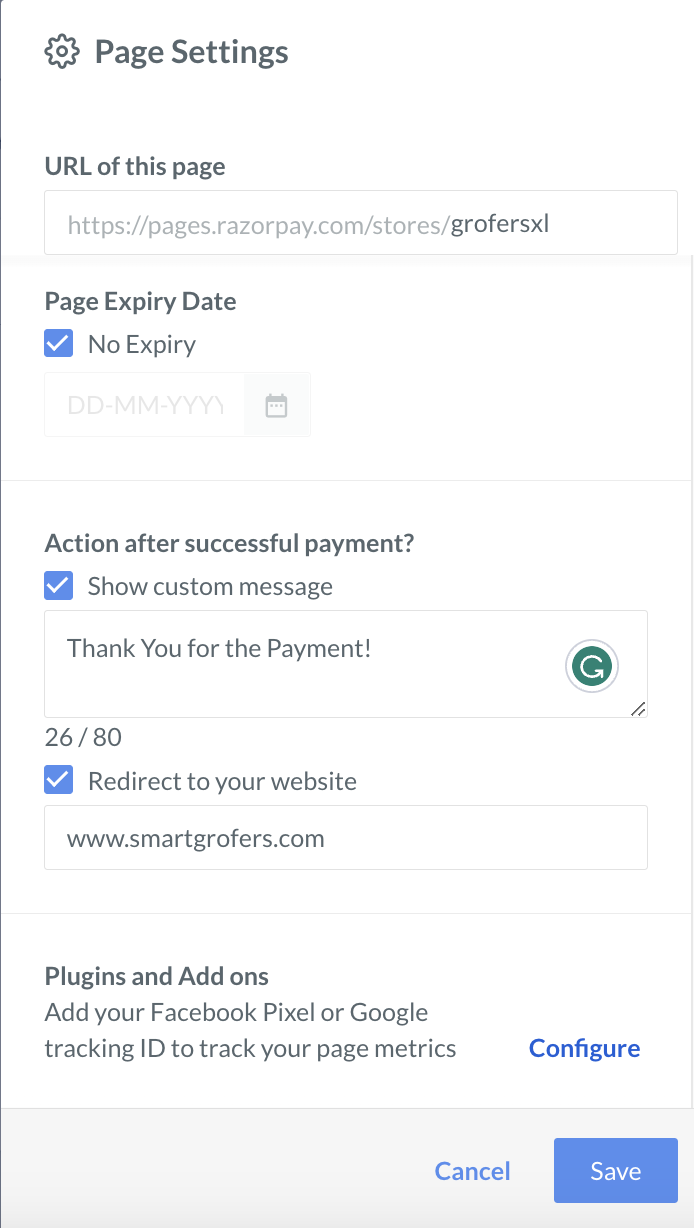
Customise your page by adding a custom URL, adding an expiry date and so on through the **Page Settings** option.
1. Log in with your Dashboard credentials.
2. Click **Page Settings** to configure the settings for the Webstore.
3. Add a unique URL slug in the **URL for this page** section.
**Watch Out!**
This is a mandatory step. You will not be able to create a Webstore if you do not add a unique URL slug.
4. You can add an expiry date for your Webstore.
5. You can also add a custom message for your customers and redirect to your preferred website after successful payment.
6. You can also configure Facebook Pixel and Google Analytics for your Webstore for metrics. Know more about how to add [Facebook Pixel and Google Analytics](/docs/payments/payment-pages/plugins-add-ons) to your Webstore.
7. Click **Save**.
### Step 3: Configure Store Settings
Customise your page by adding a custom URL, adding an expiry date and so on through the **Page Settings** option.
1. Log in with your Dashboard credentials.
2. Click **Page Settings** to configure the settings for the Webstore.
3. Add a unique URL slug in the **URL for this page** section.
**Watch Out!**
This is a mandatory step. You will not be able to create a Webstore if you do not add a unique URL slug.
4. You can add an expiry date for your Webstore.
5. You can also add a custom message for your customers and redirect to your preferred website after successful payment.
6. You can also configure Facebook Pixel and Google Analytics for your Webstore for metrics. Know more about how to add [Facebook Pixel and Google Analytics](/docs/payments/payment-pages/plugins-add-ons) to your Webstore.
7. Click **Save**.
 ### Step 4: Share and Start Accepting Payments
Share your Webstore with your customers and start accepting payments.
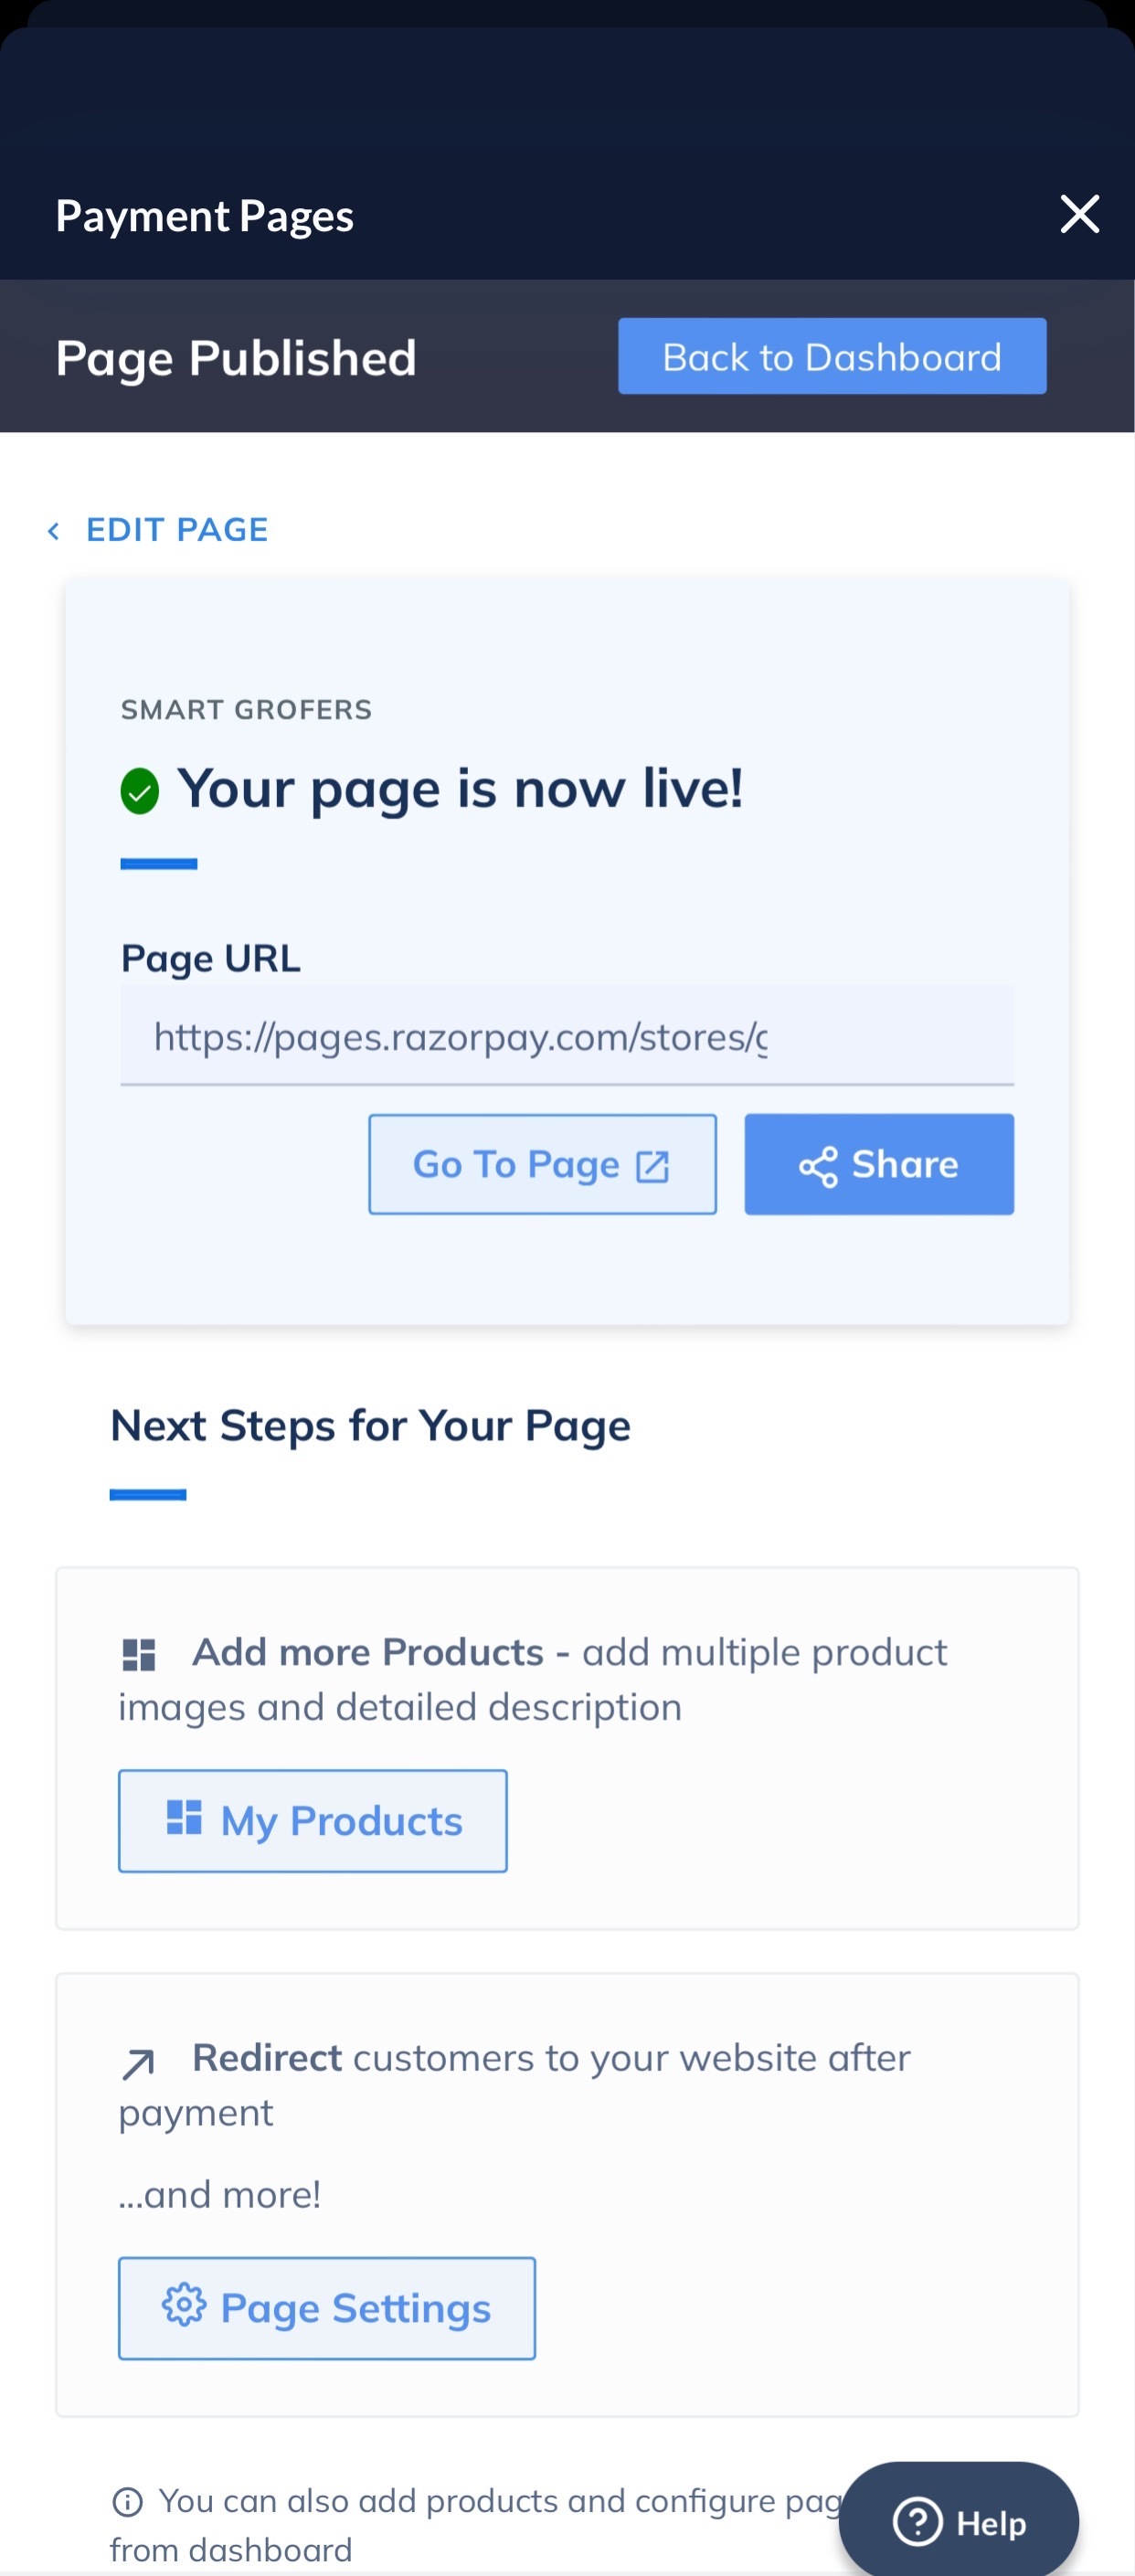
1. Once your are done creating the Webstore, tap **Publish Page** to complete the Webstore creation.
2. Tap **Share** to send the URL to your customers via different social media channels. You can also find the URL on the Dashboard in the Webstore list.
### Step 4: Share and Start Accepting Payments
Share your Webstore with your customers and start accepting payments.
1. Once your are done creating the Webstore, tap **Publish Page** to complete the Webstore creation.
2. Tap **Share** to send the URL to your customers via different social media channels. You can also find the URL on the Dashboard in the Webstore list.
 ## Edit Webstore
1. Log in with your Dashboard credentials.
2. Tap **Payment Pages** under the **ACCEPT PAYMENTS** section.
3. Under the **Accept Payments** section, tap **Payment Pages**.
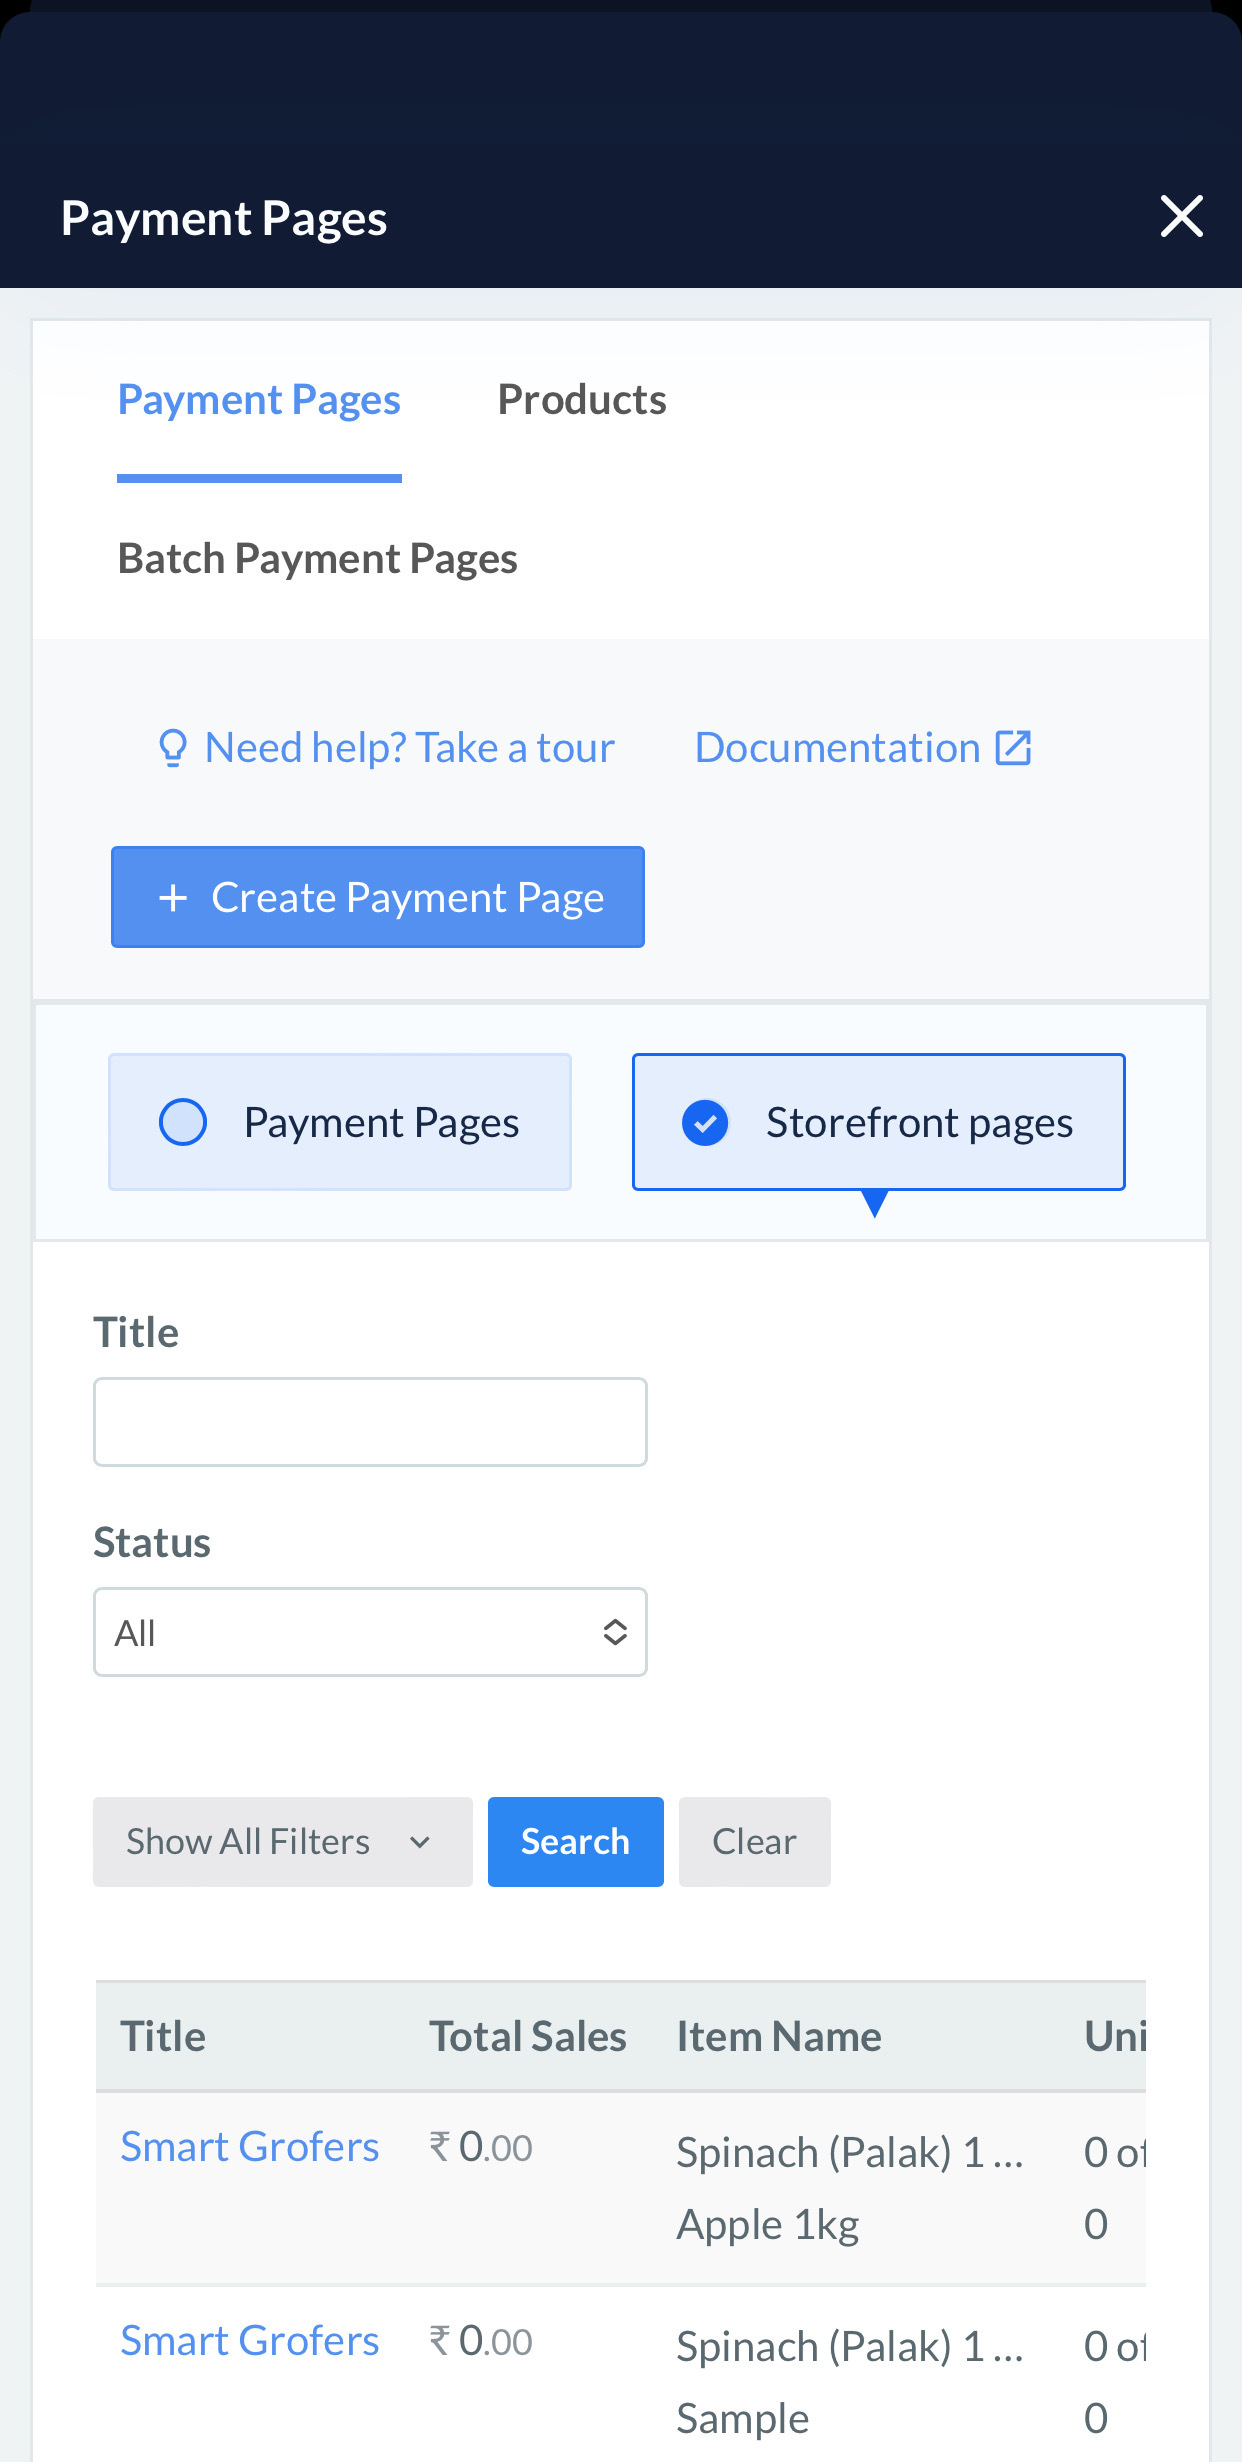
4. On the Payment Pages Dashboard, tap **Webstore**.
5. Scroll through your list of Webstore and tap on the page you wish to edit.
## Edit Webstore
1. Log in with your Dashboard credentials.
2. Tap **Payment Pages** under the **ACCEPT PAYMENTS** section.
3. Under the **Accept Payments** section, tap **Payment Pages**.
4. On the Payment Pages Dashboard, tap **Webstore**.
5. Scroll through your list of Webstore and tap on the page you wish to edit.
 6. Tap **Edit Page**.
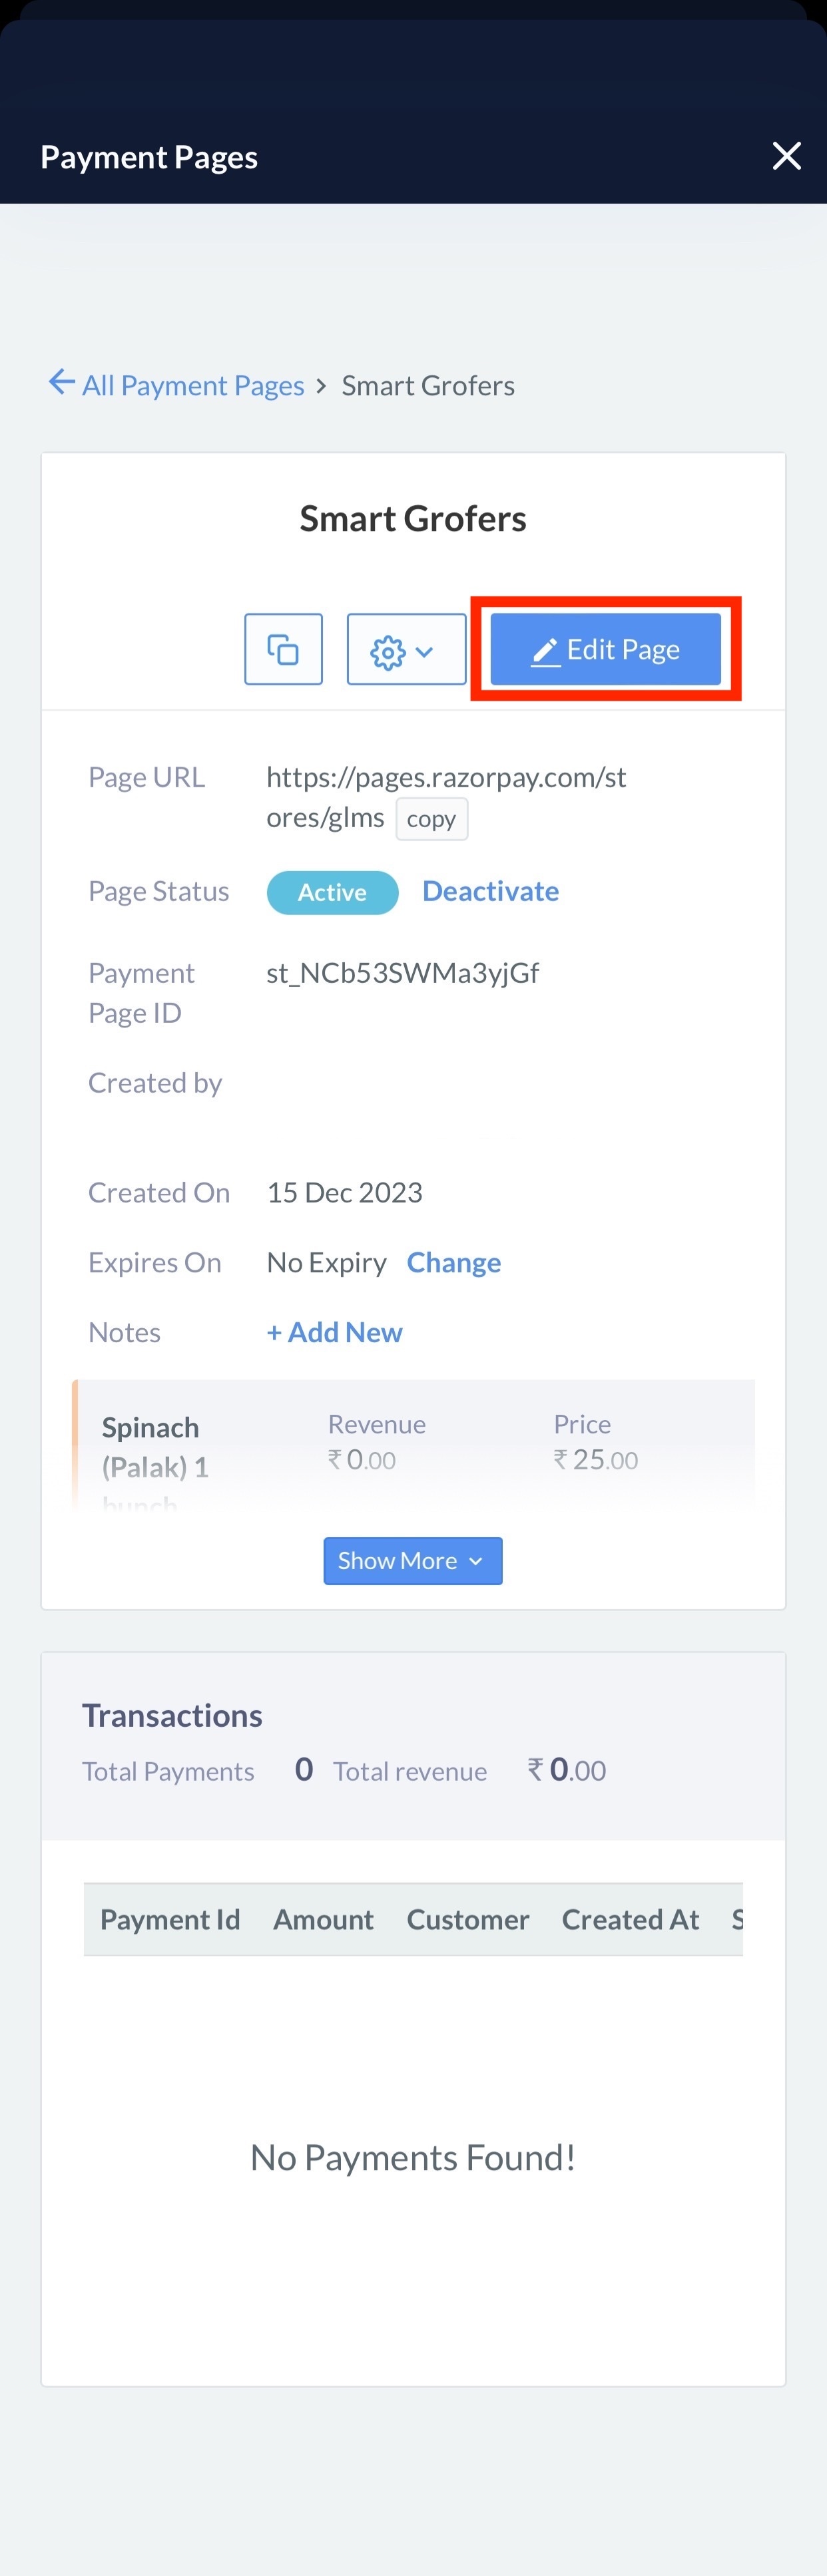 7. The page appears in edit mode. You can now edit any of the fields to update the details, including the price fields.
## Deactivate Webstore
1. Log in with your Dashboard credentials.
2. Tap **Payment Pages** under the **ACCEPT PAYMENTS** section
3. Under the **Accept Payments** section, tap **Payment Pages**.
4. Tap **Webstore** and scroll down to the list of Webstore.
7. The page appears in edit mode. You can now edit any of the fields to update the details, including the price fields.
## Deactivate Webstore
1. Log in with your Dashboard credentials.
2. Tap **Payment Pages** under the **ACCEPT PAYMENTS** section
3. Under the **Accept Payments** section, tap **Payment Pages**.
4. Tap **Webstore** and scroll down to the list of Webstore.
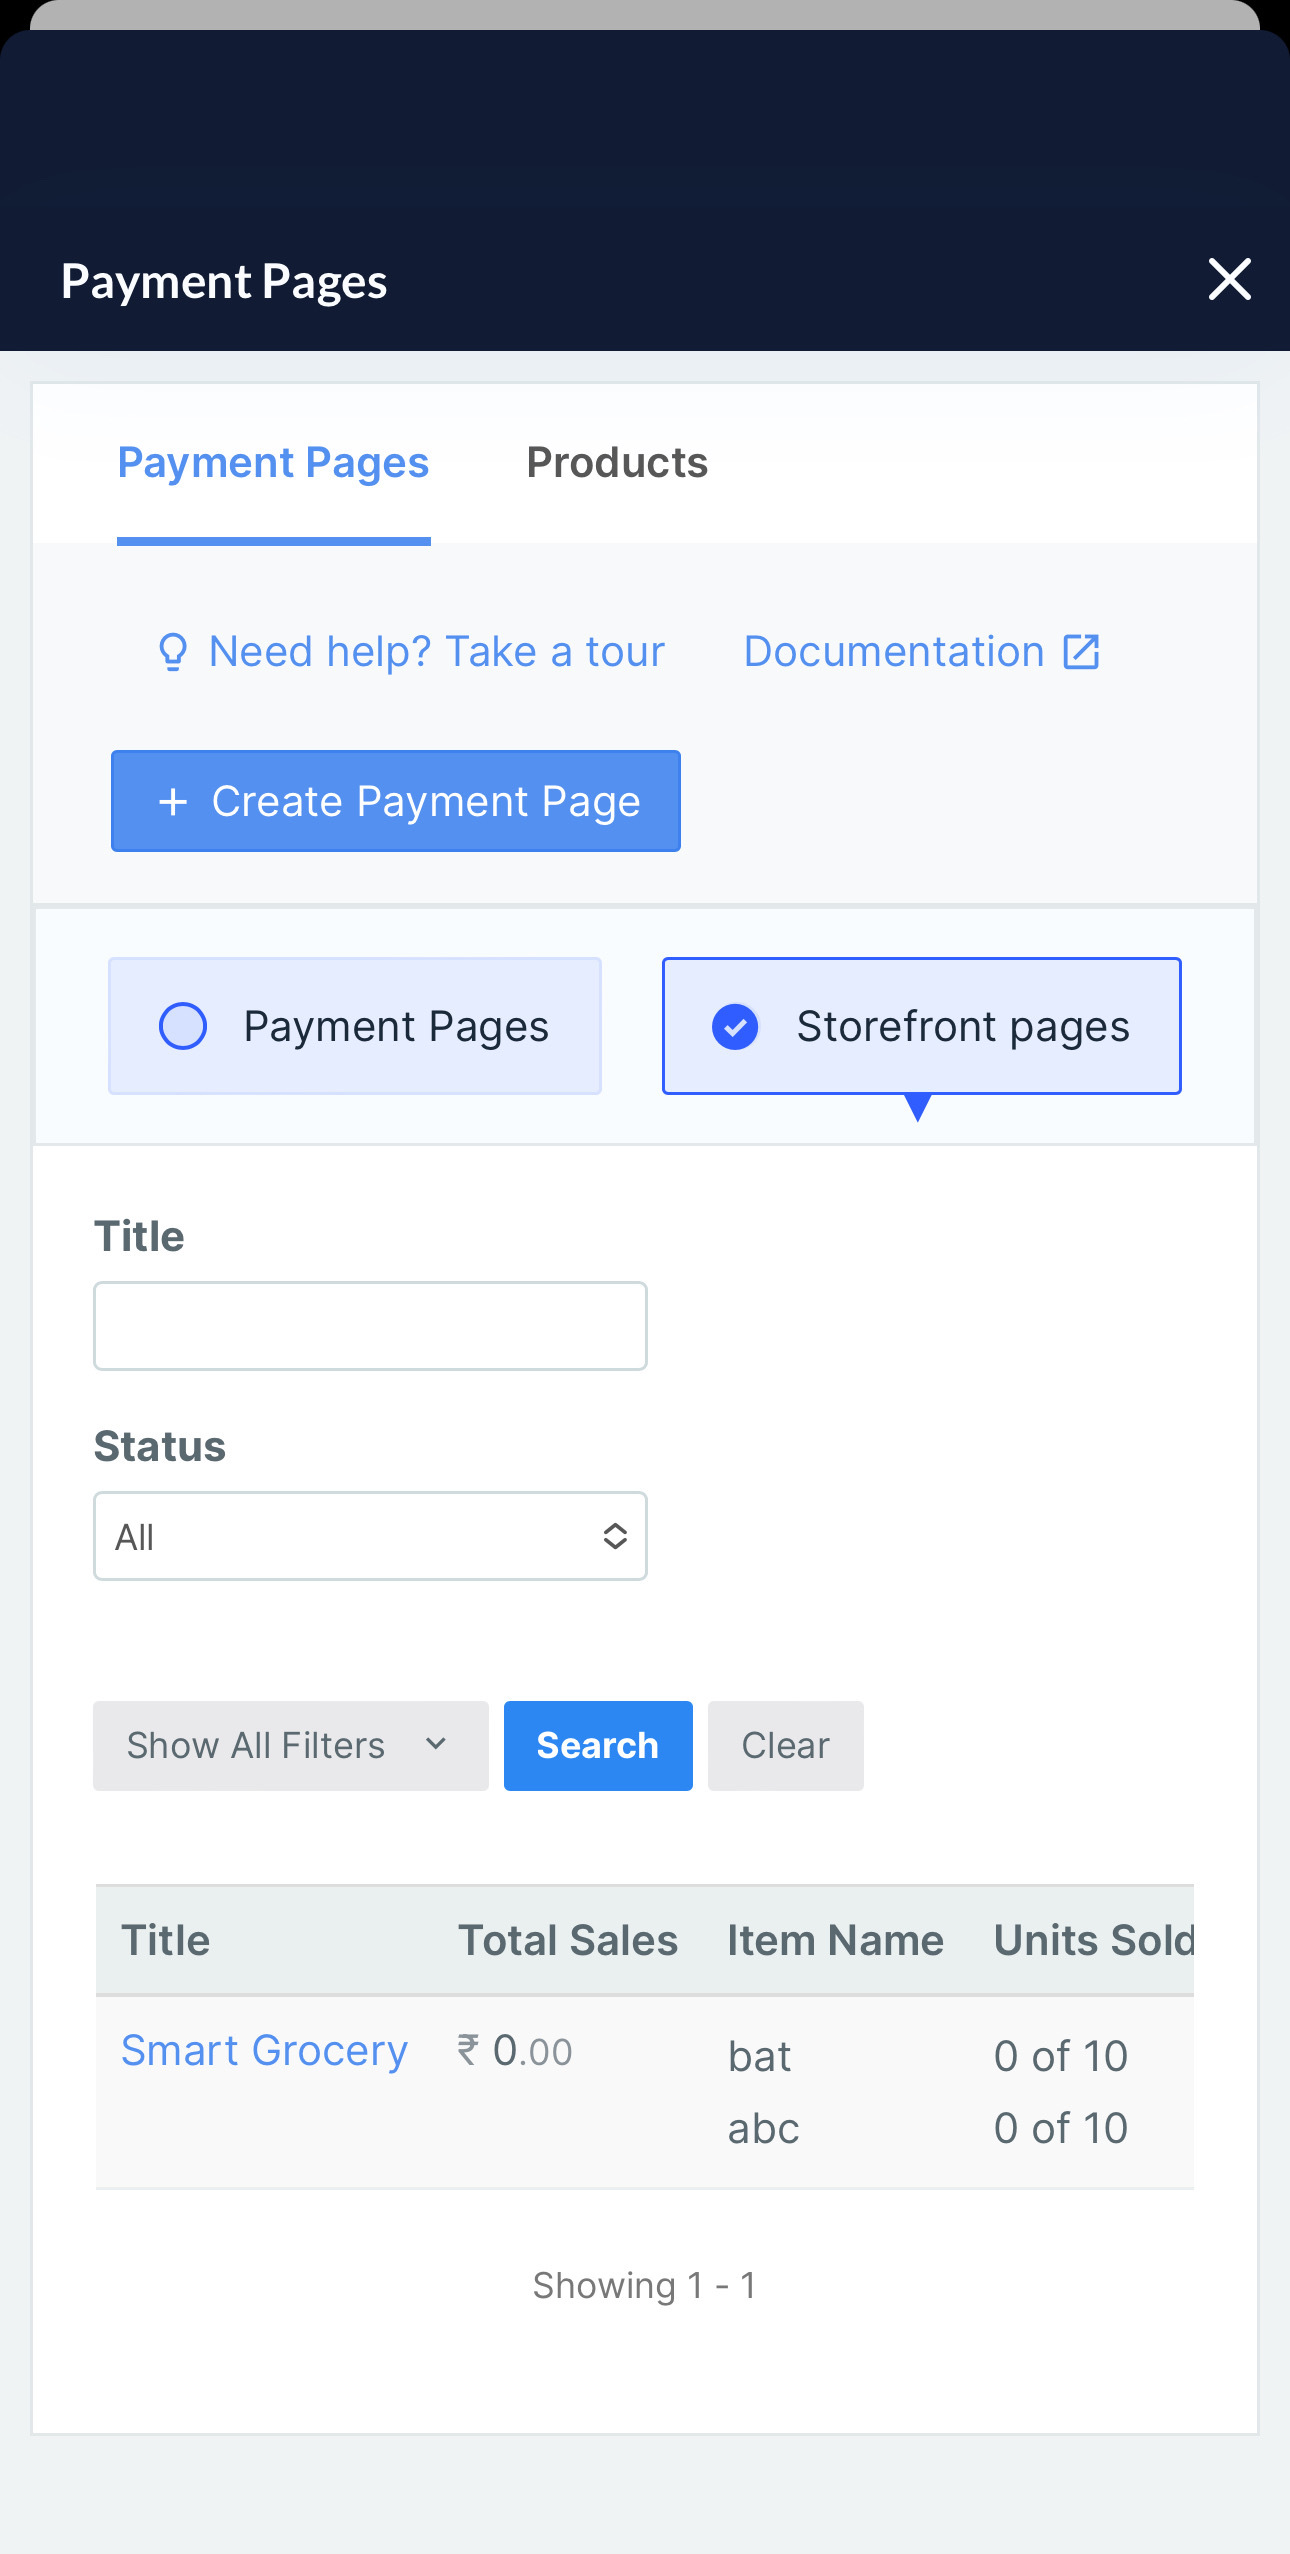 5. Tap on the Webstore you wish to deactivate.
6. Tap **Deactivate**.
5. Tap on the Webstore you wish to deactivate.
6. Tap **Deactivate**.
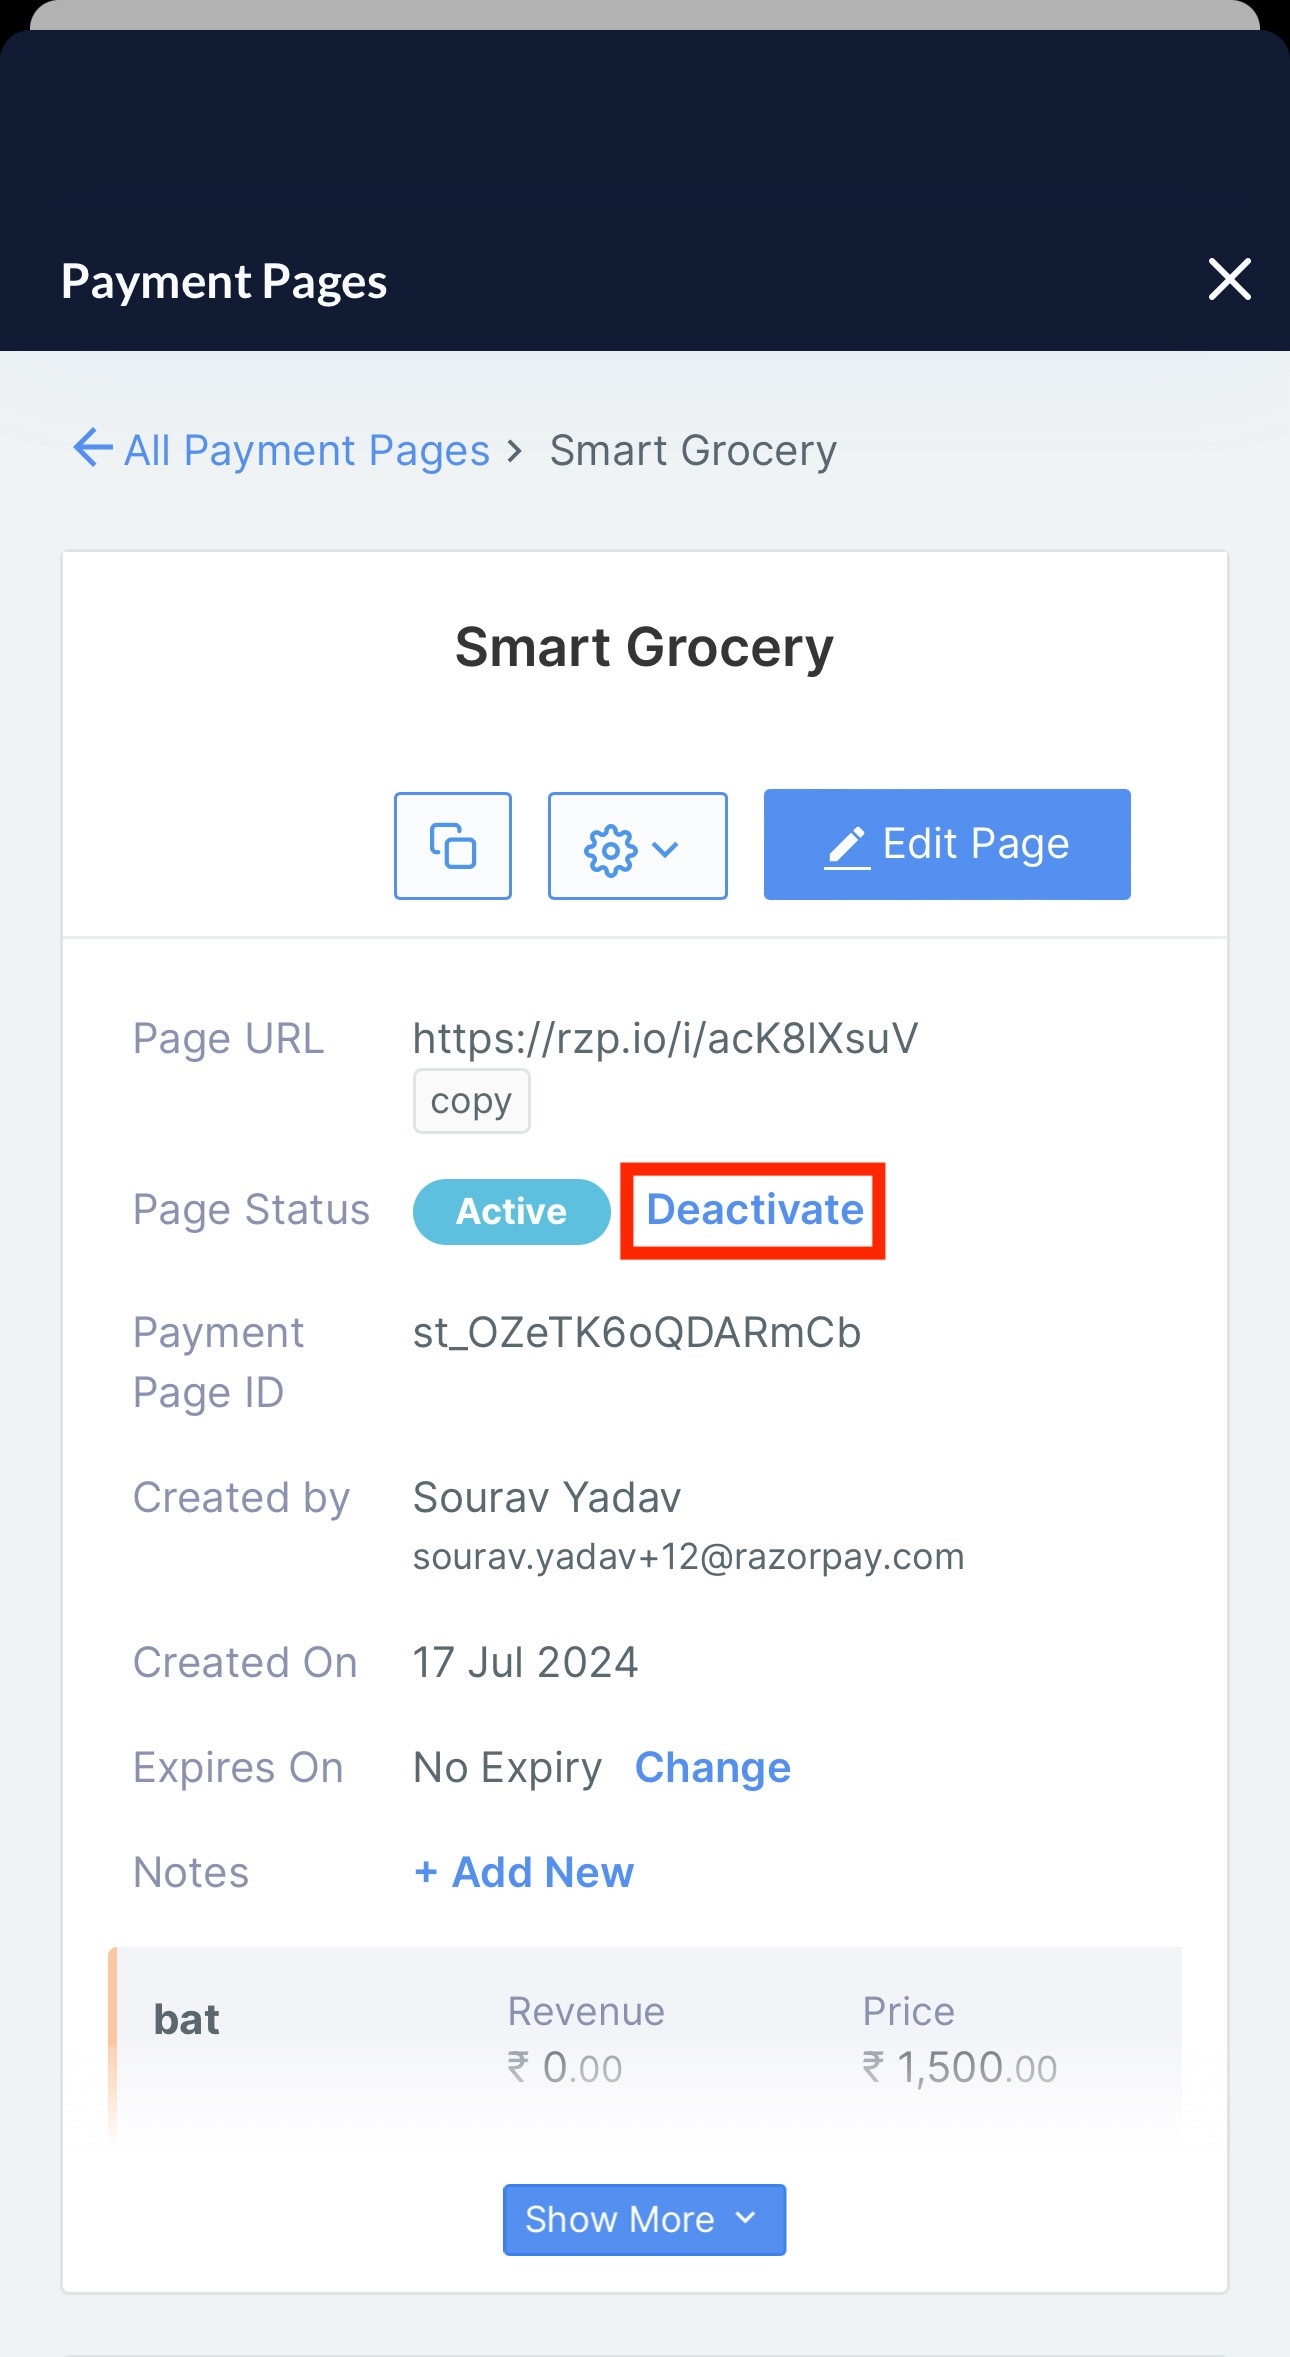 7. Tap **Yes, deactivate** to confirm.
### Related Information
* [Webstore](/docs/payments/webstore)
* [Razorpay Mobile App](/docs/payments/mobile-app)
* [Create and Send Payment Links](/docs/payments/mobile-app/accept-payments/payment-links)
7. Tap **Yes, deactivate** to confirm.
### Related Information
* [Webstore](/docs/payments/webstore)
* [Razorpay Mobile App](/docs/payments/mobile-app)
* [Create and Send Payment Links](/docs/payments/mobile-app/accept-payments/payment-links)