> ## Documentation Index
> Fetch the complete documentation index at: https://razorpay-881012b3.mintlify.site/llms.txt
> Use this file to discover all available pages before exploring further.
# Integrate No Cost EMI Offers with Standard Checkout
> Display general or order specific No Cost EMI Offers on Standard Checkout.
Available in🇮🇳 India
After creating [No Cost EMI Offers](/docs/payments/offers/no-cost-emi/create) from the Dashboard, you must integrate them with the Razorpay Standard Checkout so your customers can avail of them while making payments.
**Integrate Offers with Orders API**
Using our JS, SDK files, or other Ecommerce plugins, you **should** integrate offers with the Orders API.
## Exception
You need **not** integrate offers with Orders API if you use any of the following Razorpay products or plugins to accept payments:
* Plugins: Razorpay Magento, Shopify, or WooCommerce.
* Products: Payment Links, Payment Buttons, Payment Pages and Invoices.
This is because Razorpay automatically creates orders for these products or plugins when customers initiate payment at the Checkout.
## Validation Criteria
Only those No Cost EMI offers that pass the following validations are displayed at the Checkout:
| Criteria | Description |
| -------------------------- | -------------------------------------------------------------------------------------------------------------------------------------- |
| **Amount Match** | Order amount should be more than or equal to the [Minimum Order Amount](/docs/payments/offers/no-cost-emi/create) set in an offer. |
| **Validity** | Offer should be in the active or enabled state. |
| **Date Validation** | The current date lies within the range of the offer's `start` and `end` dates. |
| **Usage** | You can define the maximum number of times an offer can be availed. If this limit is met, the offer will not be displayed on Checkout. |
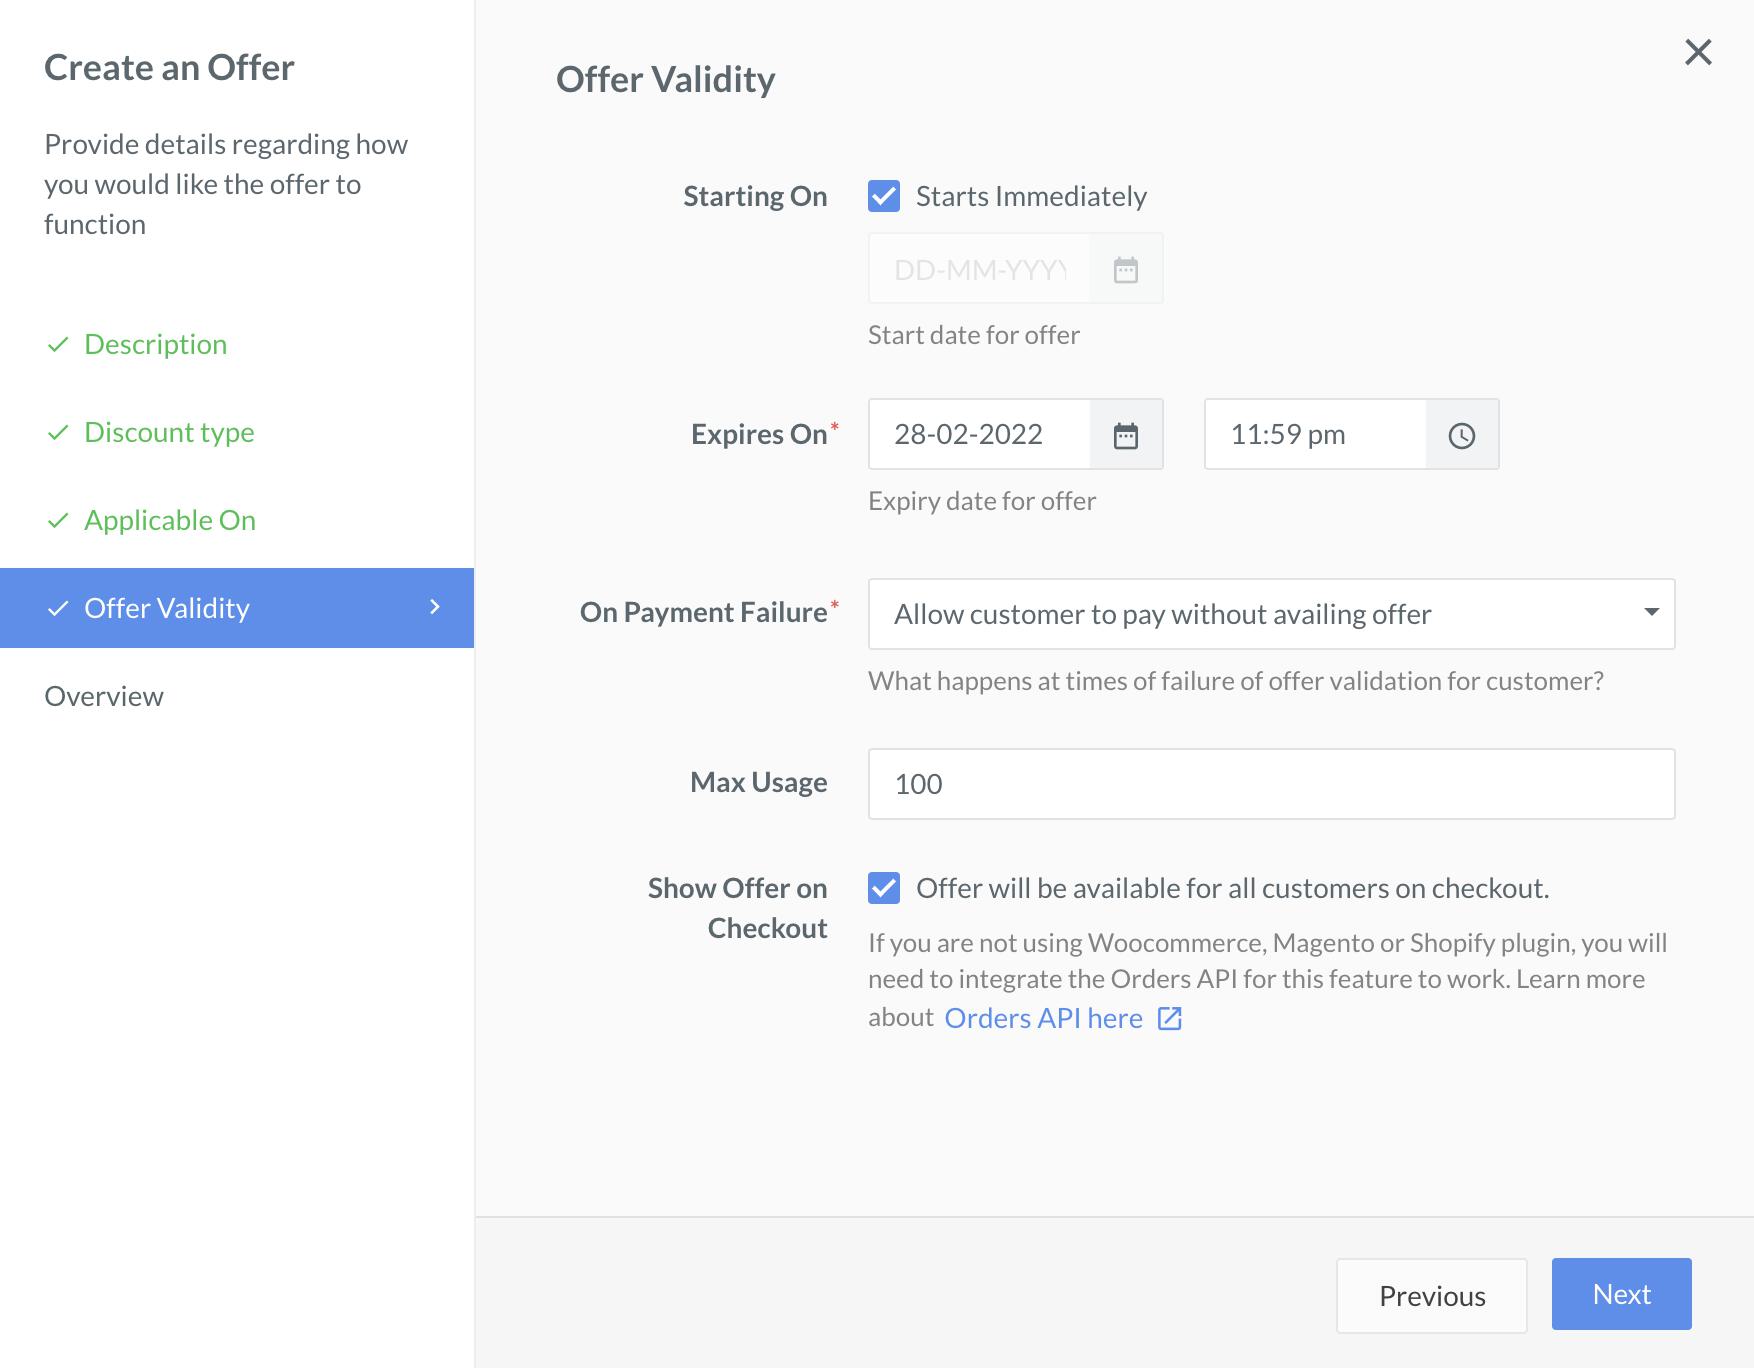
| **Show Offer on Checkout** | This option must be enabled while the offer is created. This determines whether the offer will be displayed at the Checkout or not. |
## Display No Cost EMI Offers at Checkout
There are two ways in which you can display No Cost EMI offers at the Razorpay Checkout:
* [Display No Cost EMI Offers by Default](#method-1-display-no-cost-emi-offers-by-default)
* [Display Limited No Cost EMI Offers](#method-2-display-limited-no-cost-emi-offers)
### Method 1: Display No Cost EMI Offers by Default
This is the easiest way to display No Cost EMI offers at the Checkout. While [creating the No Cost EMI offer](/docs/payments/offers/no-cost-emi/create) from the Dashboard, enable the **Show Offer on Checkout** option.
### Method 2: Display Limited No Cost EMI offers
To display a specific No Cost EMI offer at the Checkout, you should associate the offer with an order. You can pass the `offers` array as a request attribute in the Create Orders API.
Some use cases:
* If you have multiple product lines running on the same account and have certain business logic for displaying No Cost EMI offers.
* The discount has already been applied, and you would like to restrict the payment method to avail the offer.
To display offers:
1. [Create an Offer](#step-1-create-an-offer-from-the-dashboard).
2. [Pass offer\_id in Orders API](#step-2-pass-offer-id-in-orders-api).
3. [Pass order\_id and Trigger Checkout](#step-3-pass-order-id-and-trigger-the).
### Step 1: Create an Offer from the Dashboard
You can [create No Cost EMI offers](/docs/payments/offers/create#create-offers) from the Dashboard.
Let us say you have created a No Cost EMI offer `offer_ANZoaxsOww2X53`, such that a discount of ₹200 is applicable on all transactions done through AXIS netbanking only.
### Step 2: Pass offer\_id in Orders API
Create an order using the Orders API and pass the `offer_id` as a request parameter.
#### Sample Code
```bash Curl theme={null}
curl -u [YOUR_KEY_ID]:[YOUR_KEY_SECRET] \
-X POST https://api.razorpay.com/v1/orders \
-H "Content-Type: application/json" \
-d '{
"amount": 1000000,
"currency": "INR",
"offers": [
"offer_ANZoaxsOww2X53"
]
}'
```
```java Java theme={null}
RazorpayClient razorpay = new RazorpayClient("[YOUR_KEY_ID]", "[YOUR_KEY_SECRET]");
ArrayList Offer = new ArrayList();
Offer.add("offer_JTUADI4ZWBGWur");
JSONObject orderRequest = new JSONObject();
orderRequest.put("amount", 1000000); // amount in the smallest currency unit
orderRequest.put("currency", "INR");
orderRequest.put("offers", Offer);
Order order = razorpayclient.orders.create(orderRequest);
System.out.print(order);
```
```python Python theme={null}
import razorpay
client = razorpay.Client(auth=("YOUR_ID", "YOUR_SECRET"))
client.order.create({
"amount": 1000000,
"currency": "INR",
"receipt": "receipt#1",
"offers": [
"offer_ANZoaxsOww2X53"
]
})
```
```php PHP theme={null}
$api = new Api($key_id, $secret);
$api->order->create(array('amount' => 1000000, 'currency' => 'INR', 'offers'=> array('offer_JTUADI4ZWBGWur')));
```
```ruby Ruby theme={null}
require "razorpay"
Razorpay.setup('YOUR_KEY_ID', 'YOUR_SECRET')
order = Razorpay::Order.create amount: 50000, currency: 'INR', receipt: 'receipt#1', offers: [
'offer_ANZoaxsOww2X53"'
]
```
```javascript Node.js theme={null}
var instance = new Razorpay({ key_id: 'YOUR_KEY_ID', key_secret: 'YOUR_SECRET' })
instance.orders.create({
amount: 1000000,
currency: "INR",
receipt: "receipt#1",
offers: [
"offer_ANZoaxsOww2X53"
]
})
```
```go Go theme={null}
import ( razorpay "github.com/razorpay/razorpay-go" )
client := razorpay.NewClient("YOUR_KEY_ID", "YOUR_SECRET")
data := map[string]interface{}{
"amount": 50000,
"currency": "INR",
"receipt": "receipt#1",
"offers": []interface{}{
"offer_JTUADI4ZWBGWur",
},
}
body, err := client.Order.Create(data, nil)
```
```json Response theme={null}
{
"id": "order_CjyoZFRpB8r0AH",
"entity": "order",
"amount": 1000000,
"amount_paid": 0,
"amount_due": 1000000,
"currency": "INR",
"receipt": null,
"offer_id": "offer_ANZoaxsOww2X53",
"offers": [
"offer_ANZoaxsOww2X53"
],
"status": "created",
"attempts": 0,
"notes": [],
"created_at": 1561018912
}
```
#### Request Parameters
`amount` *mandatory*
: `integer` Enter the amount for which the order is to be created in currency subunits. For example, for an amount of ₹10000, enter `1000000`.
`currency` *mandatory*
: `string` ISO code of the currency associated with the order amount. Here, it is `INR`.
`offers` *mandatory*
: `array` Unique identifier of the offer. Pass the `offer_id` obtained from the response of the previous step.
### Step 3: Pass Order\_id and Trigger the Checkout
The `order_id` obtained in the previous step can be passed to the Checkout form as follows:
```javascript Checkout theme={null}
```
Know more about [Standard Checkout](/docs/payments/payment-gateway/web-integration/standard).
## Next Steps
After the customer has availed the offers and made the payment at the Checkout, you can track the status of the payments:
* From the Dashboard.
* By [configuring webhooks](/docs/webhooks).
* By polling our [payment APIs](/docs/api/payments).
### Related Information
* [About No Cost EMI Offers](/docs/payments/offers/no-cost-emi)
* [Create No Cost EMI Offers](/docs/payments/offers/no-cost-emi/create)
* [Tutorial - How to Create No Cost EMI Offers](/docs/payments/offers/no-cost-emi/tutorial)
* [No Cost EMI FAQs](/docs/payments/offers/low-cost-emi/faqs)
* [Disable Offers](/docs/payments/offers/no-cost-emi/create#disabling-no-cost-emi-offers)
 ### Method 2: Display Limited No Cost EMI offers
To display a specific No Cost EMI offer at the Checkout, you should associate the offer with an order. You can pass the `offers` array as a request attribute in the Create Orders API.
Some use cases:
* If you have multiple product lines running on the same account and have certain business logic for displaying No Cost EMI offers.
* The discount has already been applied, and you would like to restrict the payment method to avail the offer.
To display offers:
1. [Create an Offer](#step-1-create-an-offer-from-the-dashboard).
2. [Pass offer\_id in Orders API](#step-2-pass-offer-id-in-orders-api).
3. [Pass order\_id and Trigger Checkout](#step-3-pass-order-id-and-trigger-the).
### Step 1: Create an Offer from the Dashboard
You can [create No Cost EMI offers](/docs/payments/offers/create#create-offers) from the Dashboard.
Let us say you have created a No Cost EMI offer `offer_ANZoaxsOww2X53`, such that a discount of ₹200 is applicable on all transactions done through AXIS netbanking only.
### Method 2: Display Limited No Cost EMI offers
To display a specific No Cost EMI offer at the Checkout, you should associate the offer with an order. You can pass the `offers` array as a request attribute in the Create Orders API.
Some use cases:
* If you have multiple product lines running on the same account and have certain business logic for displaying No Cost EMI offers.
* The discount has already been applied, and you would like to restrict the payment method to avail the offer.
To display offers:
1. [Create an Offer](#step-1-create-an-offer-from-the-dashboard).
2. [Pass offer\_id in Orders API](#step-2-pass-offer-id-in-orders-api).
3. [Pass order\_id and Trigger Checkout](#step-3-pass-order-id-and-trigger-the).
### Step 1: Create an Offer from the Dashboard
You can [create No Cost EMI offers](/docs/payments/offers/create#create-offers) from the Dashboard.
Let us say you have created a No Cost EMI offer `offer_ANZoaxsOww2X53`, such that a discount of ₹200 is applicable on all transactions done through AXIS netbanking only.