> ## Documentation Index
> Fetch the complete documentation index at: https://razorpay-881012b3.mintlify.site/llms.txt
> Use this file to discover all available pages before exploring further.
# Tutorial - How to Create Offers
> Create Offers from the Razorpay Dashboard using an example.
Available in
🇮🇳 India
🇸🇬 Singapore
Let us create an offer from the Dashboard using an example.
Assume that you are the manager of Tea Factory, a beverage company that sells packaged teabags using your website. You want to provide discounts on online purchases to attract customers and increase sales.
You want to create a Diwali Offer with the following settings:
| Offer Criteria | Offer Information | |
| ------------------------ | ----------------------------------------- | - |
| Offer Name | Diwali DhamakaChristmas Offer | |
| Display Text | 10% discount on netbankingPayNow payments | |
| Offer Type | Discount - PercentageInstant | |
| Payment Method | NetbankingPayNow | |
| Discount % | 10 -- Minimum Order Amount | |
| Maximum Discount Allowed | | |
Let us create this offer.
## Creating Offers
To create an offer:
1. Log in to the Dashboard.
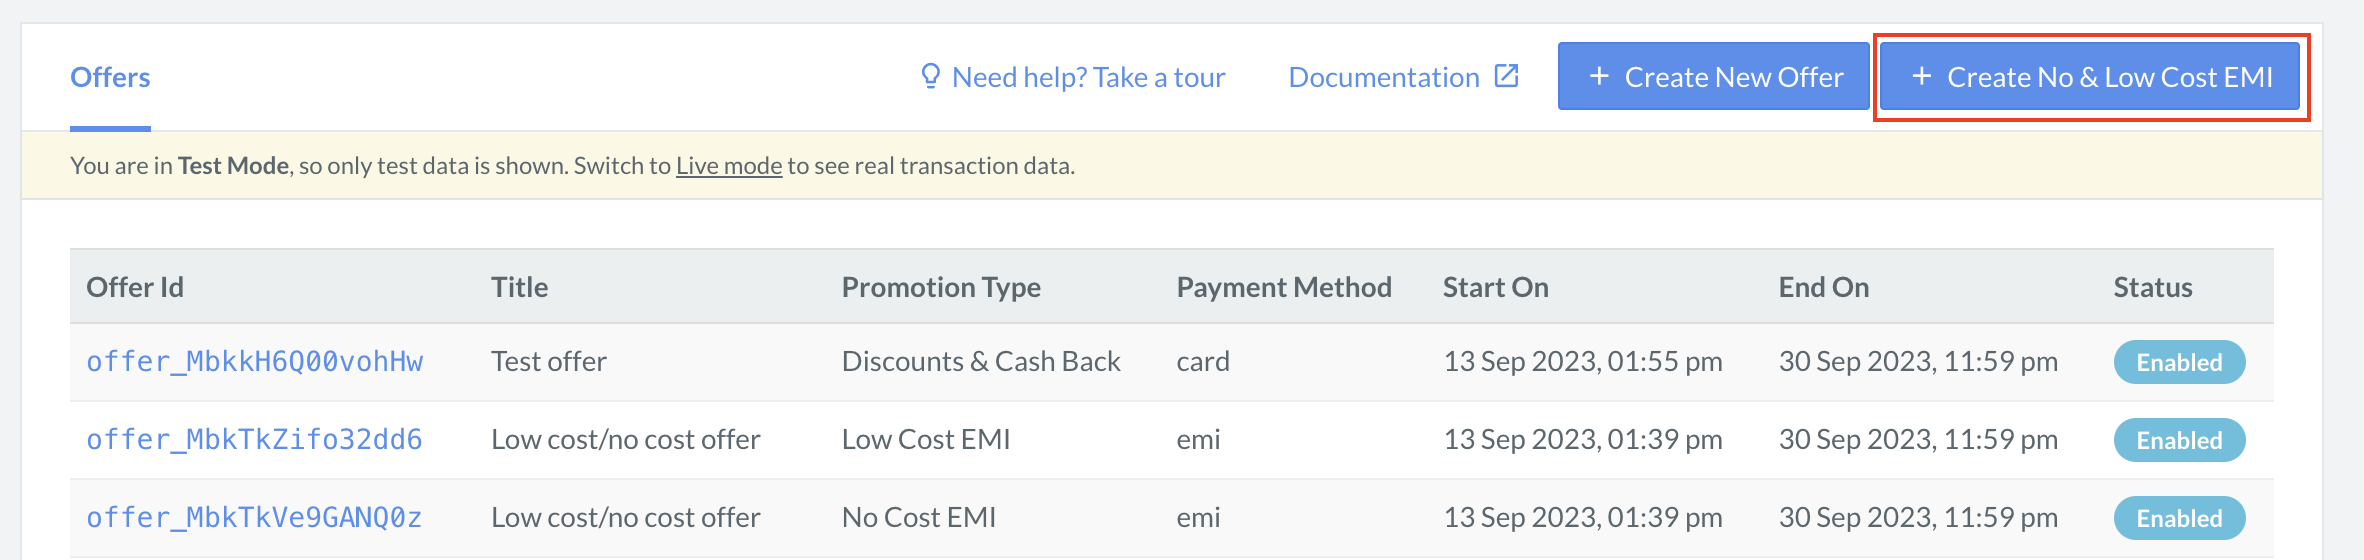
2. Navigate to **Offers** and click **Create New Offer**.
 3. The **Create an Offer** wizard appears with these four tabs.
* [**Description**](#description)
* [**Discount Type**](#discount-type)
* [**Applicable On**](#applicable-on)
* [**Offer Validity**](#offer-validity)
3. The **Create an Offer** wizard appears with these four tabs.
* [**Description**](#description)
* [**Discount Type**](#discount-type)
* [**Applicable On**](#applicable-on)
* [**Offer Validity**](#offer-validity)
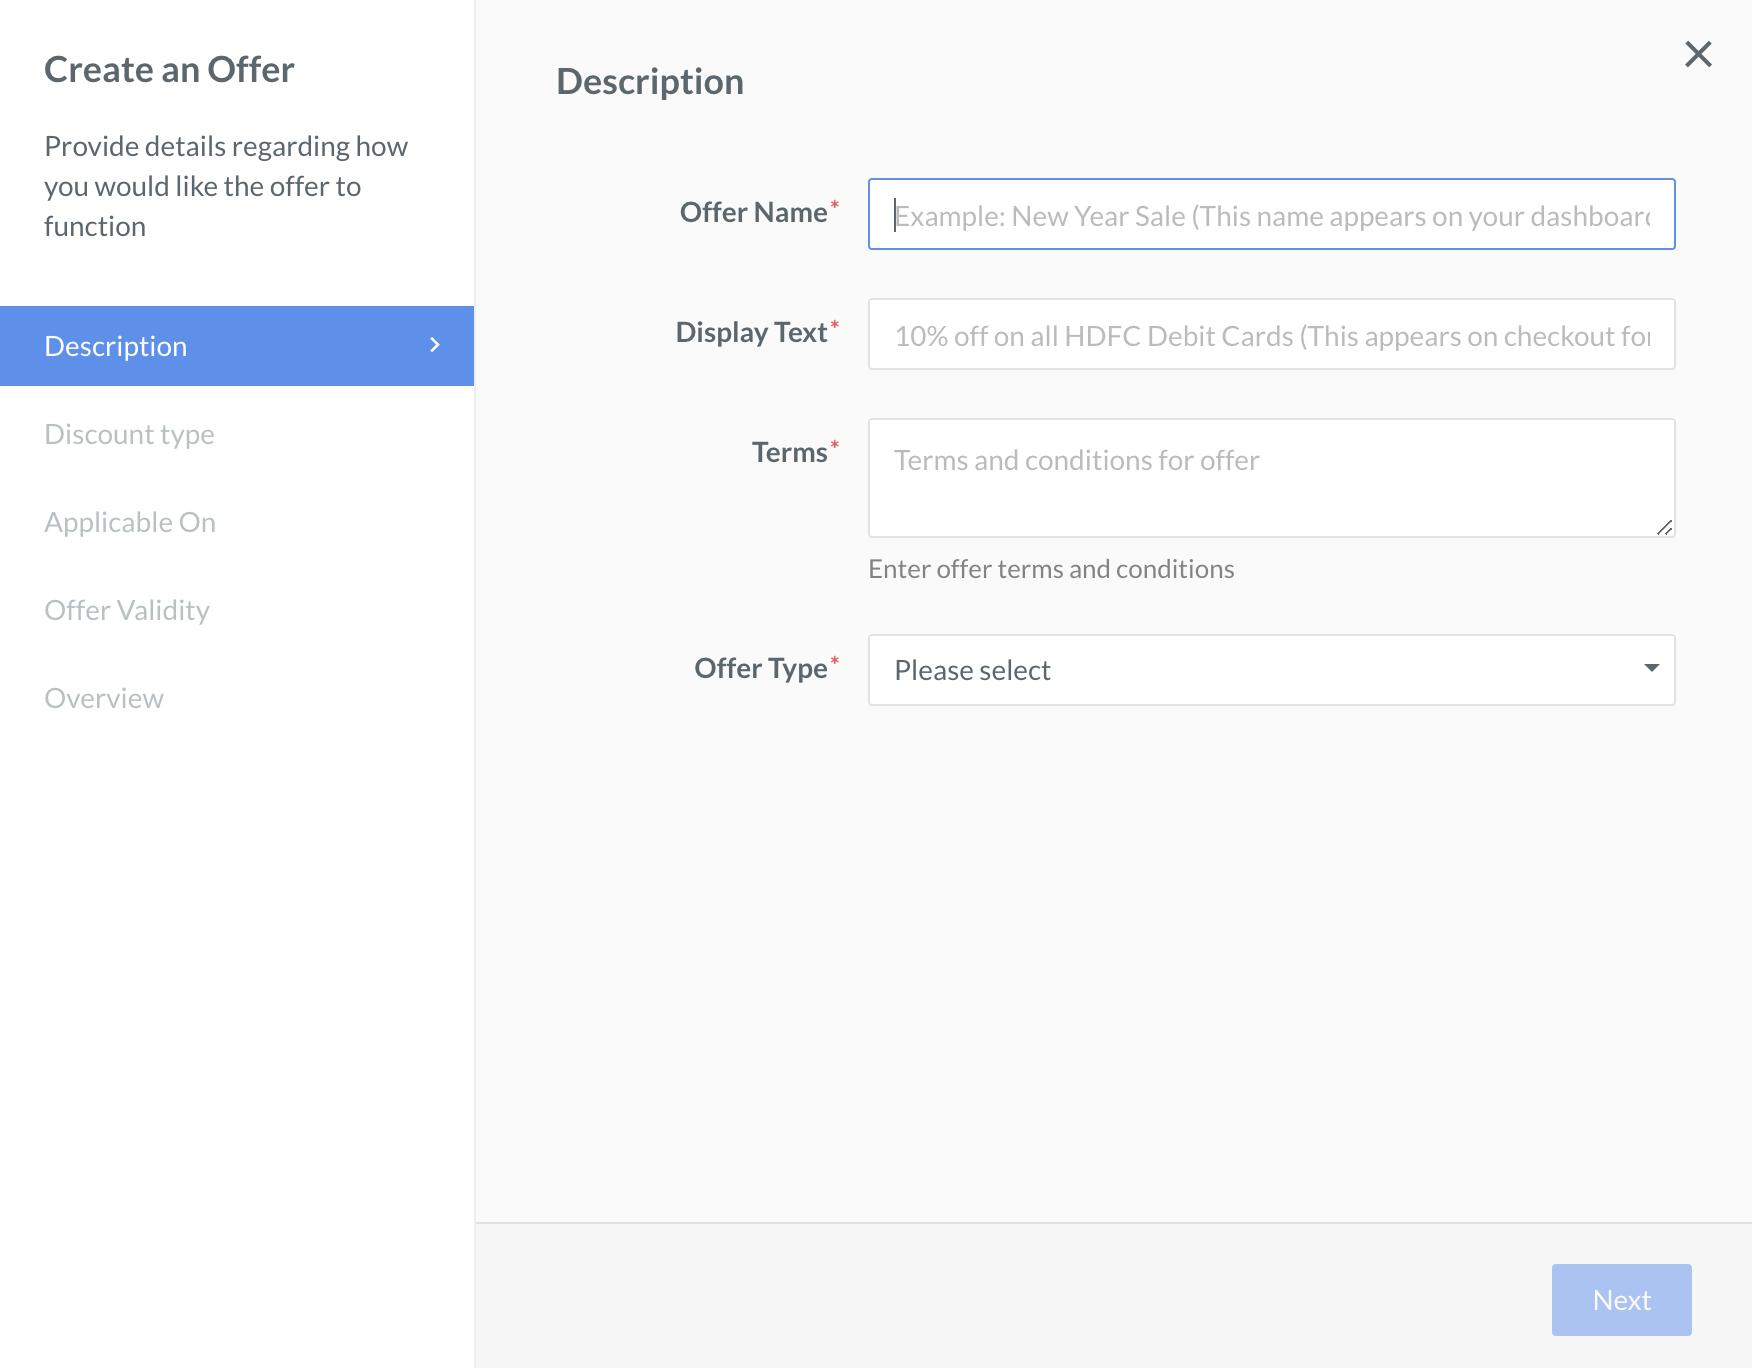 You can review the Offer configurations at the end under the [**Overview**](#overview) tab.
### Description
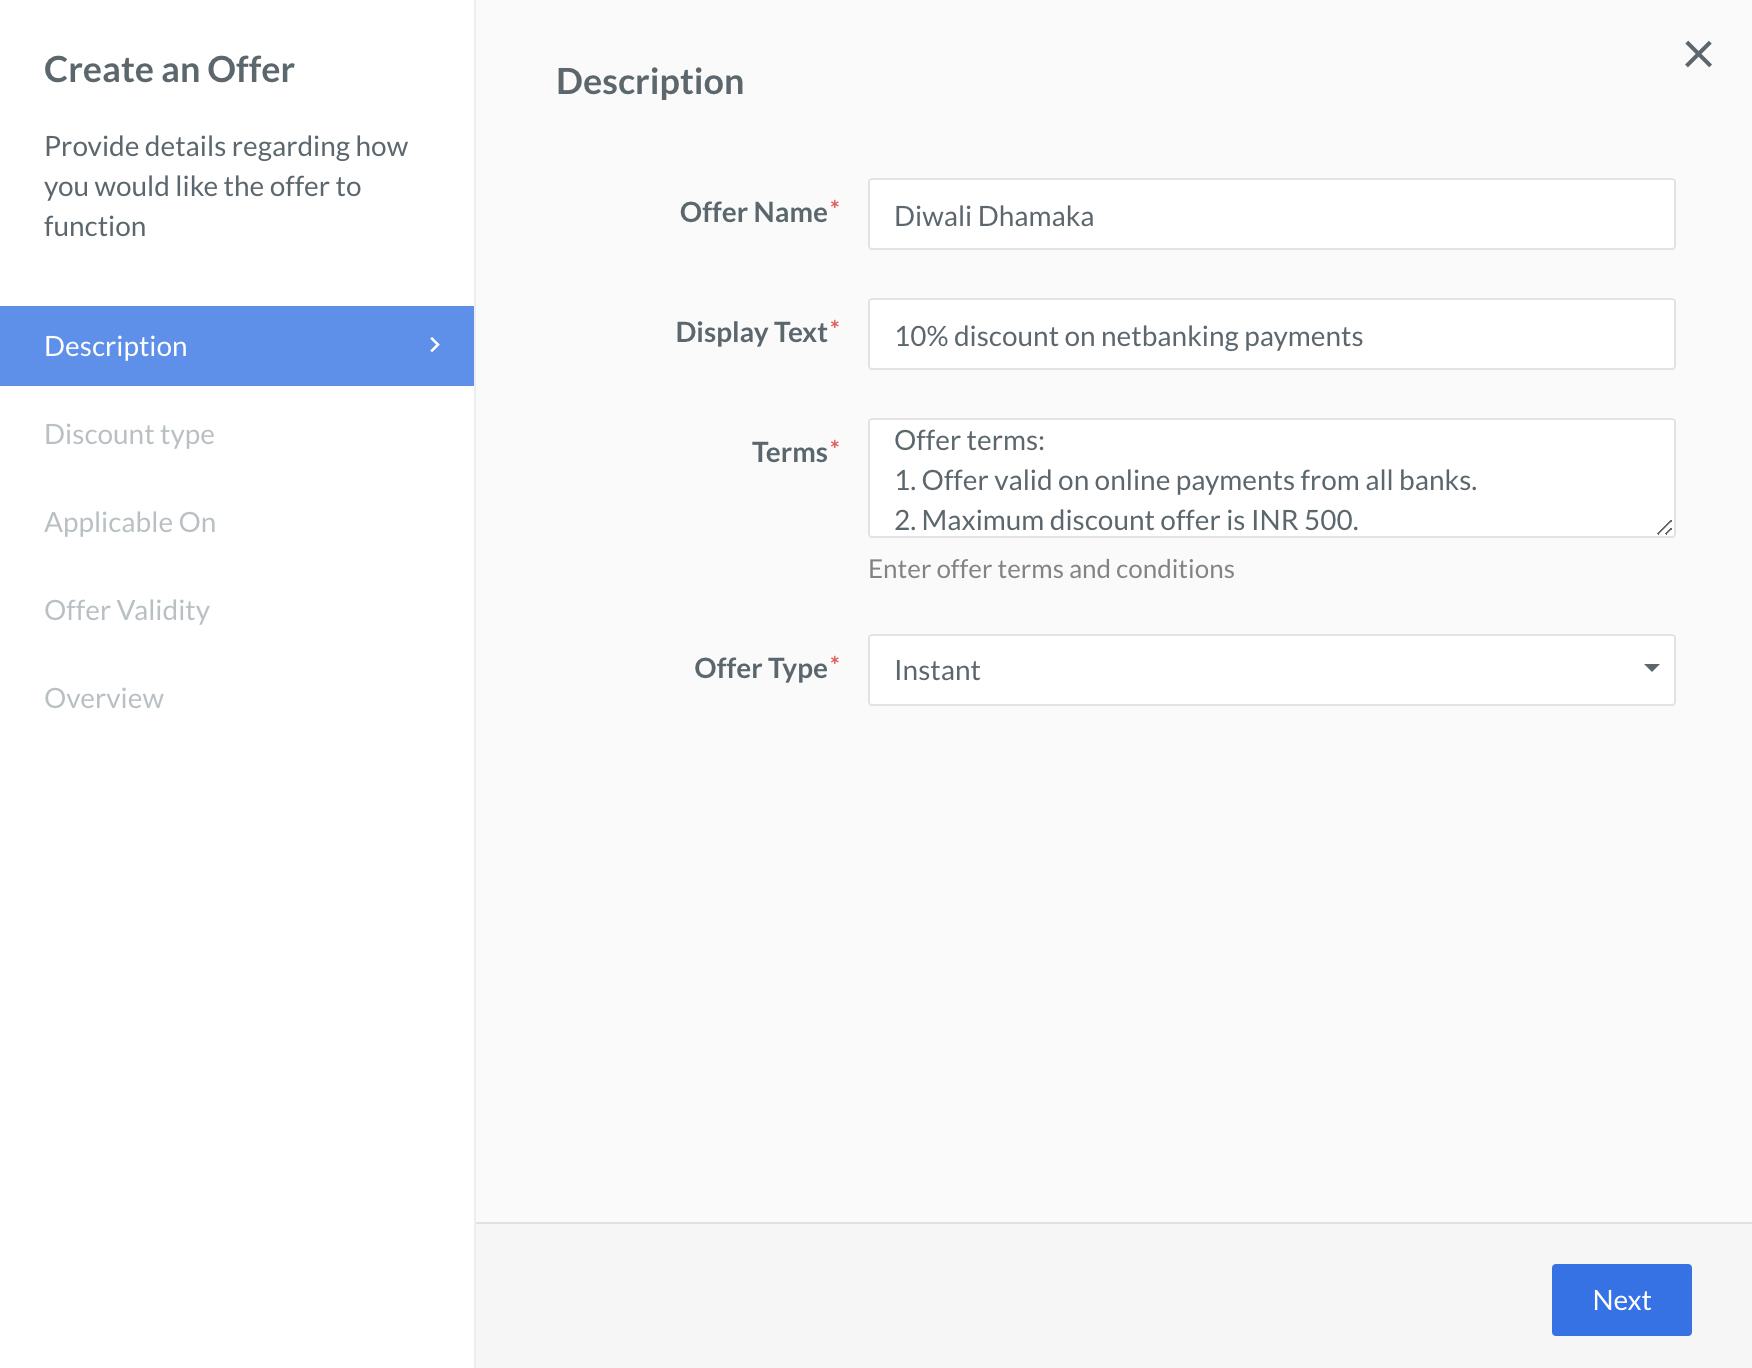
Under the **Description** tab, enter the following details. All the fields are mandatory.
1. **Offer Name**: Enter the name of the offer. For example, `Diwali Dhamaka`. This appears at the Checkout.
2. **Display Text**: Enter a meaningful description for the offer. For example, `10% discount on netbanking payments`. This appears at the Checkout.
3. **Terms**: Enter terms and conditions for the offer.
4. **Offer Type**: Select the type of offer that you want to create. For example, **Instant**. This means that the offer is applied instantly. The customer pays only the discounted amount while making the payment.
5. Click **Next**.
You can review the Offer configurations at the end under the [**Overview**](#overview) tab.
### Description
Under the **Description** tab, enter the following details. All the fields are mandatory.
1. **Offer Name**: Enter the name of the offer. For example, `Diwali Dhamaka`. This appears at the Checkout.
2. **Display Text**: Enter a meaningful description for the offer. For example, `10% discount on netbanking payments`. This appears at the Checkout.
3. **Terms**: Enter terms and conditions for the offer.
4. **Offer Type**: Select the type of offer that you want to create. For example, **Instant**. This means that the offer is applied instantly. The customer pays only the discounted amount while making the payment.
5. Click **Next**.
 ### Discount Type
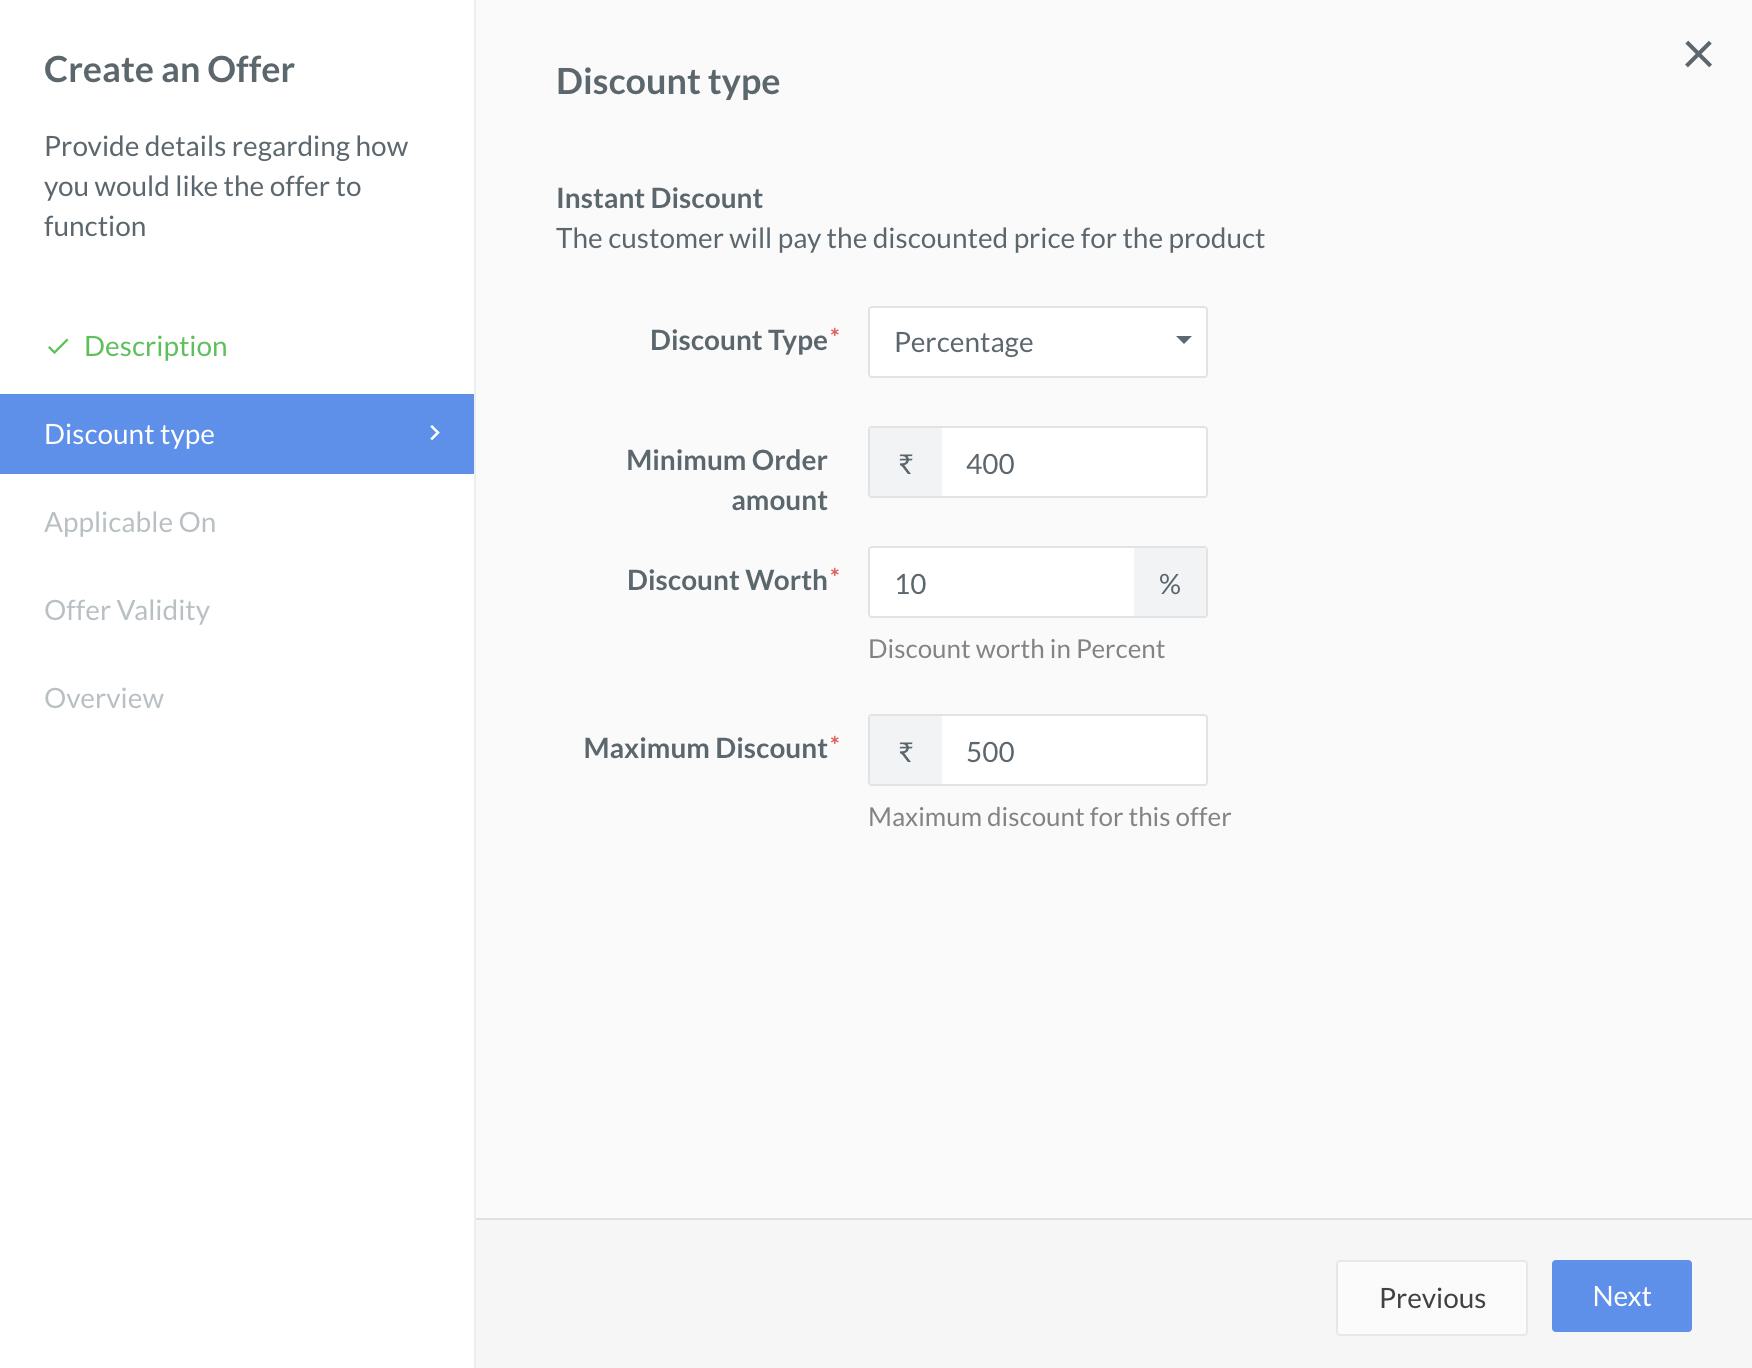
In the **Discount Type** tab, enter the discount details that should be applied for the offer.
1. **Discount Type**: Select the type of discount that should be applied to the offer. In this case, it is **Percentage**.
1. **Minimum Order amount**: Enter the minimum bill amount for which the offer can be applied. Enter `400`.
2. **Discount Worth**: The percentage by which the original price should be reduced. Enter `10`.
3. **Maximum Discount**: The maximum amount that can be deducted from the bill amount. Enter `500`.
2. Click **Next**.
### Discount Type
In the **Discount Type** tab, enter the discount details that should be applied for the offer.
1. **Discount Type**: Select the type of discount that should be applied to the offer. In this case, it is **Percentage**.
1. **Minimum Order amount**: Enter the minimum bill amount for which the offer can be applied. Enter `400`.
2. **Discount Worth**: The percentage by which the original price should be reduced. Enter `10`.
3. **Maximum Discount**: The maximum amount that can be deducted from the bill amount. Enter `500`.
2. Click **Next**.
 ### Applicable On
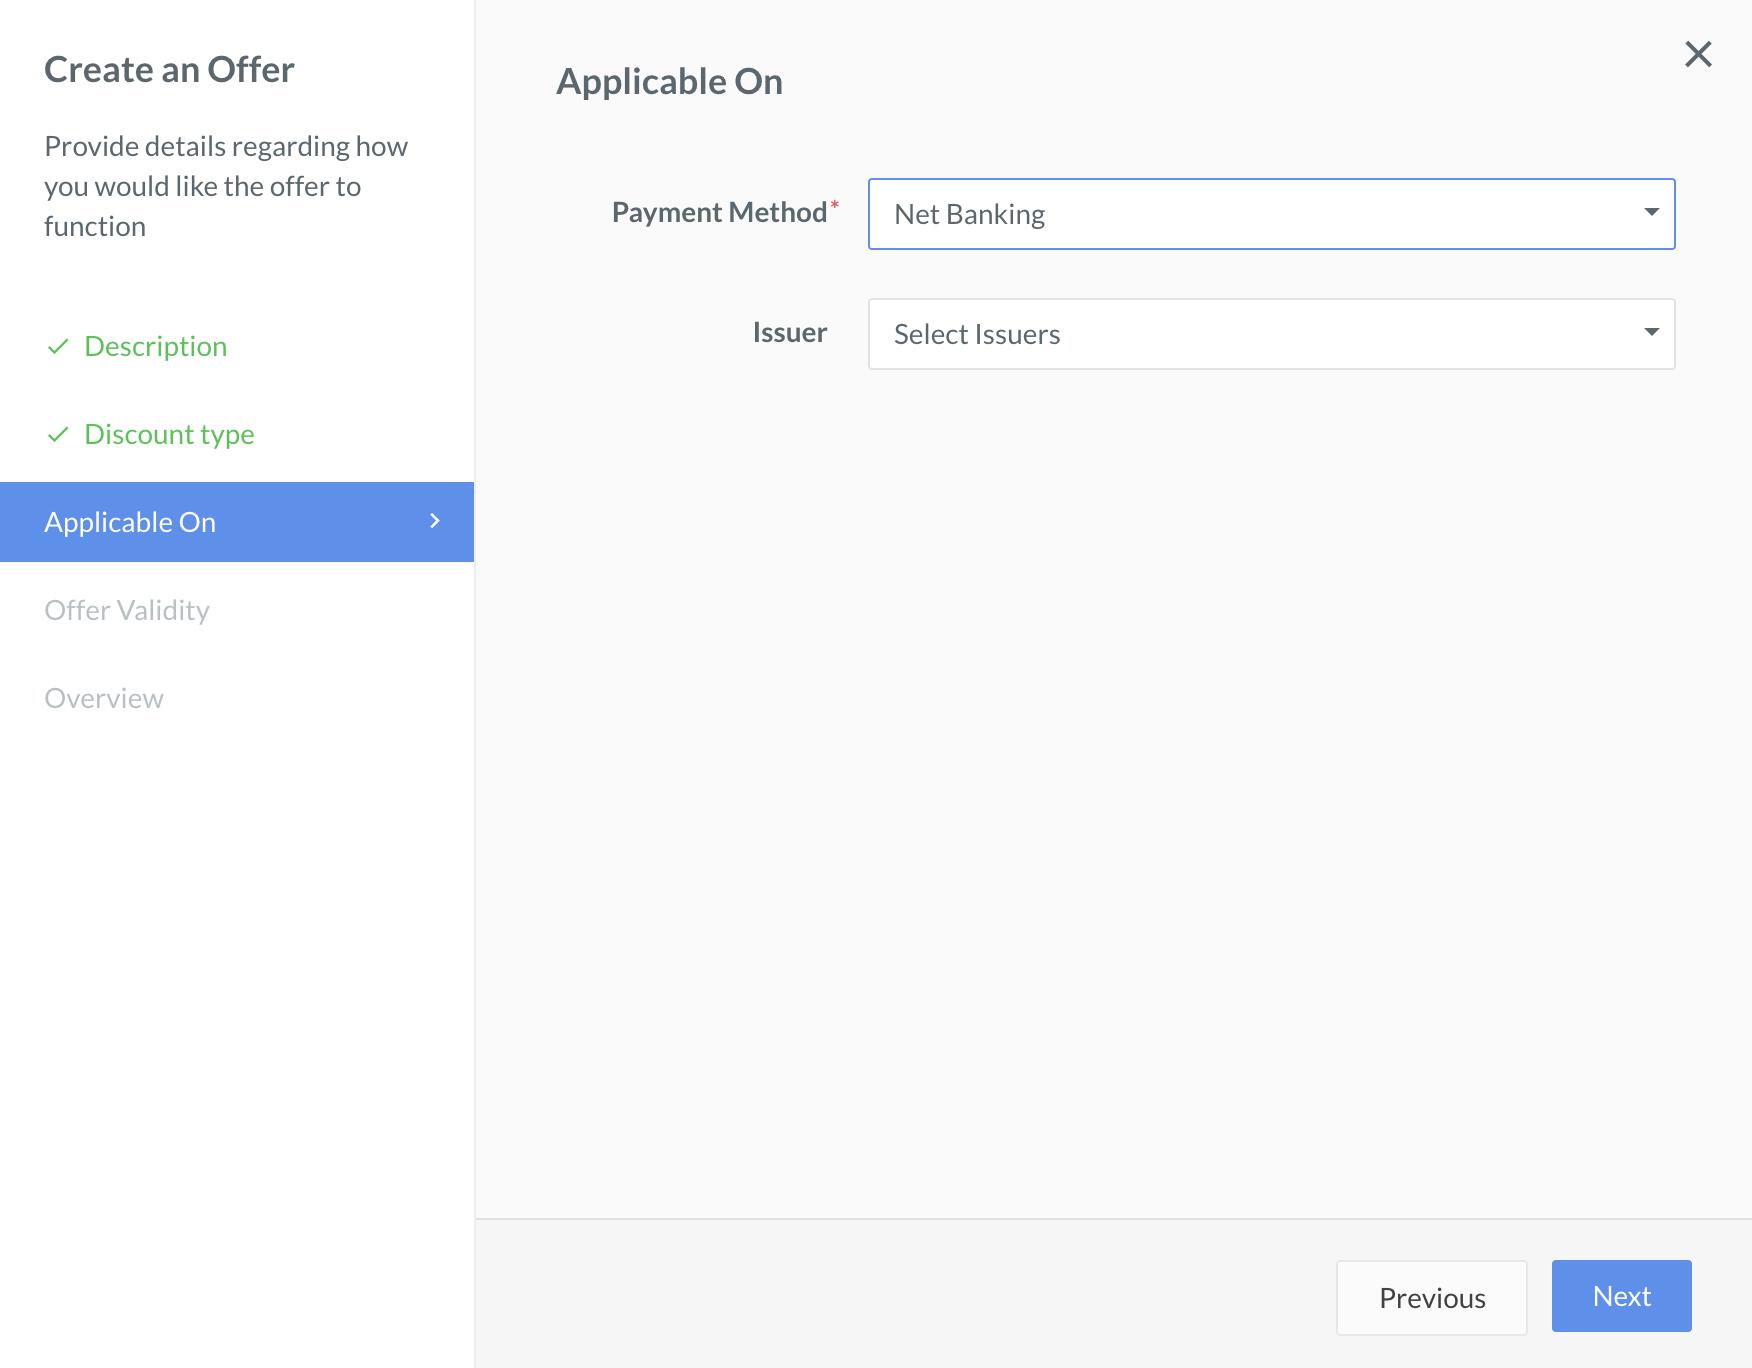
In the **Applicable On** tab, enter details of the payment method you want to enable for the offer.
1. **Payment Method**: Select the payment method to enable offers. For this example, select `Net Banking`.
2. **Issuer**: If you want to restrict the offer to online payments from a specific bank, select the bank name from the list. Otherwise, do not select any bank. For this example, since the offer applies to all banks, we will not choose a bank.
3. Click **Next**.
### Applicable On
In the **Applicable On** tab, enter details of the payment method you want to enable for the offer.
1. **Payment Method**: Select the payment method to enable offers. For this example, select `Net Banking`.
2. **Issuer**: If you want to restrict the offer to online payments from a specific bank, select the bank name from the list. Otherwise, do not select any bank. For this example, since the offer applies to all banks, we will not choose a bank.
3. Click **Next**.
 ### Offer Validity
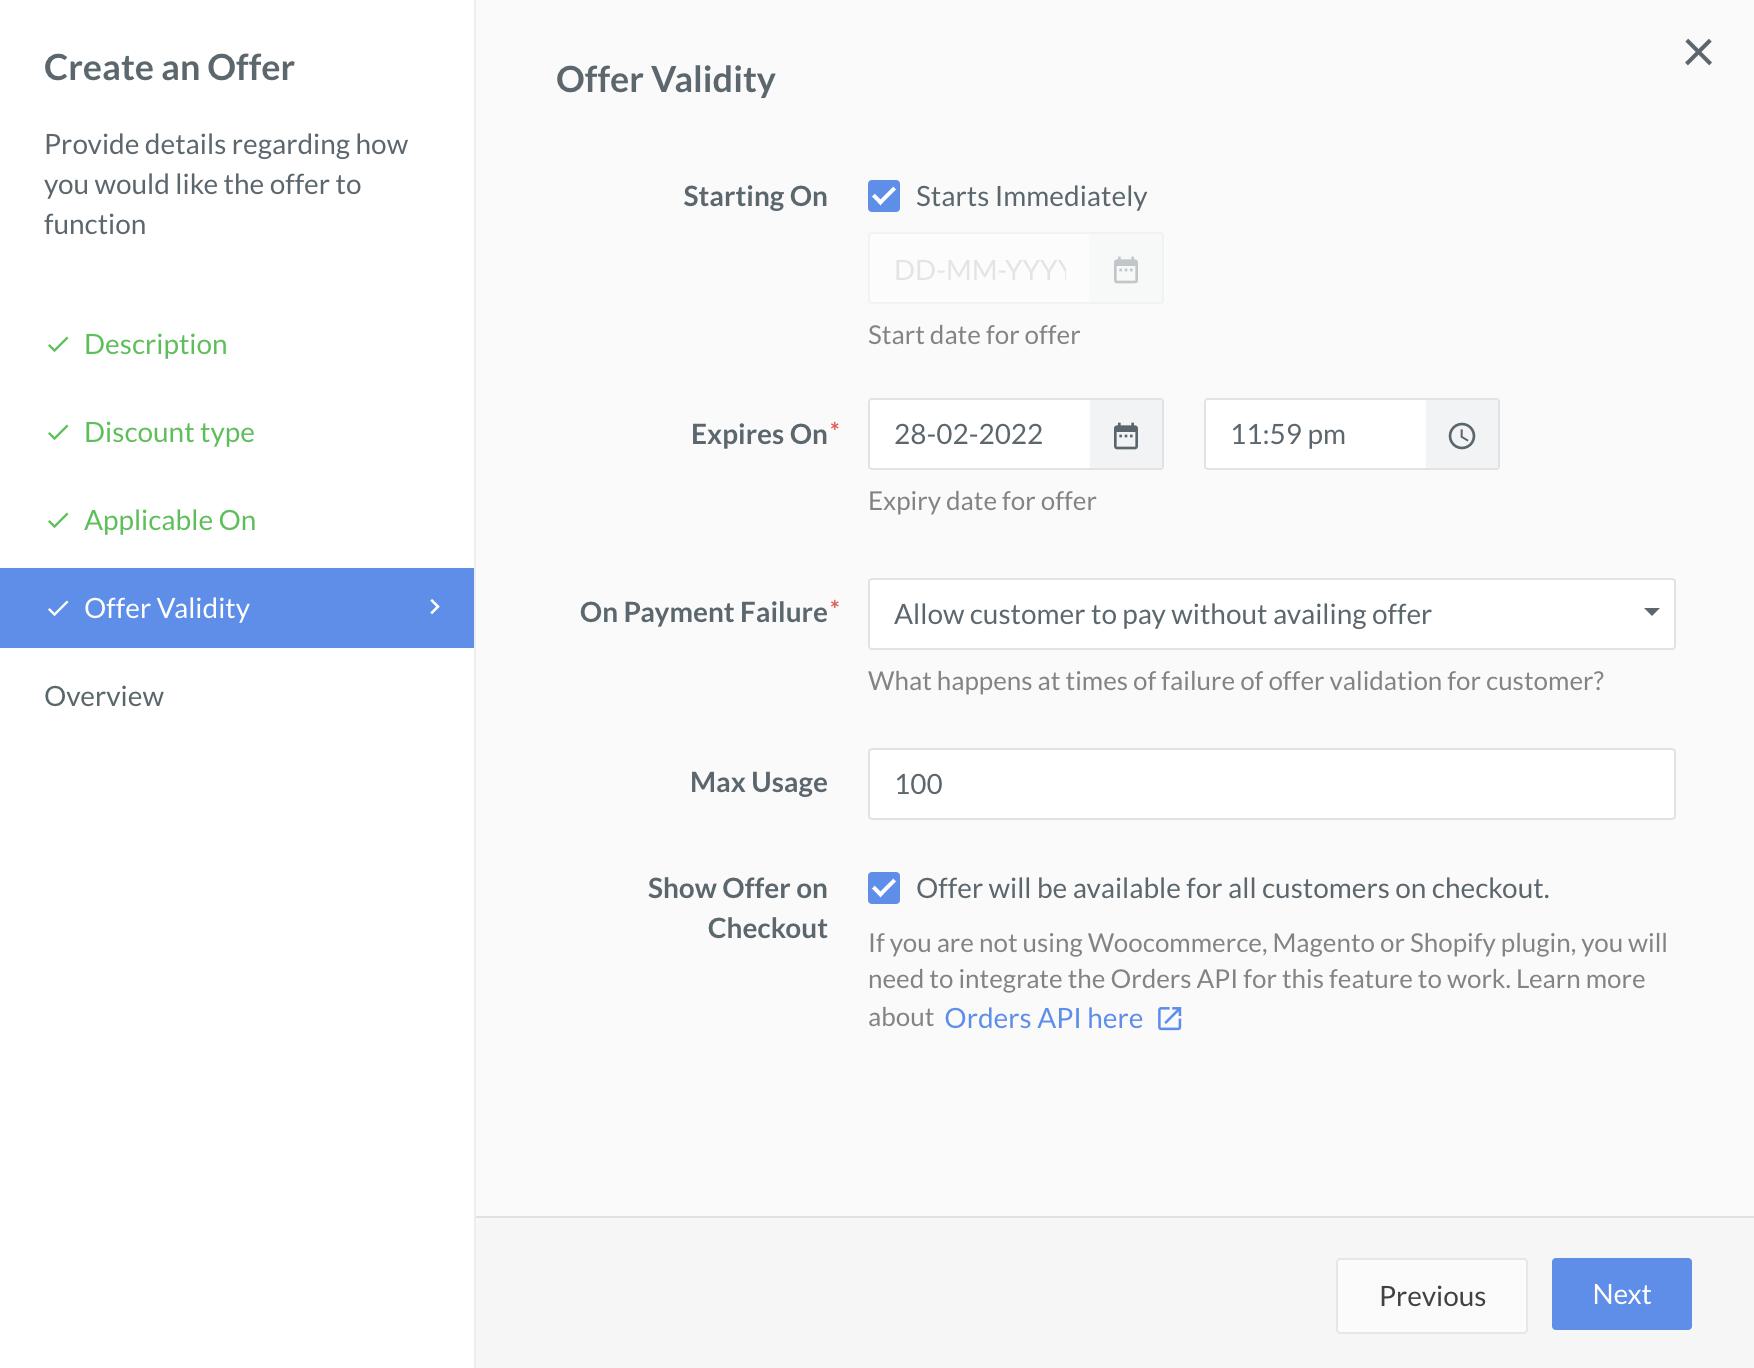
Under the **Offer Validity** tab, set how long the offer should be valid and how you want to handle the payment failure situations:
1. **Starting On**: Select the **Starts Immediately** check box for the offer to come into effect immediately. Alternatively, you can select the date and time the created Offer should become active.
2. **Expires On**: Select the date and time the Offer should end. For example, `31 Oct 2020` at `11:59 pm`.
3. **On Payment Failure**: Define how to handle payment failure.
* **Do not allow payment to go through**: The payment is failed.
* **Allow customer to pay without availing offer**: The payment is allowed even though the set validations are not met. However, the offer is not applied to the bill amount. The customer will be charged the entire order amount.
For this example, we will allow payments to go through.
4. **Max Usage**: Set the number of times the offer should be applied across all transactions. For example, `100`.
5. **Show Offer on Checkout**: Select this check box for the created offer to be displayed for all Standard Checkout payments including [Payment Links](/docs/payments/payment-links).
6. Click **Next**.
### Offer Validity
Under the **Offer Validity** tab, set how long the offer should be valid and how you want to handle the payment failure situations:
1. **Starting On**: Select the **Starts Immediately** check box for the offer to come into effect immediately. Alternatively, you can select the date and time the created Offer should become active.
2. **Expires On**: Select the date and time the Offer should end. For example, `31 Oct 2020` at `11:59 pm`.
3. **On Payment Failure**: Define how to handle payment failure.
* **Do not allow payment to go through**: The payment is failed.
* **Allow customer to pay without availing offer**: The payment is allowed even though the set validations are not met. However, the offer is not applied to the bill amount. The customer will be charged the entire order amount.
For this example, we will allow payments to go through.
4. **Max Usage**: Set the number of times the offer should be applied across all transactions. For example, `100`.
5. **Show Offer on Checkout**: Select this check box for the created offer to be displayed for all Standard Checkout payments including [Payment Links](/docs/payments/payment-links).
6. Click **Next**.
 ### Overview
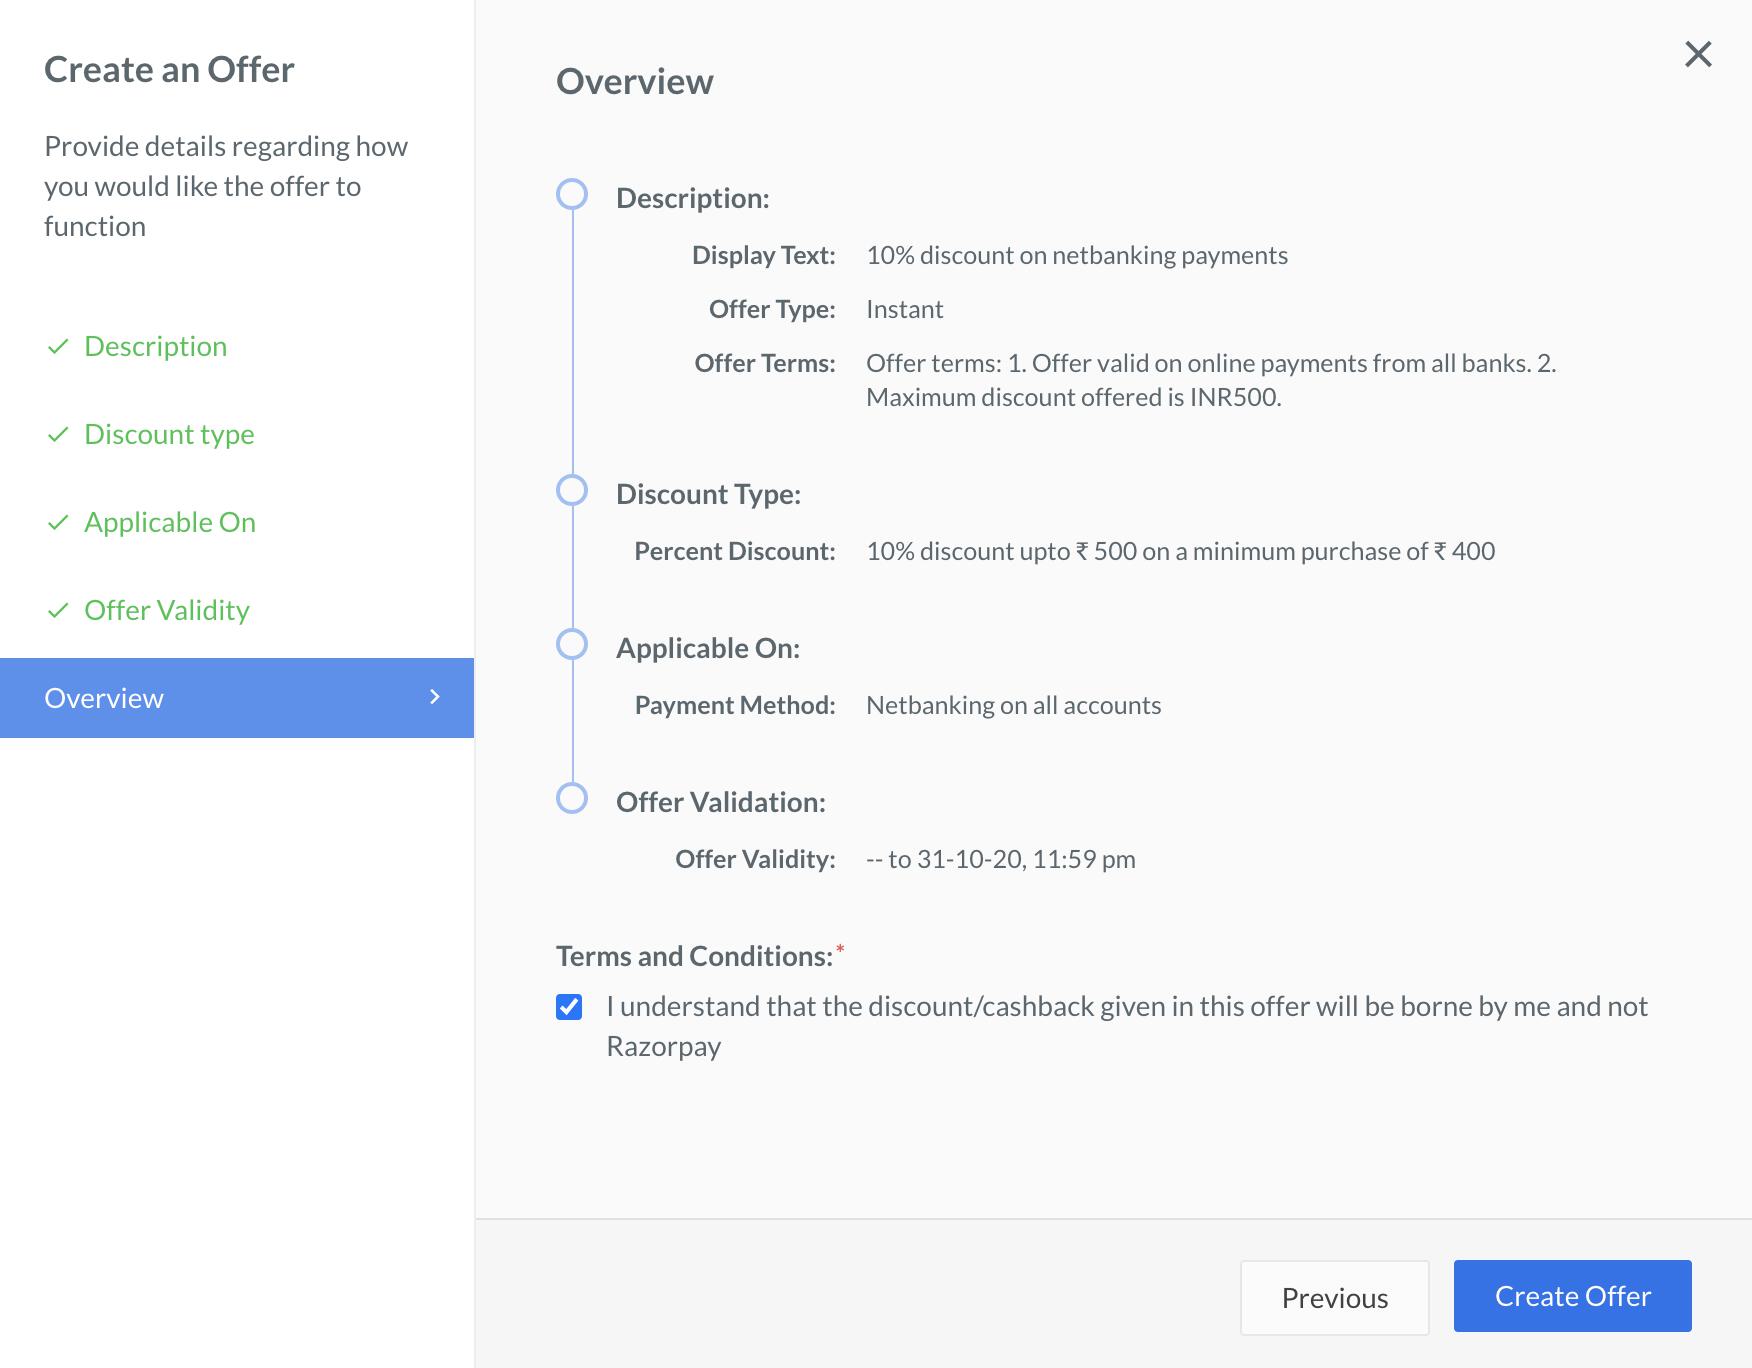
Click the **Overview** tab to view the offer summary you just created.
1. **Terms and Conditions**: Select the check box after you have read the disclaimer.
2. Click **Create Offer**.
### Overview
Click the **Overview** tab to view the offer summary you just created.
1. **Terms and Conditions**: Select the check box after you have read the disclaimer.
2. Click **Create Offer**.
 By default, all the created offers are in the **enabled** state.
## Integrate Offer with Standard Checkout
Now that an offer is created, you should integrate the offers with the Checkout for customers to avail themselves the discounts and make payments. Know more about [integrating offers with Standard Checkout](/docs/payments/offers/standard-integration).
### Related Information
* [About Offers](/docs/payments/offers)
* [Offers FAQs](/docs/payments/offers/faqs)
* [EMI² Suite](/docs/payments/payment-gateway/emi²)
By default, all the created offers are in the **enabled** state.
## Integrate Offer with Standard Checkout
Now that an offer is created, you should integrate the offers with the Checkout for customers to avail themselves the discounts and make payments. Know more about [integrating offers with Standard Checkout](/docs/payments/offers/standard-integration).
### Related Information
* [About Offers](/docs/payments/offers)
* [Offers FAQs](/docs/payments/offers/faqs)
* [EMI² Suite](/docs/payments/payment-gateway/emi²)