> ## Documentation Index
> Fetch the complete documentation index at: https://razorpay-881012b3.mintlify.site/llms.txt
> Use this file to discover all available pages before exploring further.
# Optimizer Integration Audit Tool
> Automatically identify issues with your Optimizer payment provider integration before going live.
Available in
🇮🇳 India
The Integration Audit Tool offers a secure and controlled setting to comprehensively test your integrations before going live with your payment provider. This thorough evaluation of all integration aspects reduces the risk of issues, ensuring a smooth deployment. By detecting and resolving these issues early, businesses can prevent potential problems before they escalate. This proactive approach helps protect revenue streams and, more importantly, maintains customer trust.
## Supported Payment Providers
Below is the list of payment providers supported for Integration Audit Tool:
| | Payment Provider | Availability |
| - | ---------------- | ------------ |
| 1 | Cashfree | Live |
| 2 | Paytm | Live |
| 3 | PayU | Live |
## Test Integration
Follow the steps given below to add and test your payment provider integration. The integration testing consists of 5 steps:
Follow the steps given below to test your payment provider credentials:
1. Log in to your Dashboard.
2. On the left navigation, select **Optimizer** and click **Add provider**.
3. Select the payment provider you want to add. Fill in the provider and secret key details and click **Test integration**.
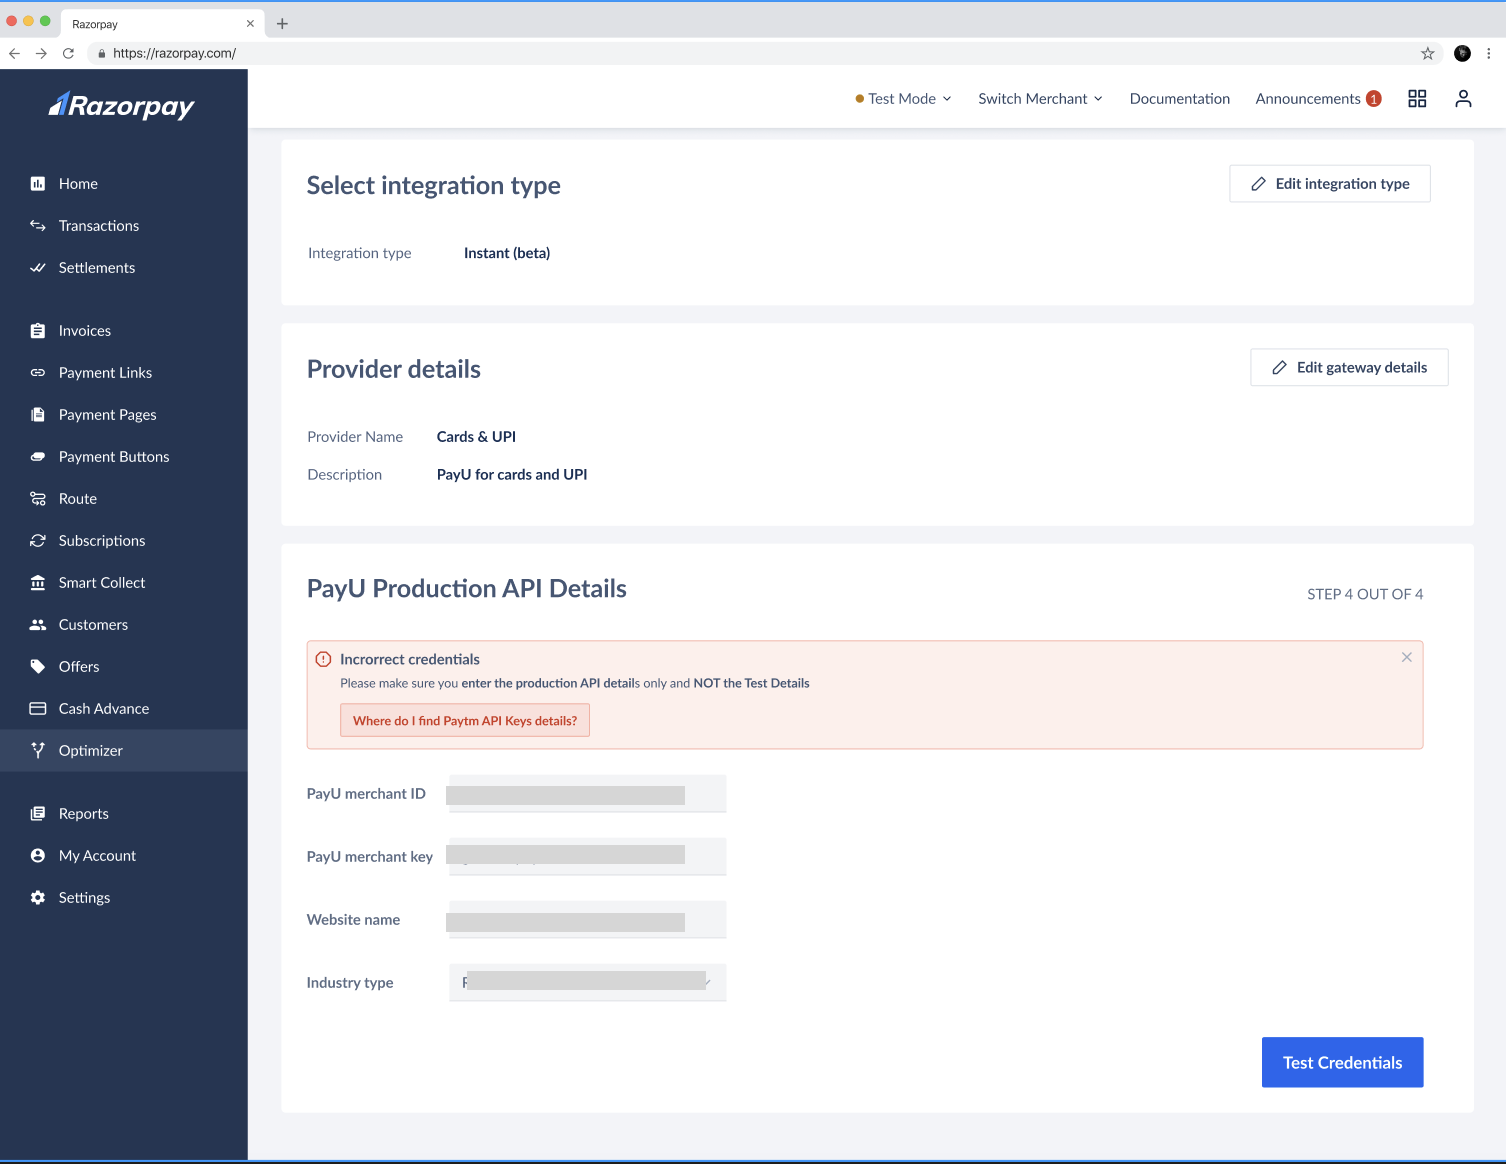
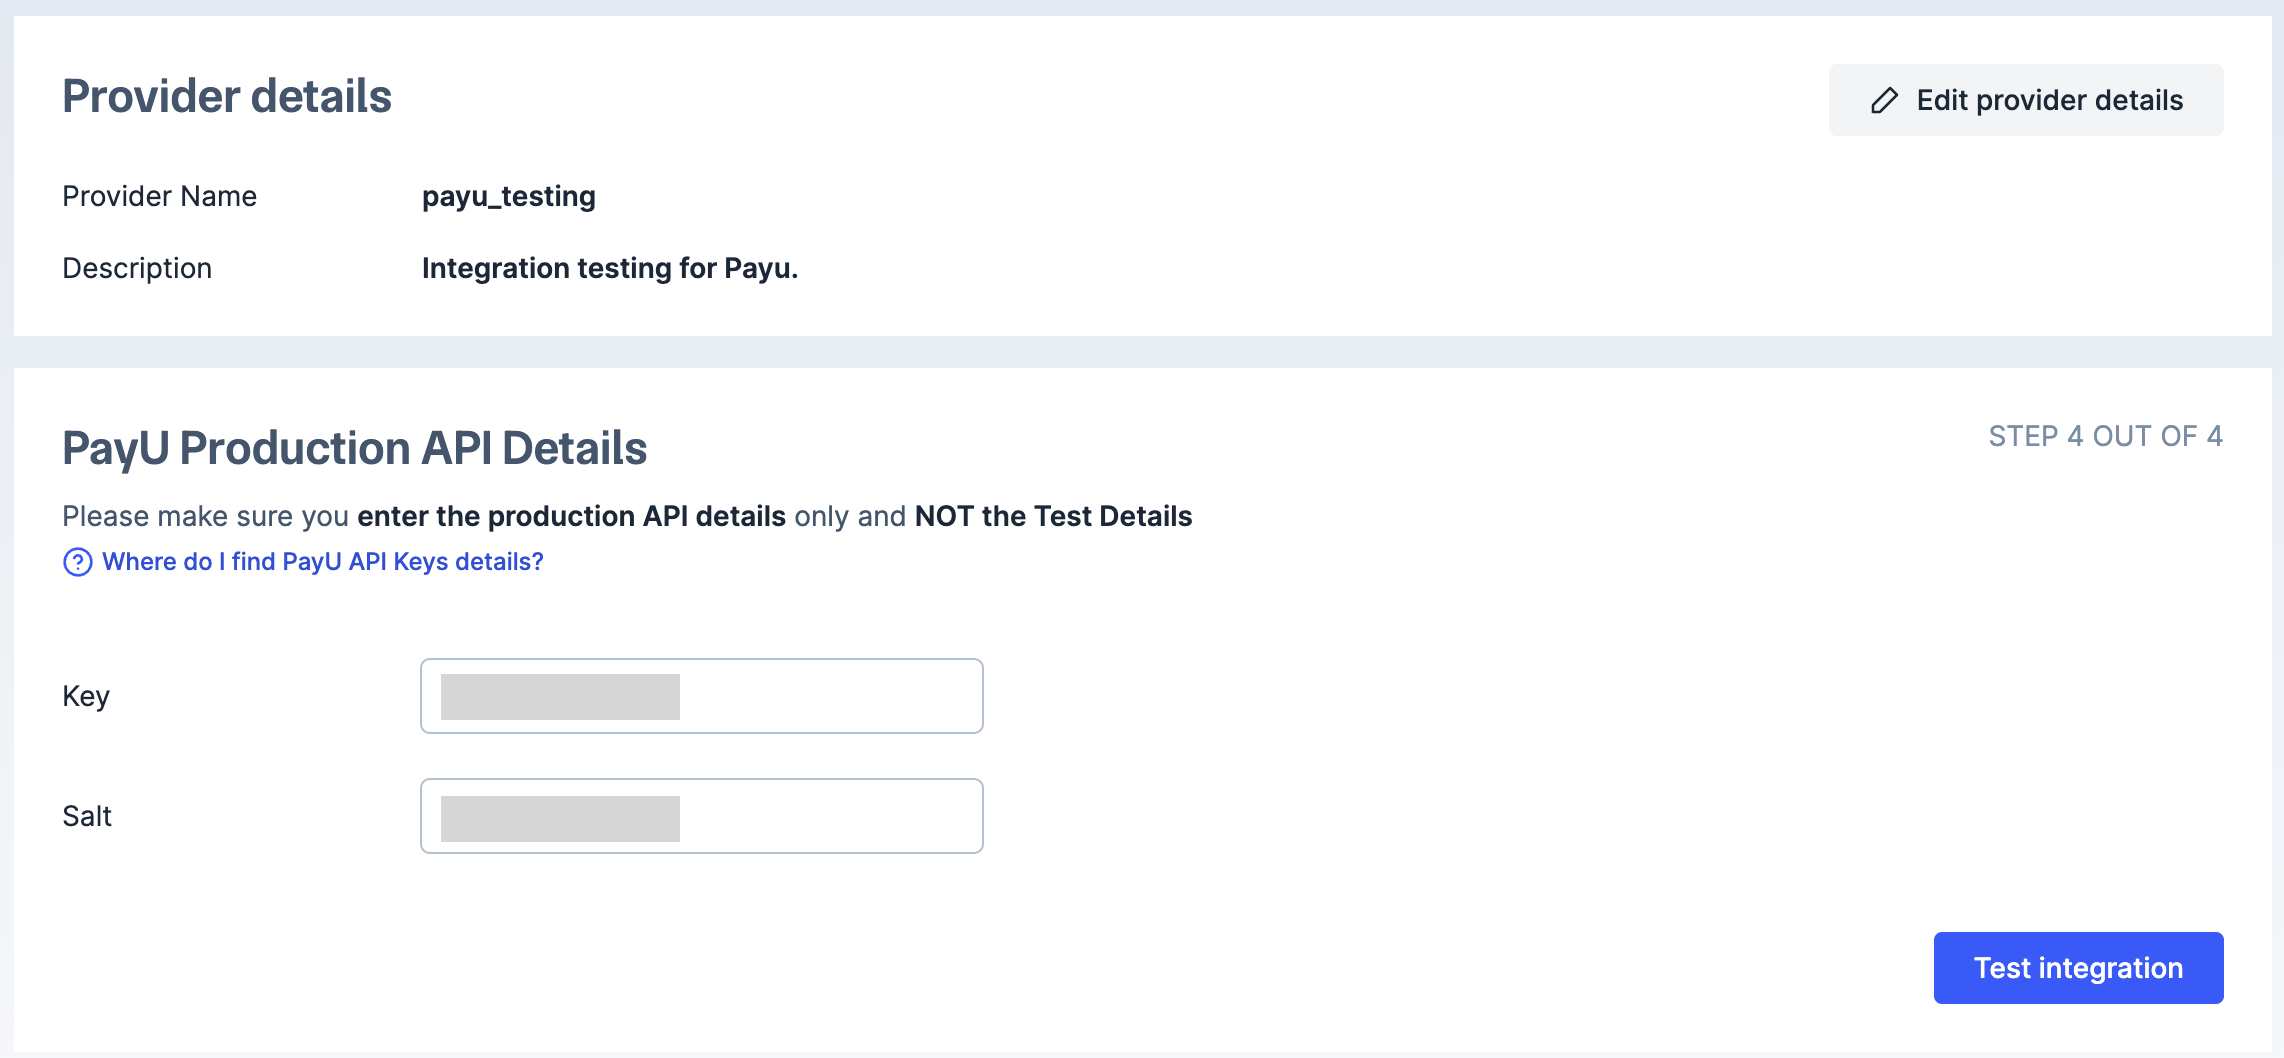 4. If the credentials are invalid, you will get an error. Re-enter the correct details and click **Test Credentials**.
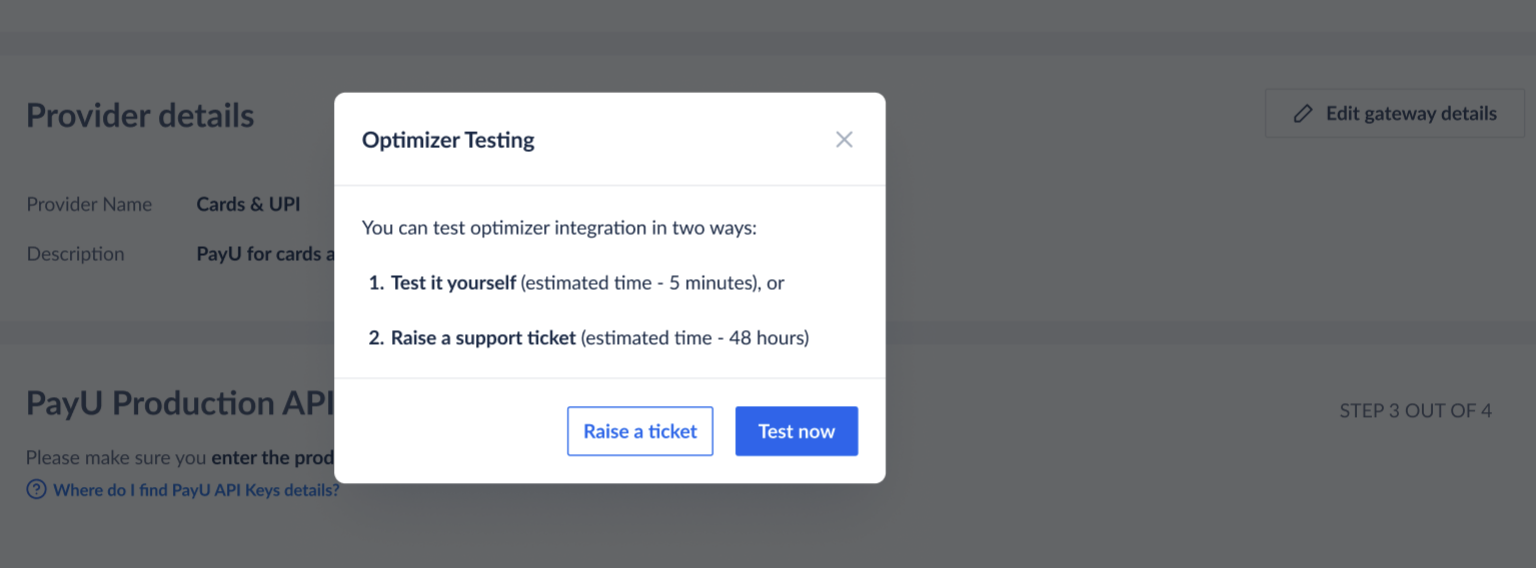
 5. On successful validation of credentials, a pop-up screen appears. Click **Test now**.
 On the **Payment testing** screen:
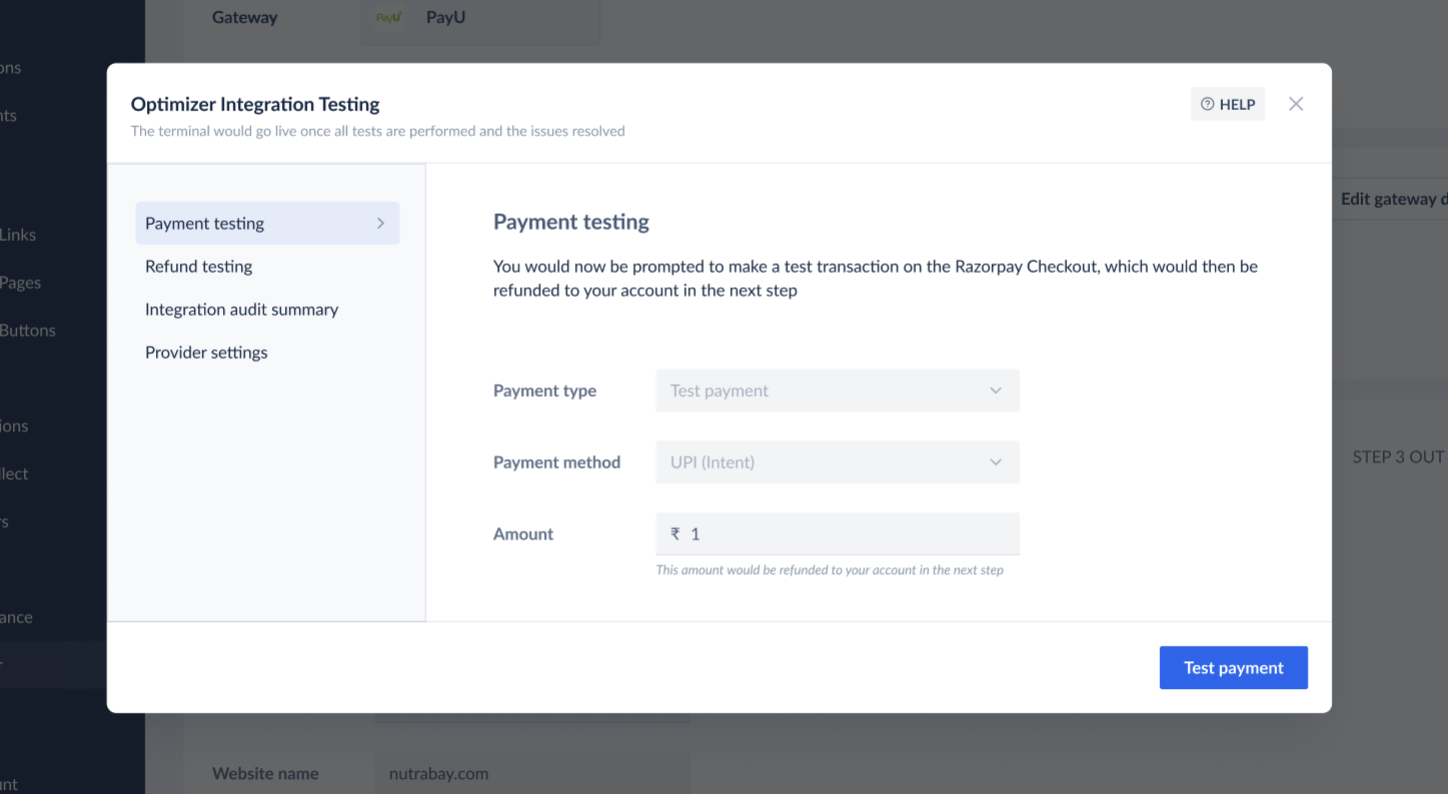
1. Enter the amount you want to test and click Test payment.
On the **Payment testing** screen:
1. Enter the amount you want to test and click Test payment.
 **Handy Tips**
The **Payment type** and **Payment method** will be set as default options.
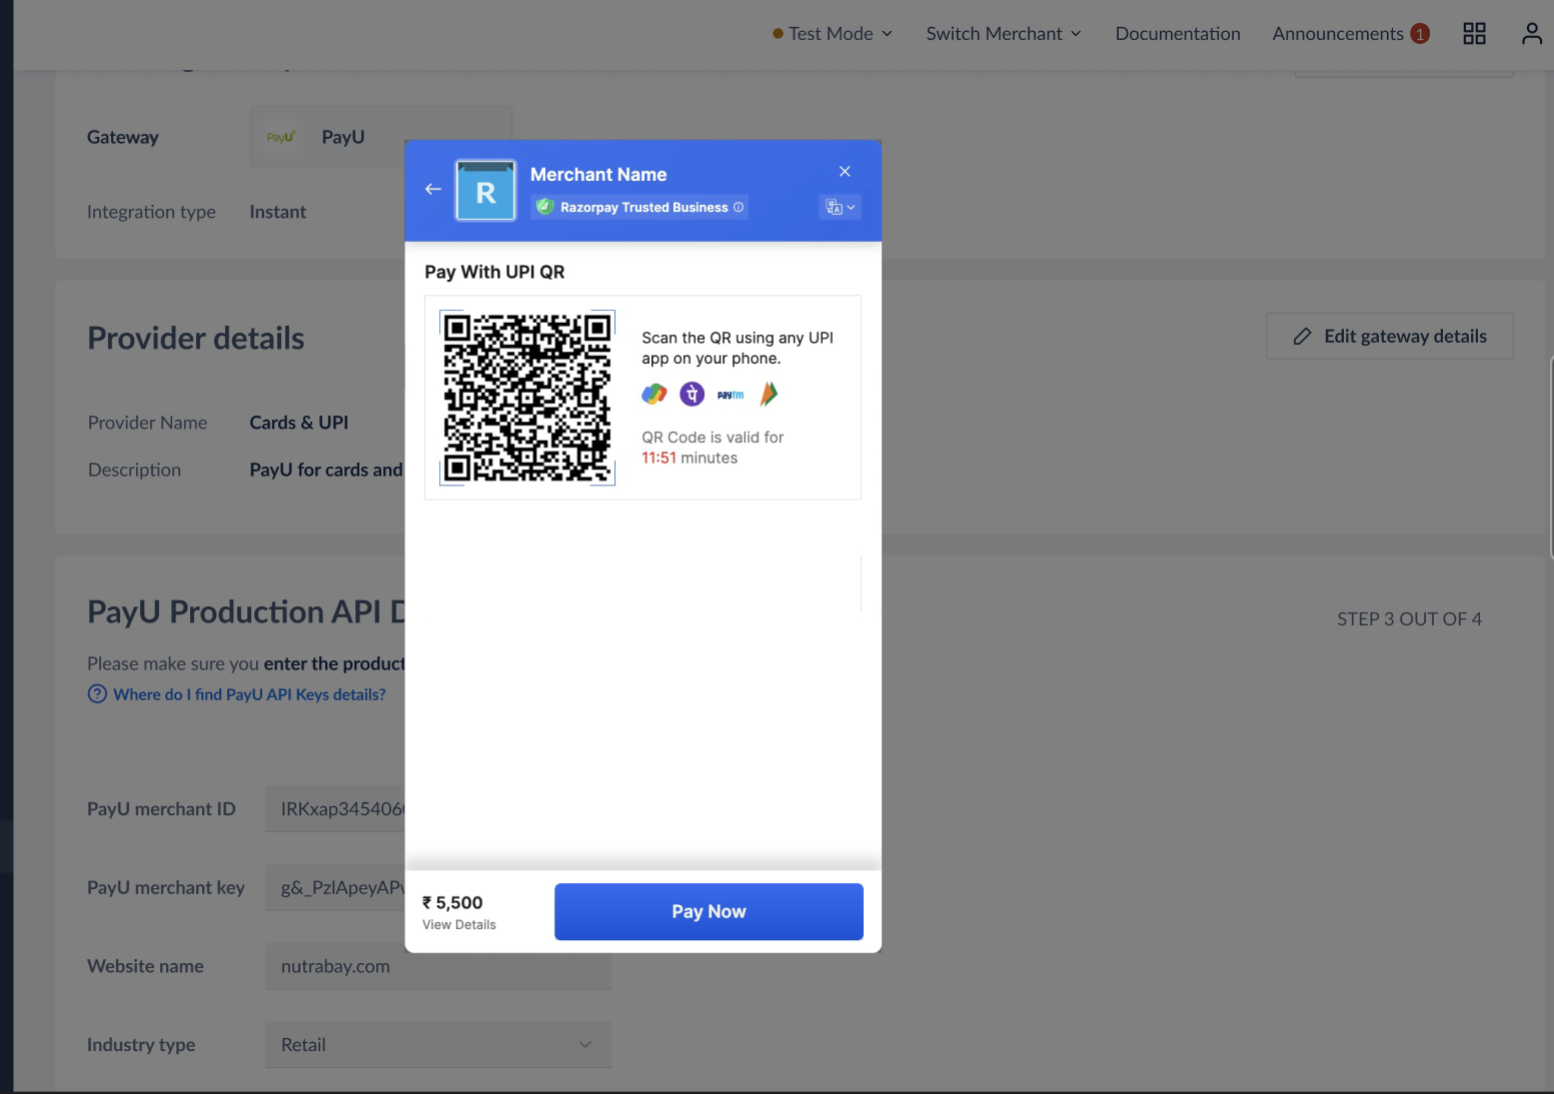
2. Scan the QR code and click **Pay Now**.
**Handy Tips**
The **Payment type** and **Payment method** will be set as default options.
2. Scan the QR code and click **Pay Now**.
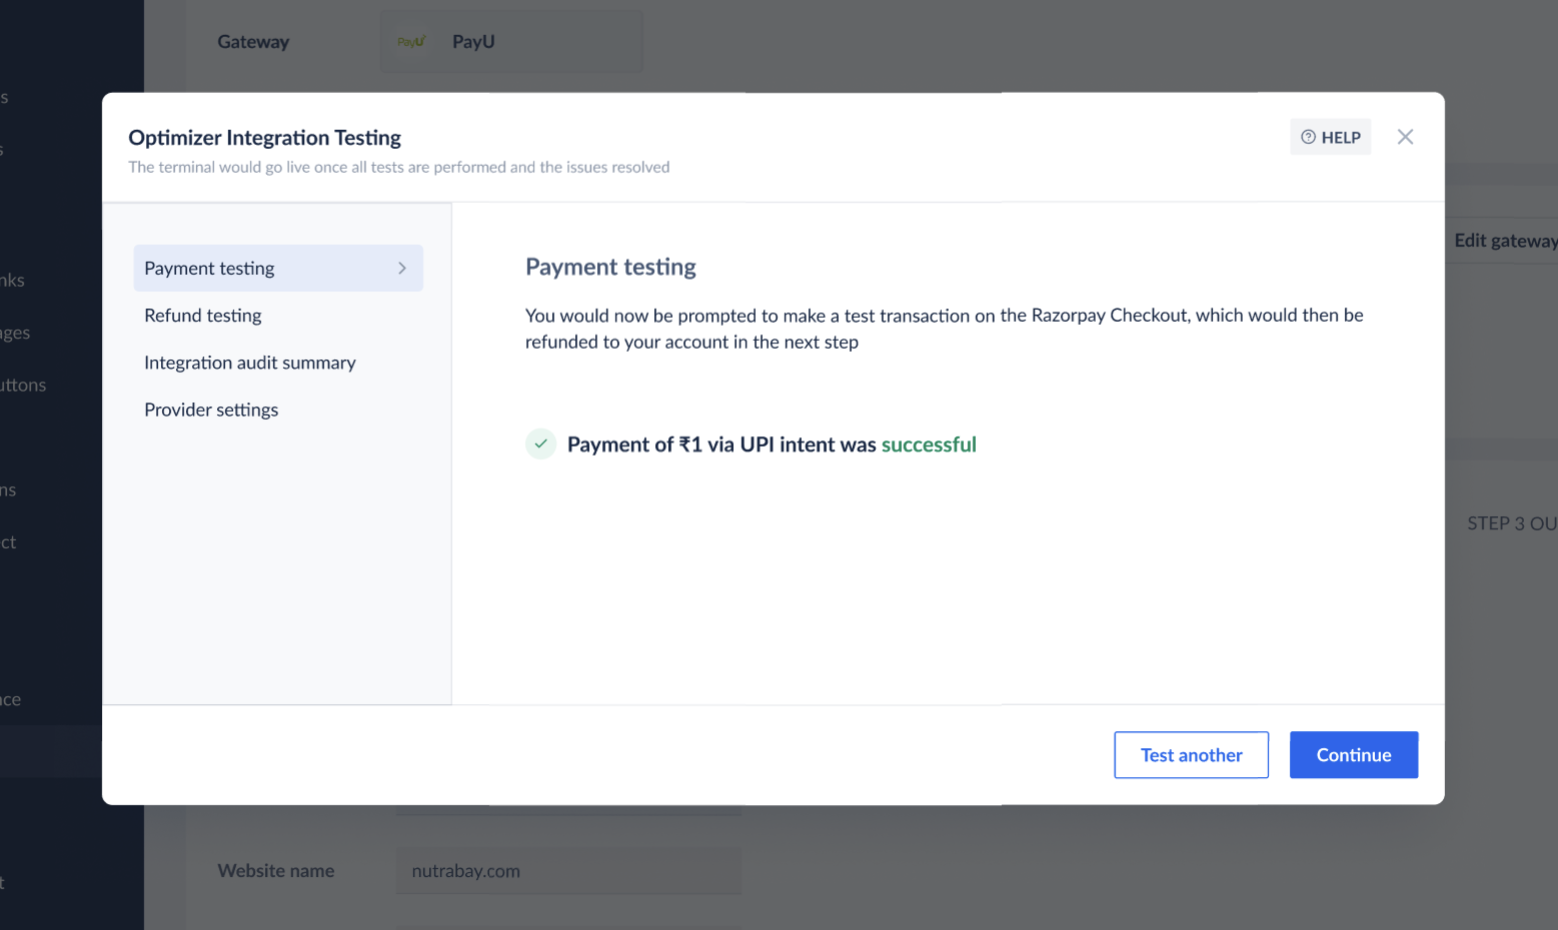
 Once the payment is successful, click **Continue**. You can click **Test another** if you want to test another payment.
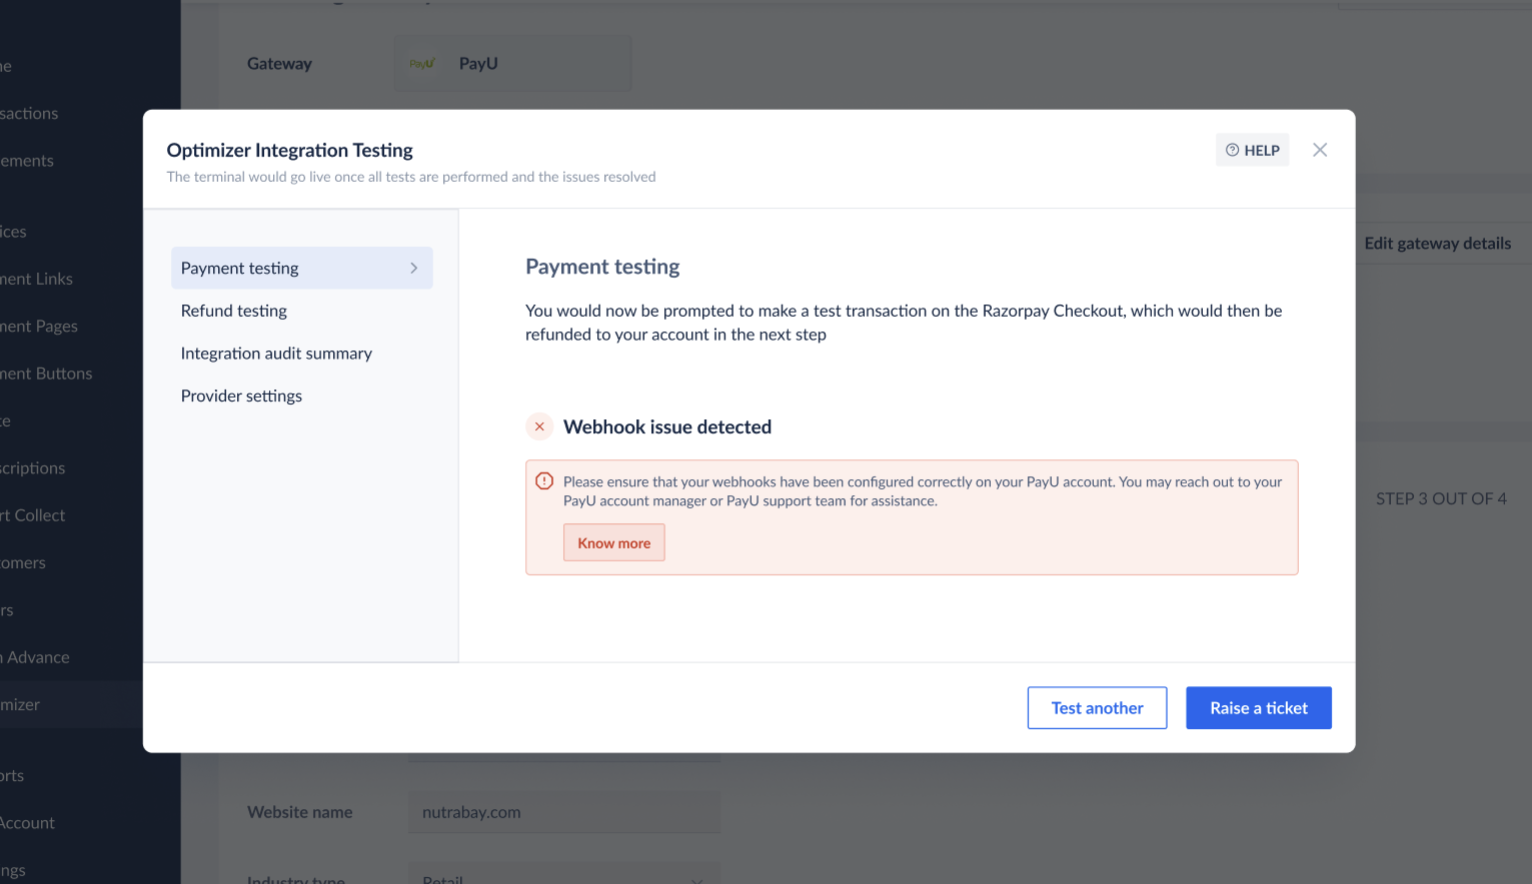
 If the payment is unsuccessful, an error message and the corrective action will appear.
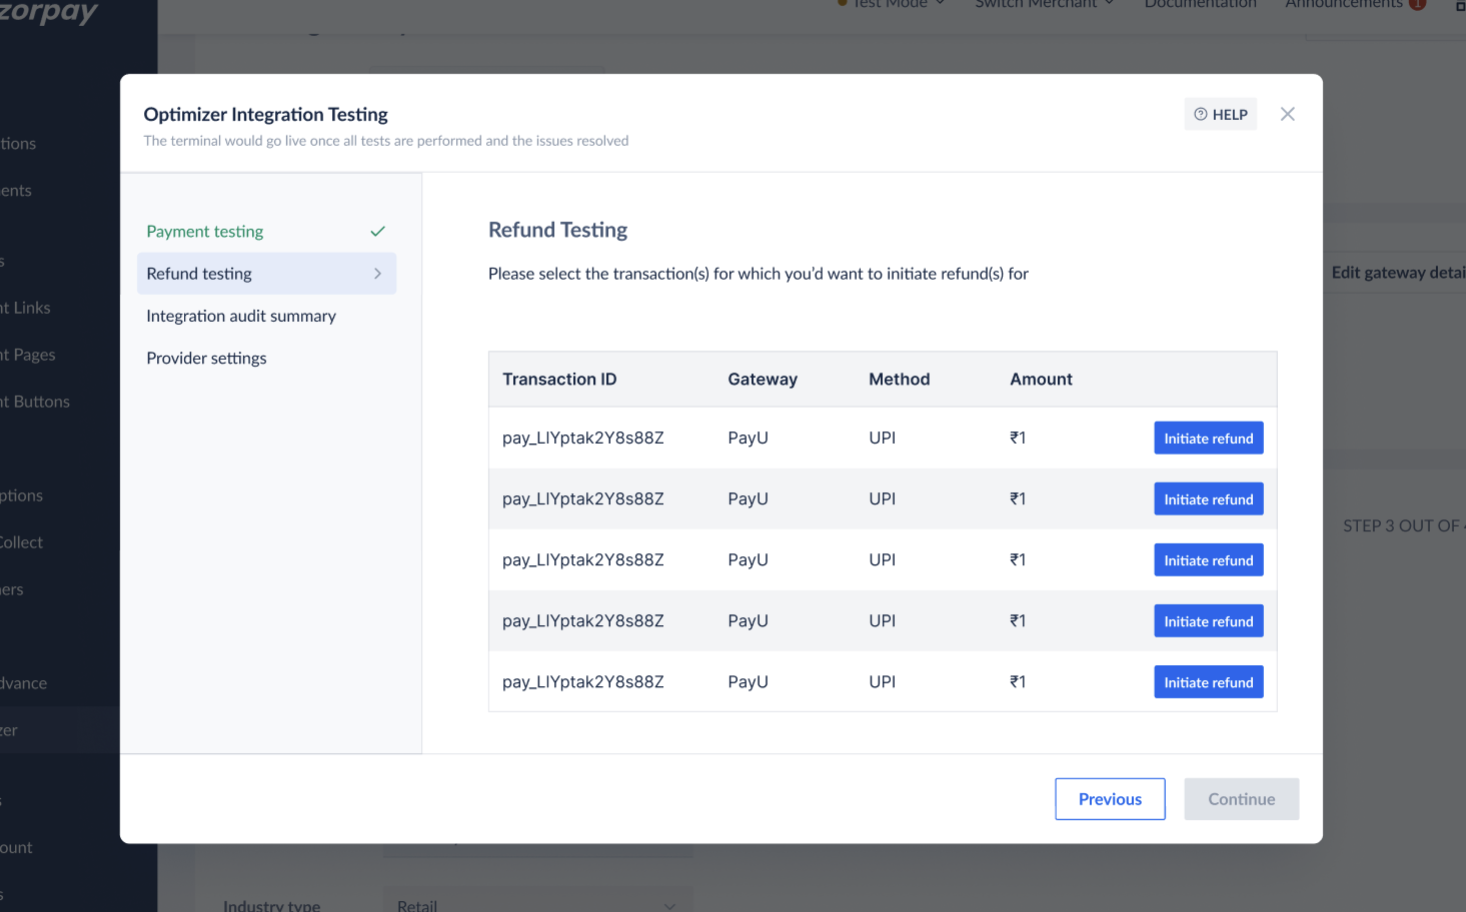
 On the Refund testing screen, click Initiate Refund for the transaction you want to test the refund.
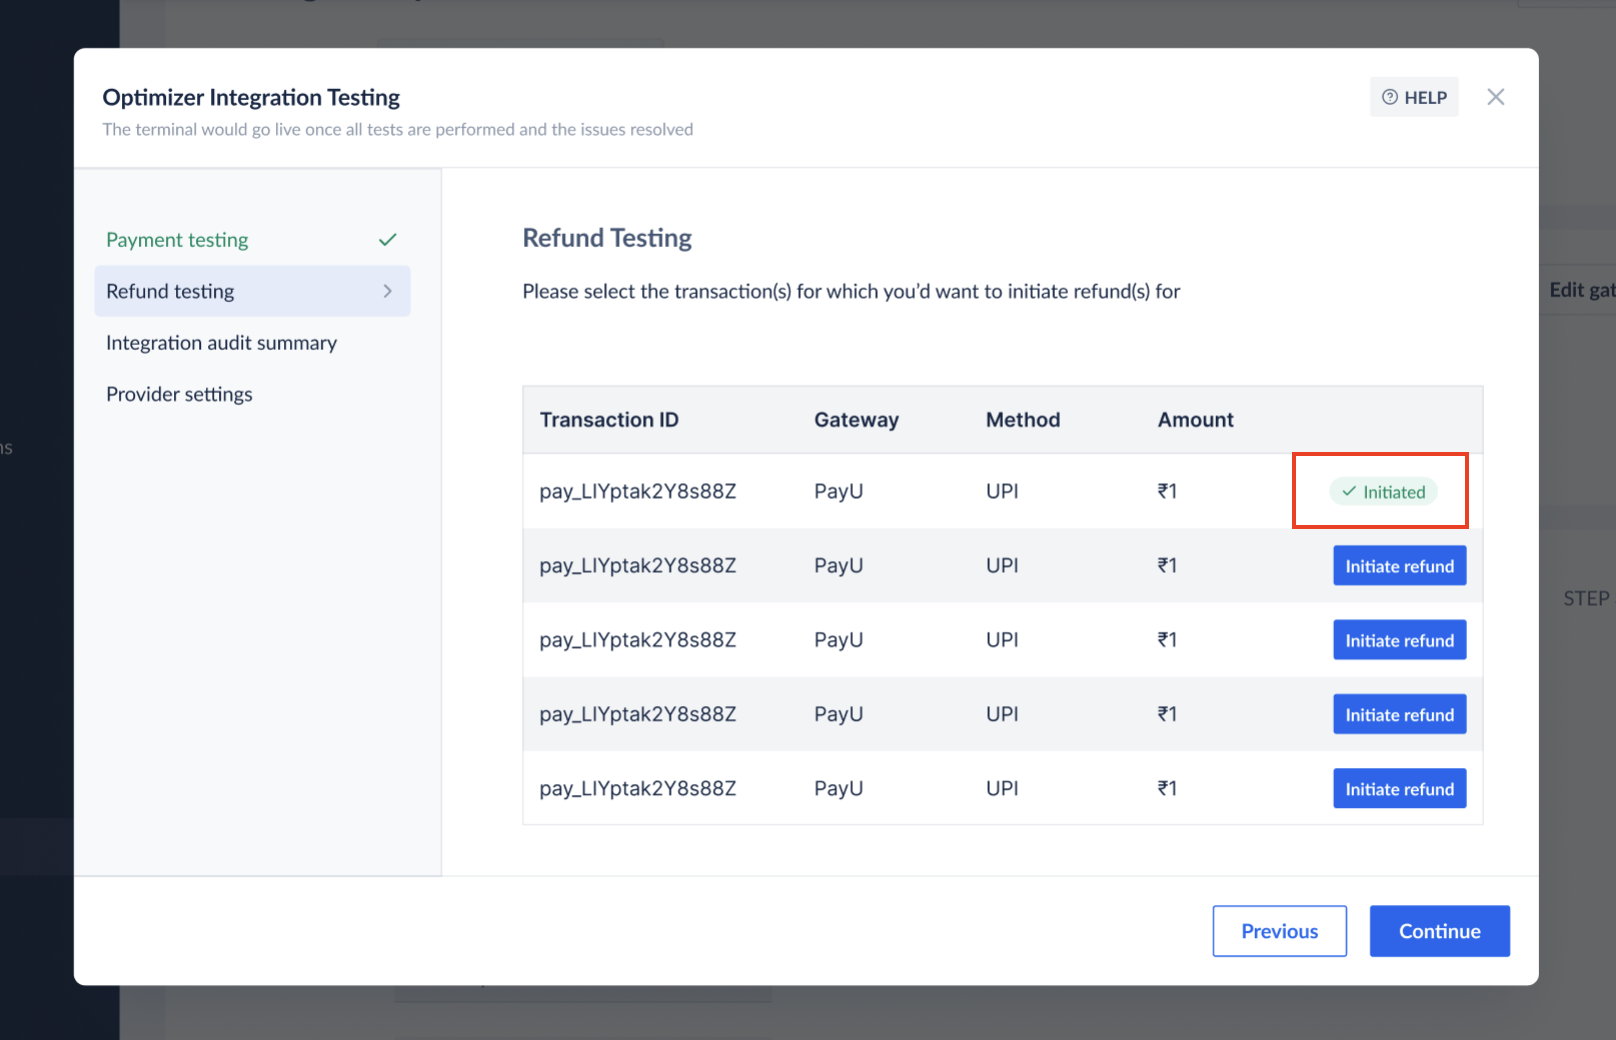
 Once the status of the transaction changes to **Initiated**, click **Continue**.
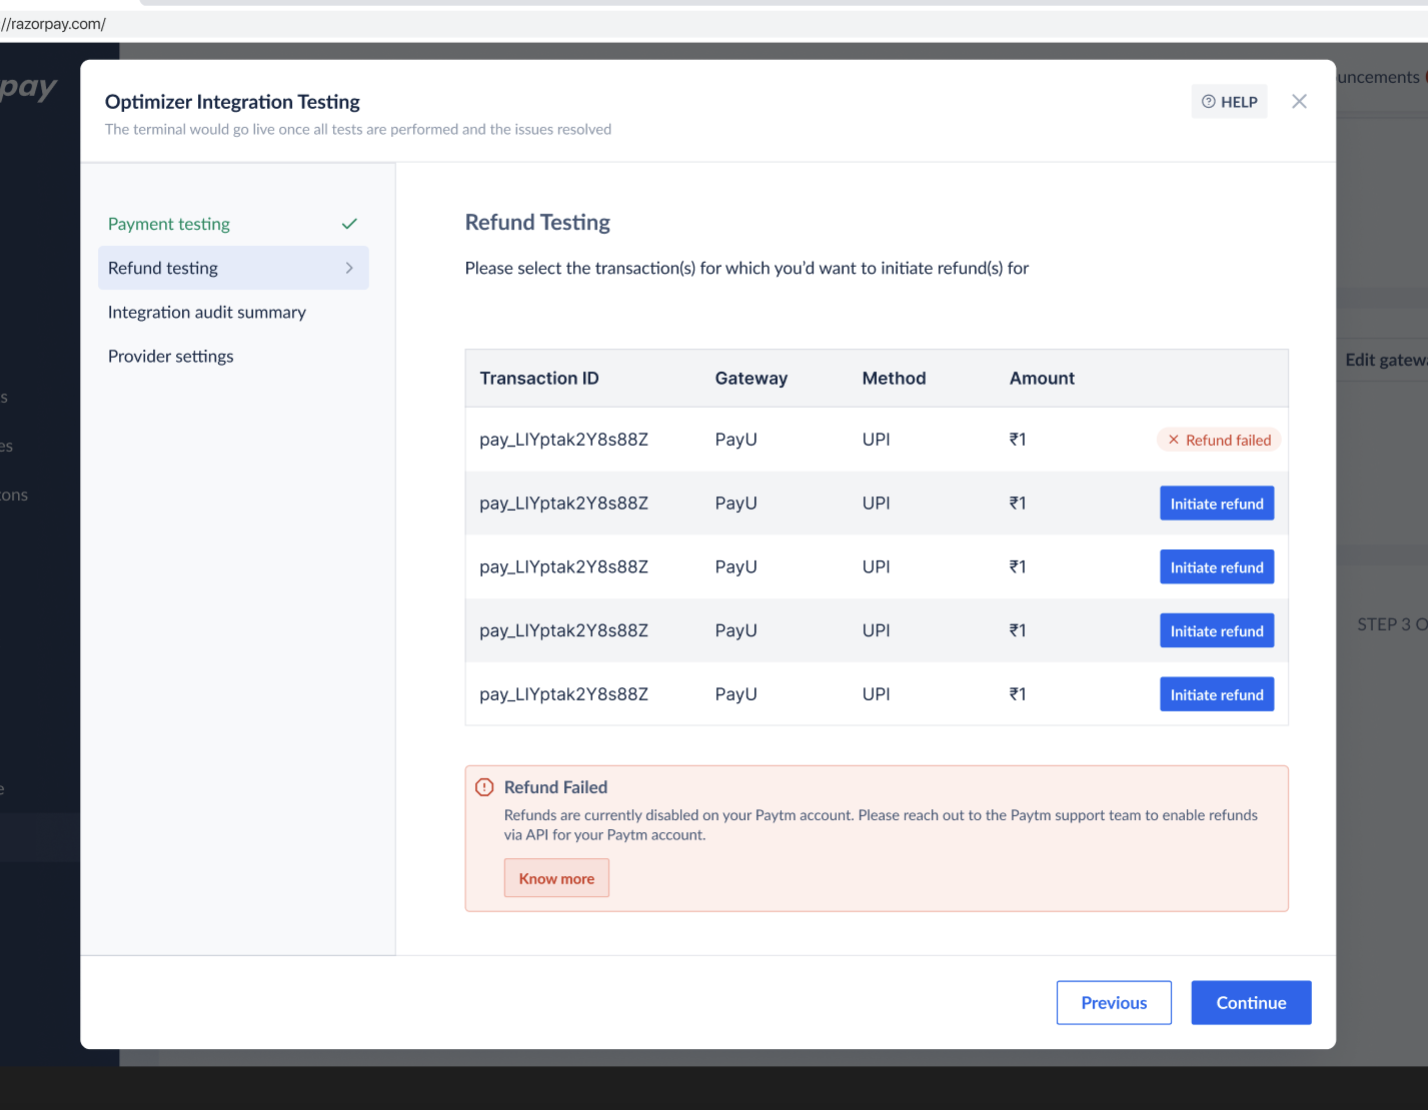
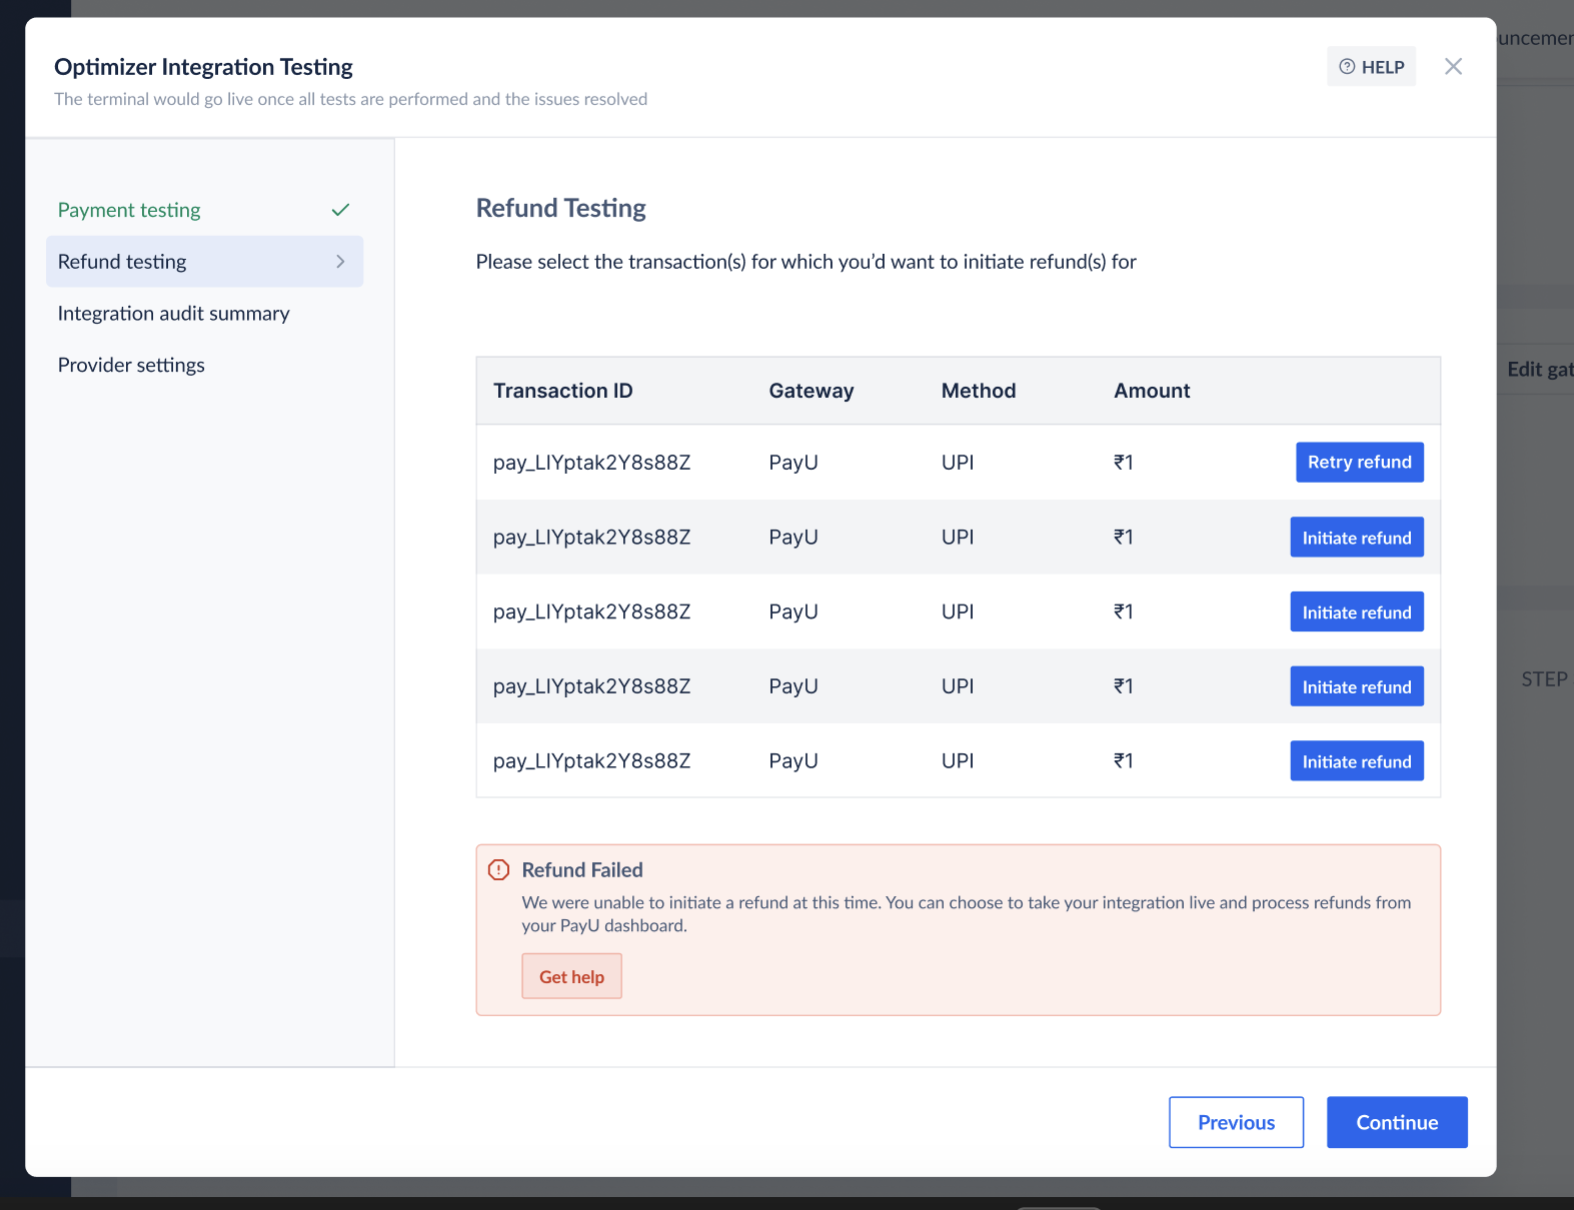
 If the refund is unsuccessful, an error message and the corrective action appears.
* Paytm:
If the refund is unsuccessful, an error message and the corrective action appears.
* Paytm:
 * Other Payment Gateways:
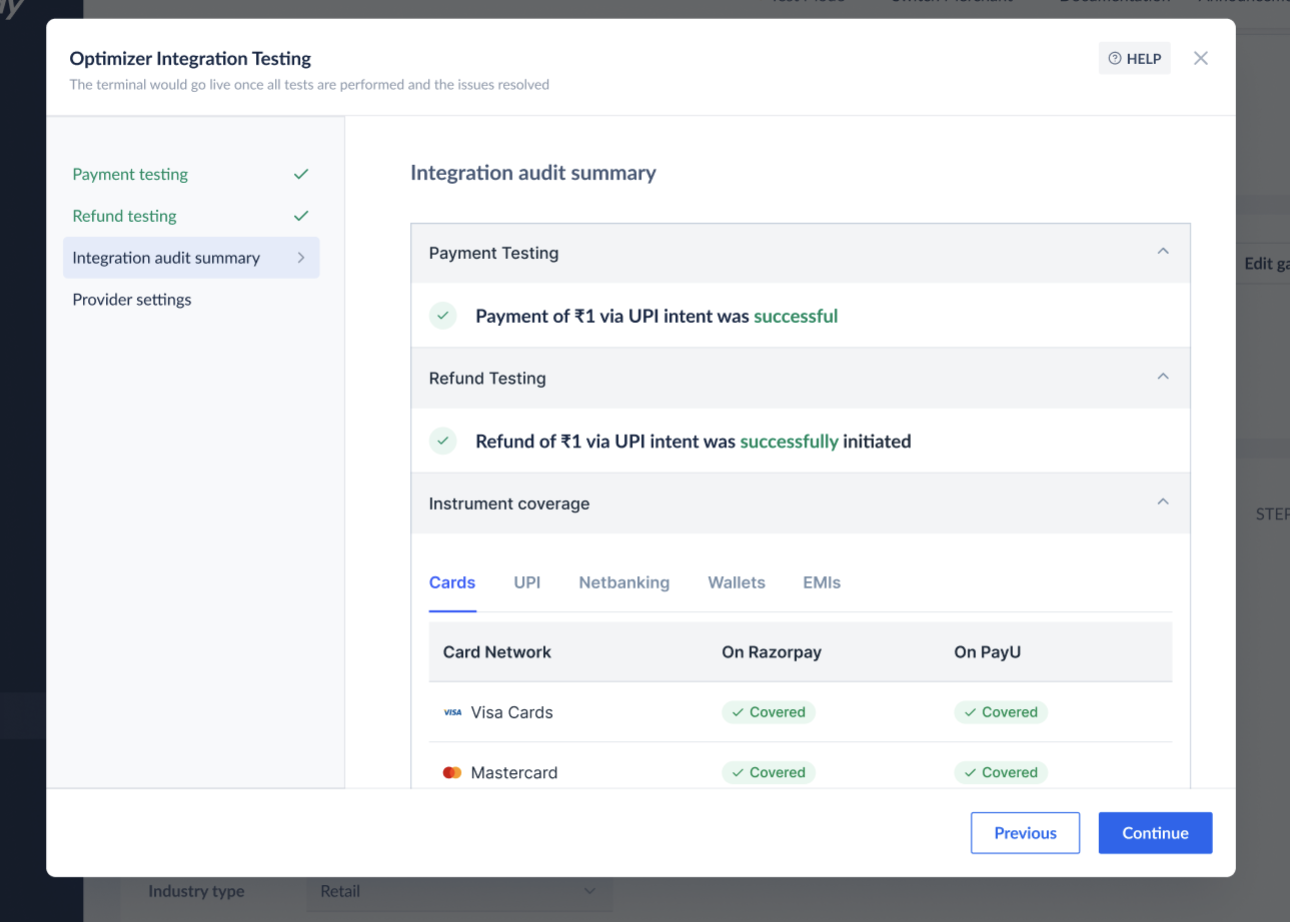
 The **Integration audit summary** screen displays the instrument coverage for all payment methods for the payment provider you want to add.
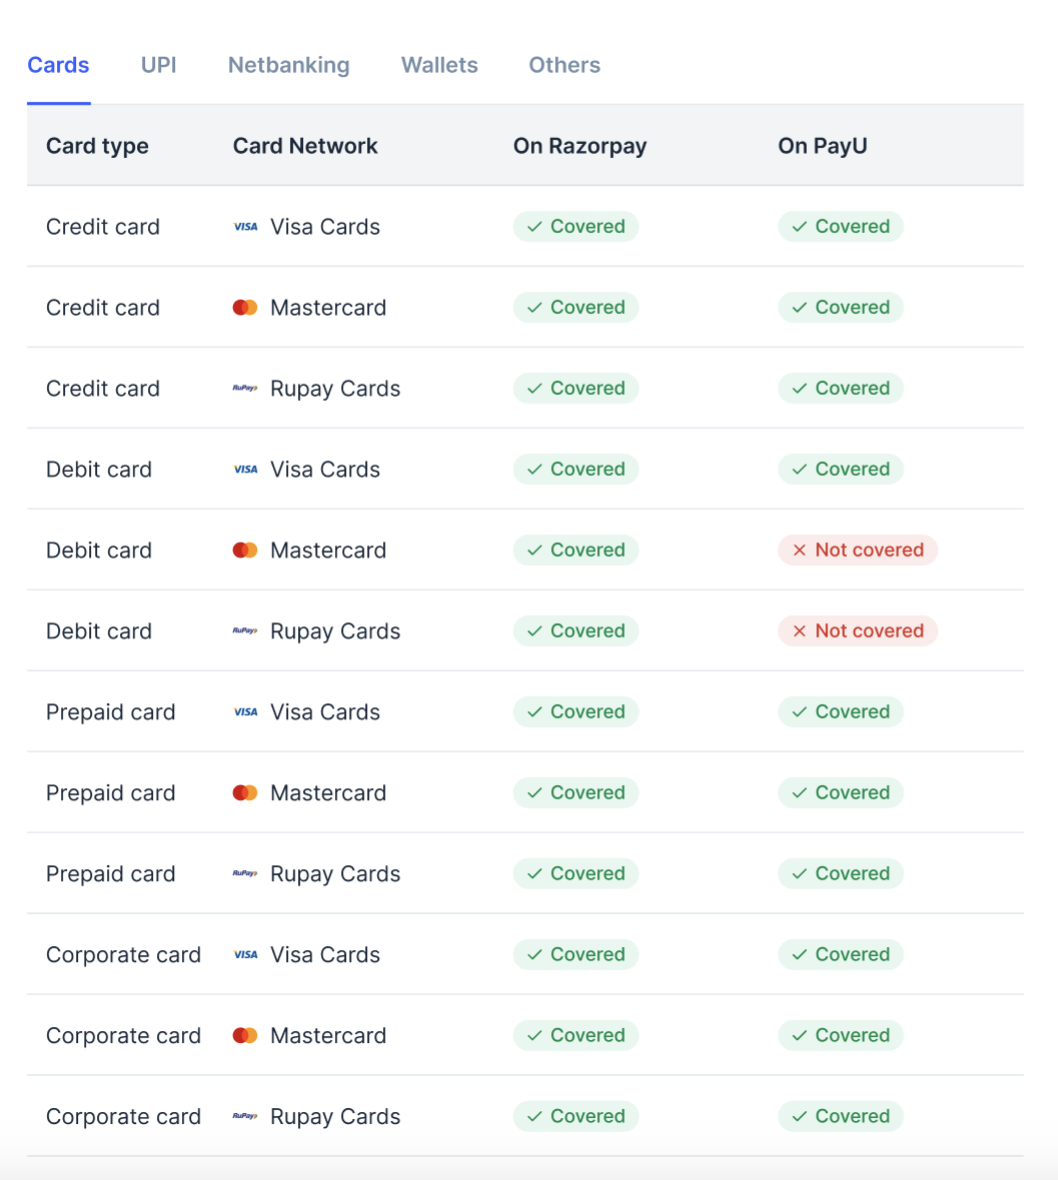
 You can double-click on any instrument to see an expanded view comparing the availability of each payment method for your payment provider with Razorpay's.
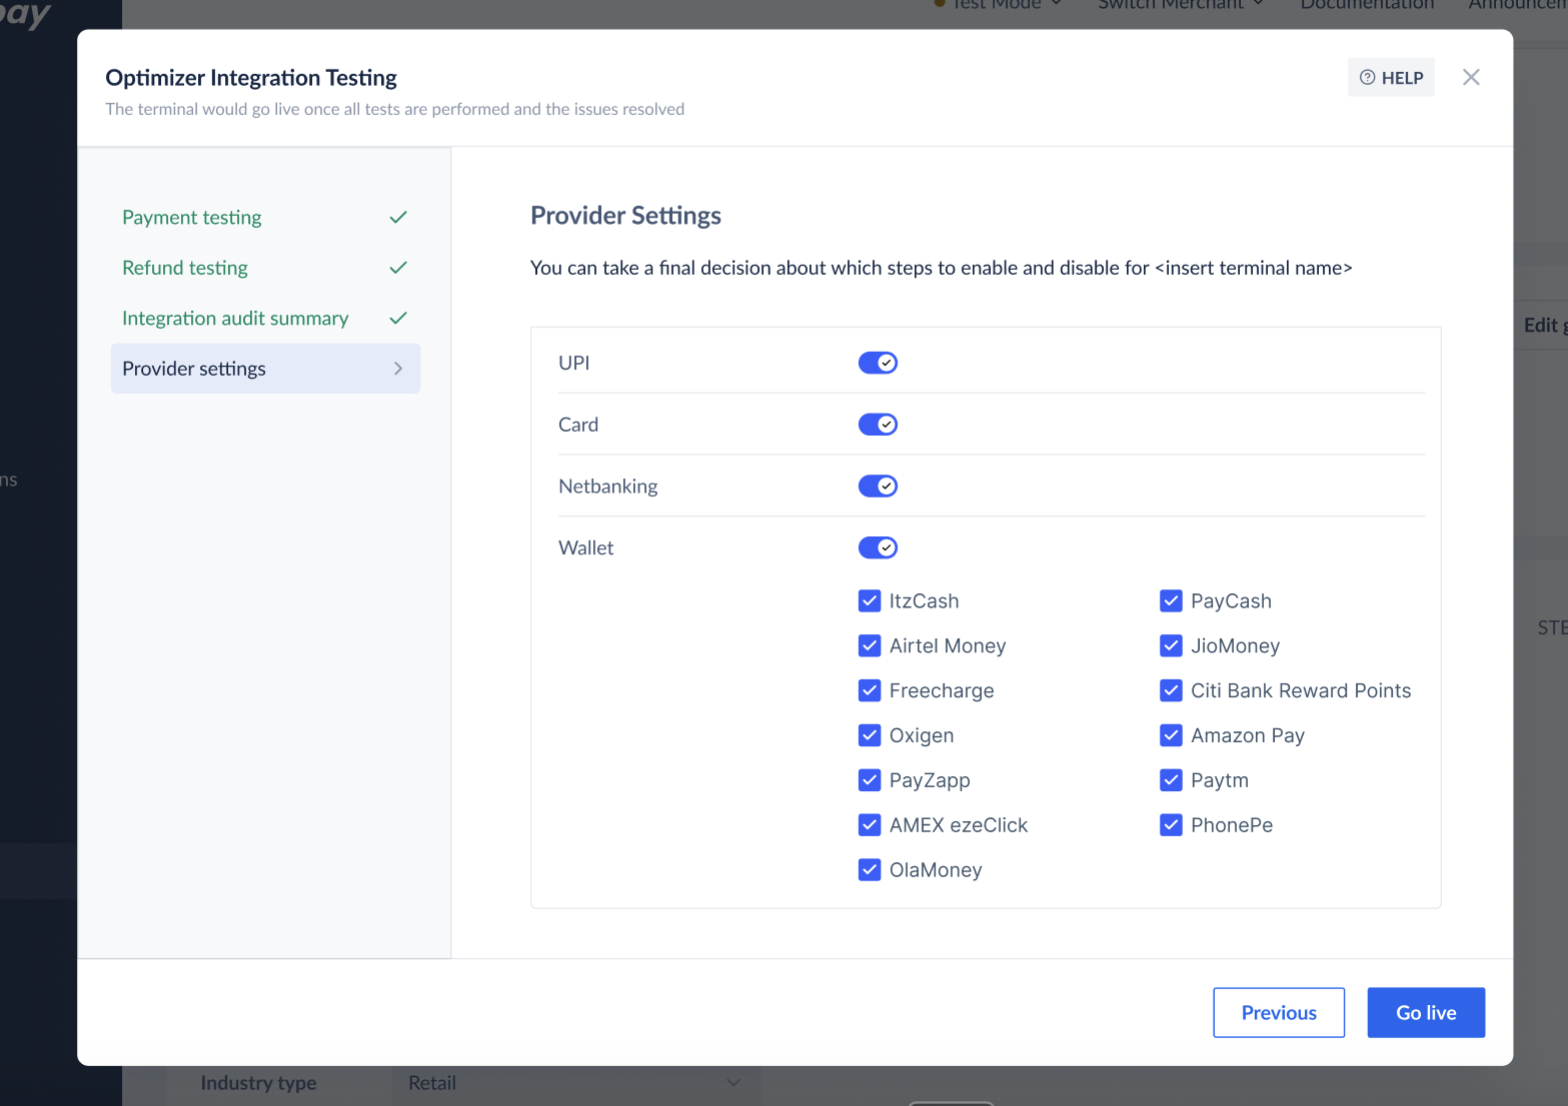
 On the Provider settings screen, enable or disable the payment methods you want for your payment provider and click **Go live**.
 After completing all the steps mentioned above, you can go live with your payment provider.
## View and Edit Payment Provider Details
Once your payment provider is added successfully, you can [view](/docs/payments/optimizer/integration-audit#view-provider-details) and [edit](/docs/payments/optimizer/integration-audit#edit-provider-details) the provider details.
To view your provider details:
1. Log in to your Dashboard.
2. On the left navigation, select **Optimizer** and click on the payment provider you added. The payment provider details appear.
After completing all the steps mentioned above, you can go live with your payment provider.
## View and Edit Payment Provider Details
Once your payment provider is added successfully, you can [view](/docs/payments/optimizer/integration-audit#view-provider-details) and [edit](/docs/payments/optimizer/integration-audit#edit-provider-details) the provider details.
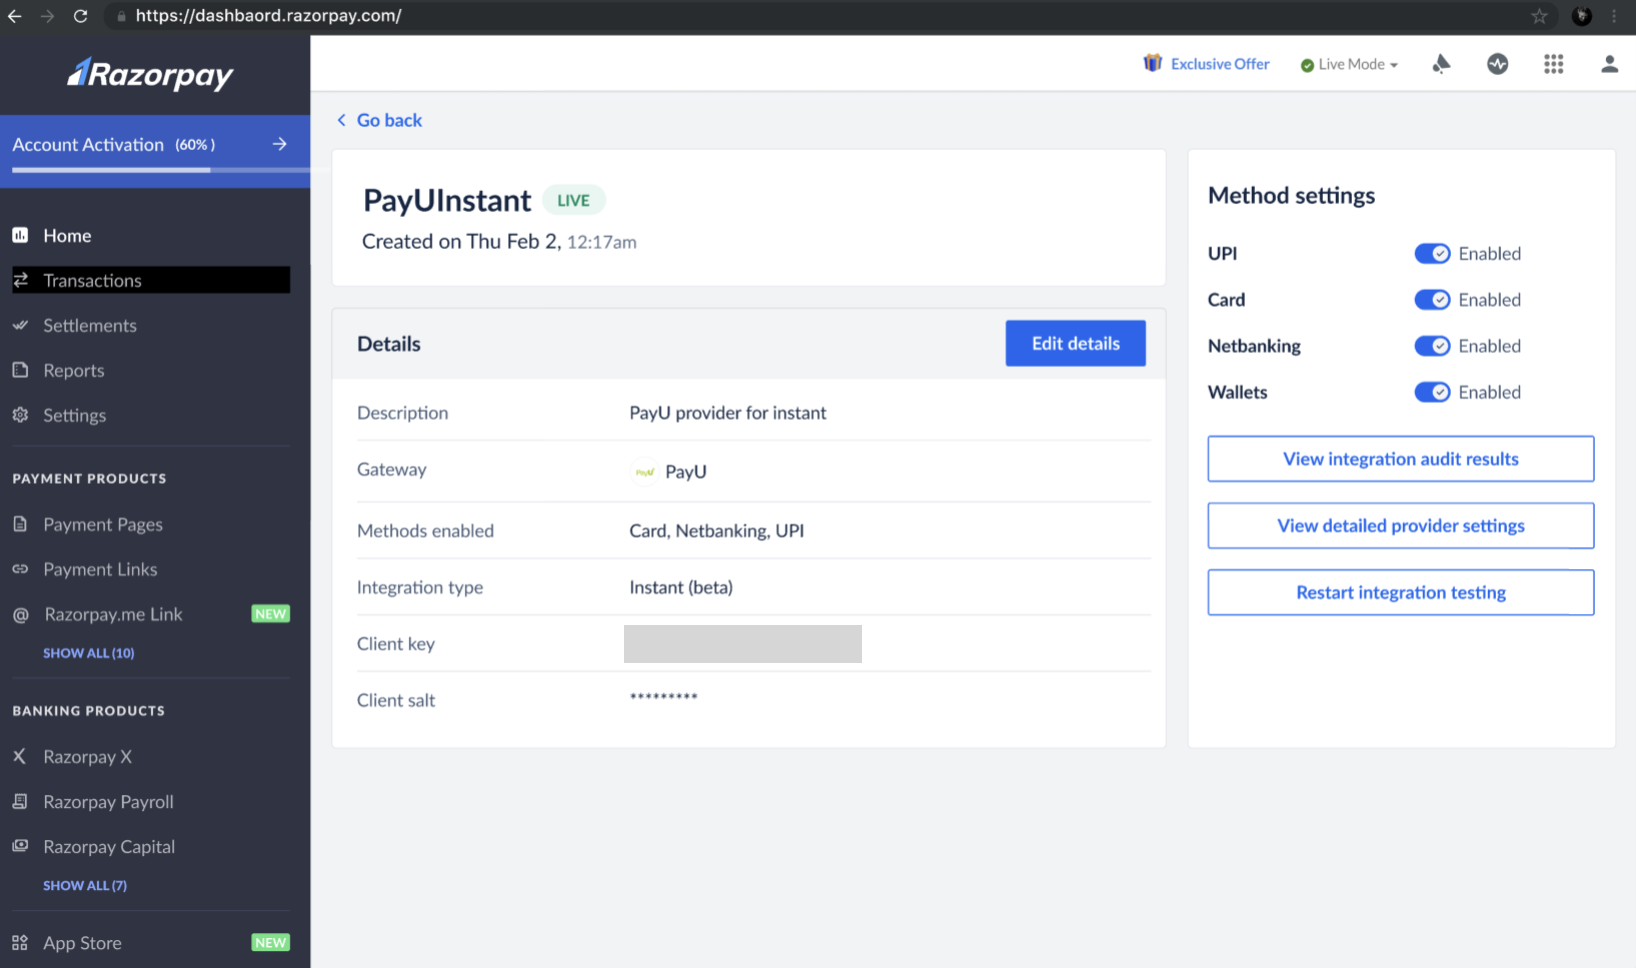
To view your provider details:
1. Log in to your Dashboard.
2. On the left navigation, select **Optimizer** and click on the payment provider you added. The payment provider details appear.
 To edit your provider details:
1. Log in to your Dashboard.
2. On the left navigation, select **Optimizer** and click on the payment provider you want to edit.
3. Click **Edit Details**.
To edit your provider details:
1. Log in to your Dashboard.
2. On the left navigation, select **Optimizer** and click on the payment provider you want to edit.
3. Click **Edit Details**.
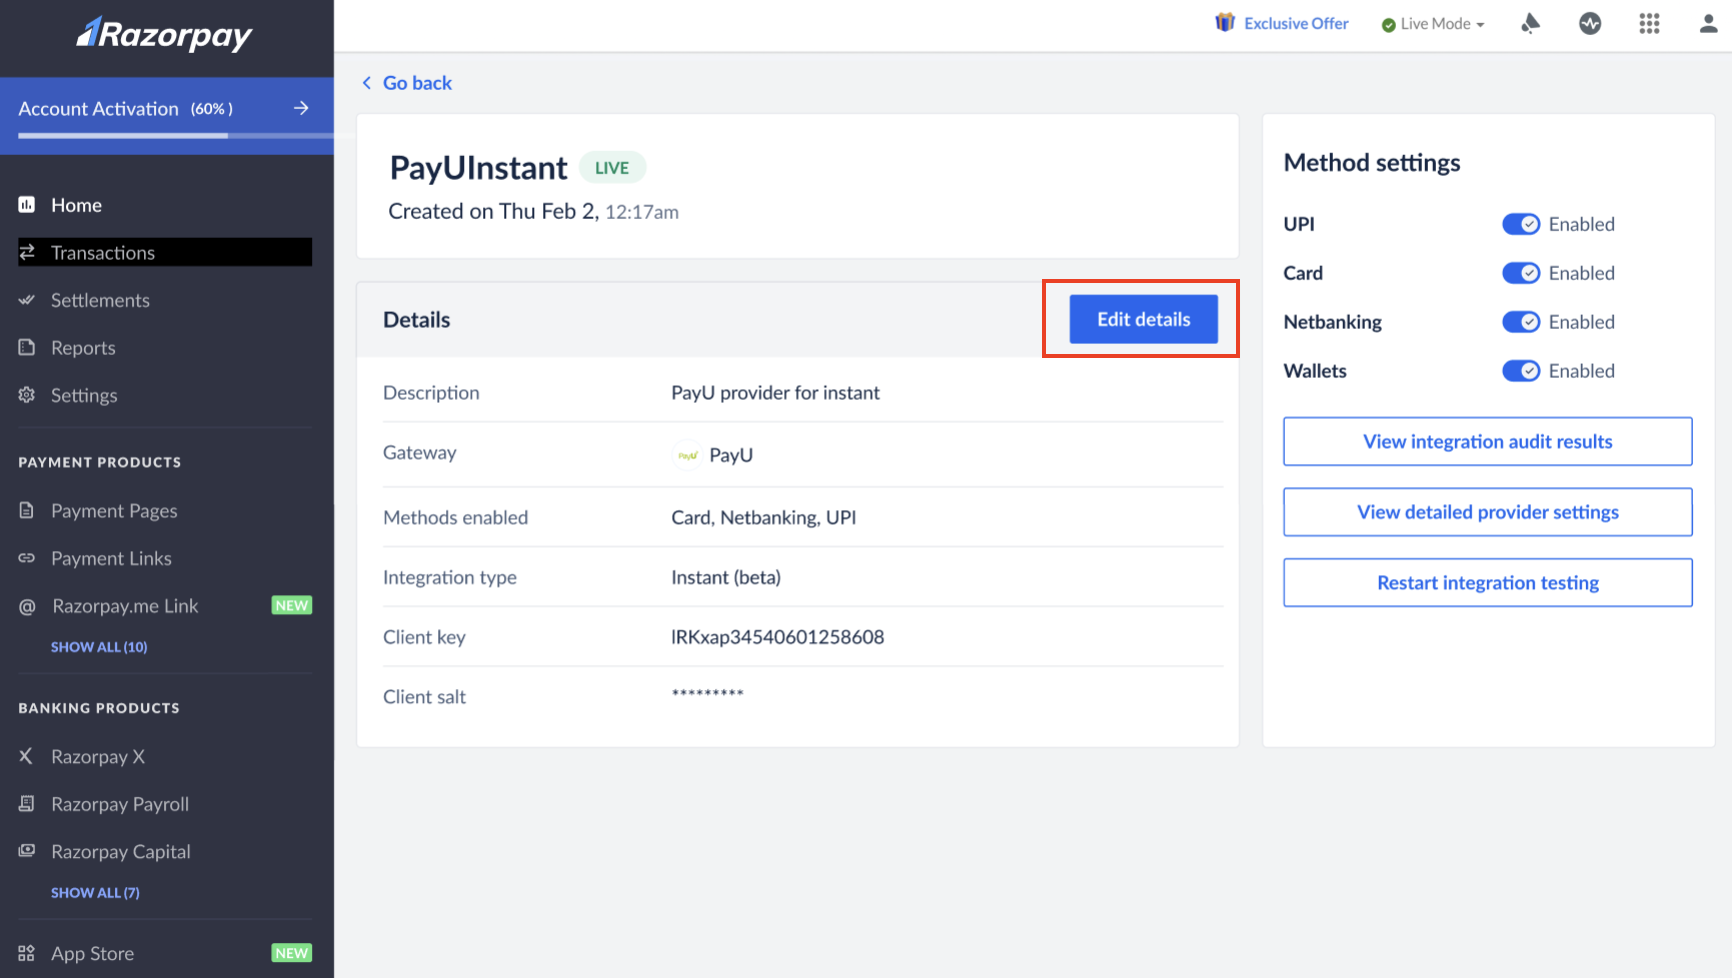 4. For example, click **Edit production details**.
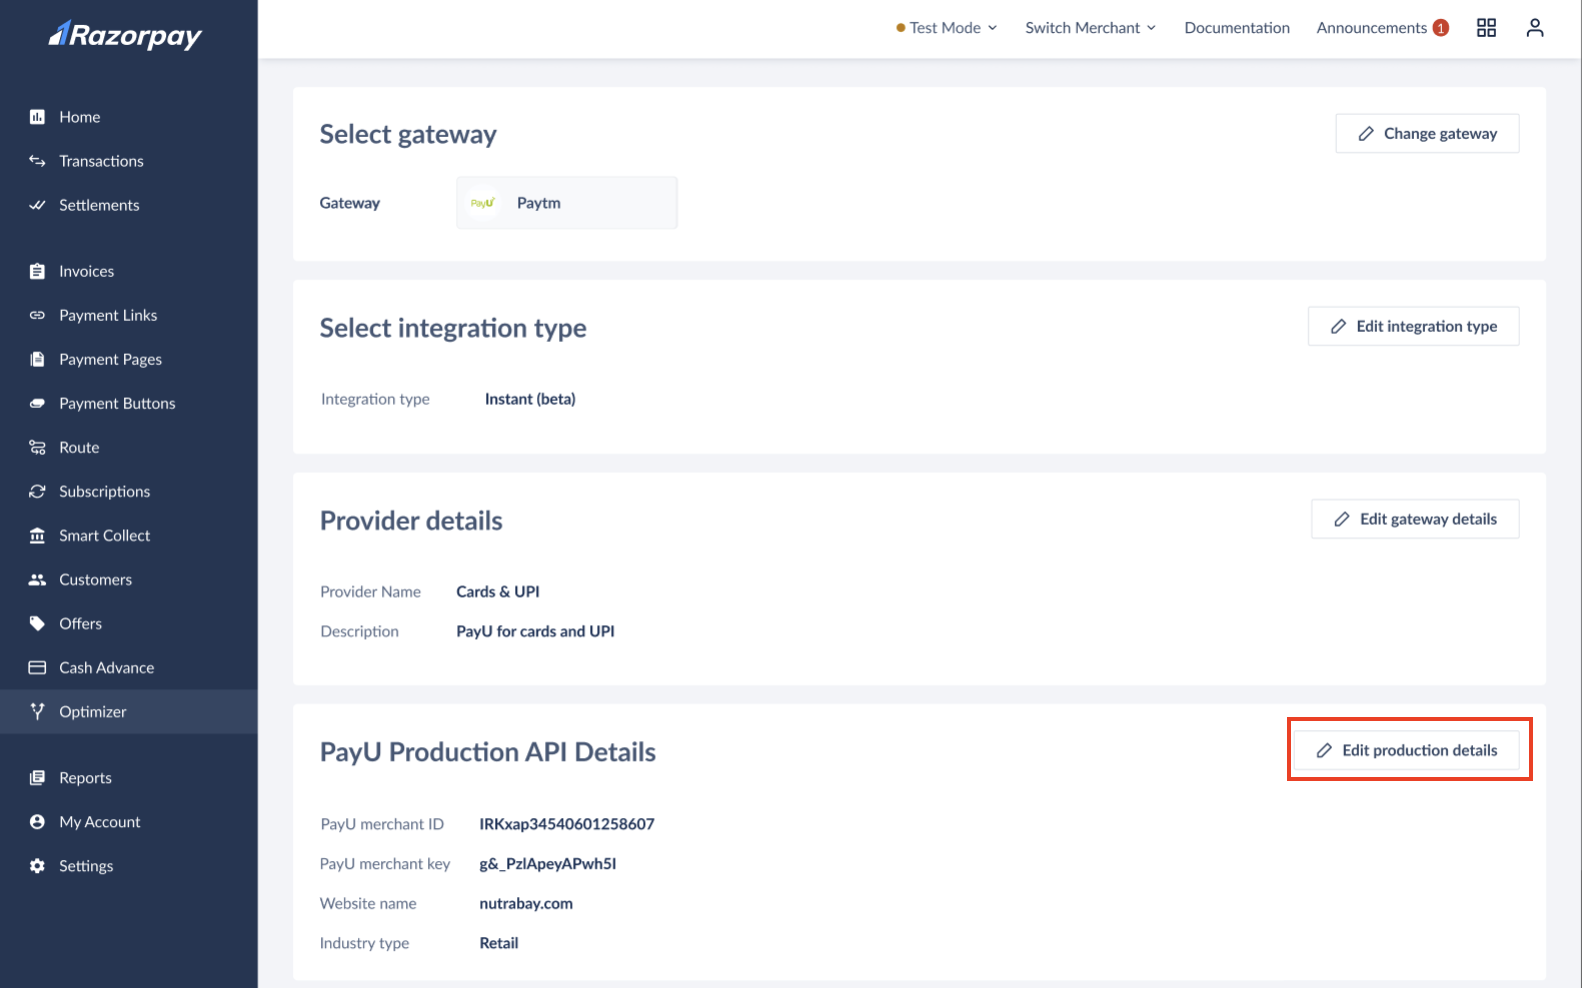 5. Make the required changes and click **Test Credentials**.
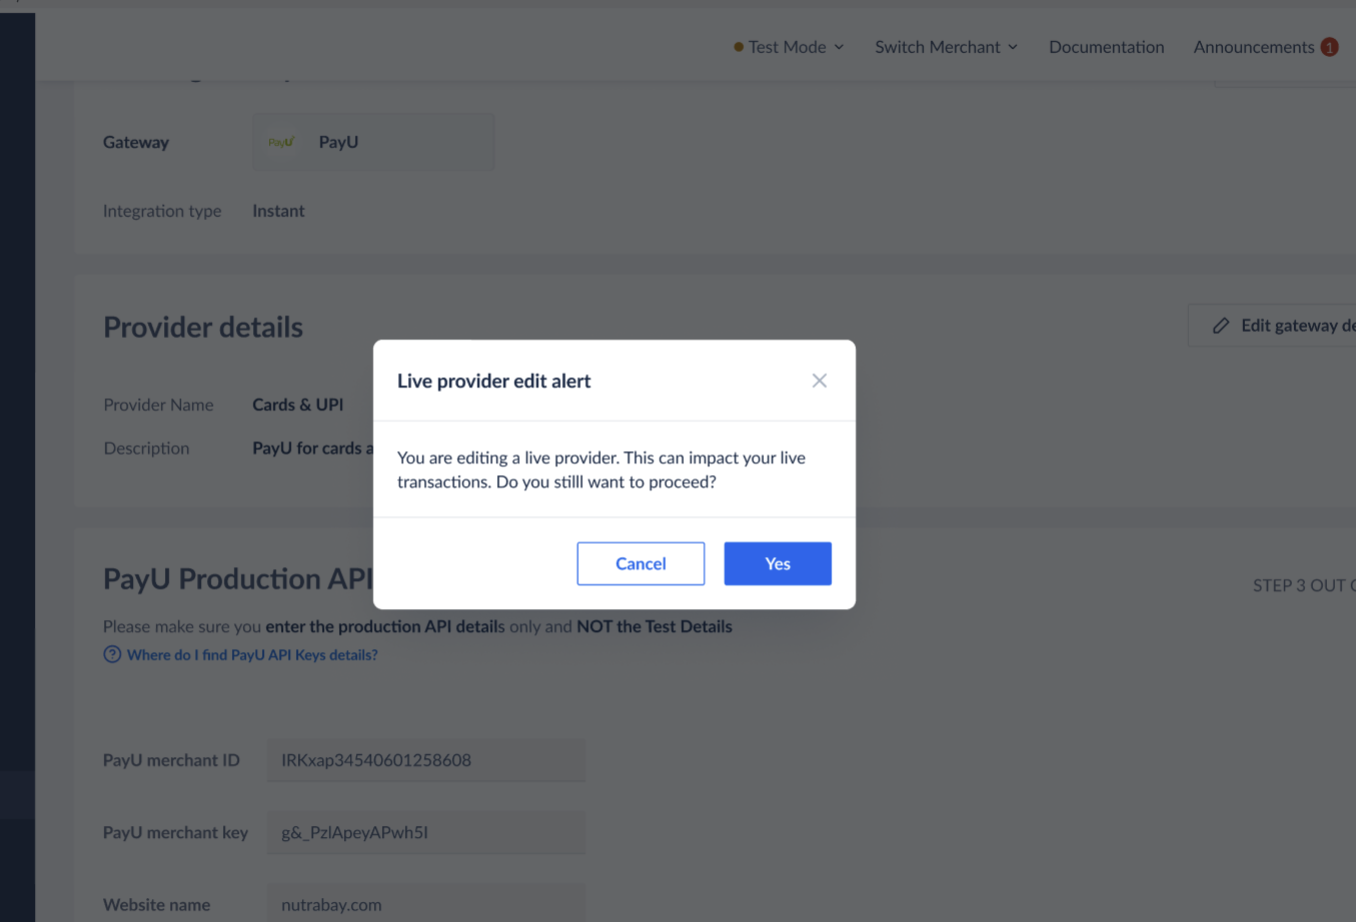
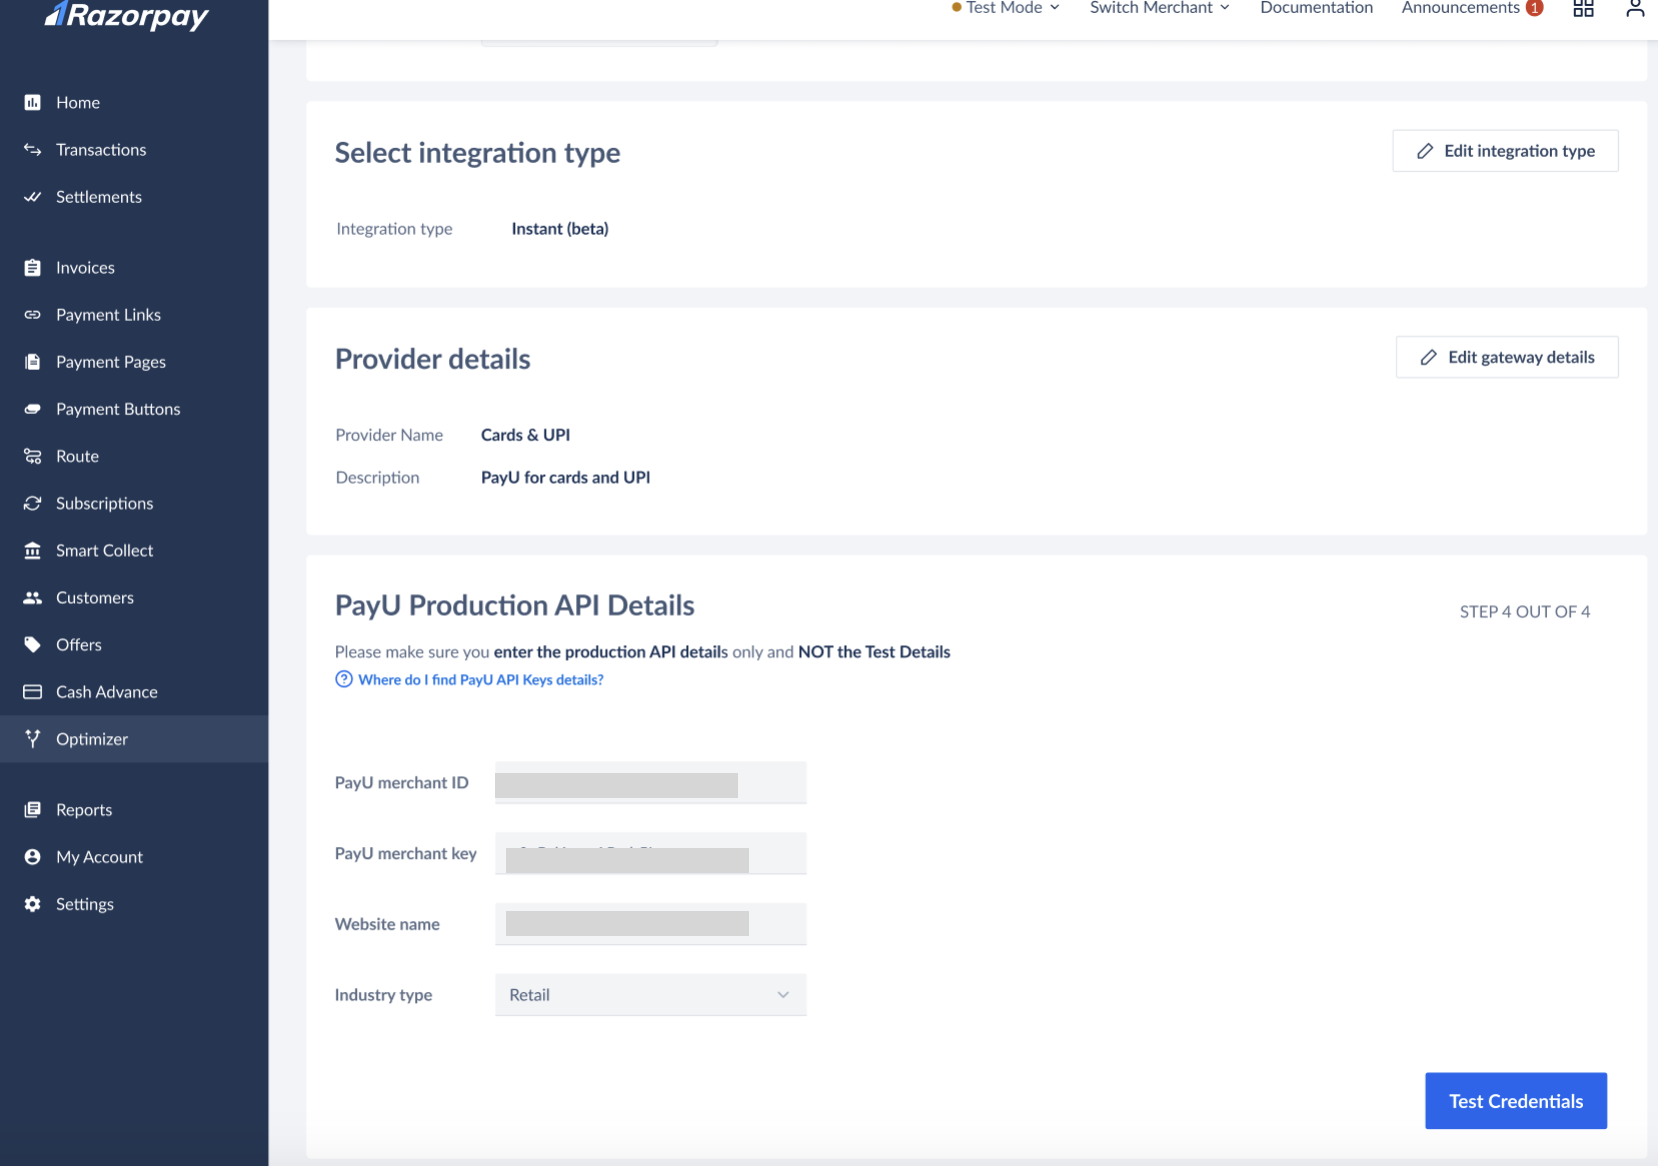 6. A confirmation pop-up appears, click **Yes** to save your changes.