> ## Documentation Index
> Fetch the complete documentation index at: https://razorpay-881012b3.mintlify.site/llms.txt
> Use this file to discover all available pages before exploring further.
# PayU Instant (beta)
> Add PayU as a payment provider using the instant integration mode on Optimizer.
Available in
🇮🇳 India
Go live with your PayU Payment Gateway account instantly using the **Instant** integration mode.
**Watch Out!**
While Optimizer can route payments based on your business logic, the method enablement of each gateway needs to be handled between you and the gateway, or it may lead to failed payments.
* You need an active PayU account with the necessary payment methods activated. Please get in touch with your PayU account manager to enable the missing payment methods if required.
* [Configure the required webhooks](/docs/payments/optimizer/payu-instant#to-configure-a-webhook).
* Generate **Merchant Key** and **Salt** on the [PayU Dashboard](https://onboarding.payu.in/app/account).
1. Log in to the [PayU Dashboard](https://onboarding.payu.in/app/account).
2. Select Payment Gateway under Collect Payments from the menu on the left navigation.
3. Scroll down to Key Salt Details section.
**Handy Tips**
Merchant Key and Salt values are generated automatically for the first time.
## Integration Requirements
Before you go live with PayU Instant (beta) on Optimizer, configure the webhooks:
1. Log in to the [PayU Dashboard](https://onboarding.payu.in/app/account).
2. Navigate to Settings → Webhook.
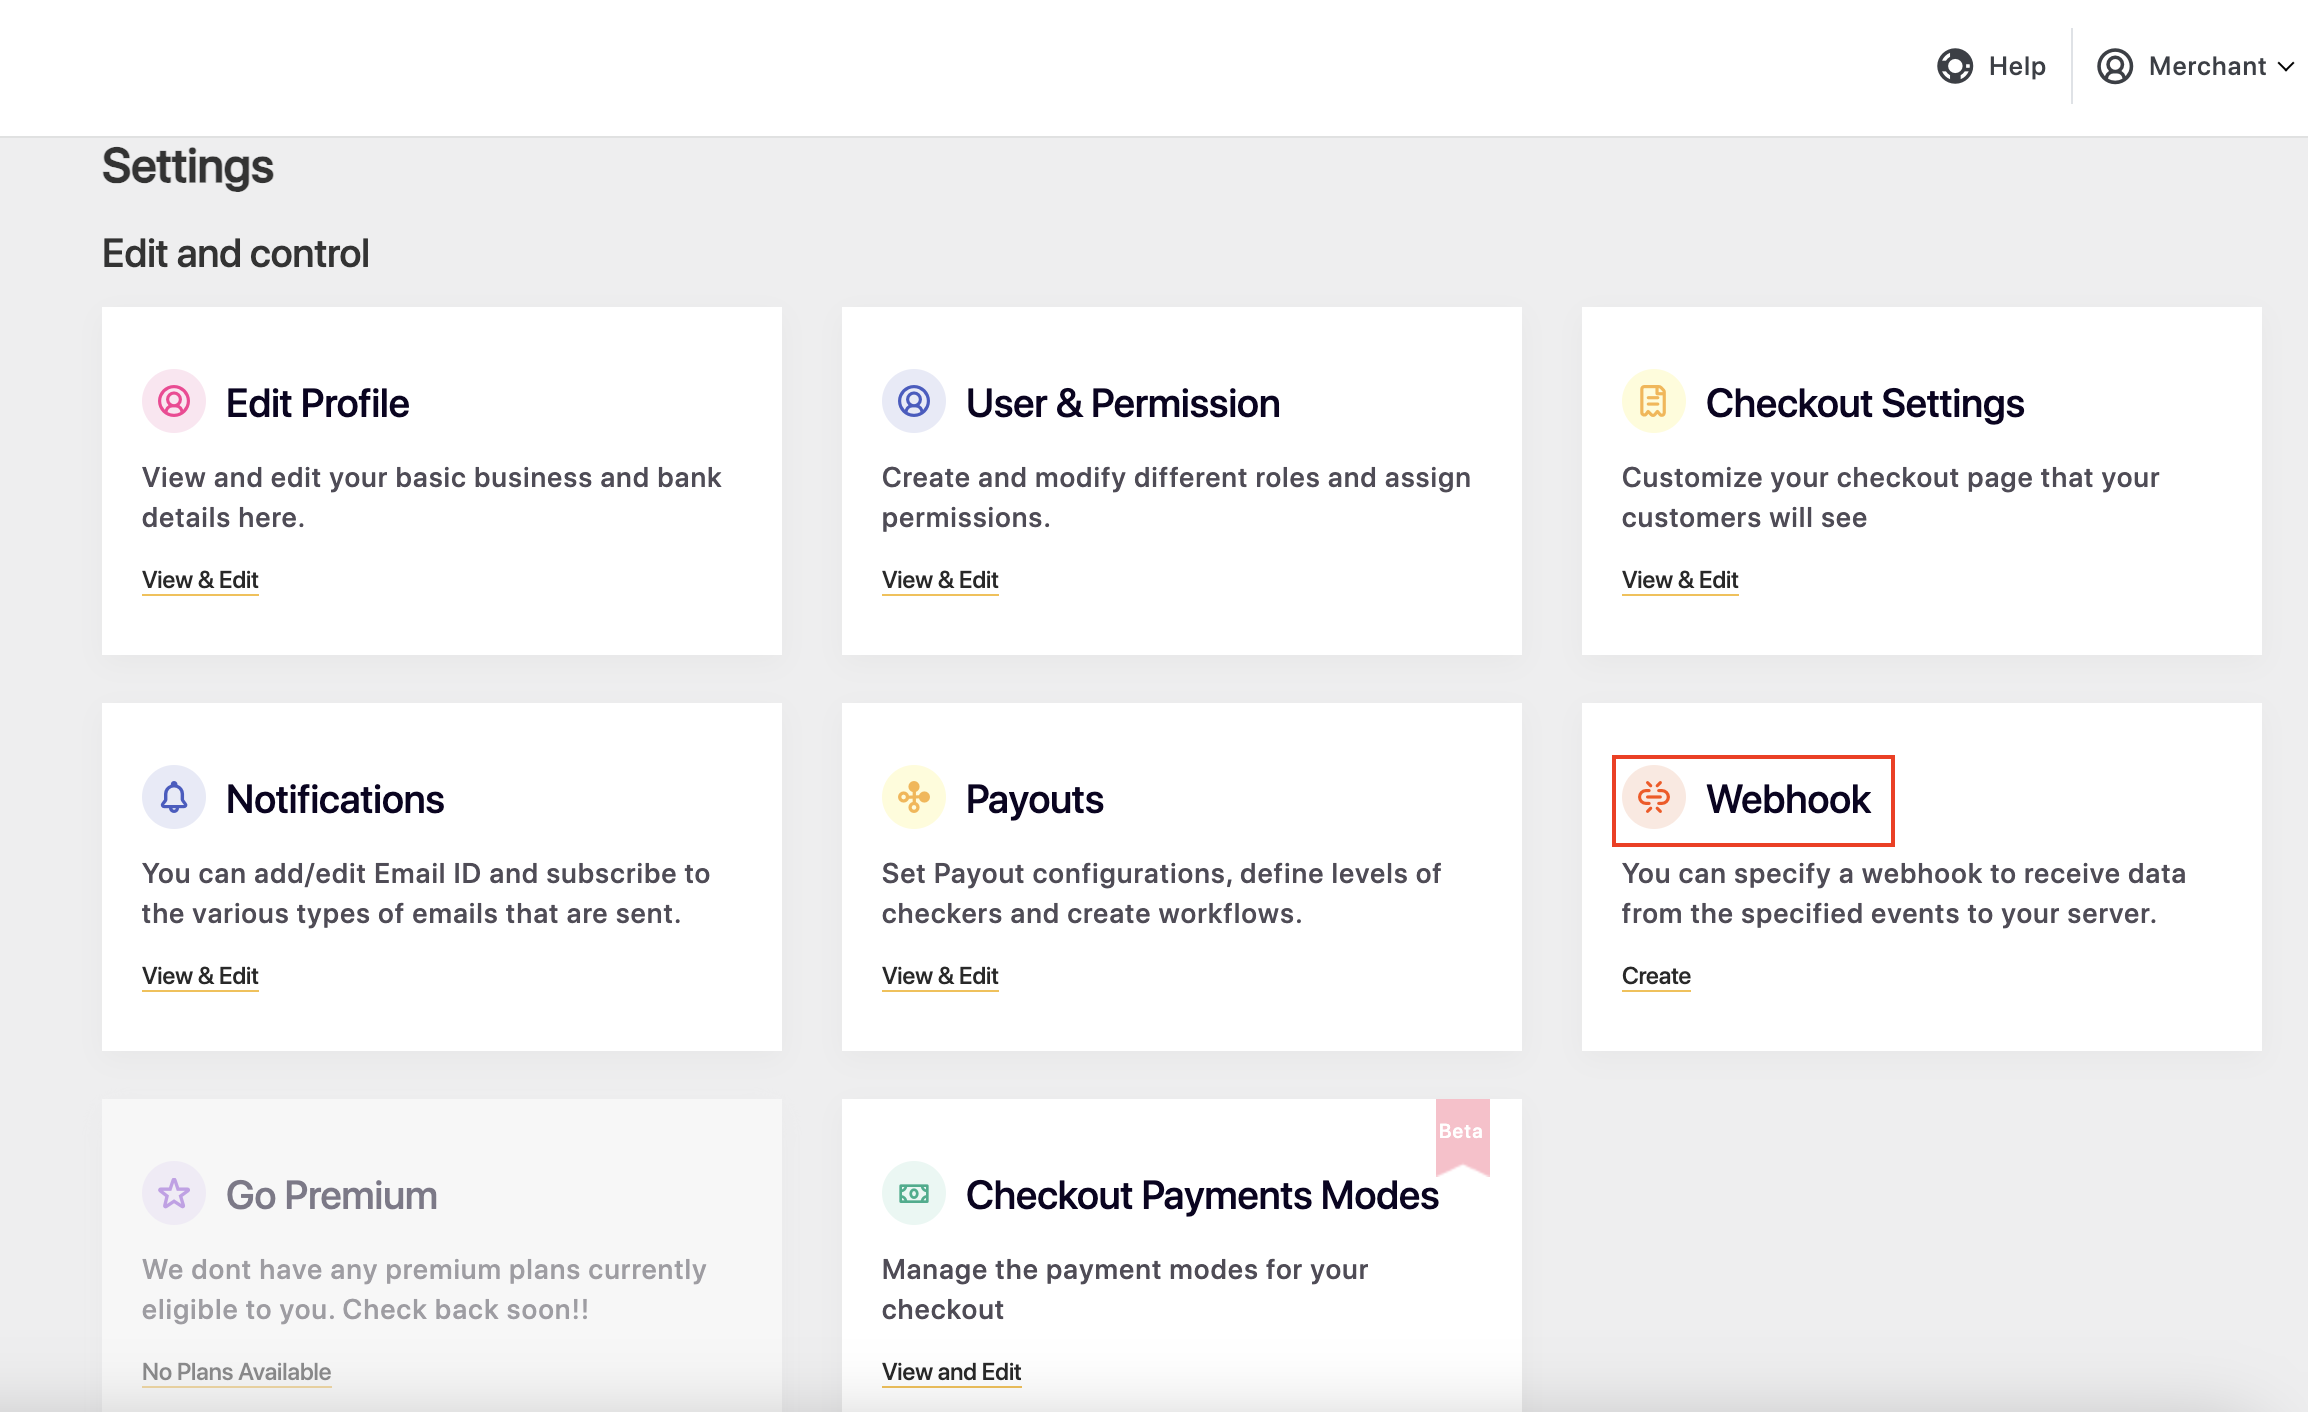 3. Click **Create Webhook** on the top-right corner of the Create Webhooks page.
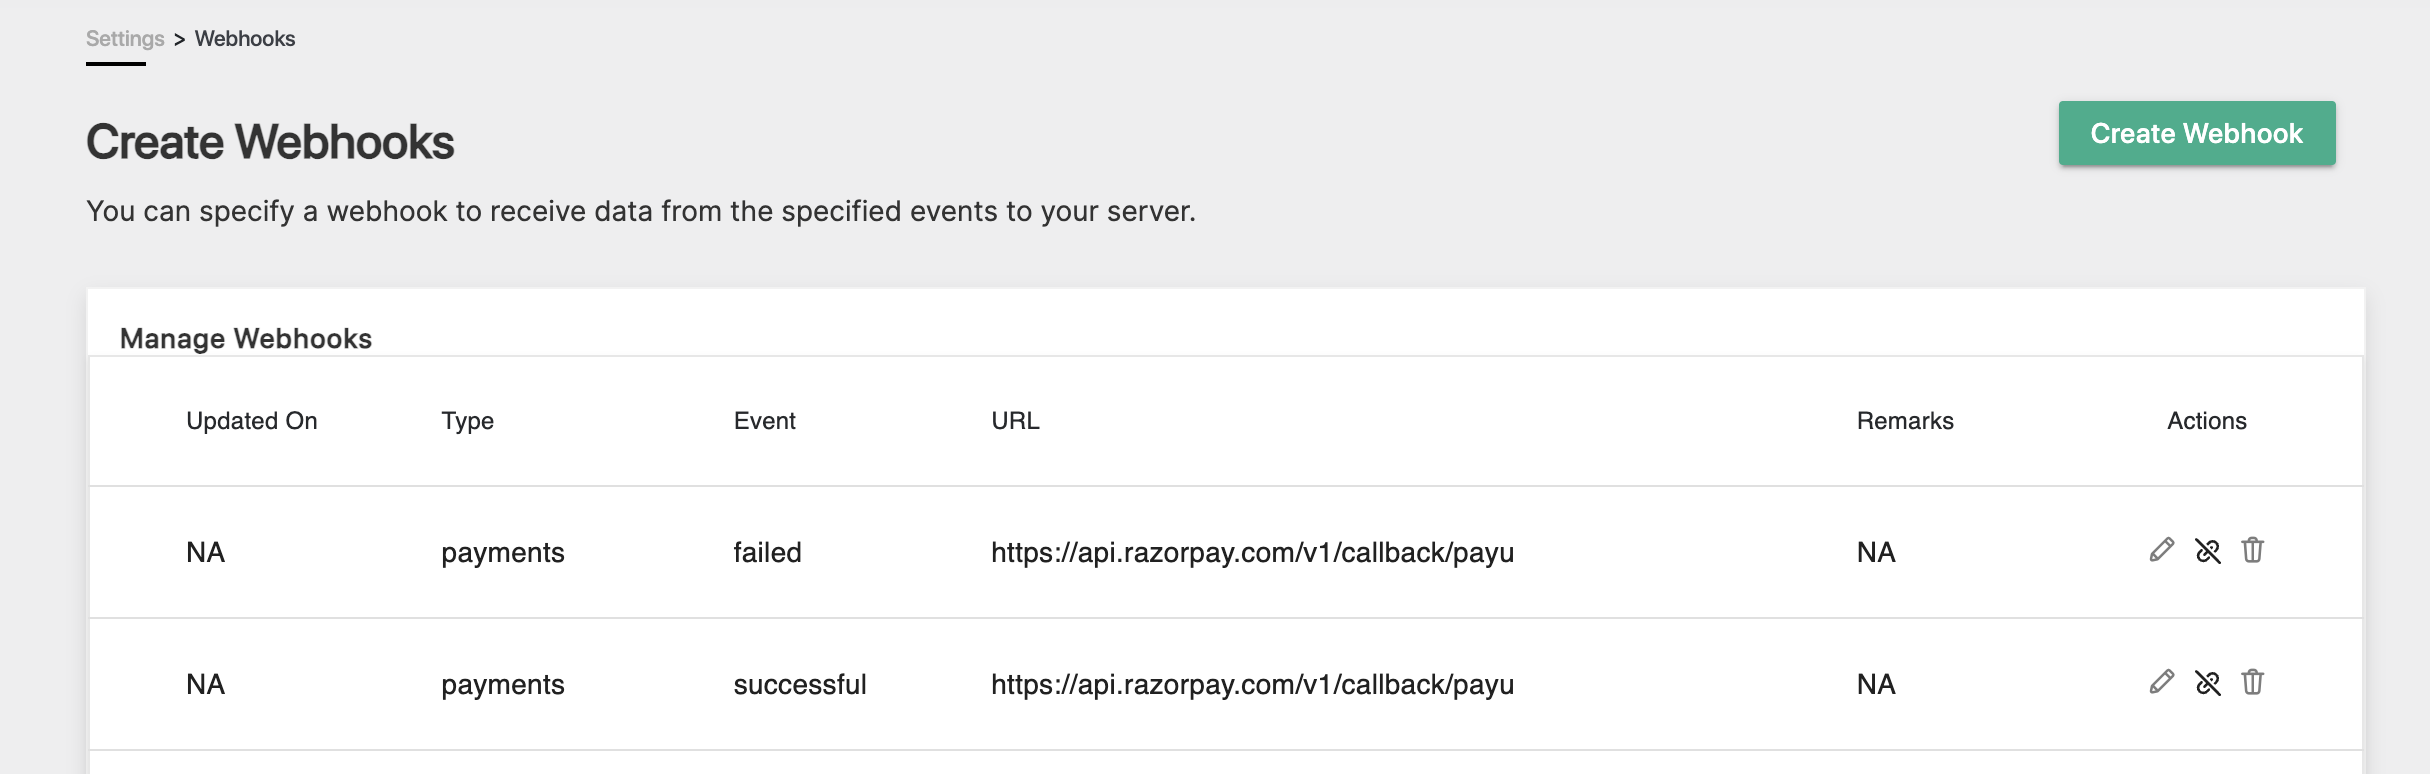 4. Select the webhook type (Payments or Payouts) and Event type.
5. Enter the webhook URL in the Webhook URL field and click **Create**.
**Handy Tips**
Make sure you configure the webhooks for both successful and failed payment events.
## Add PayU as a Payment Provider
1. Log in to your Razorpay Dashboard.
2. Go to the **PAYMENT PRODUCTS** section and click **Optimizer**.
3. In the top-right section, click **Add Provider**.
4. Select the webhook type (Payments or Payouts) and Event type.
5. Enter the webhook URL in the Webhook URL field and click **Create**.
**Handy Tips**
Make sure you configure the webhooks for both successful and failed payment events.
## Add PayU as a Payment Provider
1. Log in to your Razorpay Dashboard.
2. Go to the **PAYMENT PRODUCTS** section and click **Optimizer**.
3. In the top-right section, click **Add Provider**.
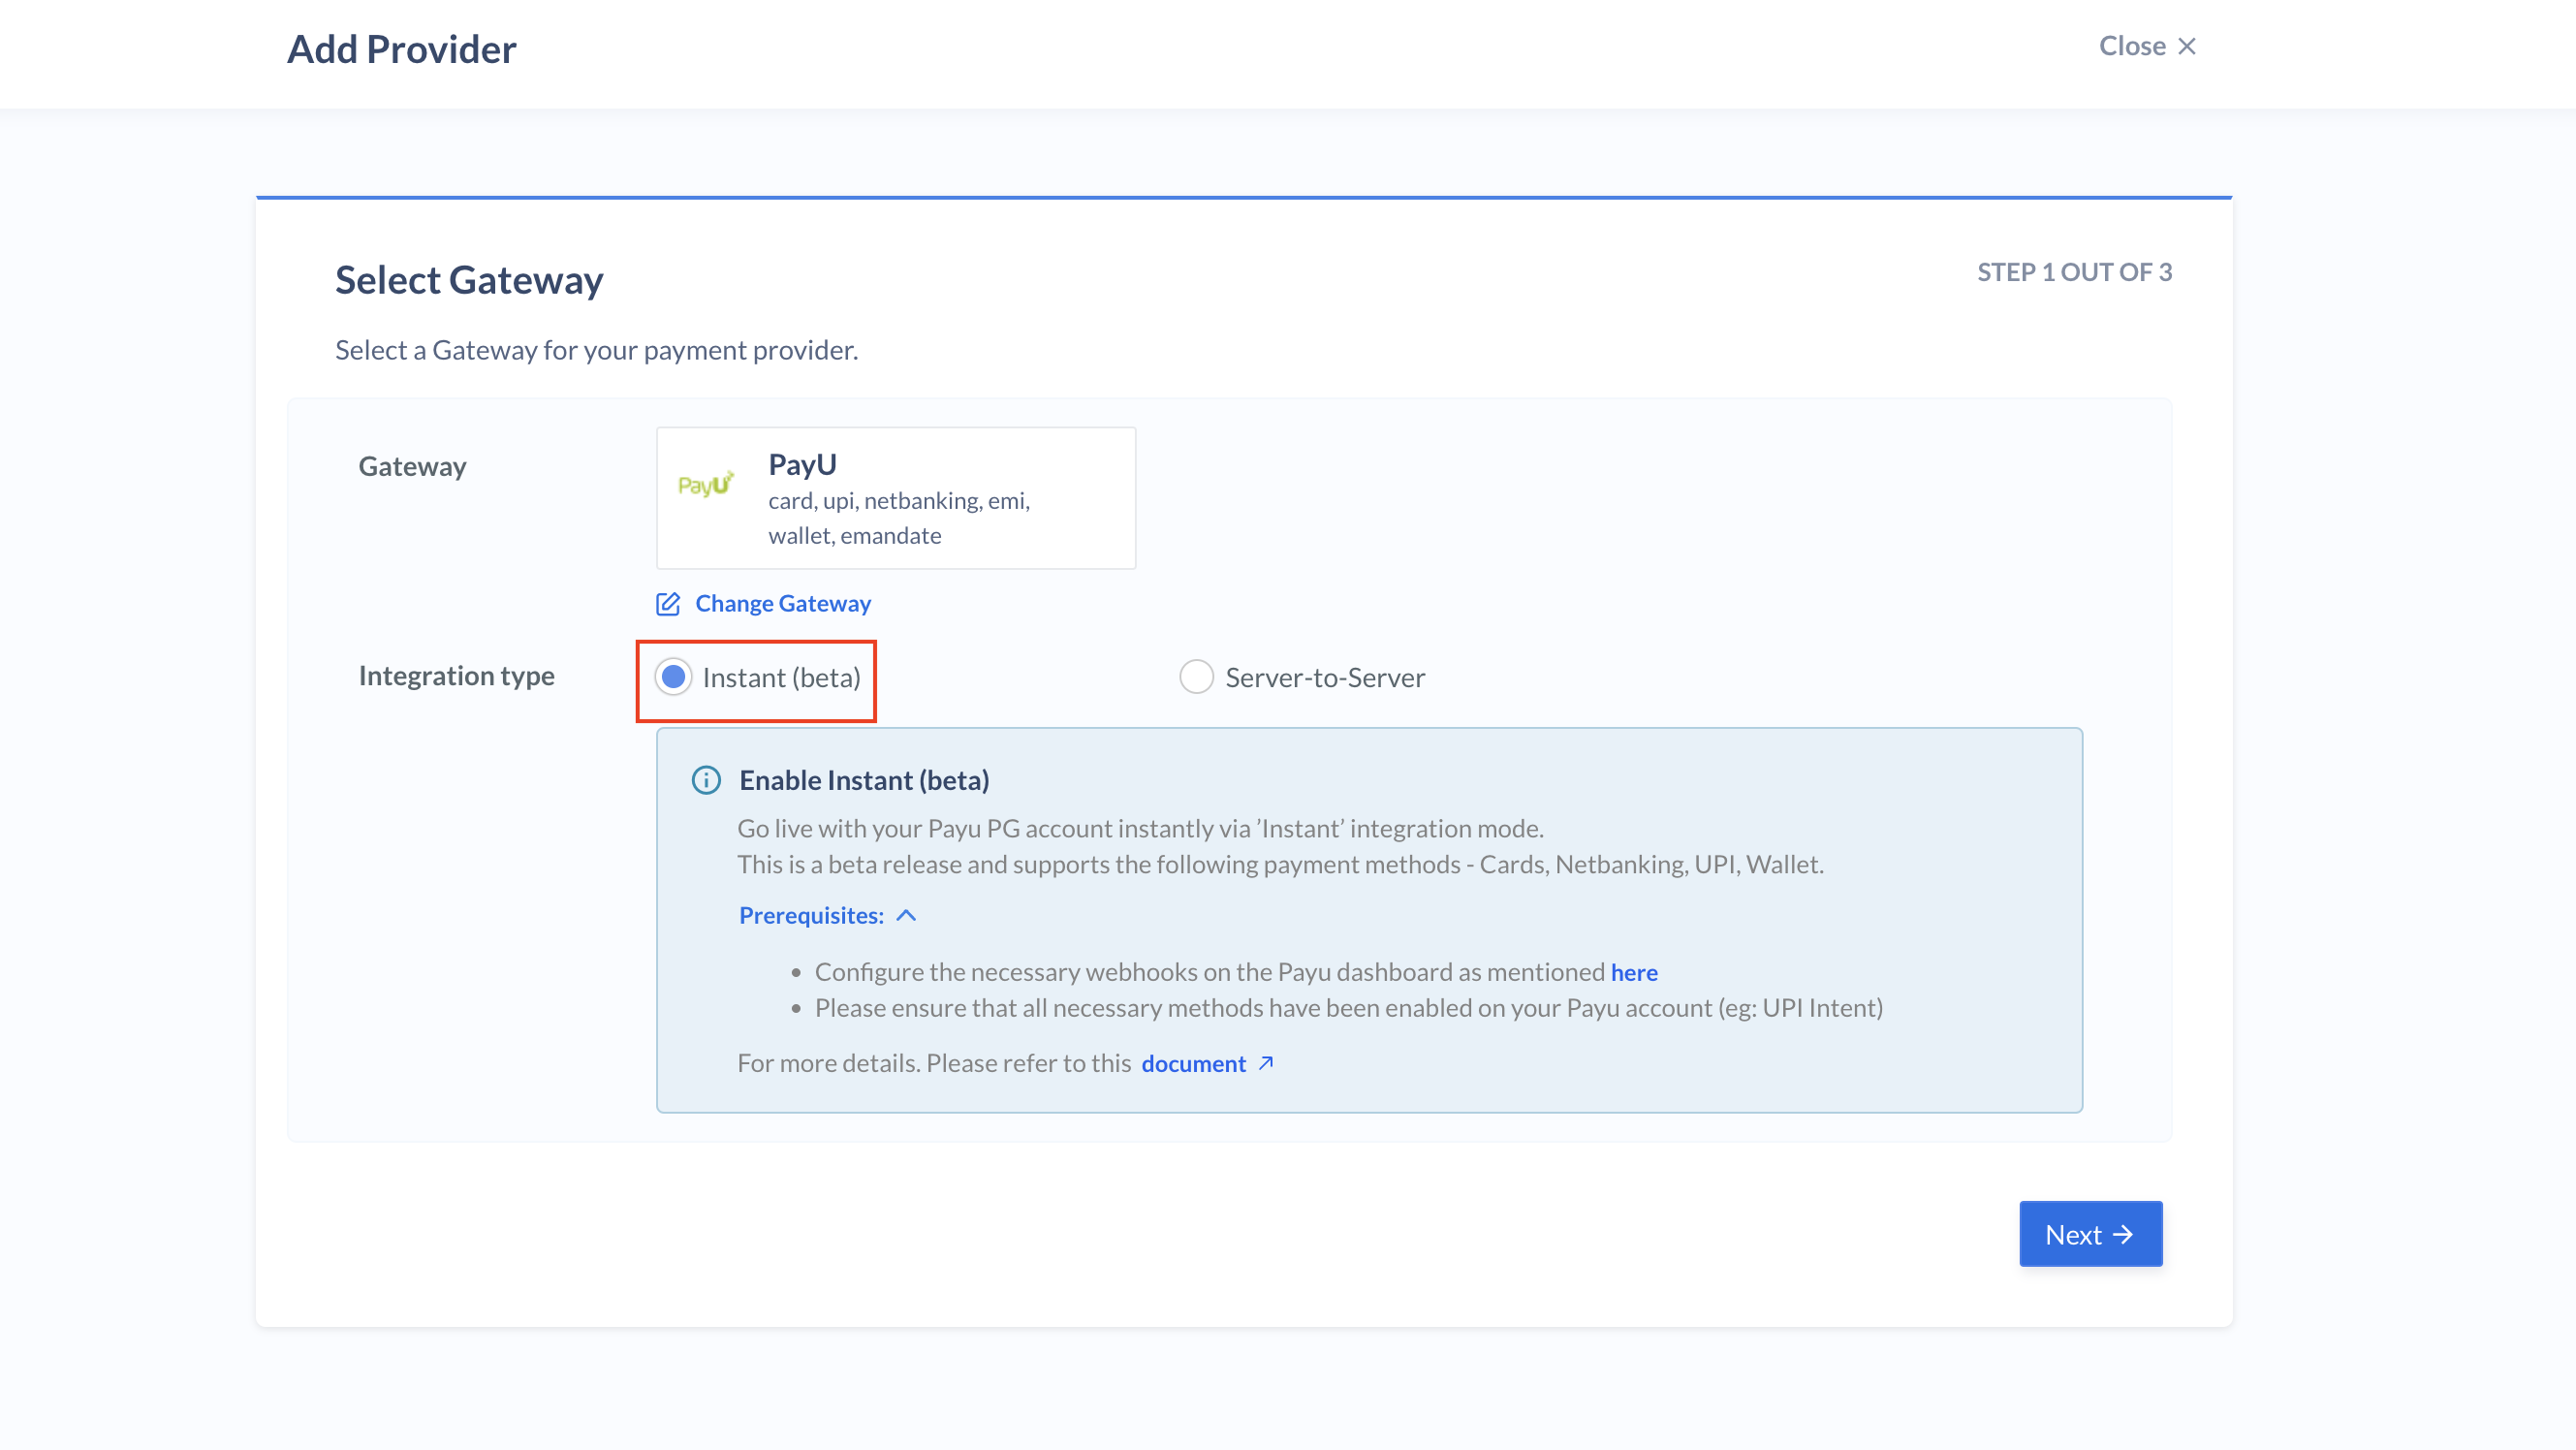
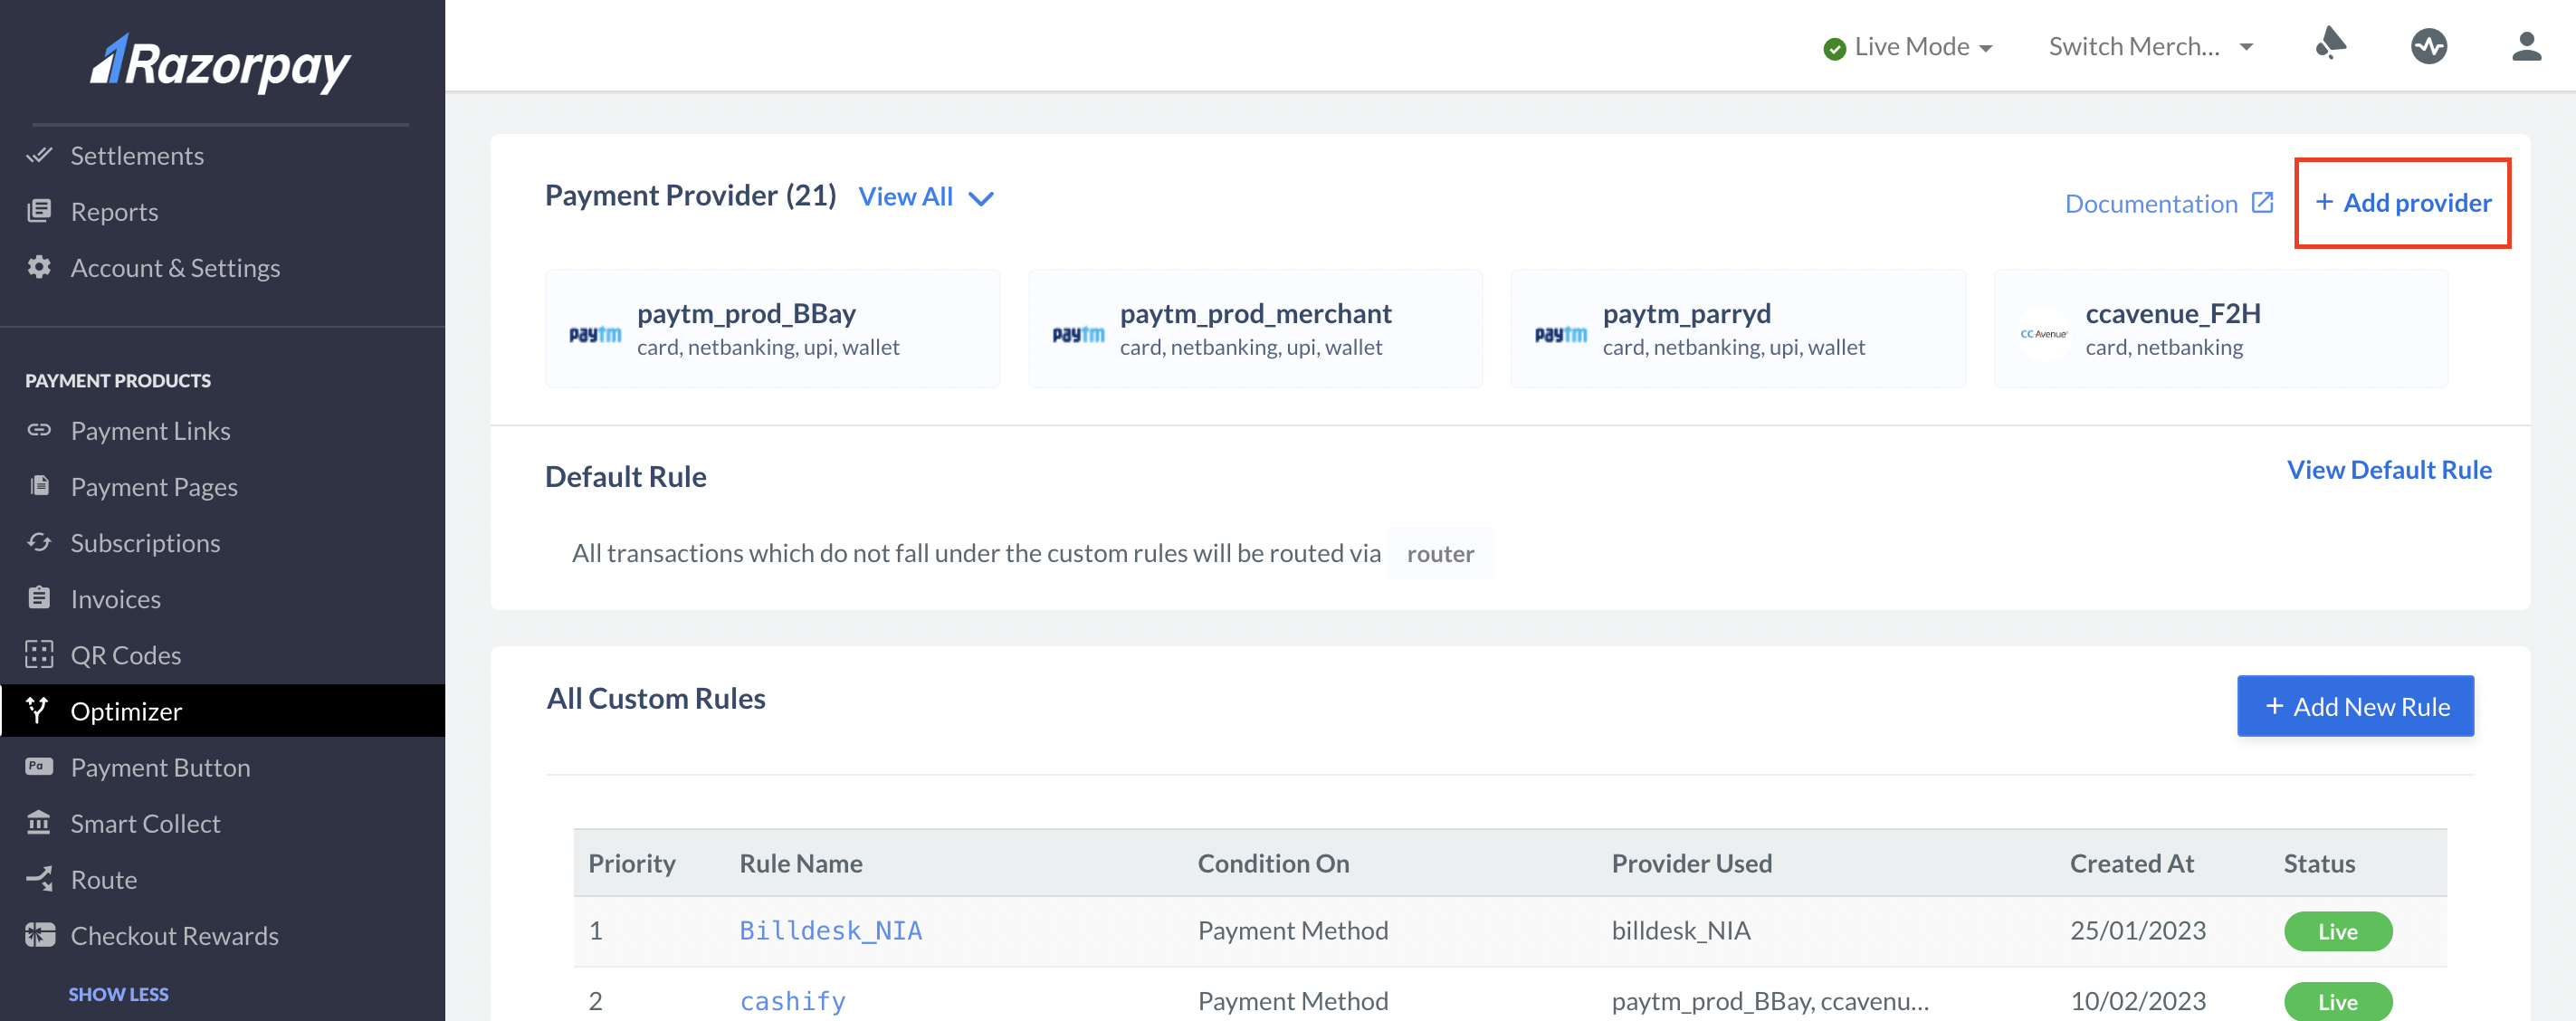 4. Select **PayU** and **Instant (beta)** in the list of gateways available and click **Next**.
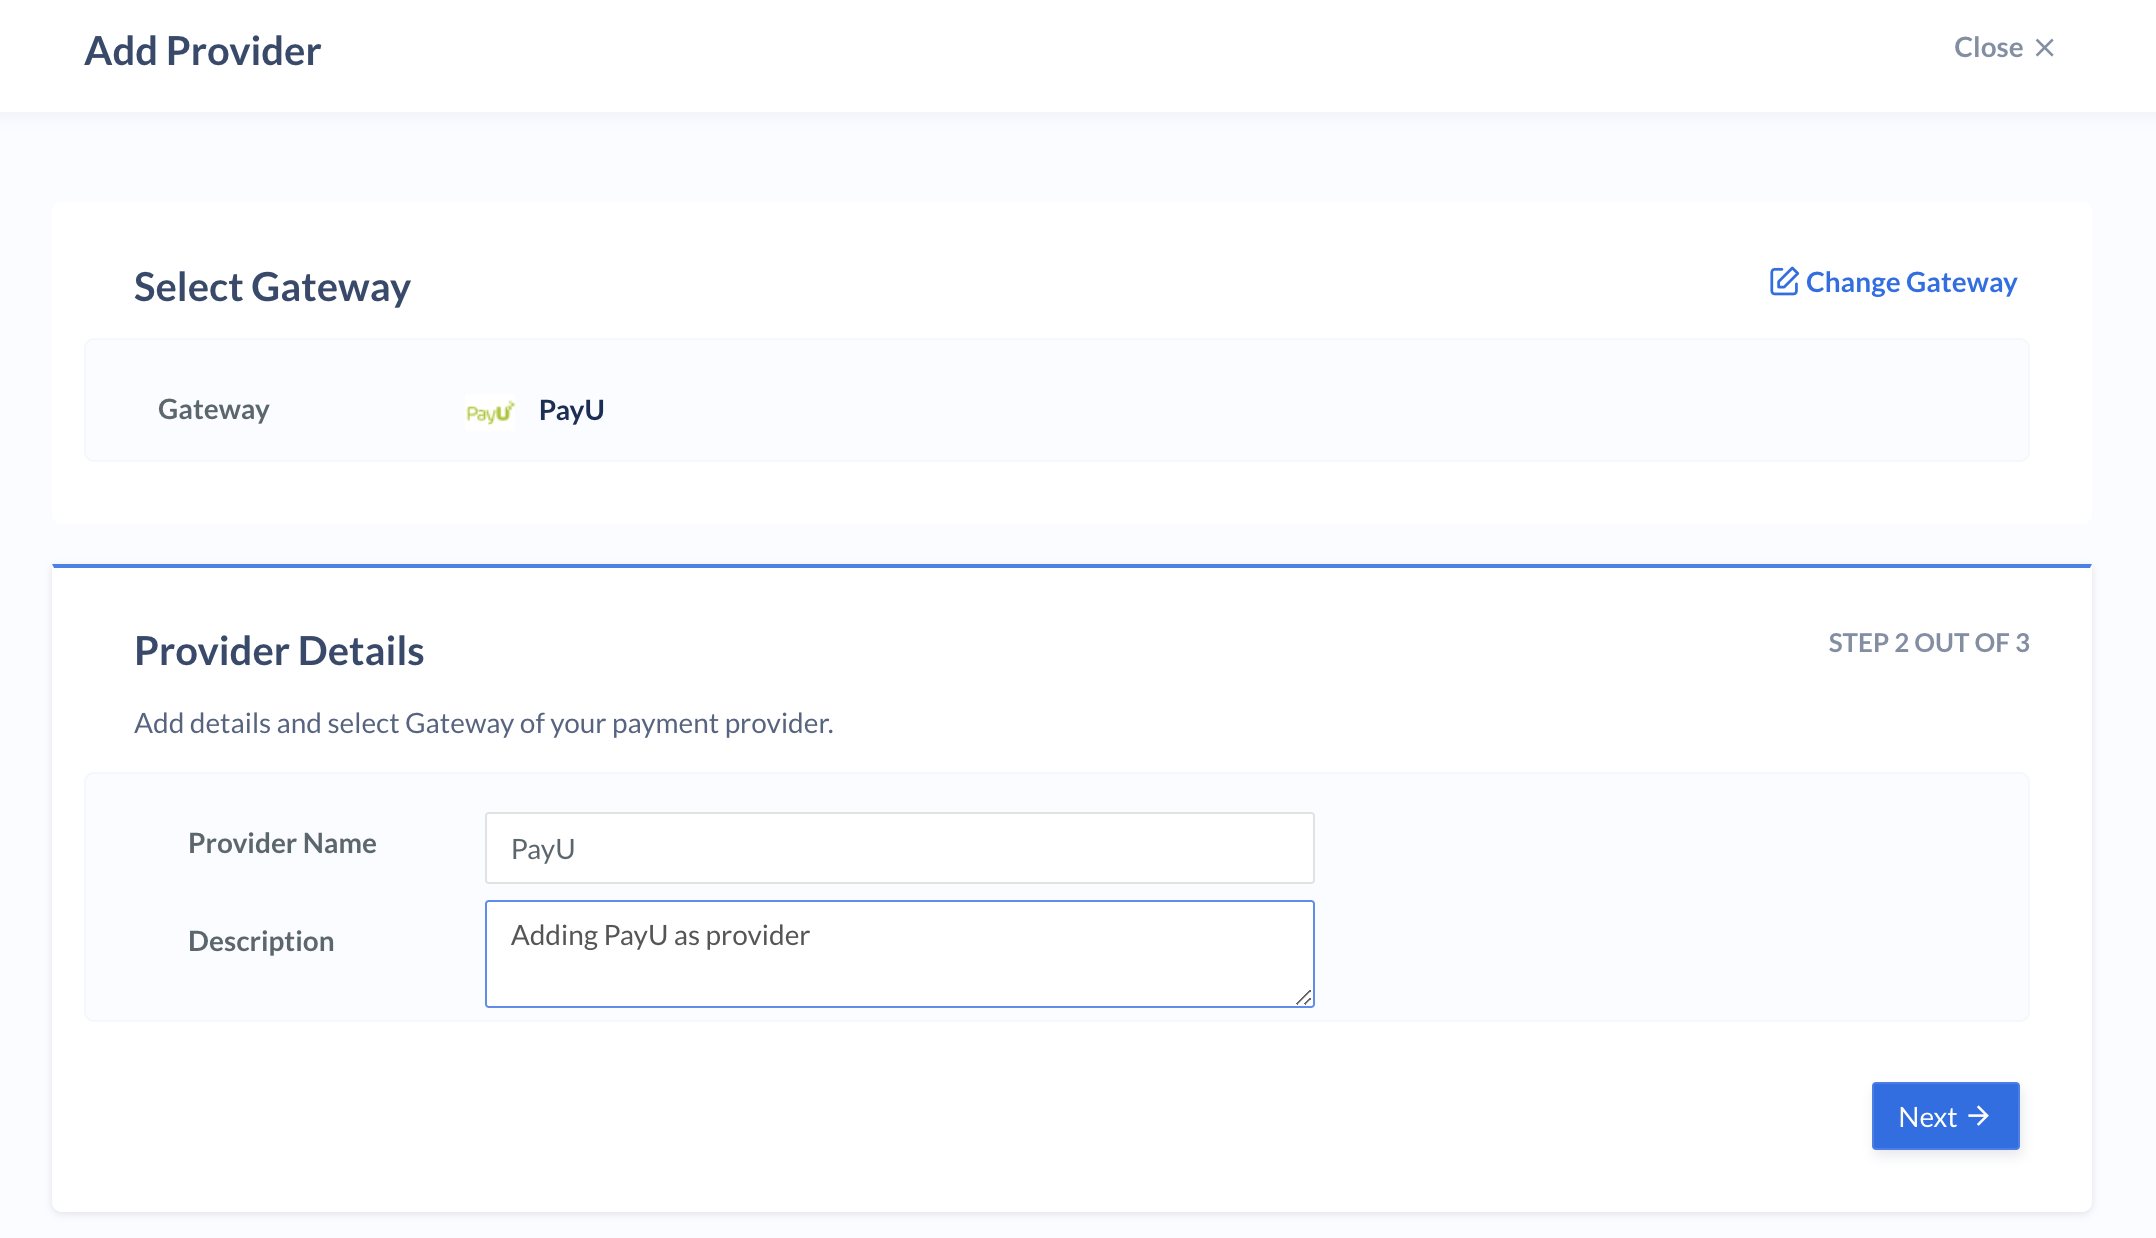
 5. Enter the provider name and description and click **Next**.
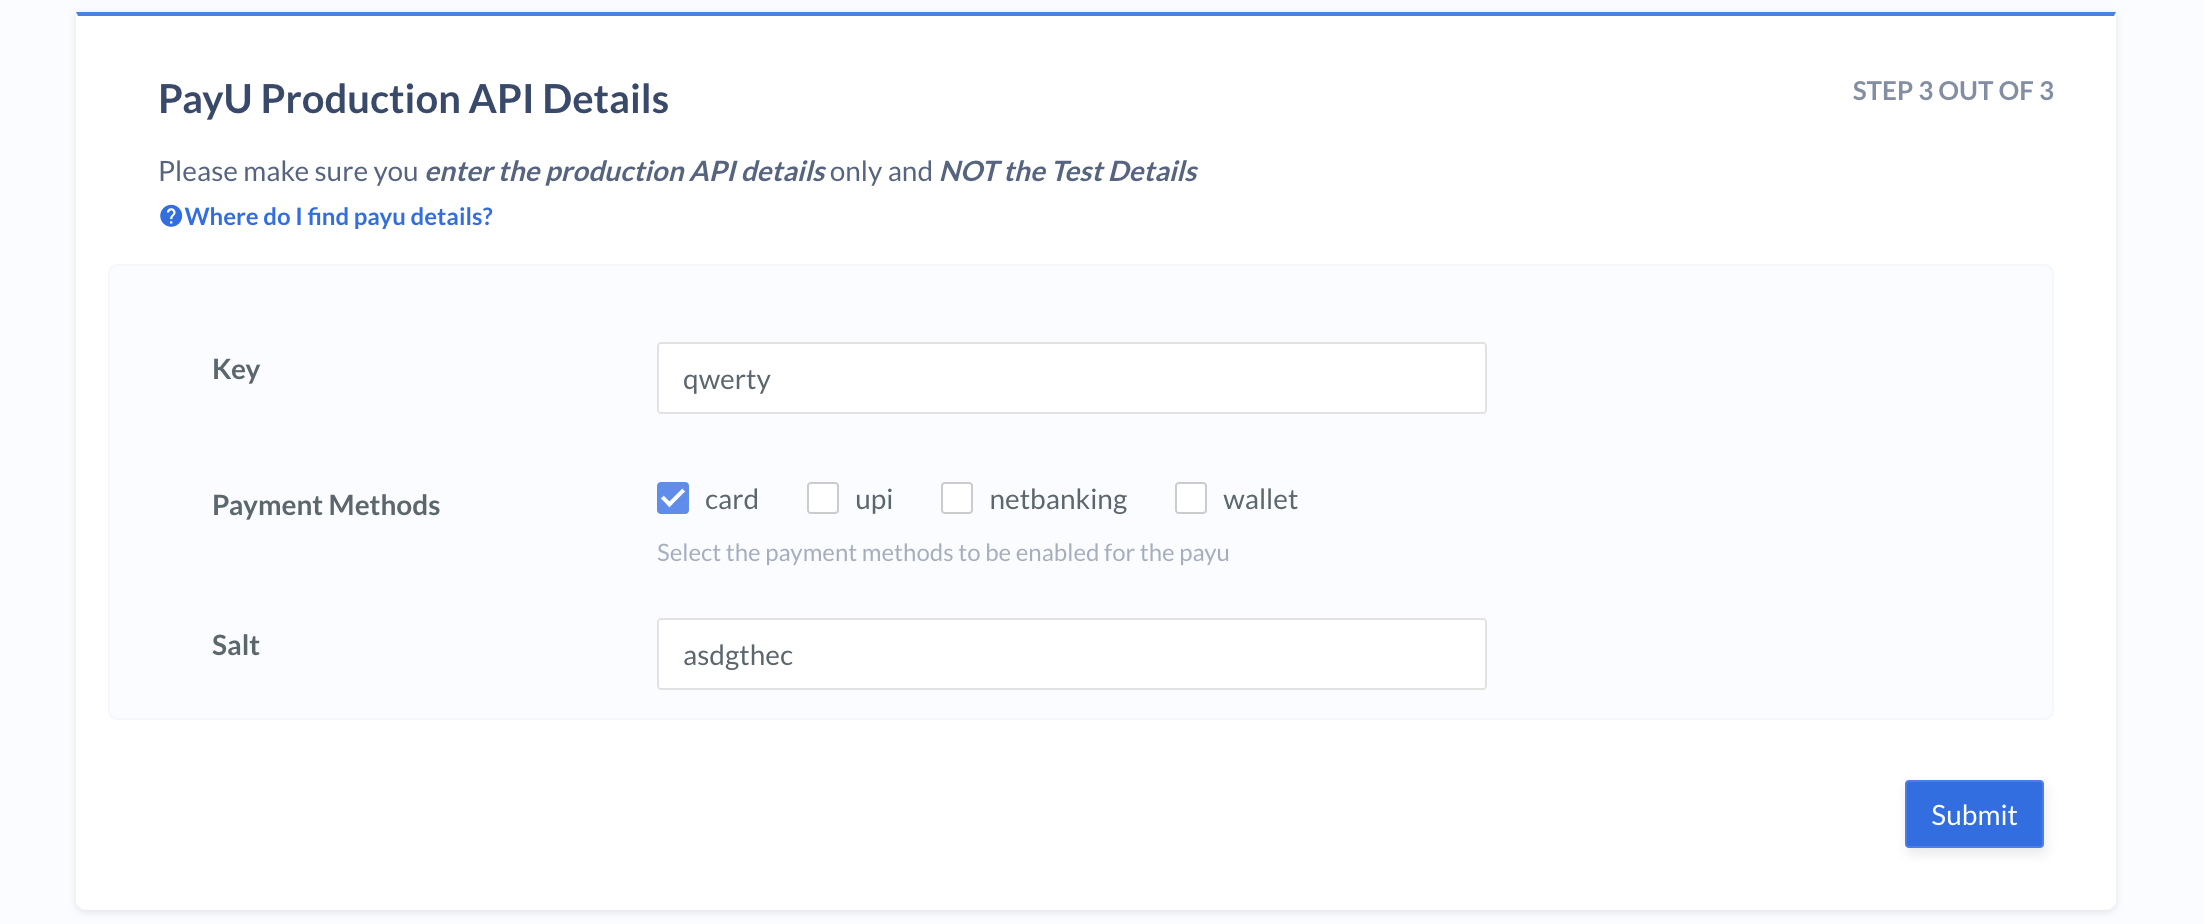
 6. Enter your PayU key and Salt key.
7. Select the payment methods you want to enable for PayU and click **Submit**.
6. Enter your PayU key and Salt key.
7. Select the payment methods you want to enable for PayU and click **Submit**.
 You have successfully added **PayU Instant (beta)** as a payment provider on Optimizer.
## Supported Payment Methods
| Payment Methods | Availability |
| ----------------------------------------------- | ------------ |
| Netbanking | Live |
| Cards | Live |
| UPI | Live |
| Wallet | Live |
| EMI | Coming Soon |
| Settlements | Live |
| Refunds | Live |
| Emandate | Coming Soon |
| [Sodexo](/docs/payments/payment-methods/sodexo) | Coming Soon |
## Send Receipt/Order ID to External Gateway
You might be generating a unique Order ID or Receipt for every order which can be passed to PayU via[Orders API](/docs/api/orders#orders-api).
To make your order id to be visible on the PayU Dashboard:
1. In Razorpay's Orders API, use the `receipt` parameter to send your unique Order ID or Receipt.
2. Razorpay passes this value to PayU in the `udf1` parameter.
3. Write to your PayU Relationship Manager to show the parameter `udf1` in the Dashboard and reports as per your use case.
## Best Practices
Before routing all traffic or some traffic to a new gateway via Optimizer, the following best practices are recommended:
All rules configured on live or test mode on the Razorpay Dashboard will reflect on live mode. However, credentials added on test mode will not be automatically replicated in live mode.
You can reach out to Razorpay for basic sanity testing of the integration. Razorpay will try a test payment of small value and ensure that the credentials are correct.
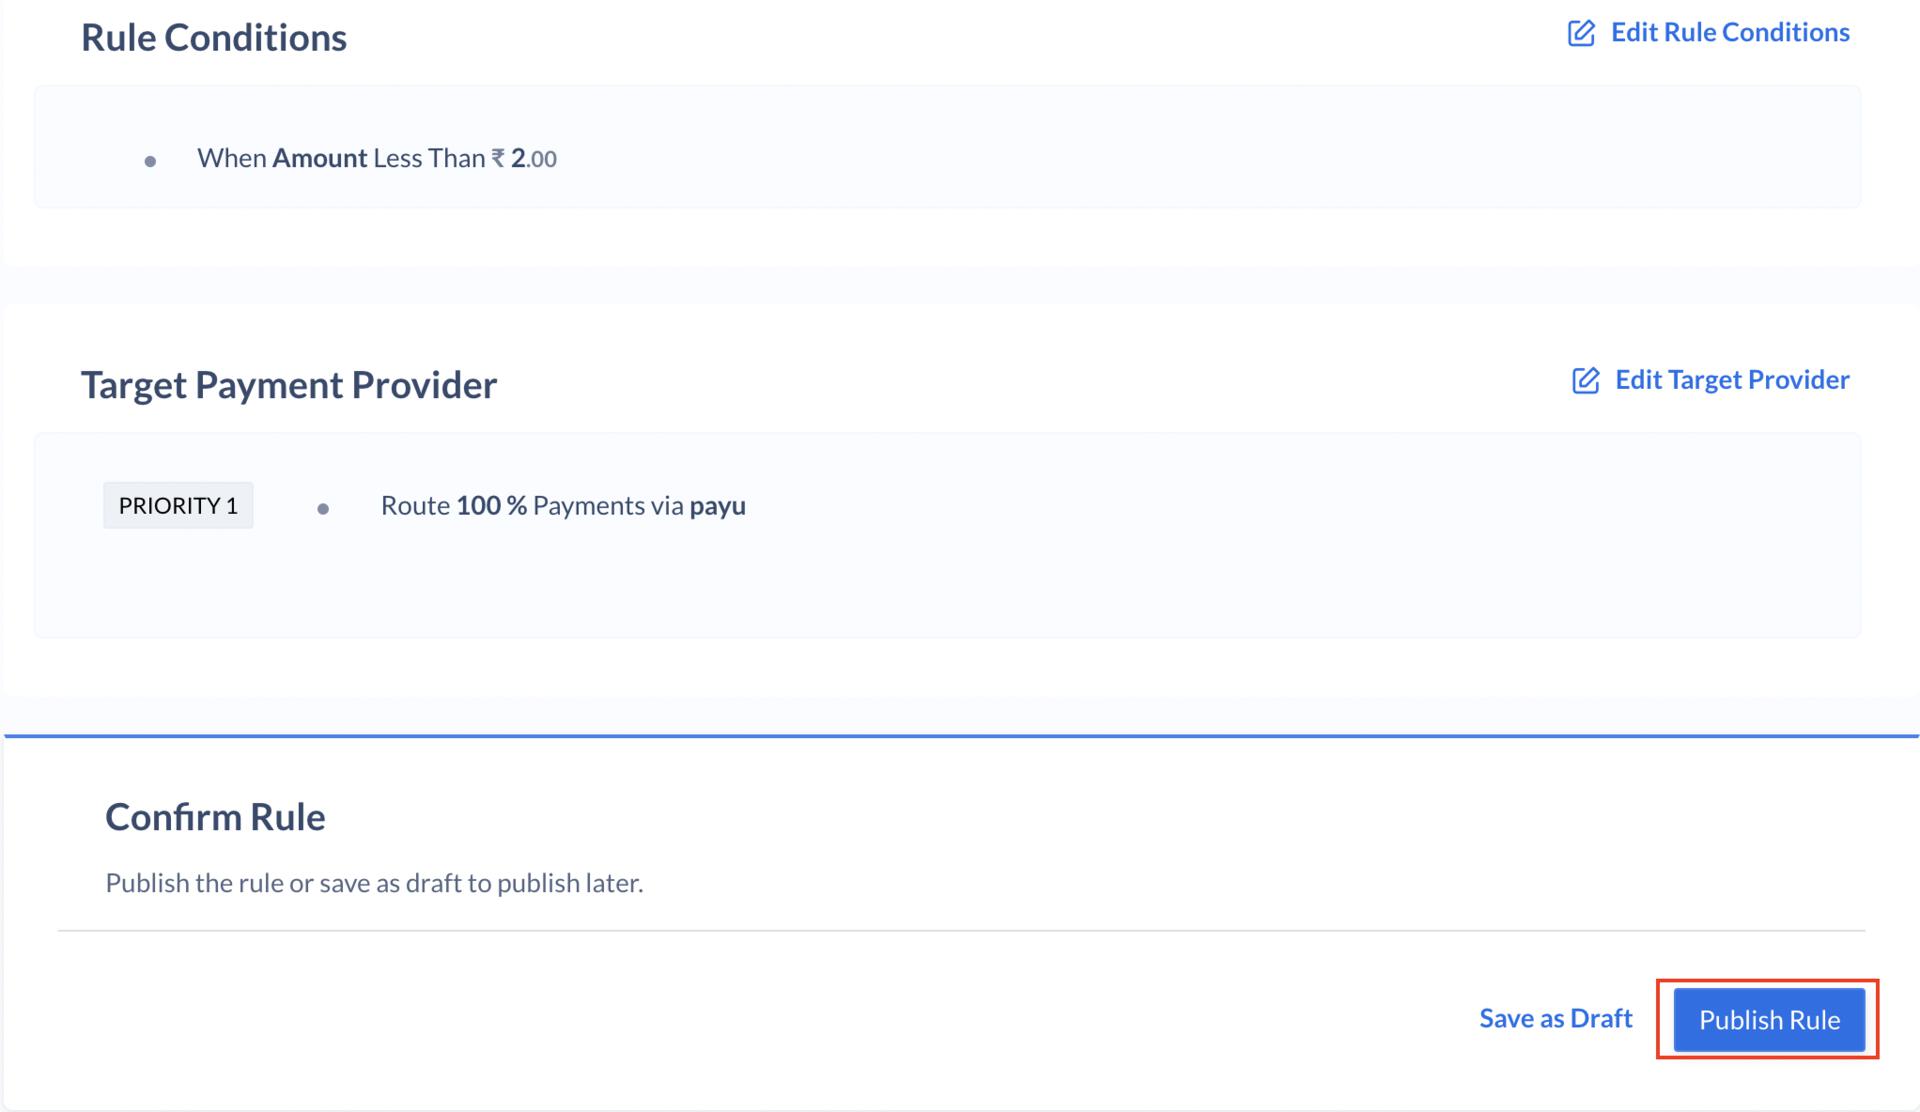
We recommend configuring a rule on live mode to route payments lesser than a set value (for example, ₹2) to the PayU gateway. This helps to test on production whether small value payments are being routed to PayU and working successfully, thus helping to avoid any direct impact on production traffic.
To configure a rule in live mode:
1. Log in to your Razorpay Dashboard.
2. In the left navigation, click **Optimizer**.
3. Click **+Add Rule** and enter the **Rule name** and **Description**.
4. Click **Next** and enter the following rule:
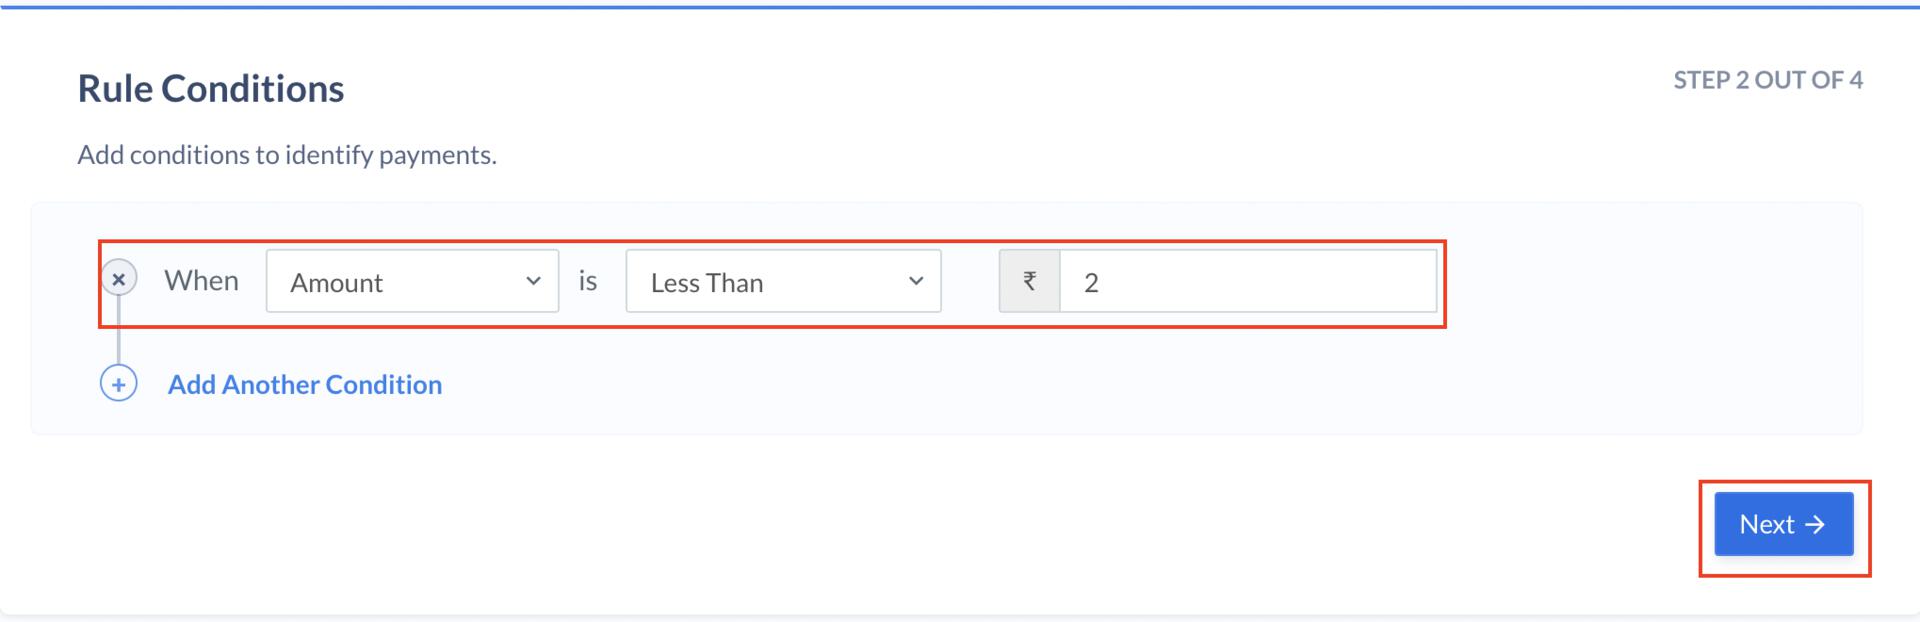
* In **Parameter** field, select **Amount (In Rupees)**.
* In **Select Connection** field, select **Less Than**.
* In **Enter Amount** field, enter the value 2 and click **Next**.
You have successfully added **PayU Instant (beta)** as a payment provider on Optimizer.
## Supported Payment Methods
| Payment Methods | Availability |
| ----------------------------------------------- | ------------ |
| Netbanking | Live |
| Cards | Live |
| UPI | Live |
| Wallet | Live |
| EMI | Coming Soon |
| Settlements | Live |
| Refunds | Live |
| Emandate | Coming Soon |
| [Sodexo](/docs/payments/payment-methods/sodexo) | Coming Soon |
## Send Receipt/Order ID to External Gateway
You might be generating a unique Order ID or Receipt for every order which can be passed to PayU via[Orders API](/docs/api/orders#orders-api).
To make your order id to be visible on the PayU Dashboard:
1. In Razorpay's Orders API, use the `receipt` parameter to send your unique Order ID or Receipt.
2. Razorpay passes this value to PayU in the `udf1` parameter.
3. Write to your PayU Relationship Manager to show the parameter `udf1` in the Dashboard and reports as per your use case.
## Best Practices
Before routing all traffic or some traffic to a new gateway via Optimizer, the following best practices are recommended:
All rules configured on live or test mode on the Razorpay Dashboard will reflect on live mode. However, credentials added on test mode will not be automatically replicated in live mode.
You can reach out to Razorpay for basic sanity testing of the integration. Razorpay will try a test payment of small value and ensure that the credentials are correct.
We recommend configuring a rule on live mode to route payments lesser than a set value (for example, ₹2) to the PayU gateway. This helps to test on production whether small value payments are being routed to PayU and working successfully, thus helping to avoid any direct impact on production traffic.
To configure a rule in live mode:
1. Log in to your Razorpay Dashboard.
2. In the left navigation, click **Optimizer**.
3. Click **+Add Rule** and enter the **Rule name** and **Description**.
4. Click **Next** and enter the following rule:
* In **Parameter** field, select **Amount (In Rupees)**.
* In **Select Connection** field, select **Less Than**.
* In **Enter Amount** field, enter the value 2 and click **Next**.
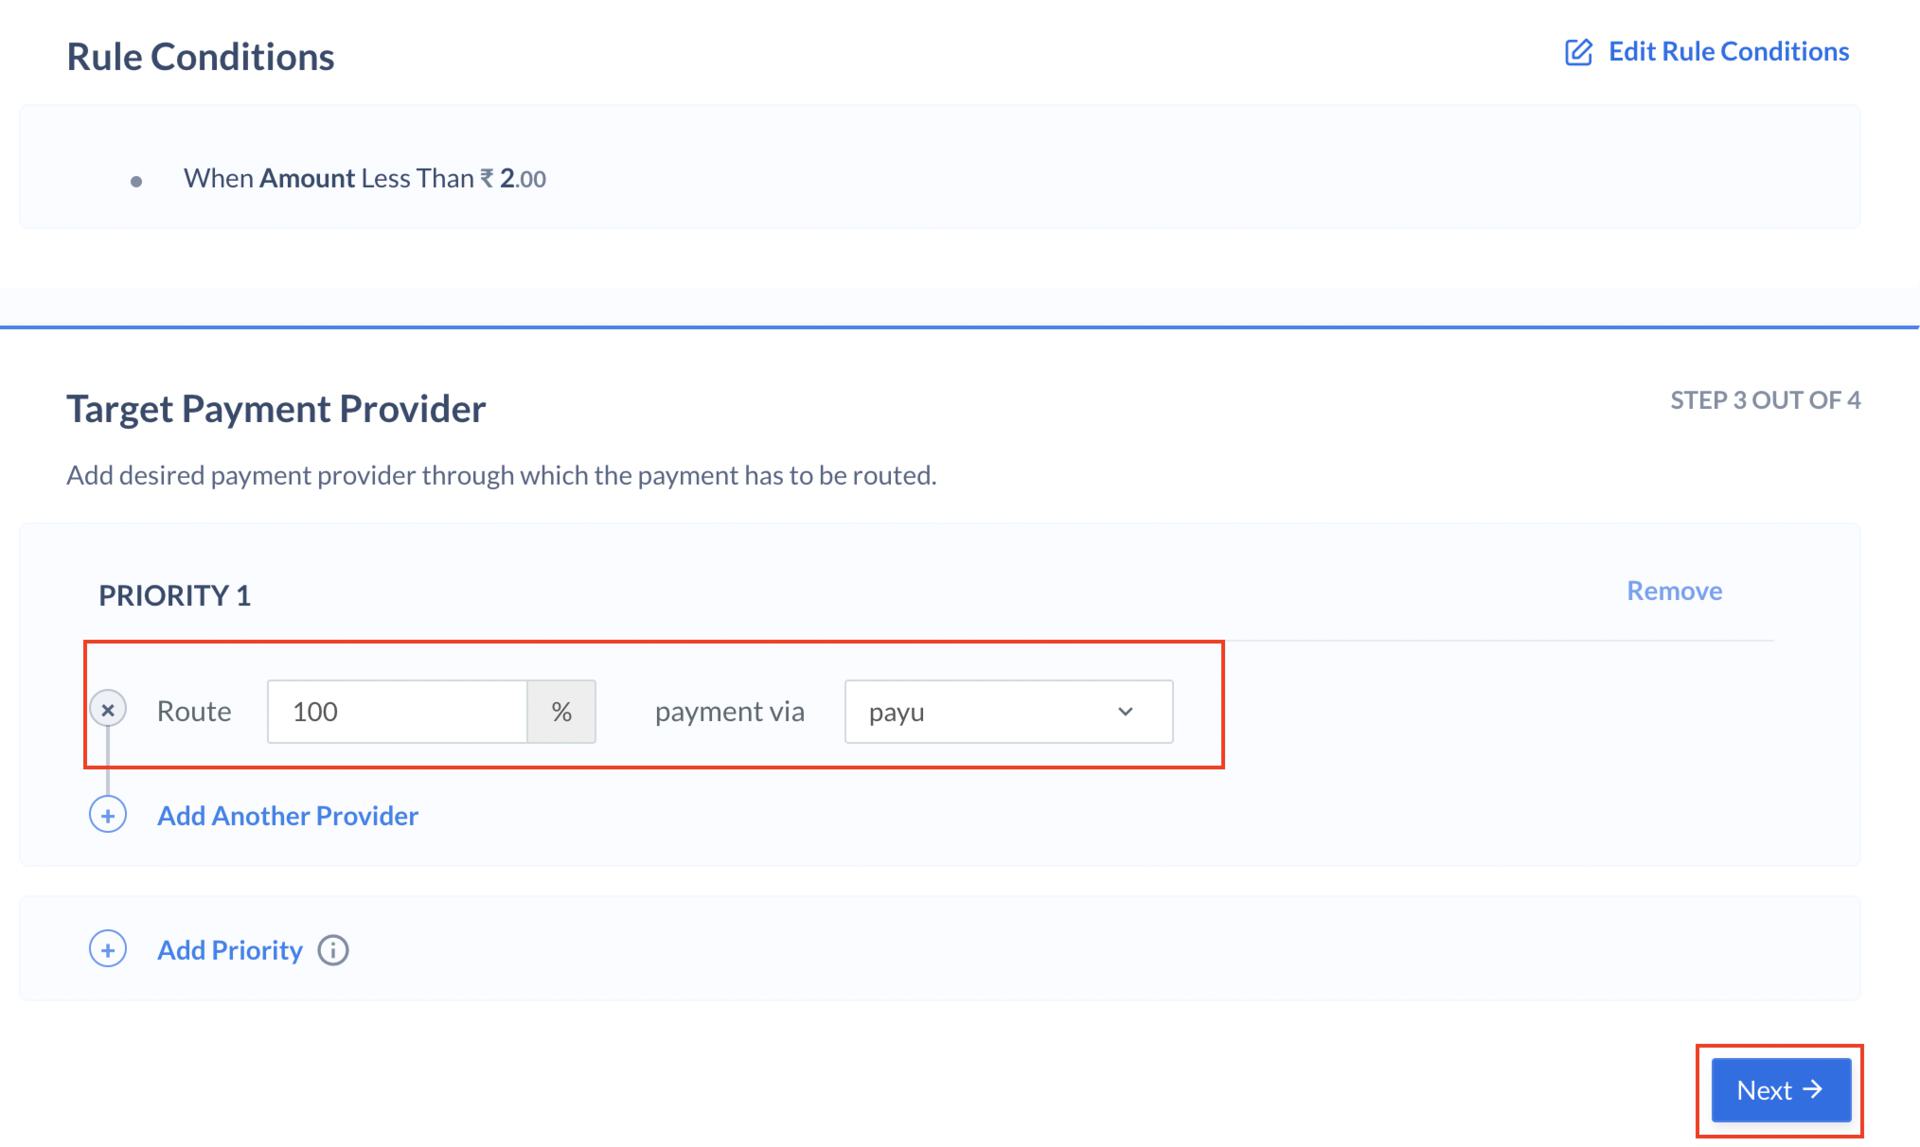
 5. Enter the value 100 in the **Route field**, select **PayU** in the **Payment Via** field, and click **Next**.
 6. Click **Publish Rule**.
 ## Go Live
After the integration is tested and successful, you can go live on PayU.
## Go Live
After the integration is tested and successful, you can go live on PayU.