> ## Documentation Index
> Fetch the complete documentation index at: https://razorpay-881012b3.mintlify.site/llms.txt
> Use this file to discover all available pages before exploring further.
# Simpl
> Add Simpl as a payment provider on Optimizer.
Available in
🇮🇳 India
Simpl PayLater and Pay-in-3 is a flexible BNPL option that lets customers split their purchases into three equal, interest-free installments. Payments are completed instantly at checkout without entering card details or OTPs. Simpl bills the total amount in three parts over a set period. For businesses, it helps enhance user experience, reduce cart drop-offs, and boost conversions while encouraging customer loyalty through convenient, no-cost payment flexibility.
Follow the steps below to onboard Simpl as a payment provider.
**Watch Out!**
Optimizer routes payments based on your business logic. But, the method enablement of each gateway needs to be handled between you and the gateway, or it may lead to failed payments.
Make sure you have Optimizer enabled for your Razorpay account.
**Handy Tips**
No additional configuration is required on your businesses end for Simpl integration.
## Integration Requirements
Before you go live with Simpl on Optimizer, add PayLater as a payment method on the Razorpay Dashboard.
1. On the Razorpay Dashboard, navigate to **Account & Settings**.
2. Select **PayLater** from the list of **payment methods**.
3. Look for **Simpl** and click **Request**. Know more about [how to request for a payment method](/docs/payments/dashboard/account-settings/payment-methods#request-for-payment-methods).
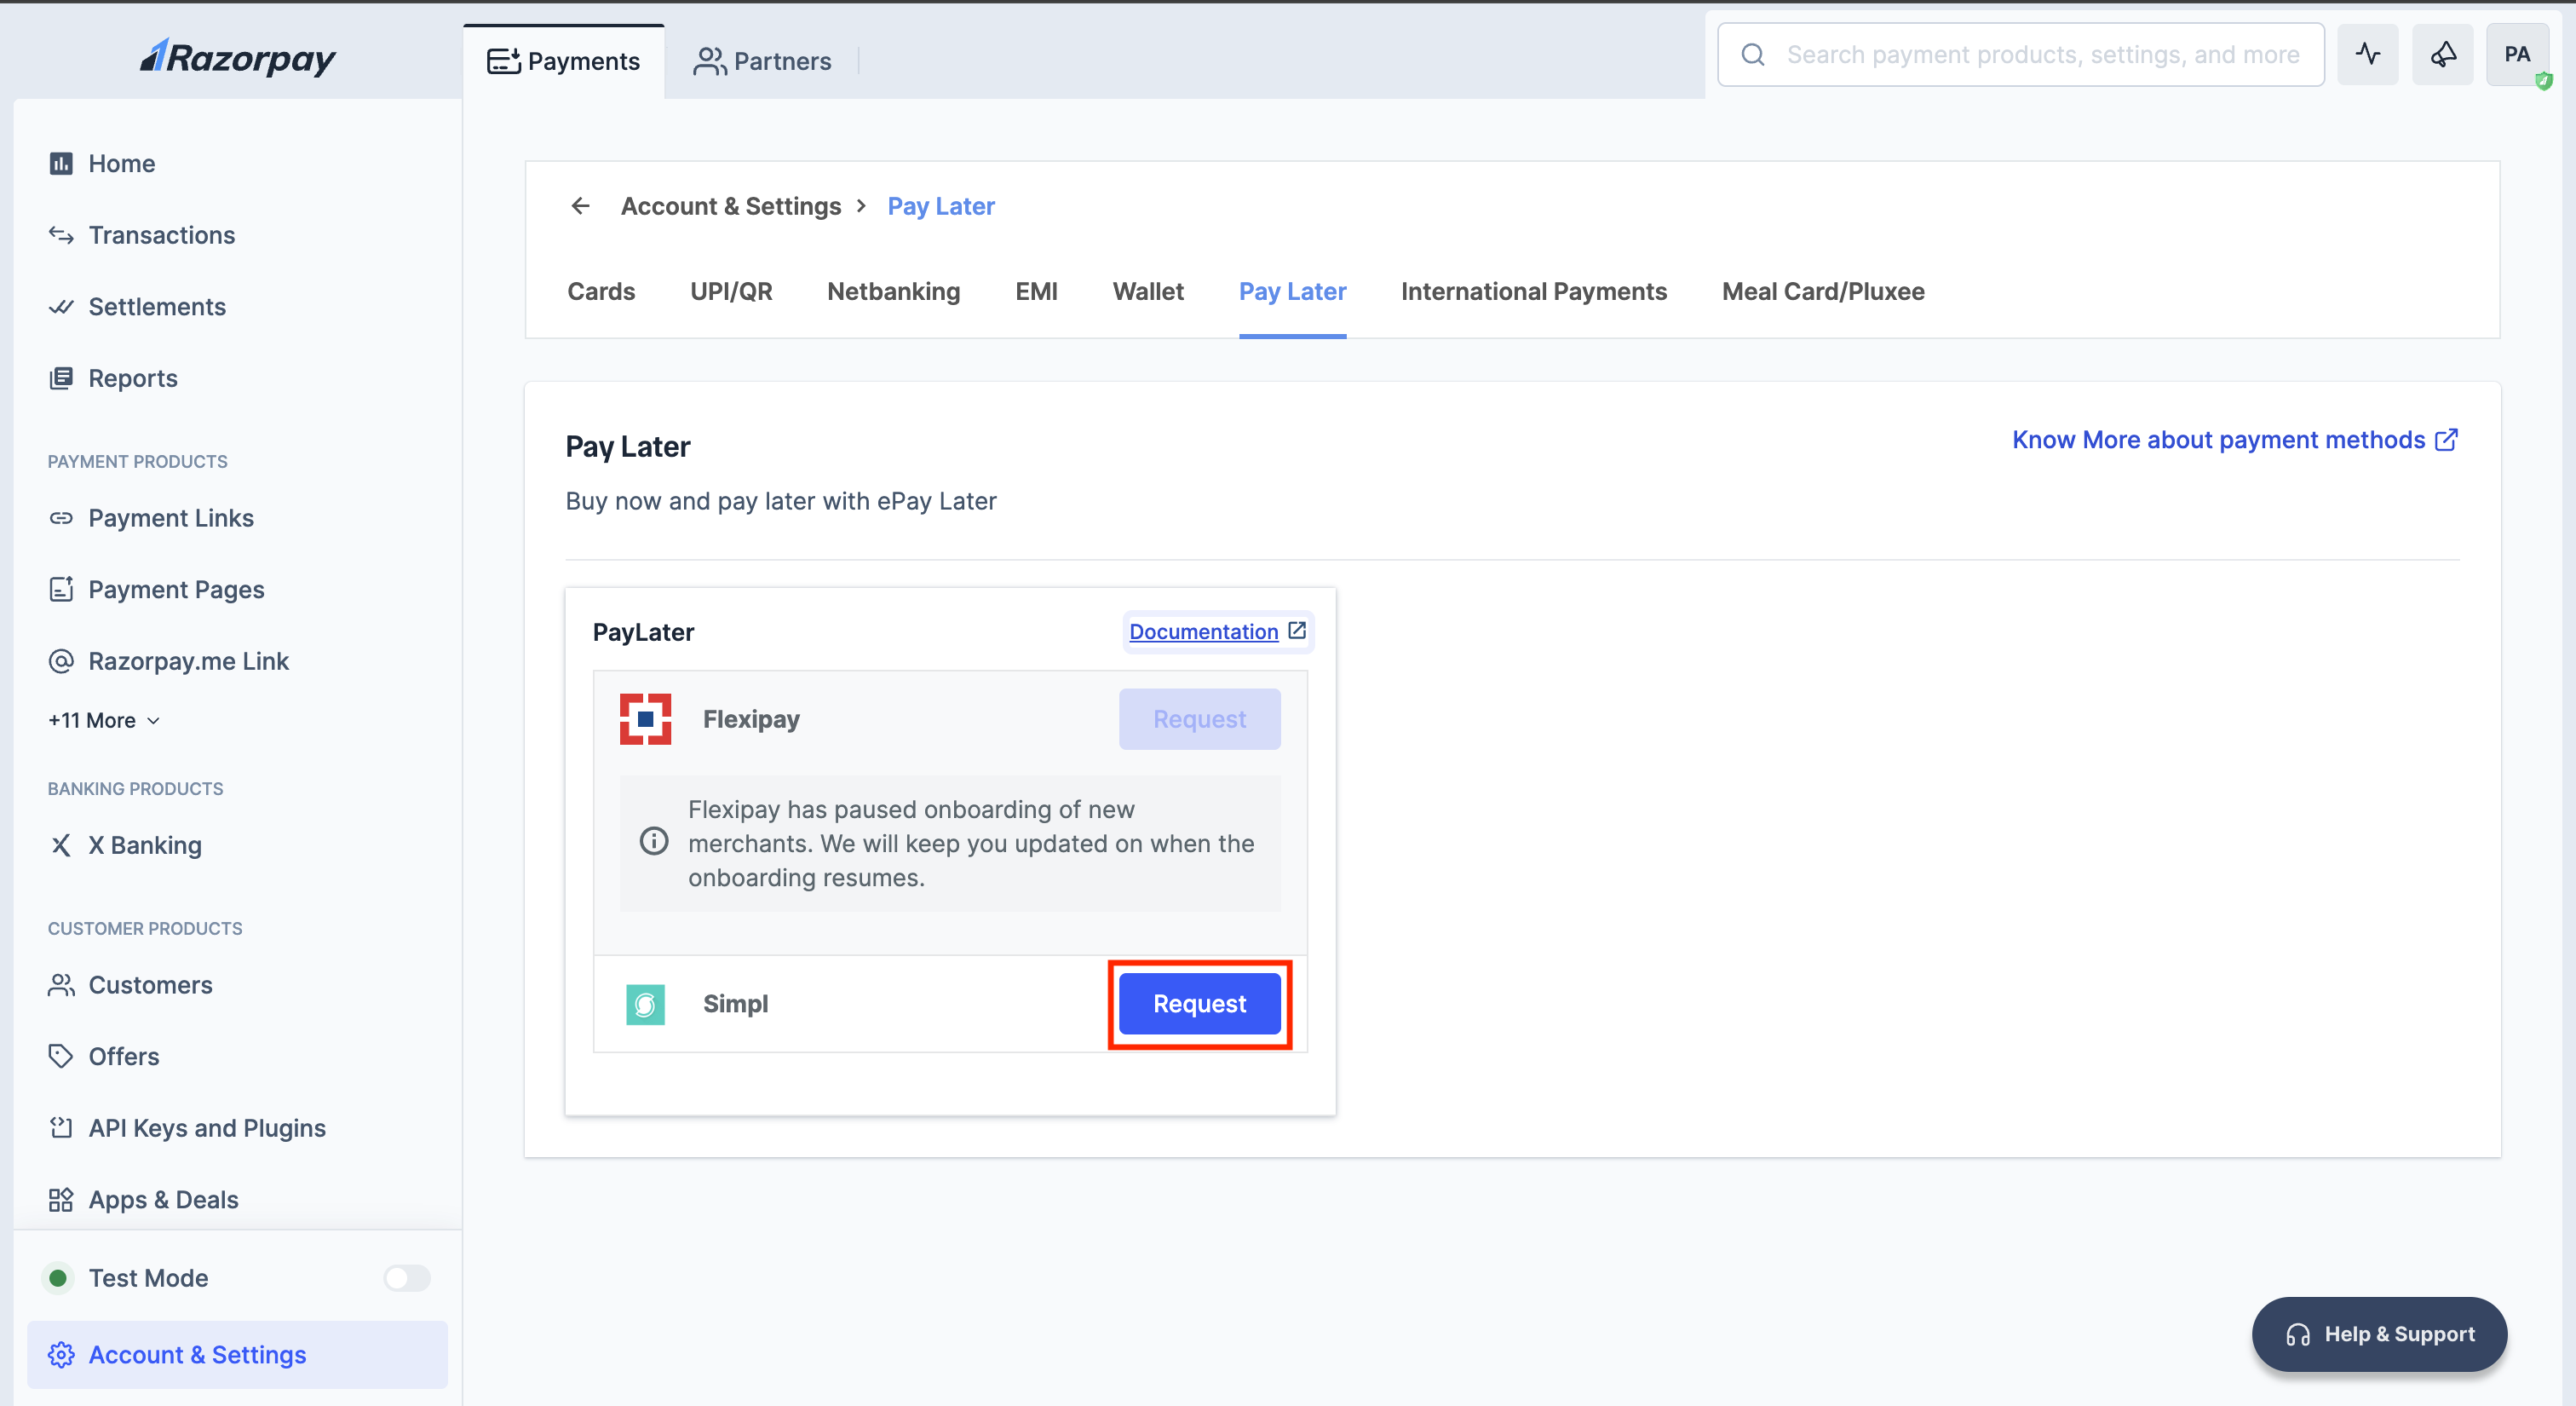 Once you complete the above steps, Simpl appears on your Razorpay Checkout.
## Add Simpl as Payment Provider
1. Log in to your Dashboard.
2. Go to the **PAYMENT PRODUCTS** section and click **Optimizer**.
3. In the top-right section, click **Add Provider**.
4. Select **Simpl** in the list of gateways available.
Once you complete the above steps, Simpl appears on your Razorpay Checkout.
## Add Simpl as Payment Provider
1. Log in to your Dashboard.
2. Go to the **PAYMENT PRODUCTS** section and click **Optimizer**.
3. In the top-right section, click **Add Provider**.
4. Select **Simpl** in the list of gateways available.
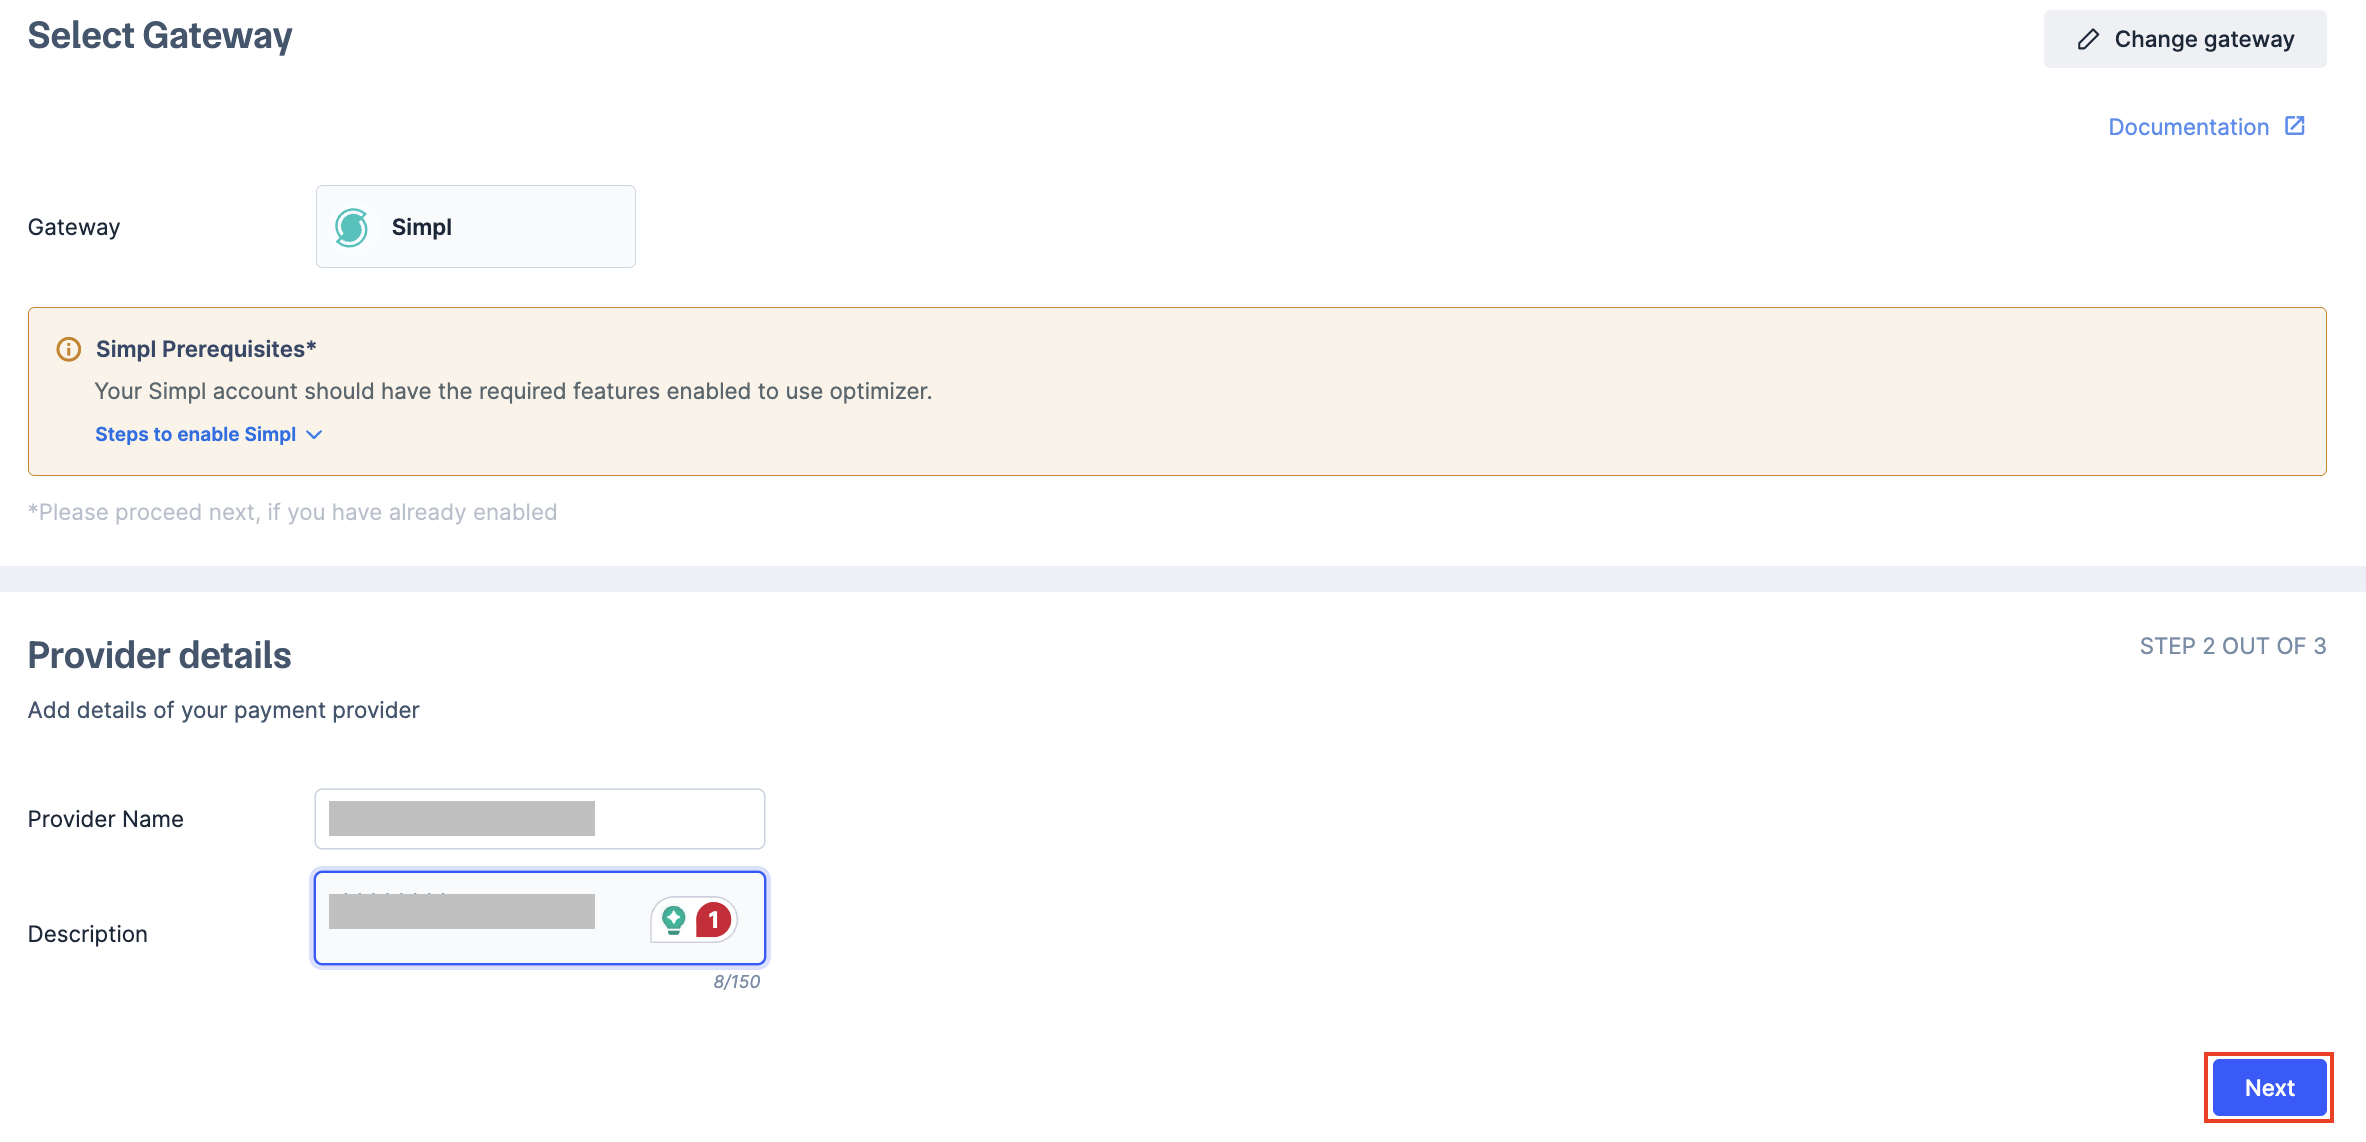
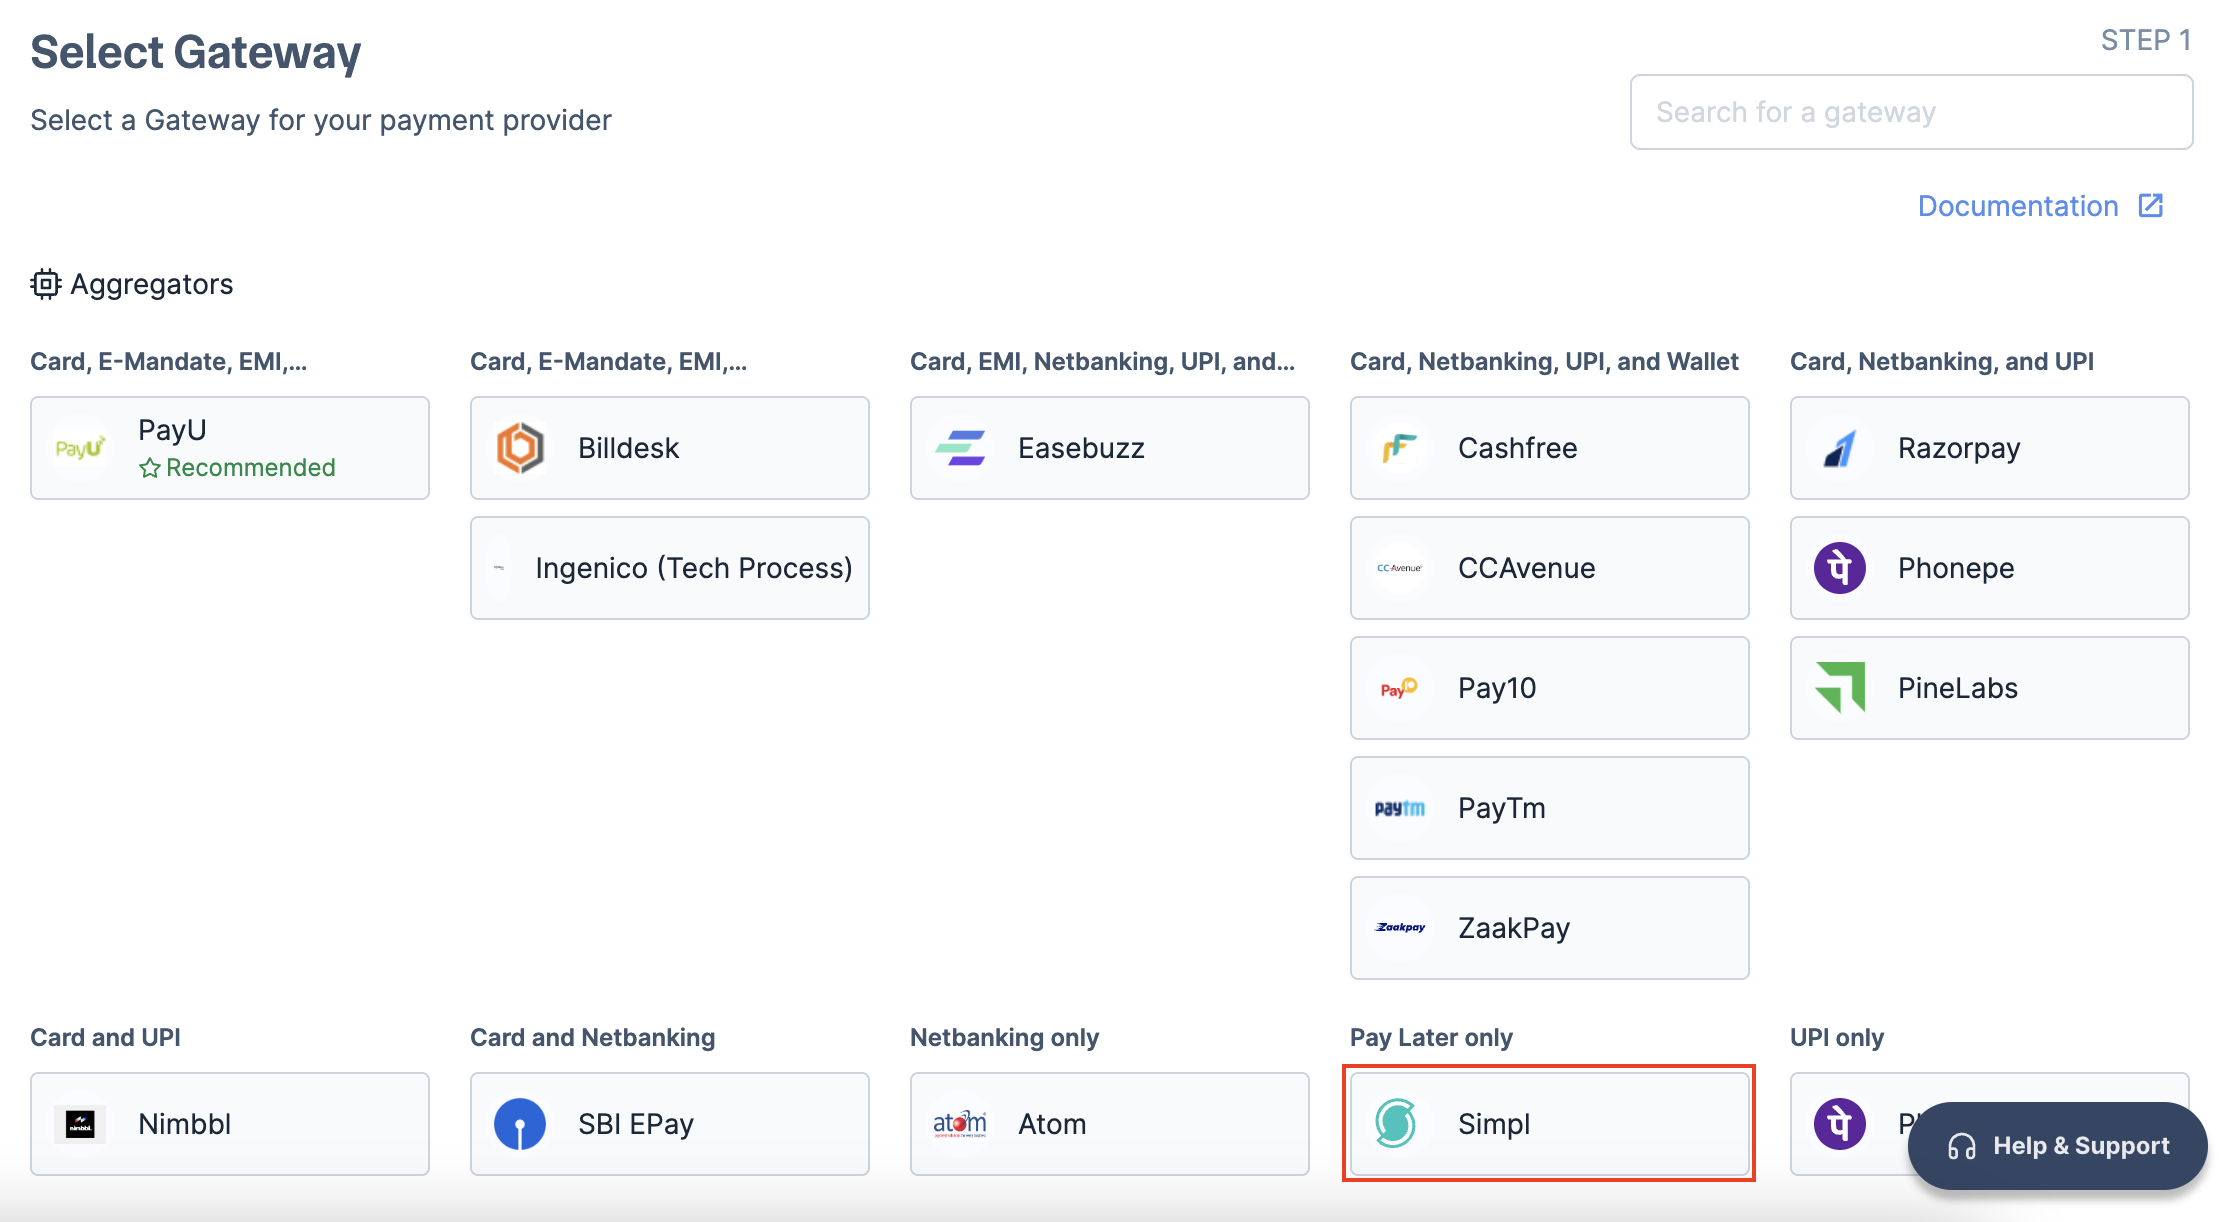 5. Enter the provider name and description and click **Next**.
 6. Enter your **Gateway Terminal Id**.
7. Select **Simpl** from the Paylaters dropdown under the payment method section, and click Submit.
6. Enter your **Gateway Terminal Id**.
7. Select **Simpl** from the Paylaters dropdown under the payment method section, and click Submit.
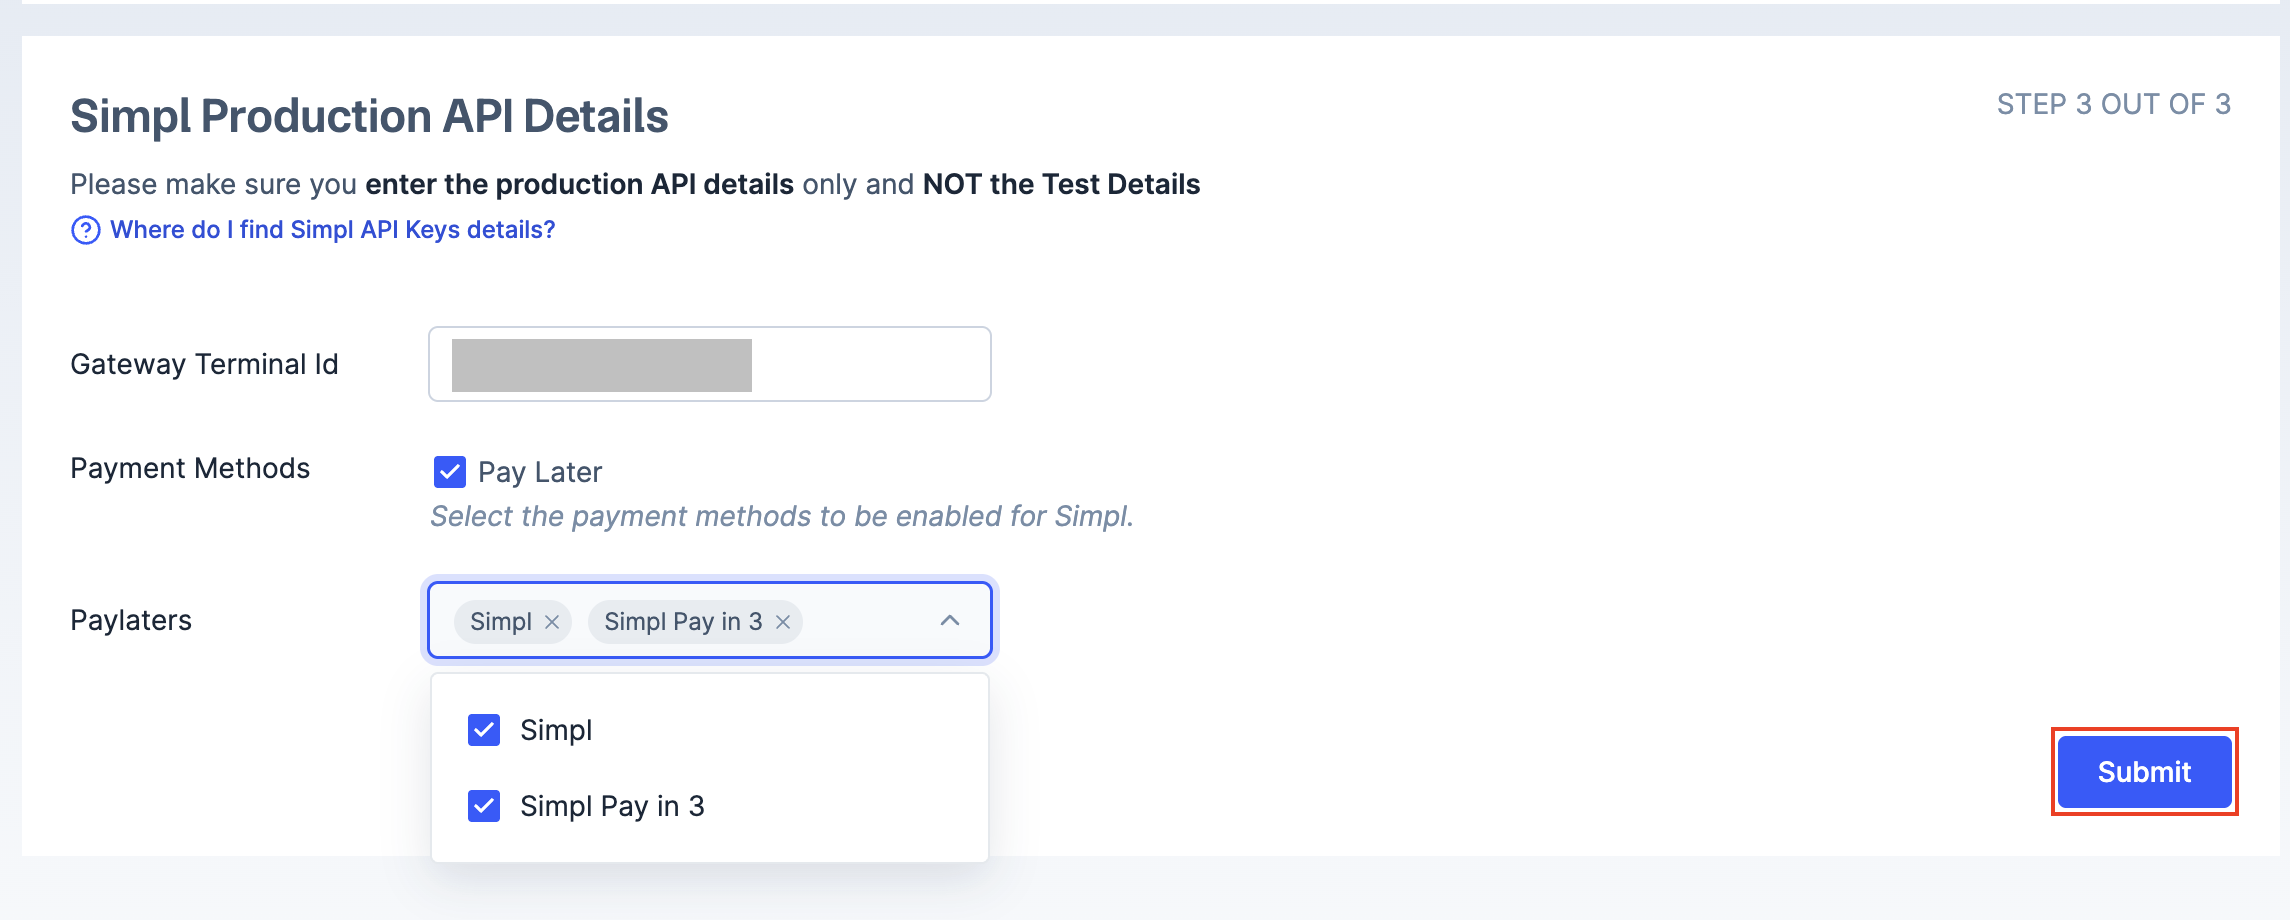 You have successfully added **Simpl** as a payment provider on Optimizer.
## Configure Custom Rule
1. Log in to your Dashboard.
2. Go to the **PAYMENT PRODUCTS** section and click **Optimizer**.
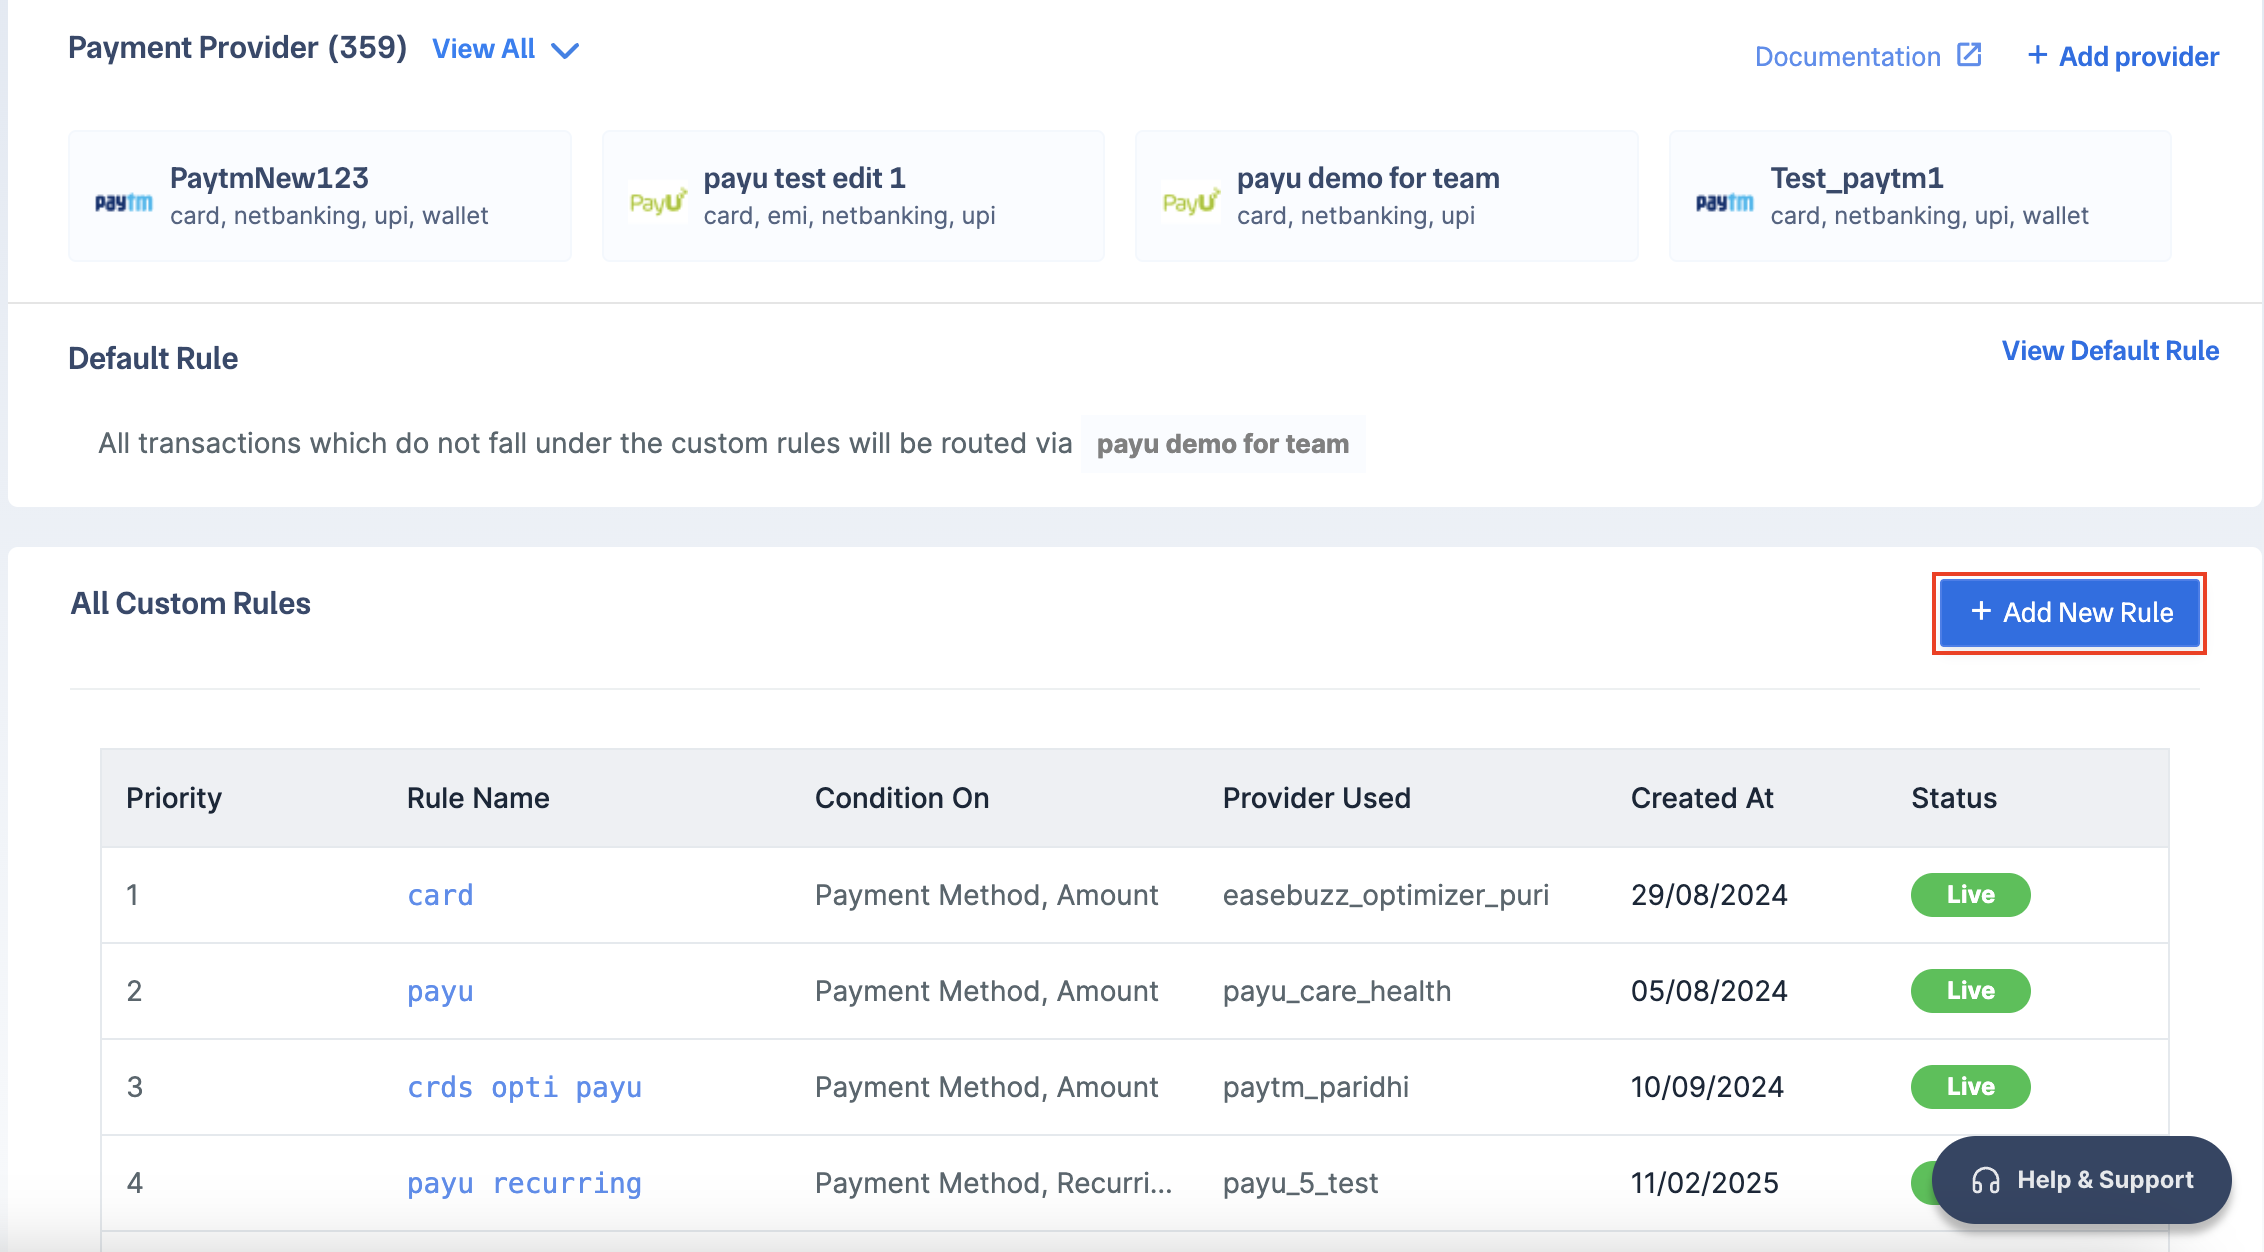
3. Click **+ Add New Rule**.
You have successfully added **Simpl** as a payment provider on Optimizer.
## Configure Custom Rule
1. Log in to your Dashboard.
2. Go to the **PAYMENT PRODUCTS** section and click **Optimizer**.
3. Click **+ Add New Rule**.
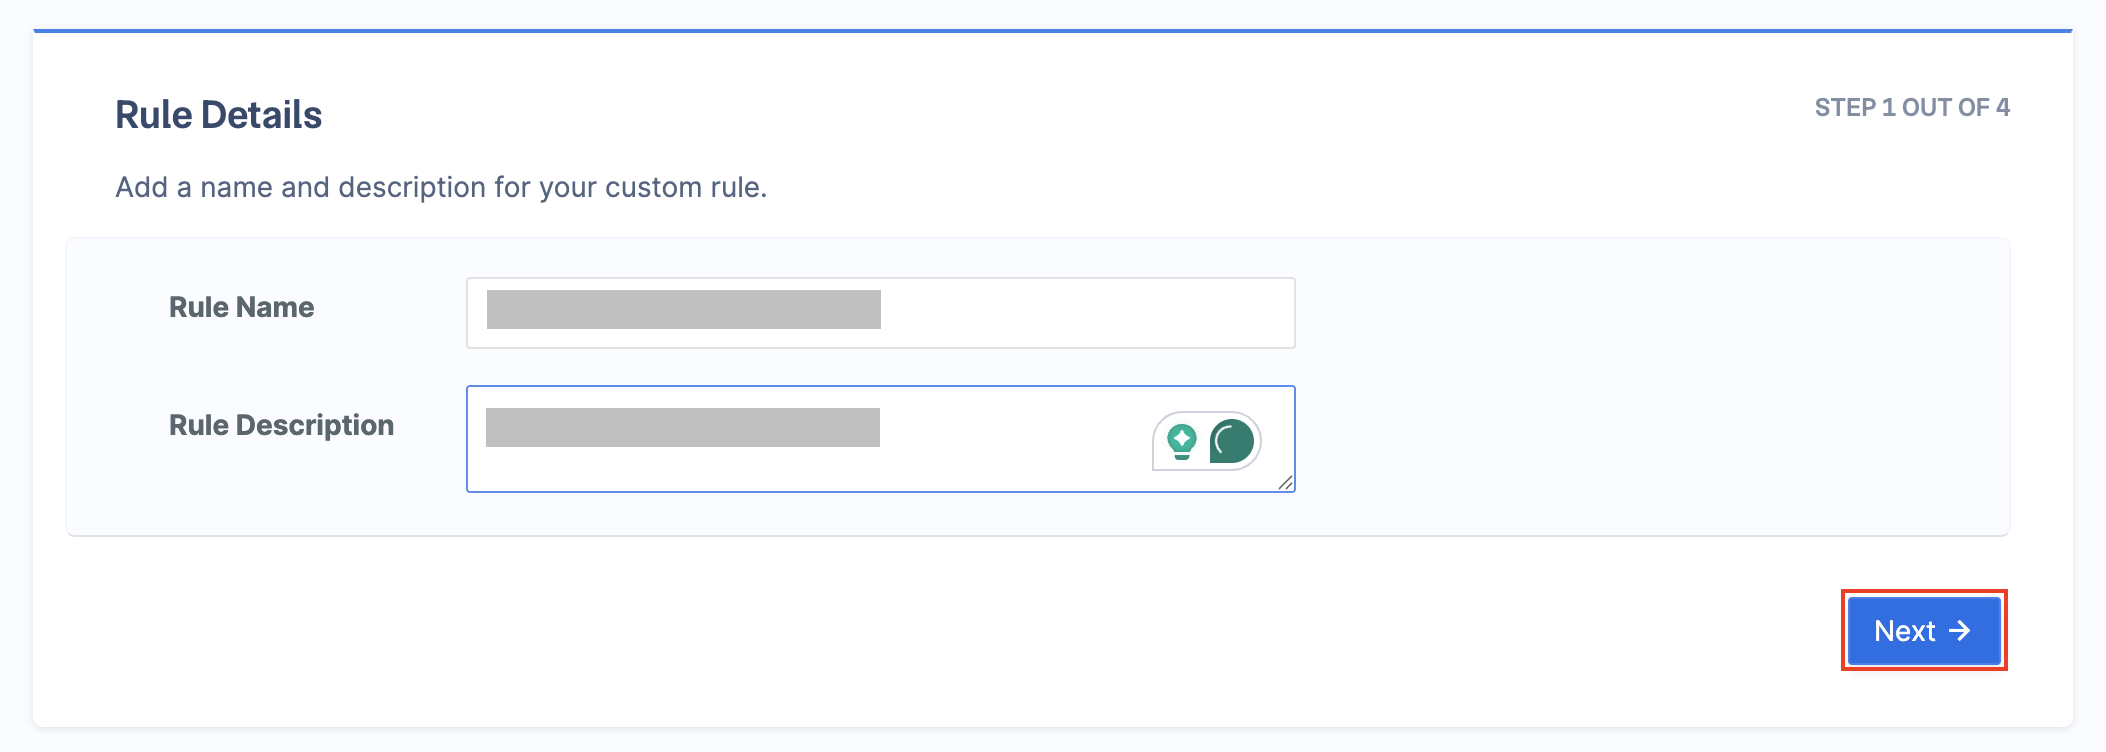
 4. Enter the **Rule Name** and **Rule Description**, then click **Next**.
 5. Select the rule conditions as follows:
* **When** - Select `Payment Method`.
* **is** - Select `Equal to`.
* **Select Comparing Value** - Select `paylater`.
6. Click **Add Another Condition** and select the rule conditions as follows:
* **When** - Select `PayLater Provider`.
* **is** - Select `Equal to`.
* **Select Comparing Value** - Select `Simpl Pay in 3`.
5. Select the rule conditions as follows:
* **When** - Select `Payment Method`.
* **is** - Select `Equal to`.
* **Select Comparing Value** - Select `paylater`.
6. Click **Add Another Condition** and select the rule conditions as follows:
* **When** - Select `PayLater Provider`.
* **is** - Select `Equal to`.
* **Select Comparing Value** - Select `Simpl Pay in 3`.
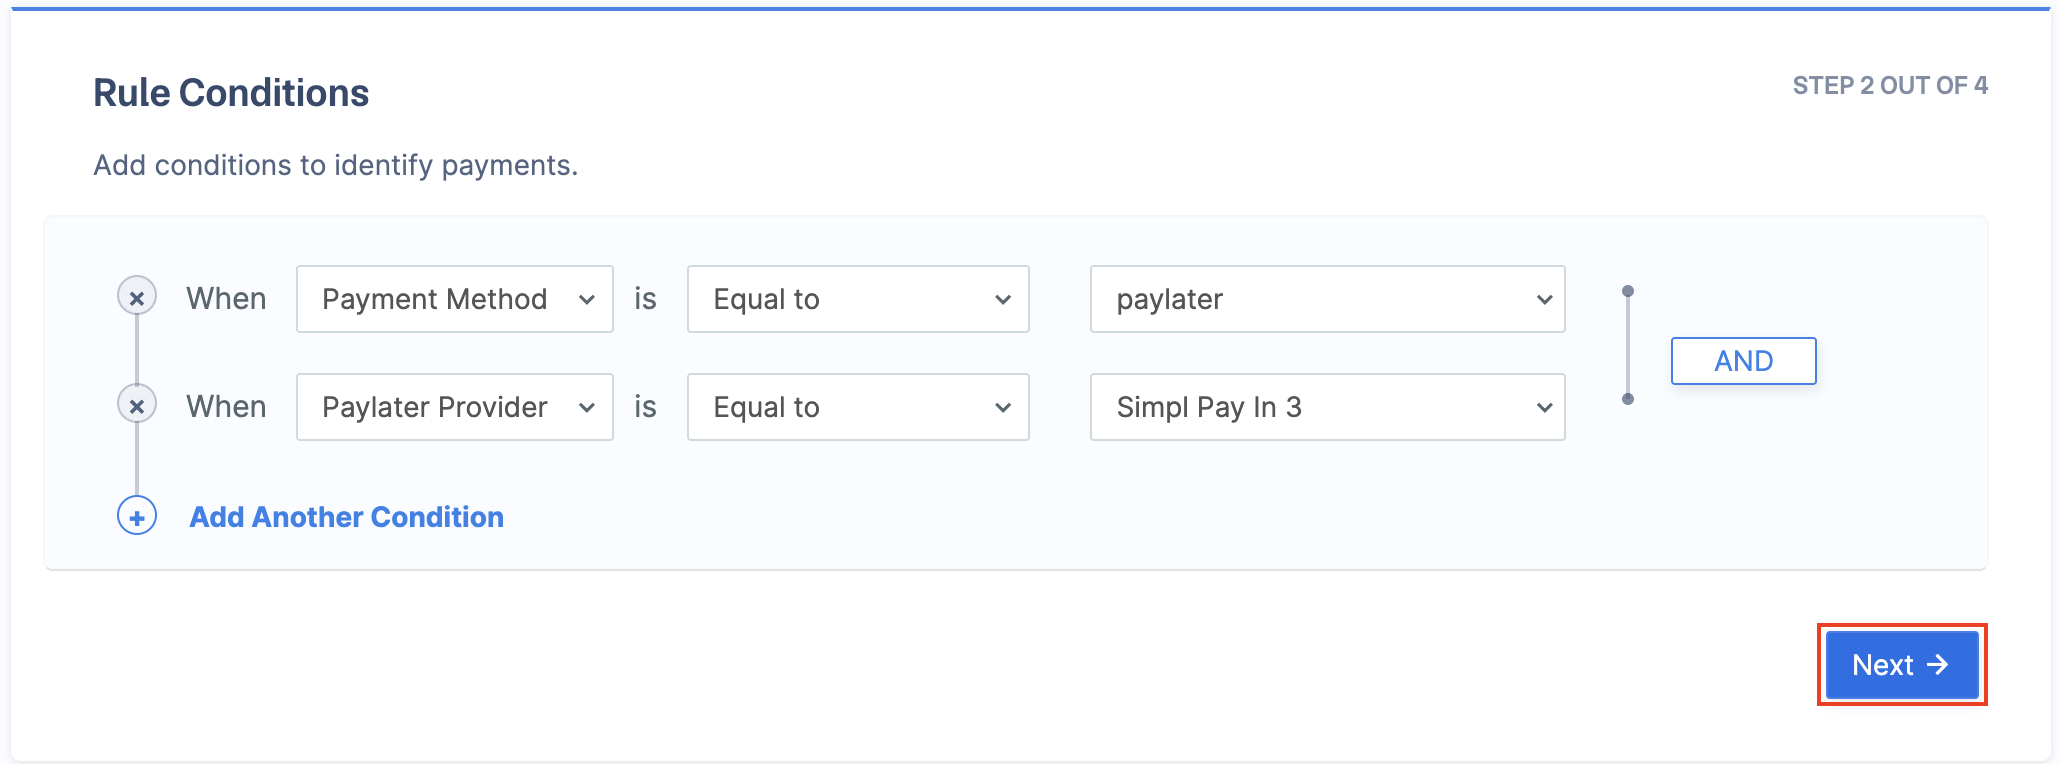 7. Click **Next**.
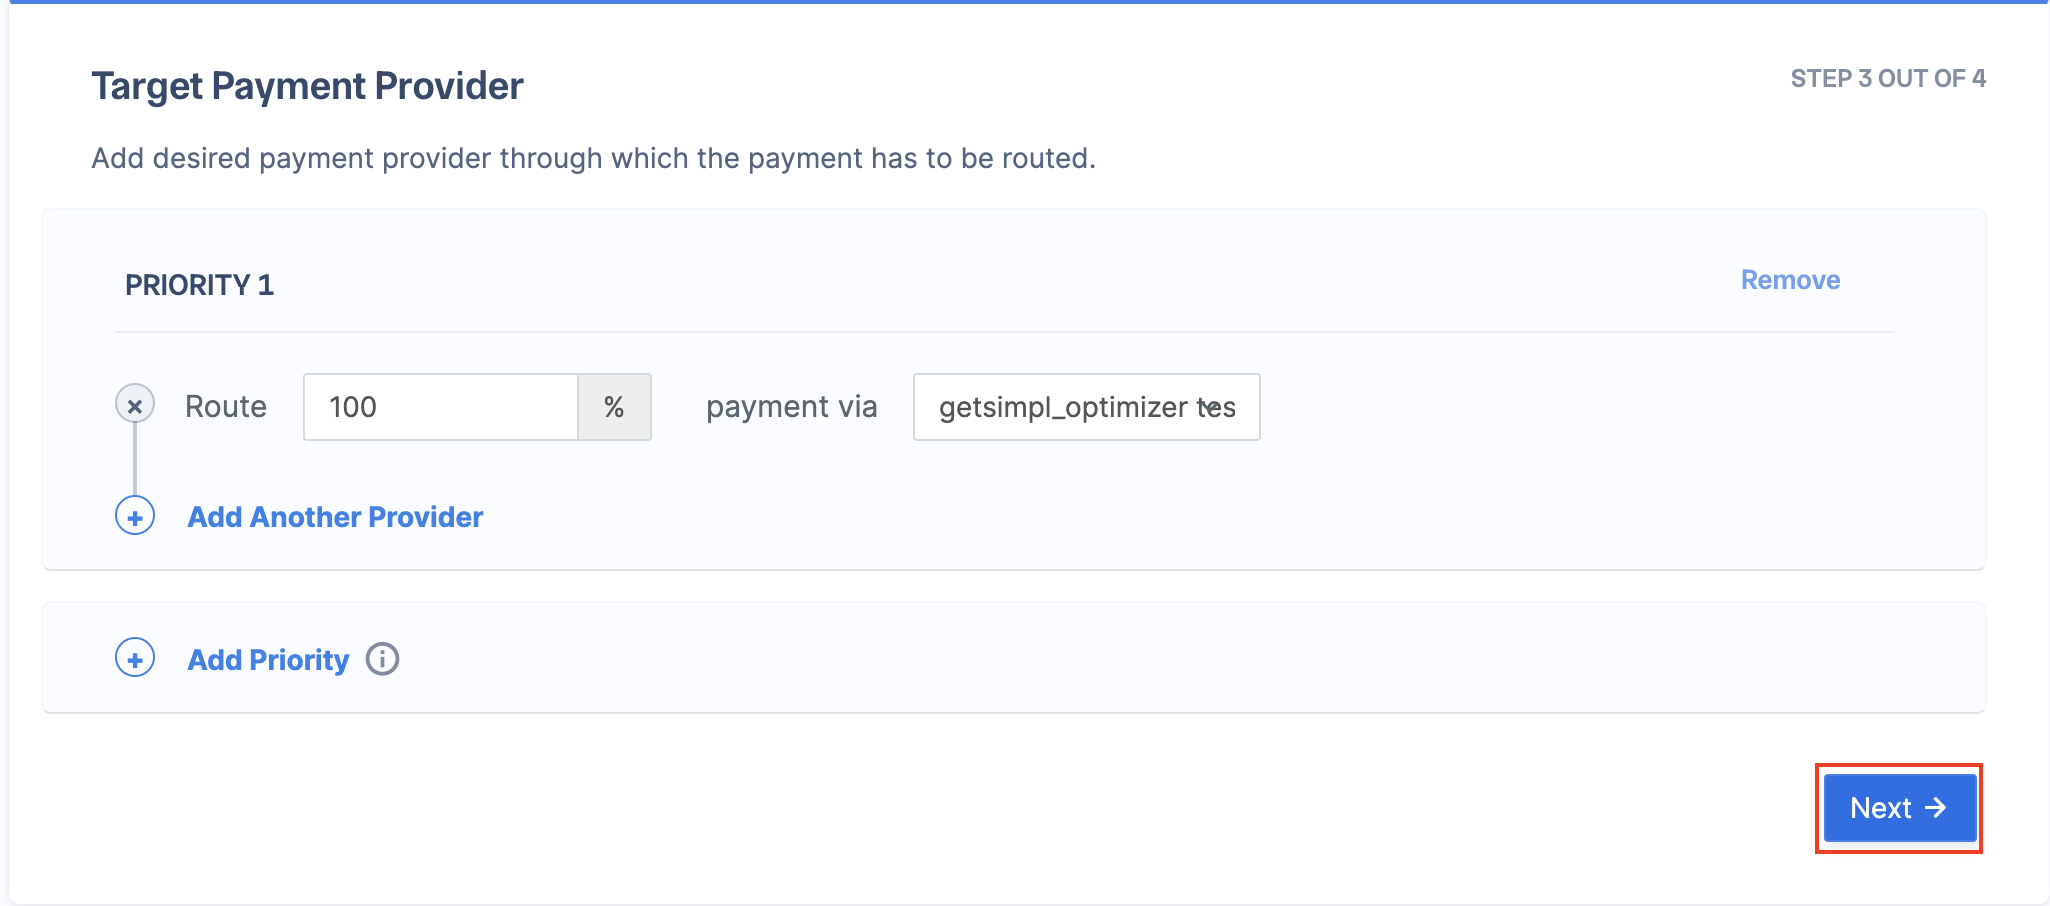
8. In the **Route** section, enter **100**, select **Simpl** in the **Payment Via** section, and click **Next**.
7. Click **Next**.
8. In the **Route** section, enter **100**, select **Simpl** in the **Payment Via** section, and click **Next**.
 9. Click **Publish Rule**.
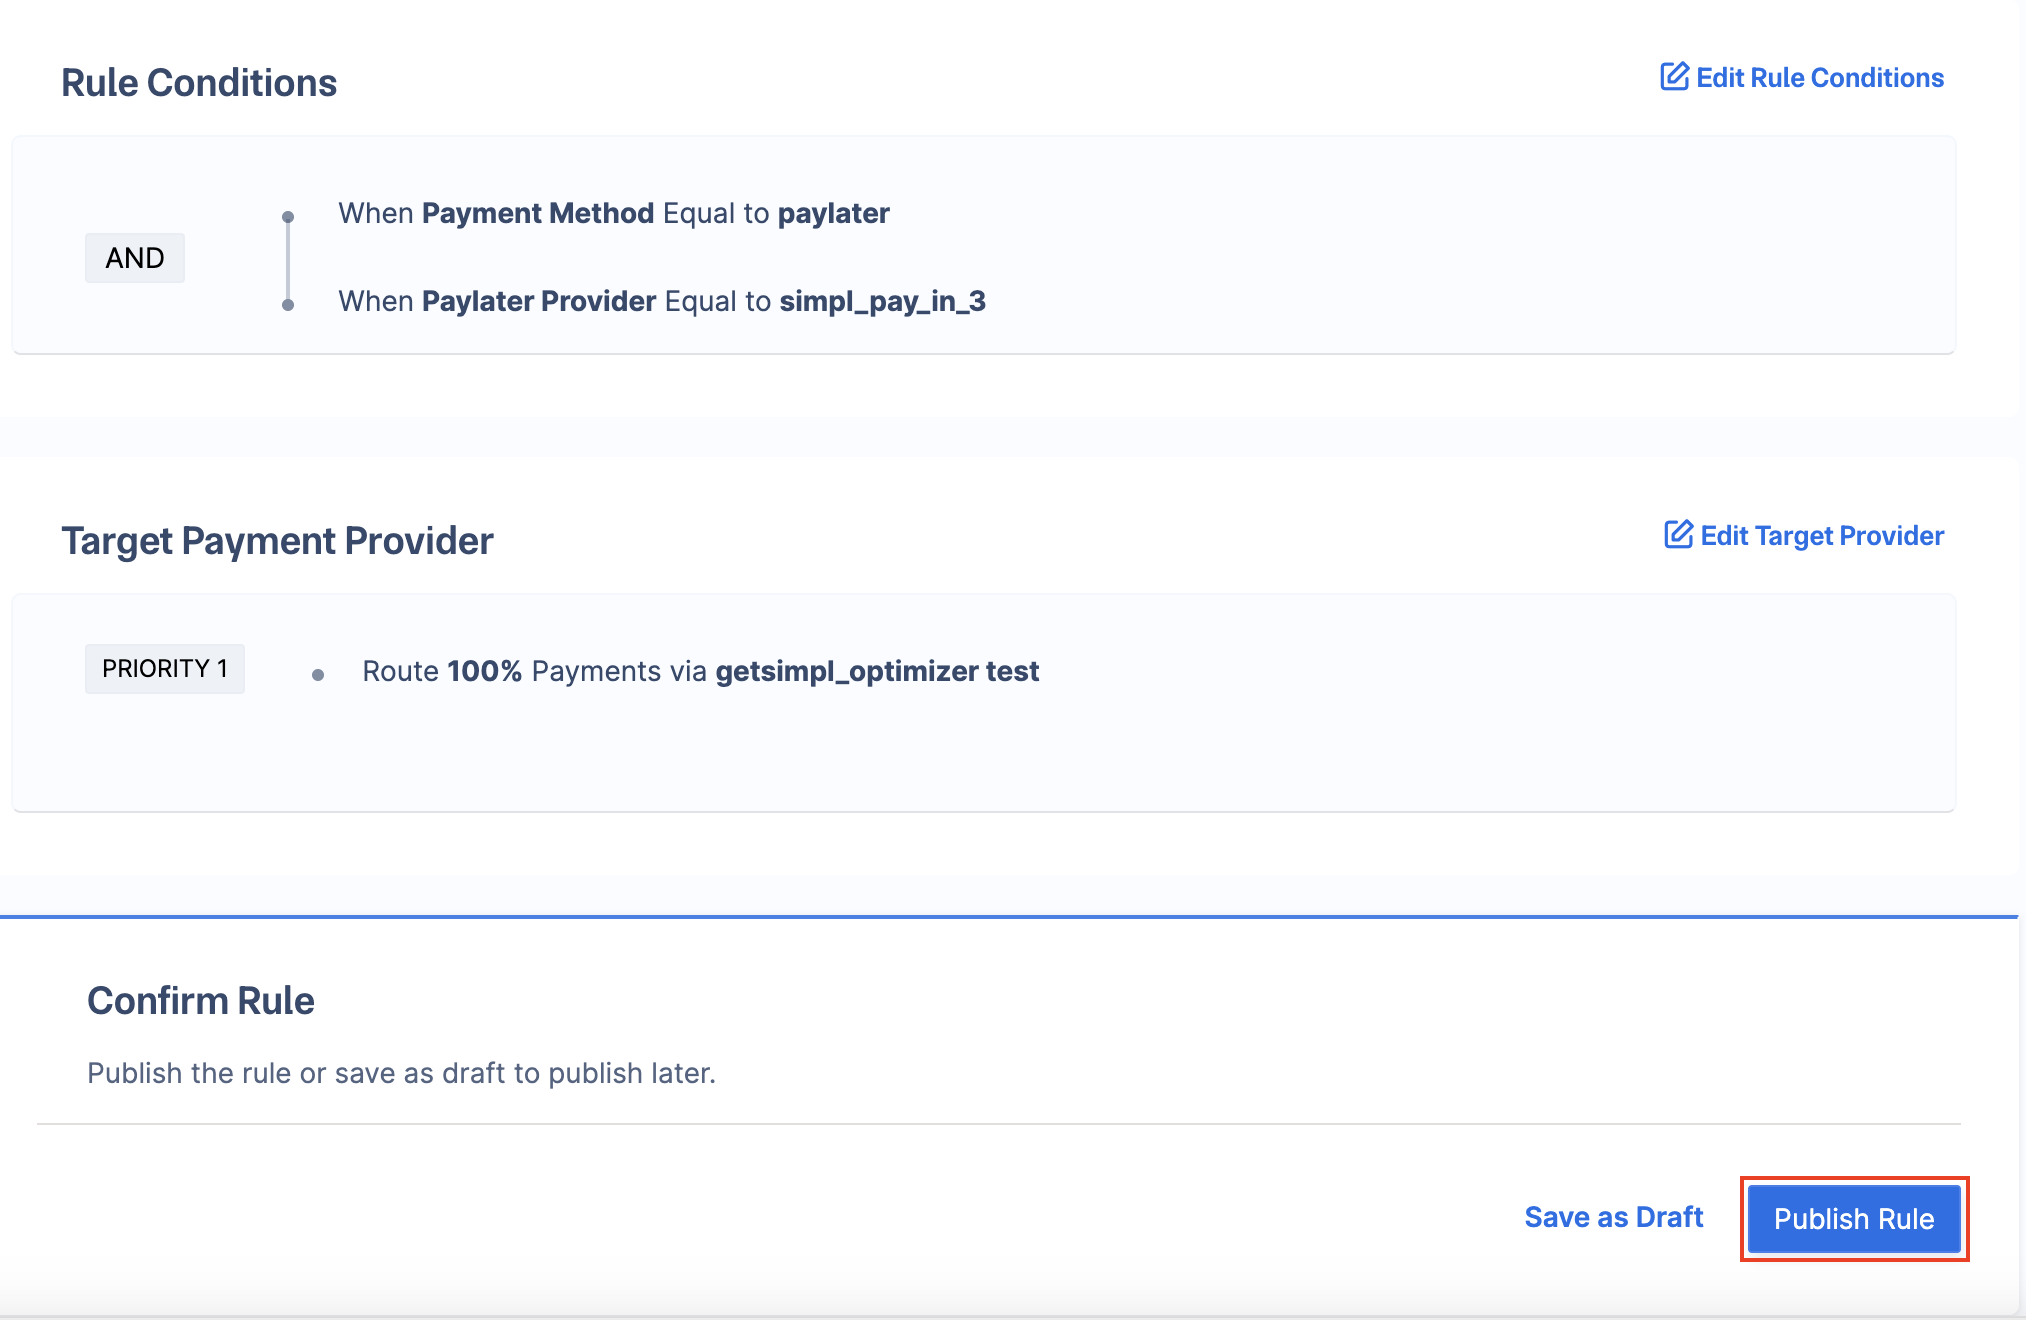 All transactions will now be routed via Simpl.
## Best Practices
Before routing all traffic or some traffic to a new gateway via Optimizer, the following best practices are recommended:
All rules configured in live or test mode on the Razorpay Dashboard will reflect in live mode. However, credentials added in test mode will not be automatically replicated in live mode.
You can reach out to Razorpay for basic sanity testing of the integration. Razorpay will try a test payment of a small value and ensure that the credentials are correct.
## Go Live
After the integration is tested and successful, you can go live with Simpl on Razorpay Optimizer.
All transactions will now be routed via Simpl.
## Best Practices
Before routing all traffic or some traffic to a new gateway via Optimizer, the following best practices are recommended:
All rules configured in live or test mode on the Razorpay Dashboard will reflect in live mode. However, credentials added in test mode will not be automatically replicated in live mode.
You can reach out to Razorpay for basic sanity testing of the integration. Razorpay will try a test payment of a small value and ensure that the credentials are correct.
## Go Live
After the integration is tested and successful, you can go live with Simpl on Razorpay Optimizer.