> ## Documentation Index
> Fetch the complete documentation index at: https://razorpay-881012b3.mintlify.site/llms.txt
> Use this file to discover all available pages before exploring further.
# Prefill Amount Fields in Payment Button
> Configure to prefill the amount fields of the Payment Button.
Available in🇮🇳 India
You can prefill the amount fields present in your Payment Button. This provides a better user experience for your customers.
## Prefill Item Quantity
You can set a particular item quantity for a product.
Let us assume you want to sell `smartphone cases` for . You create a Payment Button titled `Cool Smartphone Cases` to sell the product. You can ensure that when the customer clicks the Payment Button, the quantity to be purchased appears pre-selected as `1`.
Watch this video to see how to add Prefilled Item Quantity.
To add prefilled item quantity field:
1. Log in to the Dashboard and create a Payment Button titled **Cool Smartphone Cases**. Ensure you select the `Buy Now` button type.
2. In the **Amount Details** section, create an amount field called `Smartphone Case` using `Item with Quantity` as the field type.
3. Configure the **Customer Details** section as required.
4. **Create** the Payment Button.
5. Here is a sample embed code. Copy the embed code to add the Payment Button.
```xml Button Embed Code theme={null}
```
6. When you embed the button code on your website, add the following parameter:
```javascript Amount Field Parameter theme={null}
data-prefill.amount.smartphone_case="1"
```
The parameter structure is explained below:
| Field Name | Amount Field Label | Value |
| ------------------- | ------------------ | ----- |
| data-prefill.amount | .smartphone\_case | 1 |
**Handy Tips**
* Ensure that the field-level validations are in place. If you enter a character in the `amount` field, say `100` or `Hundred`, the field will not get populated.
* If the amount field label consists of two words, add an underscore as a separator of two words. For example, the two words in the **Smartphone Case** field should be separated by an underscore. That is, `smartphone_case`.
* If the item is out of stock or has less quantity available, though the field will appear prefilled, the customer will not be able to purchase the product.
The updated embed code looks like this:
```xml Updated Button Embed Code theme={null}
```
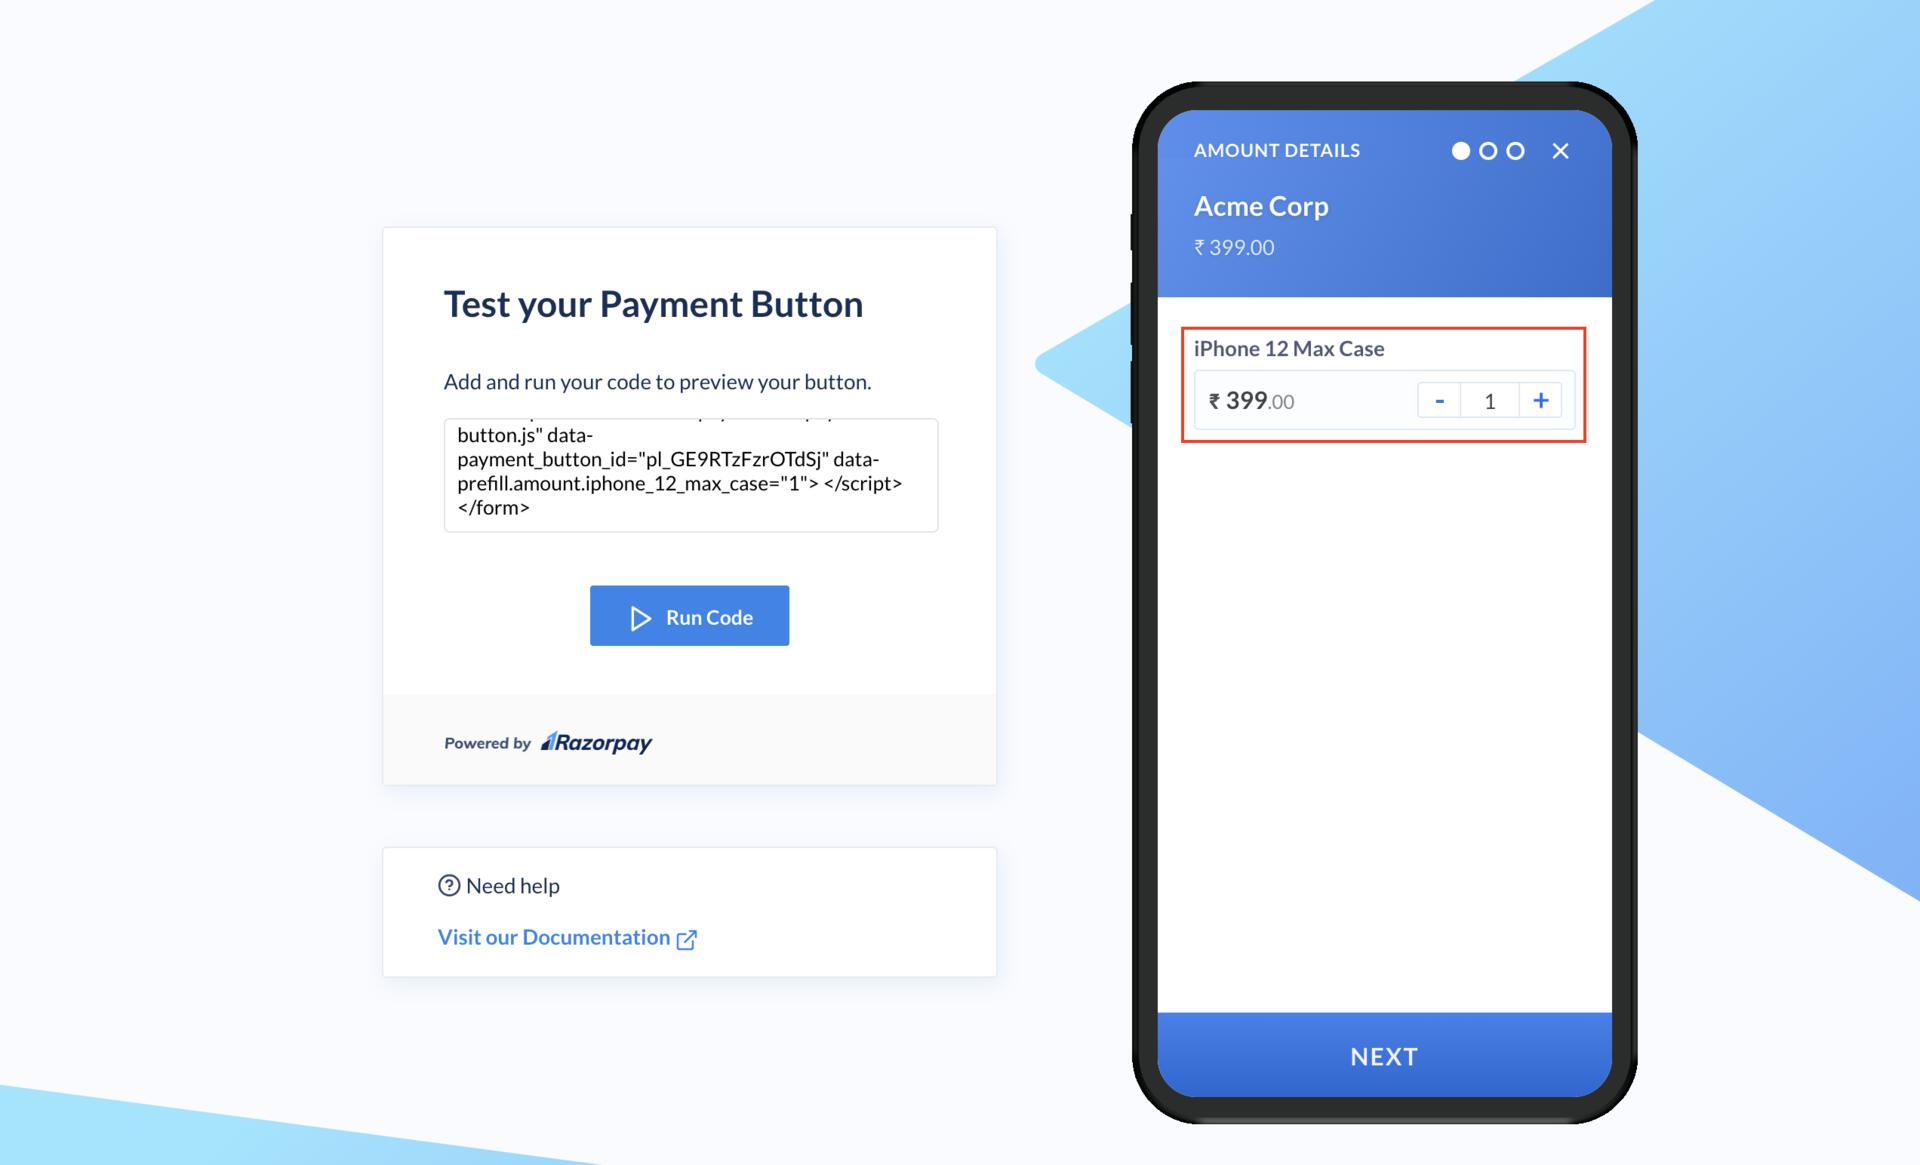
This ensures that the `Smartphone Case` item quantity will always appear prefilled as `1`.
#### Test the Code
Click the button below to open the Embed Code testing tool and test the code.
Test Embed Code
The following screenshot shows the preselected quantity:
## Pre-select Fixed Amount Field
You can add a fixed amount field which gets added during checkout when the user selects a product.
Let us continue with the smartphone case example. Assume you also provide gift wrapping services at a fixed cost of . You want to ensure that this field appears pre-selected during Checkout.
Watch this video to see how to add a Fixed Amount Field.
To pre-select Fixed Amount field:
1. Log in to the Dashboard and create a Payment Button titled **Cool Smartphone Cases**. Ensure you select the `Buy Now` button type.
2. In the **Amount Details** section, create an amount field called `Gift Wrap` using `Fixed Amount` as the field type. This should be an **optional** field.
3. Configure the **Customer Details** section as required.
4. **Update** the Payment Button.
5. Here is a sample embed code. Copy the embed code.
```xml Button Embed Code theme={null}
```
6. When you embed the button code on your website, add the following parameter:
```javascript Amount Field Parameter theme={null}
data-prefill.amount.gift_wrap="1"
```
The parameter structure is explained below:
| Field Name | Amount Field Label | Value |
| --------------------- | ------------------ | ----- |
| `data-prefill.amount` | `.gift_wrap` | 1 |
**Handy Tips**
* Ensure that the field-level validations are in place. If you enter a character in the `amount` field, say `100` or `Hundred`, the field will not get populated.
* If the amount field label consists of two words, add an underscore as a separator of two words. For example, the two words in the **Gift Wrap** field should be separated by an underscore. That is, `gift_wrap`.
* Ensure that the field is marked optional.
* If the item is out of stock or has less quantity available, though the field will appear prefilled, the customer will not be able to purchase the product.
The updated embed code looks like this:
```xml Updated Button Embed Code theme={null}
```
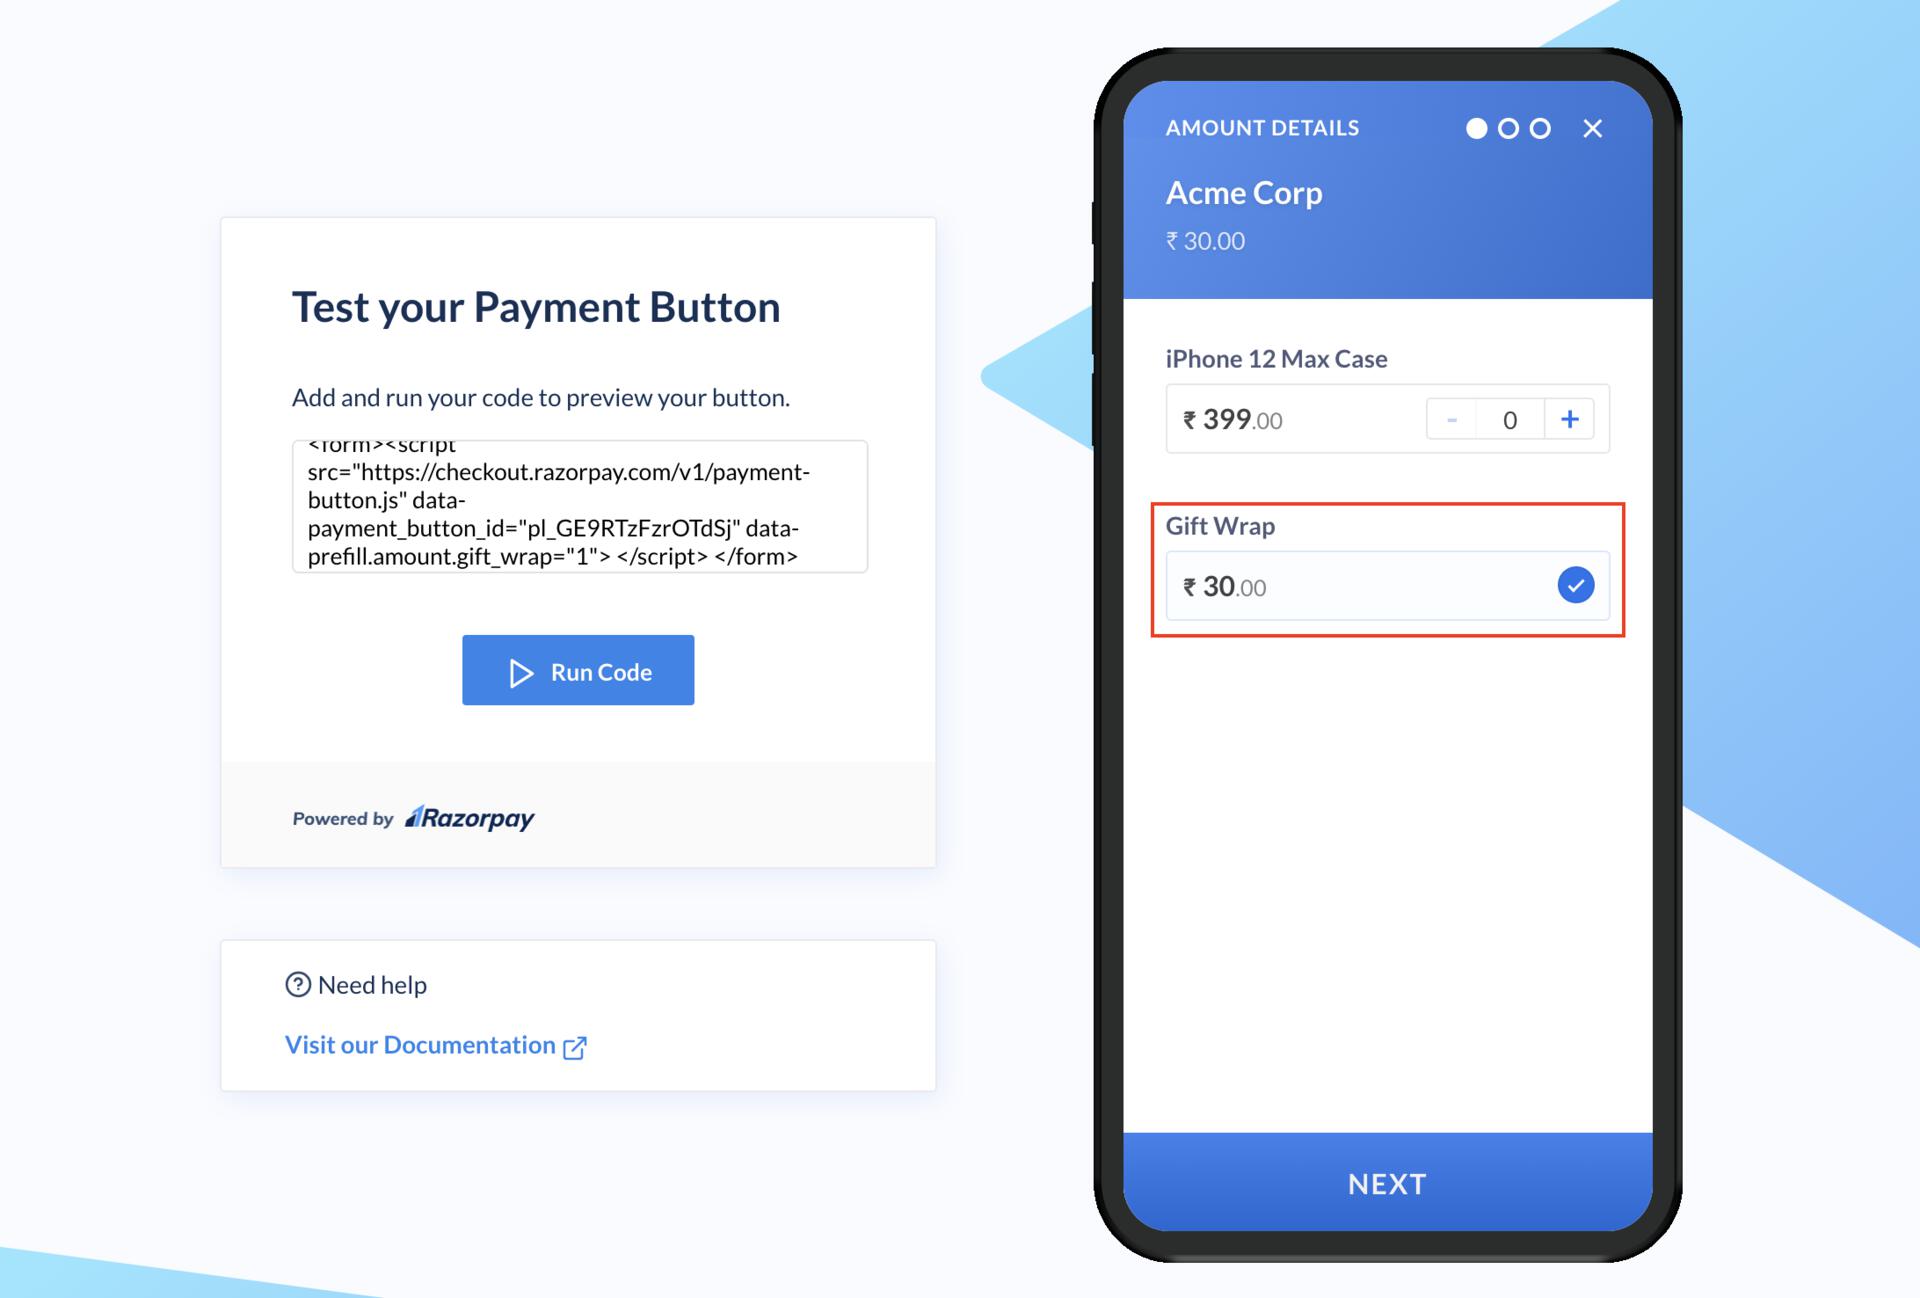
This ensures that the `Gift Wrap` amount field will appear pre-selected when customer opens Checkout.
#### Test the Code
Click the button below to open the Embed Code testing tool and test the code.
Test Embed Code
The following screenshot shows the preselected fixed amount field:
## Prefill Customer Decides Amount Field
You can add a field with a pre-filled amount value which the customer can also edit.
Suppose you are the director of an NGO that is raising funds for flood relief. Apart from the relief packages such as sanitation kits (worth ₹750) and dry ration kits (worth ₹1000), you are adding a field to collect cash.
You want to prefill the `Cash` field for donors. And, you want to show as a suggested donation amount. Donors can donate this amount, , or change the amount and then pay.
Watch this video to see how to add a Prefilled amount value which the customer can edit.
1. Log in to the Dashboard and create a Payment Button titled **Contribute to Assam Flood Relief**. Select the `Donations` button type.
2. In the **Donation Amount** section, create an amount field called `Cash`.
3. Configure the **Customer Details** section as required.
4. **Publish** the Payment Button.
5. Here is a sample embed code. Copy the embed code.
```xml Button Embed Code theme={null}
```
6. When you embed the button code on your website, add the following parameter:
```javascript Amount Field Parameter theme={null}
data-prefill.amount.cash="500"
```
The parameter structure is explained below:
| Field Name | Amount Field Label | Value |
| --------------------- | ------------------ | ----- |
| `data-prefill.amount` | `.cash` | 500 |
**Handy Tips**
* Ensure that the field-level validations are in place. If you enter a character in the `amount` field, say `100` or `Hundred`, the field will not get populated.
* If you are using a custom field name for amount, ensure that the field name is entered in lowercase and is separated by an underscore. For example, if the amount field name is `Cash Funds`, enter the suffix as `cash_funds`.
* Pre-population of the amount field is subject to the Minimum and Maximum Input Price set for the amount field. For example, if the Maximum Input Price has been set as , the Cash field cannot be prefilled with a value higher than .
The updated embed code looks like this:
```xml Updated Button Embed Code theme={null}
```
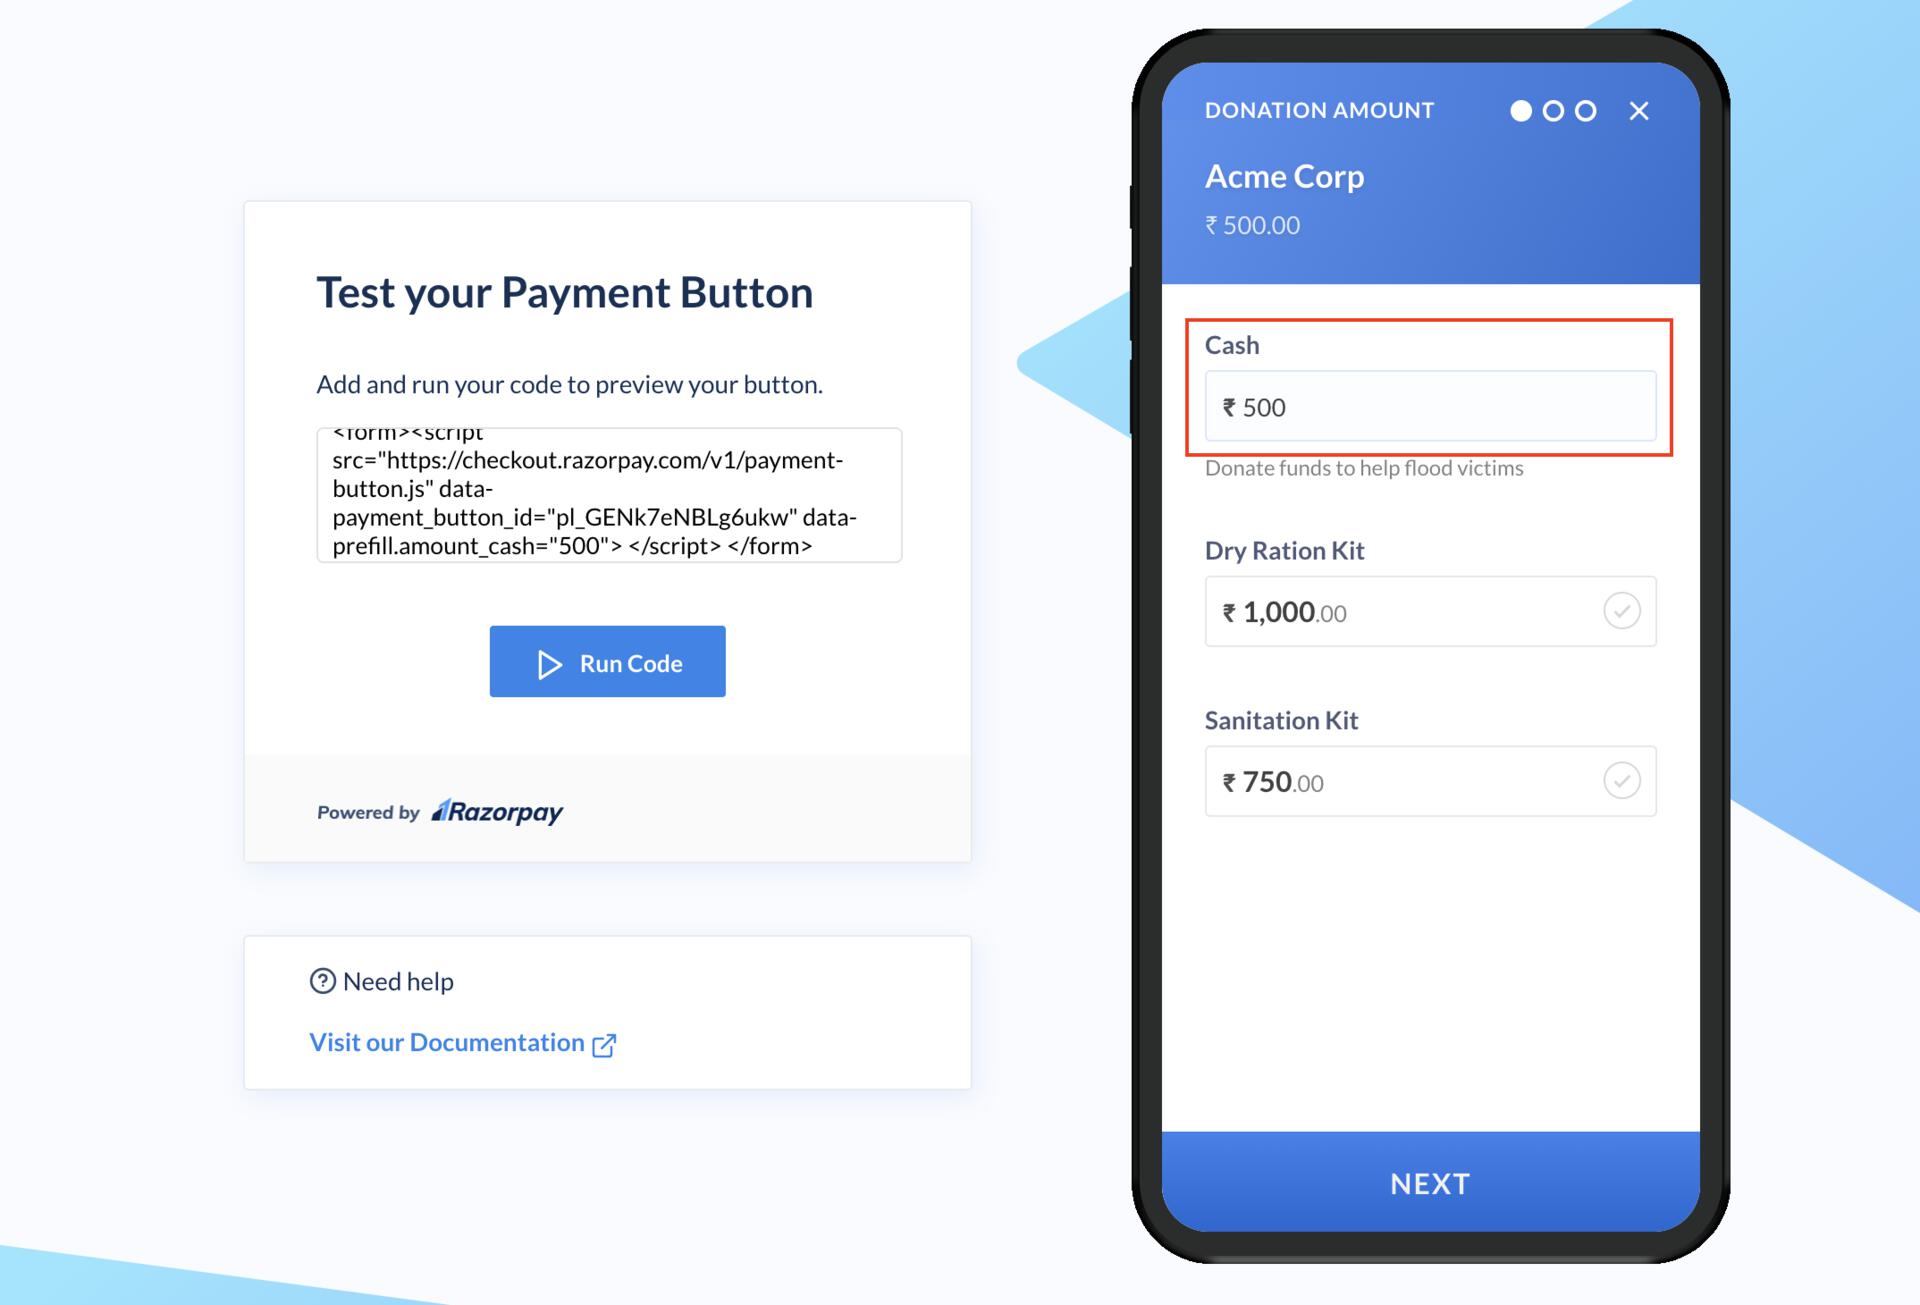
This ensures that the `Cash` amount field will appear prefilled with an amount of ₹500 when the customer opens Checkout.
#### Test the Code
Click the button below to open the Embed Code testing tool and test the code.
Test Embed Code
The following screenshot shows the prefilled editable amount field:
### Related Information
* [Payment Button](/docs/payments/payment-button)
* [How Payment Button Works](/docs/payments/payment-button/how-it-works)
* [Payment Button States](/docs/payments/payment-button/states)
* [Quick Pay Button](/docs/payments/payment-button/quick-pay)
* [Buy Now Button](/docs/payments/payment-button/buy-now)
* [Donations Button](/docs/payments/payment-button/donations)
* [Custom Payment Button](/docs/payments/payment-button/custom)
* [Manage Payment Button](/docs/payments/payment-button/manage)
* [Search for a Payment Button](/docs/payments/payment-button/search)