> ## Documentation Index
> Fetch the complete documentation index at: https://razorpay-881012b3.mintlify.site/llms.txt
> Use this file to discover all available pages before exploring further.
# Embed Payment Button on WordPress Website
> Embed a Razorpay Payment Button on your WordPress website and accept payments from customers.
Available in🇮🇳 India
Version 2.4.6 released for Payment Button Wordpress. This version fixes naming conflict in Razorpay section.
WordPress is one of the most popular Content Management Systems out there. You can quickly build a website using WordPress and embed the our Payment Button to accept payments from customers.
## WordPress Plan
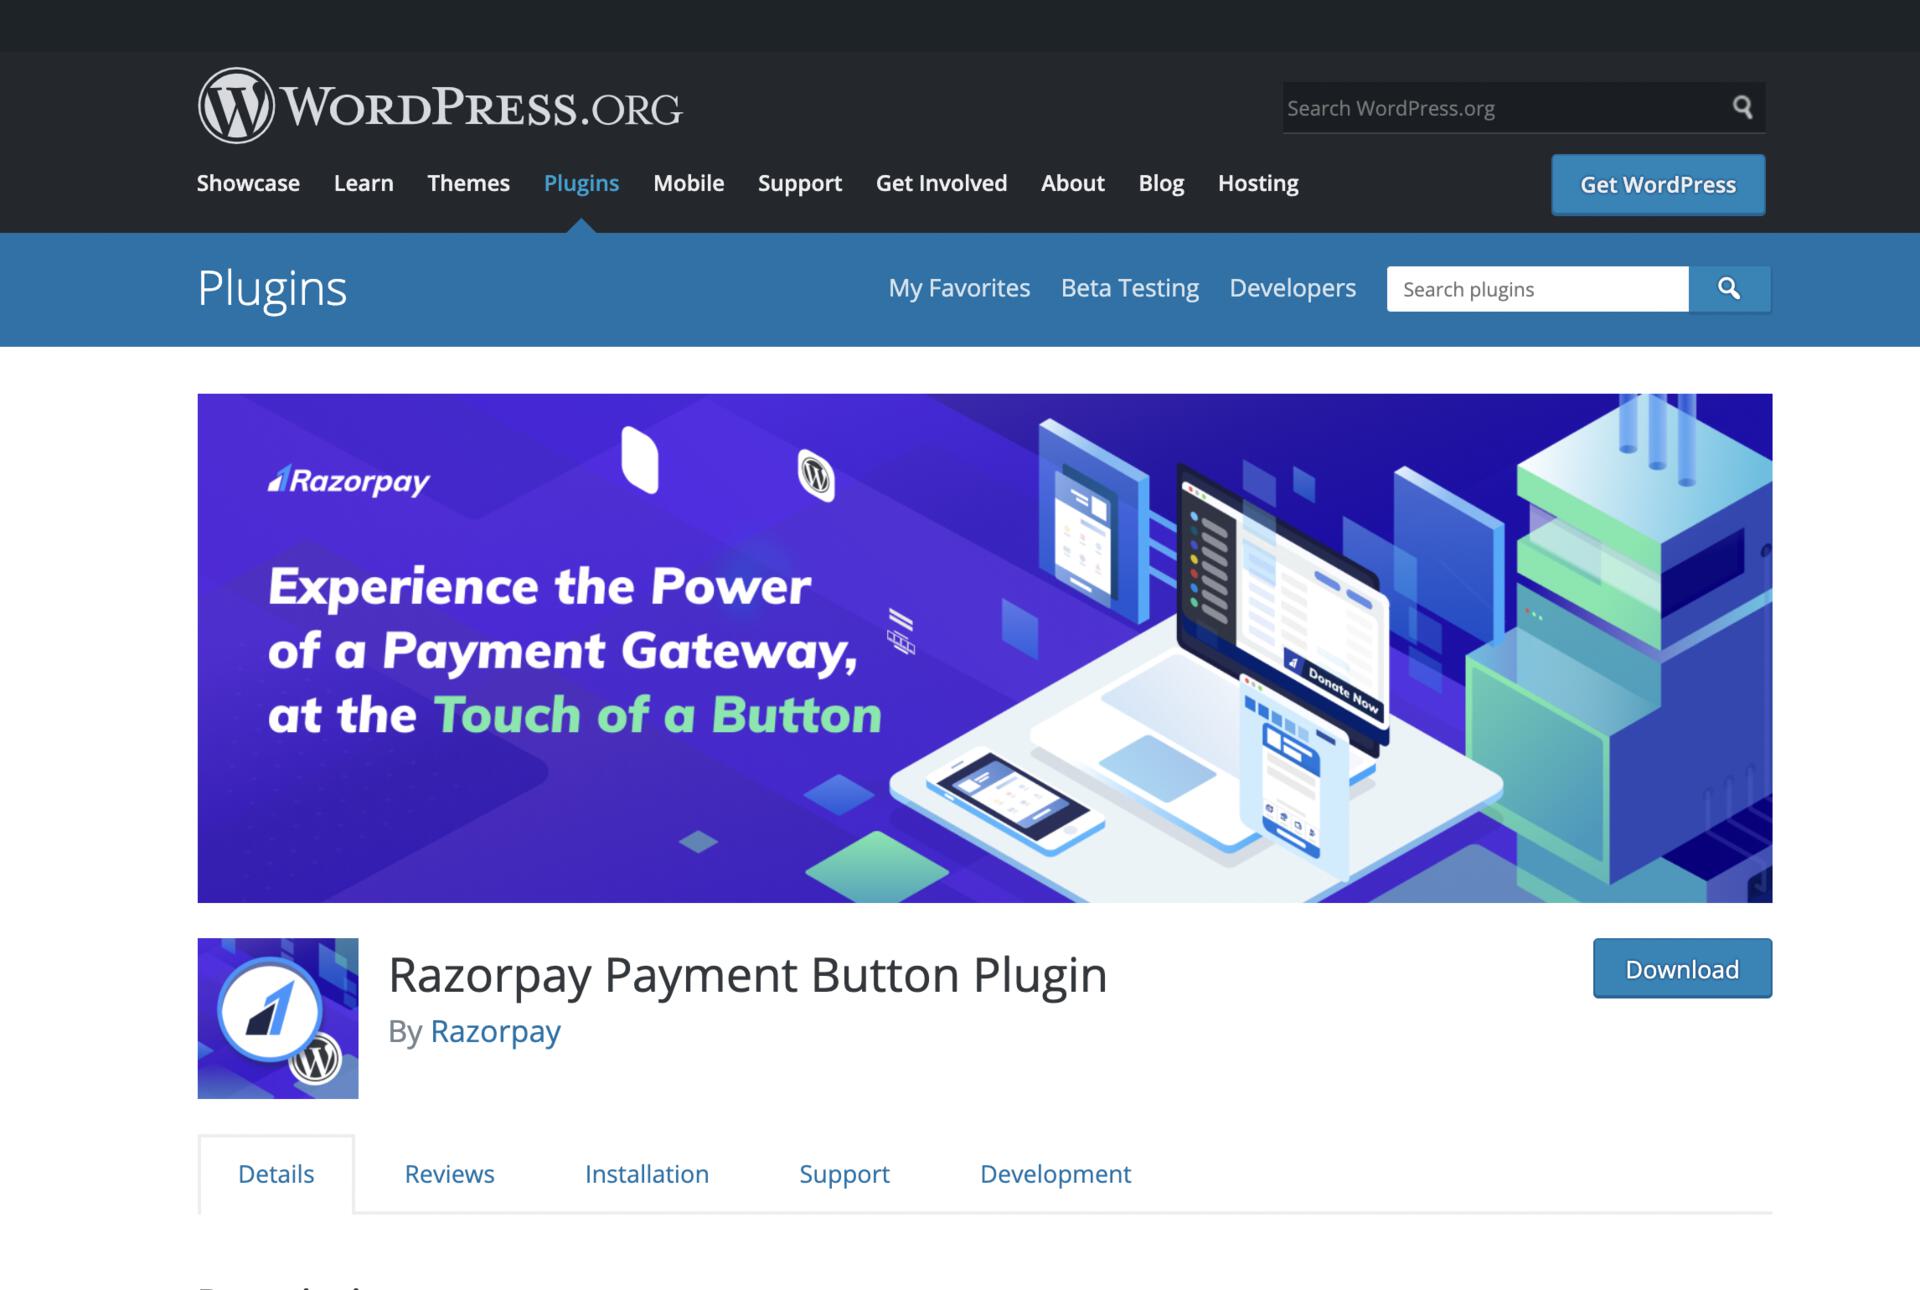
If you have built your website using `www.wordpress.com`, and are on a paid plan, you can directly install the Razorpay Payment Button Plugin from the WordPress Plugins store.
1. [Install the Razorpay Payment Button Plugin on your WordPress site](https://wordpress.org/plugins/razorpay-payment-button/).
2. [Create a Payment Button on Dashboard](#step-2-create-a-payment-button-on-razorpay).
3. [Embed the Payment Button on your WordPress site](#step-3-embed-the-payment-button-on-wordpress).
If you are using WordPress with the free plan, you need to use MAMP to set up a local WordPress site and continue with the Payment Button
implementation.
1. [Set up WordPress site locally on your system](#step-1-set-up-wordpress-site-locally-on).
2. [Create a Payment Button on Dashboard](#step-2-create-a-payment-button-on-razorpay).
3. [Embed the Payment Button on your WordPress site](#step-3-embed-the-payment-button-on-wordpress).
## Prerequisites
1. Download the [Razorpay Payment Button WordPress Plugin](https://wordpress.org/plugins/razorpay-payment-button/).
2. Create a Razorpay account.
3. Navigate to **Settings** → **API Keys** and [generate API keys](/docs/api/authentication#generate-api-keys) in the test mode.
Add the API key details in the Razorpay Payment Button plugin settings.
**Handy Tips**
* When testing: Generate the keys in Test mode.
* To accept live payments: Generate the keys in Live mode and replace them in the Payment Button plugin settings.
## Set Up a Payment Button Using Wordpress Plugin
Watch this video to see how to set up a Payment Button using Wordpress Plugin.
### 1. Set Up WordPress Site Locally on Your System
See: [Installation Steps for Windows](https://documentation.mamp.info/en/MAMP-Windows/Installation/)
To install WordPress on your Mac system:
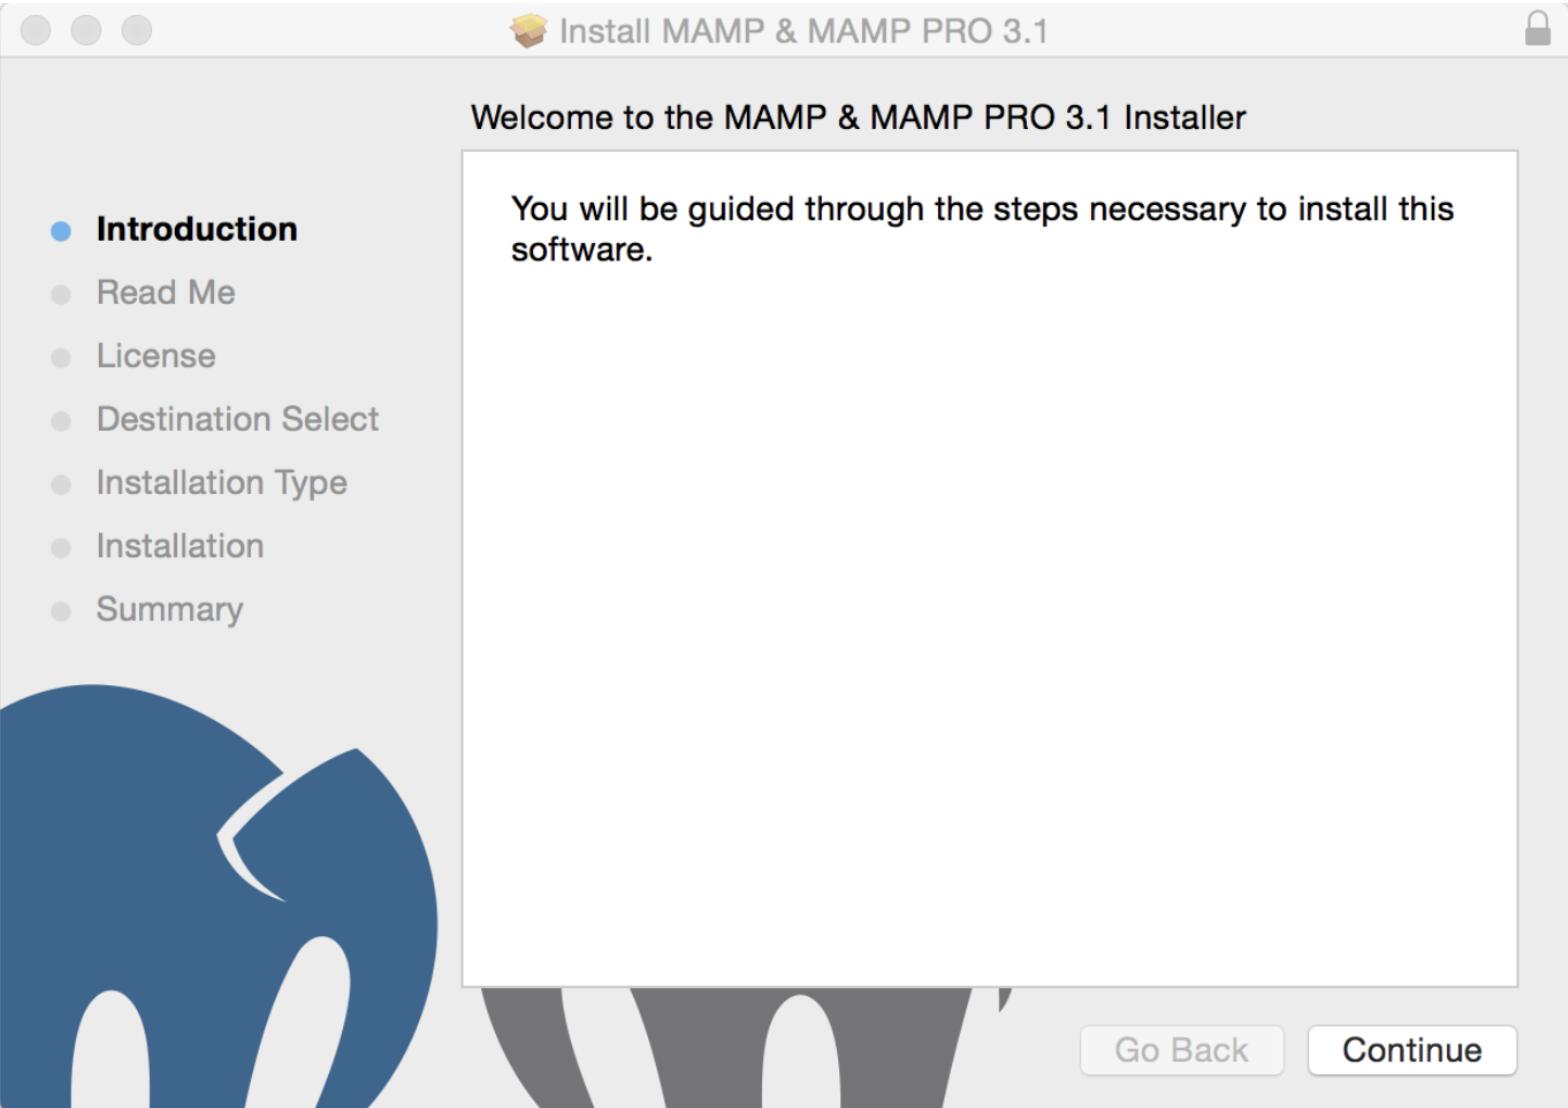
1. [Download the latest version of MAMP](https://www.mamp.info/en/downloads/) and install it on your Mac system. This software enables you to manage your websites locally.
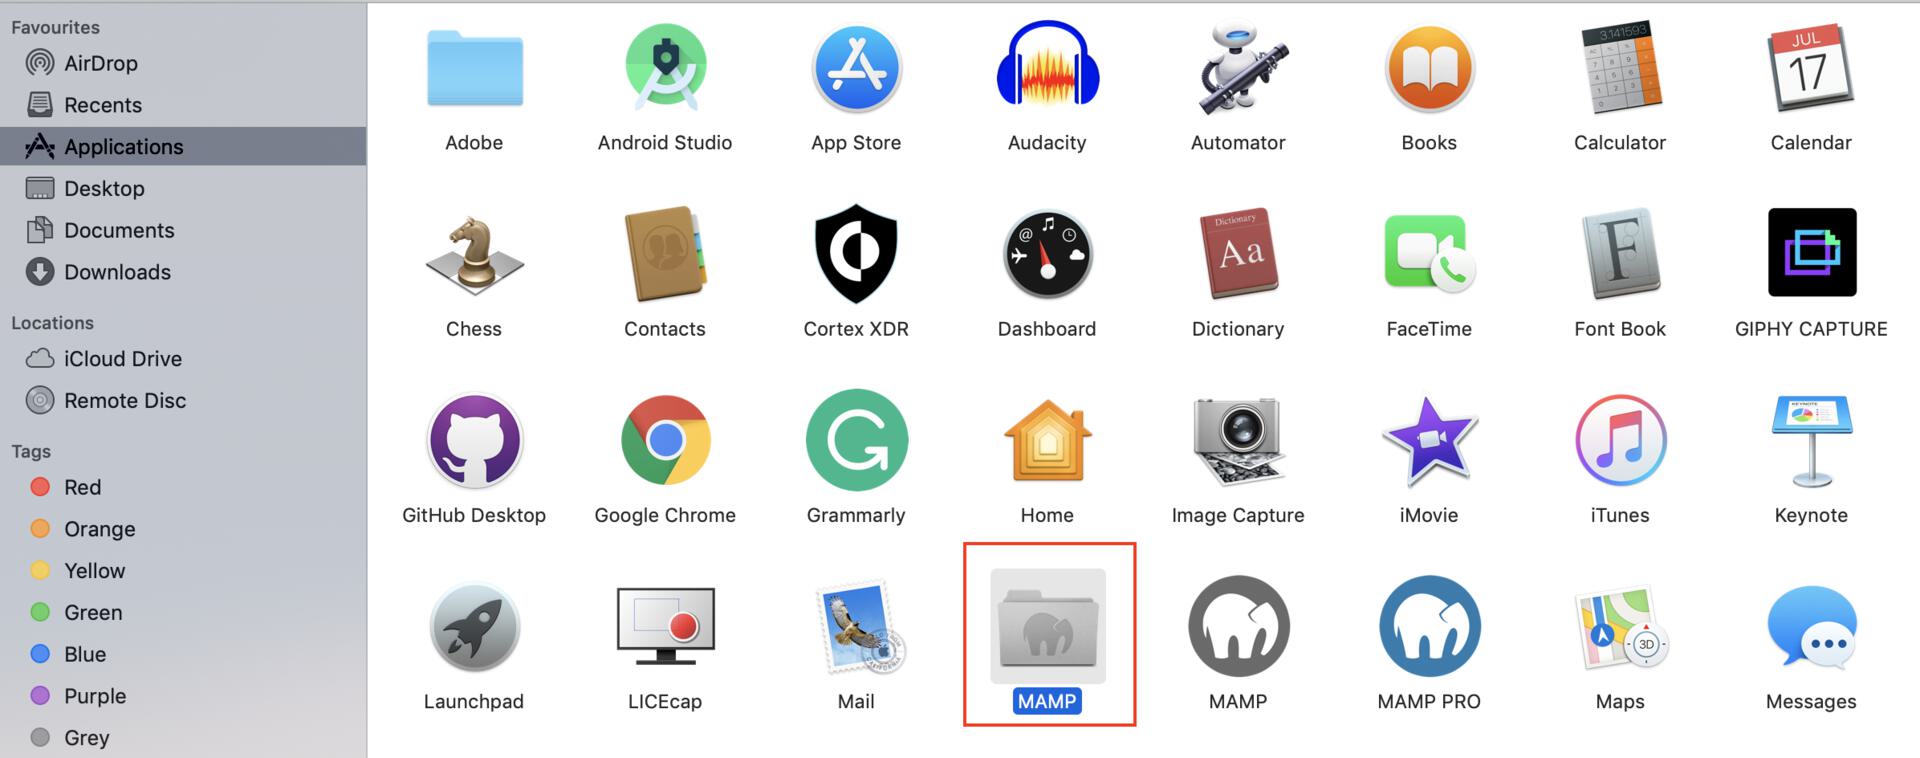
2. Install the downloaded file using the wizard and save MAMP in your **Applications** folder.
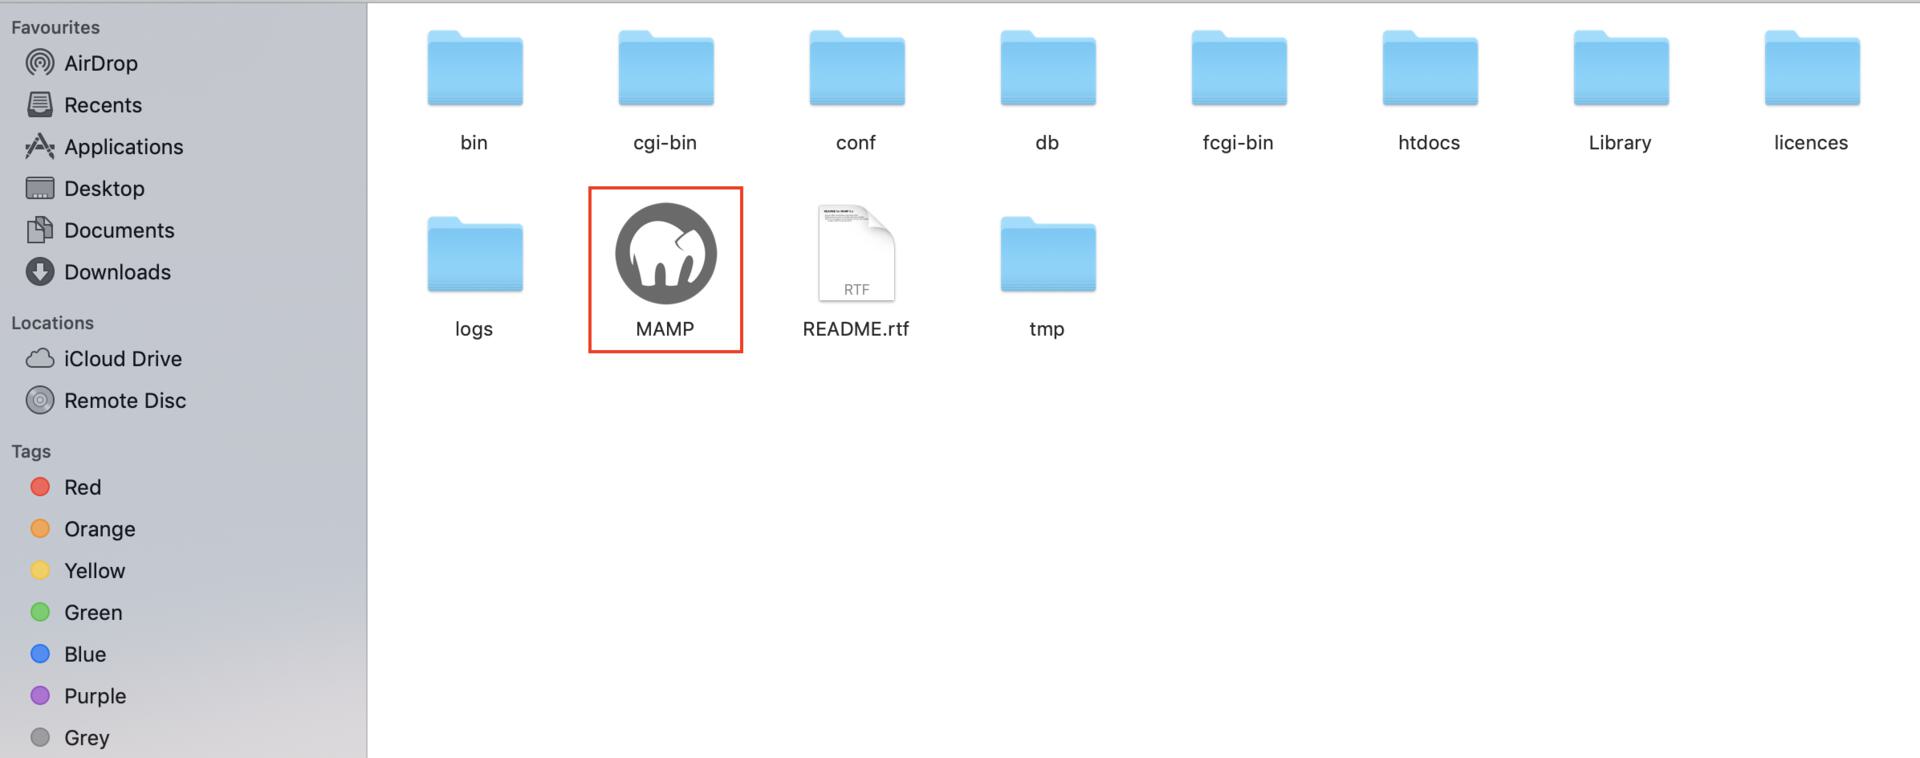
3. Navigate to the **MAMP** folder.
In the folder, click the **MAMP** icon:
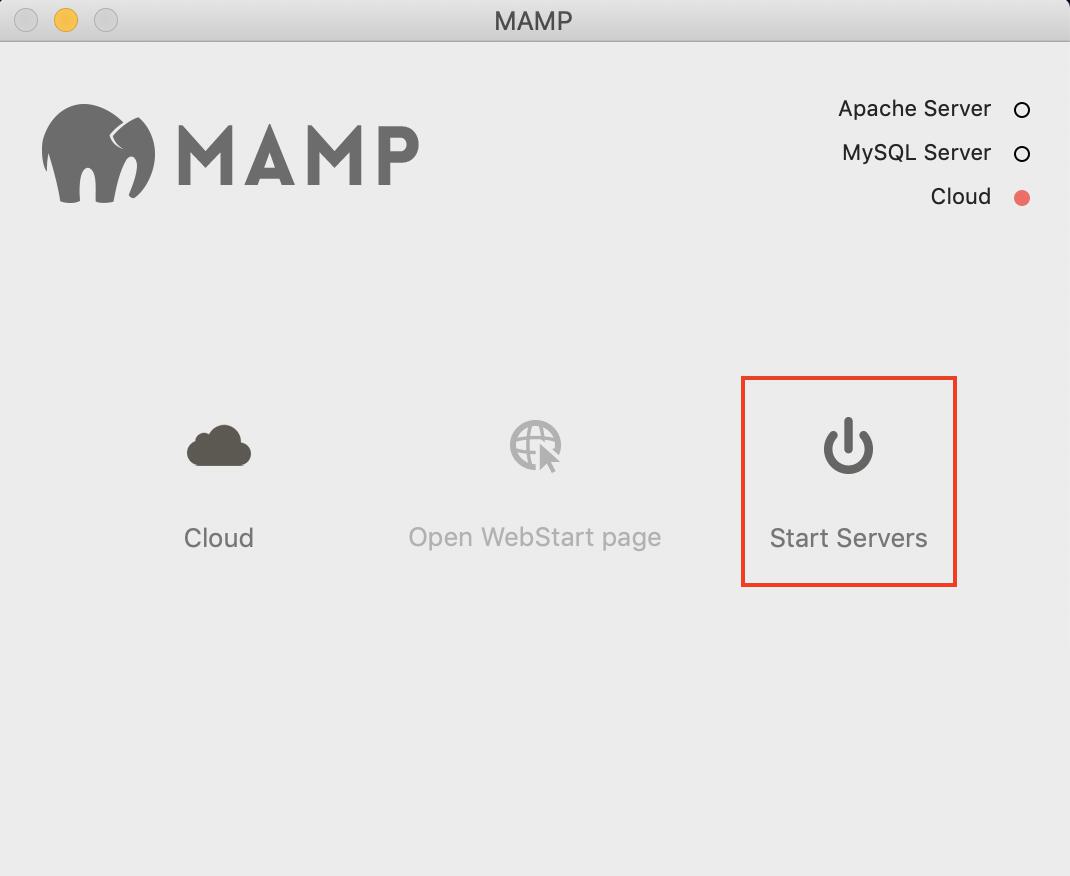
4. Click **Start Server** to run the server on your system.
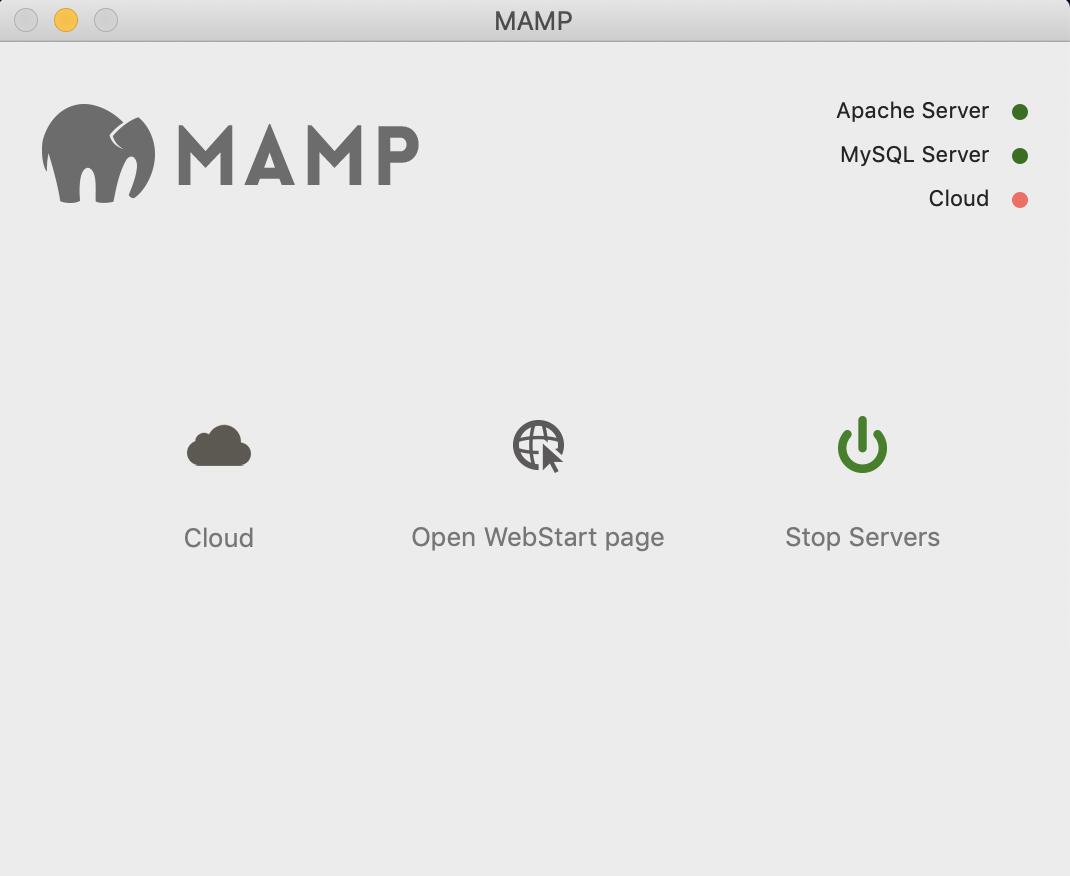
The server status appears green once they are ready.
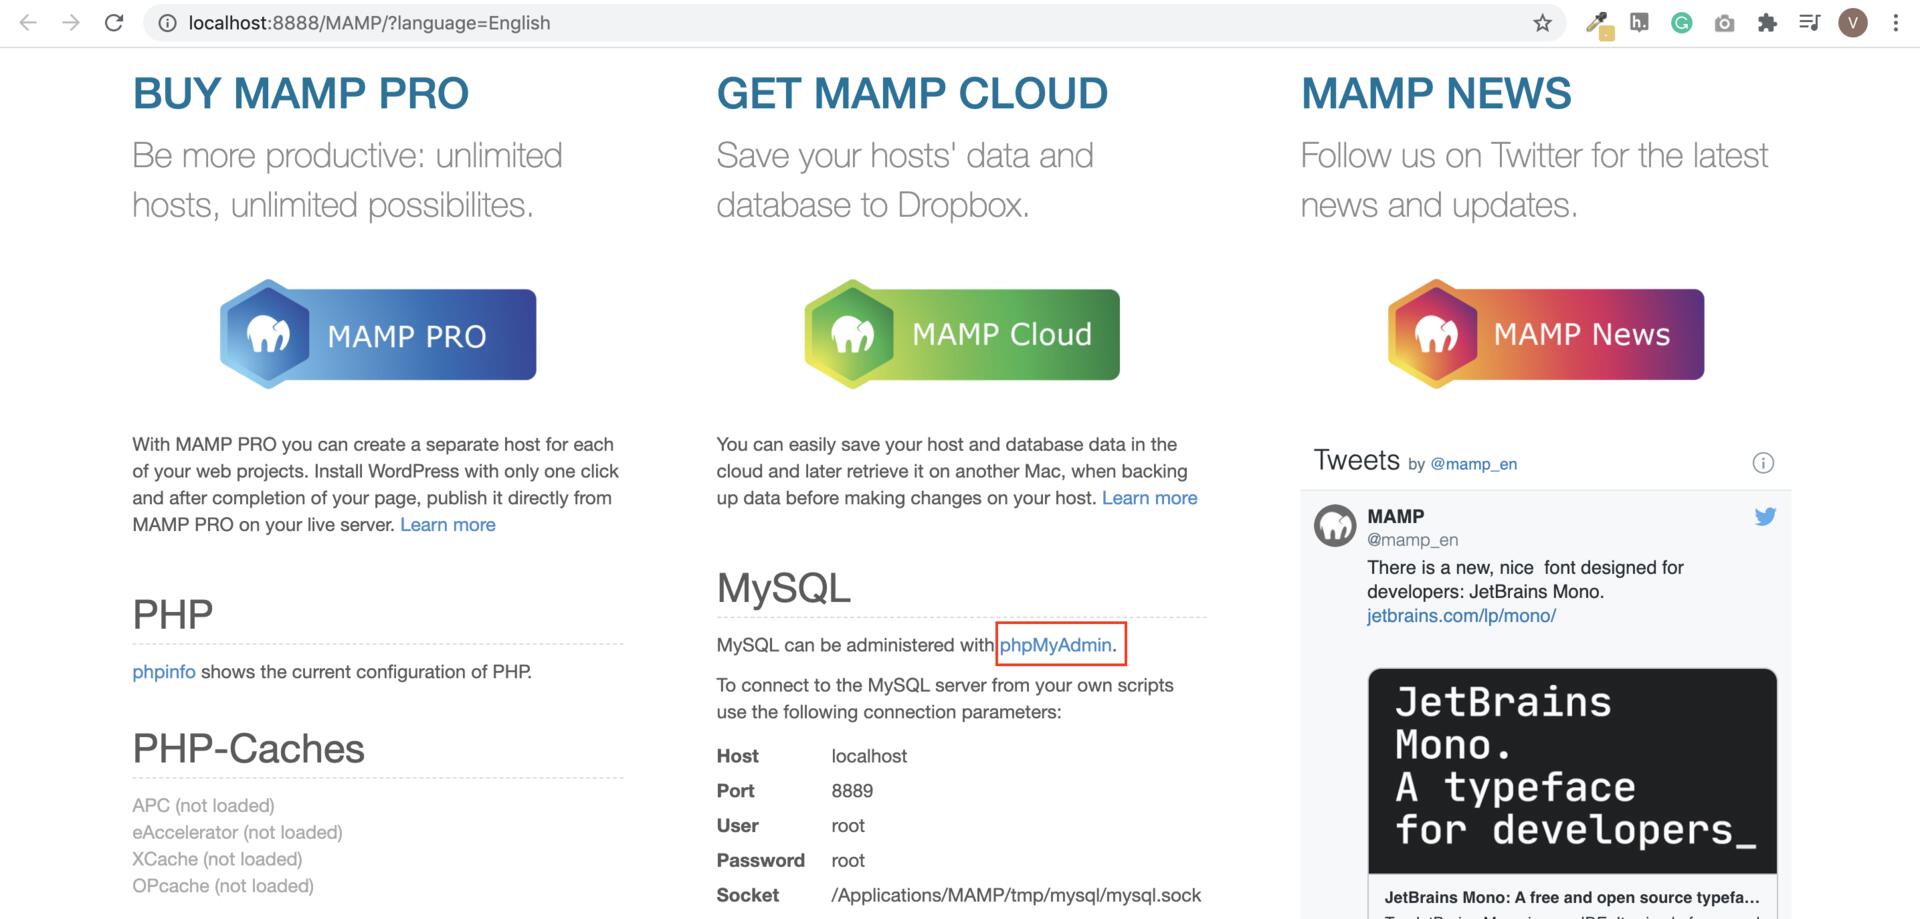
5. Click **Open WebStart Page**. The server starts running on your browser as shown:
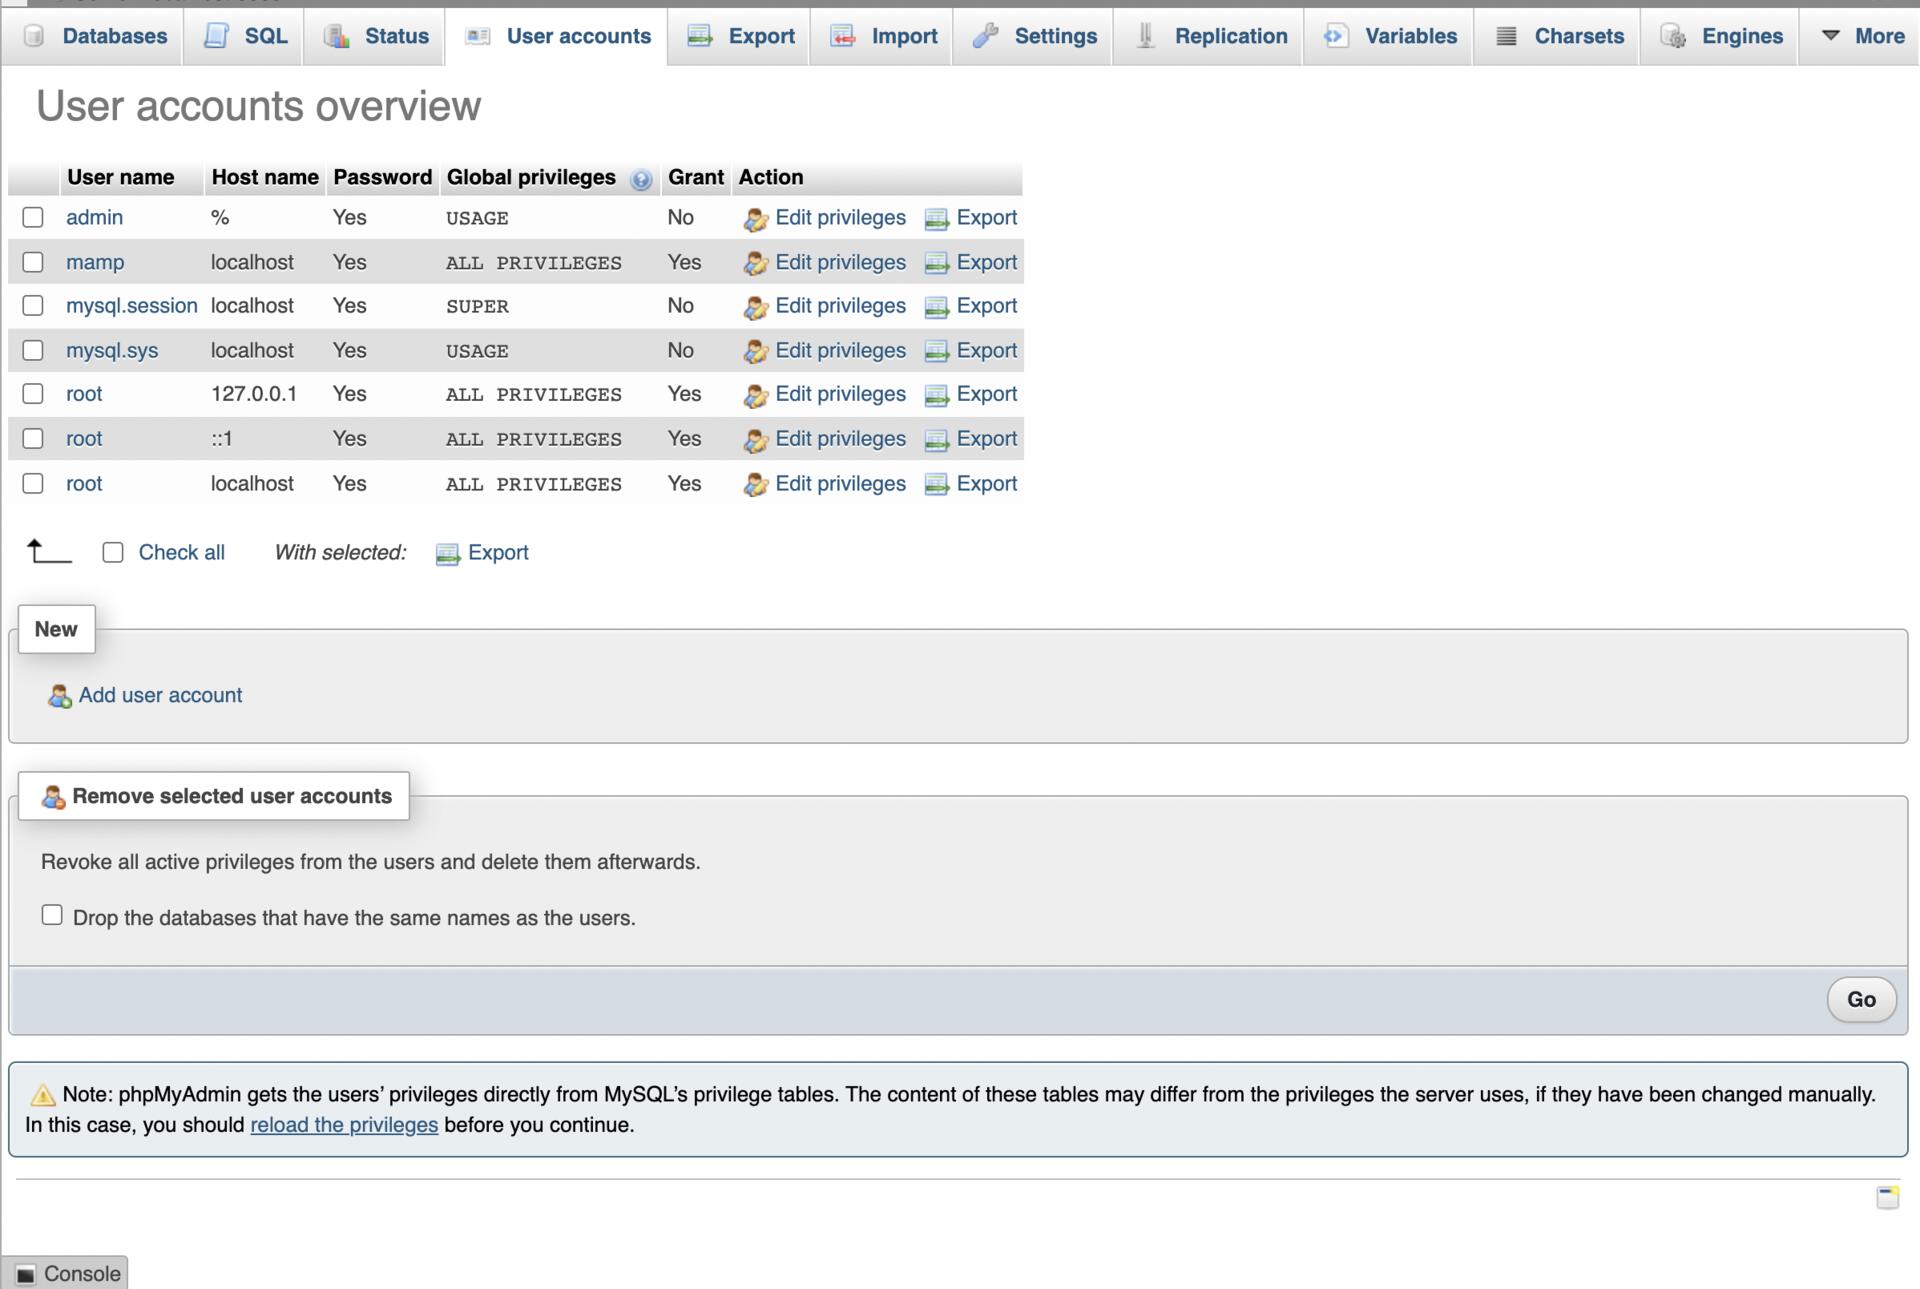
6. We must set up a MySQL database for the WordPress website. This is done using **phpMyAdmin**.
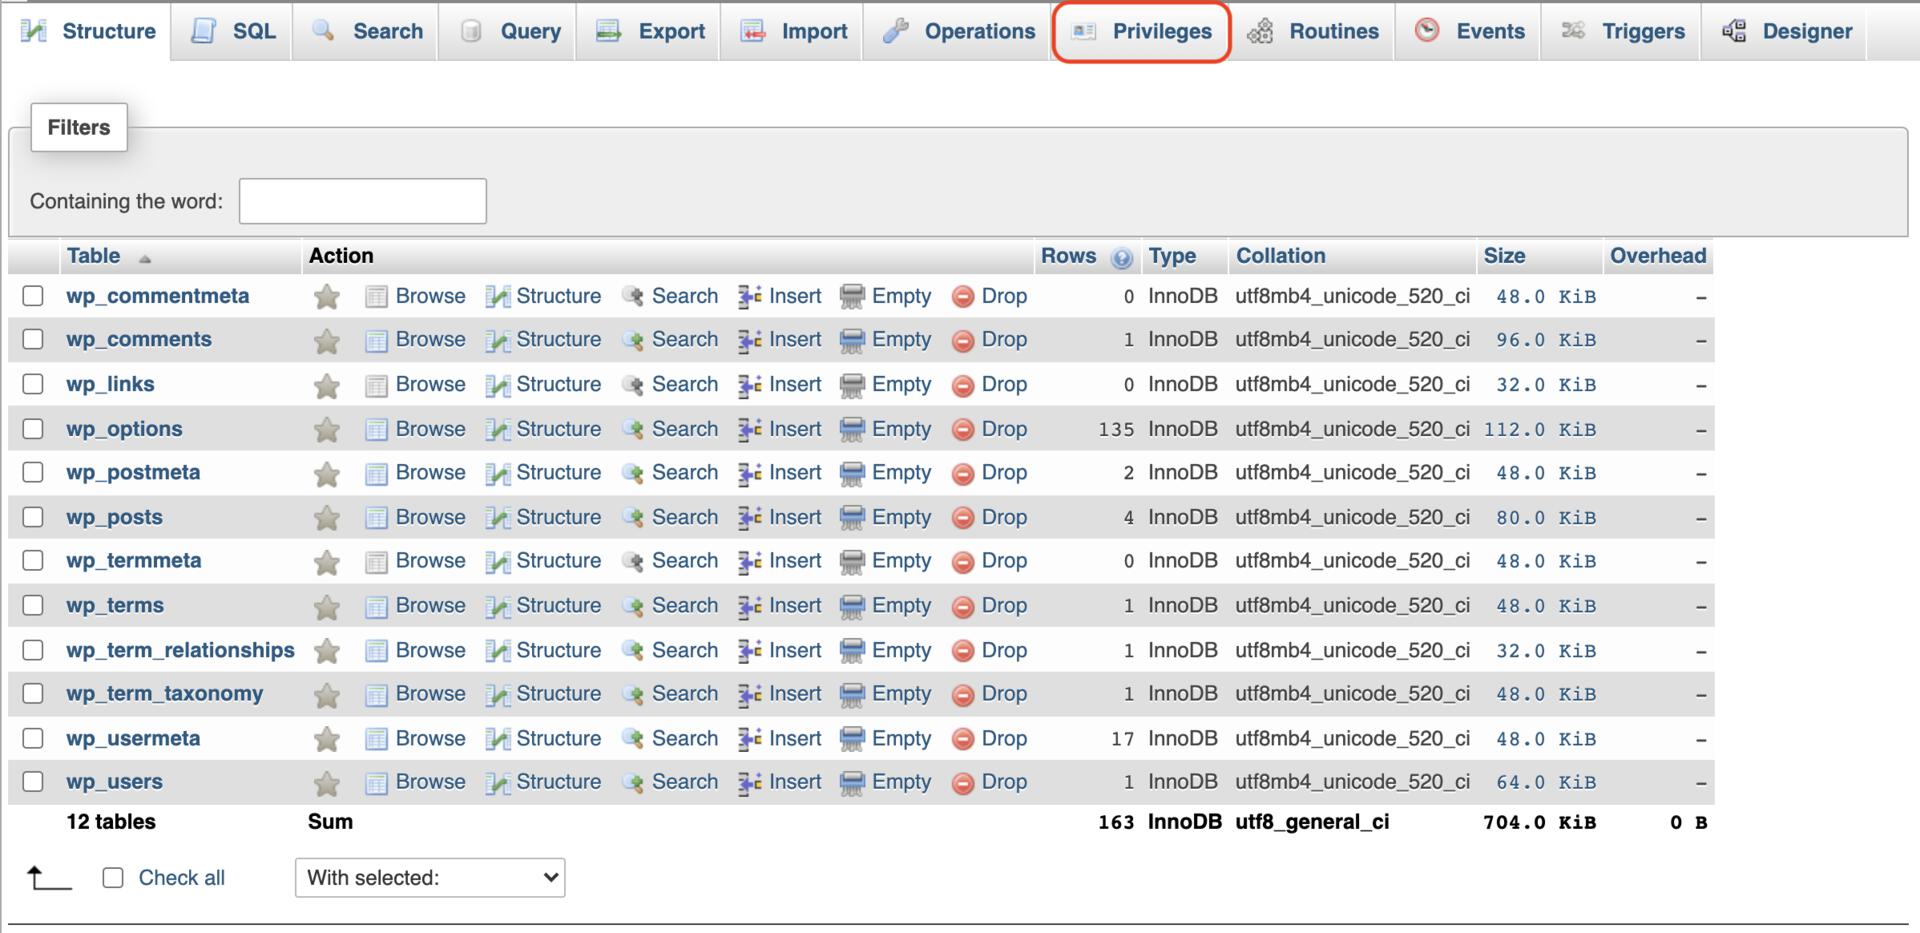
a. Select the required database and click **Privileges**.
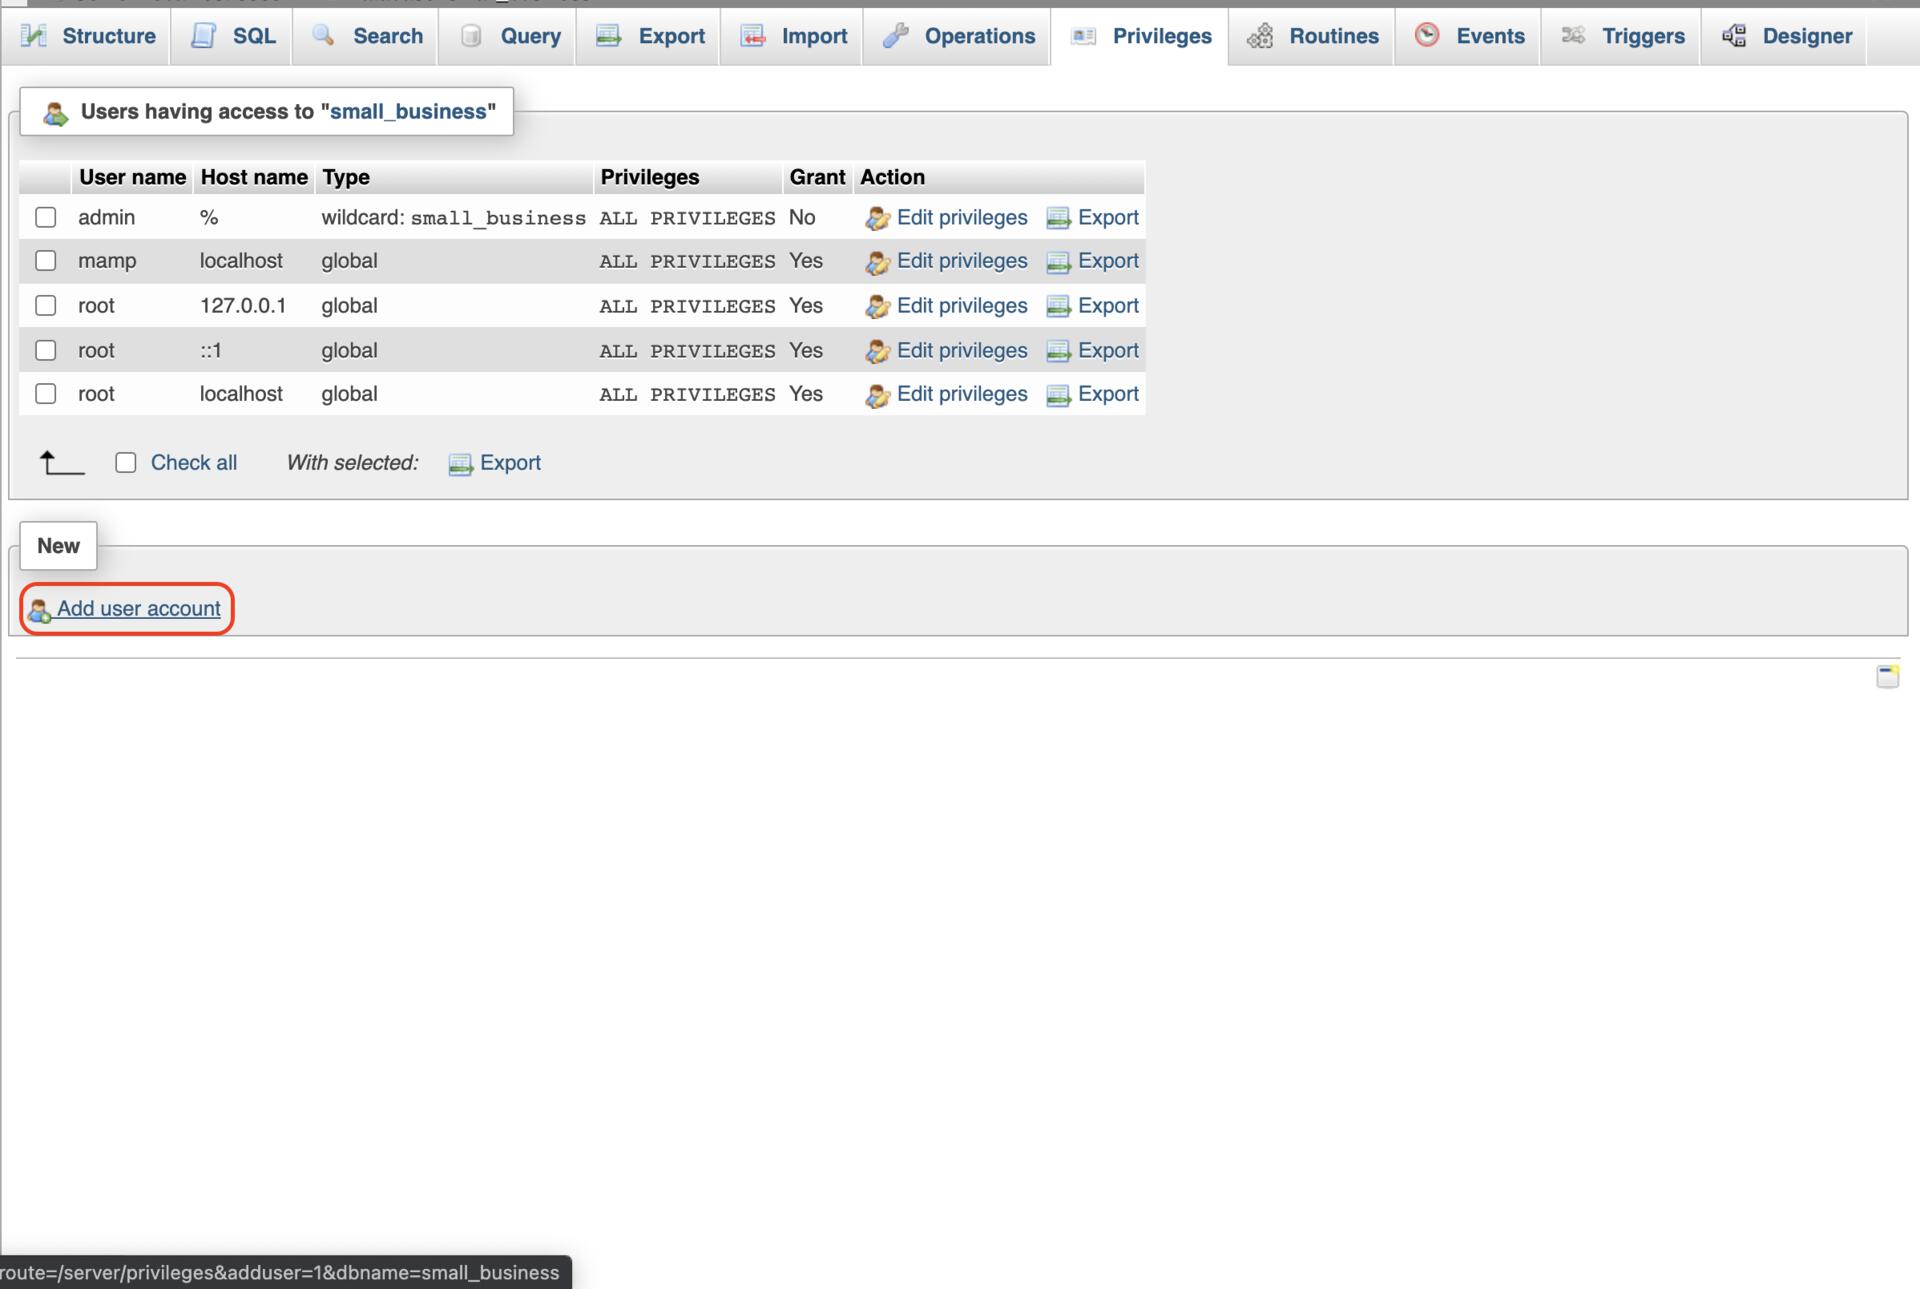
b. Click **Add user account**.
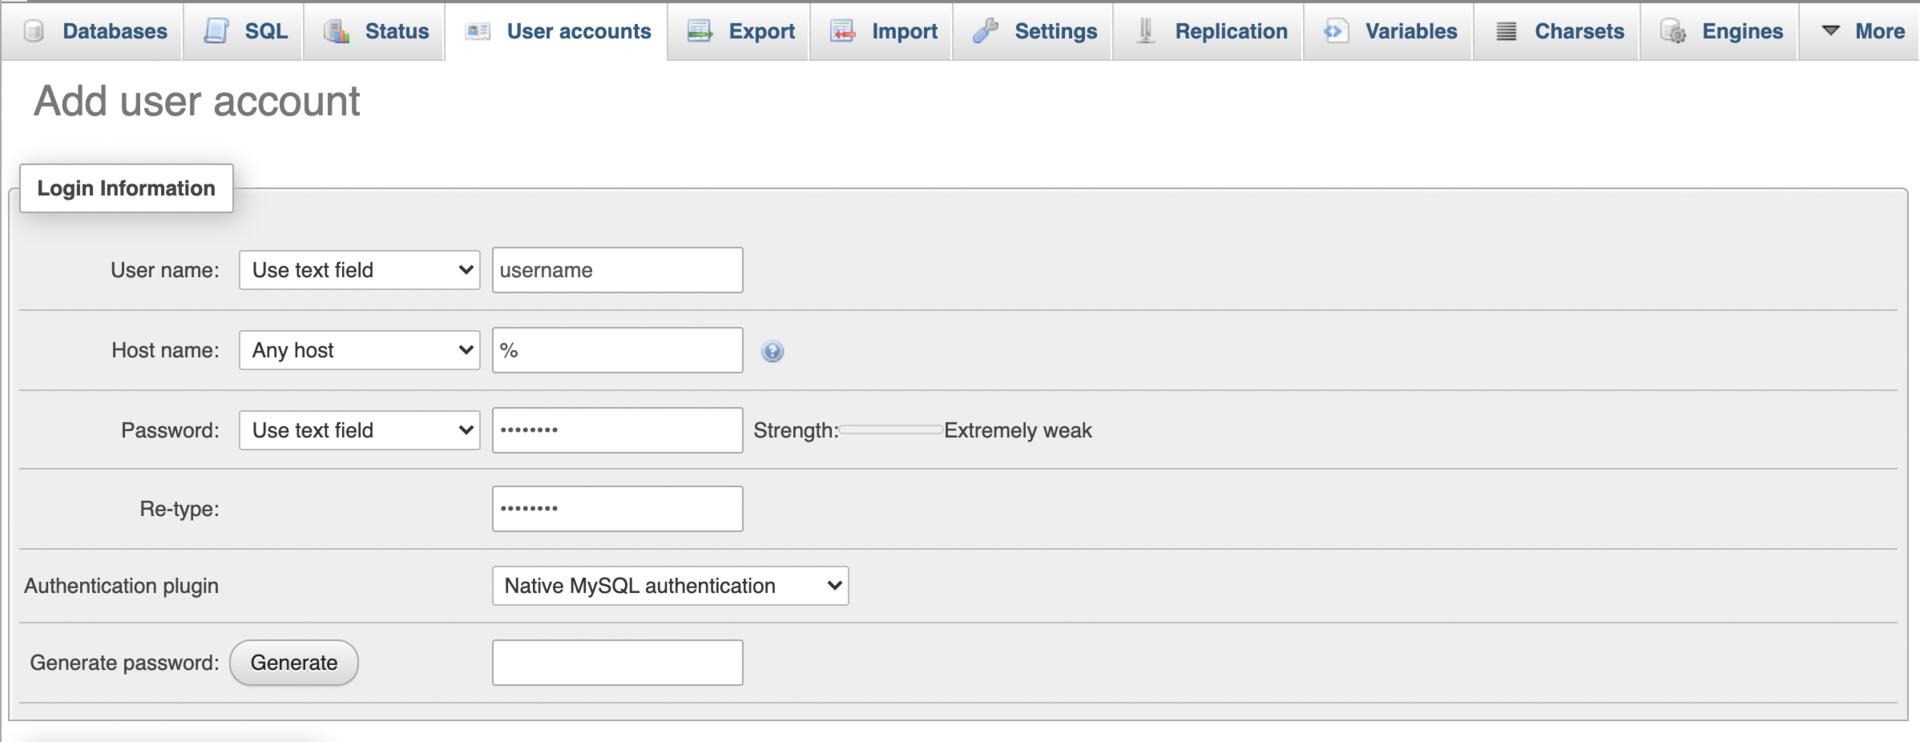
c. Enter the username and password, same as the WordPress account login credentials.
d. Click **Go**.
7. Navigate to the WordPress application you had downloaded.
8. Rename the `WordPress` folder. Provide a name relevant to the site you will be building/testing locally. For example, `teafactory`. Add the `teafactory` folder in `htdocs` of your MAMP directory.
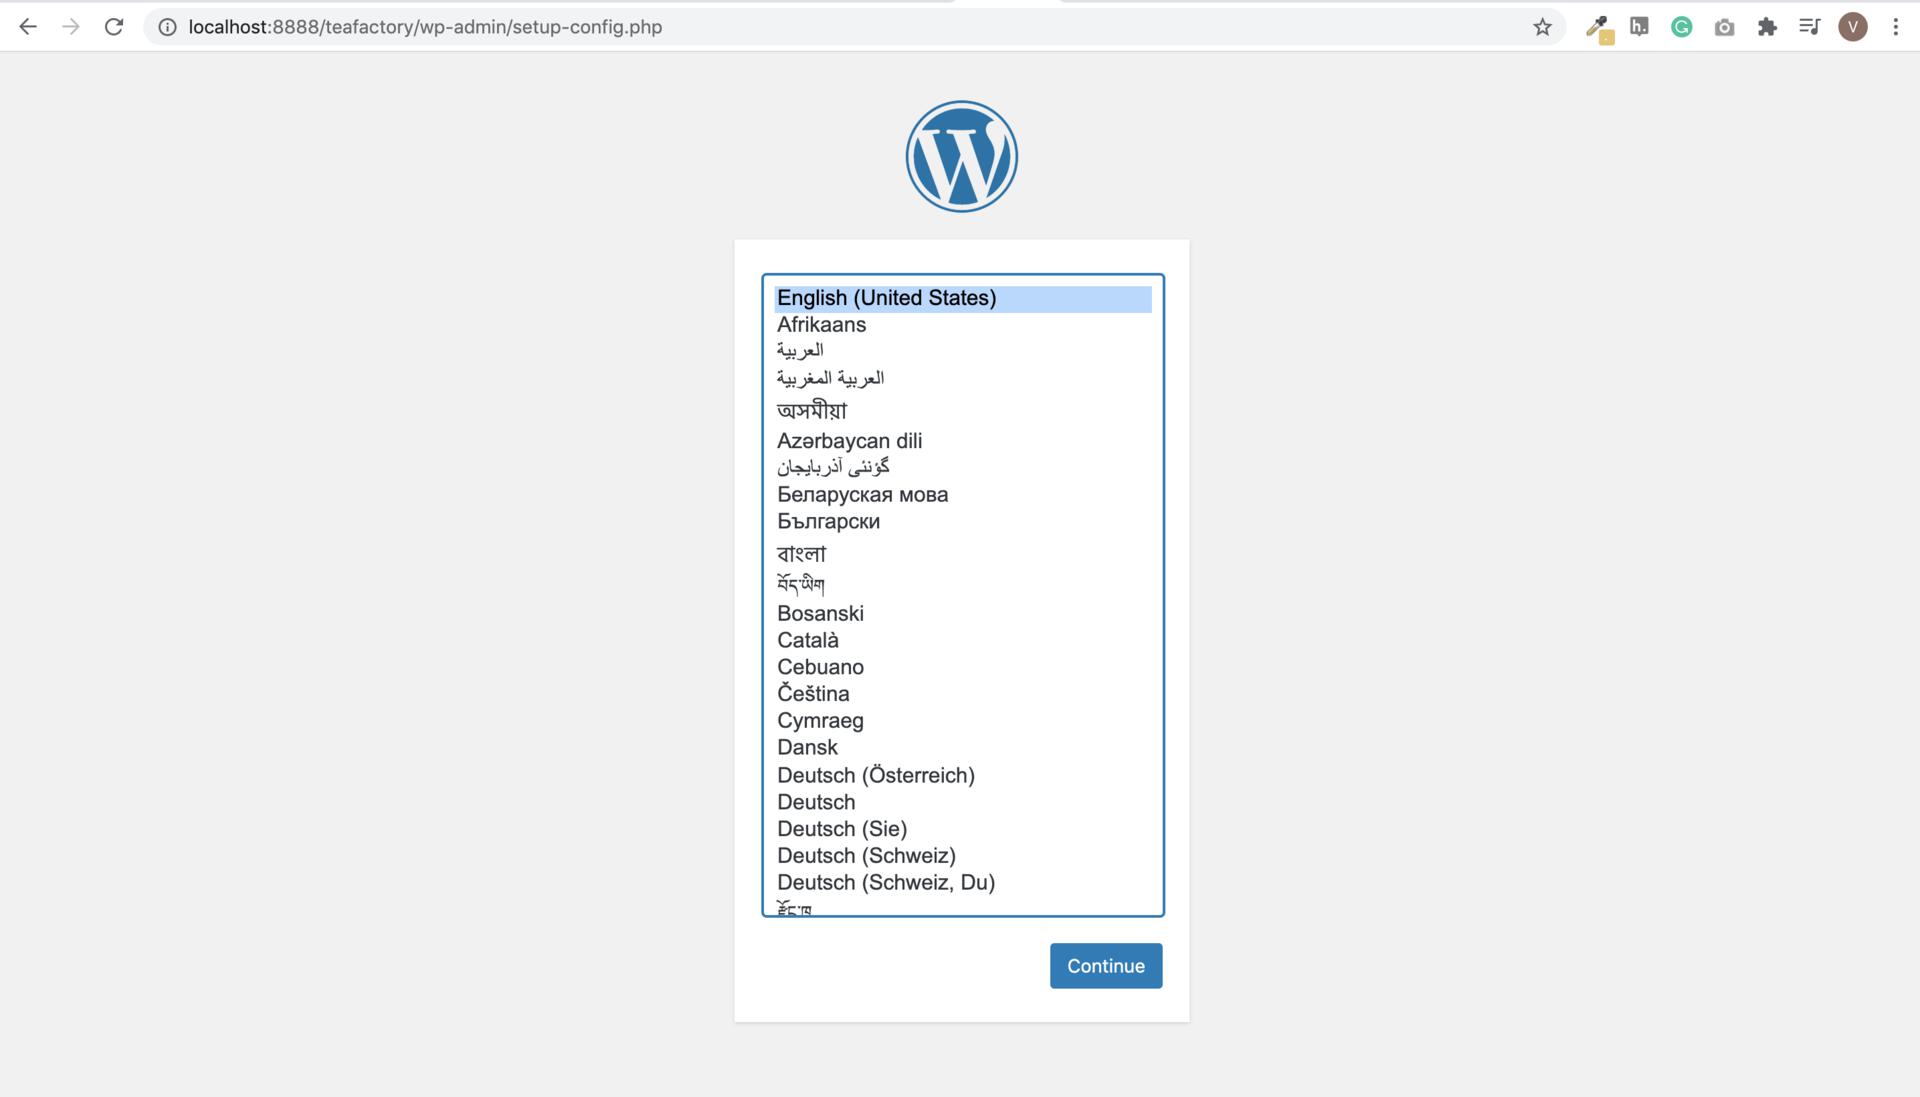
9. Open the browser and type in the URL pointing to your site folder. For example, `localhost:8888/teafactory`. Select the language of your choice and click **Continue** → **Let's Go**.
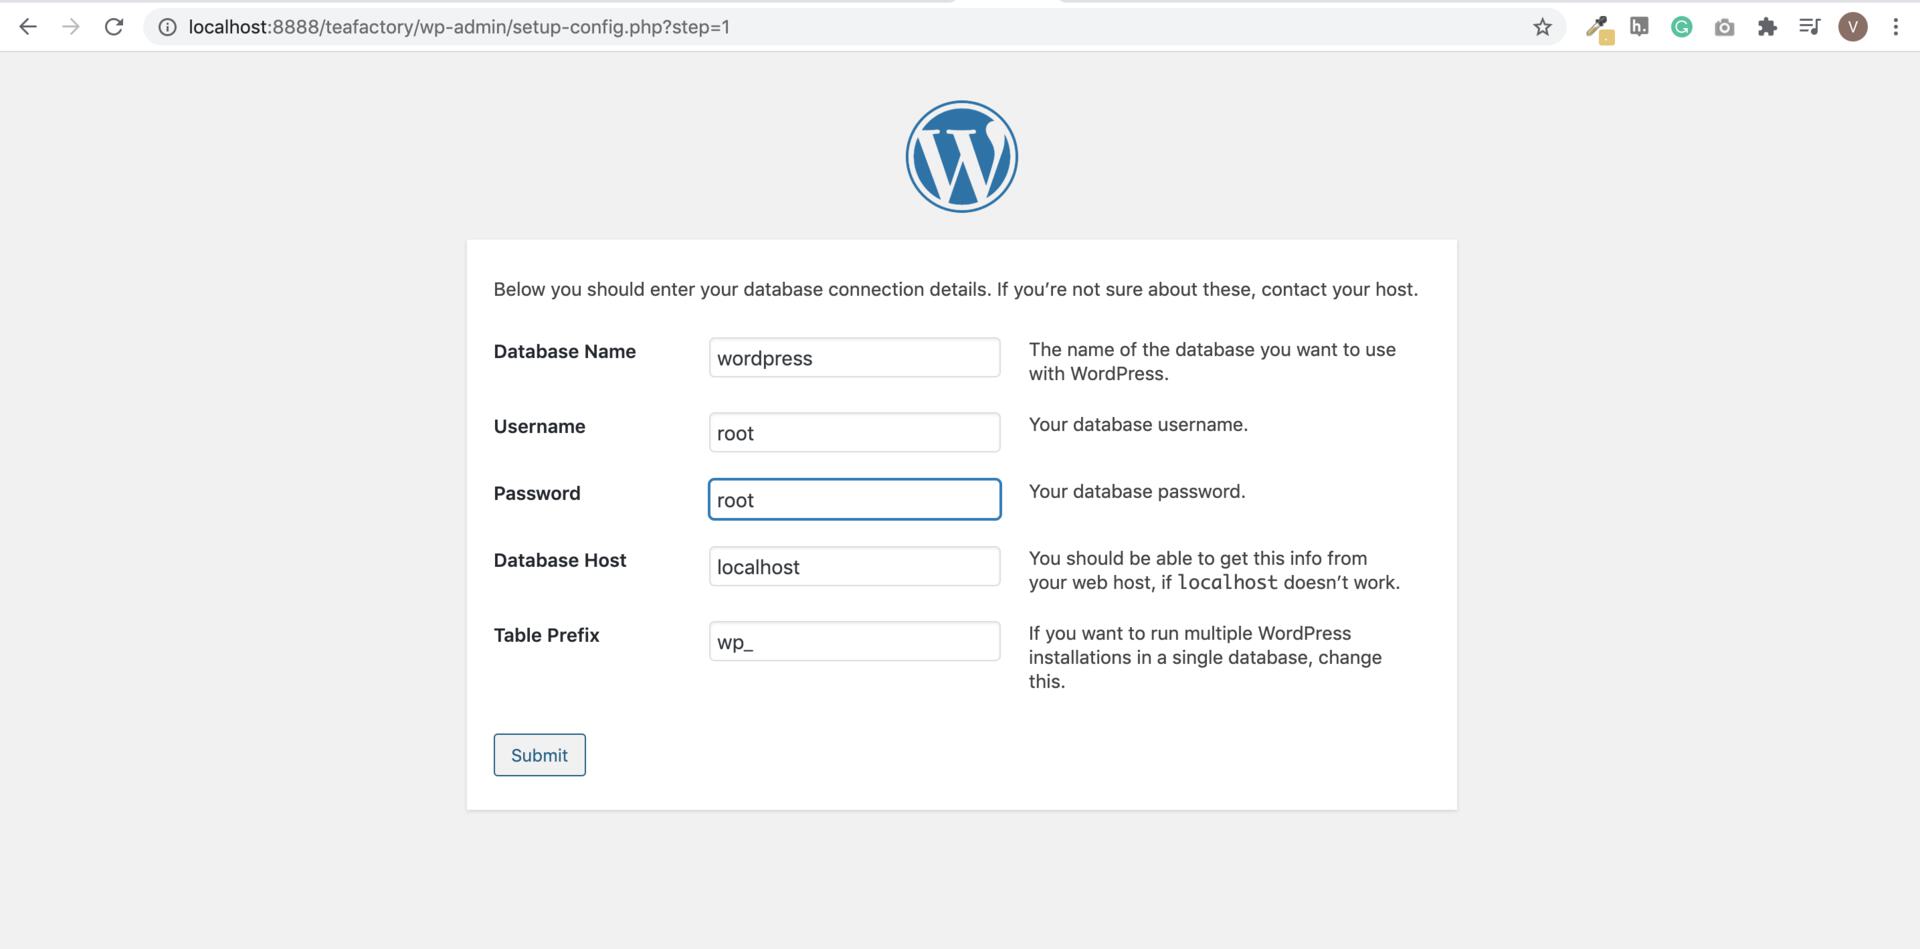
10. Enter your database details. Provide a name for the database, and enter `root` for both the database username and password. Click **Submit**.
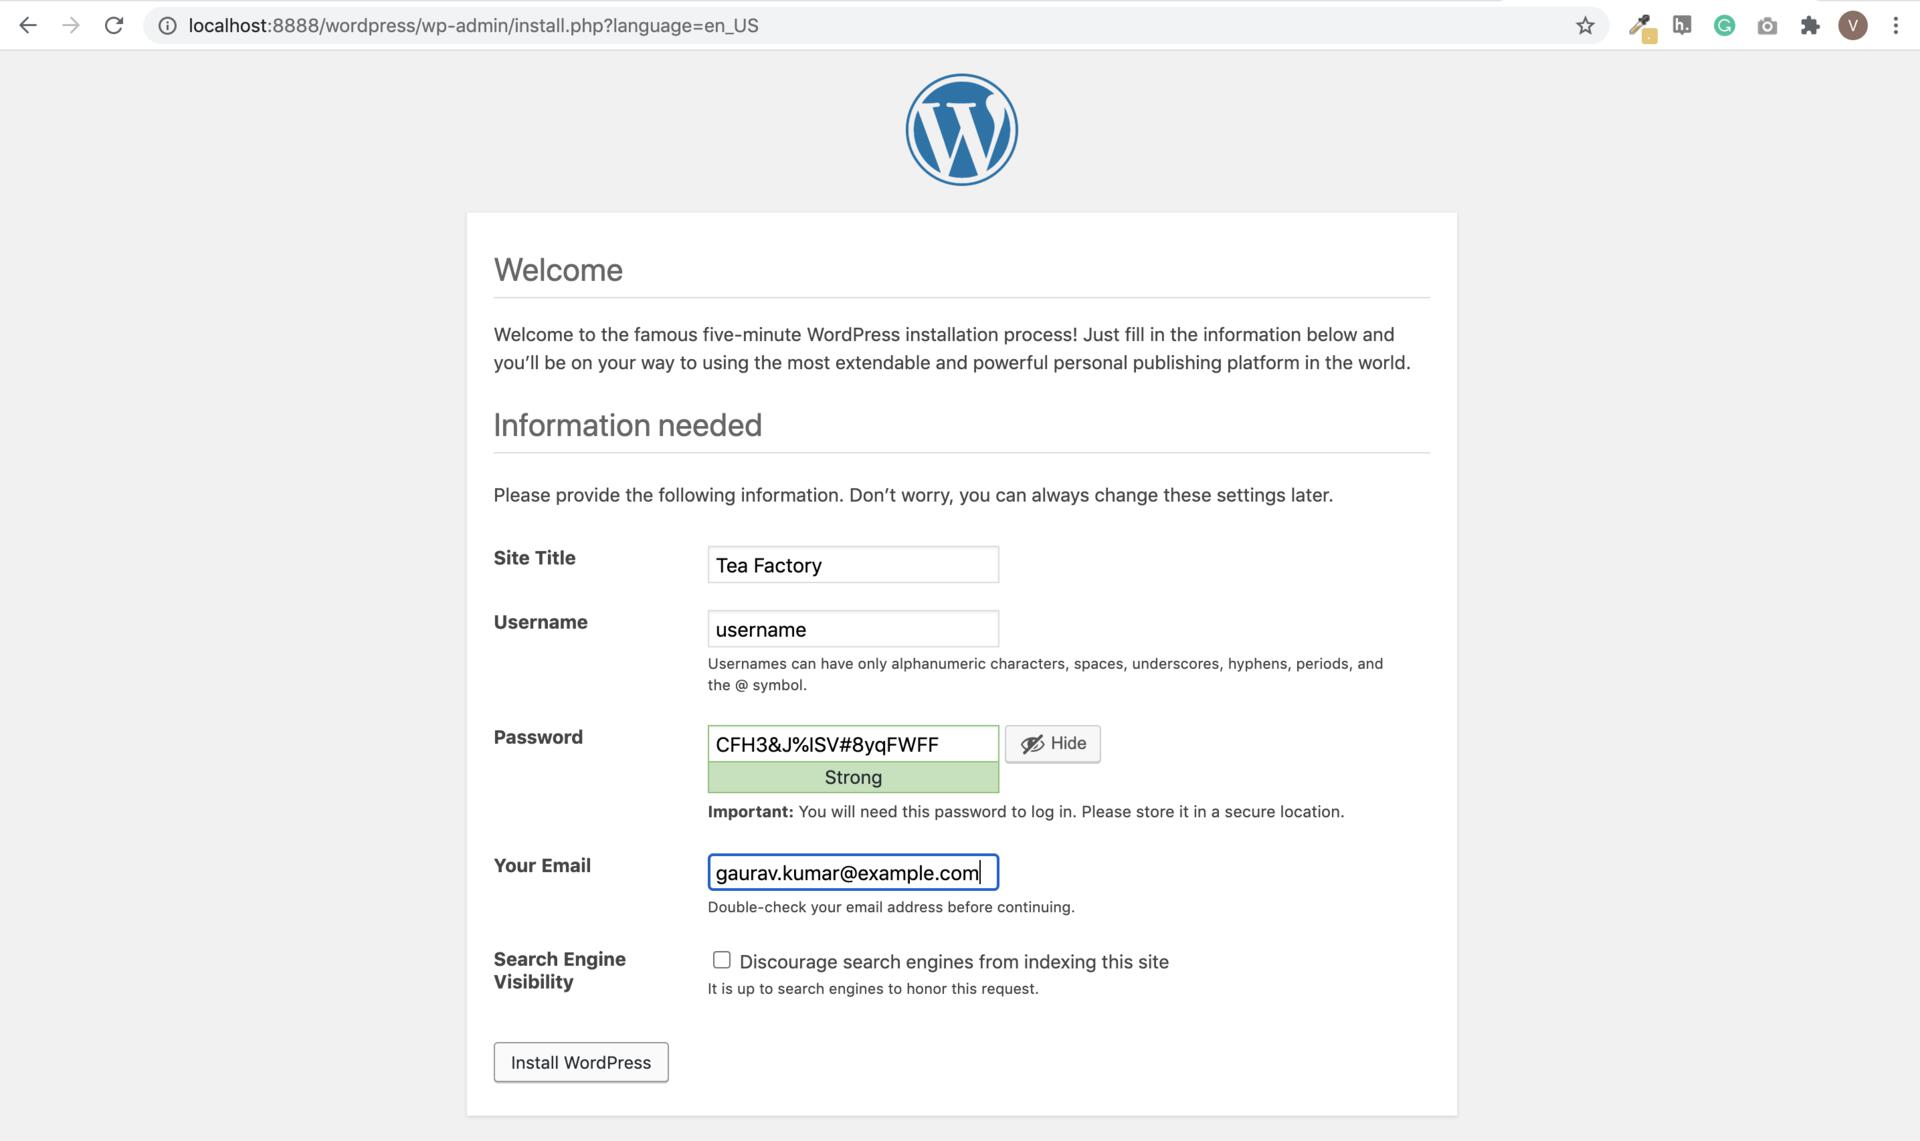
11. Provide the required general site information (which you can change later), as well as your login information in WordPress.
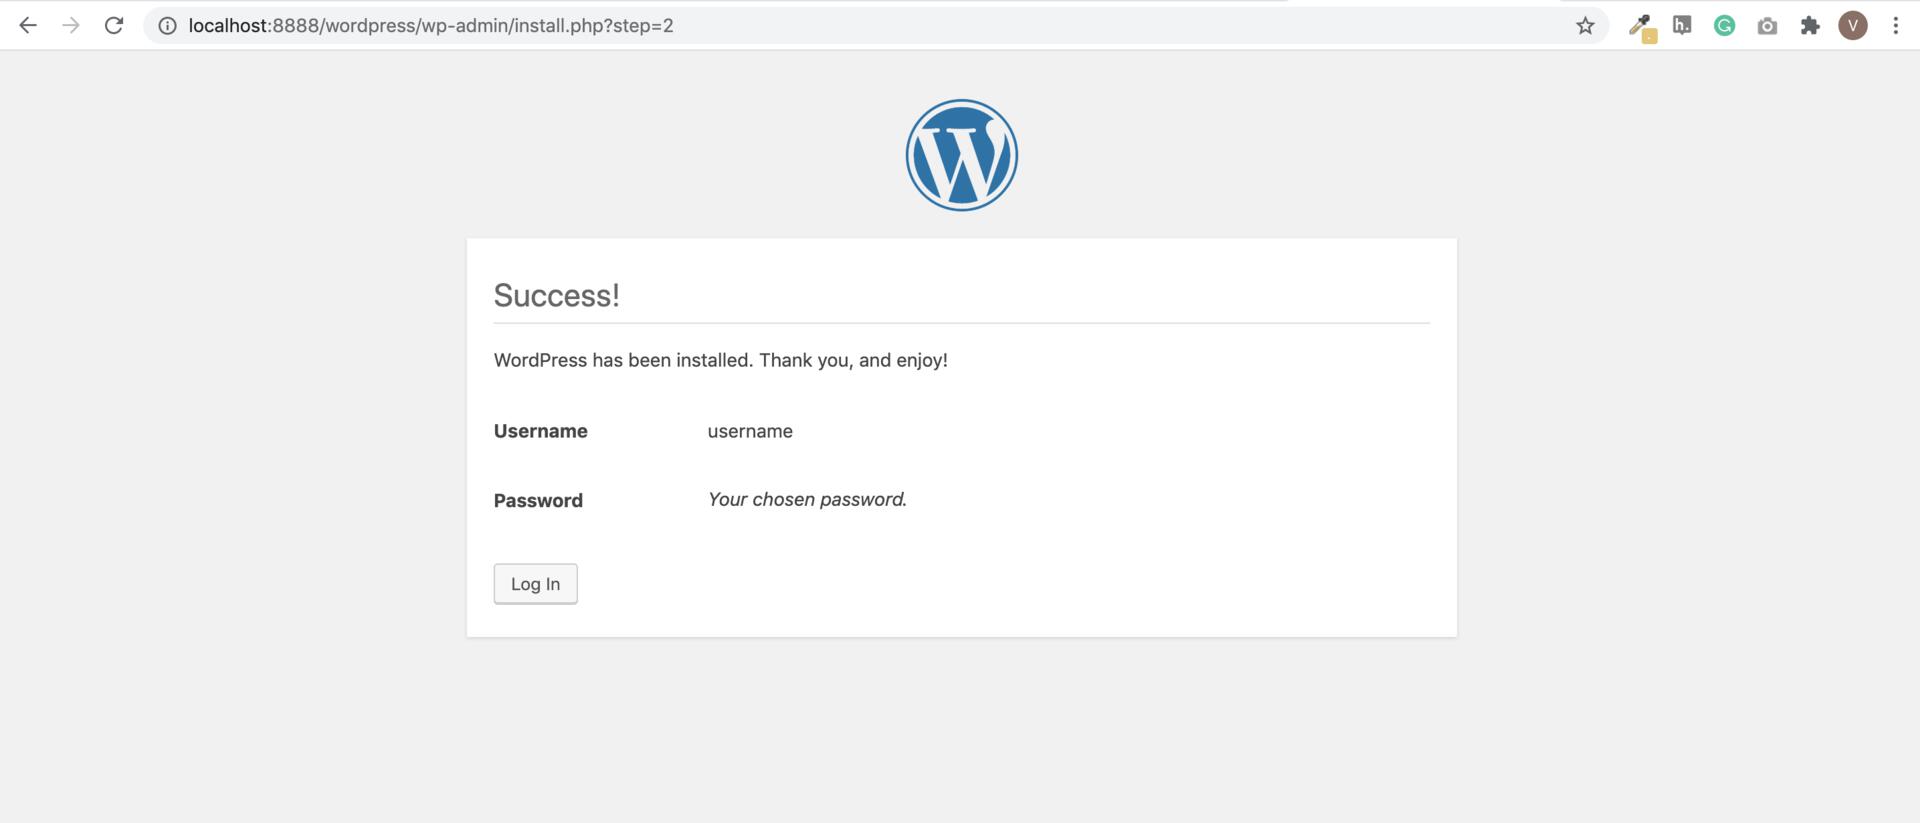
12. Click the **Install WordPress** button. With this, your website is ready.
## 2. Create a Payment Button on Razorpay Dashboard
To accept payments on your WordPress site, you must create a Payment Button.
* [Quick Pay Button](/docs/payments/payment-button/quick-pay)
* [Buy Now Button](/docs/payments/payment-button/buy-now)
* [Donations Button](/docs/payments/payment-button/donations)
* [Custom Button](/docs/payments/payment-button/custom)
## 3. Embed the Payment Button on WordPress Site
To embed the Payment Button:
3.1 Download and install the Razorpay Payment Button Plugin. You can do this using either of these methods:
* [Download the plugin from the WordPress Plugin Directory](https://wordpress.org/plugins/razorpay-payment-button/) and add the zip file to your WordPress website's **Plugins** folder.
* Add the plugin directly onto your WordPress website from the **Plugin** page.
3.2 In your WordPress site, activate the plugin in the **WordPress Plugin Manager**.
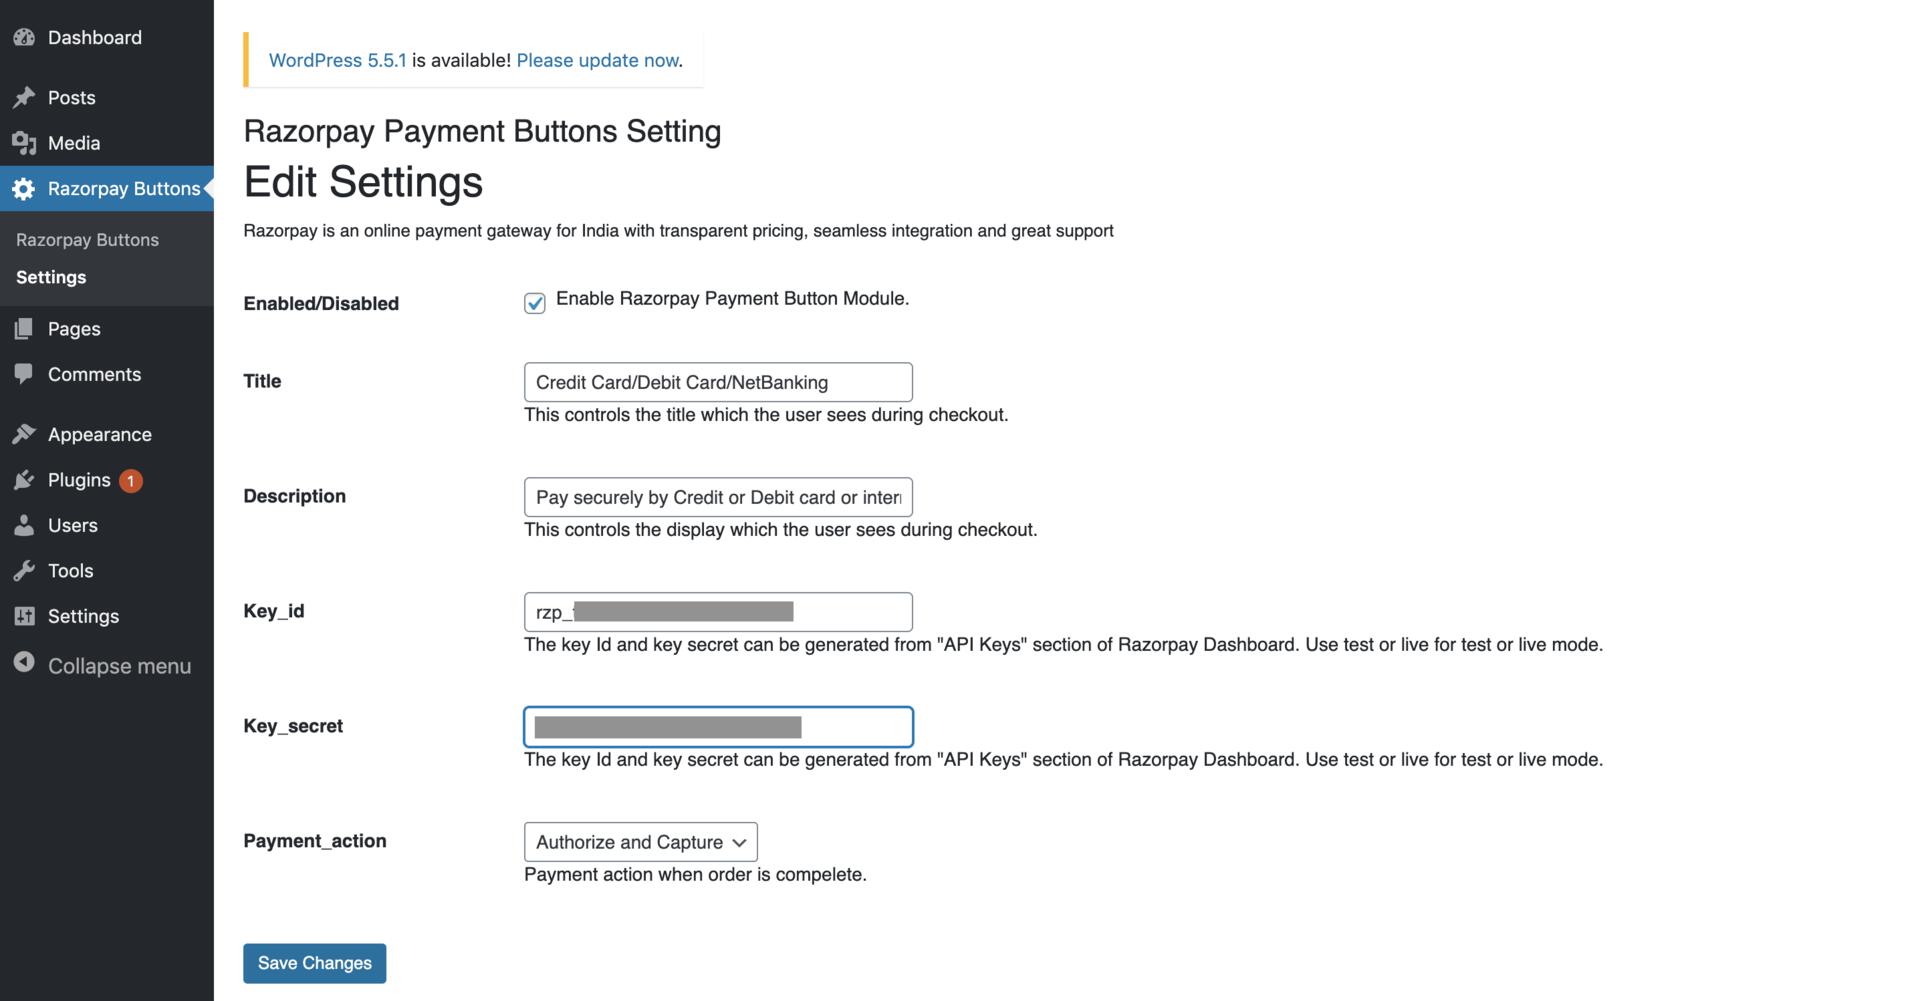
3.3 Navigate to **Razorpay Buttons** → **Settings** to add your Razorpay API key details and connect your Razorpay account to the plugin.
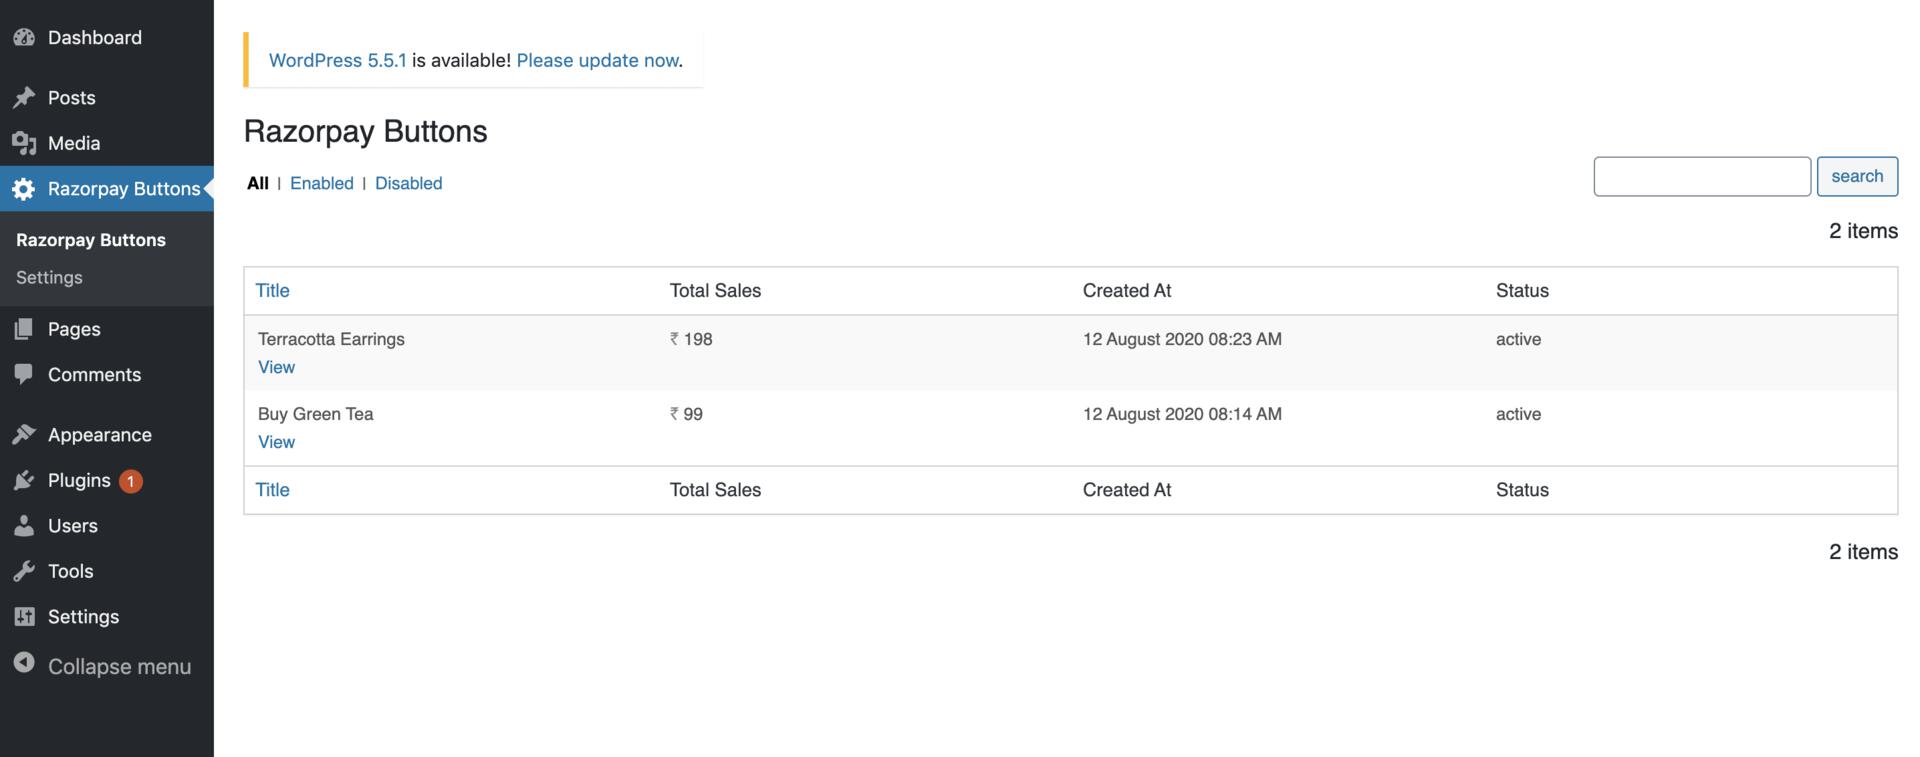
3.4 Navigate to **Razorpay Buttons**. A list of buttons you created on Razorpay are available here. Select the required button.
3.5 Click **Pages** and navigate to the page where you want to embed the Payment button.
3.6 Select **Add Block** → **Widgets** → **Razorpay: Payment Button** to embed the Payment button onto the page.
3.7 Choose the Payment Button using the drop-down and publish or update the page.
The Payment Button appears on the page.
You can now start accepting payments on your WordPress website using the Payment Button.
## FAQs
You cannot directly use the Payment Button code generated from the Dashboard if you are using `www.wordpress.com`. You must upgrade to the WordPress paid plan and use the Razorpay Payment Button plugin.
If you are using Thrive Editor to add the button code for Razorpay, it is essential to note that Thrive Editor does not support the direct inclusion of scripts in HTML pages or posts. It automatically places a code tag on top of the script and adds a `` above the payment button script. Unfortunately, there is no workaround for this behaviour. We recommend using the WordPress default editor, Gutenberg, or any other compatible editor to add payment buttons effectively. These editors allow you to add payment button scripts without the interference caused by Thrive Editor's script handling. This will ensure a smooth integration of Razorpay payment buttons into your website.
This error indicates that your API Key and Secret for Razorpay have expired. Follow the steps given below to resolve the issue:
1. Log in to Dashboard.
2. Generate new [API Keys](/docs/api/authentication#generate-api-keys).
3. Replace the old API Key and Secret in your integration code with the newly generated API keys.
### Related Information
* [Payment Button](/docs/payments/payment-button)
* [Create a WordPress Website](/docs/payments/payment-button/supported-platforms/wordpress/create-website)
* [Payment Button Elementor Plugin for WordPress](/docs/payments/payment-button/supported-platforms/wordpress/elementor)
* [Payment Button SiteOrigin Plugin for WordPress](/docs/payments/payment-button/supported-platforms/wordpress/site-origin)
* [Payment Button Visual Composer Plugin for WordPress](/docs/payments/payment-button/supported-platforms/wordpress/visual-composer)
 ## WordPress Plan
 3. Navigate to the **MAMP** folder.
 4. Click **Start Server** to run the server on your system.
 The server status appears green once they are ready.
 5. Click **Open WebStart Page**. The server starts running on your browser as shown:
 6. We must set up a MySQL database for the WordPress website. This is done using **phpMyAdmin**.
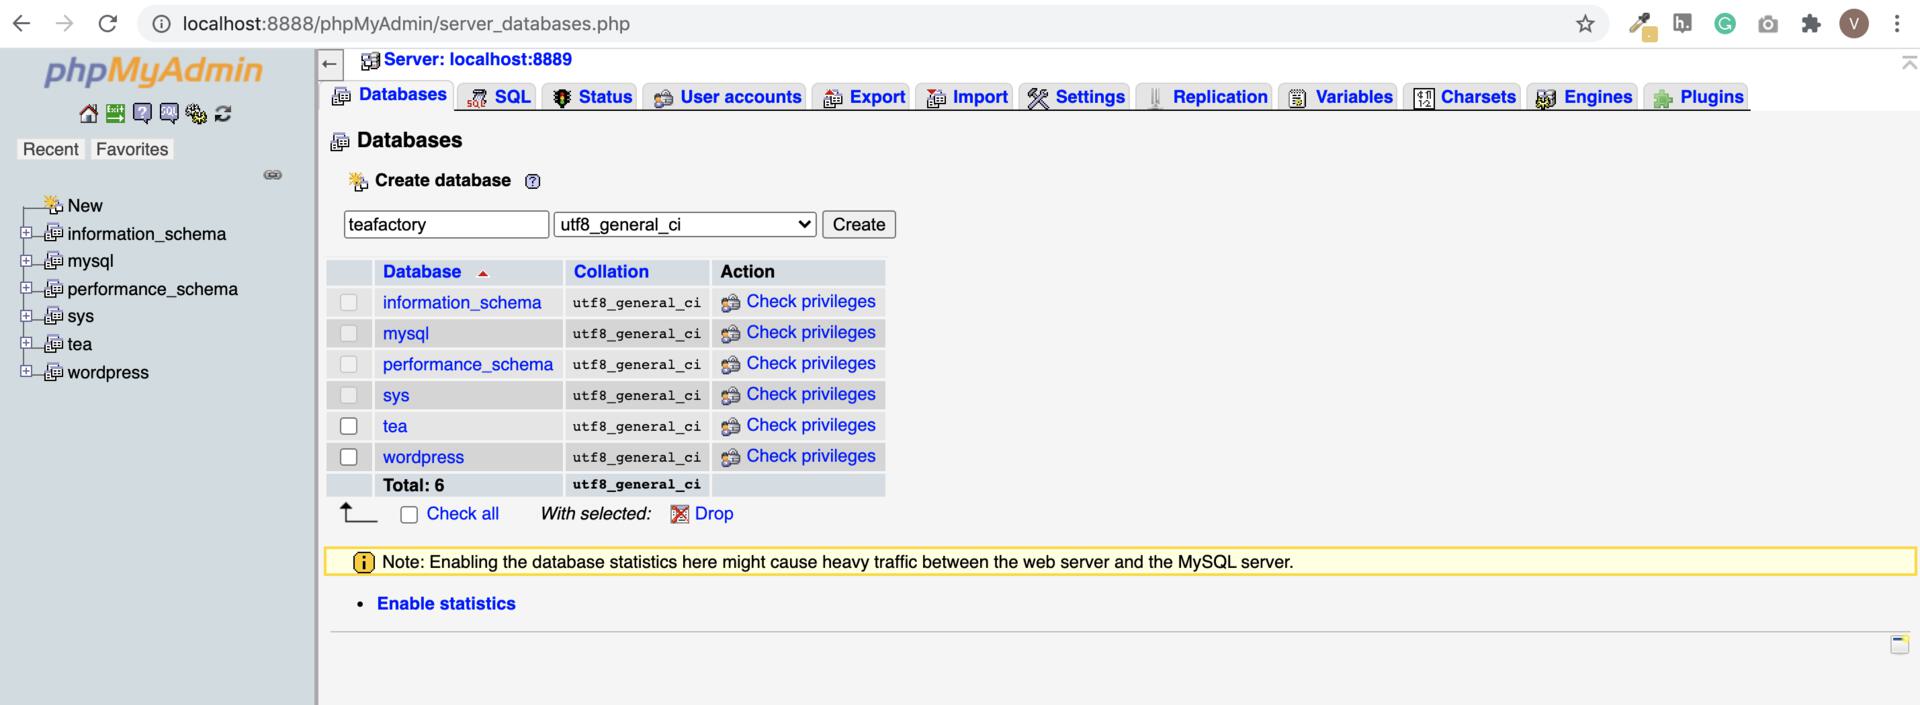 a. Select the required database and click **Privileges**.
 b. Click **Add user account**.

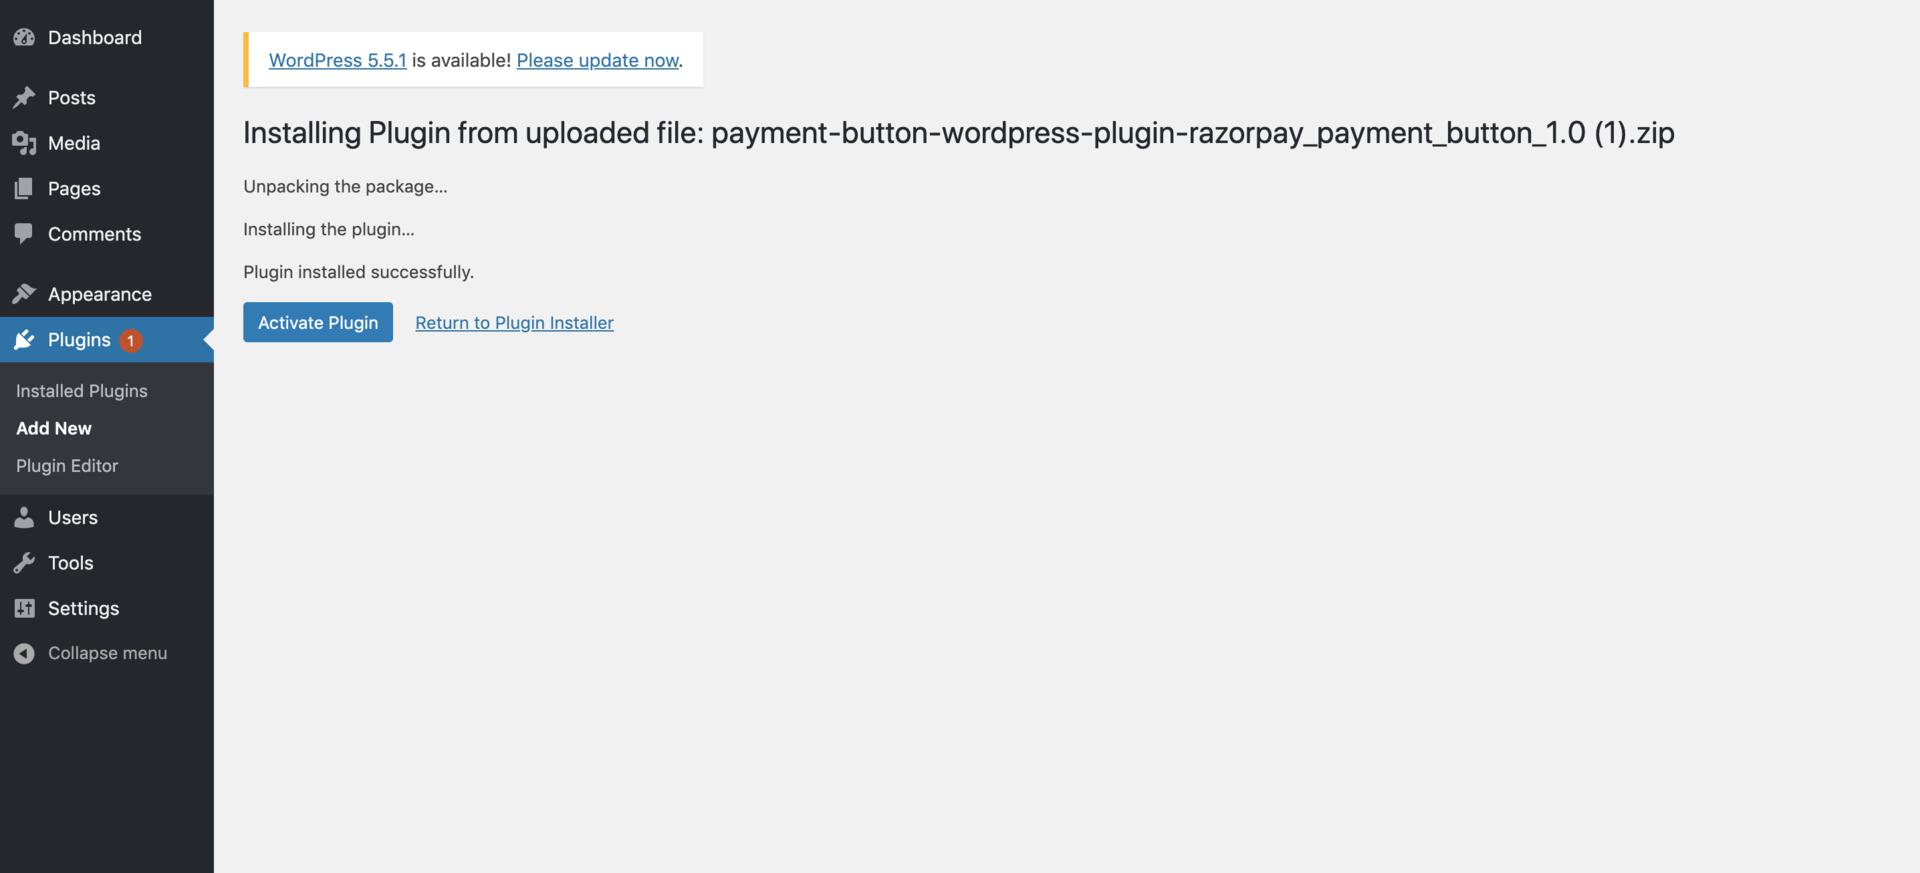 3.3 Navigate to **Razorpay Buttons** → **Settings** to add your Razorpay API key details and connect your Razorpay account to the plugin.
 3.4 Navigate to **Razorpay Buttons**. A list of buttons you created on Razorpay are available here. Select the required button.
 3.5 Click **Pages** and navigate to the page where you want to embed the Payment button.
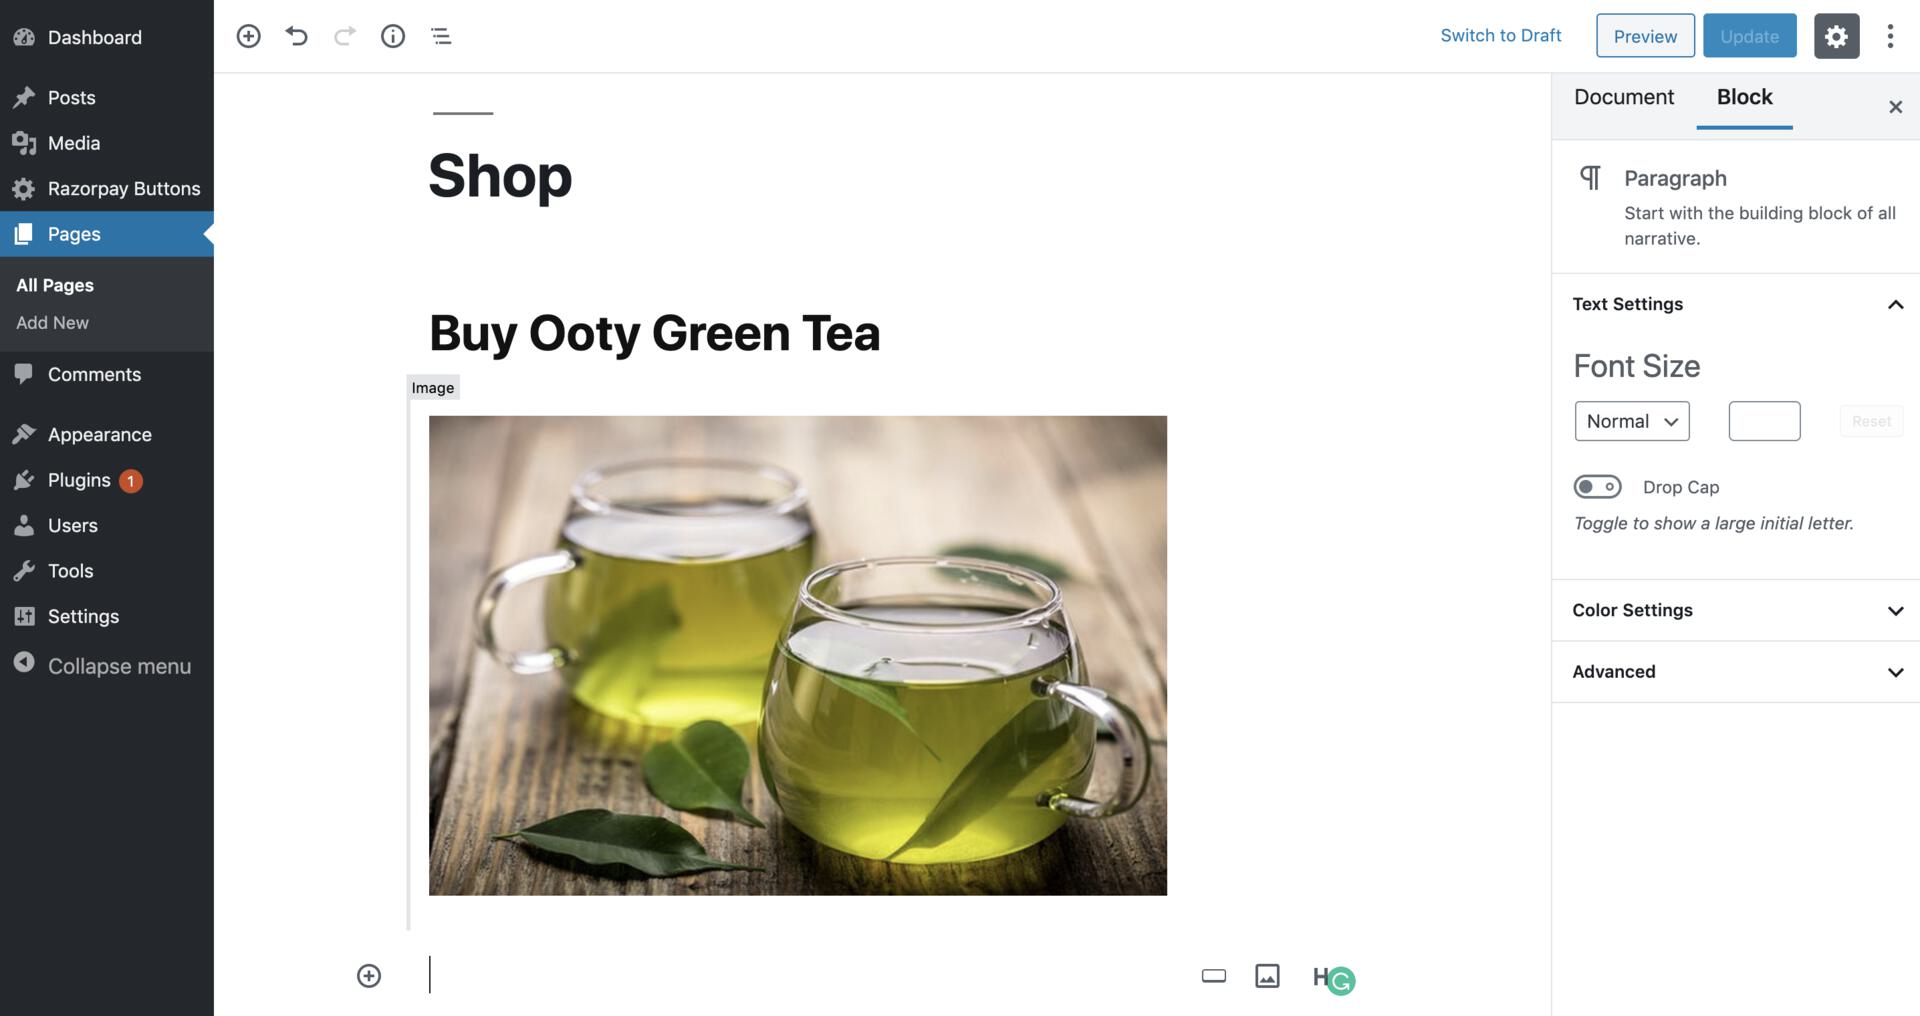 3.6 Select **Add Block** → **Widgets** → **Razorpay: Payment Button** to embed the Payment button onto the page.
 3.7 Choose the Payment Button using the drop-down and publish or update the page.
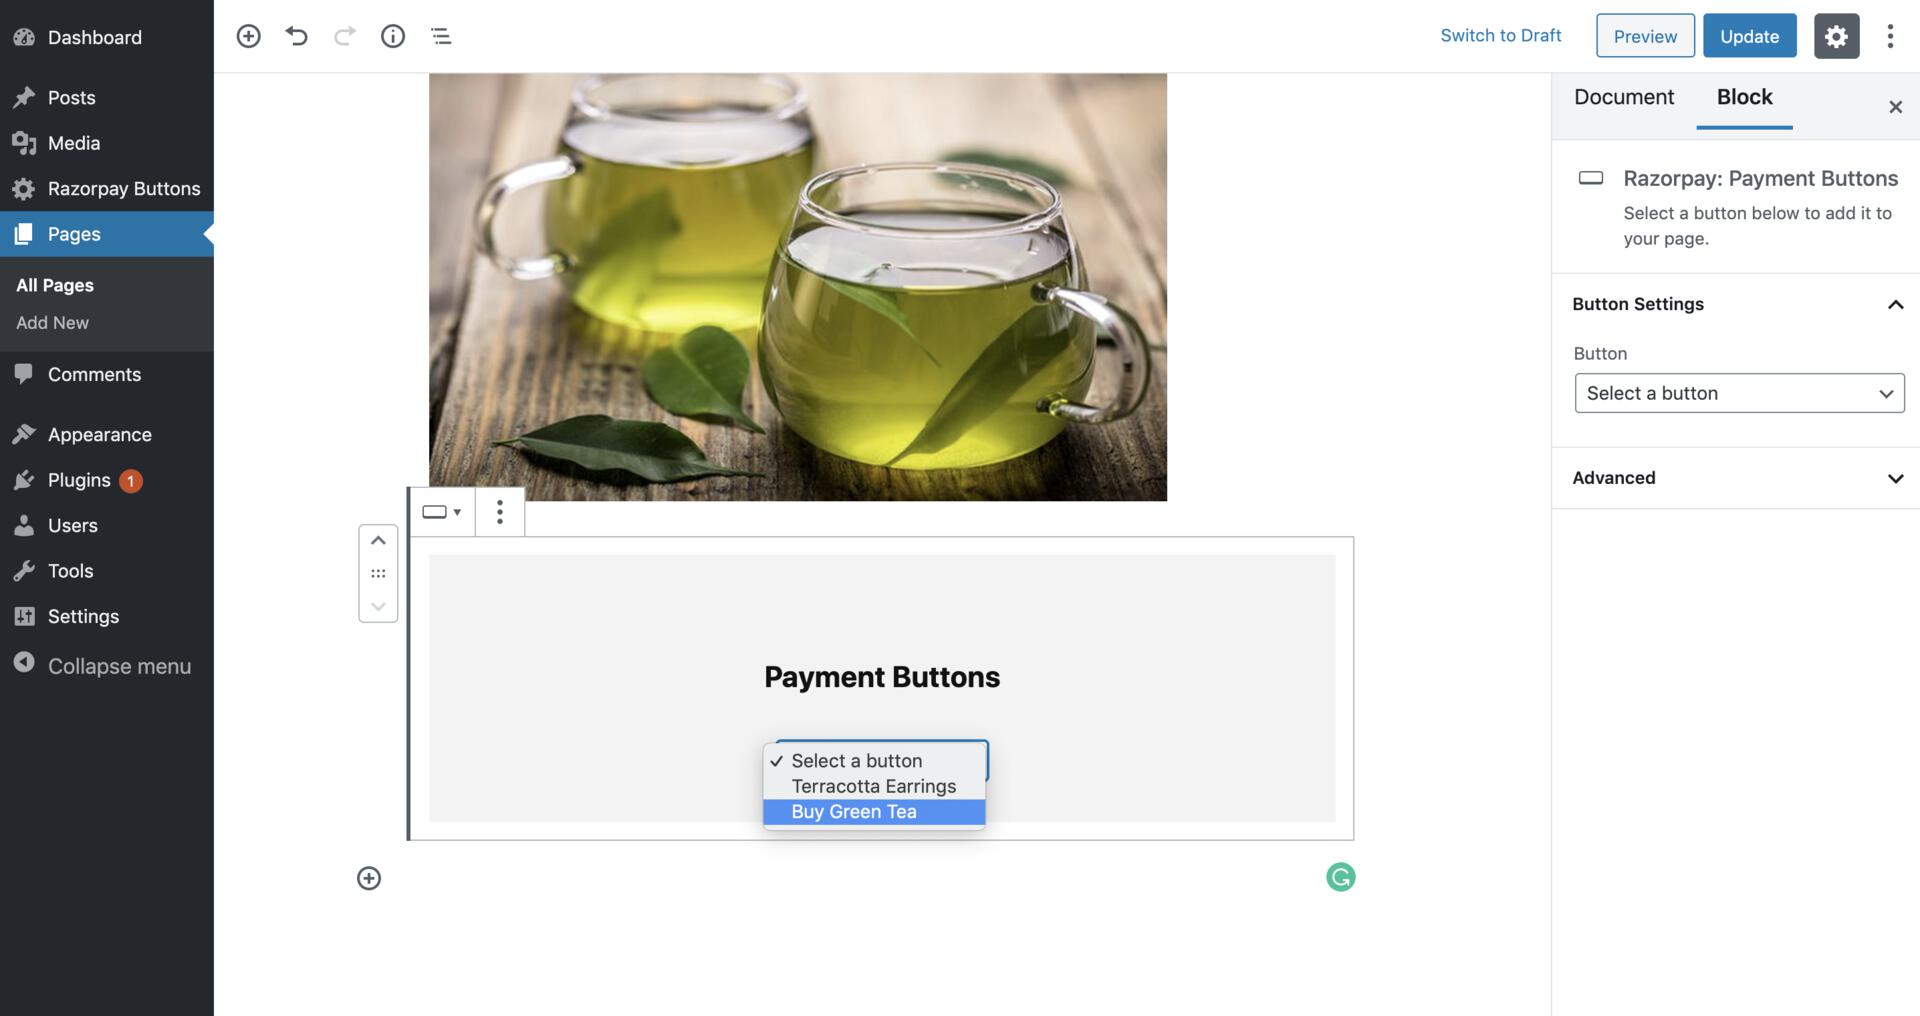 The Payment Button appears on the page.
 You can now start accepting payments on your WordPress website using the Payment Button.
## FAQs
You can now start accepting payments on your WordPress website using the Payment Button.
## FAQs