> ## Documentation Index
> Fetch the complete documentation index at: https://razorpay-881012b3.mintlify.site/llms.txt
> Use this file to discover all available pages before exploring further.

# Migration Steps for Existing Users

> Follow the step-by-step guide on migrating from the existing Razorpay App to All-in-one Razorpay Payment Gateway on your Shopify store.

<div style={{display:"flex",flexWrap:"wrap",alignItems:"center",gap:"0.35rem 0.9rem",border:"1px solid rgba(128,128,128,0.28)",borderRadius:"0.5rem",padding:"0.45rem 0.75rem",margin:"0 0 1.25rem",fontSize:"0.875rem"}}>
  <span style={{fontWeight:600}}>Available in</span>
  <span>🇮🇳 India</span>
</div>

If you are using Razorpay to accept payments, you can now upgrade to the **All-in-one Razorpay Payment Gateway** on your Shopify Store. Watch the [video tutorial](#video-tutorial) or follow the [migration steps](#migration-steps) to migrate to All-in-one Razorpay Payment Gateway. Know more about why you need to [upgrade to All-in-one Razorpay Payment Gateway](/docs/payments/payment-gateway/ecommerce-plugins/shopify/faqs#1-why-do-i-need-to-upgrade-to).

## Video Tutorial

Watch this video to know how to migrate from the existing Razorpay App to All-in-one Razorpay Payment Gateway on your Shopify store.

<iframe width="560" height="315" src="https://www.youtube.com/embed/3mUfBE9WkCo" title="How to migrate from existing Razorpay App to Razorpay Secure App on Shopify Store" frameBorder="0" allow="accelerometer; autoplay; clipboard-write; encrypted-media; gyroscope; picture-in-picture" allowFullScreen />

## Migration Steps

Follow the steps given below to migrate from the existing Razorpay App to All-in-one Razorpay Payment Gateway.

<AccordionGroup>
  <Accordion title="Migration">
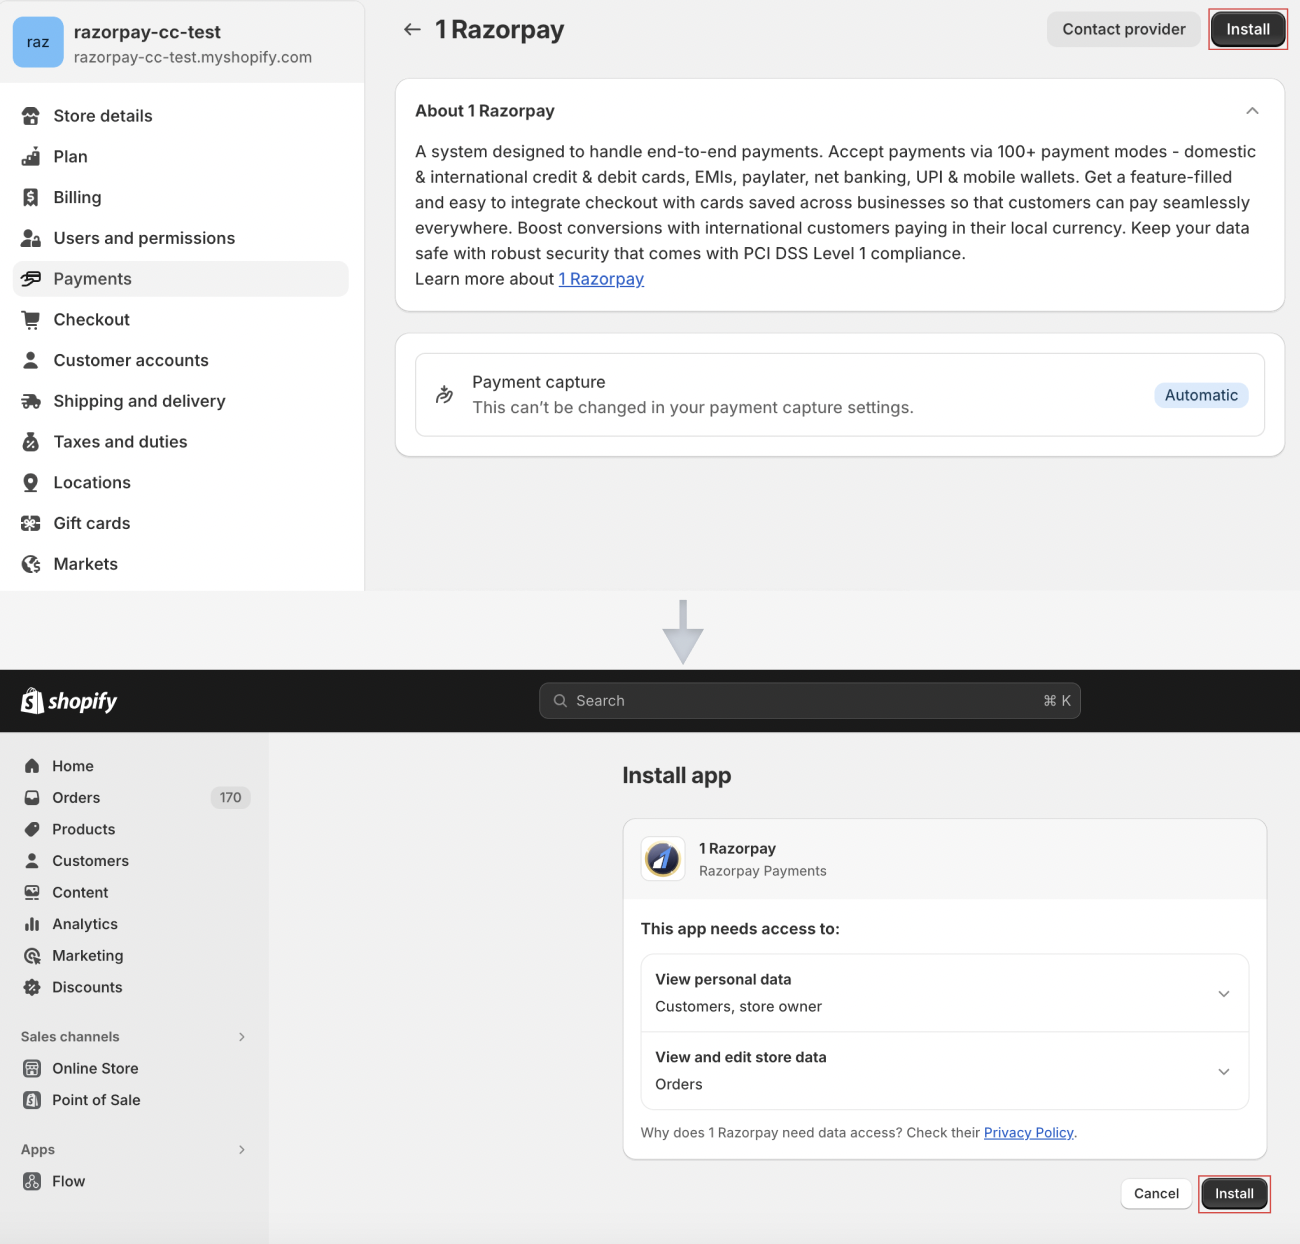
    1. Click on [this link](https://accounts.shopify.com/store-login?redirect=settings%2Fpayments%2Falternative-providers%2F1058839) to access the All-in-one Razorpay Payment Gateway on your Shopify store.
    2. Click **Install**.
           <img src="https://razorpay.com/docs/build/browser/assets/images/shopify-1-razorpay-install-new.jpg" class="click-zoom" alt="Shopify Install" width="600" />
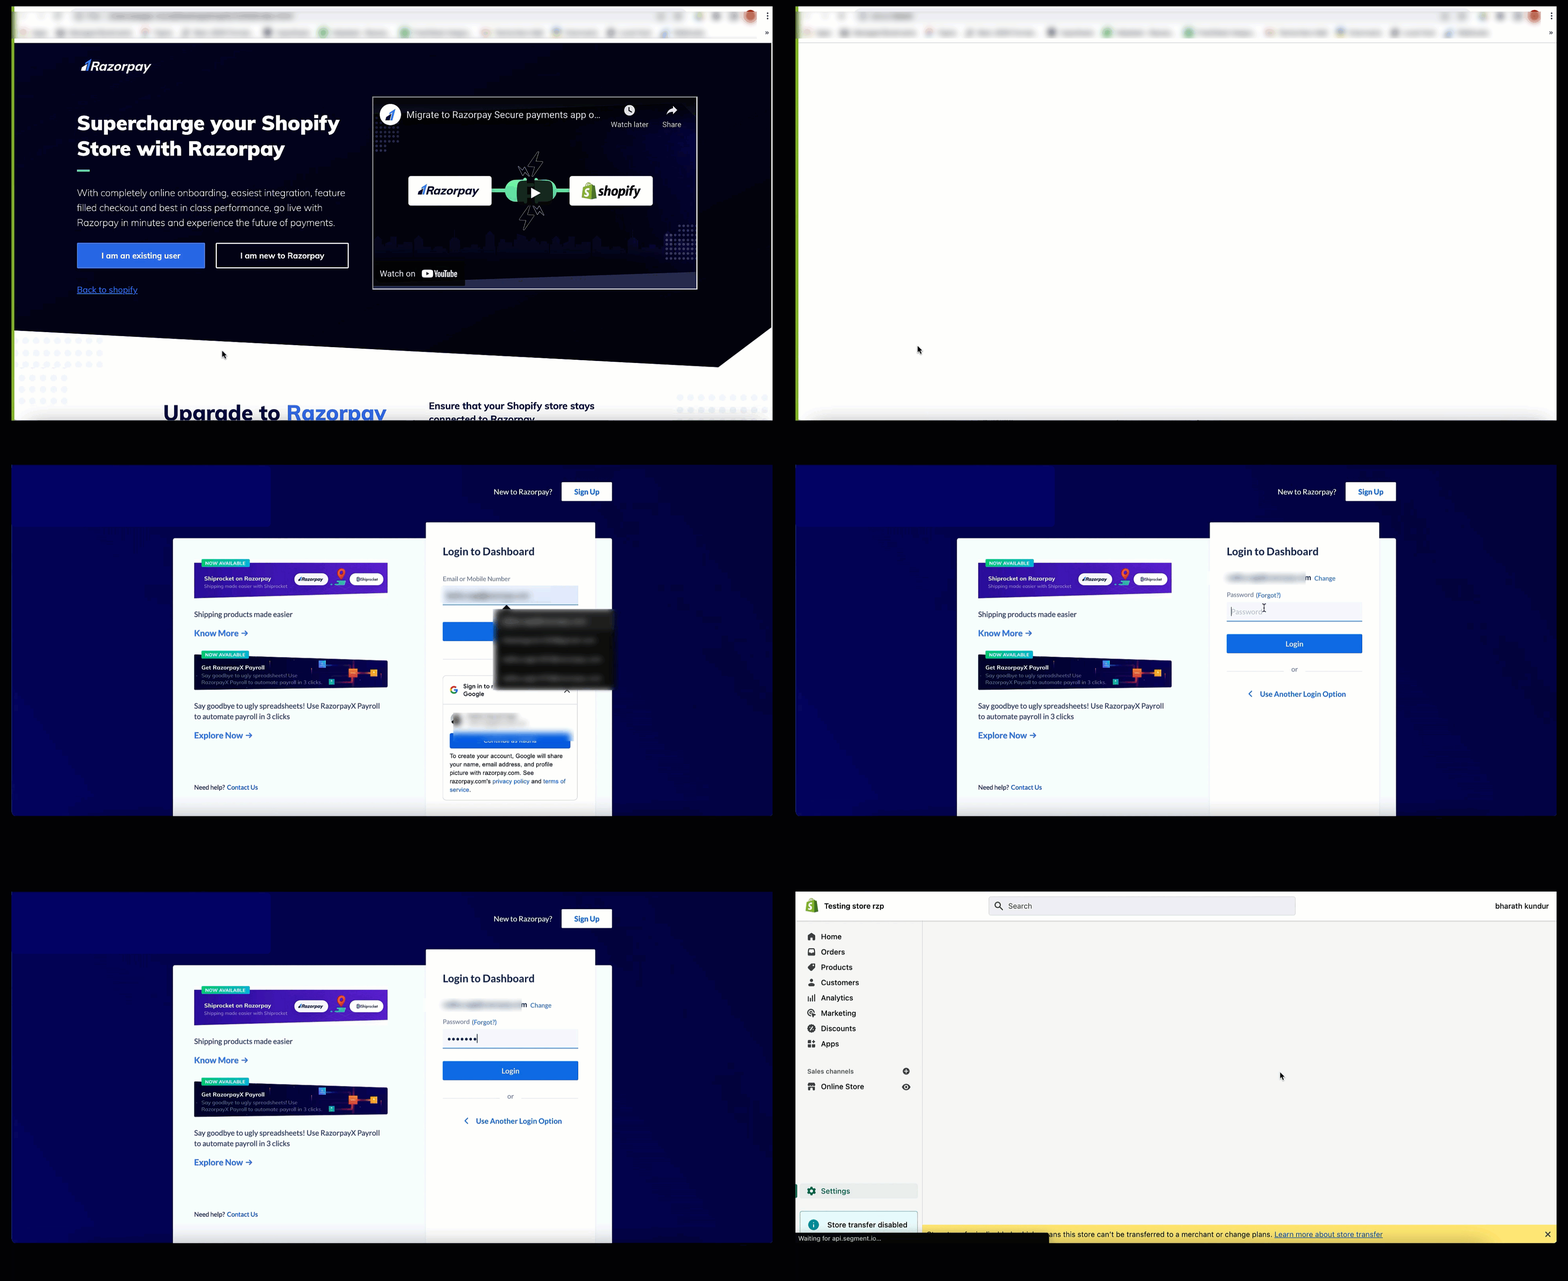
    3. You will be redirected to a landing page. Click **I am an existing user**.
           <img src="https://razorpay.com/docs/build/browser/assets/images/shopify-existing-merchant.jpg" class="click-zoom" alt="Existing Merchant Shopify" width="600" />
    4. Scroll down and click **Login**.

    <Info>
      **Handy Tips**

      Make sure you log in with **owner** credentials to connect Razorpay with Shopify successfully.
    </Info>

    <img src="https://razorpay.com/docs/build/browser/assets/images/shopify-login-v2.gif" alt="Shopify login" width="600" />

    5. Click **Activate** on the activation screen on your Shopify Dashboard. <br />
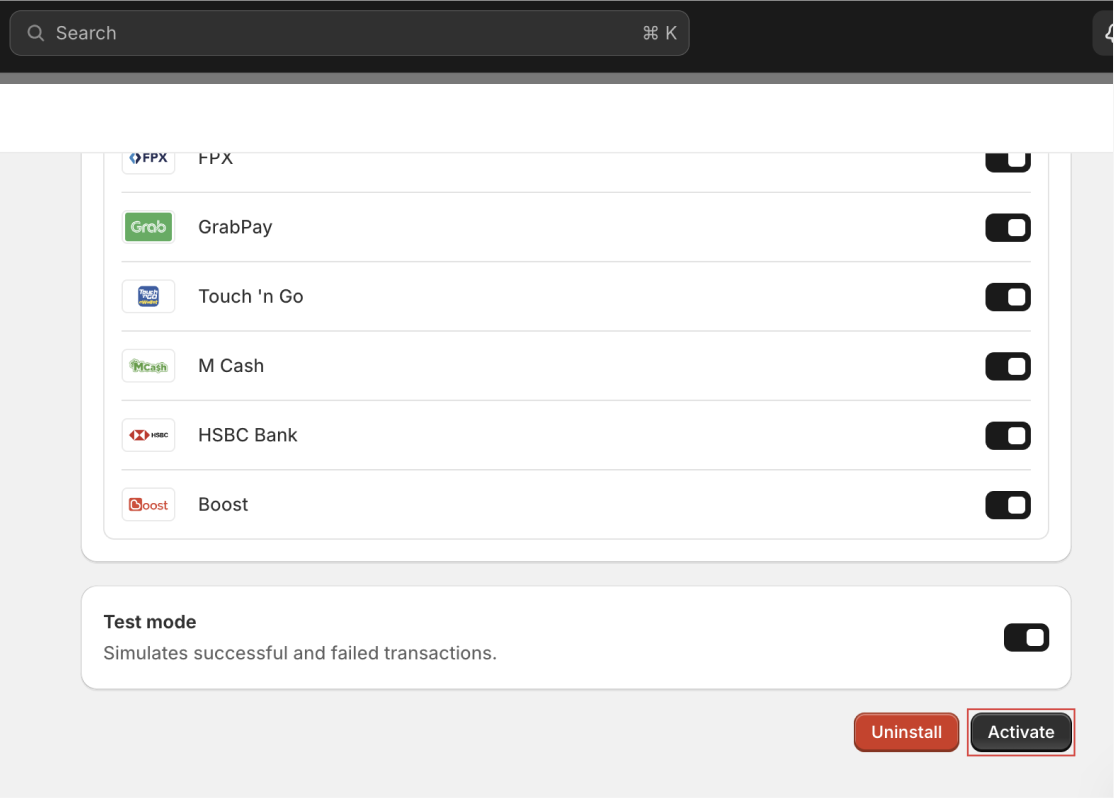
           <img src="https://razorpay.com/docs/build/browser/assets/images/shopify-1razorpay-activate.jpg" class="click-zoom" alt="Shopify Activate" width="600" />

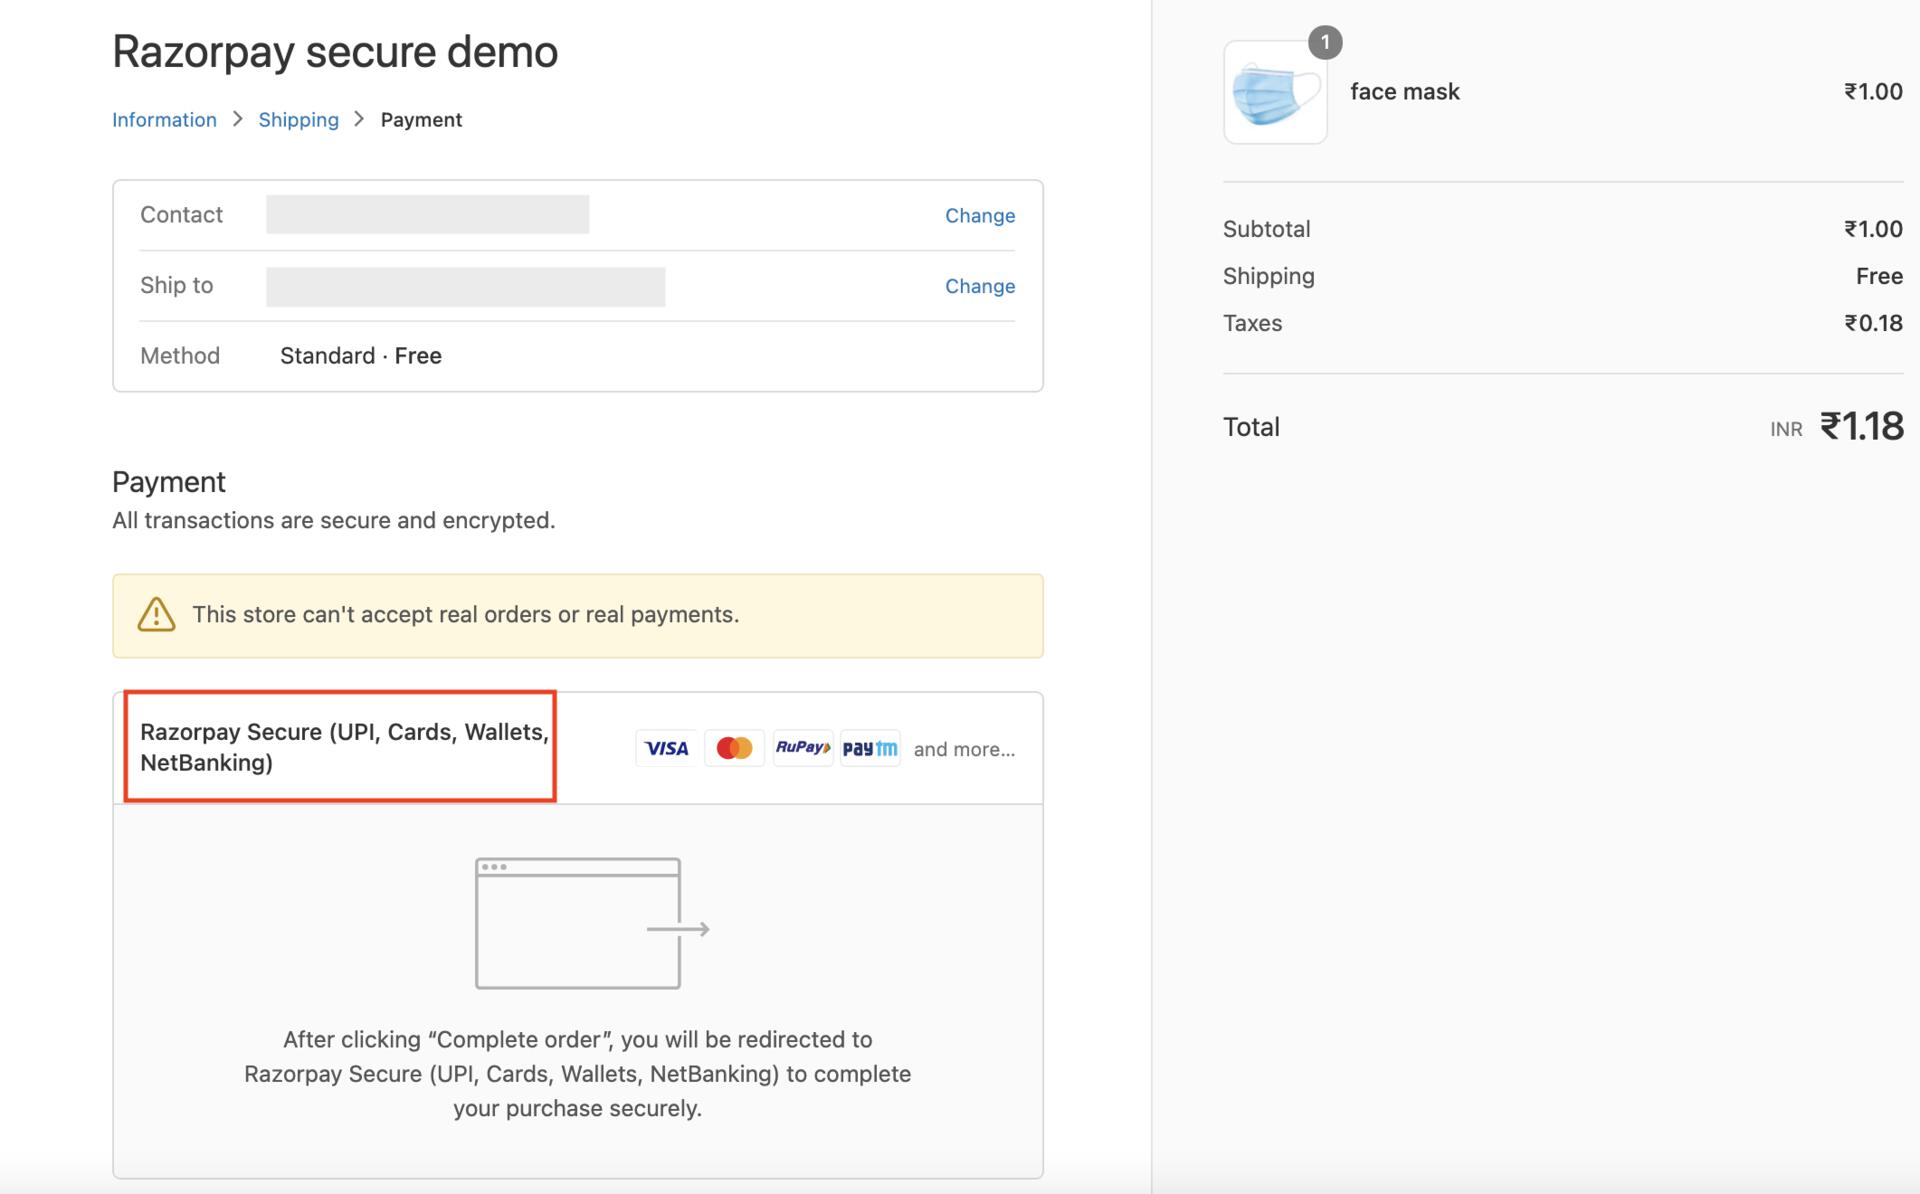
    All-in-one Razorpay Payment Gateway now appears as a Payment Gateway on your Shopify Store checkout.<br />
    <img src="https://razorpay.com/docs/build/browser/assets/images/shopify-v2-checkout.jpg" class="click-zoom" alt="Shopify Checkout" width="600" />

    <Warning>
      **Watch Out!**

      Ensure you deactivate the existing Razorpay App after activating the new **All-in-one Razorpay Payment Gateway** App.
    </Warning>
  </Accordion>

  <Accordion title="Deactivation">
    To deactivate the existing Razorpay App:

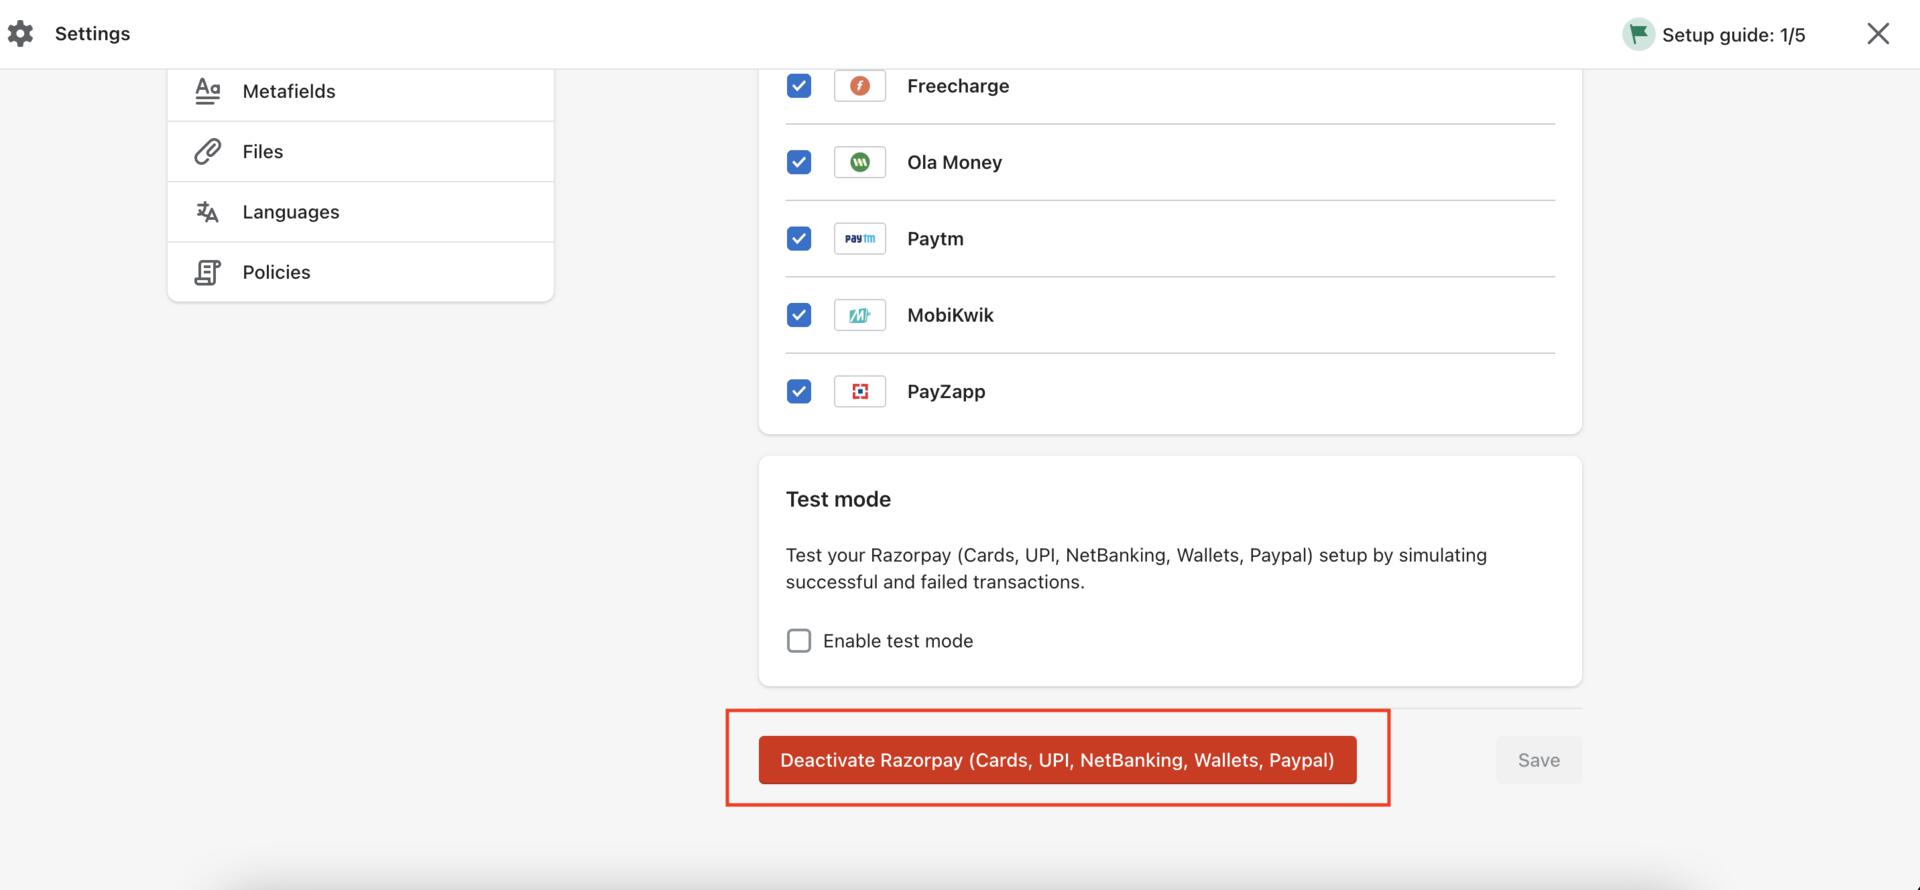
    1. Click on [this link](https://accounts.shopify.com/store-login?redirect=settings/payments/alternative-providers/1030400) to access the existing Razorpay App on your Shopify store.
    2. Click **Deactivate Razorpay** to deactivate the existing Razorpay App on your Shopify store.
           <img src="https://razorpay.com/docs/build/browser/assets/images/shopify-deactivate-v1-final.jpg" class="click-zoom" alt="Deactivate Shopify v1" width="700" />

    For more information, see [Shopify FAQs](/docs/payments/payment-gateway/ecommerce-plugins/shopify/faqs).
  </Accordion>
</AccordionGroup>

## Reconcile Payments on All-in-one Razorpay Payment Gateway

You can reconcile payments for All-in-one Razorpay Payment Gateway using the **Payment Id** provided at the Shopify checkout.
Know more about how to [reconcile Shopify orders on the Dashboard](/docs/payments/payment-gateway/ecommerce-plugins/shopify/reconcile-payments).

## Difference in Order Information Between Old Razorpay App and All-in-one Razorpay Payment Gateway

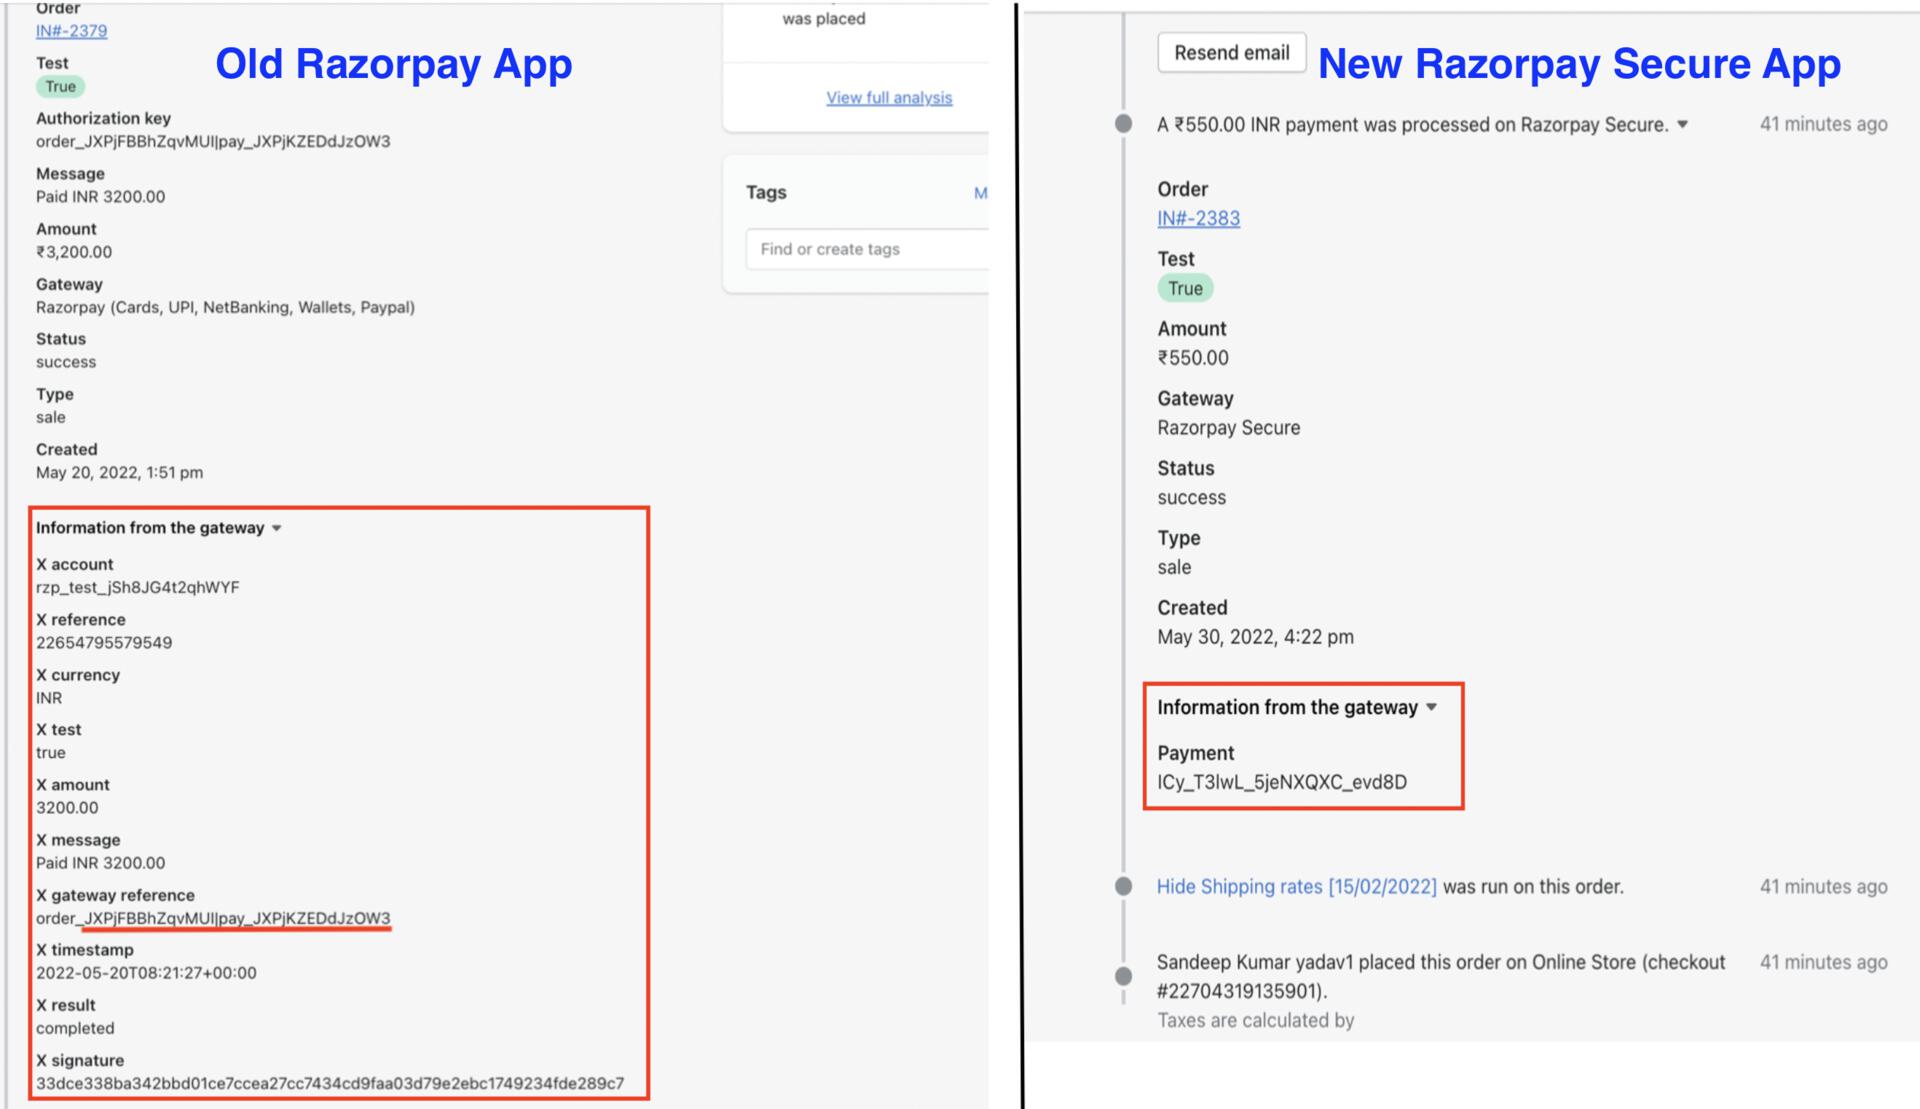
Check the table below to understand the difference in data about the gateway provided by the Old Razorpay App and All-in-one Razorpay Payment Gateway.

| **Old Razorpay App**                                                                                                                                                               | **All-in-one Razorpay Payment Gateway** |
| ---------------------------------------------------------------------------------------------------------------------------------------------------------------------------------- | --------------------------------------- |
| <ul><li>Razorpay account details.</li><li>Razorpay reference number.</li><li> Currency</li><li>Amount</li><li> Gateway reference Id</li><li> Timestamp</li><li>Signature</li></ul> | <ul><li>Payment Id</li></ul>            |

The image below shows the difference in data provided by the old Razorpay App and All-in-one Razorpay Payment Gateway.

<img src="https://razorpay.com/docs/build/browser/assets/images/old-new-plugin.jpg" class="click-zoom" alt="Old New difference" width="800" />

<Info>
  **Handy Tips**

  In the case of the old Razorpay app, multiple data were available to track payments, whereas, in the case of the All-in-one Razorpay Payment Gateway app, only a single piece of data, the `Payment Id`, is provided by Shopify. Know more about [how to process a payment](https://shopify.dev/apps/payments/processing-a-payment#resolve-a-payment) on Shopify.
</Info>