> ## Documentation Index
> Fetch the complete documentation index at: https://razorpay-881012b3.mintlify.site/llms.txt
> Use this file to discover all available pages before exploring further.
# Integrate the Widget on Your Website
> Integrate Affordability Widget on your Website to spread awareness about the EMI²-based payment options before they reach checkout.
Available in
🇮🇳 India
Integrate with Affordability Widget to influence your customer's purchase decisions before they reach checkout by displaying various affordable payment options and offers.
**Handy Tips**
Razorpay Affordability Widget is compatible with all JavaScript frameworks like React, Vue, Angular, Svelte and so on.
## Prerequisites
* Create a [Razorpay account](https://dashboard.razorpay.com/signup).
* Generate the [API keys](/docs/api/authentication#generate-api-keys) from the Dashboard by navigating to **Account & Settings** → **Website and app settings** → **API keys**.
* You can use the **Test Mode** keys to test the integration and preview the Widget. Later, switch to **Live Mode** of the Dashboard, generate the [Live API keys](/docs/api/authentication#live-mode-api-keys) and replace it with the test keys.
**Handy Tips**
Only the Owner, Admin and Manager roles can enable the widget.
## Integration Steps
Follow the integration steps given below to embed the widget on your website.
1. [Integrate the Widget](#step-1-integrate-the-widget).
2. [Enable the Widget](#step-2-enable-the-widget).
### Step 1: Integrate the Widget
Follow the integration steps given below to integrate the widget:
1. Embed the JavaScript file into your website. Copy the snippet and add it to the head section of your website.
```javascript JavaScript theme={null}
```
2. Create an HTML element with the below id under the product price. This is to indicate where the affordability widget should appear.
```javascript Add Parameter theme={null}
```
3. Copy-paste the following snippet to the JS file and link it to your HTML file. Add the test key ID generated from the [Dashboard](#prerequisites).
```javascript Add Parameter theme={null}
const key = "rzp_test_XXXX00000XXXX"; //Replace it with your Test Key ID generated from the Dashboard
const amount = 400000; //in paise
window.onload = function() {
const widgetConfig = {
"key": key,
"amount": amount,
};
const rzpAffordabilitySuite = new RazorpayAffordabilitySuite(widgetConfig);
rzpAffordabilitySuite.render();
}
```
`key` *mandatory*
: `string` API Key ID generated from the [Dashboard](/docs/api/authentication#generate-api-keys). For example, `rzp_test_XXXX00000XXXX`.
`amount` *mandatory*
: `integer` The amount to be paid by the customer in paise. For example, if the amount is ₹4000, enter `400000`.
**Watch Out!**
Ensure you pass the final amount in paise to the widget which you want to display to your customers on the product and checkout pages.
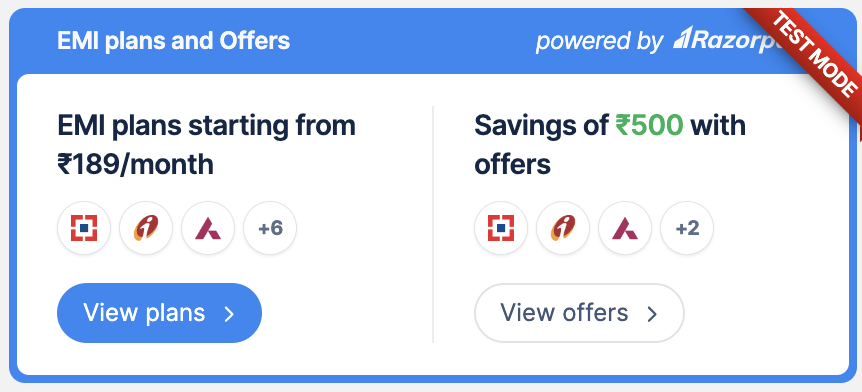
You can now preview the widget on your product description page in test mode. Here is a glimpse of the default widget.
 #### Switch to Live Mode
After you preview the widget, switch to live mode and replace the test API keys in the sample code with the live ones to take the integration live. Know more about [live API keys](/docs/api/authentication#live-mode-api-keys).
### Step 2: Enable the Widget
Once you preview the widget on your product description page, you have to enable the widget to display it on your website for your customers.
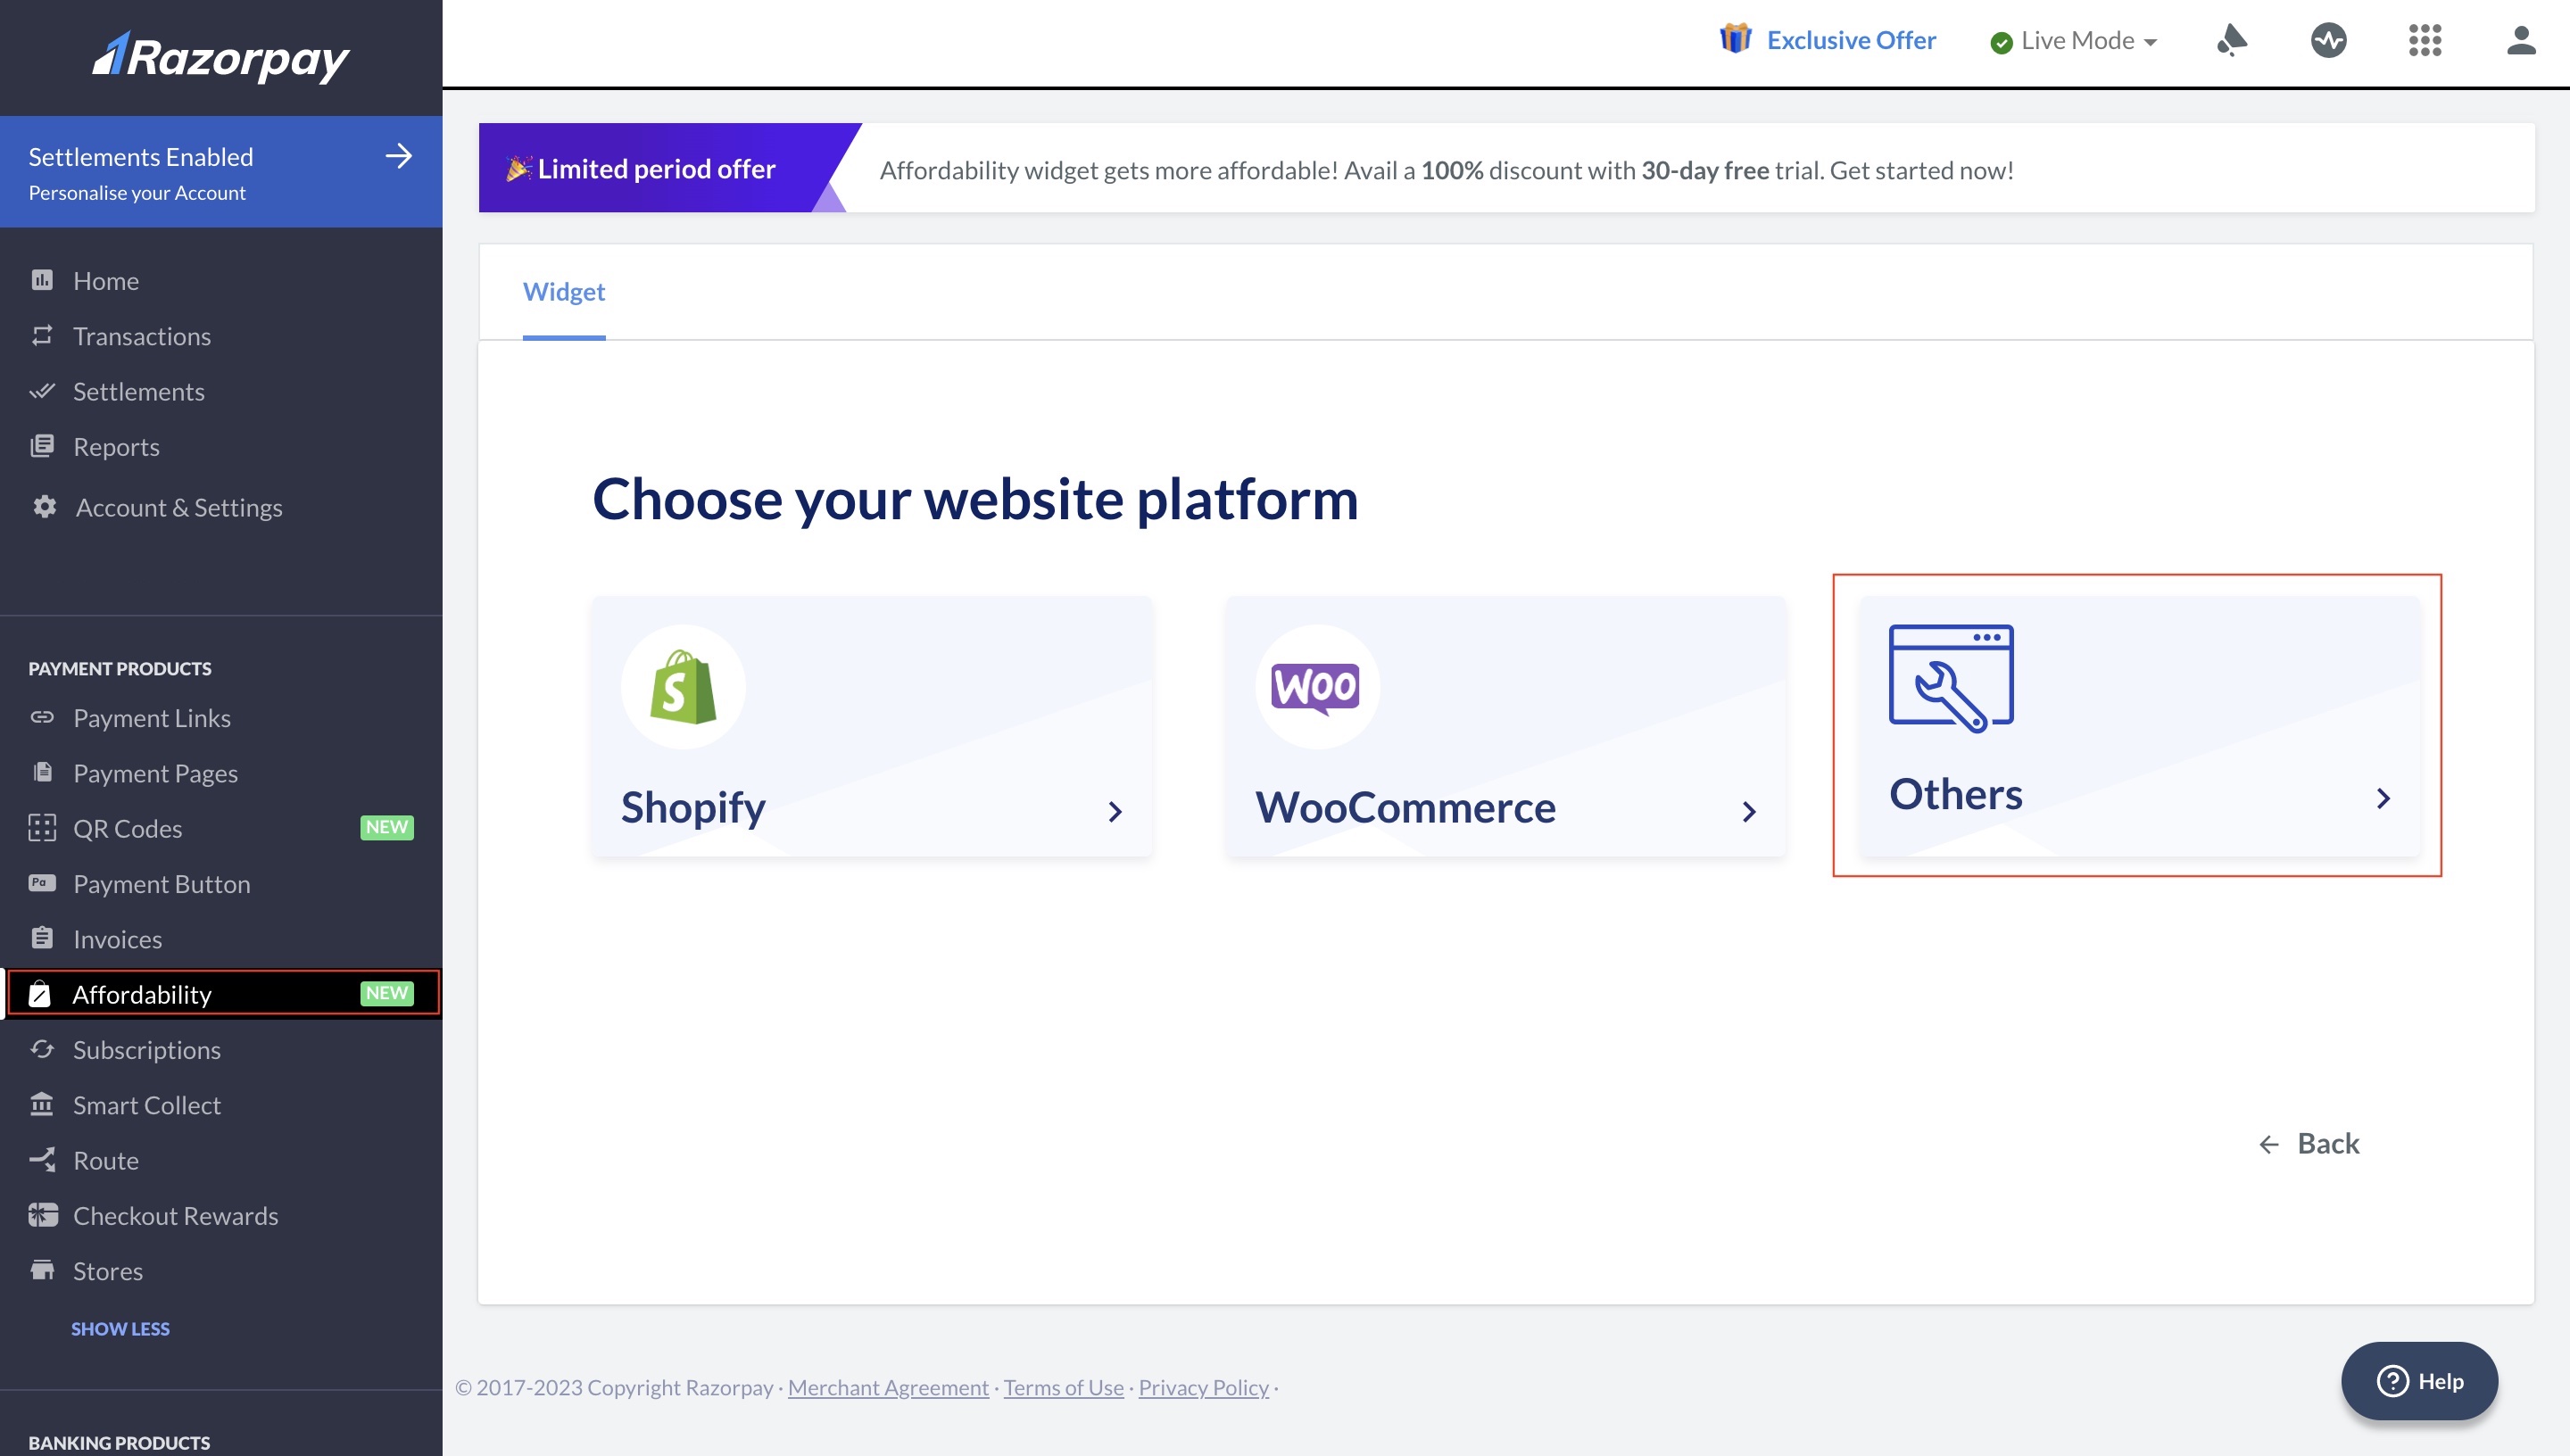
1. Log in to the Dashboard and navigate to **Affordability** in the **Payment Products** section.
2. Choose **Others** as your **website platform**.
#### Switch to Live Mode
After you preview the widget, switch to live mode and replace the test API keys in the sample code with the live ones to take the integration live. Know more about [live API keys](/docs/api/authentication#live-mode-api-keys).
### Step 2: Enable the Widget
Once you preview the widget on your product description page, you have to enable the widget to display it on your website for your customers.
1. Log in to the Dashboard and navigate to **Affordability** in the **Payment Products** section.
2. Choose **Others** as your **website platform**.
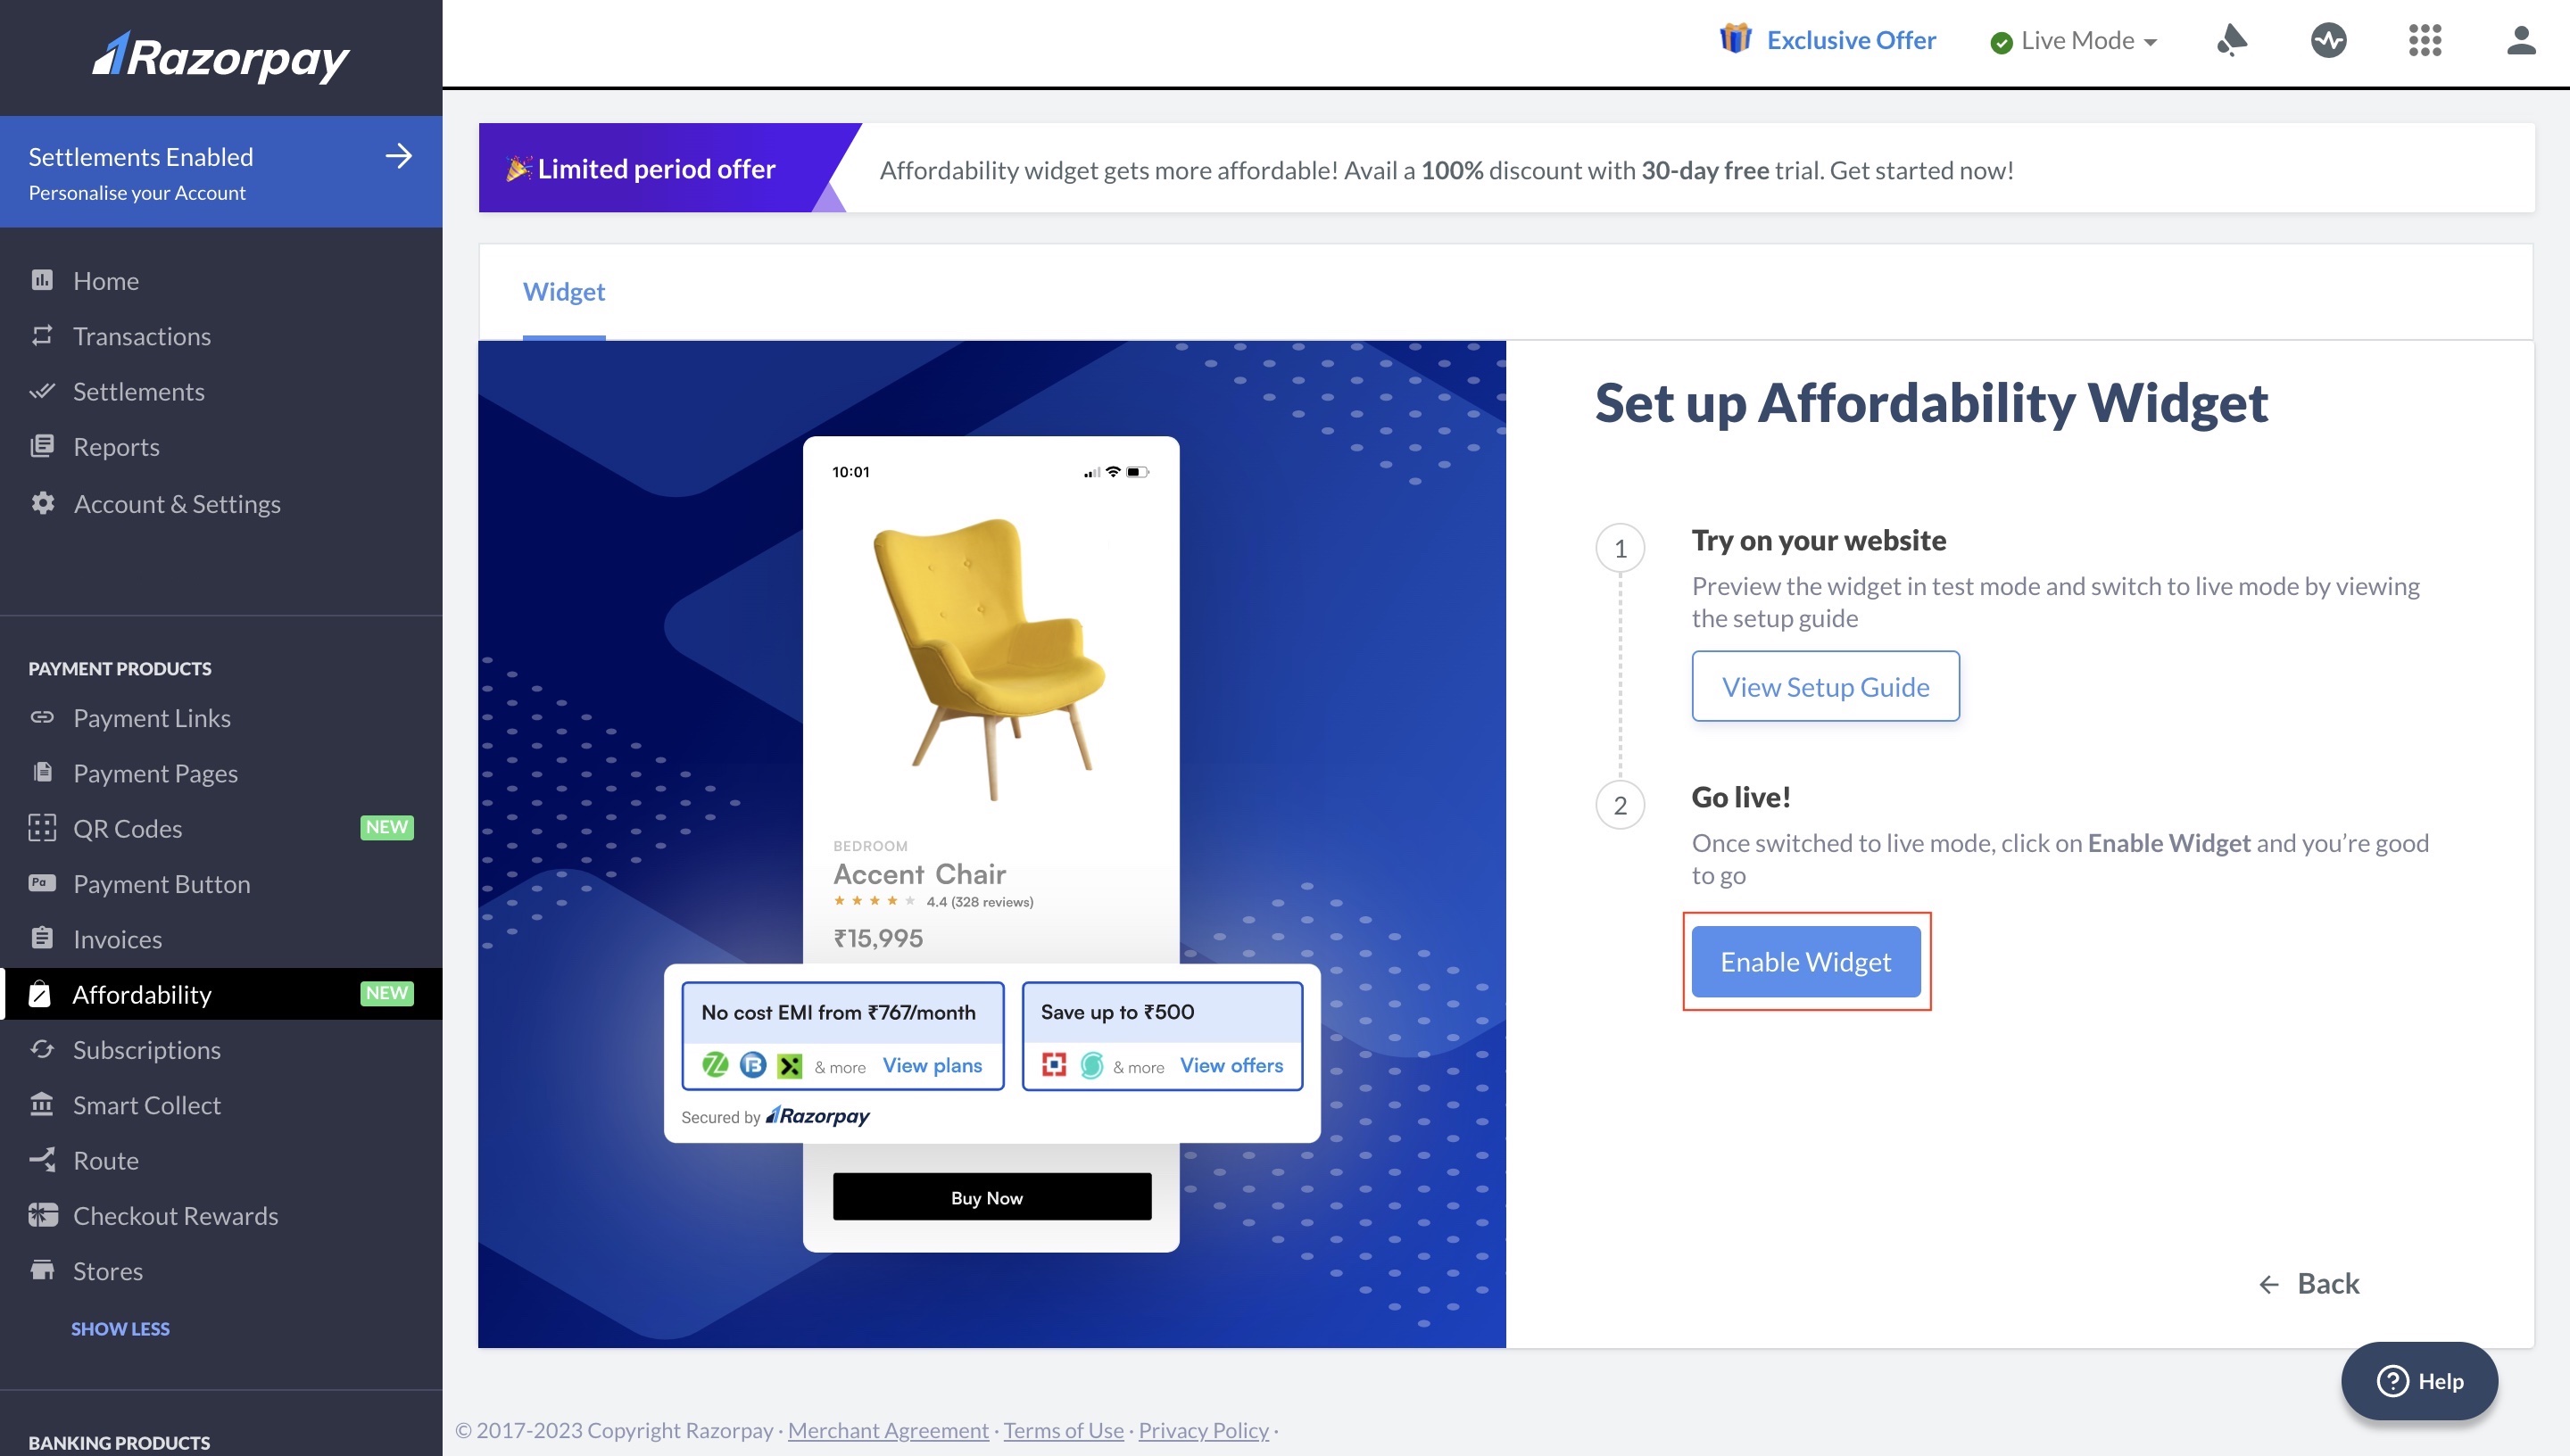
 3. Click **Enable Widget** in the **Go live!** section.
 4. Select the check box if you consent to enable the widget and click **Yes, enable**.
## Successful Activation
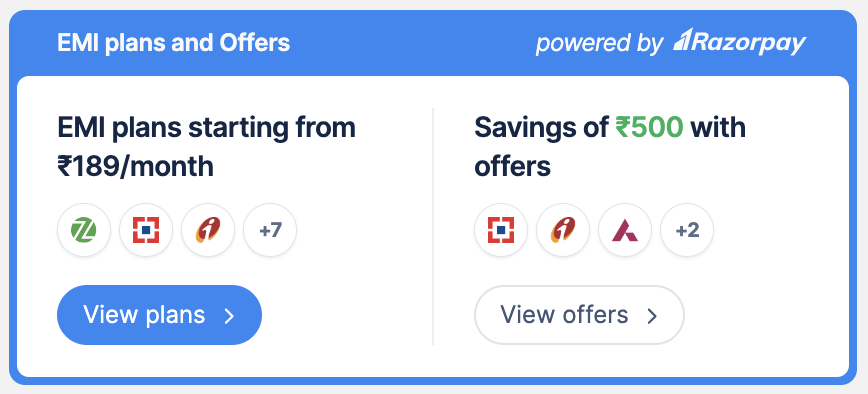
Here is a glimpse of the default widget with offers and payment method options enabled.
4. Select the check box if you consent to enable the widget and click **Yes, enable**.
## Successful Activation
Here is a glimpse of the default widget with offers and payment method options enabled.
 **Minimum Order Limit**
All the payment method options that are enabled and that satisfy the minimum order limit appear on the widget. Know more about the minimum order limit for:
* [EMI](/docs/payments/payment-gateway/emi²/faqs#1-what-are-the-standard-credit-card-interest)
* [Cardless EMI](/docs/payments/payment-gateway/emi²/faqs#cardless-emi)
* [Pay Later](/docs/payments/payment-gateway/emi²/faqs#2-what-are-the-standard-interest-rates-charged)
**Feature Enablement**
Raise a request with our [Support team](https://razorpay.com/support/#request) to integrate Razorpay Affordability Widget with Checkout. Your customers can select an offer/payment option on the widget, proceed to checkout and complete the payment.
## Next Steps
After you successfully integrate the widget on your website, you can choose to [customise the widget](/docs/payments/payment-gateway/emi²/widget/native-web/customise) based on your requirement.
**Handy Tips**
* Fill in the [integration support form](https://form.typeform.com/to/Ro3nJPzp) in case you are facing any issues with the integration.
* In case you have any queries, raise a ticket on the [Razorpay Support Portal](https://razorpay.com/support/).
### Related Information
* [Affordability Widget FAQs for Native website](/docs/payments/payment-gateway/emi²/widget/faqs#native-website)
* [Integrate Affordability Widget on WooCommerce website](/docs/payments/payment-gateway/emi²/widget/woocommerce)
* [Integrate Affordability Widget on your Shopify store](/docs/payments/payment-gateway/emi²/widget/shopify)
* [Integrate Affordability Widget on your Android app](/docs/payments/payment-gateway/emi²/widget/android)
**Minimum Order Limit**
All the payment method options that are enabled and that satisfy the minimum order limit appear on the widget. Know more about the minimum order limit for:
* [EMI](/docs/payments/payment-gateway/emi²/faqs#1-what-are-the-standard-credit-card-interest)
* [Cardless EMI](/docs/payments/payment-gateway/emi²/faqs#cardless-emi)
* [Pay Later](/docs/payments/payment-gateway/emi²/faqs#2-what-are-the-standard-interest-rates-charged)
**Feature Enablement**
Raise a request with our [Support team](https://razorpay.com/support/#request) to integrate Razorpay Affordability Widget with Checkout. Your customers can select an offer/payment option on the widget, proceed to checkout and complete the payment.
## Next Steps
After you successfully integrate the widget on your website, you can choose to [customise the widget](/docs/payments/payment-gateway/emi²/widget/native-web/customise) based on your requirement.
**Handy Tips**
* Fill in the [integration support form](https://form.typeform.com/to/Ro3nJPzp) in case you are facing any issues with the integration.
* In case you have any queries, raise a ticket on the [Razorpay Support Portal](https://razorpay.com/support/).
### Related Information
* [Affordability Widget FAQs for Native website](/docs/payments/payment-gateway/emi²/widget/faqs#native-website)
* [Integrate Affordability Widget on WooCommerce website](/docs/payments/payment-gateway/emi²/widget/woocommerce)
* [Integrate Affordability Widget on your Shopify store](/docs/payments/payment-gateway/emi²/widget/shopify)
* [Integrate Affordability Widget on your Android app](/docs/payments/payment-gateway/emi²/widget/android)