> ## Documentation Index
> Fetch the complete documentation index at: https://razorpay-881012b3.mintlify.site/llms.txt
> Use this file to discover all available pages before exploring further.

# Add Domain Link (Beta)

> Create a customised URL for your Payment Page.

<div style={{display:"flex",flexWrap:"wrap",alignItems:"center",gap:"0.35rem 0.9rem",border:"1px solid rgba(128,128,128,0.28)",borderRadius:"0.5rem",padding:"0.45rem 0.75rem",margin:"0 0 1.25rem",fontSize:"0.875rem"}}>
  <span style={{fontWeight:600}}>Available in</span>
  <span>🇮🇳 India</span>
  <span>🇺🇸 United States</span>
</div>

You can link your domain to your Payment Page's URL with the custom domain linking feature. This helps you align your payment page with your website/brand.

**Example**

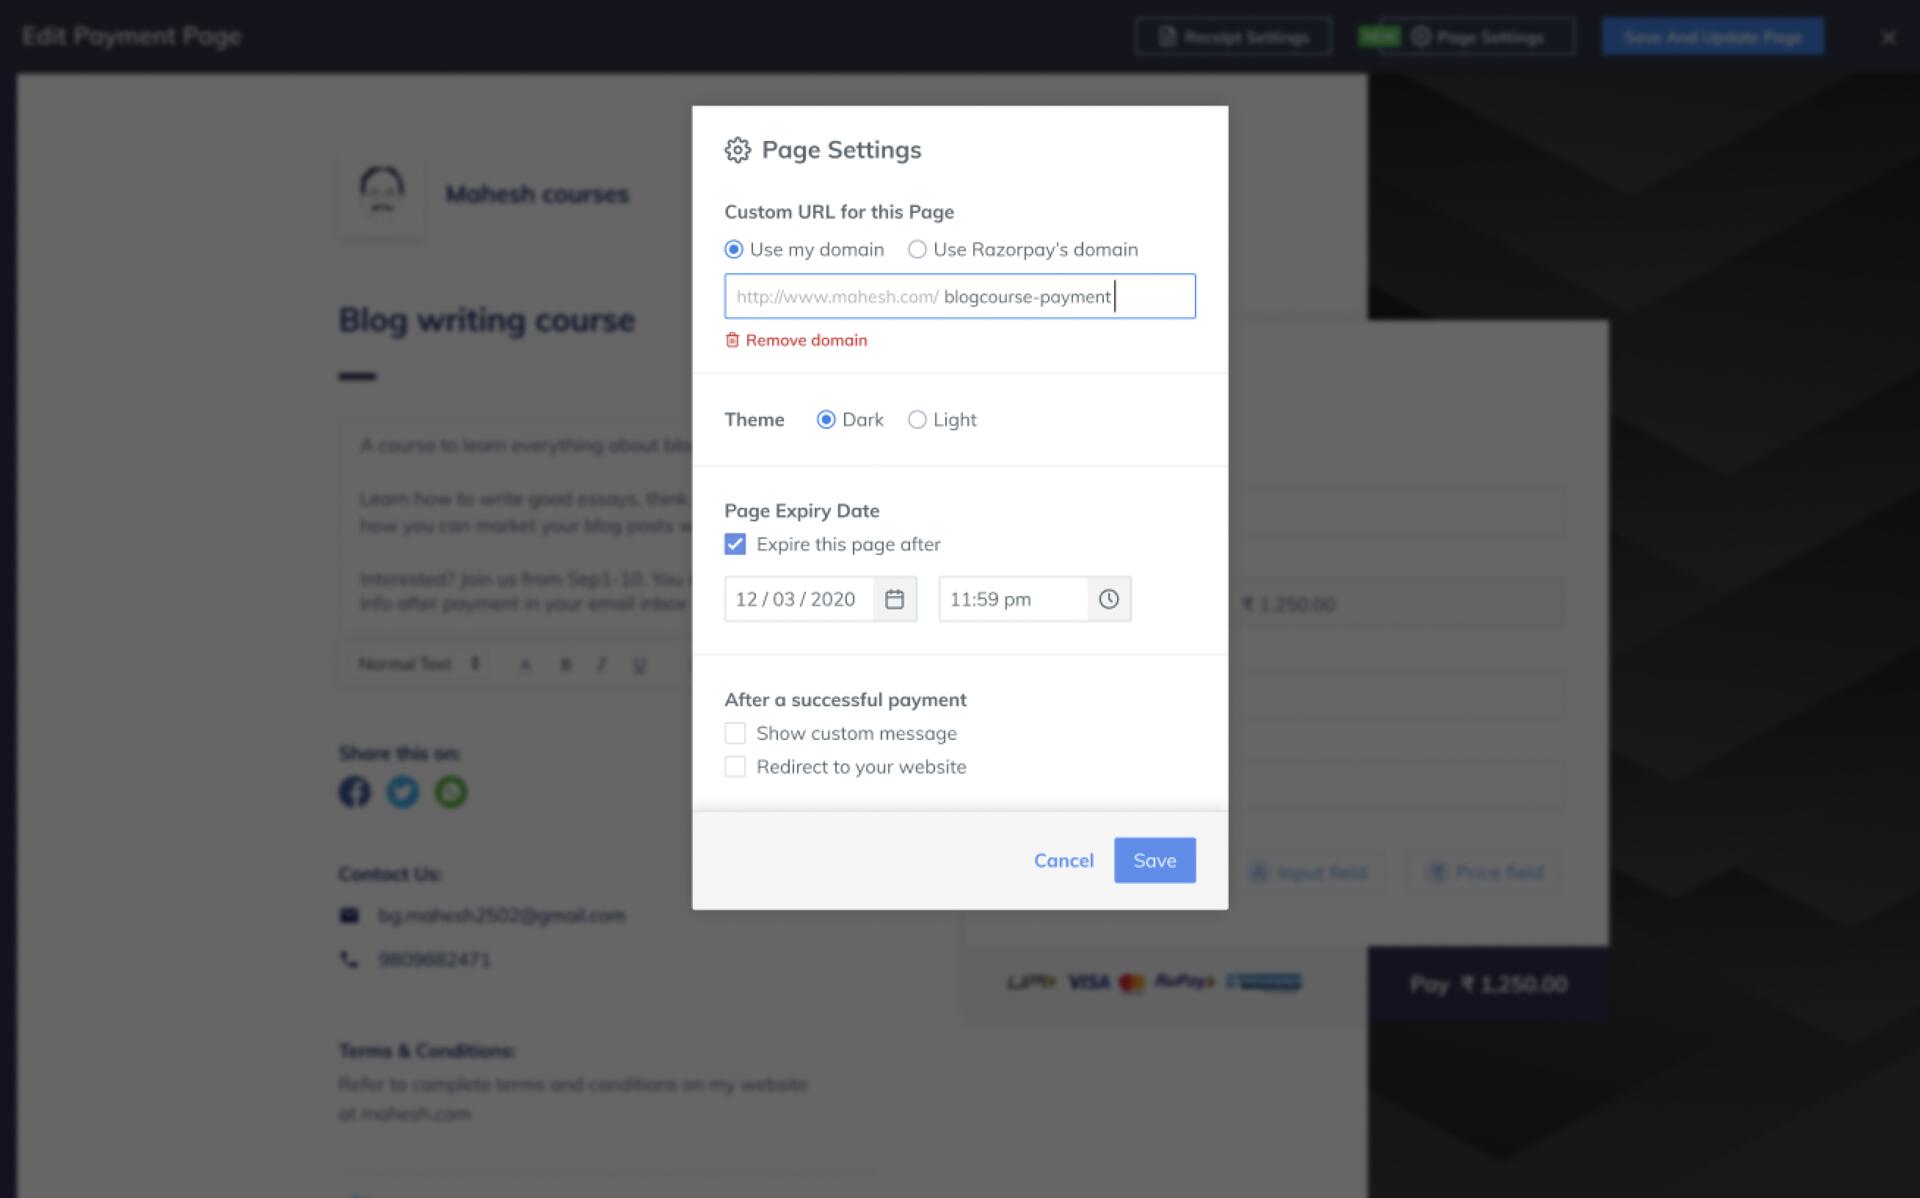
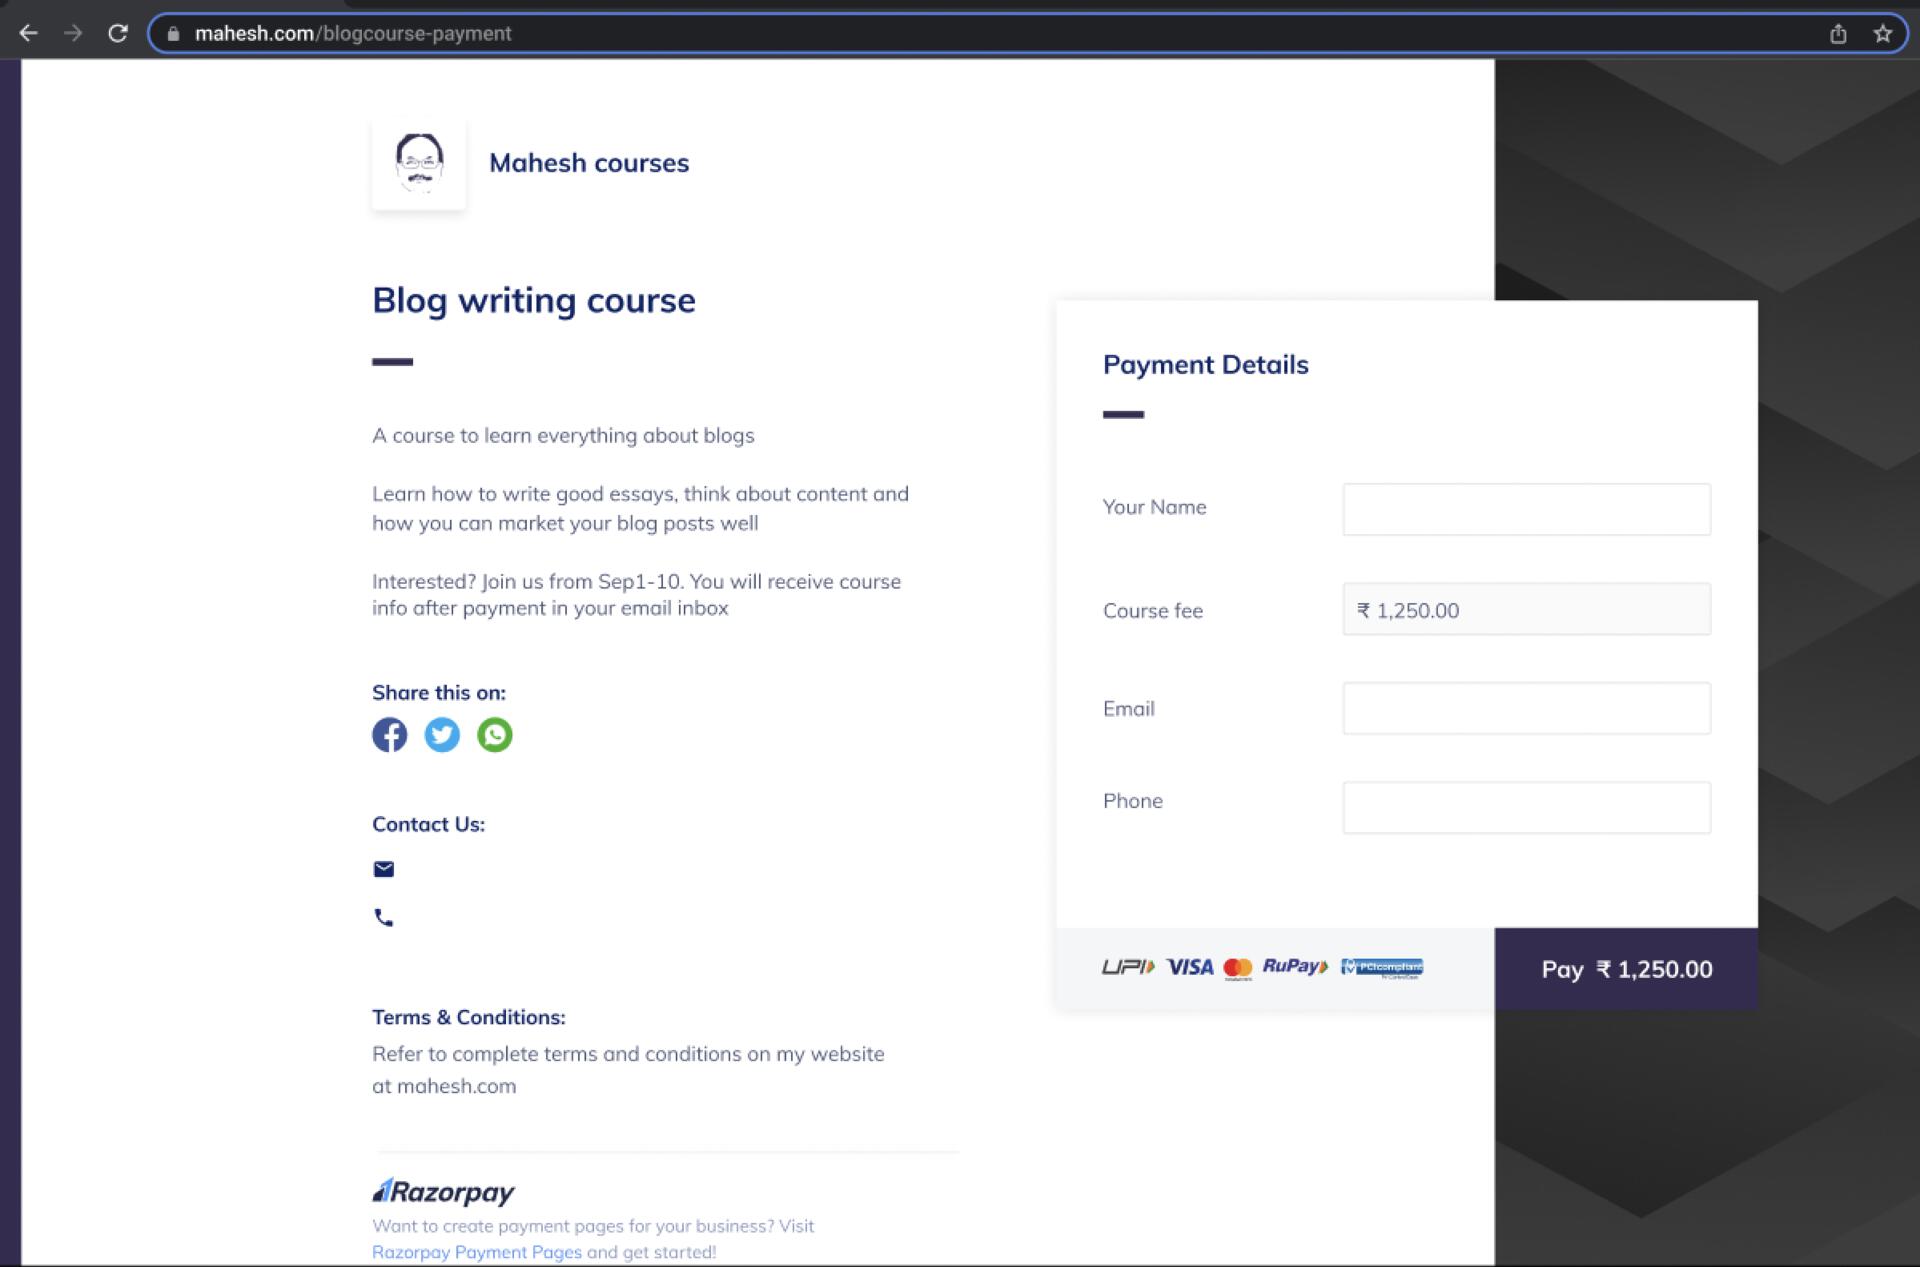
Let us assume that you have a blog website named `https://www.mahesh.com` and are charging fees for your course using a Payment Page. You can now link this page to your website by adding a custom slug using the Domain Linking feature.

The URL will be `https://www.mahesh.com/blogcourse-payment` where `blogcourse-payment` is the custom slug given to your Payment Page.

<Info>
  **Feature Request**

  This is an on-demand feature. Please raise a request with our [Support team](https://razorpay.com/support/#request) to get this feature activated on your Razorpay account.
</Info>

<img src="https://razorpay.com/docs/build/browser/assets/images/pp-mahesh.jpg" alt="Example website" width="800" />

<AccordionGroup>
  <Accordion title="Connect Your Domain Link">
    To connect your domain link to your Payment Page:

    1. Log in to the Dashboard and navigate to **Payment Pages**.
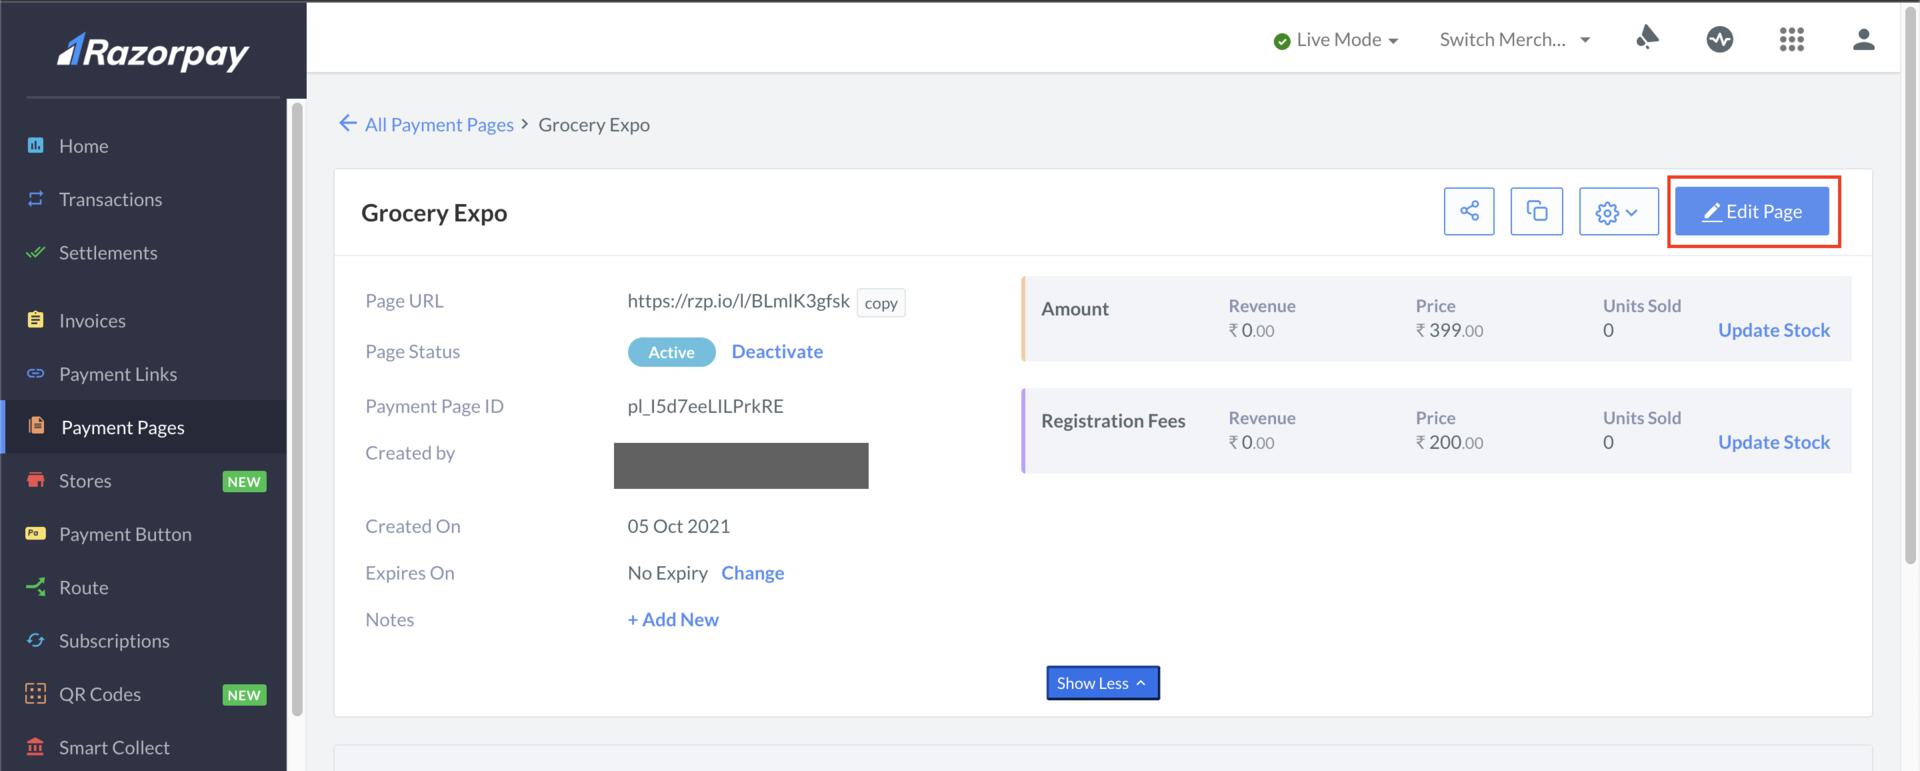
    2. Select the page you wish to link to your domain and click **Edit Page**.
           <img src="https://razorpay.com/docs/build/browser/assets/images/pp-domain-edit-page.jpg" alt="Edit Page" width="800" />
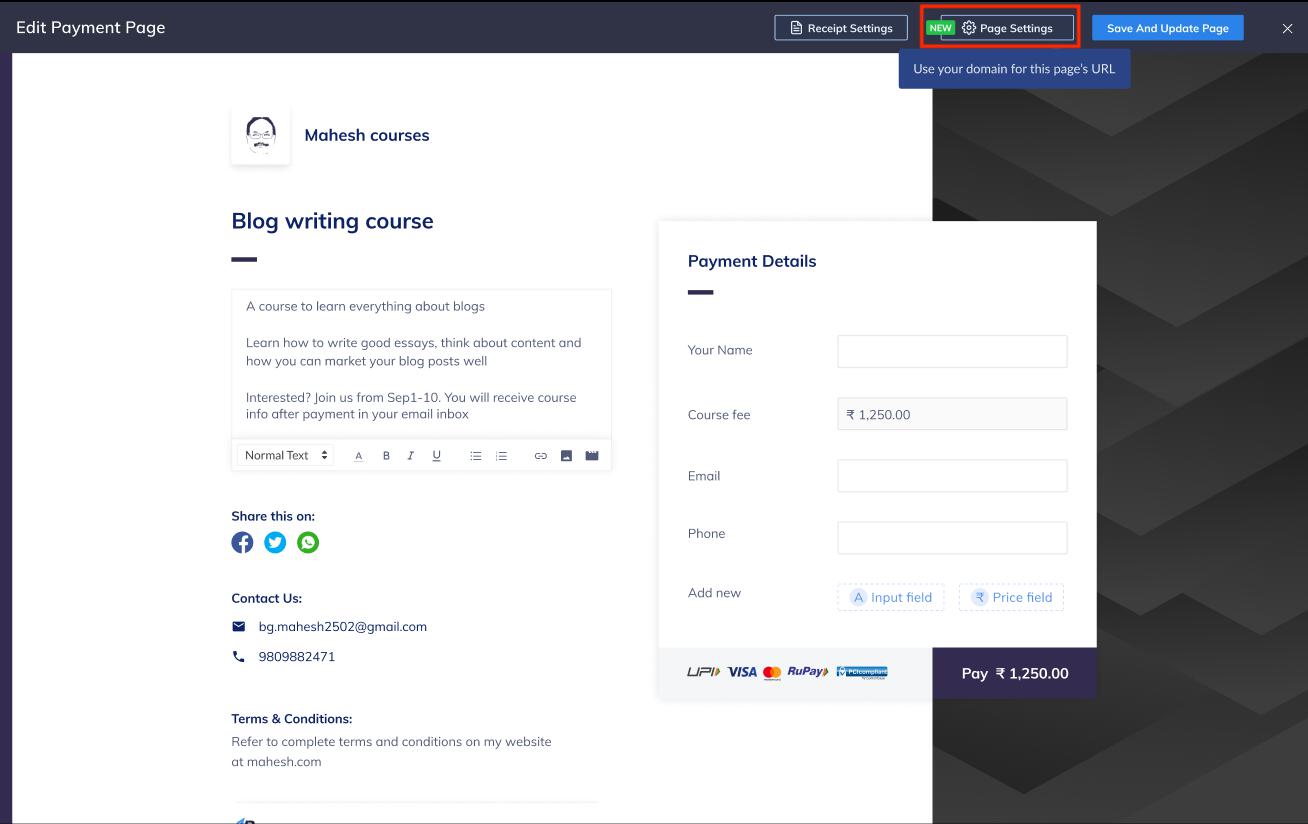
    3. This opens the page in edit mode. Click **Page Settings**.
           <img src="https://razorpay.com/docs/build/browser/assets/images/pp-page-settings.jpg" alt="Page Settings" width="800" />
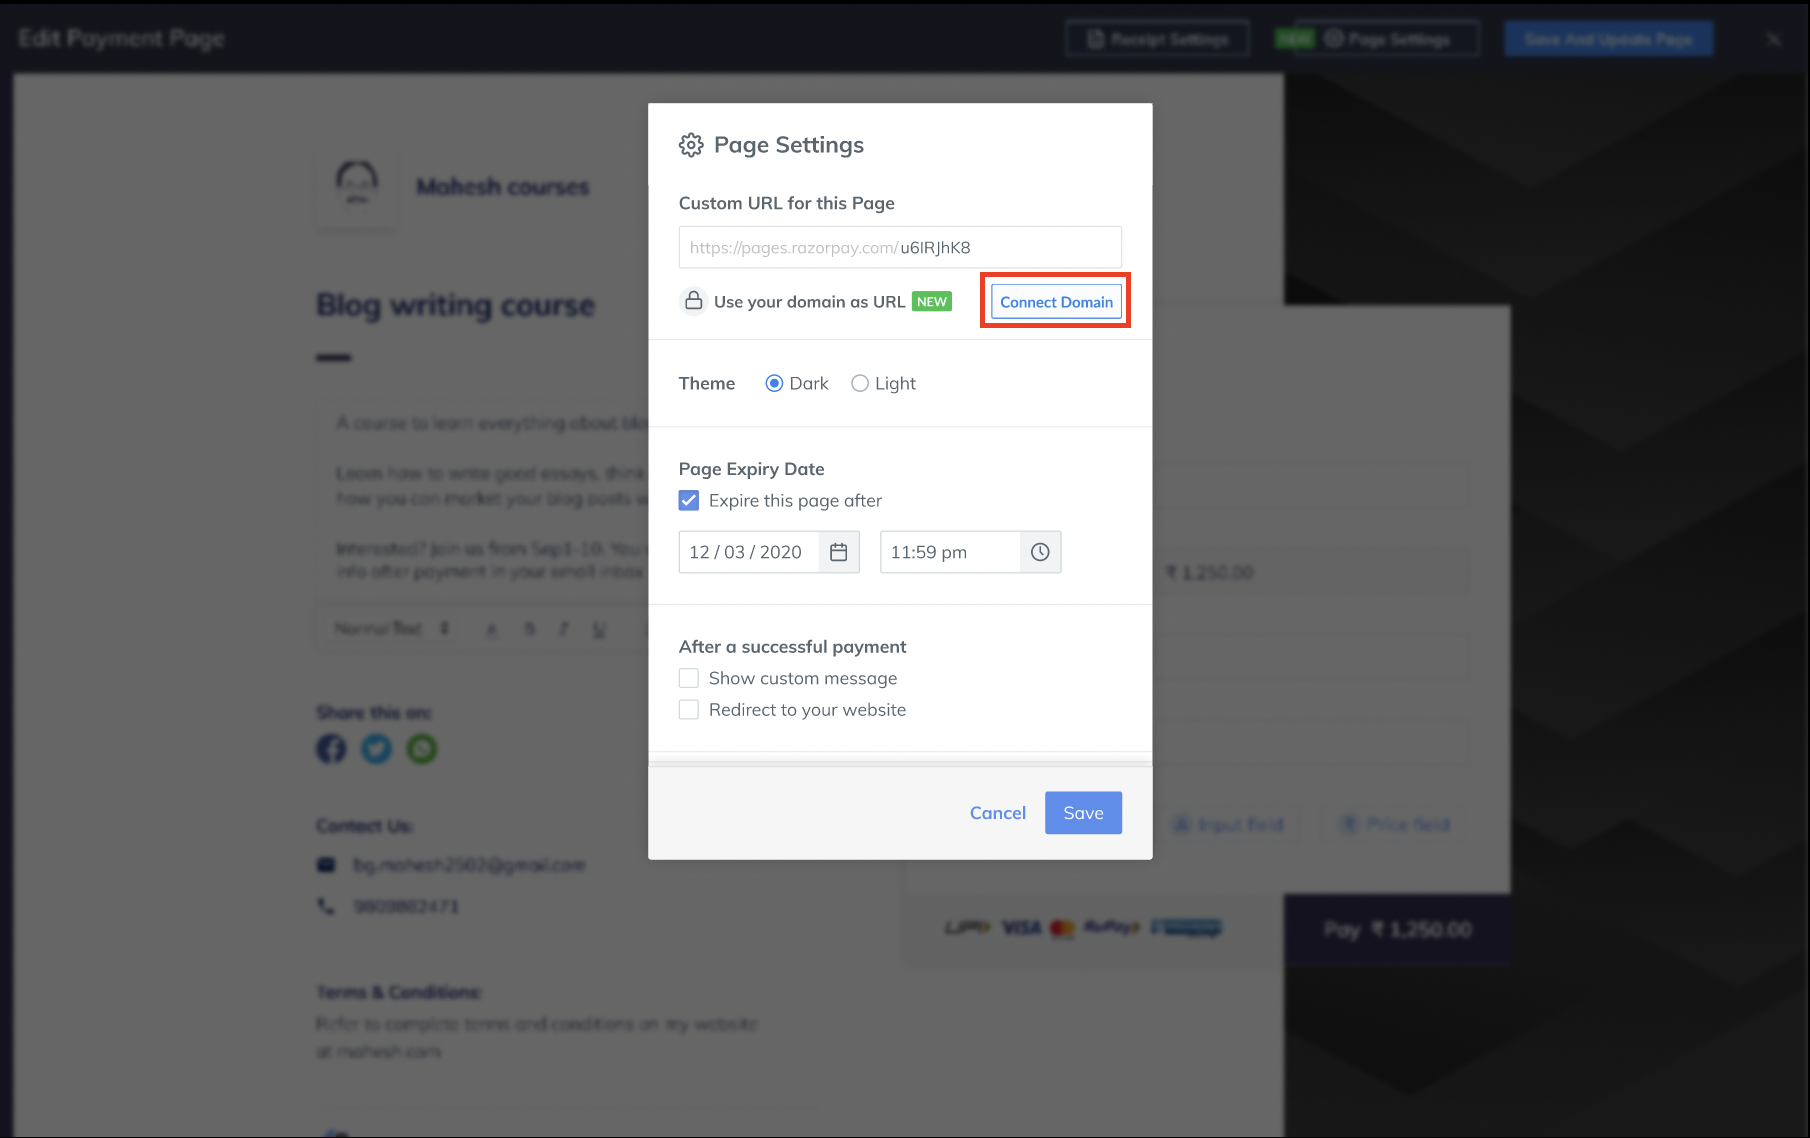
    4. In the pop-up page that appears, click **Connect Domain**.
           <img src="https://razorpay.com/docs/build/browser/assets/images/pp-connect-domain.jpg" alt="Connect Domain" width="800" />
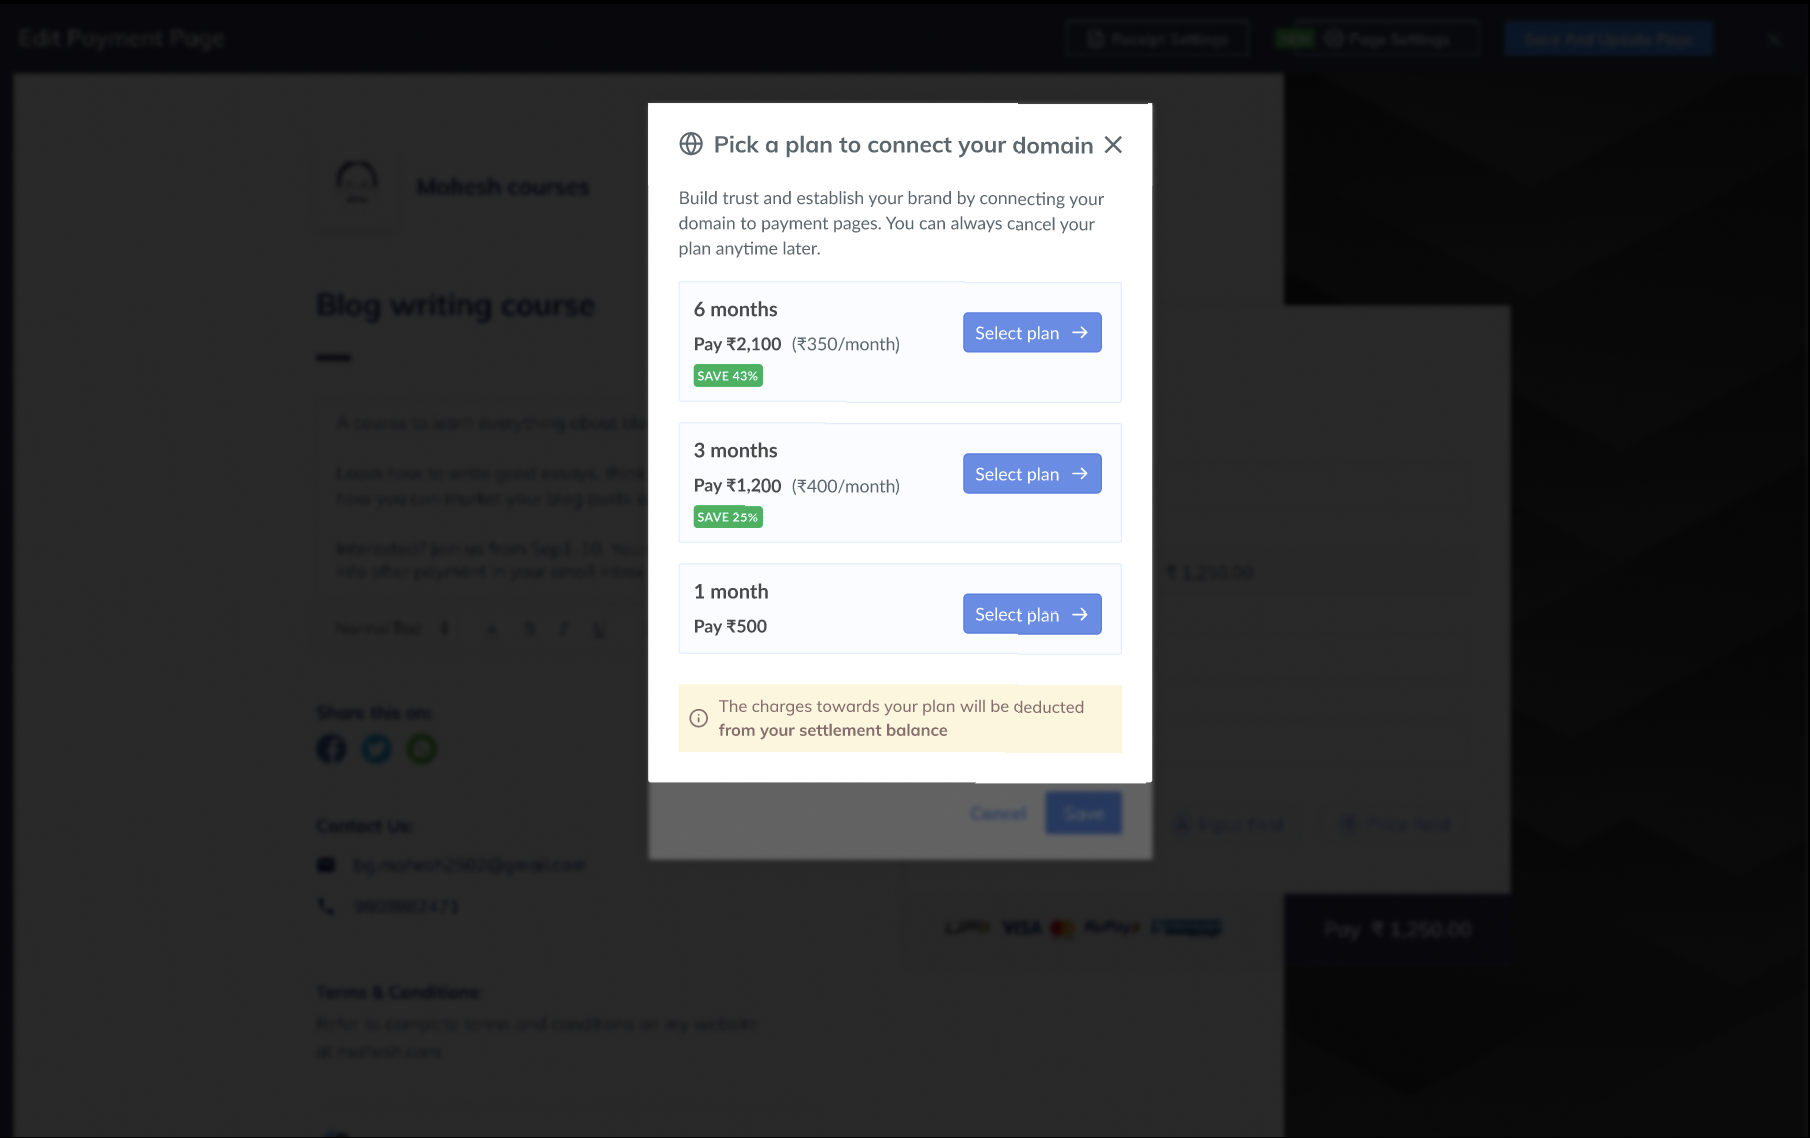
    5. Select a subscription plan that works for you. We offer 3 subscription plans for you to choose from:

    | Plan     | Price       |
    | -------- | ----------- |
    | 6 Months | (350/month) |
    | 3 Months | (400/month) |
    | 1 Month  |             |
    <img src="https://razorpay.com/docs/build/browser/assets/images/pp-domain-linking-pricing-plans.jpg" alt="Domain Linking Pricing Plans" width="800" />

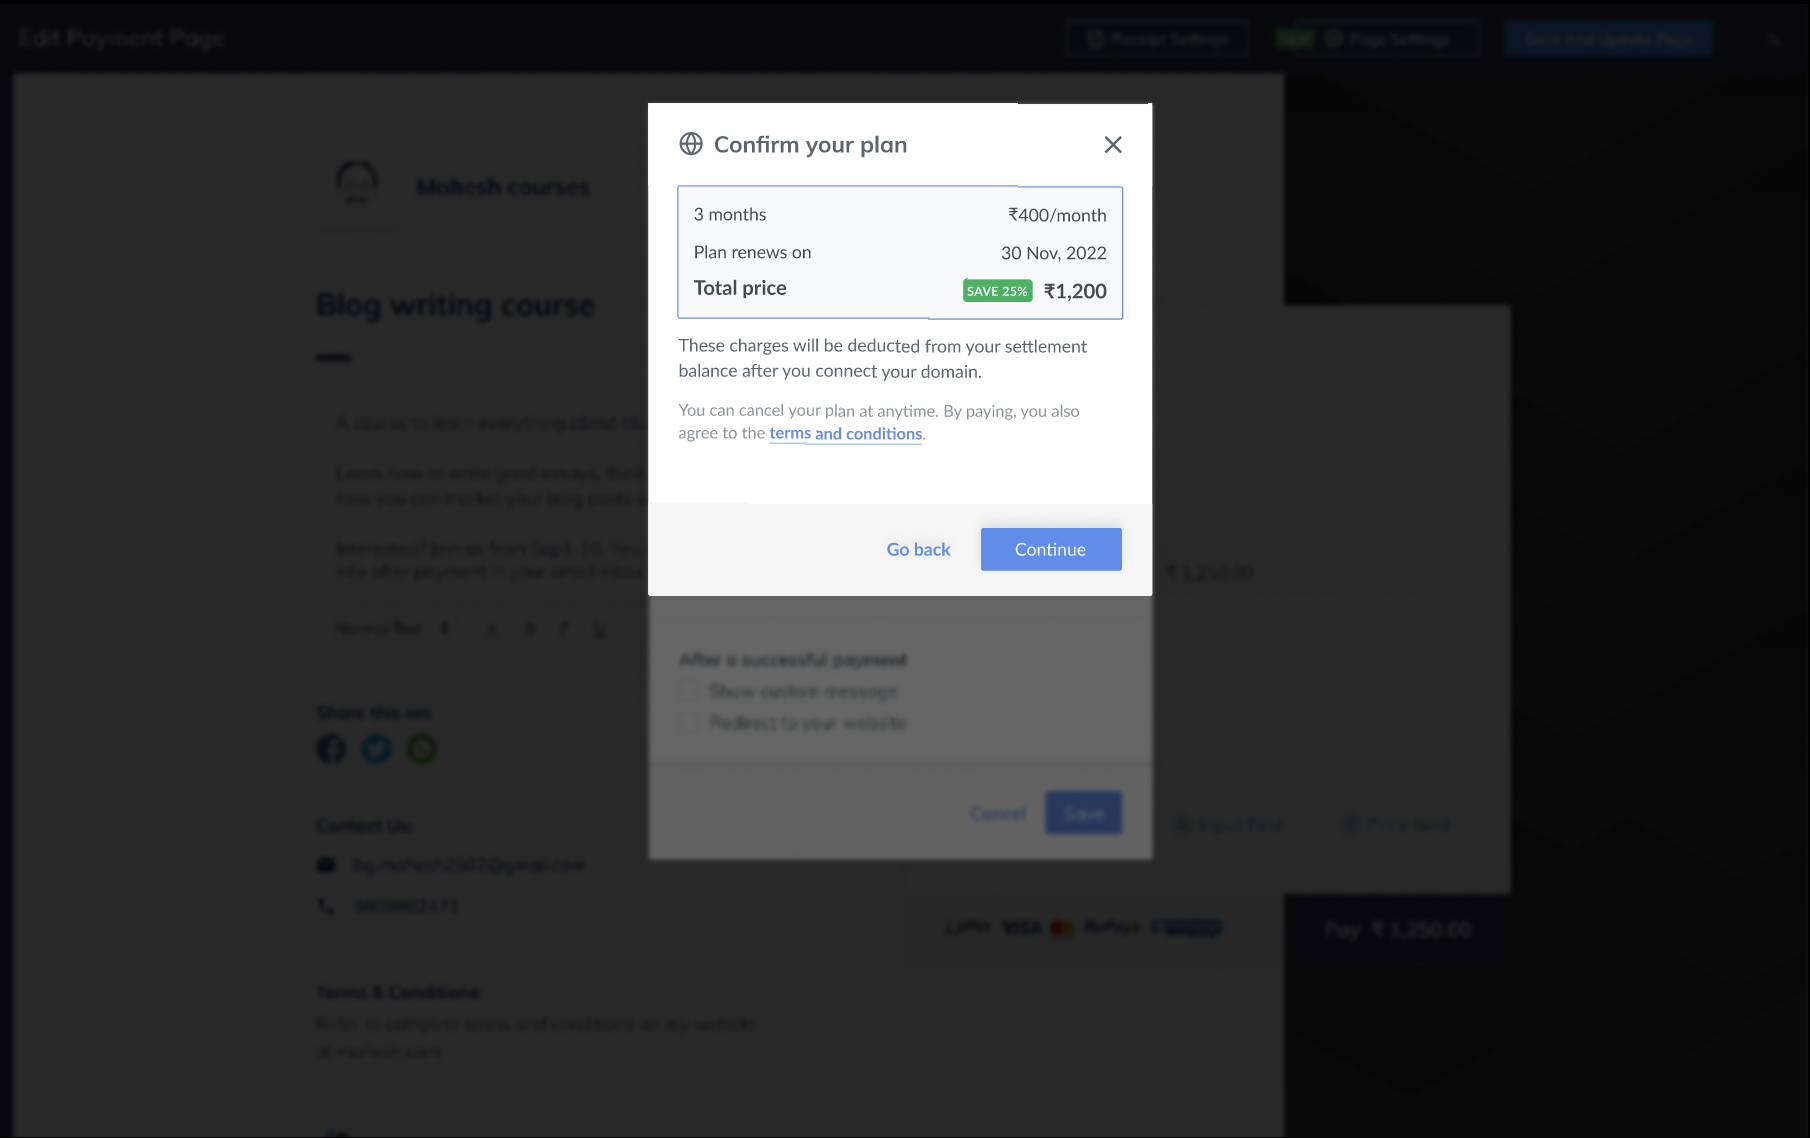
    6. Select a plan of your choice and click **Continue**.
           <img src="https://razorpay.com/docs/build/browser/assets/images/pp-domain-linking-select-plan.jpg" alt="Select Plan for Pricing" width="800" />
    7. Enter the domain or sub-domain you wish to use as your Payment Page's URL and click **Next**.
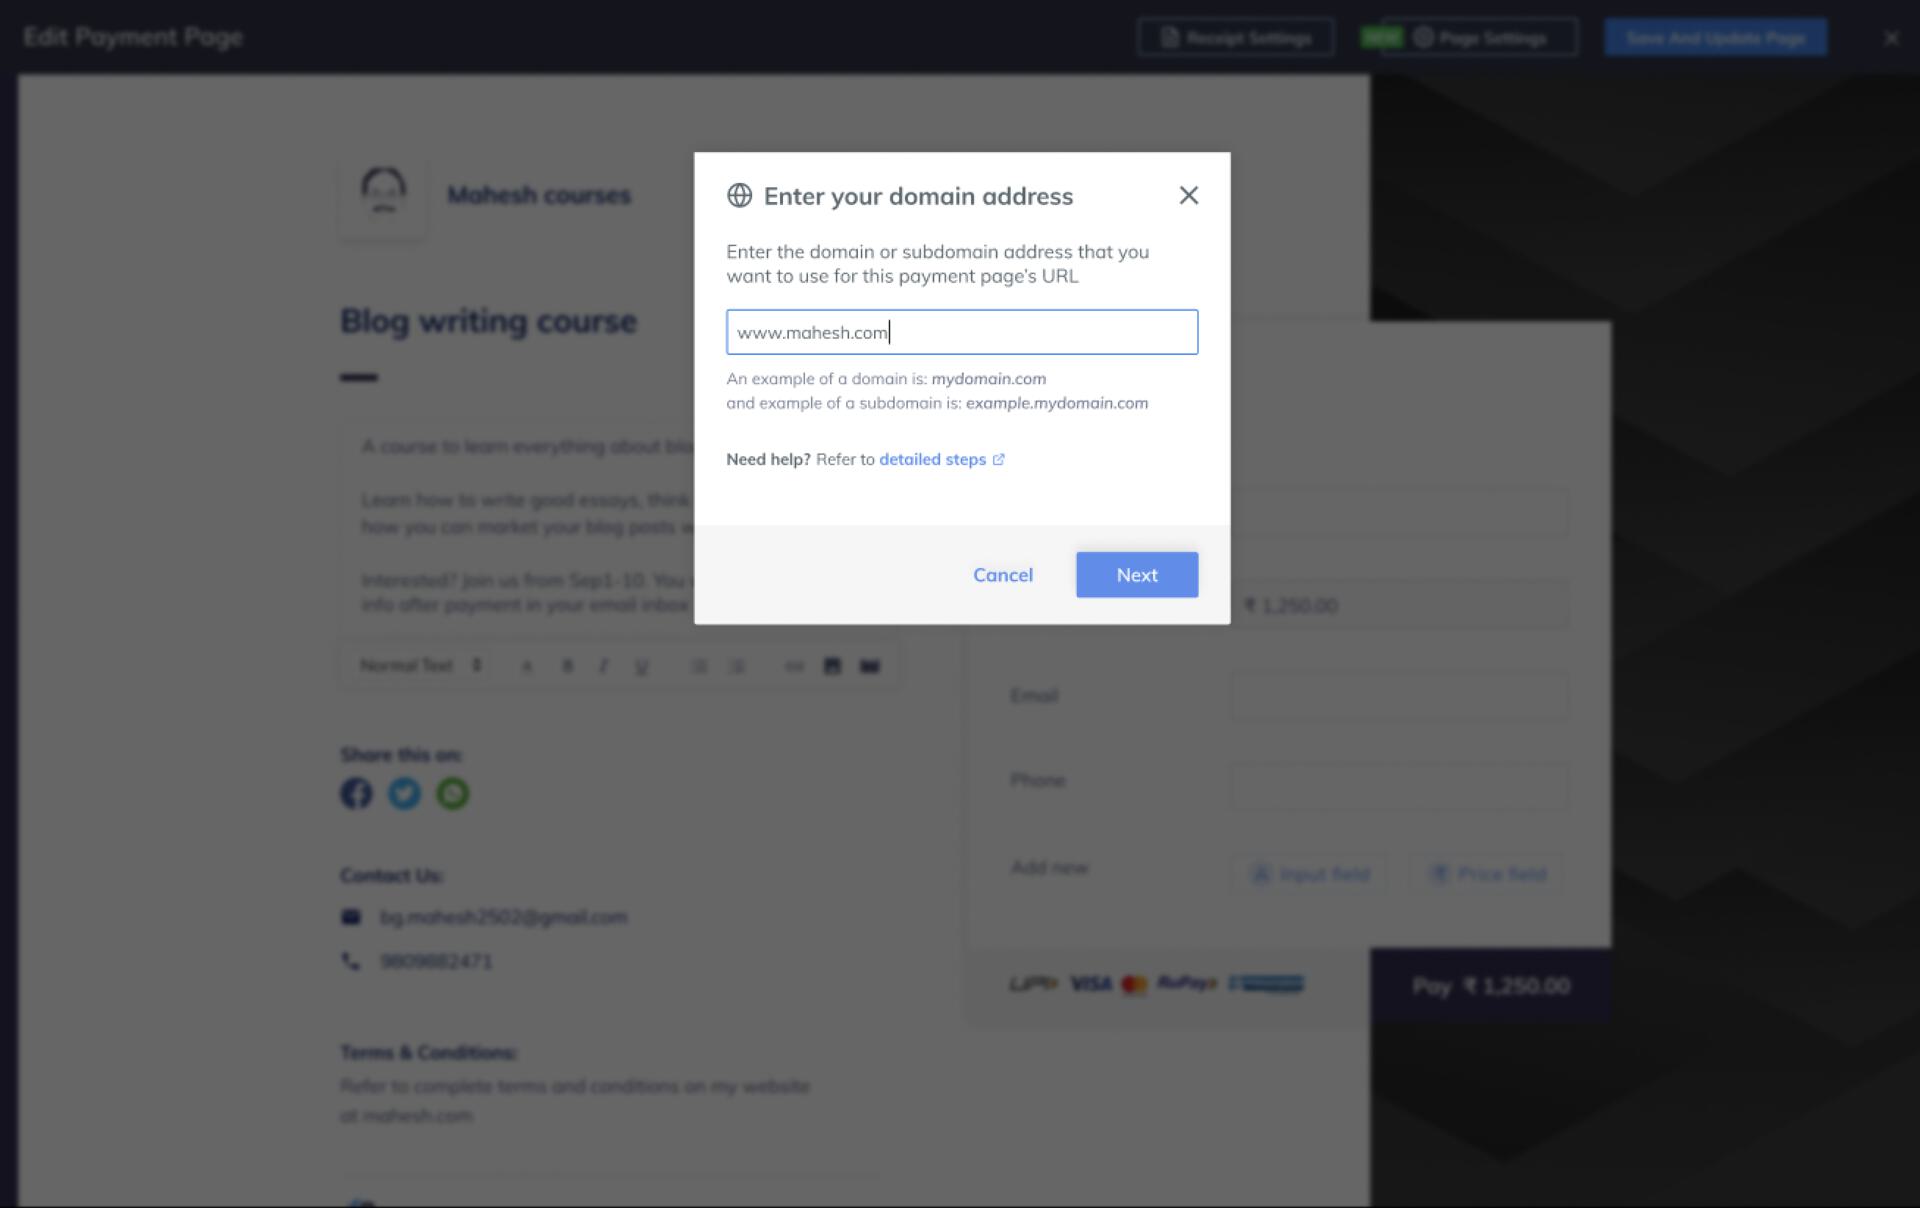
           <img src="https://razorpay.com/docs/build/browser/assets/images/pp-domain-name.jpg" alt="Add Domain Name" width="800" />
    8. Go to your domain and update the DNS values after receiving them. Given below is an example from Google Domains:
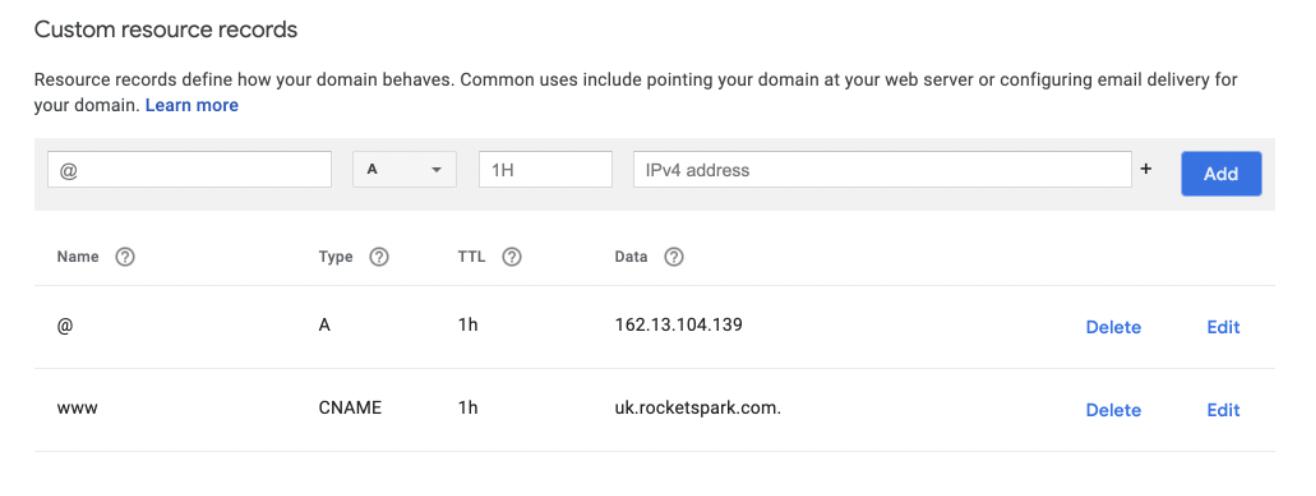
           <img src="https://razorpay.com/docs/build/browser/assets/images/pp-google-domains.jpg" alt="Google Domain Page" width="700" />
    9. After updating the DNS values, select the check box that asks if you have updated the DNS values and click **Verify connection**.
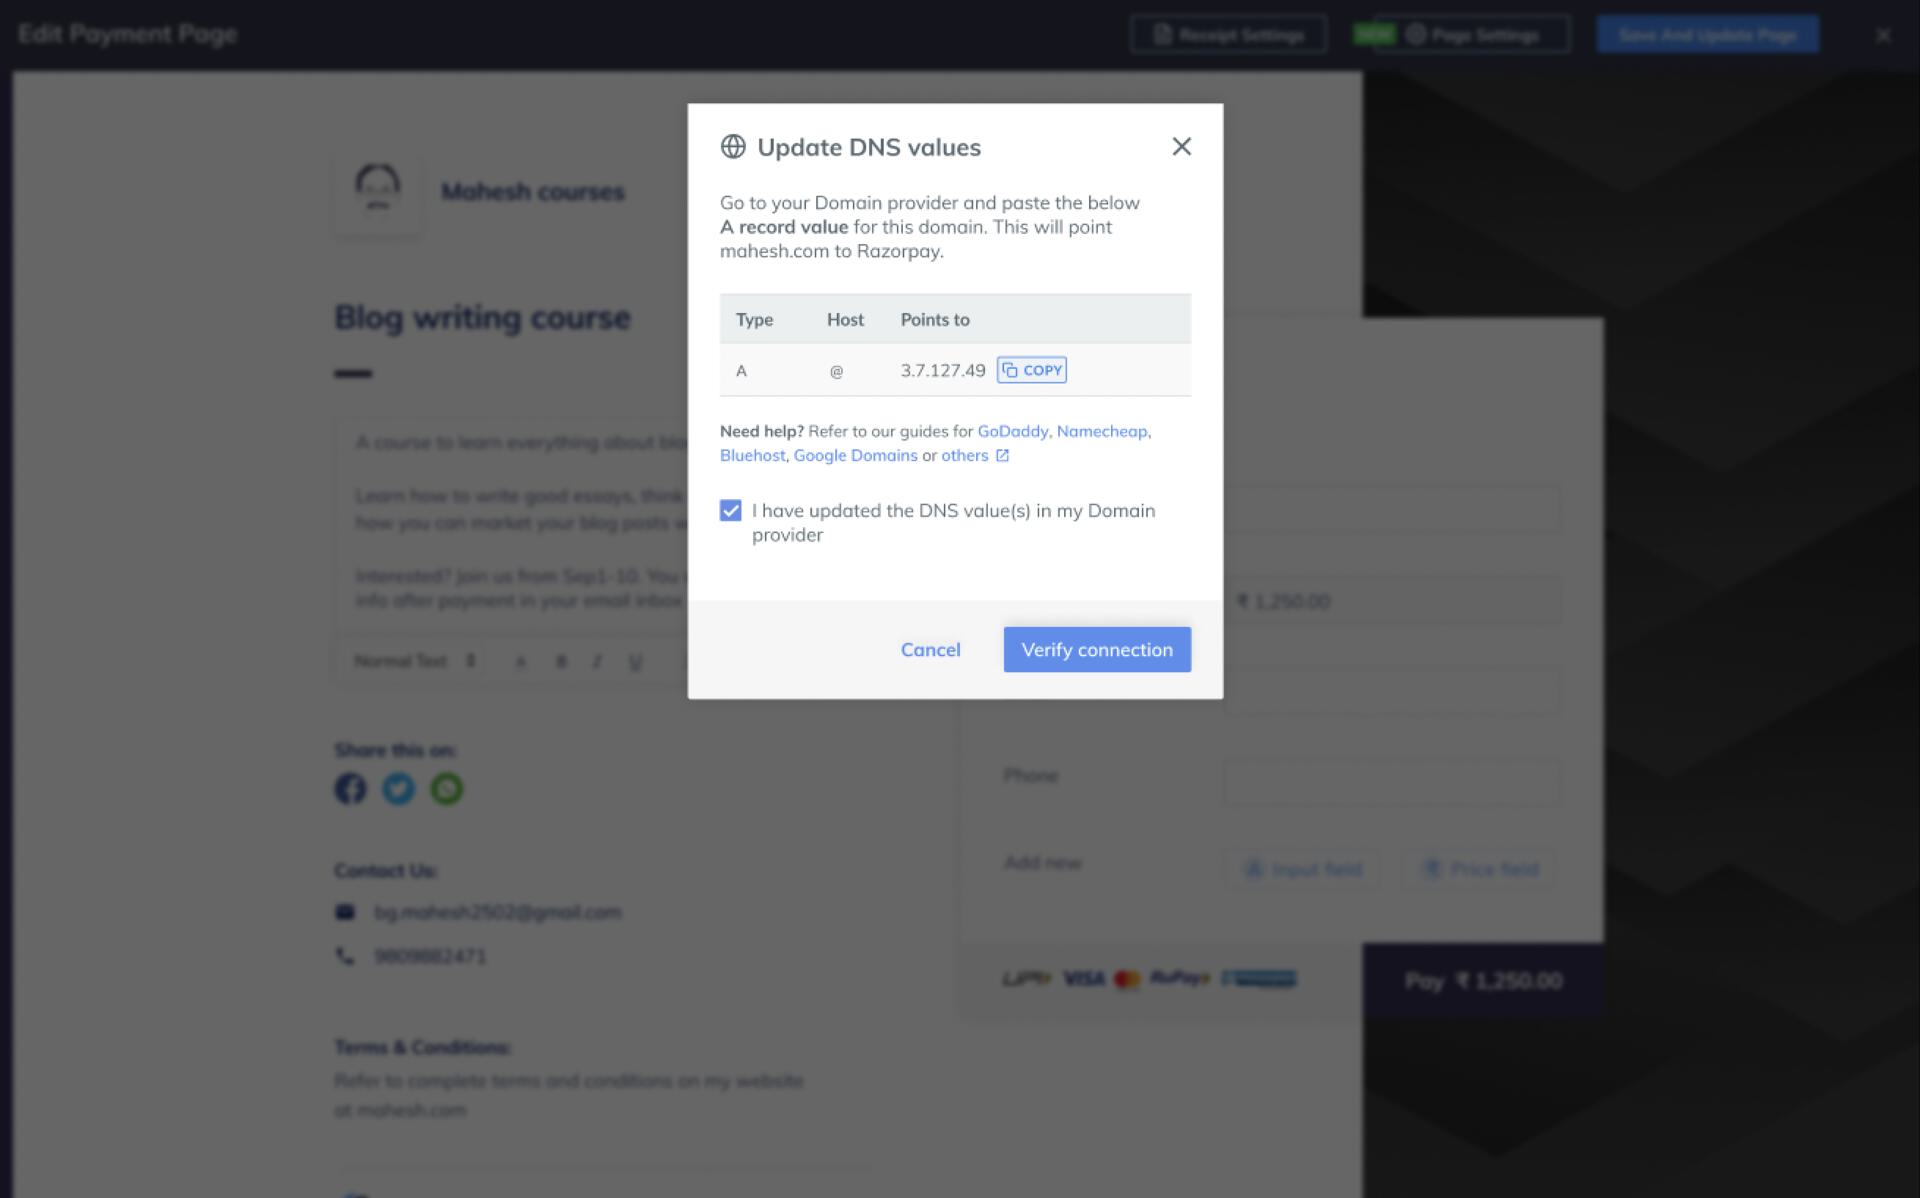
           <img src="https://razorpay.com/docs/build/browser/assets/images/pp-update-dns.jpg" alt="Update DNS Values" width="800" />
    10. After your domain is connected, customise the URL by clicking **Okay, customize URL**.
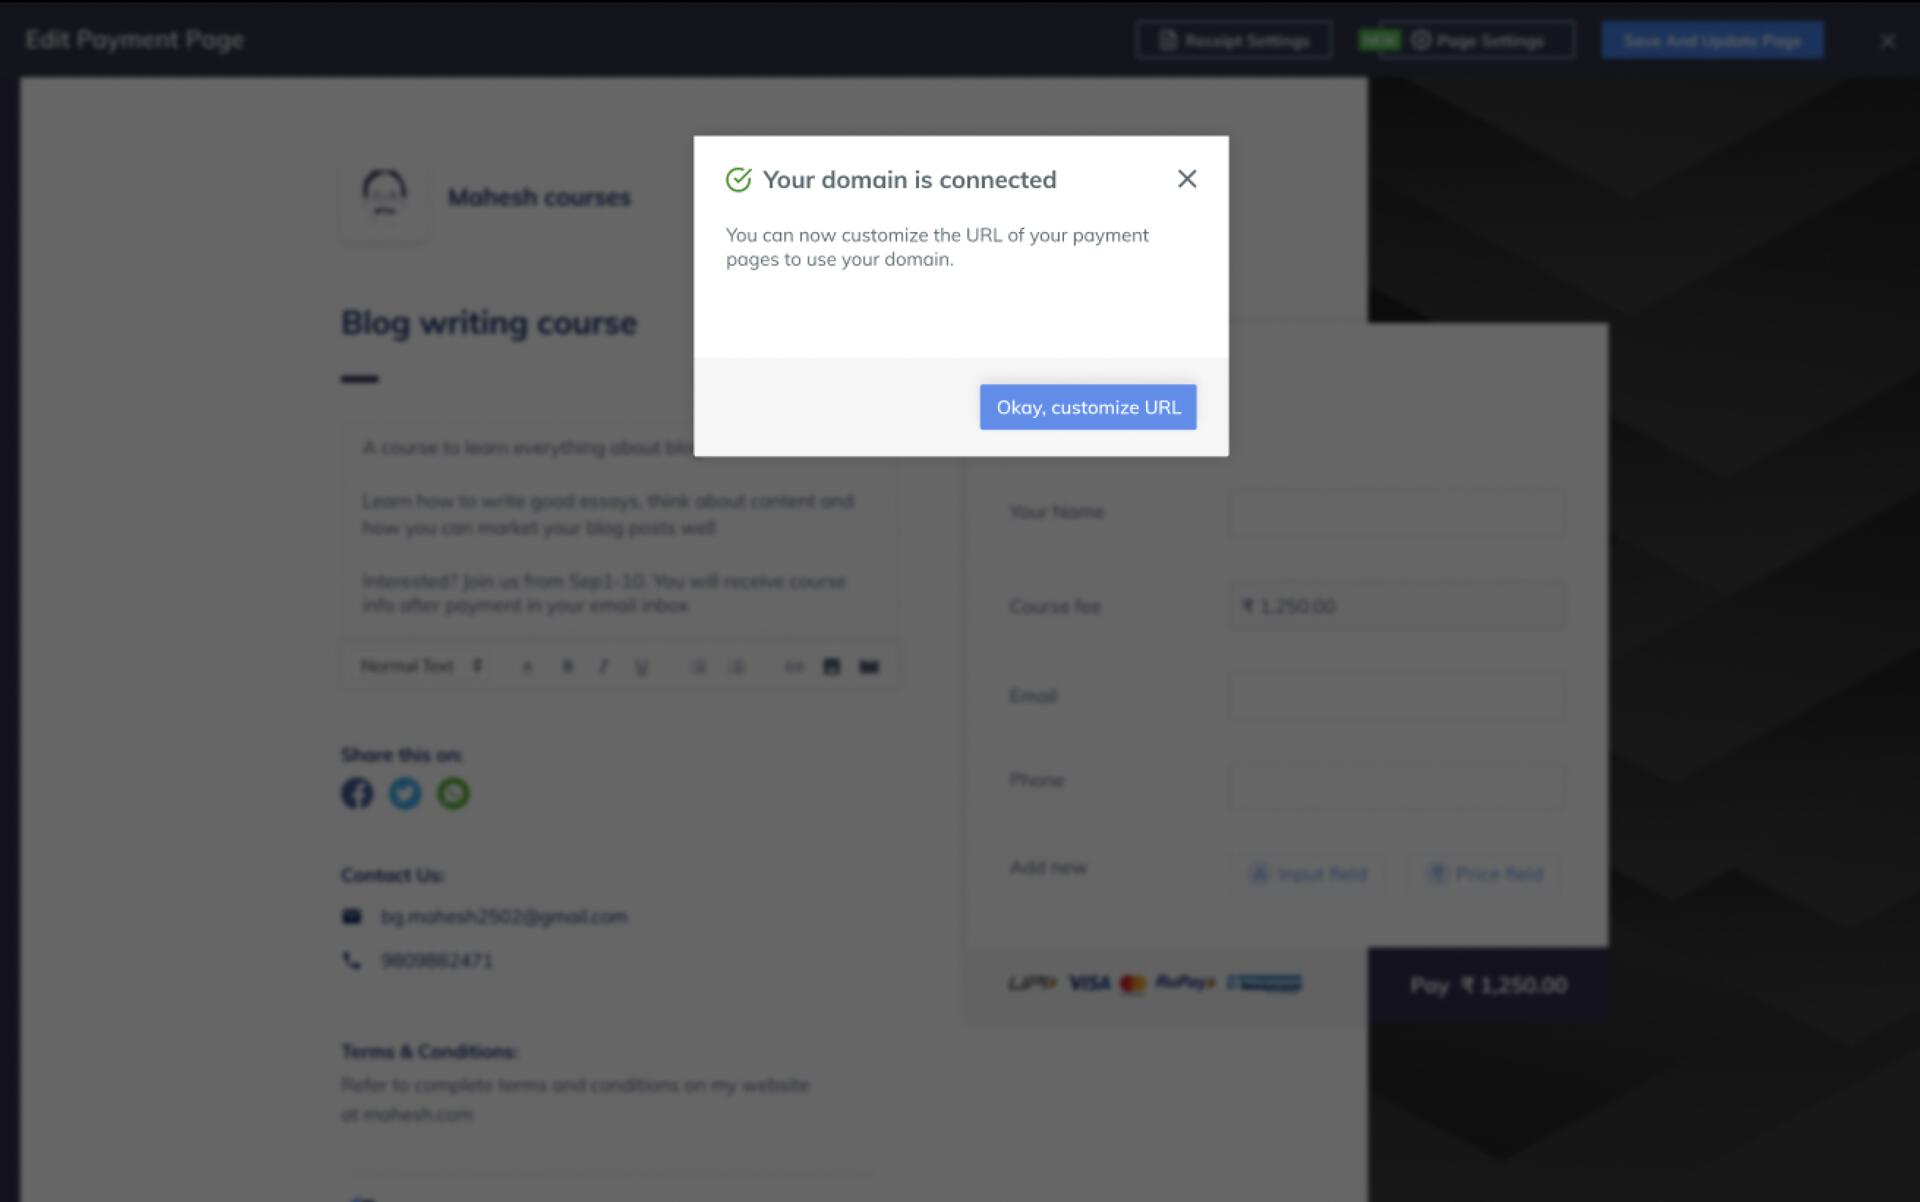
            <img src="https://razorpay.com/docs/build/browser/assets/images/pp-domain-connected.jpg" alt="Domain Connected Message" width="800" />
  </Accordion>

  <Accordion title="Customise your Domain Link (Optional)">
    After successfully connecting your domain, you can customise your domain link by following the steps given below:

    1. Click **Page Settings**.
    2. In the pop-up page that appears, select one of these:
       * **Use my domain**: Select this option to customise your domain link name as per your preference. For example, assam-flood-relief-funds.
             <img src="https://razorpay.com/docs/build/browser/assets/images/pp-use-my-domain.jpg" alt="Use my Domain option" width="800" />
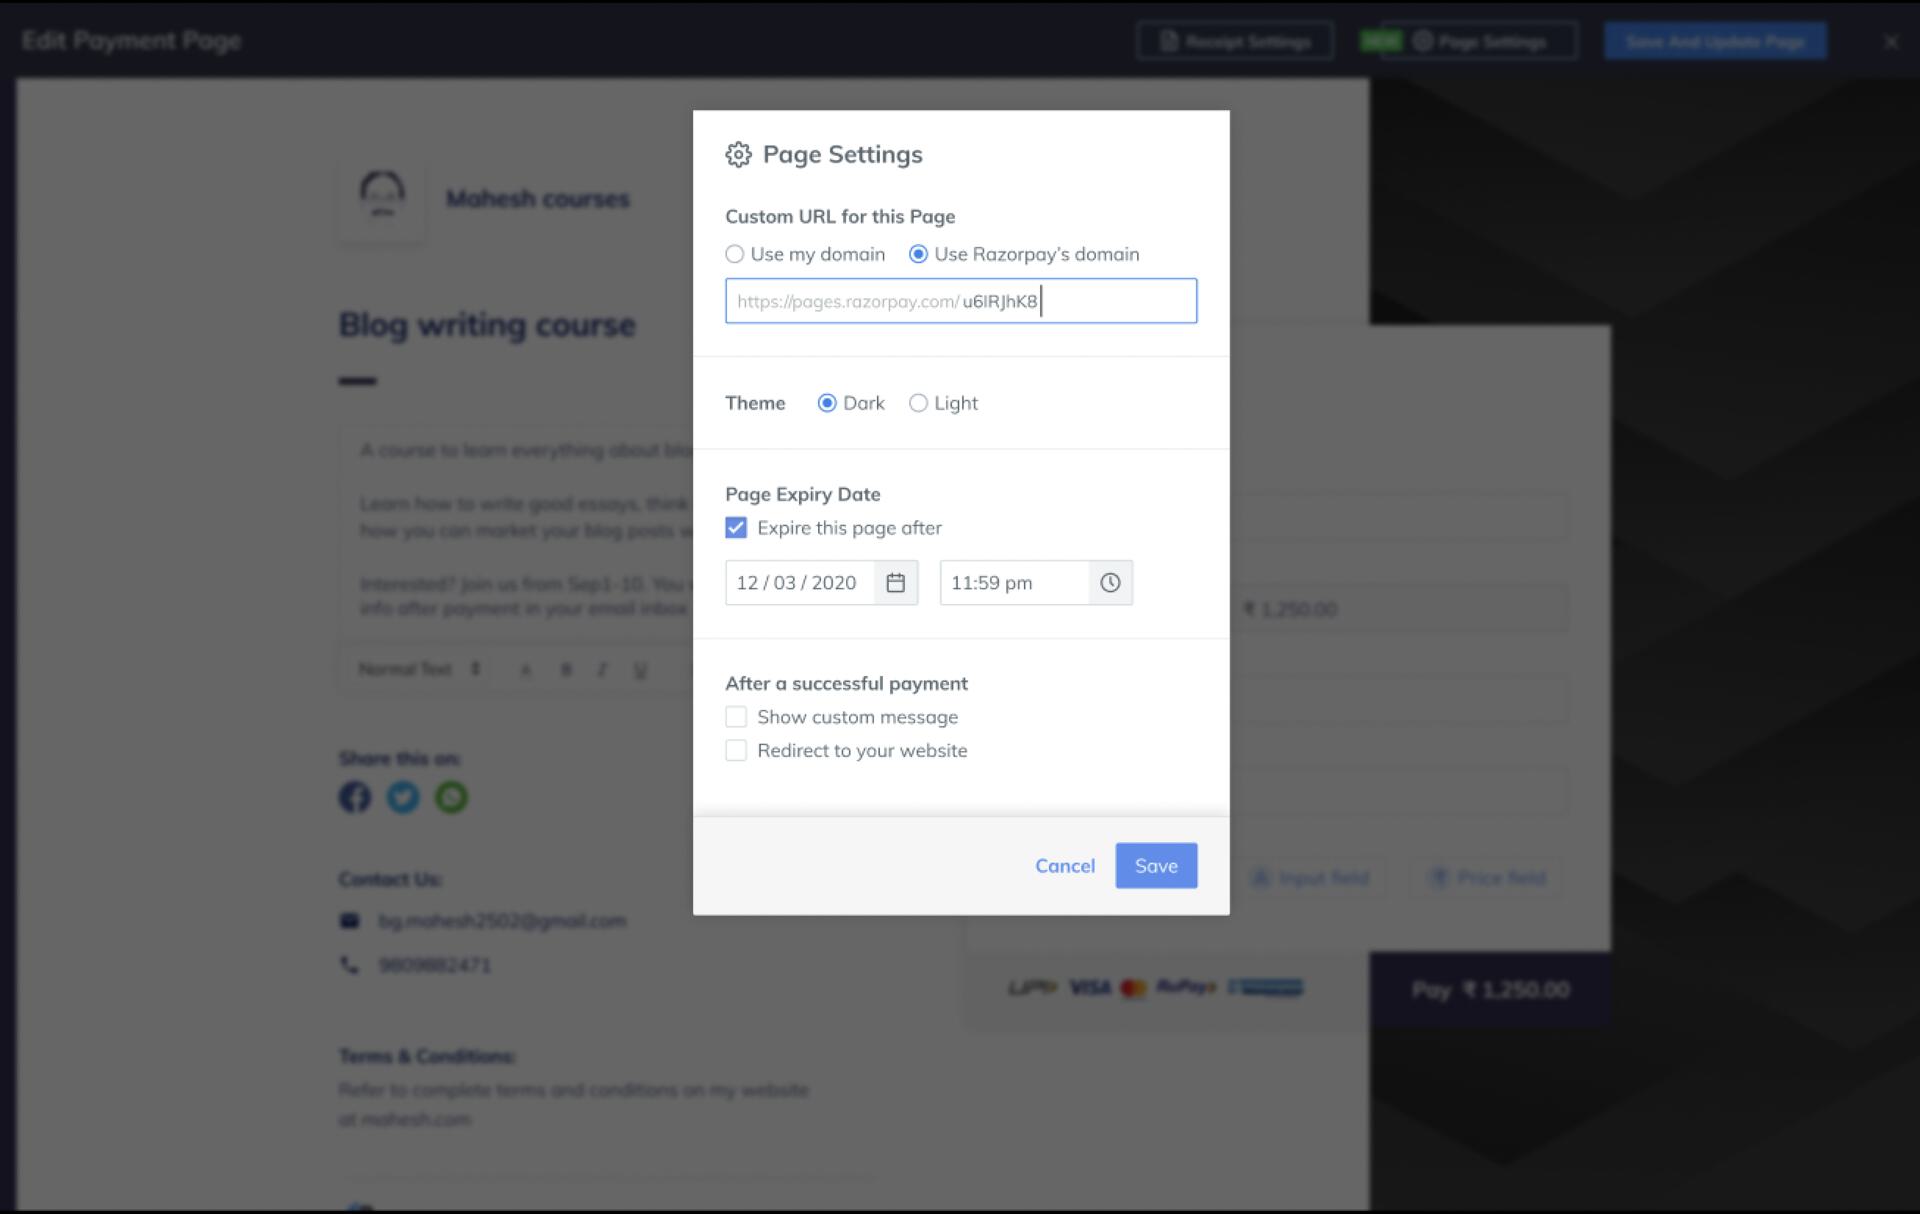
       * **Use Razorpay's domain**: Select this option to use Razorpay's domain.
             <img src="https://razorpay.com/docs/build/browser/assets/images/pp-use-rzp-domain.jpg" alt="Use Razorpay's Domain option" width="800" />
       * Click **Save**.
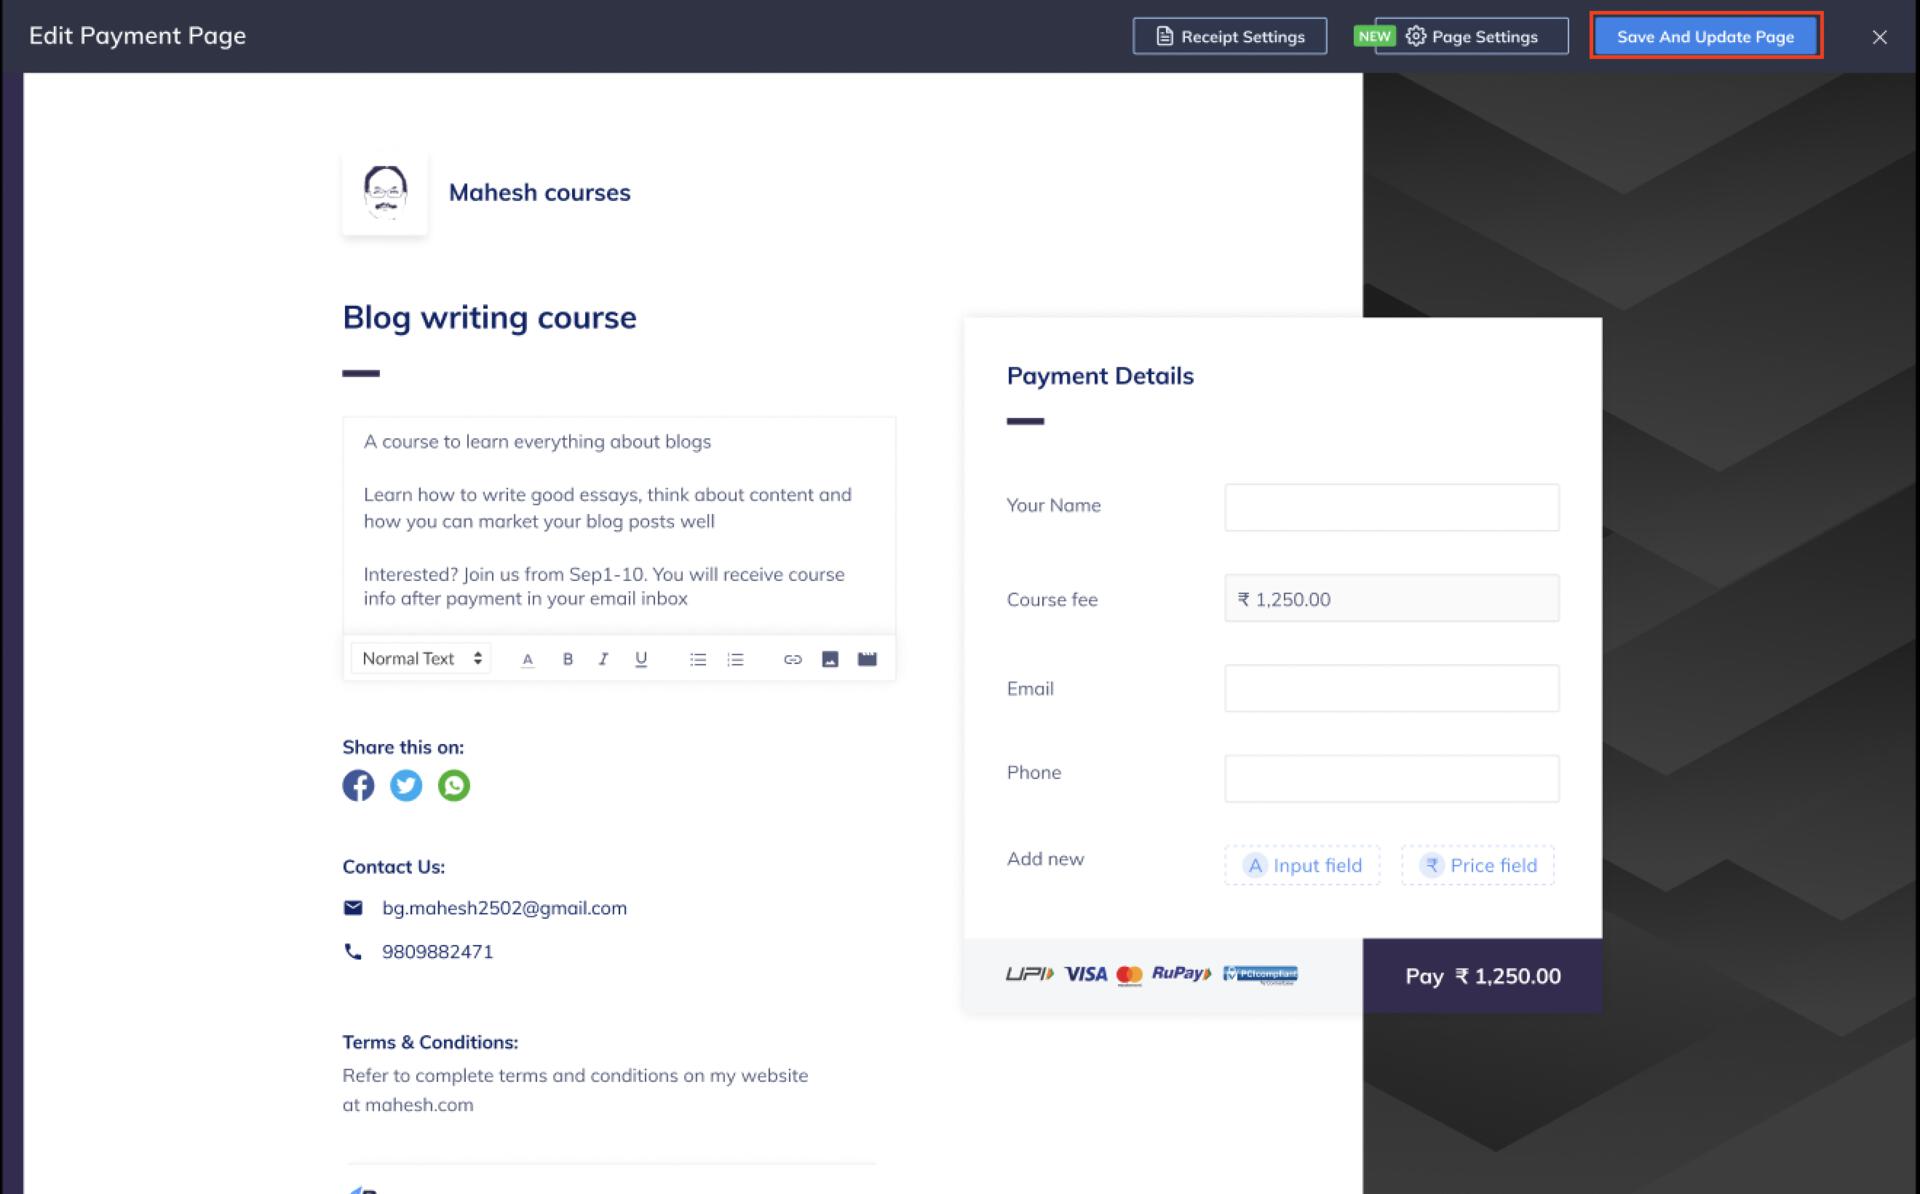
    3. **Click Save and Update** after customising domain link.
           <img src="https://razorpay.com/docs/build/browser/assets/images/pp-save-update.jpg" alt="Save your Domain" width="800" />

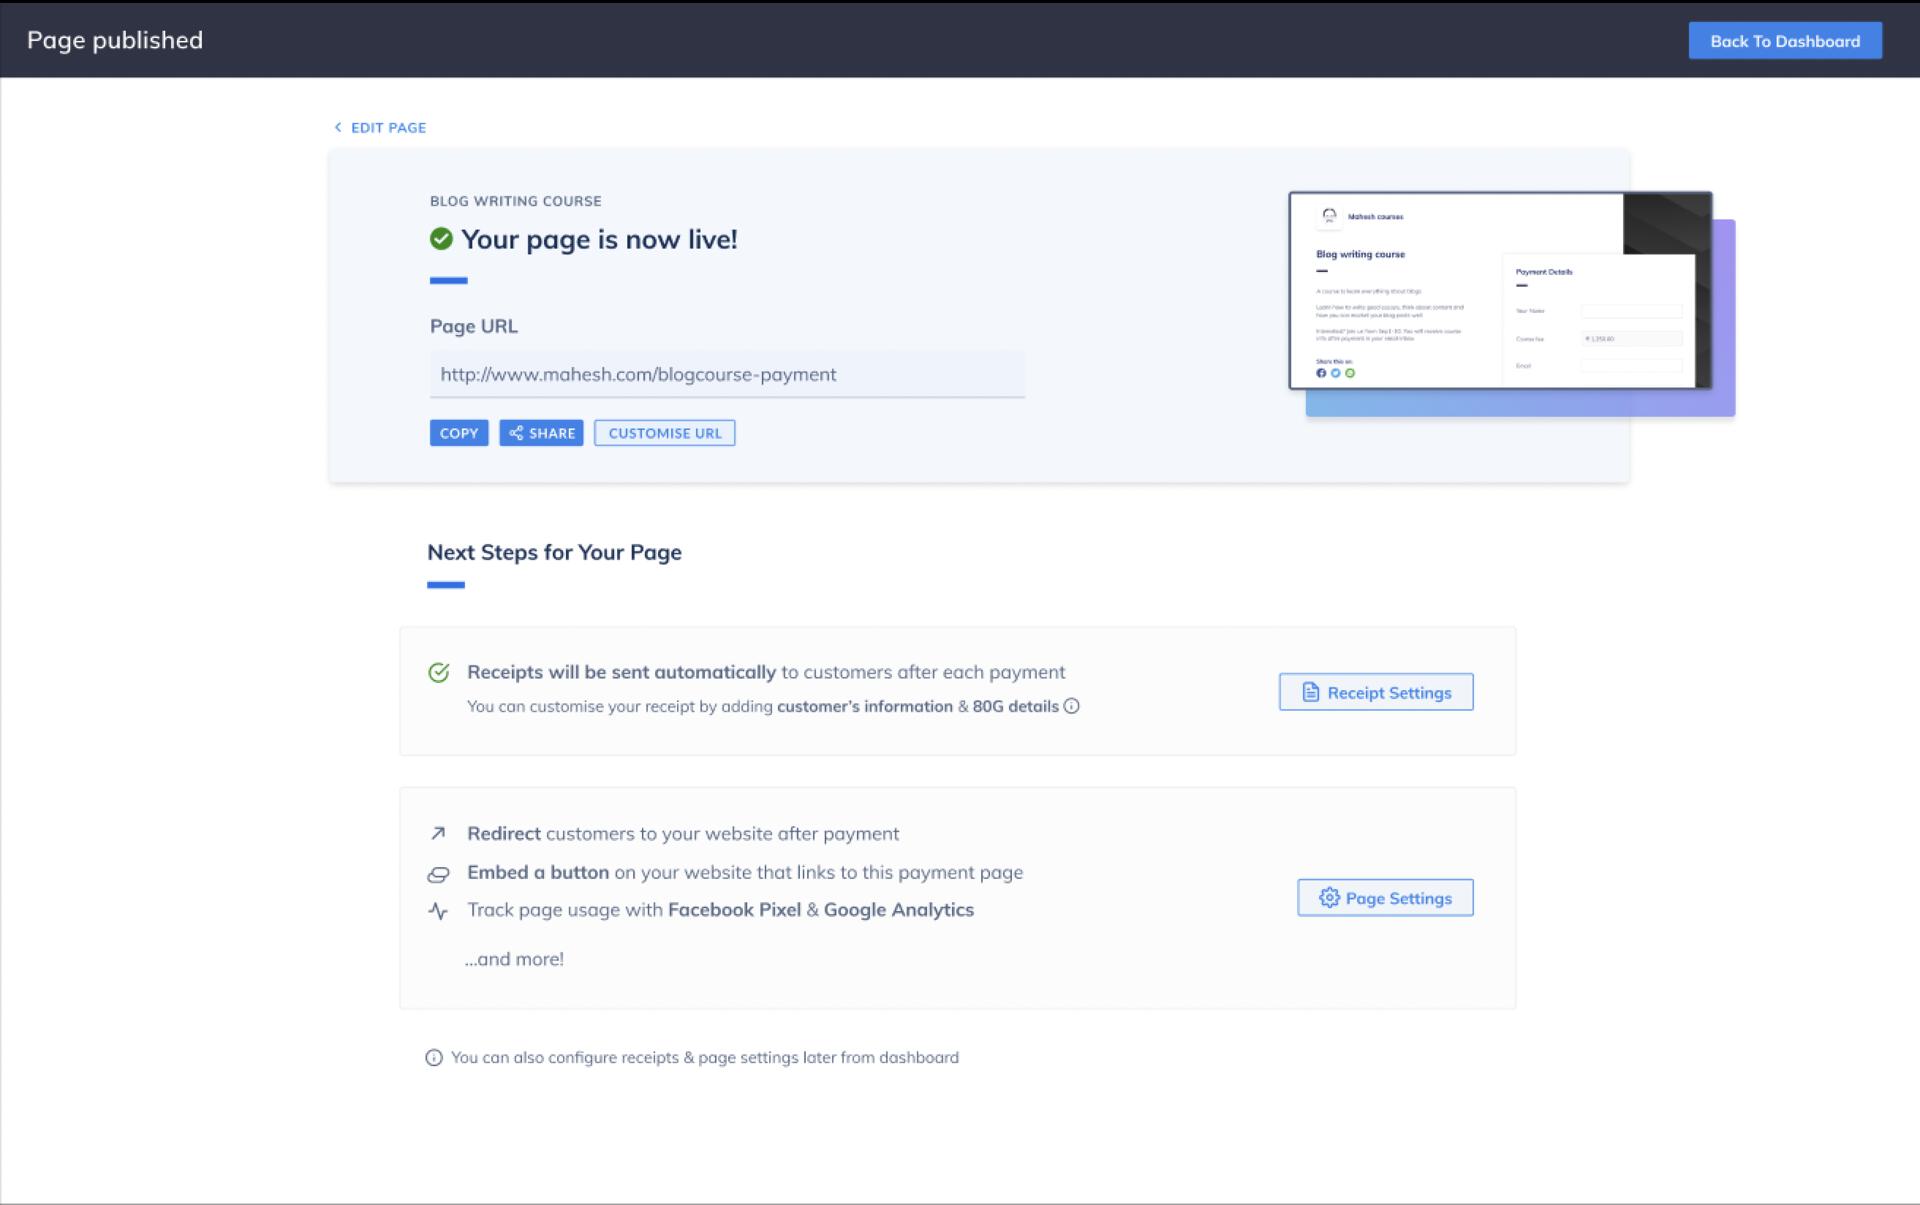
    Your page is now live with the updated domain link.
    <img src="https://razorpay.com/docs/build/browser/assets/images/pp-changes-saved.jpg" alt="Domain changes saved" width="800" />
  </Accordion>

  <Accordion title="Remove Your Domain Link">
    You can choose to remove the domain link from your Payment Page. Follow the steps given below to remove your domain:

    1. Remove the DNS values from your Domain.
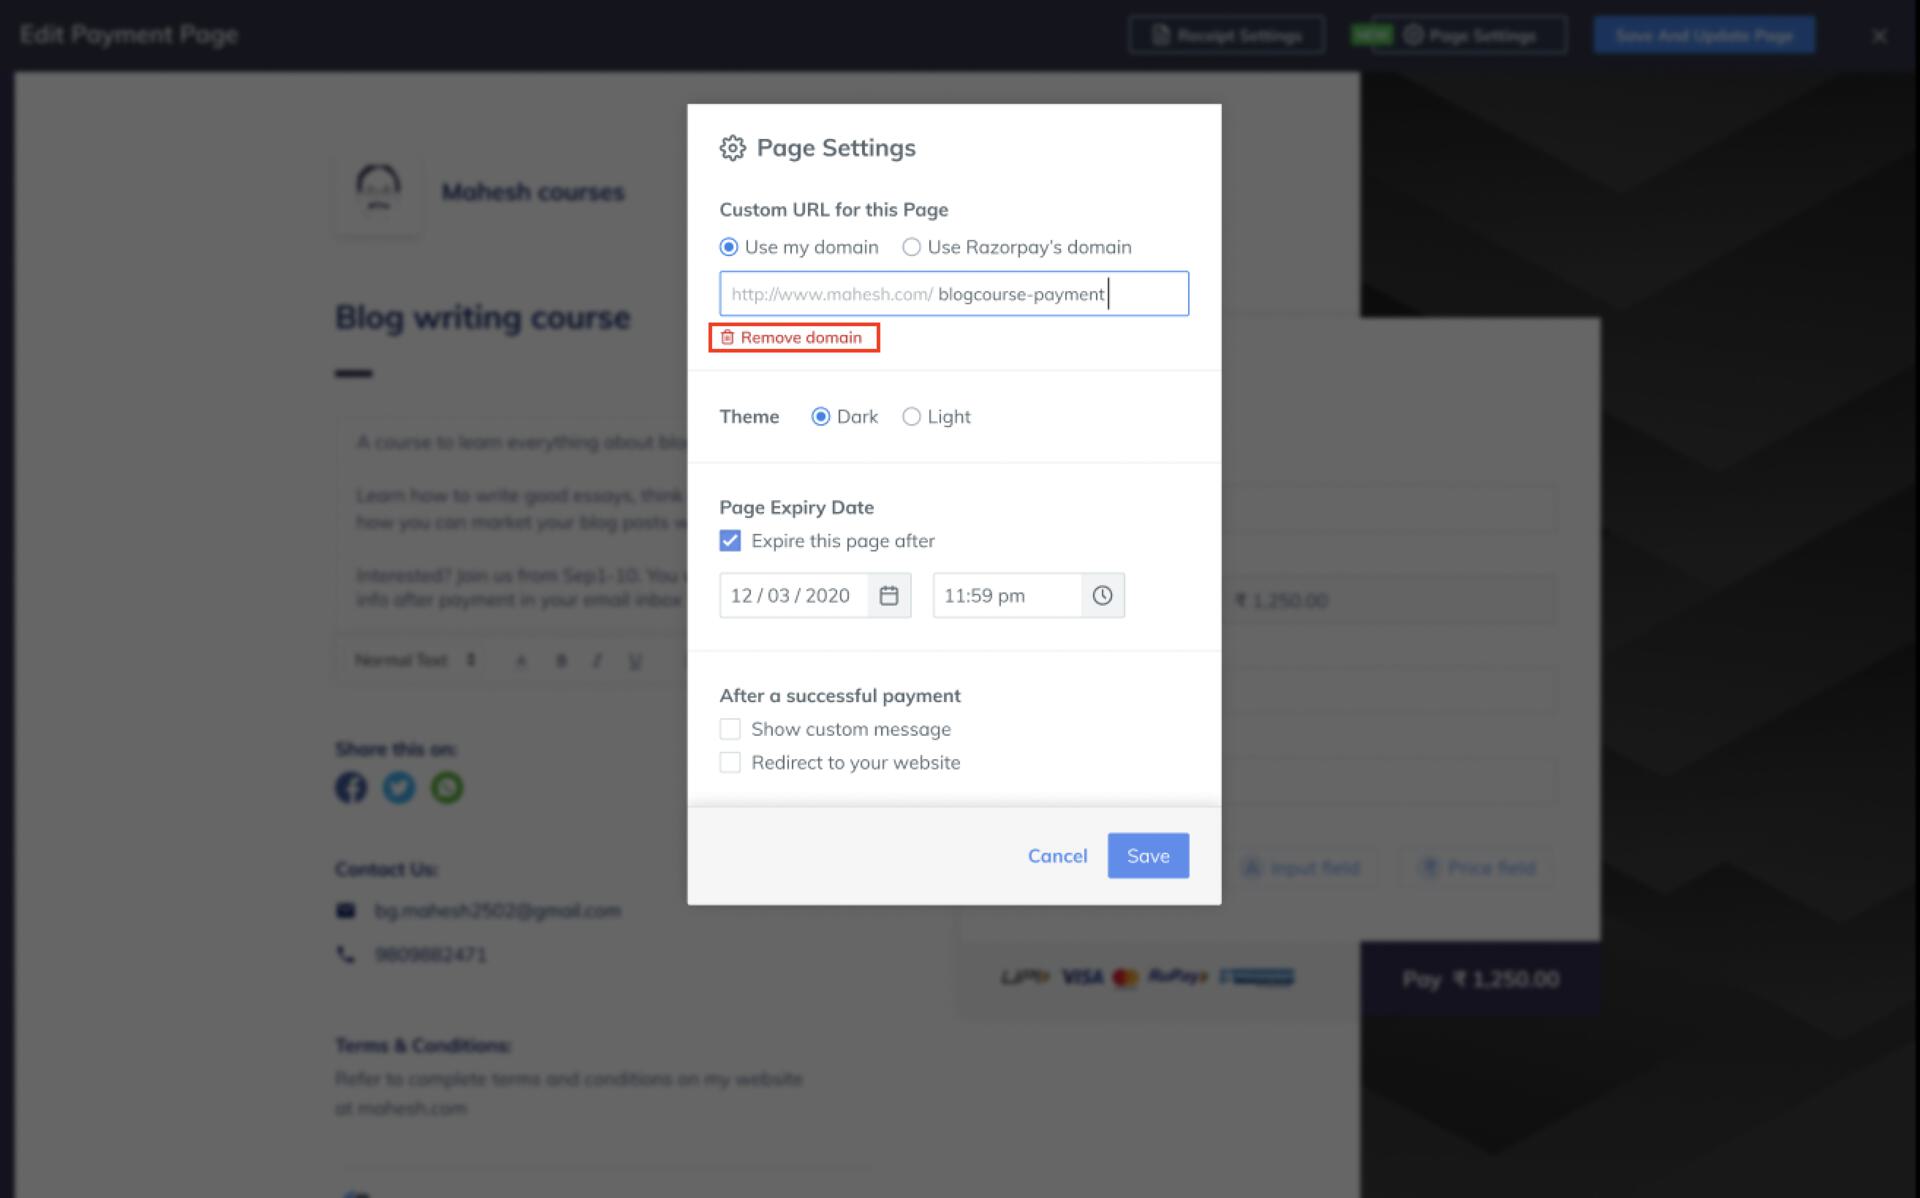
    2. Click **Page Settings**. In the pop-up page that appears, click **Remove domain**.
           <img src="https://razorpay.com/docs/build/browser/assets/images/pp-click-remove-domain.jpg" alt="Remove Domain option" width="800" />
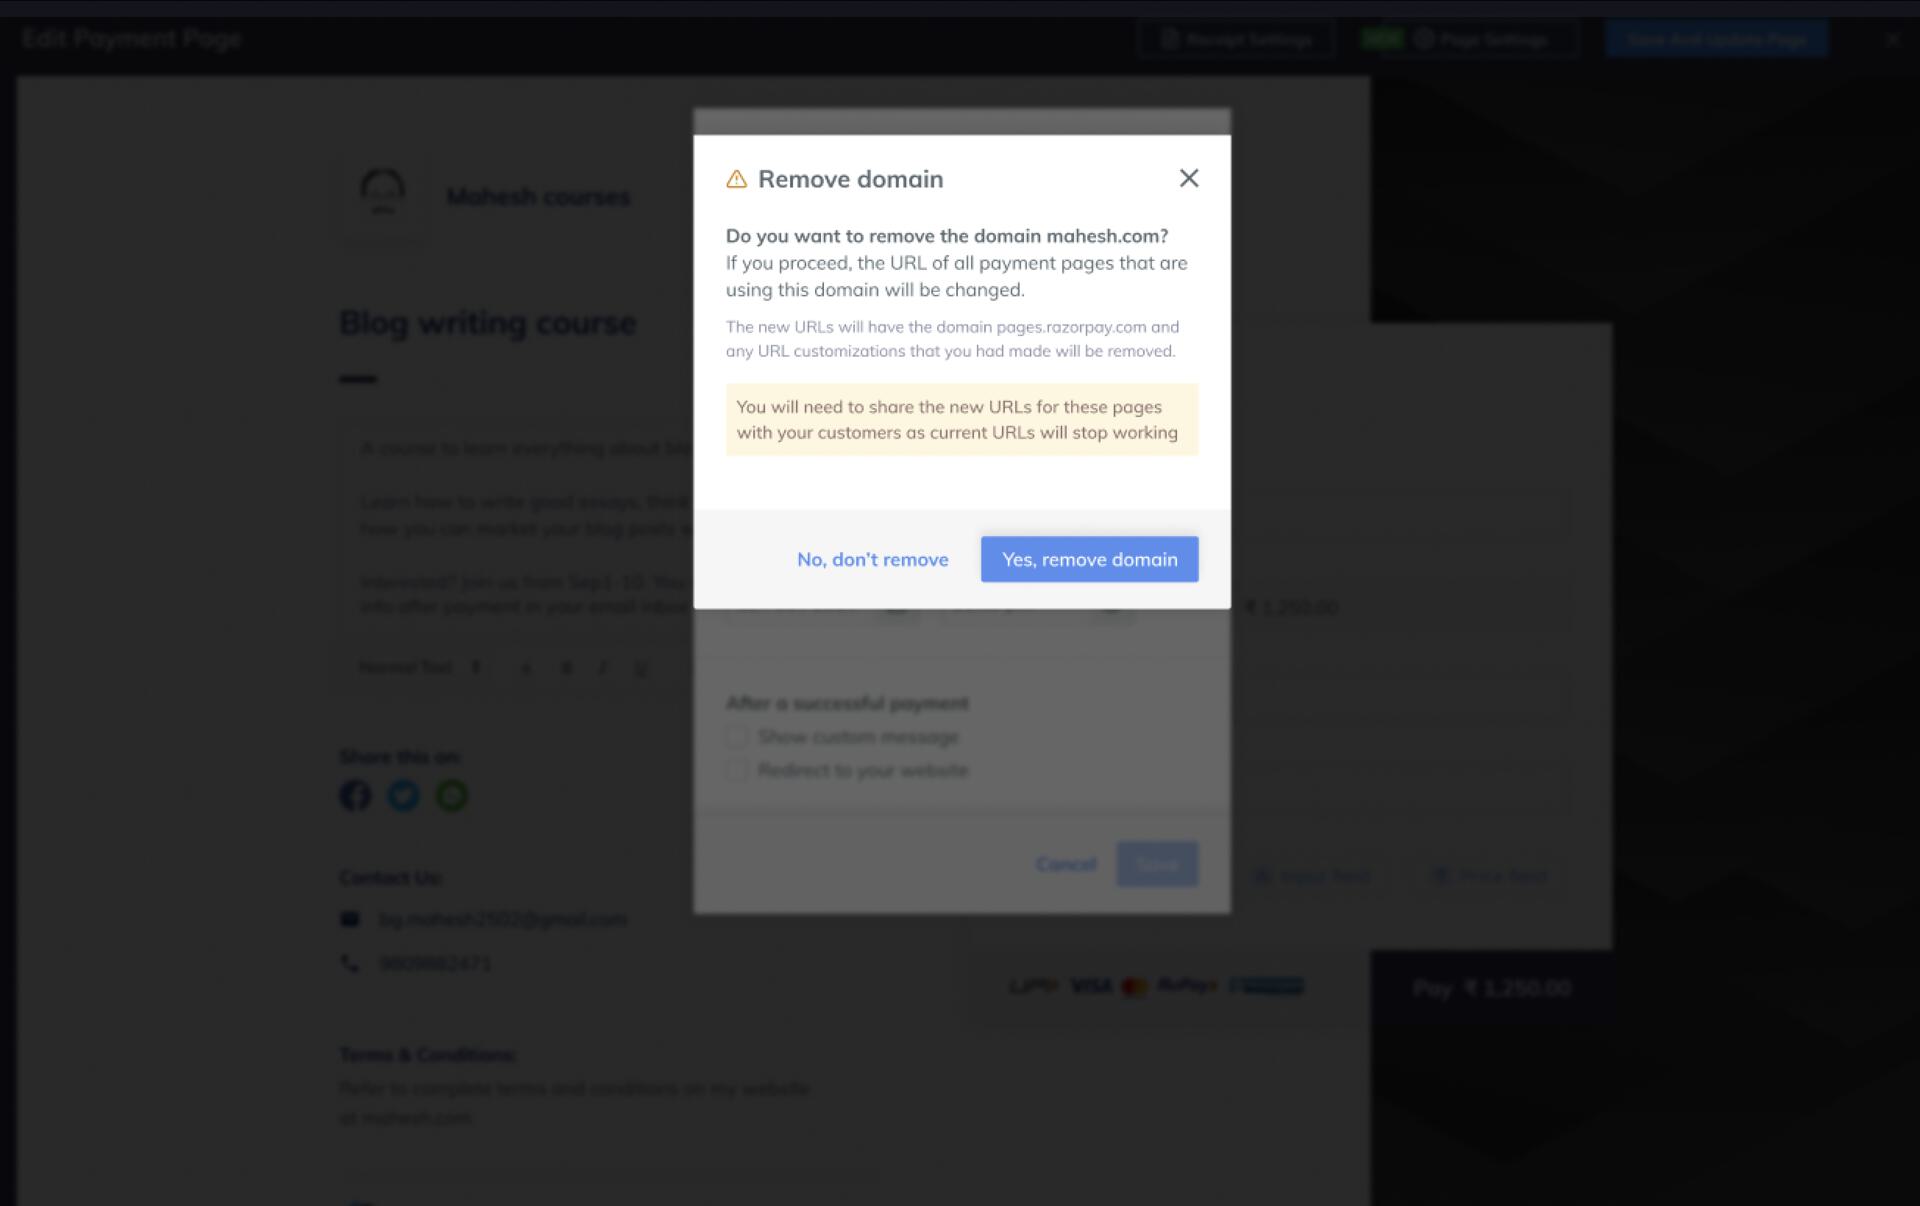
    3. Click **Yes, remove domain** to confirm the removal.
           <img src="https://razorpay.com/docs/build/browser/assets/images/pp-confirmation-remove.jpg" alt="Domain removal confirmation" width="800" />
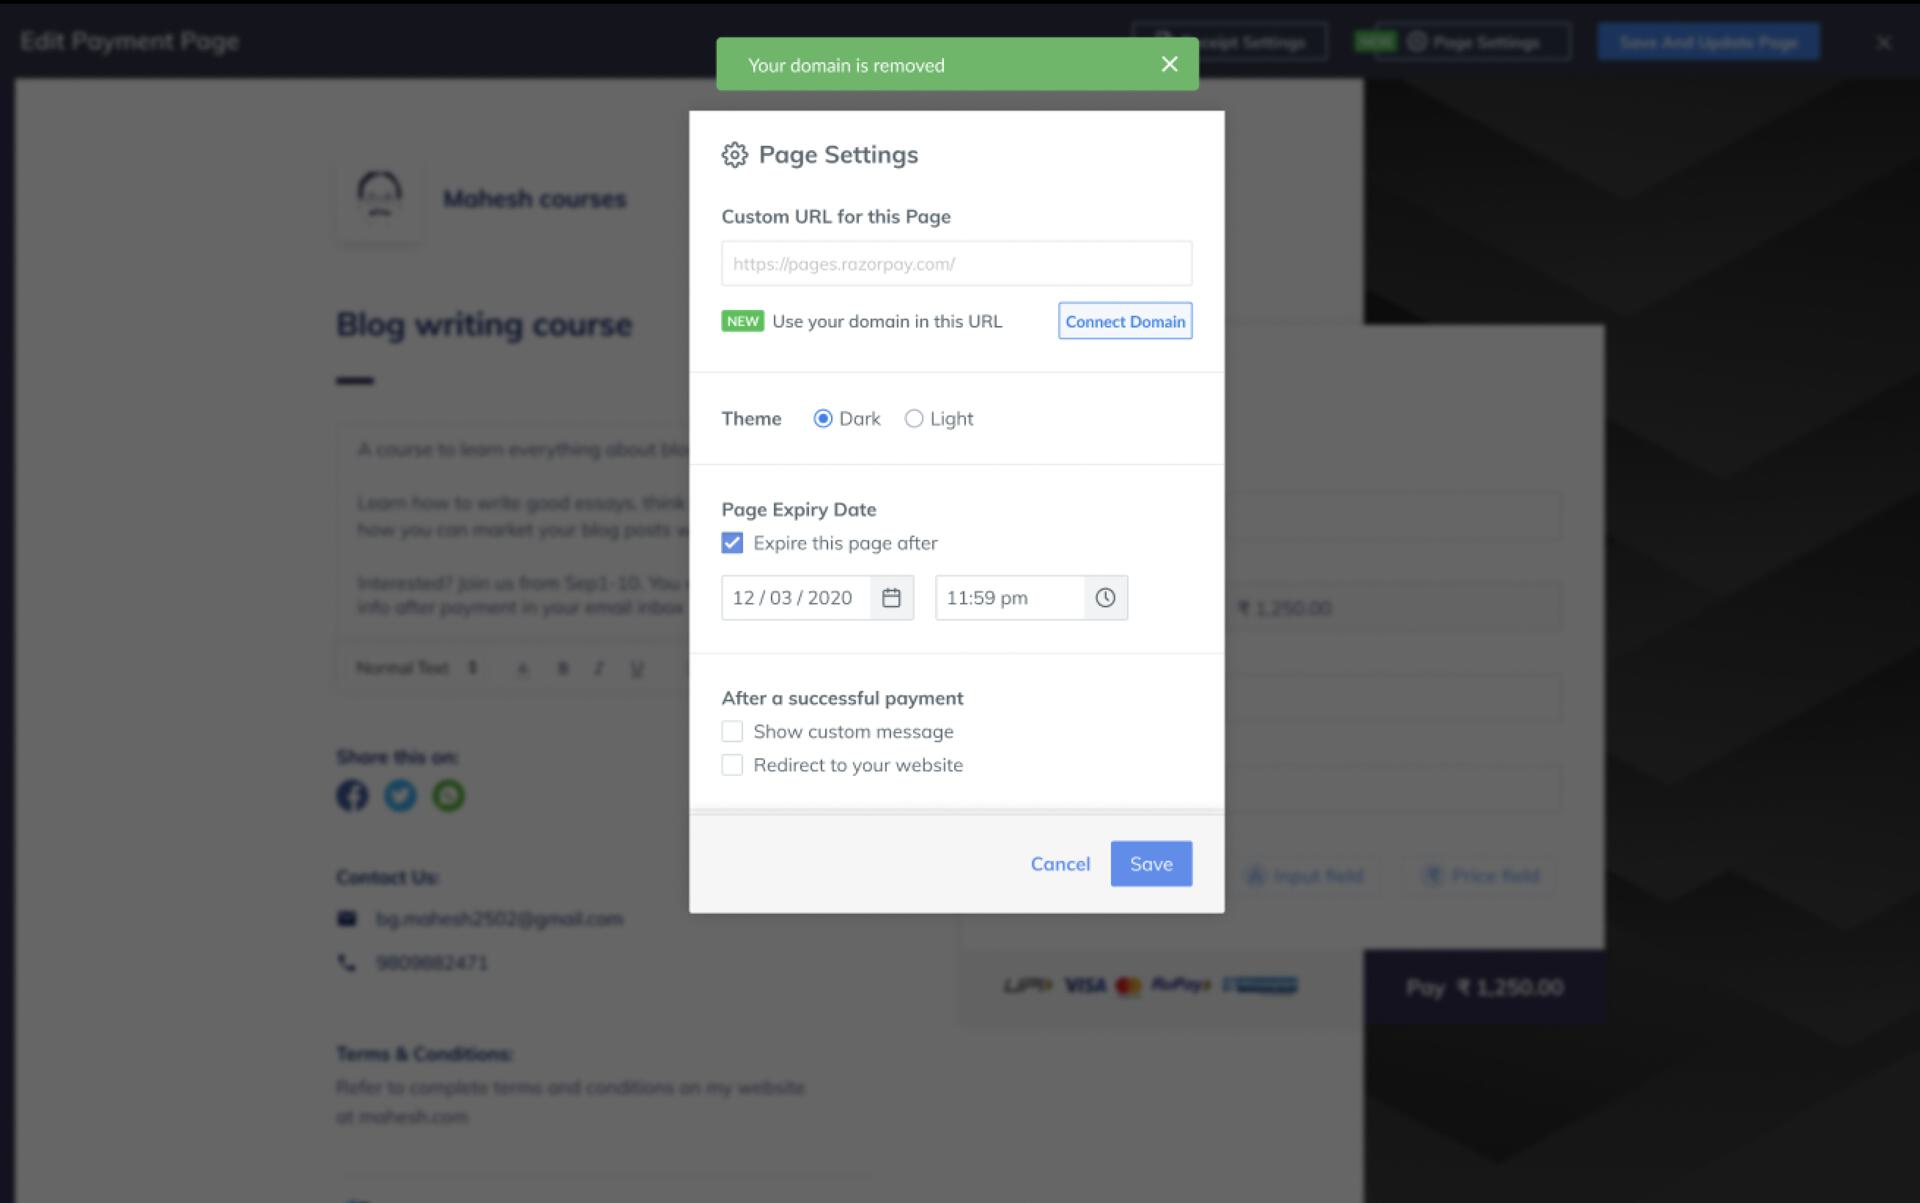
    4. You have successfully removed your domain from your Payment Page. Click **Save**.
           <img src="https://razorpay.com/docs/build/browser/assets/images/pp-domain-removed.jpg" alt="Domain removed confirmation" width="800" />
  </Accordion>
</AccordionGroup>

### Related Information

* [How Payment Pages Work](/docs/payments/payment-pages/how-it-works)

* [Create a Payment Page](/docs/payments/payment-pages/create)

* [Payment Pages States](/docs/payments/payment-pages/states)