> ## Documentation Index
> Fetch the complete documentation index at: https://razorpay-881012b3.mintlify.site/llms.txt
> Use this file to discover all available pages before exploring further.
# Integrate Payment Pages with Magic Checkout
> Integrate Payment Pages with Magic Checkout and start accepting payments.
Available in
🇮🇳 India
Use Magic Checkout to help customers easily complete transactions on your Razorpay Payment Page. Customers can add and securely save their addresses and preferred payment details at checkout as a one-time activity. They can then re-use these details while making repeat payments across any Payment Page in the Razorpay network.
## Advantages
* 20% rise in conversion rates as we prefill customer details for every subsequent purchase.
* Frictionless checkout experience reduces cart abandonment rates and increases sales.
* Customers can securely save their addresses and use them for repeat transactions, thus leading to lesser clicks and smoother checkout.
## Integration Steps
You can integrate your Payment Page with Magic Checkout using the following steps.
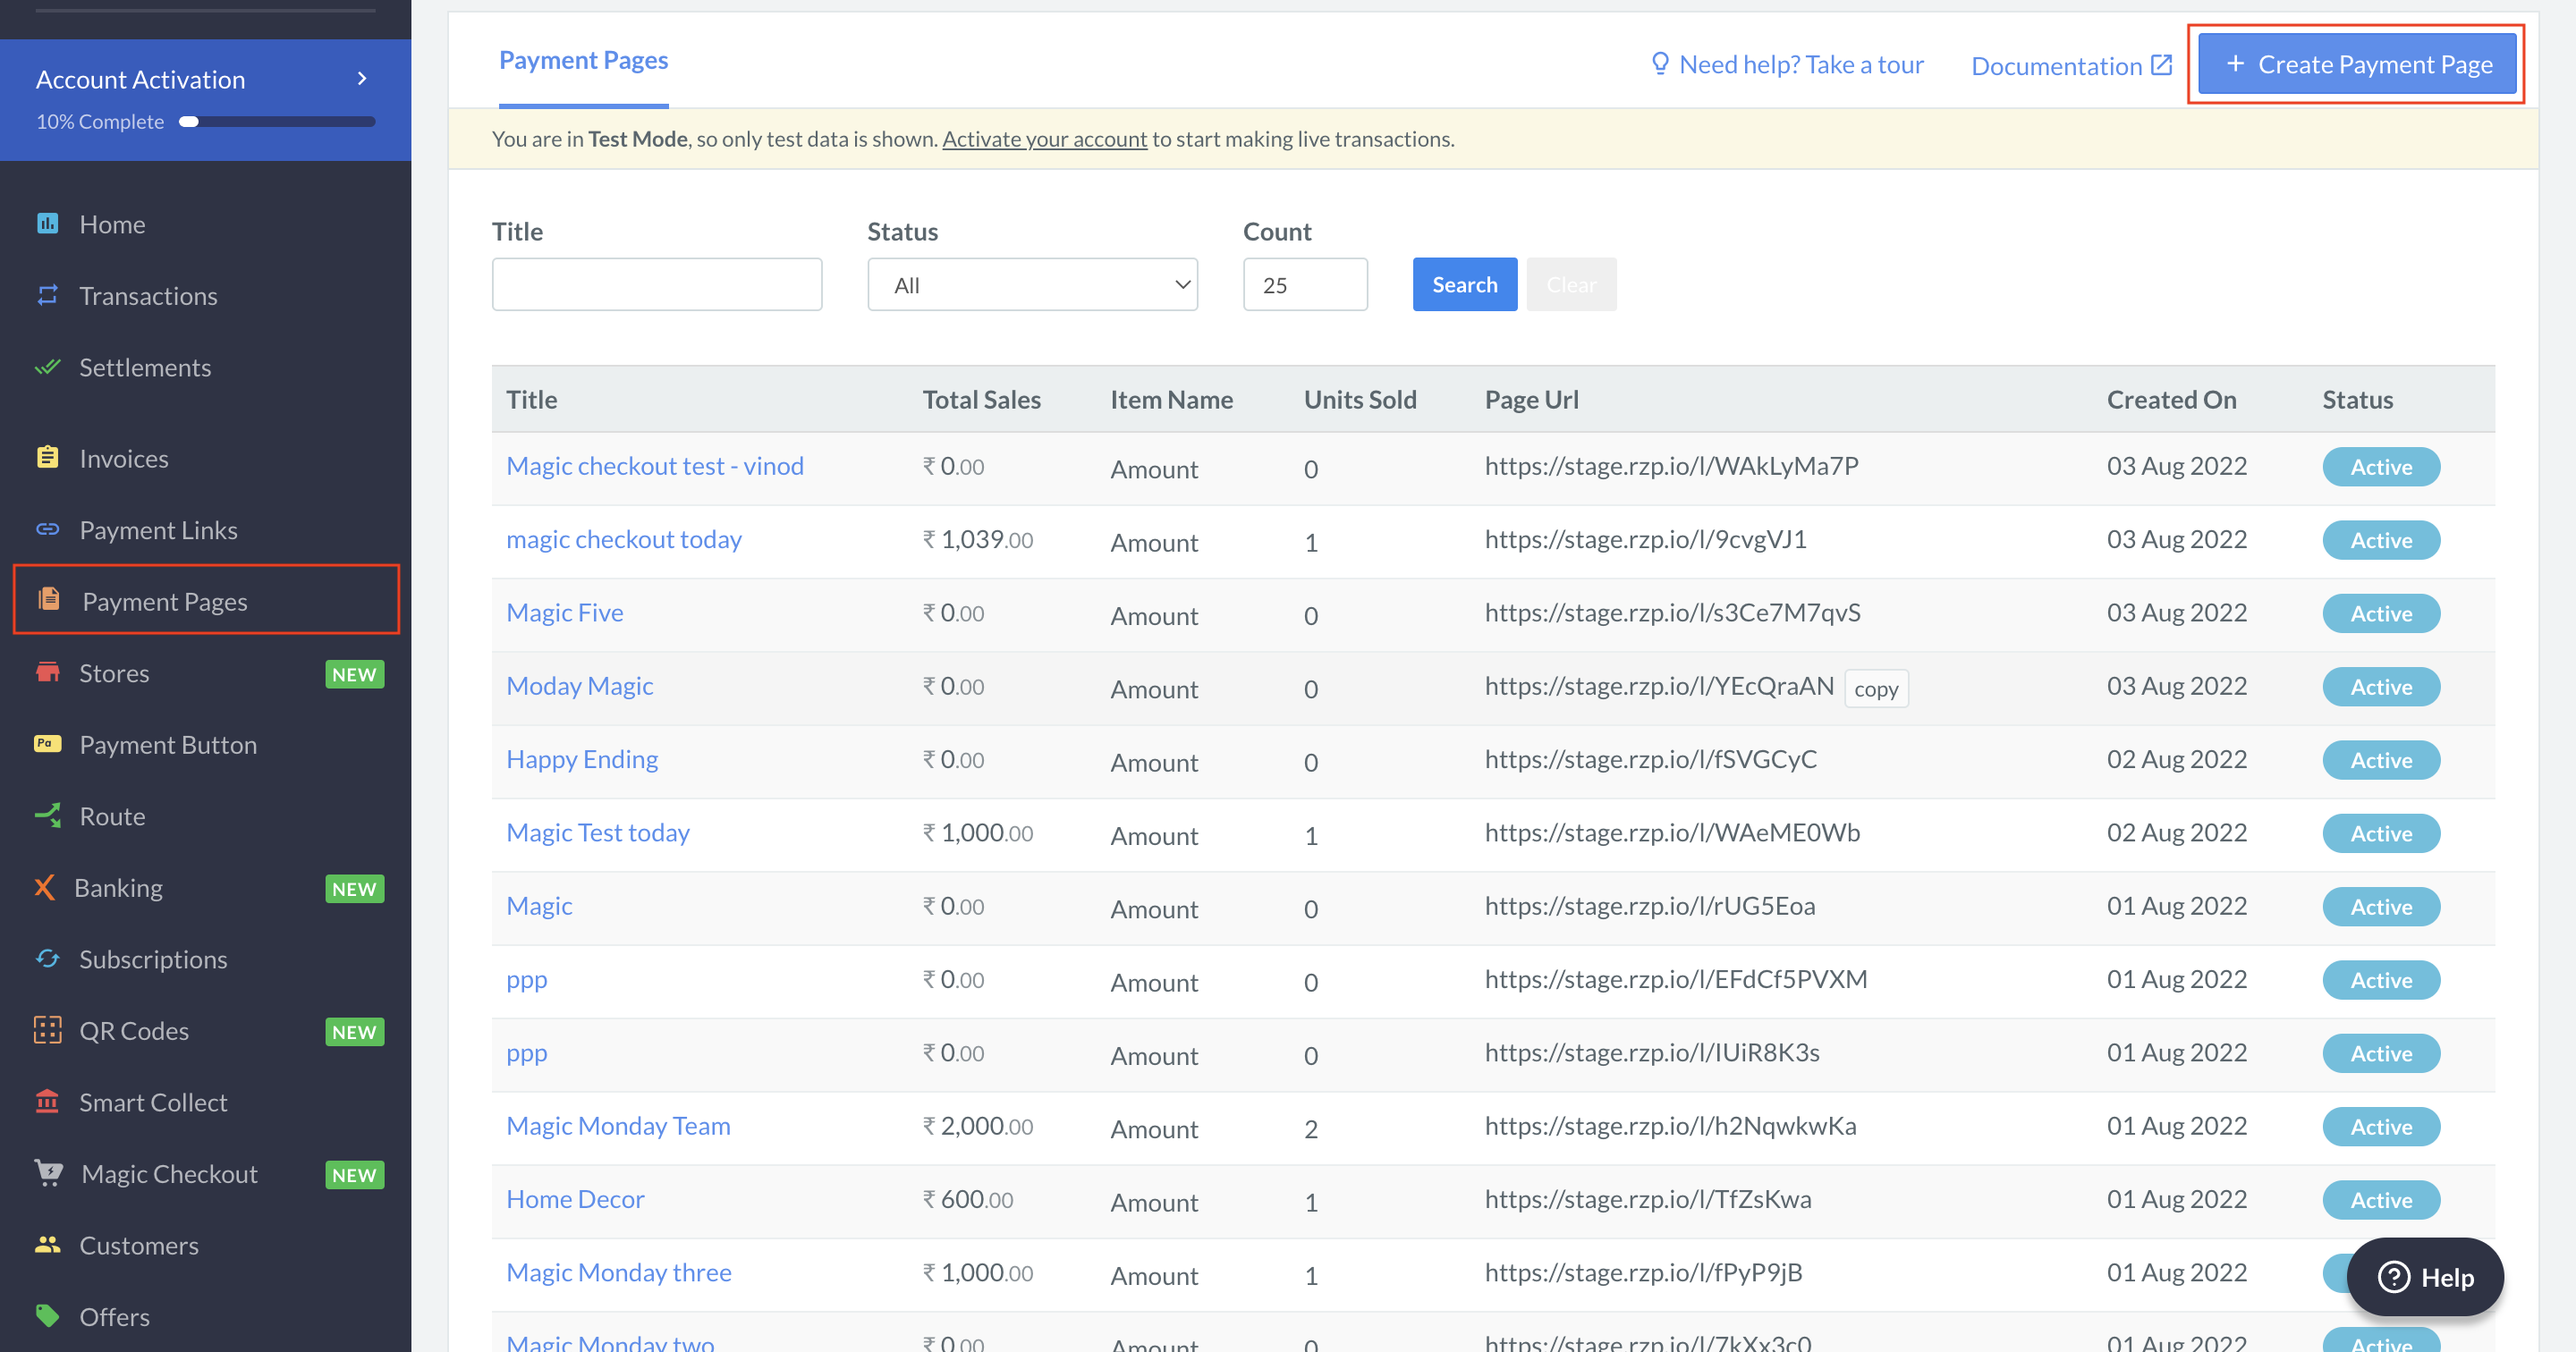
1. Log in to the Dashboard and navigate to Payment Pages.
2. Click the **+ Create Payment Page** button.
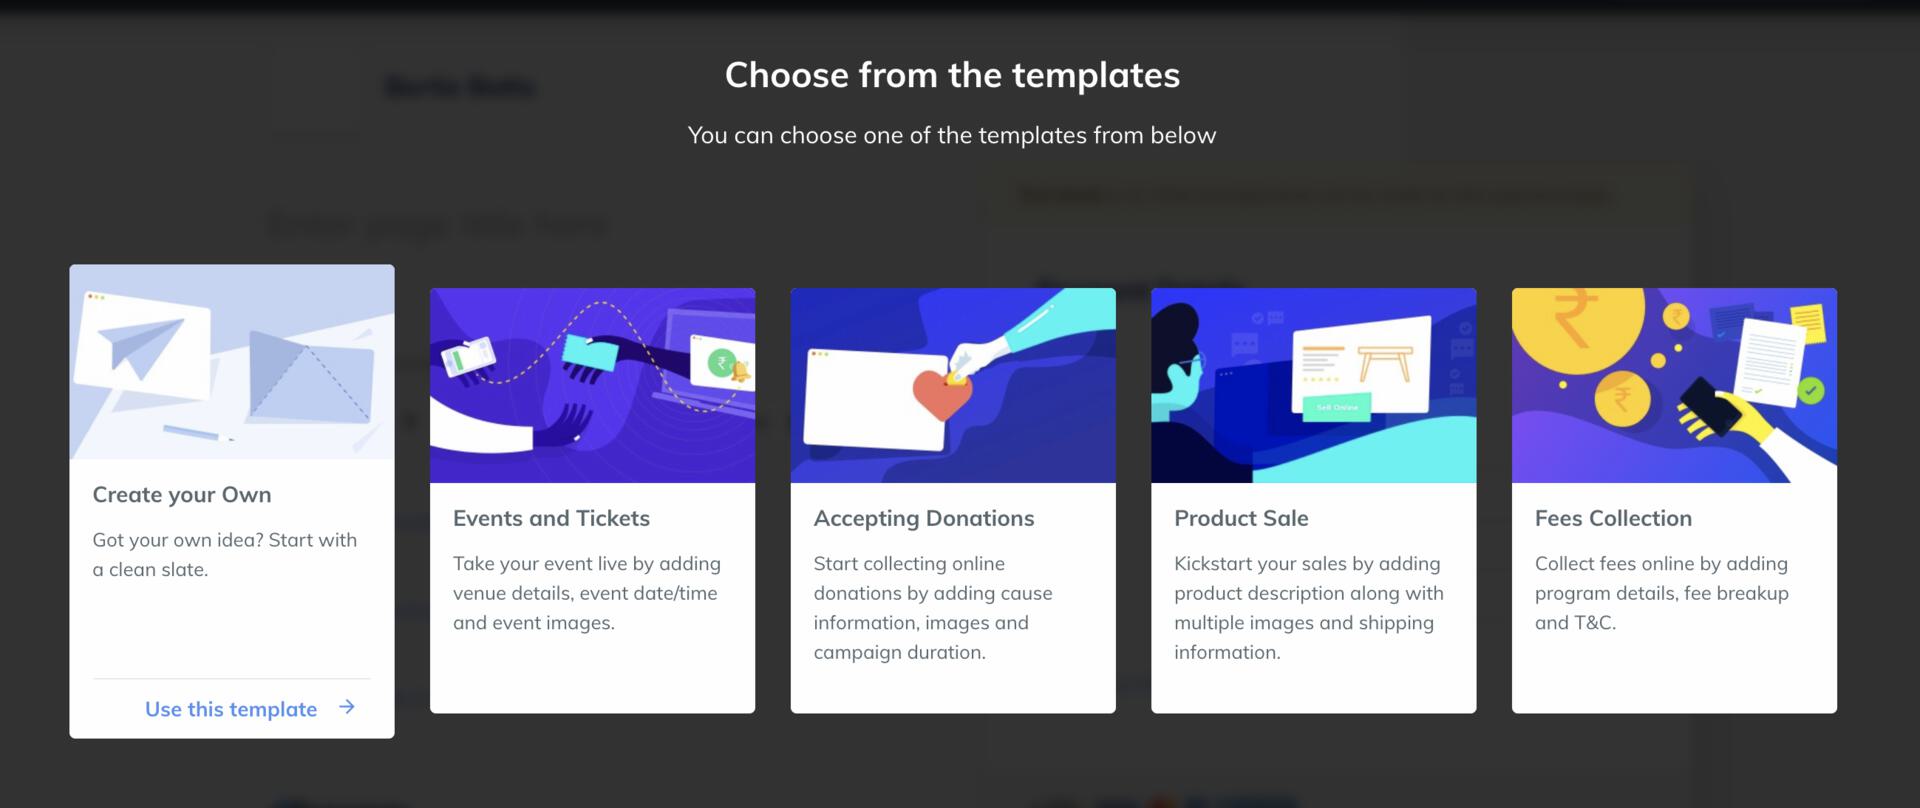
 3. Select a template from the list or click **Create your Own**.
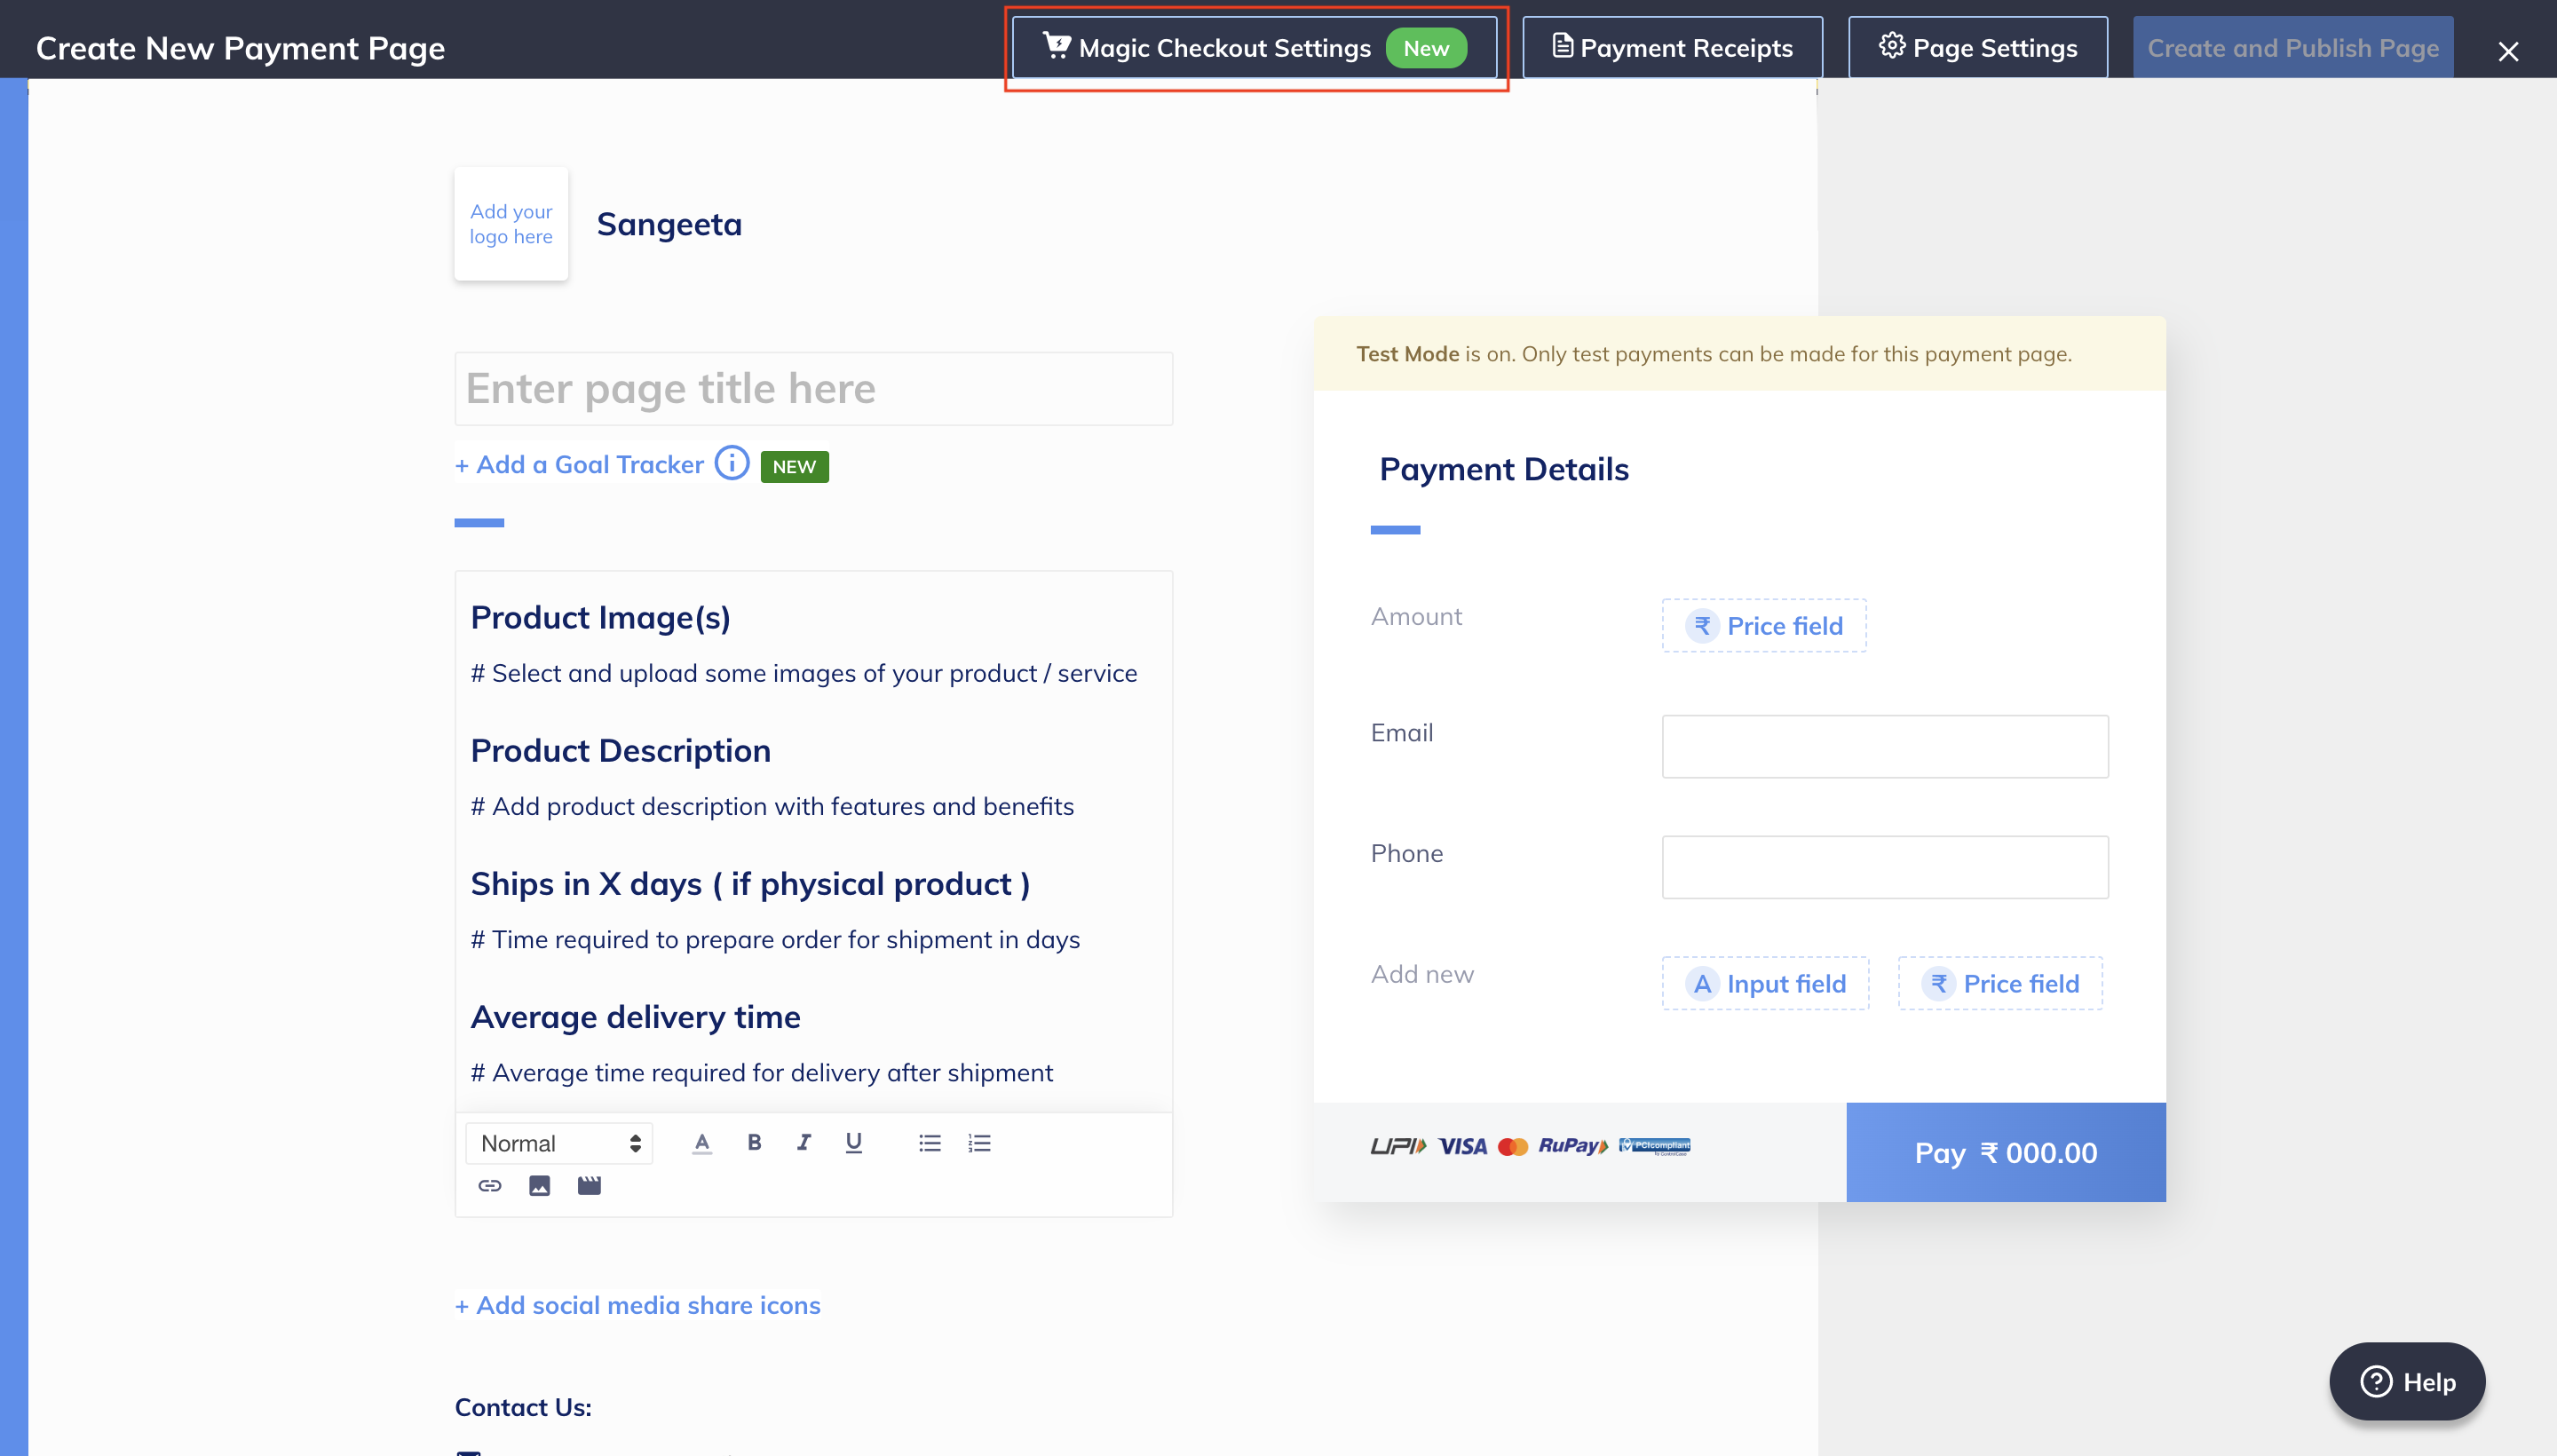
 4. Click **Magic Checkout Settings**.
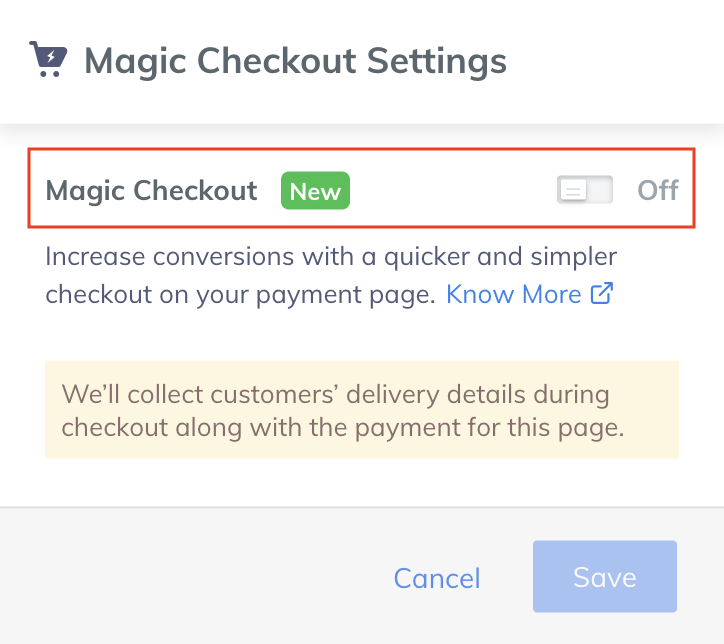
 5. Enable **Magic Checkout**. This will remove your customer input fields such as shipping and customer details.
 6. Select the required **Delivery Charge**. The three different categories for delivery charges are:
* **No extra charge**: No charges applied for delivery.
* **Yes, a flat amount**: Add the amount the customer should pay for delivery charges. For example, if the order value is ₹500 and the delivery charge is ₹50, then the customer should pay ₹550 in total.
* **Depends on the order amount**: Specify the minimum and maximum order value and the respective delivery charge. For example, if the order value is between ₹0 to ₹100, the delivery charge can be ₹10.
6. Select the required **Delivery Charge**. The three different categories for delivery charges are:
* **No extra charge**: No charges applied for delivery.
* **Yes, a flat amount**: Add the amount the customer should pay for delivery charges. For example, if the order value is ₹500 and the delivery charge is ₹50, then the customer should pay ₹550 in total.
* **Depends on the order amount**: Specify the minimum and maximum order value and the respective delivery charge. For example, if the order value is between ₹0 to ₹100, the delivery charge can be ₹10.
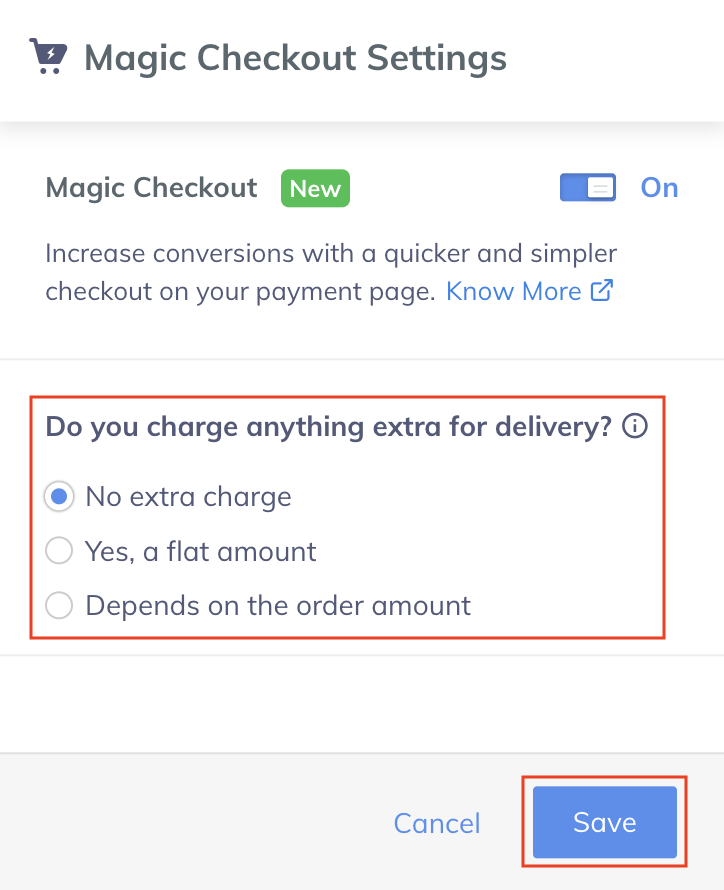 7. Click **Save**. After you save the changes, the following address fields are removed, and the customer's shipping address will be collected at checkout. Click **Confirm and Save**.
* Email
* Phone
* Address
* City
* State
* Pincode
7. Click **Save**. After you save the changes, the following address fields are removed, and the customer's shipping address will be collected at checkout. Click **Confirm and Save**.
* Email
* Phone
* Address
* City
* State
* Pincode
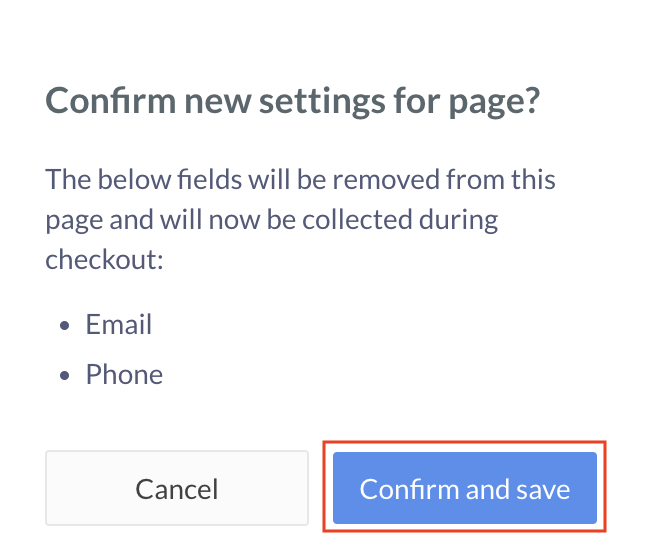 8. Continue with the creation of your Payment Page. Know more about how to [Create a Payment Page](/docs/payments/payment-pages/create#step-2-add-page-details/).
## Edit Payment Page
To edit a Payment Page:
1. Navigate to **Payment Page** on the Dashboard.
2. In the list of **Payment Pages** that appears, click on the link of the page that you want to edit.
3. In the top right corner of the page, click the **Edit** button.
8. Continue with the creation of your Payment Page. Know more about how to [Create a Payment Page](/docs/payments/payment-pages/create#step-2-add-page-details/).
## Edit Payment Page
To edit a Payment Page:
1. Navigate to **Payment Page** on the Dashboard.
2. In the list of **Payment Pages** that appears, click on the link of the page that you want to edit.
3. In the top right corner of the page, click the **Edit** button.
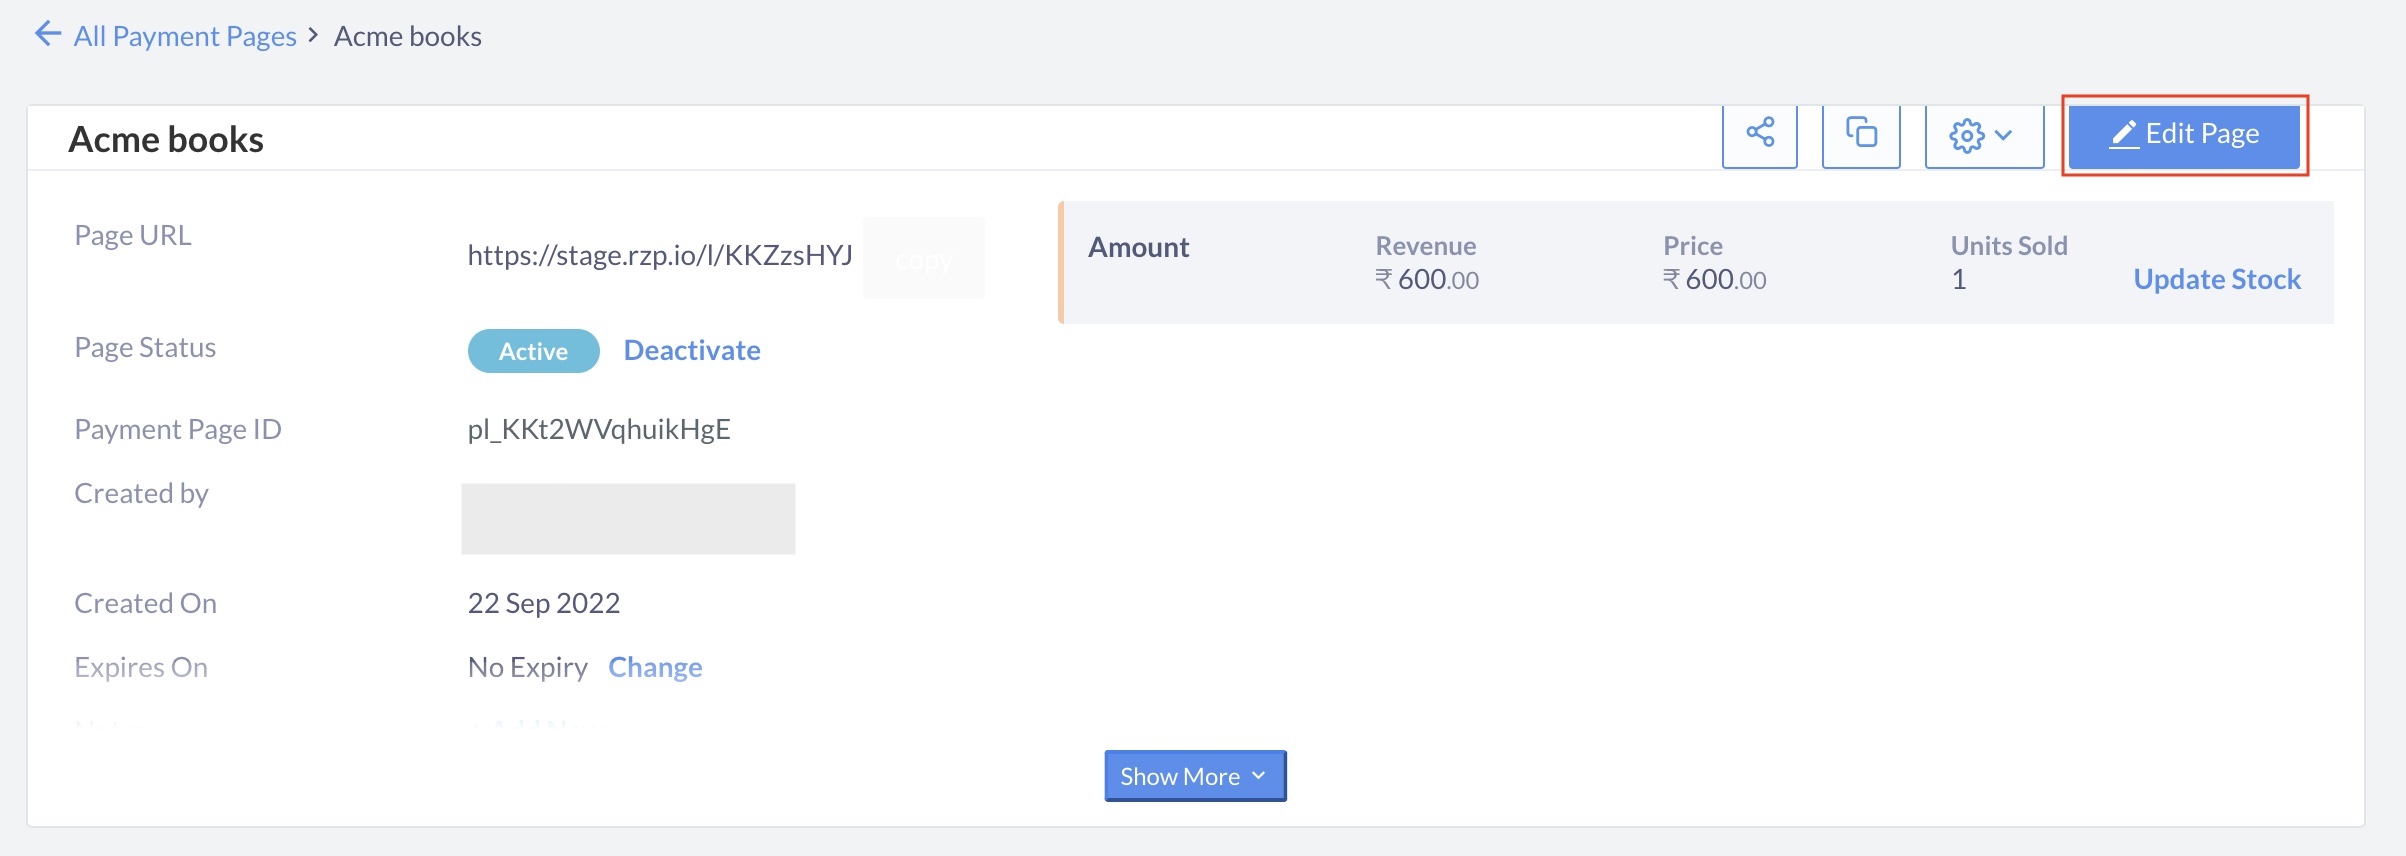 4. The page appears in edit mode. You can now edit any of the fields from [step 4](/docs/payments/payment-pages/plugins-add-ons/magic-checkout#integration-steps:~:text=Click%20Magic%20Checkout%20Settings.) onwards.
## Customer Experience
After you publish the page and share it with your customers, they can perform the following steps to complete the payment successfully.
Watch the GIF to understand the end-to-end payment flow.
4. The page appears in edit mode. You can now edit any of the fields from [step 4](/docs/payments/payment-pages/plugins-add-ons/magic-checkout#integration-steps:~:text=Click%20Magic%20Checkout%20Settings.) onwards.
## Customer Experience
After you publish the page and share it with your customers, they can perform the following steps to complete the payment successfully.
Watch the GIF to understand the end-to-end payment flow.
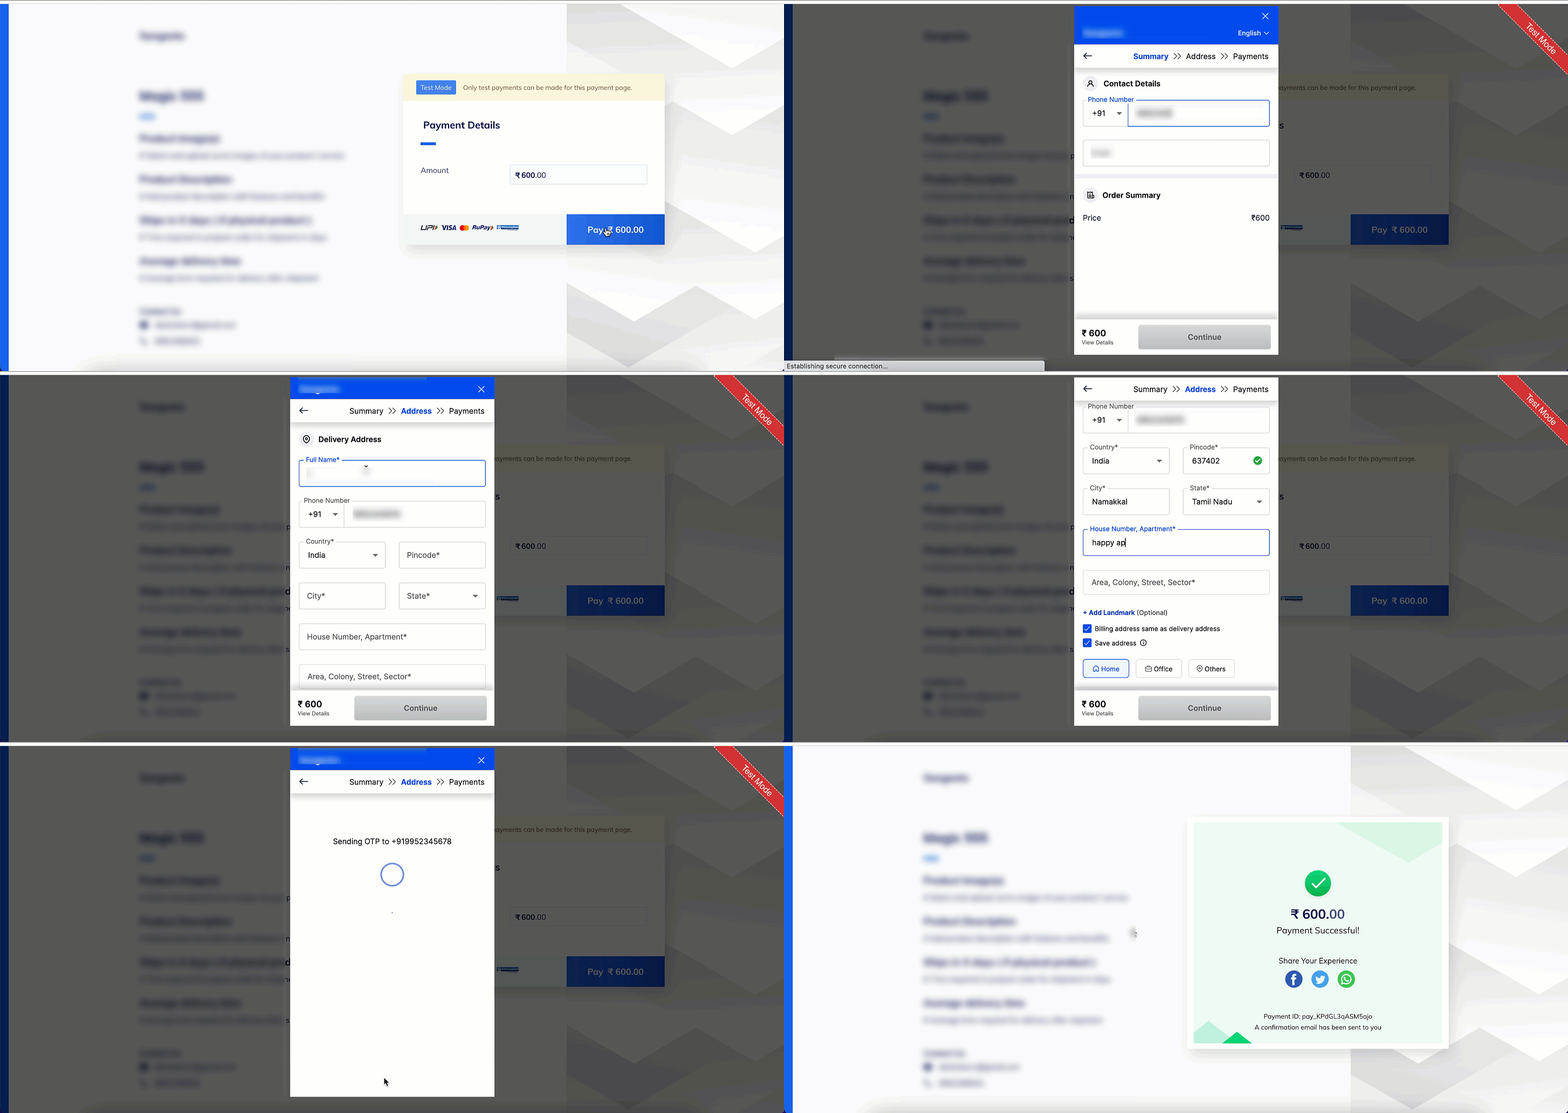 When a customer clicks the Pay button, they should complete these steps on the Magic Checkout pop-up page:
1. Enter the **Contact Details** which includes **Mobile Number** and **Email**. Click **Continue**.
2. Enter the **Pincode** and **Address**.
3. Enter **Full Name**.
4. Select the check box if the **Billing address is same as delivery address**.
5. Select the check box to **Save address** and use them for repeat transactions if required. Click **Continue**.
6. Enter the **OTP** to verify the mobile number.
7. Select a **Payment Method** and click **Pay Now**.
8. Enter the relevant details and complete the payment.
## Shipping and Customer details
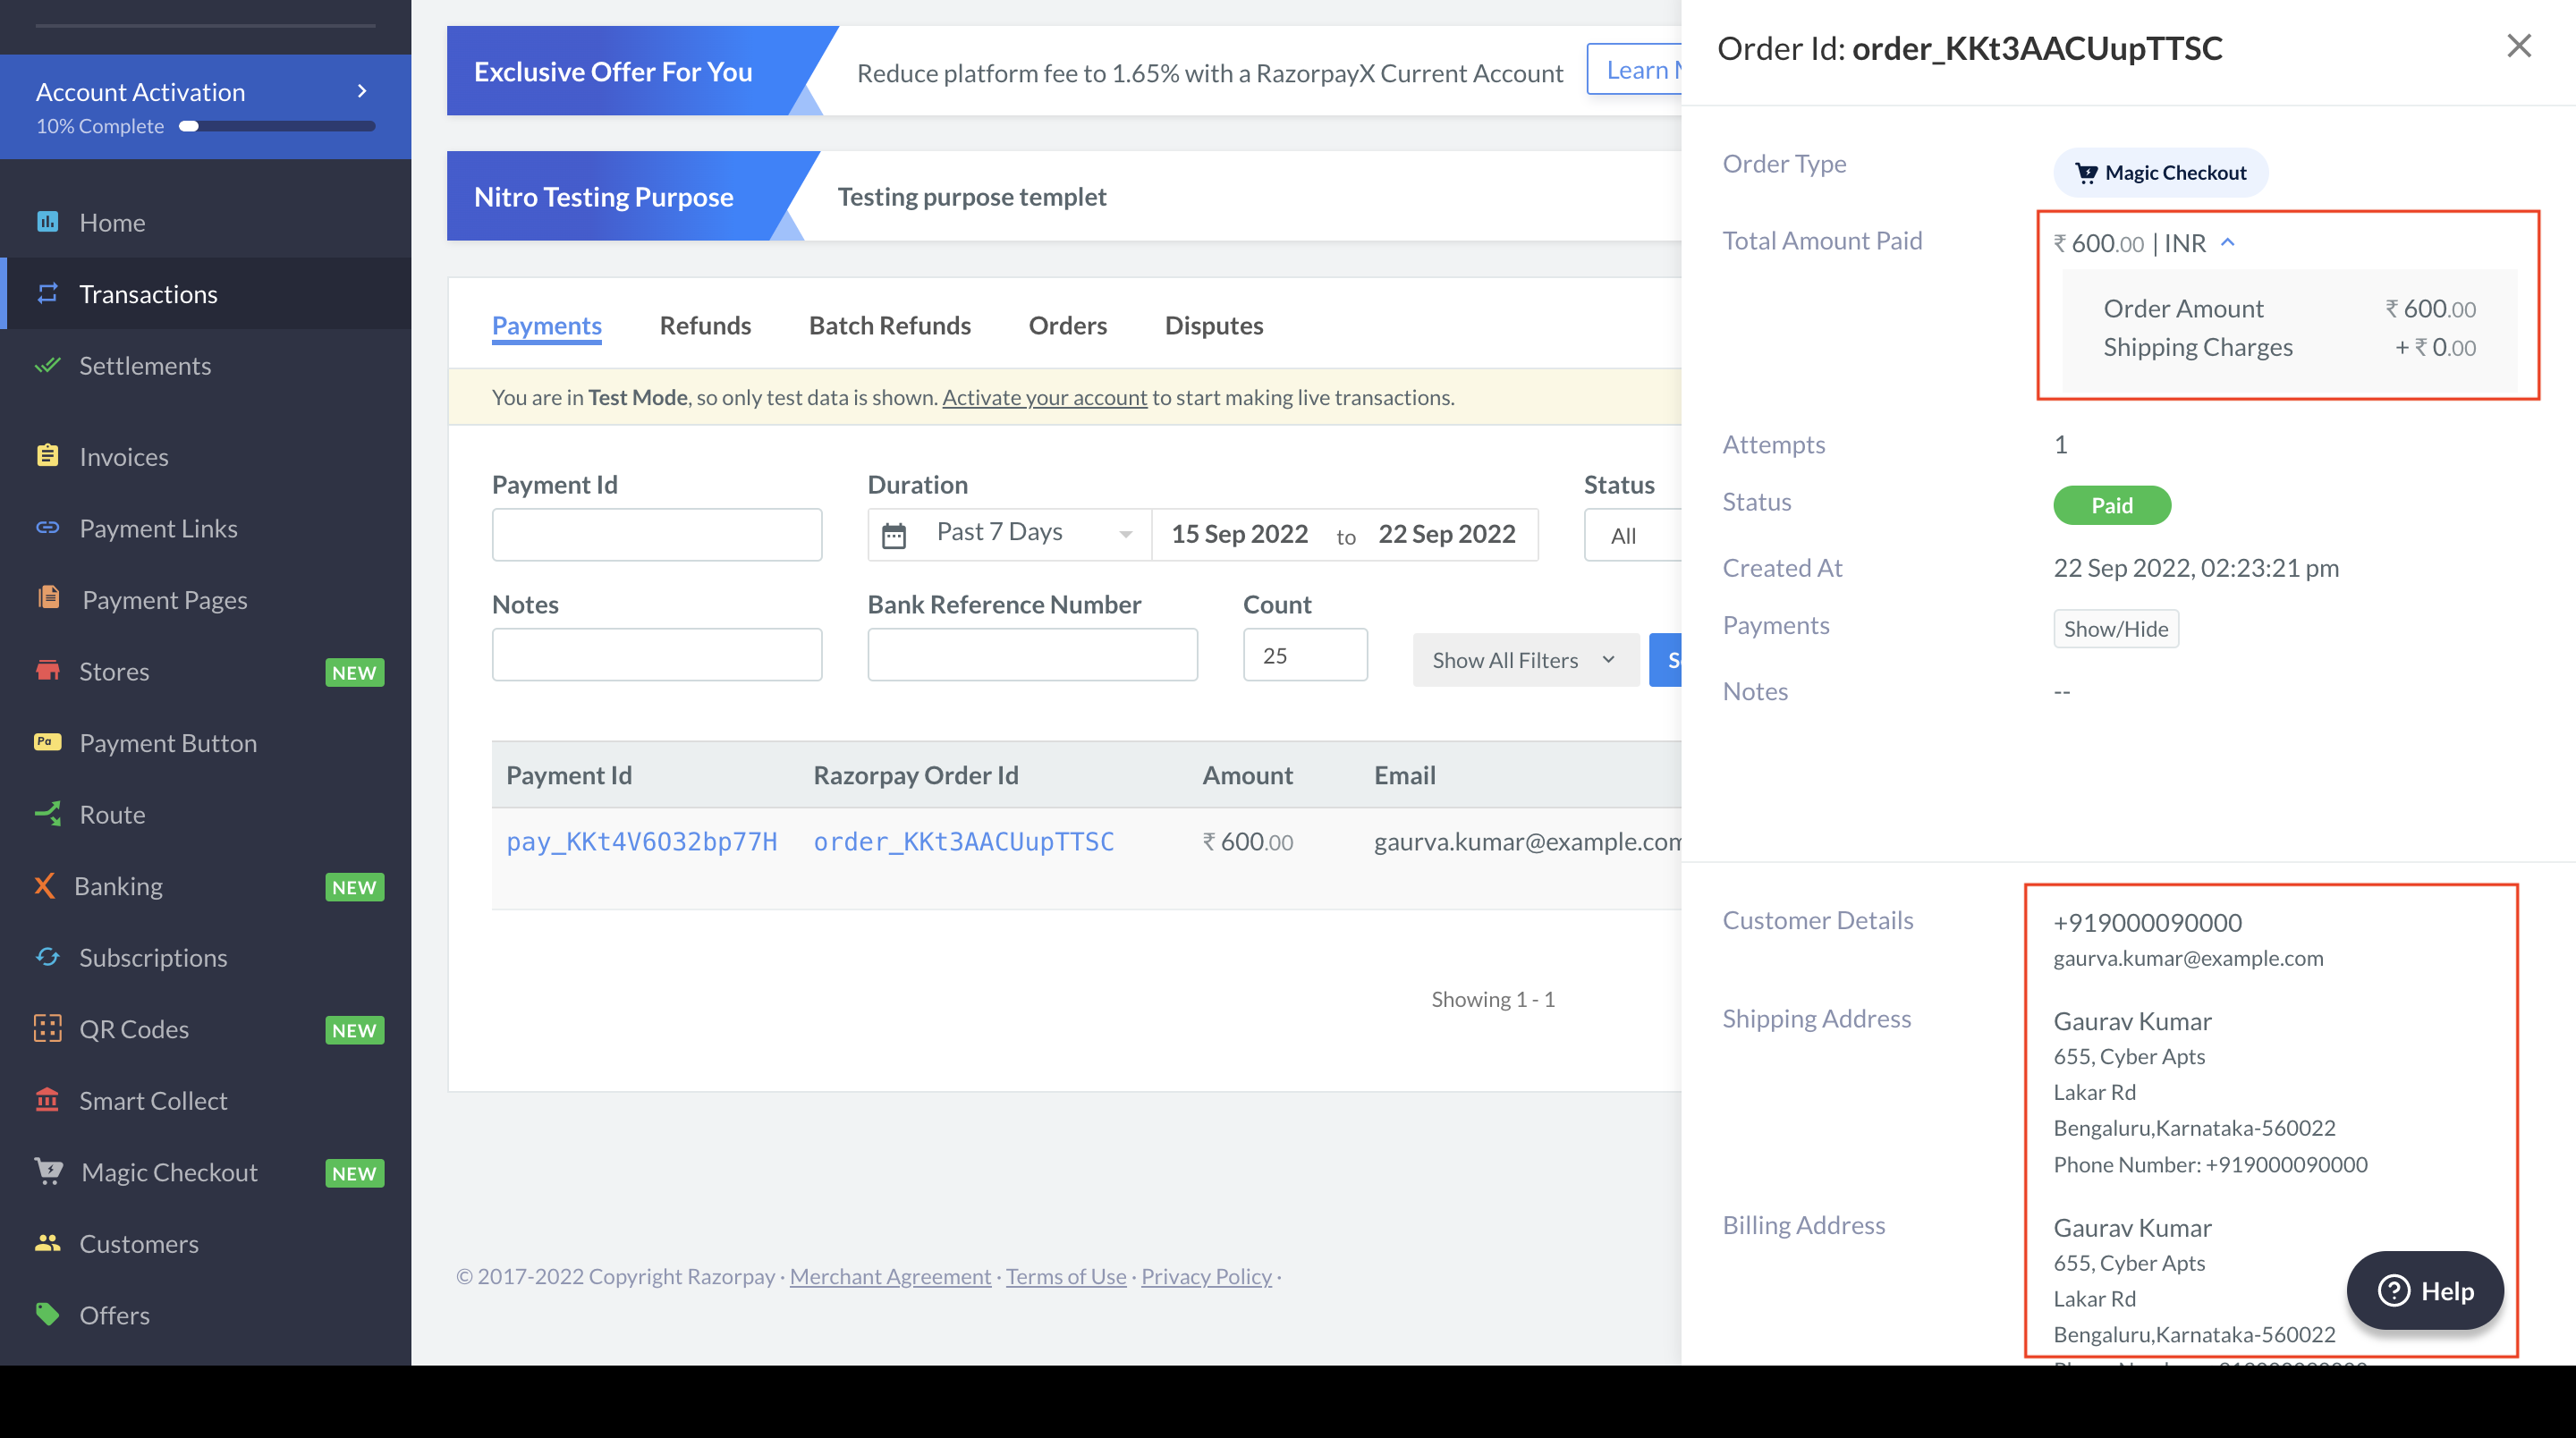
Navigate to **Transactions** and select the relevant **Order Id** to view the shipping and customer details.
When a customer clicks the Pay button, they should complete these steps on the Magic Checkout pop-up page:
1. Enter the **Contact Details** which includes **Mobile Number** and **Email**. Click **Continue**.
2. Enter the **Pincode** and **Address**.
3. Enter **Full Name**.
4. Select the check box if the **Billing address is same as delivery address**.
5. Select the check box to **Save address** and use them for repeat transactions if required. Click **Continue**.
6. Enter the **OTP** to verify the mobile number.
7. Select a **Payment Method** and click **Pay Now**.
8. Enter the relevant details and complete the payment.
## Shipping and Customer details
Navigate to **Transactions** and select the relevant **Order Id** to view the shipping and customer details.
 **Handy Tips**
After you integrate Payment Pages with Magic Checkout, you can also integrate with [Shiprocket](/docs/payments/payment-pages/plugins-add-ons/shiprocket) if required.
**Watch Out!**
If you choose to disable magic checkout, your website/app will automatically fall back to your default Checkout experience
**Handy Tips**
After you integrate Payment Pages with Magic Checkout, you can also integrate with [Shiprocket](/docs/payments/payment-pages/plugins-add-ons/shiprocket) if required.
**Watch Out!**
If you choose to disable magic checkout, your website/app will automatically fall back to your default Checkout experience