> ## Documentation Index
> Fetch the complete documentation index at: https://razorpay-881012b3.mintlify.site/llms.txt
> Use this file to discover all available pages before exploring further.
# Configure Payment Pages Receipt
> Generate, download and share receipts with customers for payments on your Payment Pages. Send email notifications and PDF receipts to your customers.
Available in🇮🇳 India🇸🇬 Singapore🇺🇸 United States
You can share payment receipts with customers via email once they complete payments using the Payment Page.
## Set Up Payment Receipt
Payment Page Receipts can be generated and shared using **Automated Rececipts** or **Manual Receipts**.
You can automatically share the payment receipt with customers via email and SMS. An auto-generated reference number is added by Razorpay.
To configure automated Payment Page receipts:
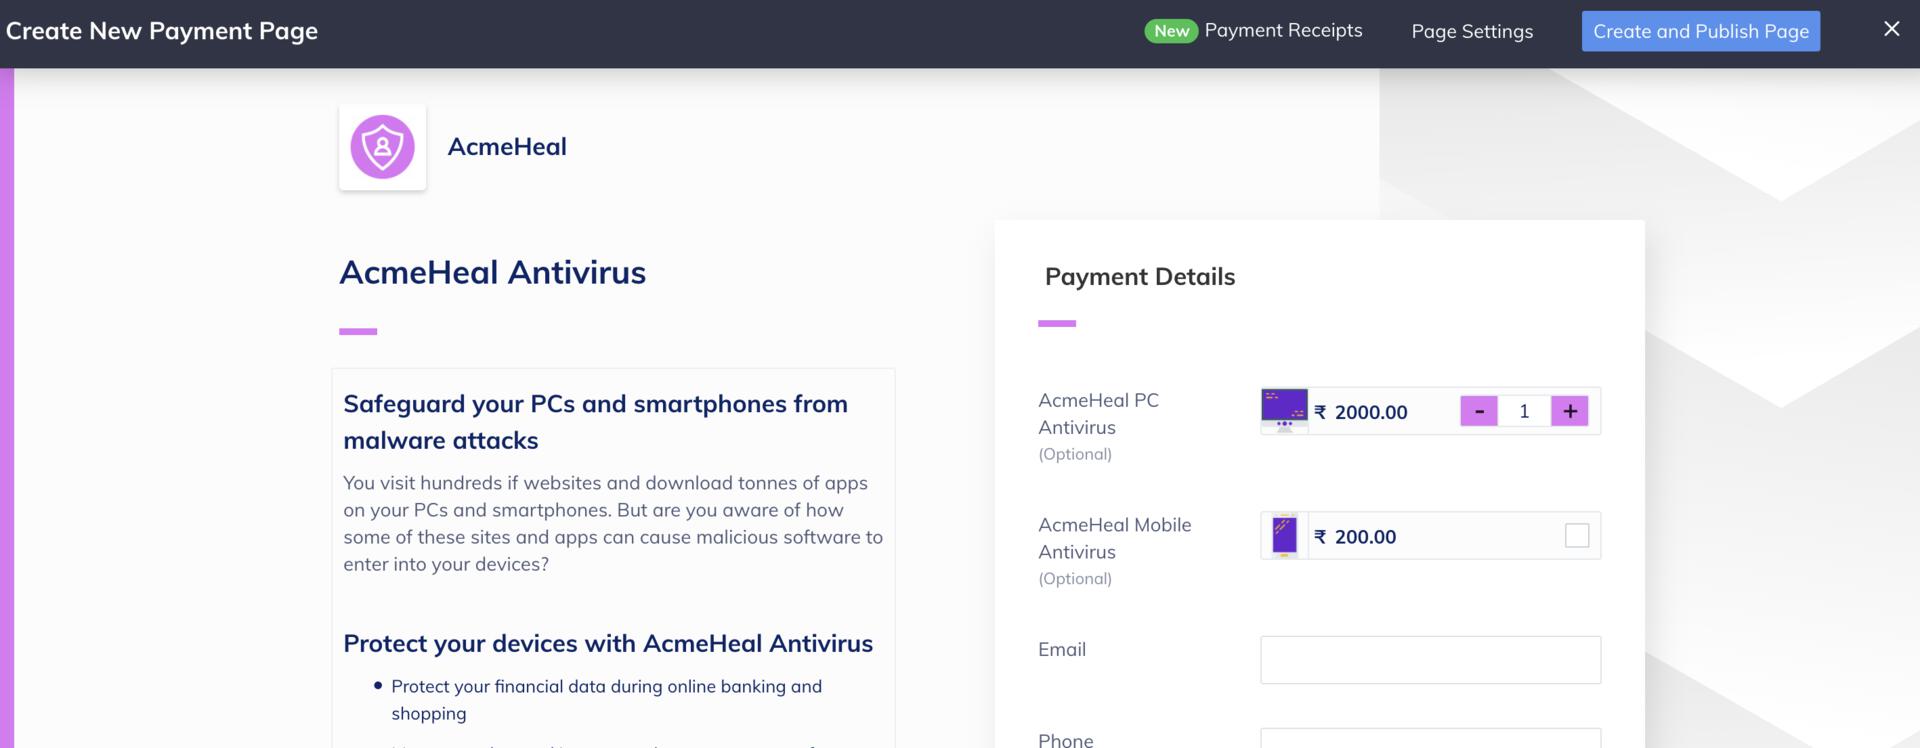
1. While creating or editing the Payment Page, select **Payment Receipts** from the top menu ribbon.
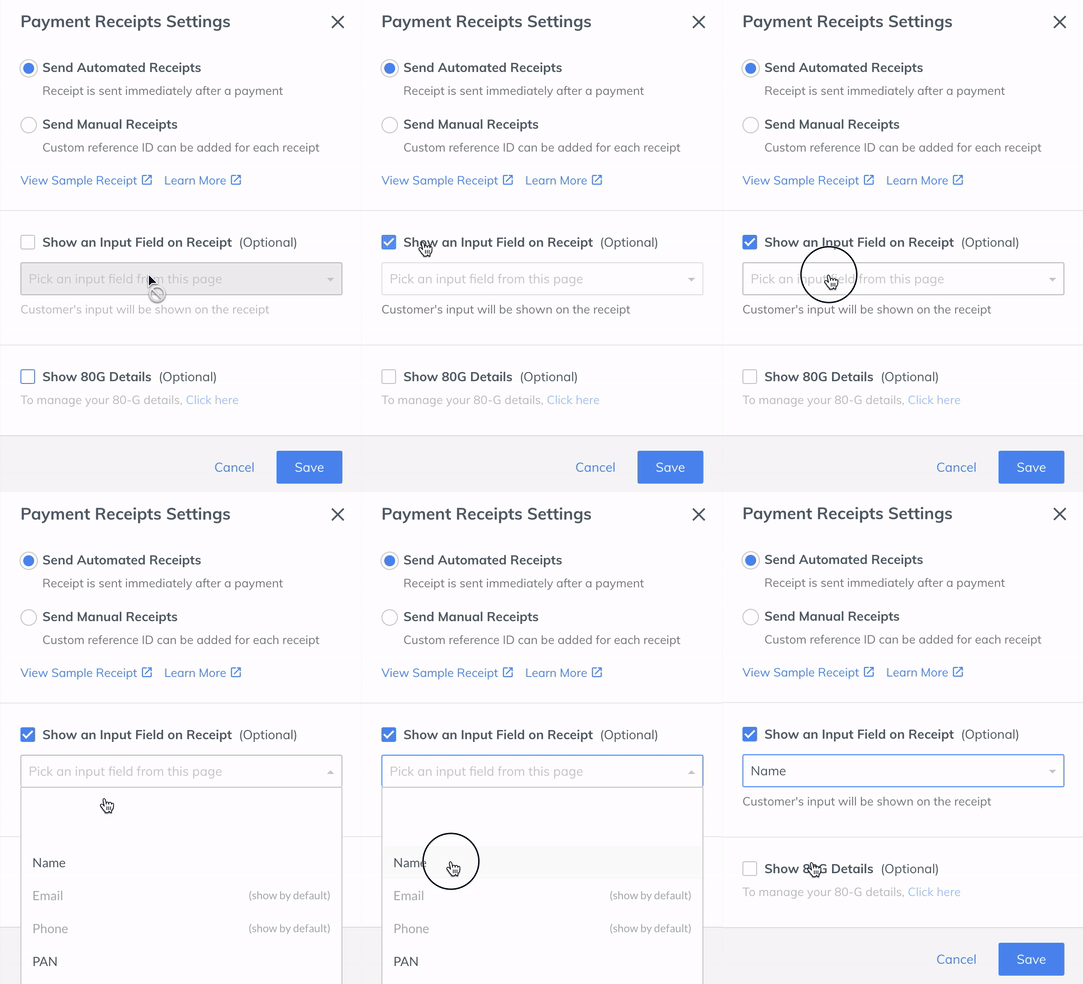
2. On the **Payment Receipts Settings** pop-up page, select **Send Automated Receipts**.
3. To show an input field such as Name, Address and its associated value in the receipt:
1. Enable the **Show an Input Field on Receipt** option.
2. In the drop-down list, select one of the custom input fields such as `Name`, `Address` or `Landmark`, used on the Payment Page. For example, if you have selected `Name`, the customer's name `Gaurav Kumar` will appear on the Payment Page receipt.
4. Click **Save**.
You can also manually add a reference number to the receipt and share it with your customers.
To configure manual Payment Page receipt:
1. On the Payment Page creation page, select **Payment Receipts** from the top menu ribbon.
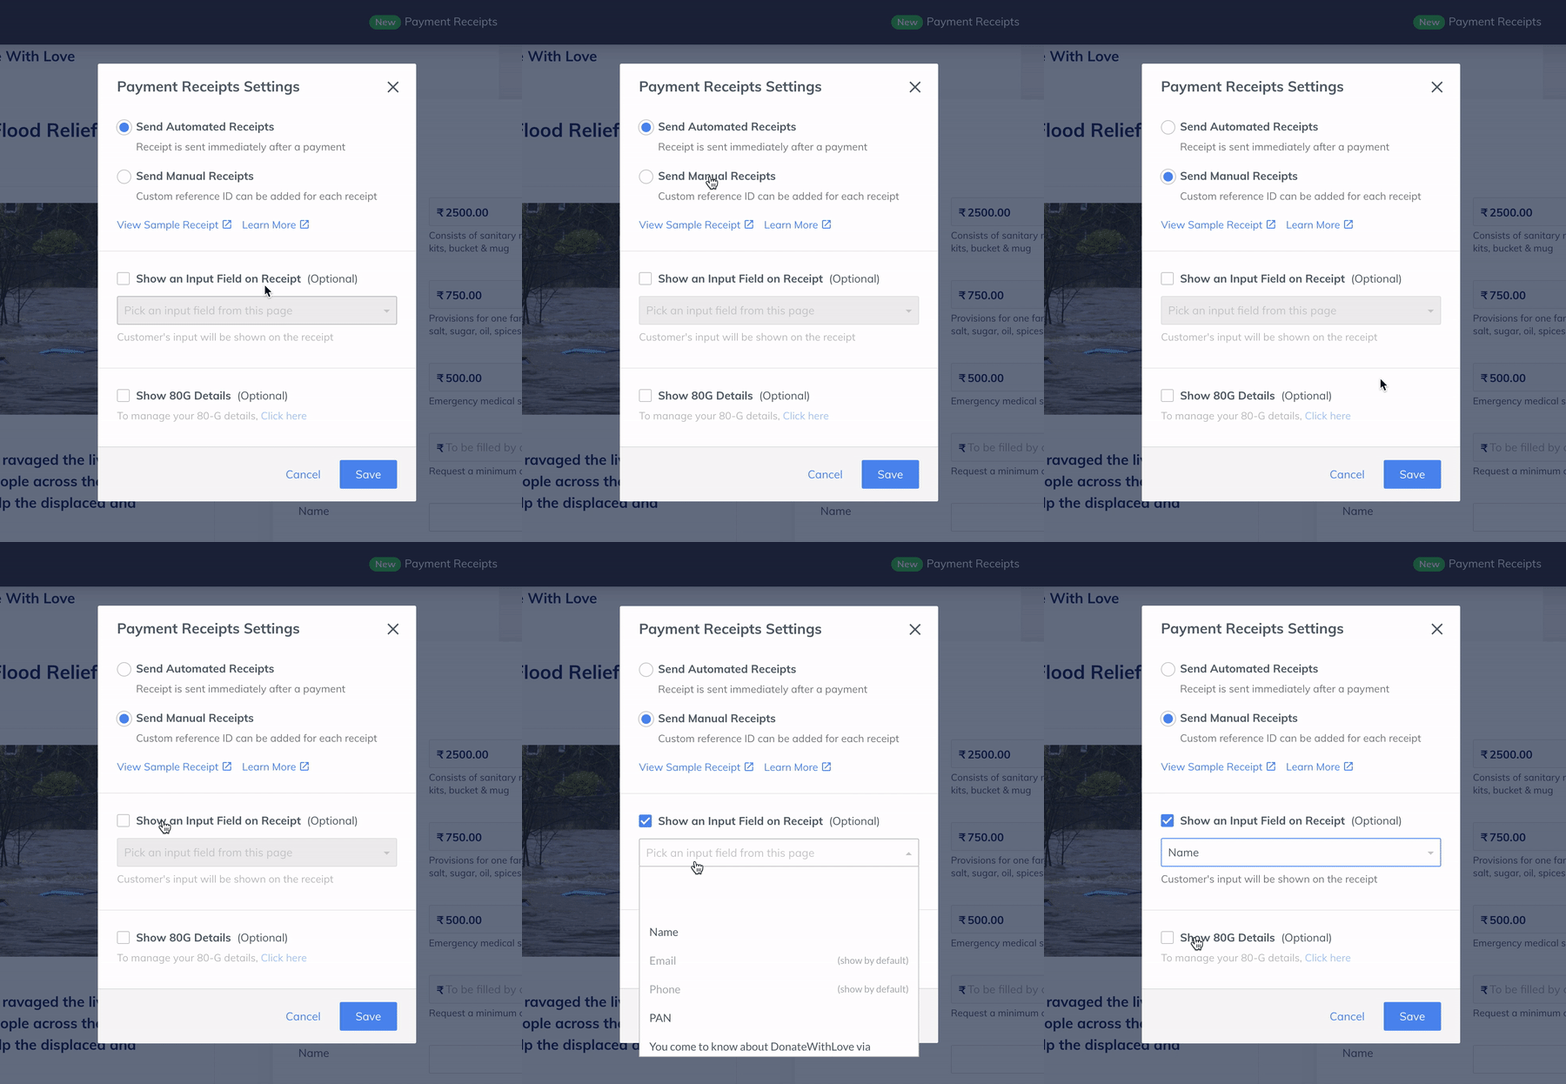
2. On the **Payment Receipts Settings** pop-up page, select **Send Manual Receipts**.
3. To show an input field such as `Name`, `Address` and its associated value in the receipt:
1. Enable the **Show an Input Field on Receipt** option.
2. In the drop-down list, select one of the custom input fields such as `Name`, `Address` or `Landmark`, used on the Payment Page. For example, if you selected `Name`, the customer's name `Gaurav Kumar` will appear on the Payment Page receipt.
4. Click **Save**.
5. Navigate to the page's **Transactions Details** page. All the payments made using the Payment Page are listed here.
6. Click the Payment id to view the payment details.
7. In the **Payment Receipt** field, click the **Send Receipt** button.
8. Enter a reference number for the receipt as per your business requirements.
9. Click **Send**.
You can also download the payment receipt using the **Download Receipt** button.
To resend the receipt to a customer:
1. Navigate to the page's **Transactions Details** screen. All the payments made using the Payment Page are listed here.
2. Click on the Payment id to view the payment details.
3. In the **Payment Receipt** field, click the **Send** button. This will resend the receipt to the customer.
You can download the payment receipt using the **Download** button.
After your customers complete the payment using the Payment Page, the payment receipt is sent to them via email as a PDF attachment. The details entered by the customer on the Payment Page appear on the email body.
Here is a sample PDF of the payment receipt.
### Related Information
[Configure 80G-Enabled Payment Pages Receipt](/docs/payments/payment-pages/80g-receipt)
 2. On the **Payment Receipts Settings** pop-up page, select **Send Automated Receipts**.
3. To show an input field such as Name, Address and its associated value in the receipt:
1. Enable the **Show an Input Field on Receipt** option.
2. In the drop-down list, select one of the custom input fields such as `Name`, `Address` or `Landmark`, used on the Payment Page. For example, if you have selected `Name`, the customer's name `Gaurav Kumar` will appear on the Payment Page receipt.
4. Click **Save**.
2. On the **Payment Receipts Settings** pop-up page, select **Send Automated Receipts**.
3. To show an input field such as Name, Address and its associated value in the receipt:
1. Enable the **Show an Input Field on Receipt** option.
2. In the drop-down list, select one of the custom input fields such as `Name`, `Address` or `Landmark`, used on the Payment Page. For example, if you have selected `Name`, the customer's name `Gaurav Kumar` will appear on the Payment Page receipt.
4. Click **Save**.
 4. Click **Save**.
5. Navigate to the page's **Transactions Details** page. All the payments made using the Payment Page are listed here.
4. Click **Save**.
5. Navigate to the page's **Transactions Details** page. All the payments made using the Payment Page are listed here.
 6. Click the Payment id to view the payment details.
7. In the **Payment Receipt** field, click the **Send Receipt** button.
8. Enter a reference number for the receipt as per your business requirements.
6. Click the Payment id to view the payment details.
7. In the **Payment Receipt** field, click the **Send Receipt** button.
8. Enter a reference number for the receipt as per your business requirements.
 9. Click **Send**.
You can also download the payment receipt using the **Download Receipt** button.
9. Click **Send**.
You can also download the payment receipt using the **Download Receipt** button.

