> ## Documentation Index
> Fetch the complete documentation index at: https://razorpay-881012b3.mintlify.site/llms.txt
> Use this file to discover all available pages before exploring further.

# Create a QR Code

> Create a QR Code, add a custom brand name and view Payments from the Razorpay Dashboard.

<div style={{display:"flex",flexWrap:"wrap",alignItems:"center",gap:"0.35rem 0.9rem",border:"1px solid rgba(128,128,128,0.28)",borderRadius:"0.5rem",padding:"0.45rem 0.75rem",margin:"0 0 1.25rem",fontSize:"0.875rem"}}>
  <span style={{fontWeight:600}}>Available in</span>
  <span>🇮🇳 India</span>
</div>

Razorpay QR Code is a QR-based solution that enables you to accept digital payments from your customers. You can create a QR Code using the Dashboard or the API and share it with your customers. Customers then scan the code and complete the payment.

## Create a QR Code from the Dashboard

Here is a short video on how to create QR Codes on the Dashboard.

<iframe width="560" height="315" src="https://www.youtube.com/embed/YUAU8C1PRDc" title="Create a QR code on Razorpay Dashboard to accept payments" frameBorder="0" allow="accelerometer; autoplay; clipboard-write; encrypted-media; gyroscope; picture-in-picture" allowFullScreen />

To create a QR Code:

1. Log in to the Dashboard.
2. Go to the **PAYMENT PRODUCTS** section and click **QR Codes** → **+Create QR Codes**.
   <img src="https://razorpay.com/docs/build/browser/assets/images/qr-codes-create-create-qrcode.jpg" class="click-zoom" alt="Create QR codes on the Razorpay Dashboard" width="800" />
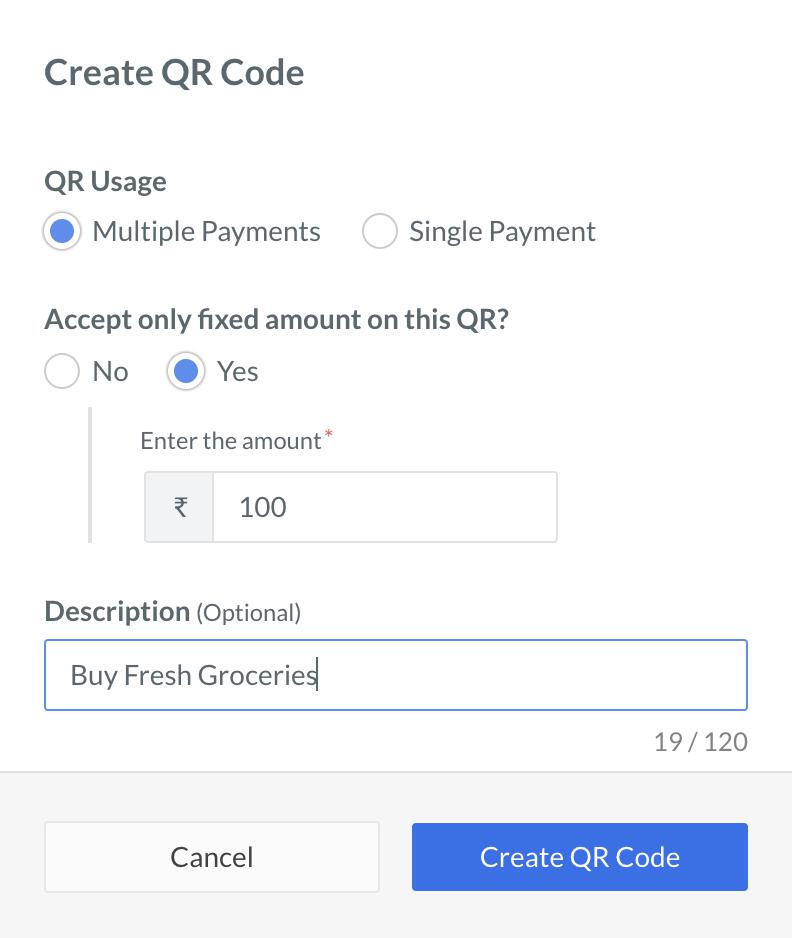
3. Provide the following details:

<AccordionGroup>
  <Accordion title="QR Usage">
    You can configure the QR Code to receive a single payment or multiple payments.

    * **Multiple Payments**: Enables QR Code to receive multiple payments.
    * **Single Payment**: Enables QR Code to receive only one payment. Once this payment is received, the QR Code is automatically closed.

    <Warning>
      **Watch Out!**

      * QR Codes that support multiple payments cannot be closed.
      * You can only accept a fixed amount for single payment QR Codes.
    </Warning>
  </Accordion>

  <Accordion title="Accept only fixed amount on this QR?">
    You can decide whether to accept fixed amount or let the customer decide the amount:

    * **Yes**: Set to **Yes** and specify the fixed amount you want to receive from customers. Customers will not be able to pay an amount greater than or lesser than the specified amount.
    * **No**: Set to **No** to allow customers to pay an amount of their choice.
  </Accordion>

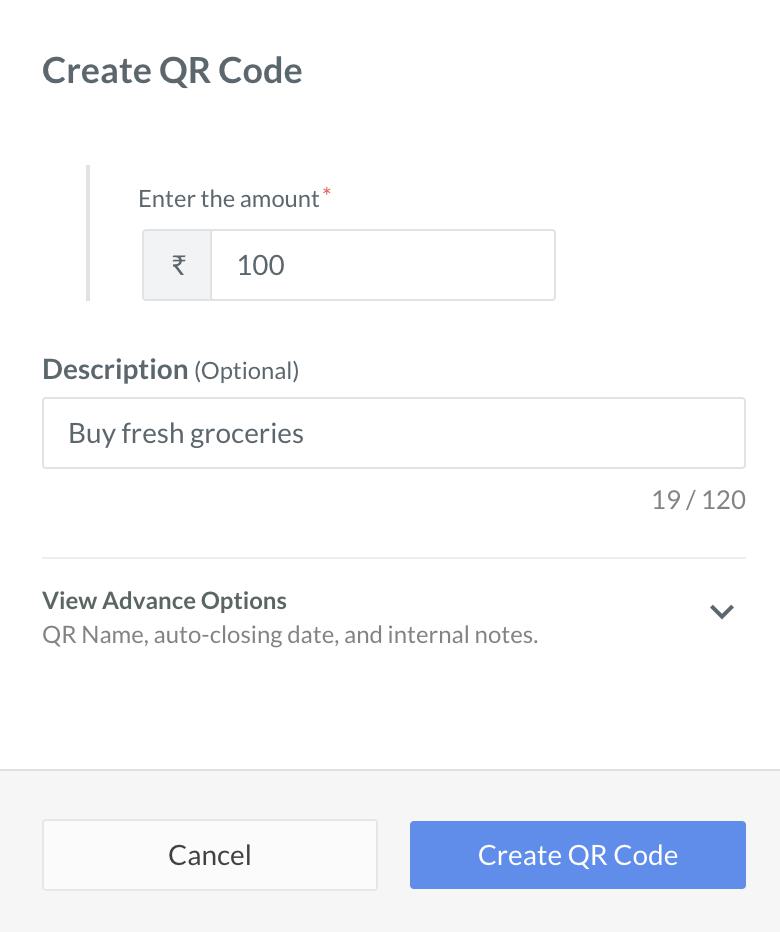
  <Accordion title="Description [Optional]">
    Add a description for your reference.

    <img src="https://razorpay.com/docs/build/browser/assets/images/qr-codes-create-add-details.jpg" class="click-zoom" alt="Add a description while creating a QR code" width="300" />

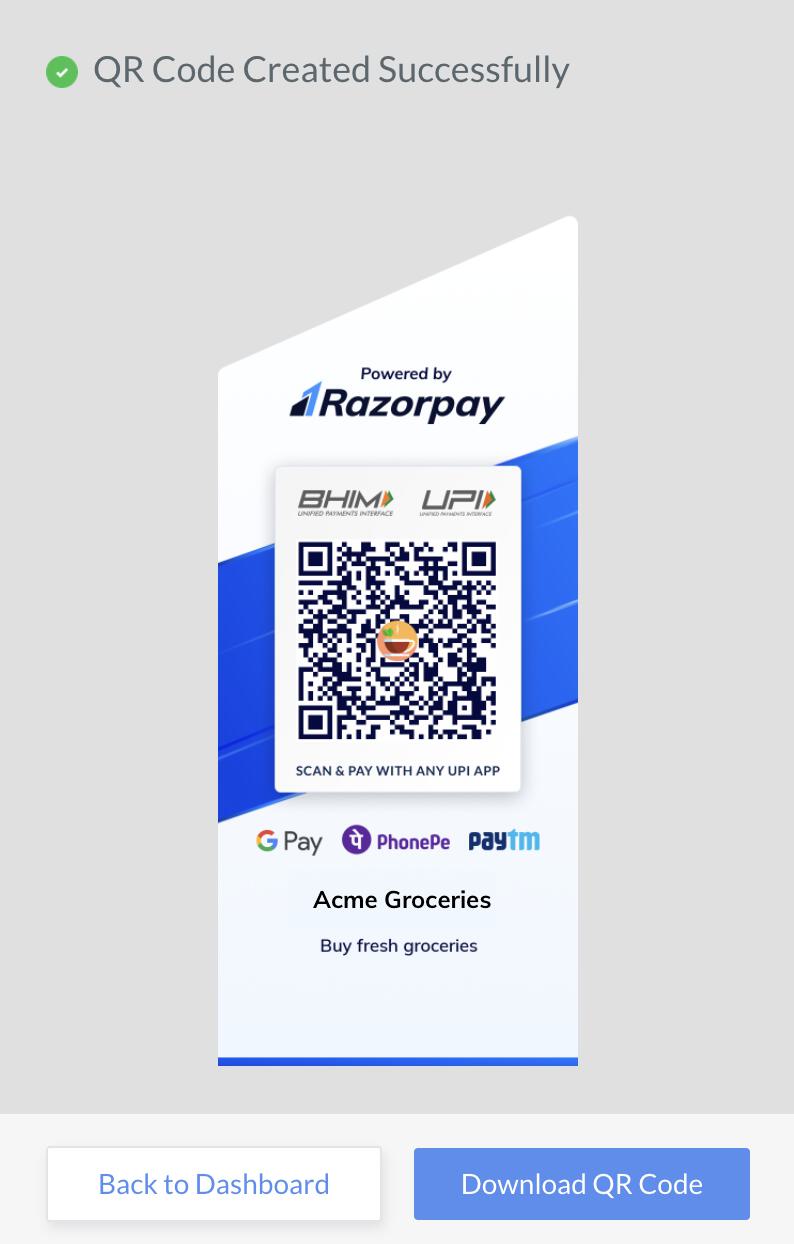
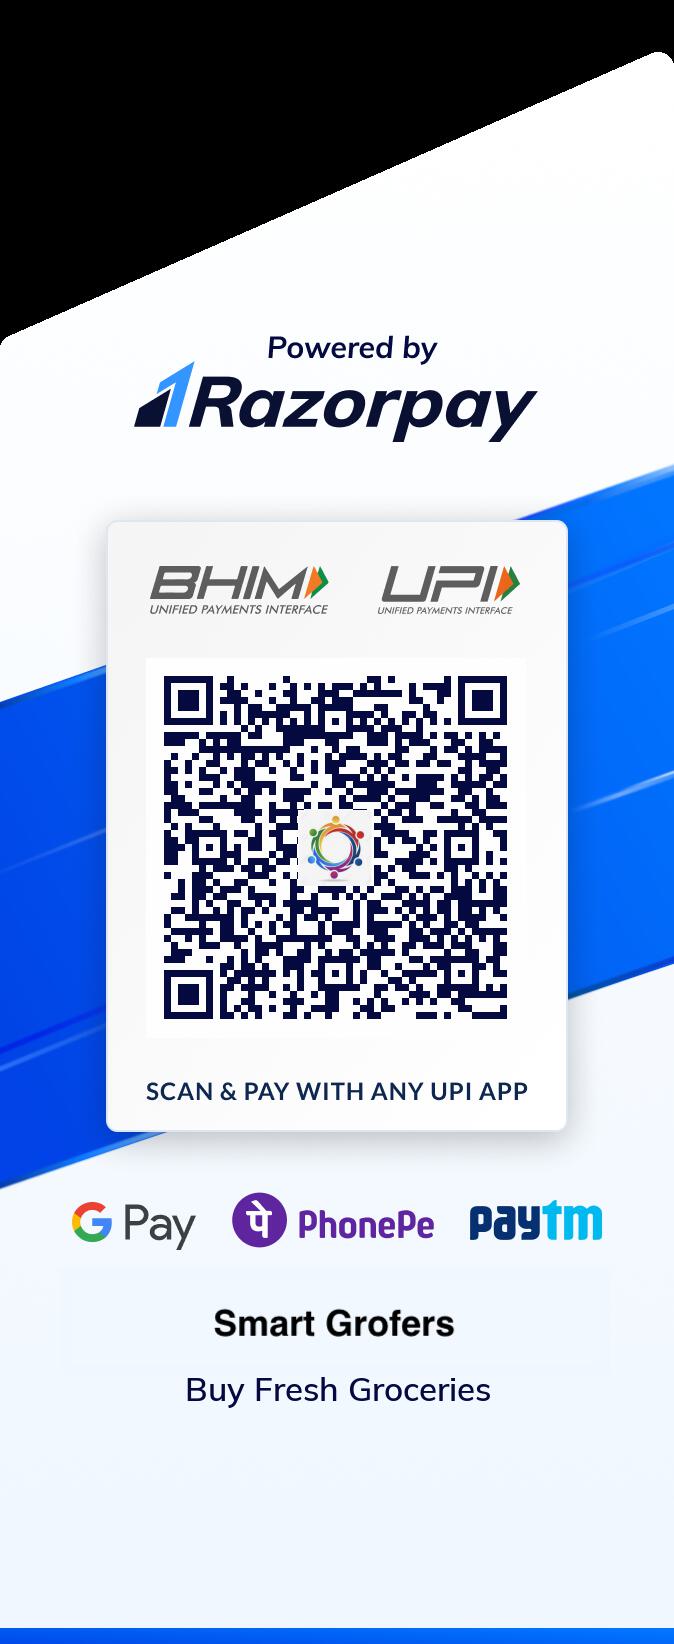
    * Details added in description will show up in the QR Image.
          <img src="https://razorpay.com/docs/build/browser/assets/images/qr-code-image.jpg" class="click-zoom" alt="QR Image with description" width="250" />
  </Accordion>

  <Accordion title="Advanced Options">
    Click **View Advanced Options** to view and configure advanced options.

    <img src="https://razorpay.com/docs/build/browser/assets/images/qr-codes-create-view-advanced-options.jpg" class="click-zoom" alt="View advanced options while creating a QR code" width="300" />

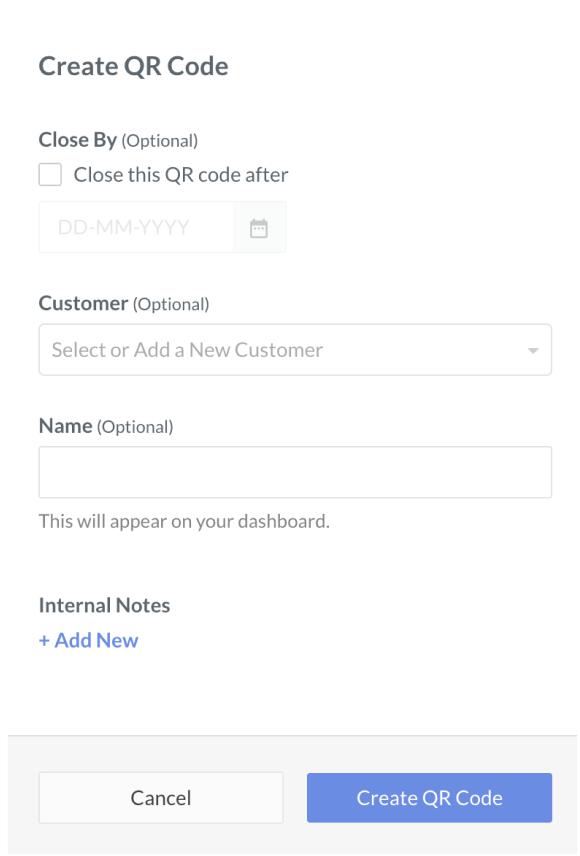
    * **Close By (Optional)**: Set a closure date for the QR Code. Select the **Close this QR Code after** option to select the date and time at which the account must be automatically closed. Ensure that the time specified is at least 15 minutes after the QR Code creation time.
    <Warning>
      **Watch Out!**

      The **Close By** feature is not available for QR Codes accepting **Multiple Payments**.
    </Warning>

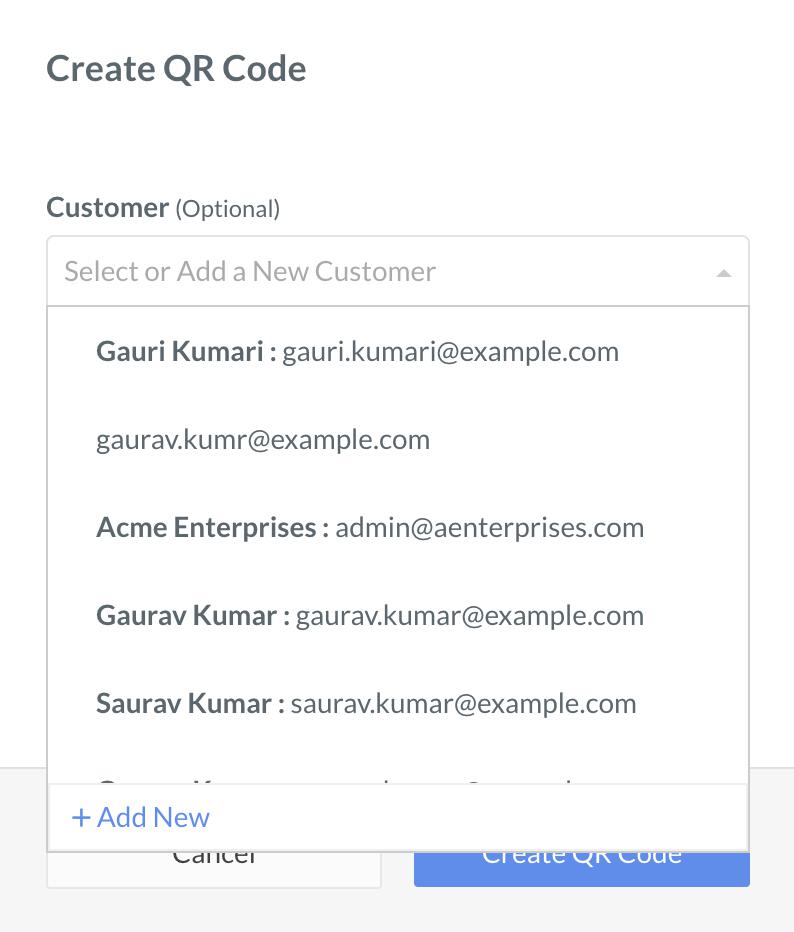
    * **Customer**: Select the customer from the drop-down list. You can also [create a new customer](#create-a-new-customer-while-creating-qr-code) while creating the QR Code.

    <Info>
      **Handy Tip**

      You may skip this step and proceed with creation, if you do not wish to tag it to a specific customer. However, you cannot modify the QR Code and tag it to a customer later.
    </Info>
  </Accordion>

  <Accordion title="Name">
    Add a name for the QR Code for your reference. This will appear on your Dashboard.

    <Info>
      **Handy Tip**

      This is for your reference only and will not be visible to the end user.
    </Info>
  </Accordion>

  <Accordion title="Add Internal Note">
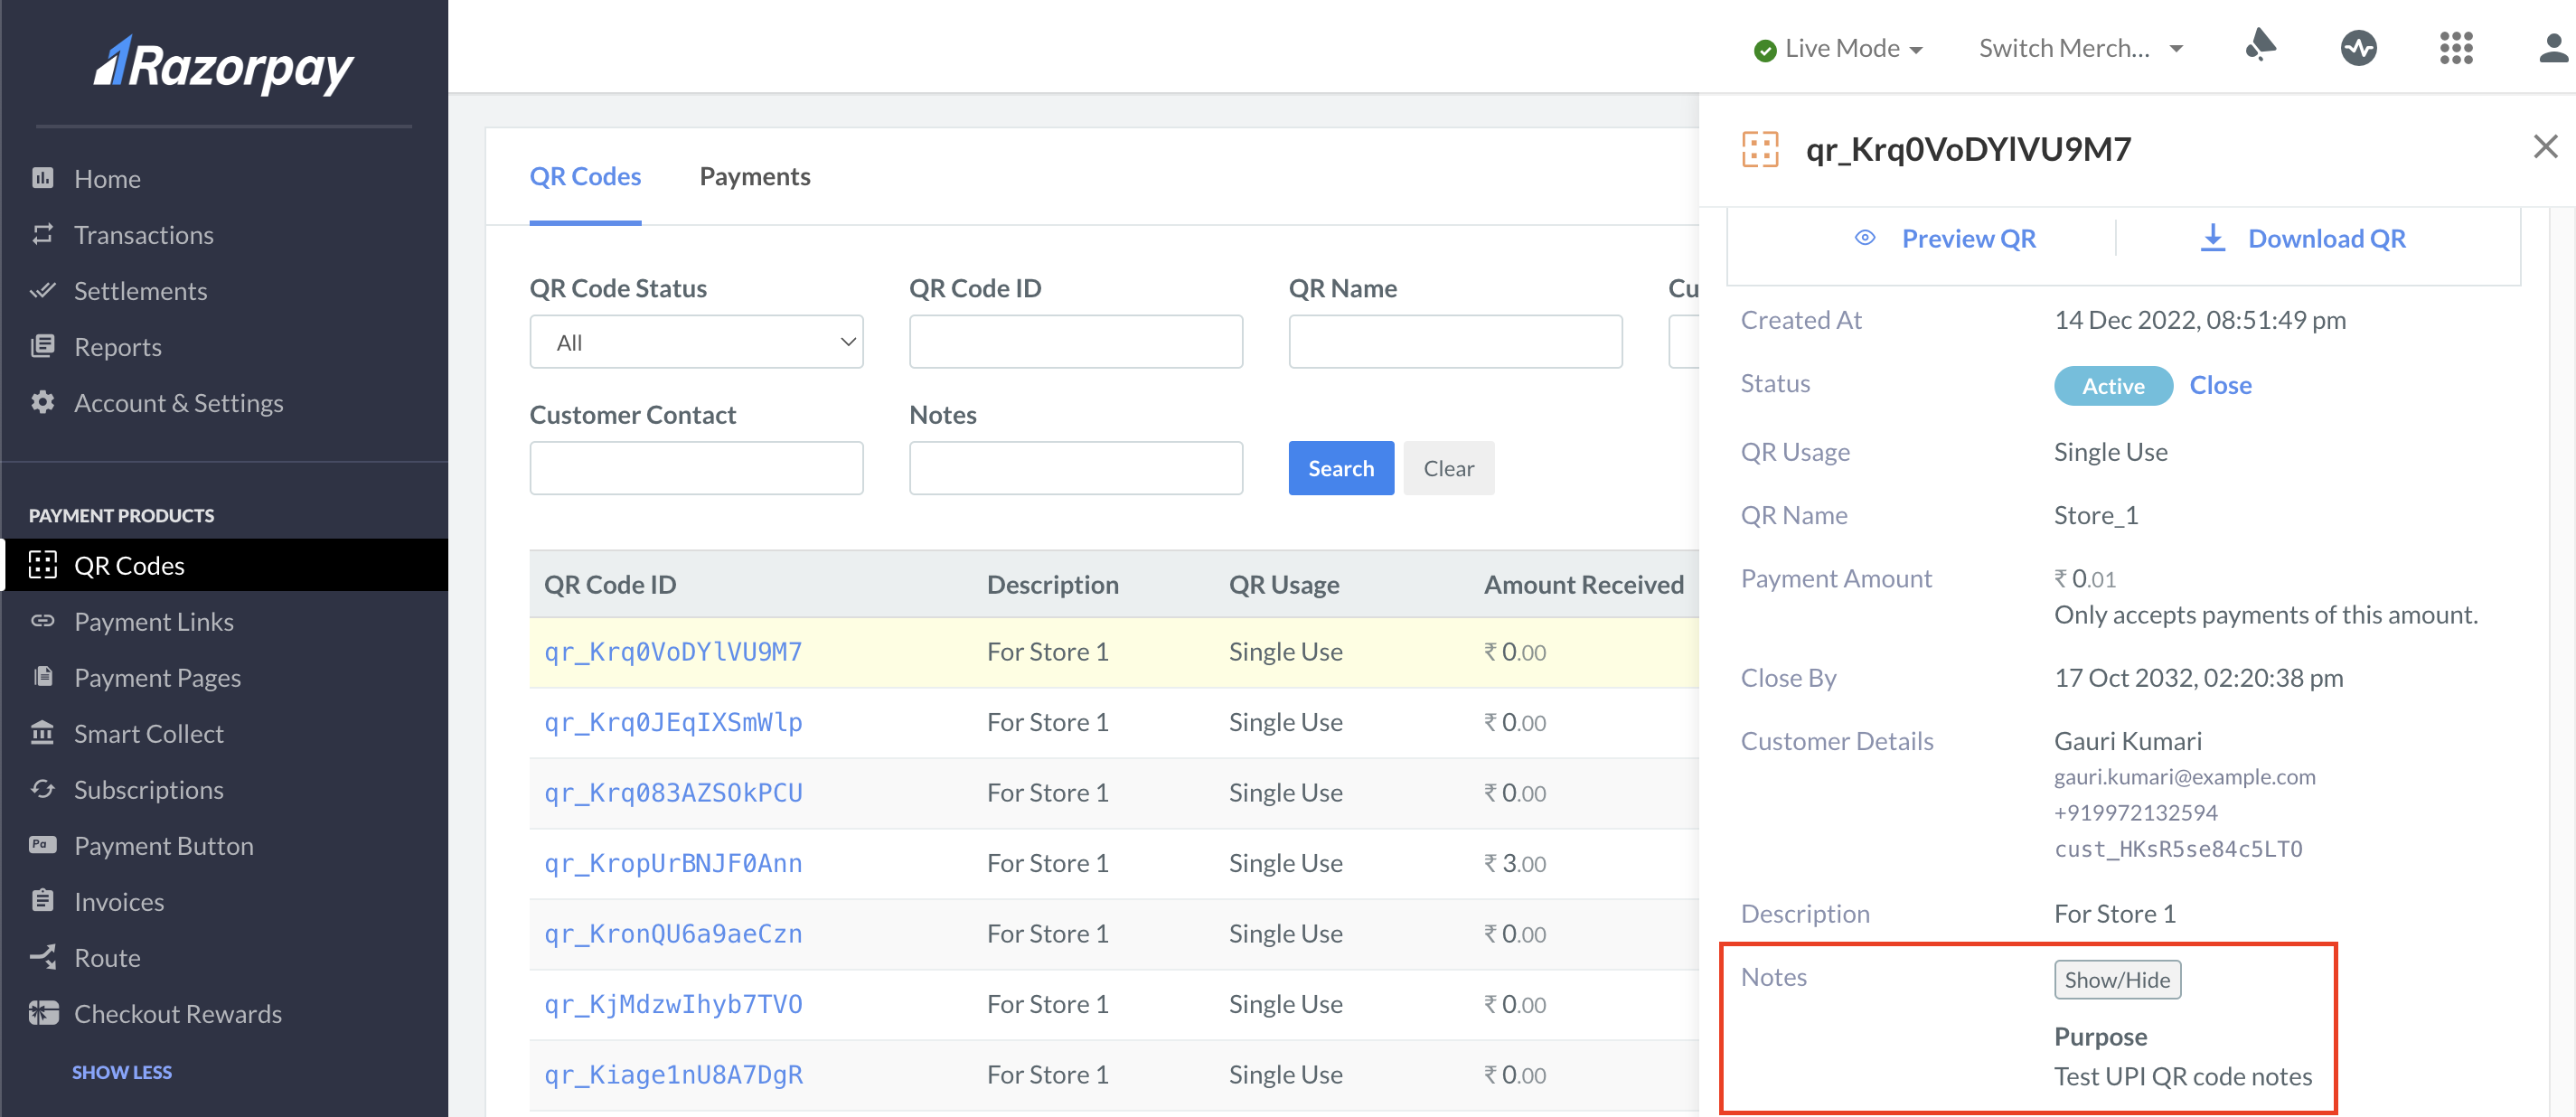
    Add notes for internal reference.

    <img src="https://razorpay.com/docs/build/browser/assets/images/qr-codes-create-configure.jpg" class="click-zoom" alt="Add customer, name and internal notes while creating a QR code" width="300" />

    * This helps with reconciliation and will be available in the payments reports for the payments captured via QR.
          <img src="https://razorpay.com/docs/build/browser/assets/images/qr-codes-internal-notes.jpg" class="click-zoom" alt="Internal notes of a payment captured via QR code" width="800" />
  </Accordion>
</AccordionGroup>

1. Click **Create QR Code**. The QR Code is created.

<img src="https://razorpay.com/docs/build/browser/assets/images/qr-codes-create-generated.jpg" class="click-zoom" alt="QR code created successfully" width="400" />

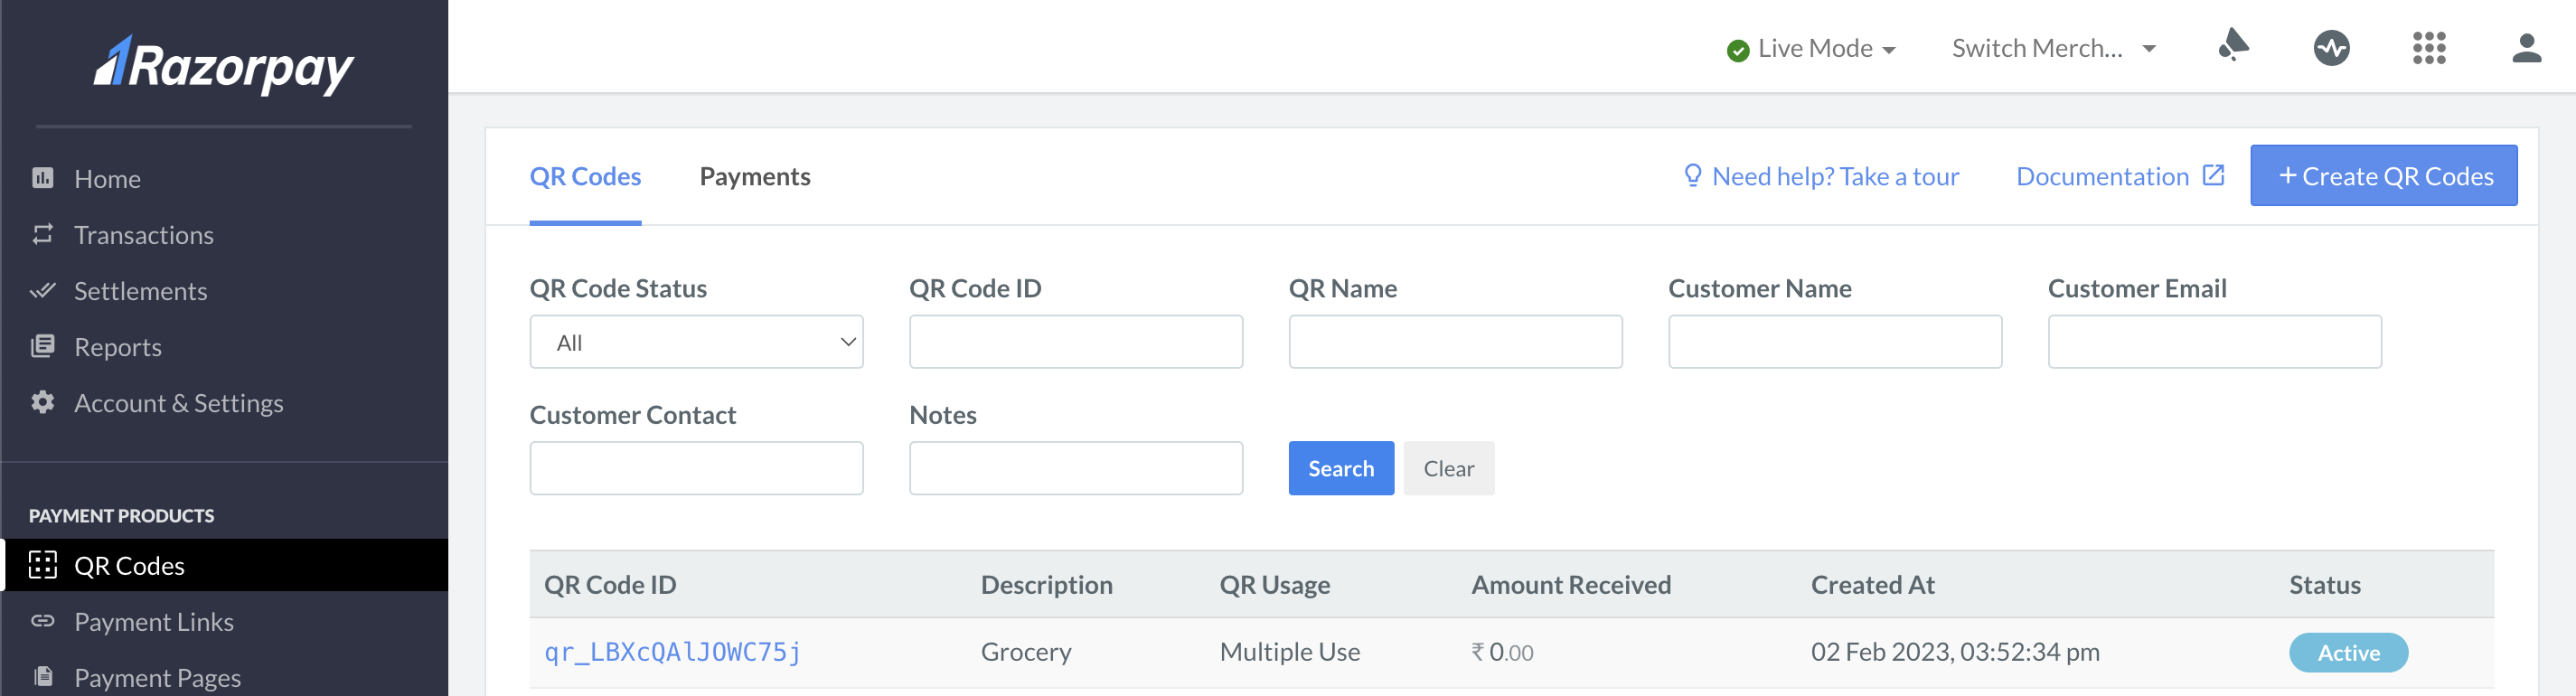
You can download and share the QR Code image with your customers. The QR Code appears in the list.
<img src="https://razorpay.com/docs/build/browser/assets/images/qr-codes-create-create-qrcode.jpg" class="click-zoom" alt="List of QR codes on the Razorpay Dashboard" width="800" />

<Info>
  **Handy Tips**

  * If you create a QR Code in **Test Mode** through the payment gateway flow, the QR Code will disappear after two seconds.
  * You can scan QR Codes that are created only in **Live Mode**.
</Info>

### Create a New Customer While Creating a QR Code

To create a customer while creating a QR Code:

1. Click **View Advanced Options**.
2. In the **Customers** field, click **+Add New**.
   <img src="https://razorpay.com/docs/build/browser/assets/images/qr-codes-create-add-new-customer.jpg" class="click-zoom" alt="Create a new customer while creating a QR code" width="300" />
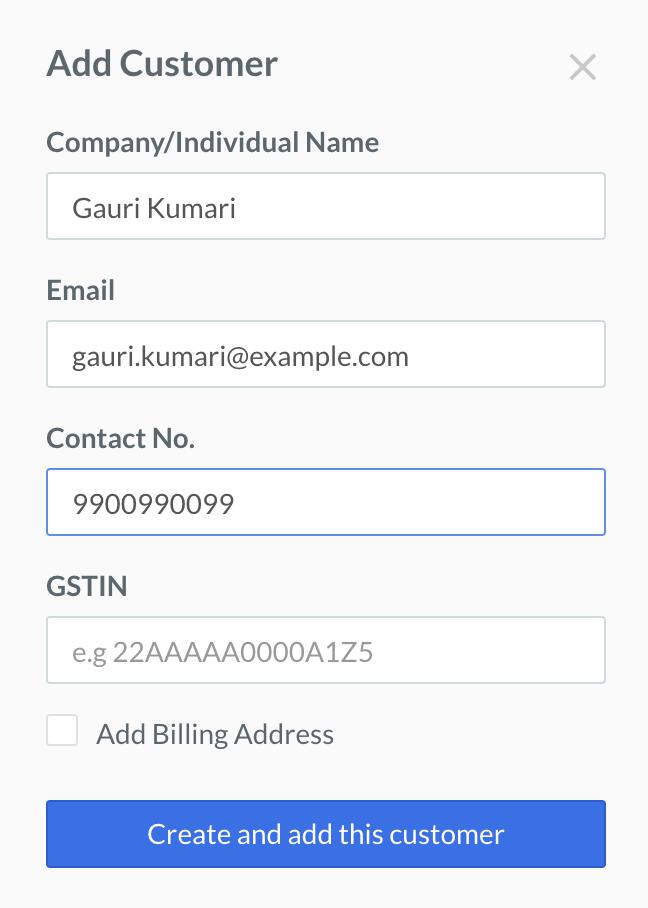
3. Specify details such as **Company/Individual Name**, **Email** and
   **Contact No.**
<img src="https://razorpay.com/docs/build/browser/assets/images/qr-codes-create-add-customer-details.jpg" class="click-zoom" alt="Add details to create a new customer" width="300" />

1. Click **Create and add this customer**.

The details of the newly created customer are auto-populated on the QR Code. This customer name is also displayed under the **Customers** menu, and you can create more QR Codes for them in the future.

Know more about [customers](/docs/payments/customers).

### Add a Custom Brand Name to Your QR Codes

You can increase your brand outreach using QR Codes by customising your brand name. Customers who scan the QR Code will see your custom Business Name after they make the payment. Know more about how you can add a [brand name and logo](/docs/payments/dashboard/account-settings/checkout-styling#brand-name-and-logo) from the Dashboard.

## View Payments

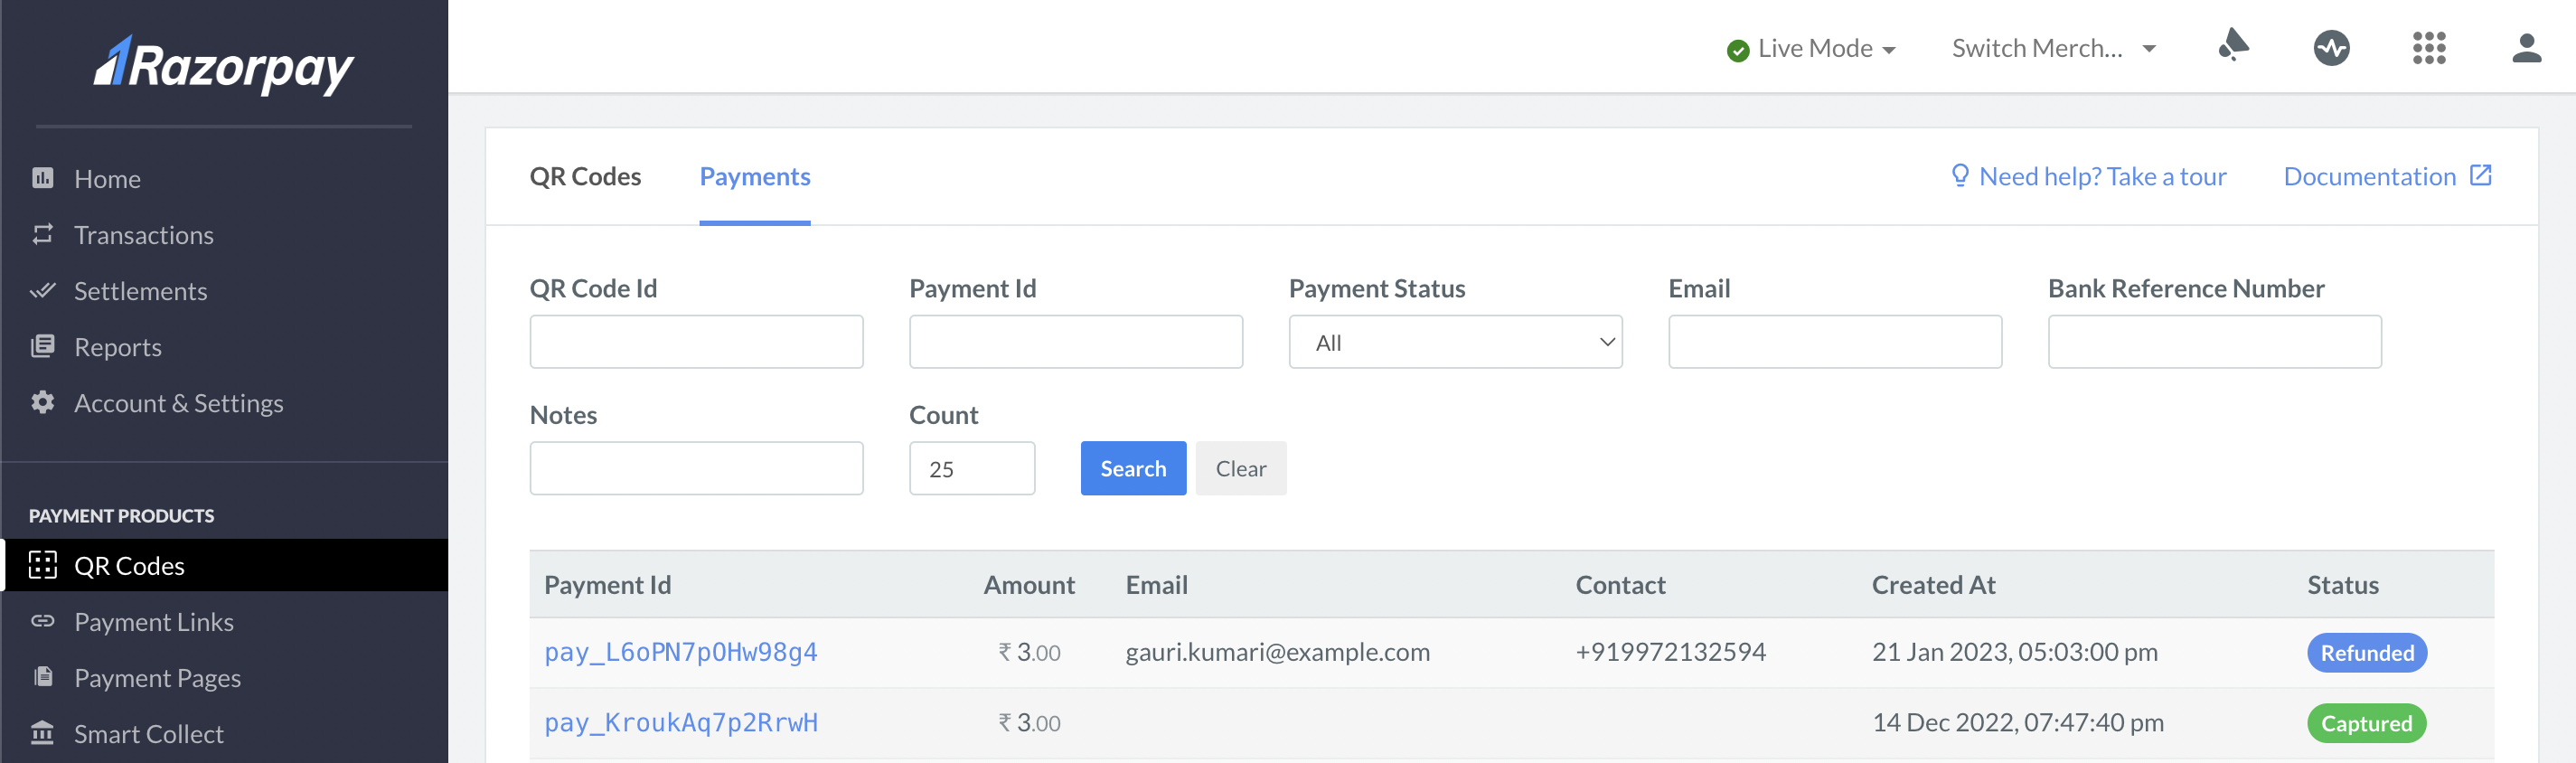
The payments received on QR Codes appear on the **Payments** tab.

To view payments made for QR Codes:

1. Click **Payments**.
2. Select the **Payment Id** from the list.
   <img src="https://razorpay.com/docs/build/browser/assets/images/qr-codes-create-payment.jpg" class="click-zoom" alt="List of payments made via QR codes on the Razorpay Dashboard" width="800" />
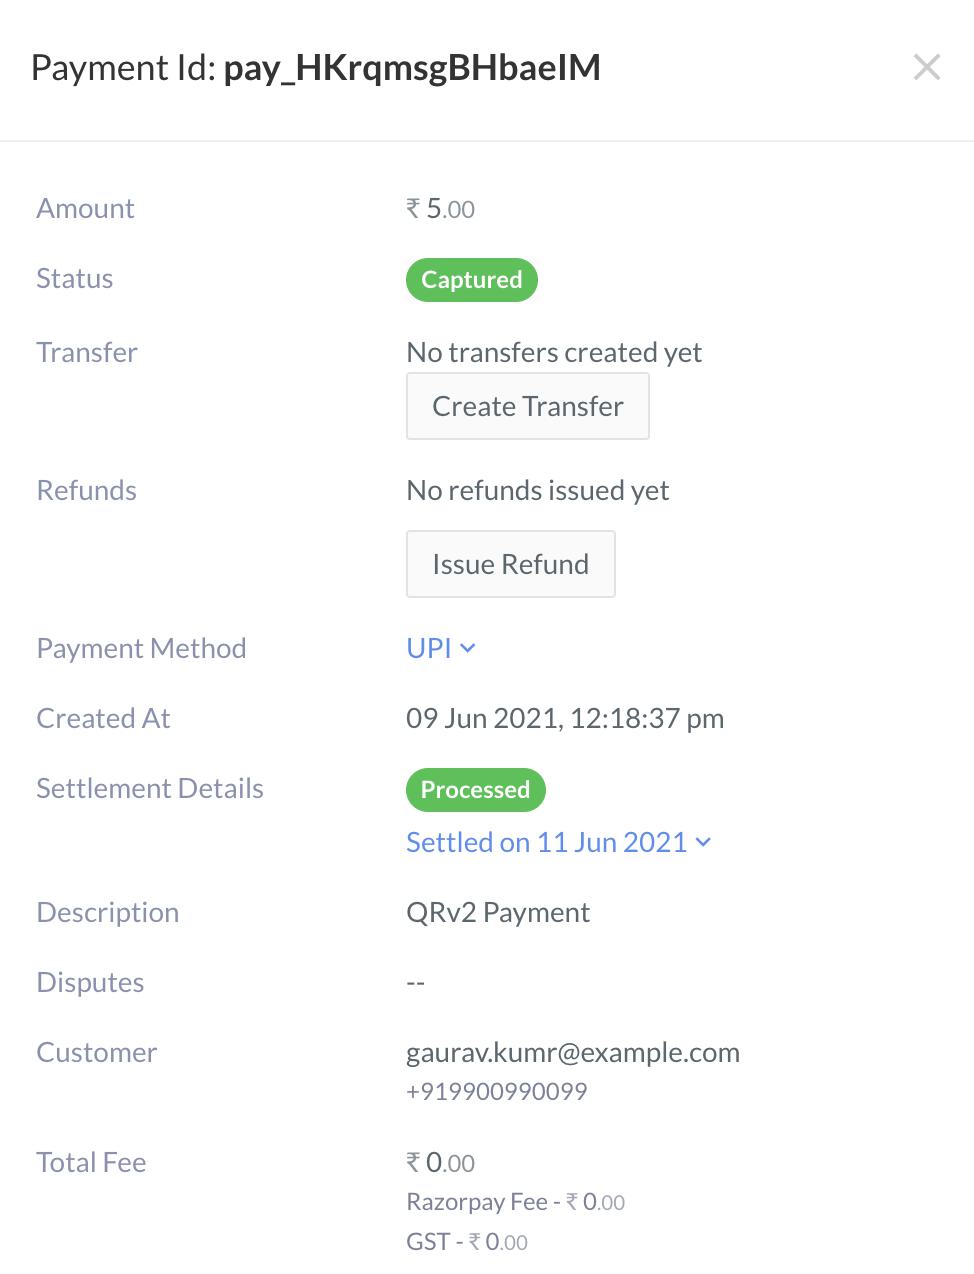
3. The payment details appear in the right pane. You can perform the following operations from this tab:
   1. **Create Transfer**: Transfer the payment to a linked account. Know more about [Route](/docs/payments/route).
   2. **Create Refund**: Refund the payment to the customer. Know more about [Refunds](/docs/payments/refunds).
   <img src="https://razorpay.com/docs/build/browser/assets/images/qr-codes-create-payment-details.jpg" class="click-zoom" alt="Create a transfer or a refund for a payment" width="400" />

## What Next

Once you have created the QR Code, you can share the short URL with the customer. You can also print or download it and send the image. You can also choose to [close the QR Code](/docs/payments/qr-codes/close).

<Info>
  **Handy Tips**

  The position of the Business name on the scanned screen will depend on the PSP app.
</Info>

### Related information

* [QR Code](/docs/payments/qr-codes)
* [How QR Codes Work](/docs/payments/qr-codes/how-it-works)
* [Search a QR Code](/docs/payments/qr-codes/search)
* [Close a QR Code](/docs/payments/qr-codes/close)