> ## Documentation Index
> Fetch the complete documentation index at: https://razorpay-881012b3.mintlify.site/llms.txt
> Use this file to discover all available pages before exploring further.
# Integrate Recurring Payments Using Wallets
> Steps to integrate Recurring Payments using Wallet.
Available in
🇮🇳 India
Set up recurring payments using Touch'n Go wallet. Customers authorise their wallet once and subsequent payments are processed automatically without additional authentication.
## Integration Flow
The recurring payments integration involves three main steps:
1. [Register Wallet Mandate](#1-register-wallet-mandate): Customer authorises their wallet for future charges.
2. [Fetch Token Details](#2-fetch-token-details): Retrieve and verify the mandate registration.
3. [Charge Customers](#3-charge-customers): Create subsequent payments as needed.
## 1. Register Wallet Mandate
Mandate registration creates an **authorisation transaction** where customers provide consent to charge their Touch'n Go wallet for future payments. This generates a secure **token** that represents the customer's payment authorisation.
**Watch Out!**
Standard Checkout authorisation can only be created using Razorpay APIs.
**Step 1:** [**Create a Customer**](/docs/api/payments/recurring-payments/wallets/create-authorization-transaction#1-1-1-create-a-customer)
Create a customer record in Razorpay to associate the mandate with. This returns a `customer_id` to be used in subsequent steps.
**Step 2:** [**Create an Order**](/docs/api/payments/recurring-payments/wallets/create-authorization-transaction#1-1-2-create-an-order)
Create an order for the authorisation amount. You can set this to RM 1 for minimal authorisation or the actual first payment amount. Pass the token parameters including `max_amount` and `expire_at` to set mandate limits.
**Step 3:** [**Create Authorisation Payment**](/docs/api/payments/recurring-payments/wallets/create-authorization-transaction#113-create-an-authorization-payment)
Initialise Razorpay Checkout with the `order_id`, `customer_id` and recurring-specific parameters. Specify `wallet` as the payment method. The customer completes the authorisation on Touch'n Go interface. Once the authorisation is successful, you receive a `token_id` in the payment response. This token represents the customer's wallet mandate.
### Registration Link Flow
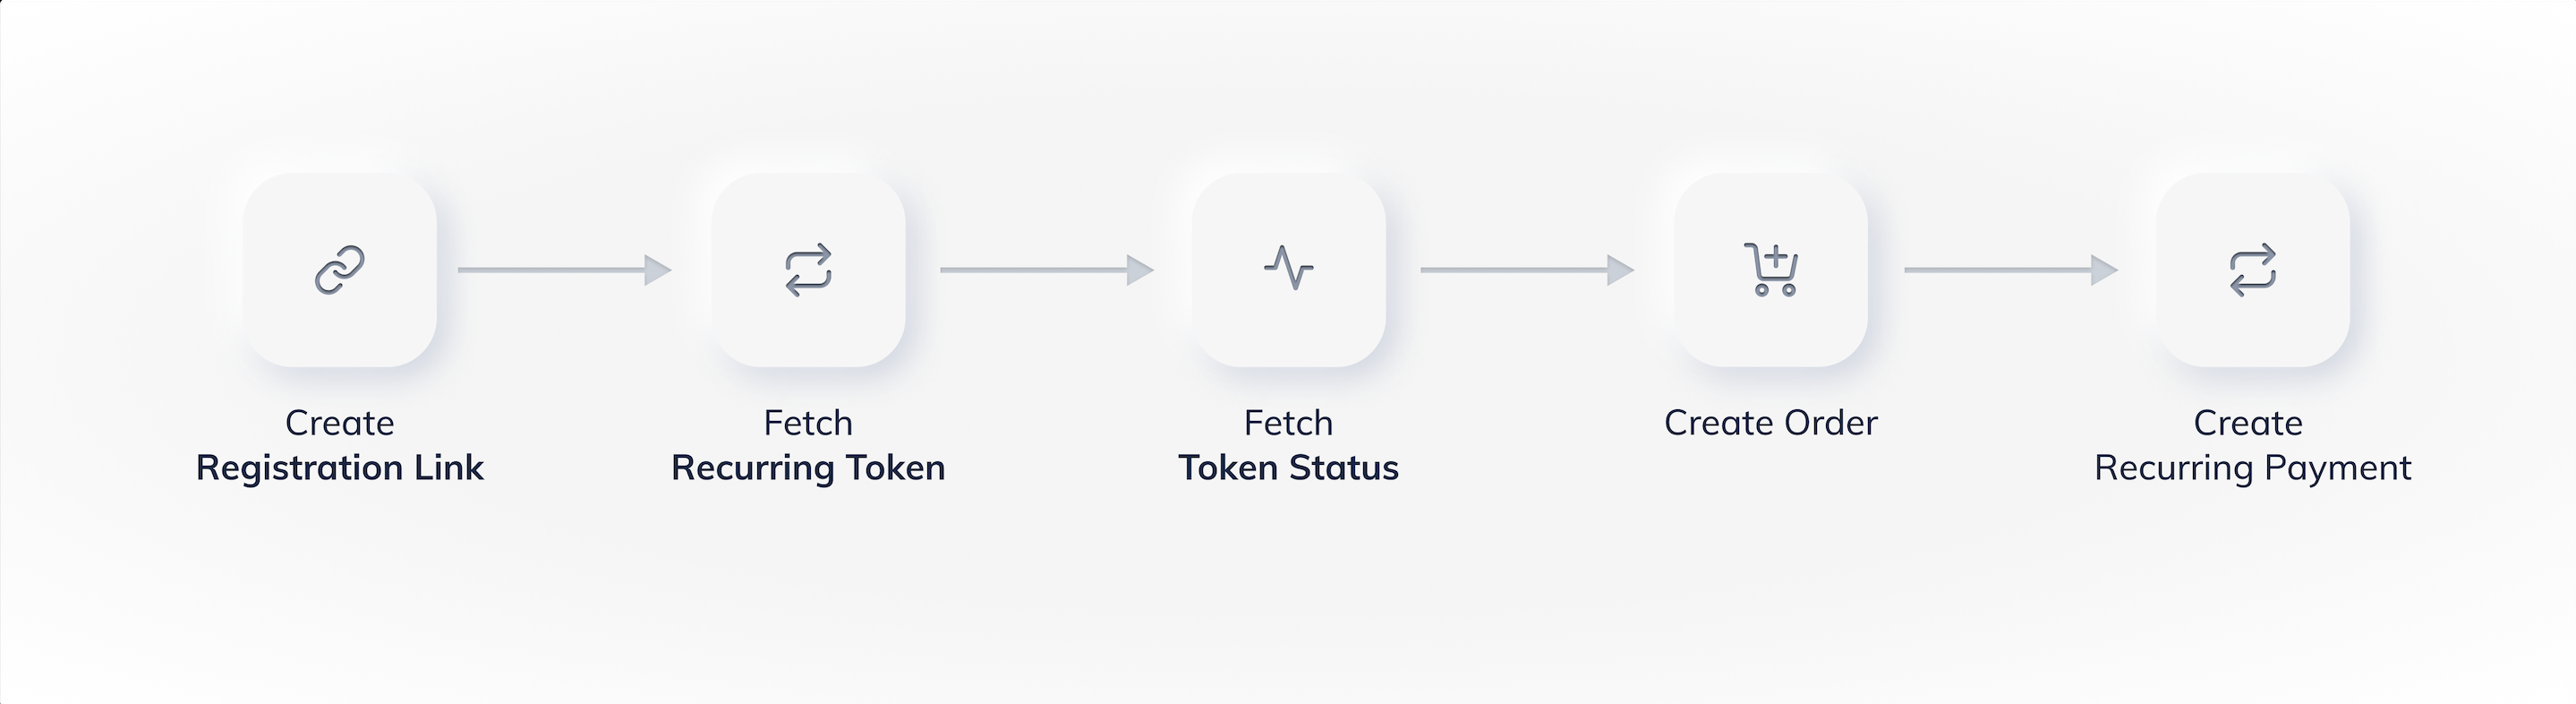 **Create a Registration Link** using:
* [APIs](/docs/api/payments/recurring-payments/wallets/create-authorization-transaction#1-2-1-create-a-registration-link)
* [Dashboard](/docs/payments/recurring-payments/create#1-create-a-registration-link)
Specify the authorisation amount, customer details, wallet type (Touch'n Go) and token parameters (max\_amount and expire\_at). The link can be sent to your customer via email or SMS.
**Send the link** to your customer. The customer clicks the link, is redirected to Touch'n Go wallet interface, and completes the authorisation.
**No Need to Create Customer and Order Separately**
When using registration links, Razorpay automatically creates both the customer and order records for you.
### Registration Link Statuses
A registration link moves through the following states during its life cycle:
| Status | Description | Webhook |
| --------- | ----------------------------------------------------------------------------------------------------------------------------------------- | --------------------------------------------------------------------------------- |
| Issued | A registration Link is created and sent to the customer. | NA |
| Paid | Payment is made for the issued registration Link.
**Create a Registration Link** using:
* [APIs](/docs/api/payments/recurring-payments/wallets/create-authorization-transaction#1-2-1-create-a-registration-link)
* [Dashboard](/docs/payments/recurring-payments/create#1-create-a-registration-link)
Specify the authorisation amount, customer details, wallet type (Touch'n Go) and token parameters (max\_amount and expire\_at). The link can be sent to your customer via email or SMS.
**Send the link** to your customer. The customer clicks the link, is redirected to Touch'n Go wallet interface, and completes the authorisation.
**No Need to Create Customer and Order Separately**
When using registration links, Razorpay automatically creates both the customer and order records for you.
### Registration Link Statuses
A registration link moves through the following states during its life cycle:
| Status | Description | Webhook |
| --------- | ----------------------------------------------------------------------------------------------------------------------------------------- | --------------------------------------------------------------------------------- |
| Issued | A registration Link is created and sent to the customer. | NA |
| Paid | Payment is made for the issued registration Link.
Once the registration Link is paid, search for Token corresponding to the payment. | [invoice.paid](/docs/api/payments/recurring-payments/webhooks#invoice-paid) |
| Cancelled | The registration link has been canceled. In such cases, you need to create a registration link again. | NA |
| Expired | The registration link has expired. You can set an expiry timestamp at the time of creation. | [invoice.expired](/docs/api/payments/recurring-payments/webhooks#invoice-expired) |
Once the customer has made the Authorisation Payment, it moves through the following states as per the [payment flow](/docs/payments/payment-gateway/how-it-works):
| Status | Description | Webhook |
| ---------- | ------------------------------------------------------------------------------------------------------------------------------------------------------------------------------------------------------------- | -------------------------------------------------------------------------------------------------------------------------------------------------------------- |
| Created | Payment is created when a customer enters and submits the payment information. | NA |
| Authorized | Payment is authorized when the customer’s payment details are successfully authenticated by the bank. | [payment.authorized](/docs/api/payments/recurring-payments/webhooks#payment-authorized) |
| Captured | Indicates that the payment is verified by you.
Once a payment is captured you can [retrieve the token](/docs/payments/recurring-payments/create#3-search-for-the-token). | [payment.captured](/docs/api/payments/recurring-payments/webhooks#payment-captured) or [order.paid](/docs/api/payments/recurring-payments/webhooks#order-paid) |
| Failed | Indicates that the payment has failed.
If the payment has failed, you need to [create an authorisation transaction](/docs/api/payments/recurring-payments/cards/create-authorization-transaction) again. | [payment.failed](/docs/api/payments/recurring-payments/webhooks#payment-failed) |
## 2. Fetch Token Details
After the authorisation transaction is complete, a **token** is generated. The token securely stores the customer's wallet authorisation and represents their mandate.
You can retrieve token information using:
* [APIs](/docs/api/payments/recurring-payments/wallets/tokens)
* [Dashboard](/docs/payments/recurring-payments/create#3-search-for-the-token)
* [Webhooks](/docs/payments/recurring-payments/subscribe-to-webhooks#token-states)
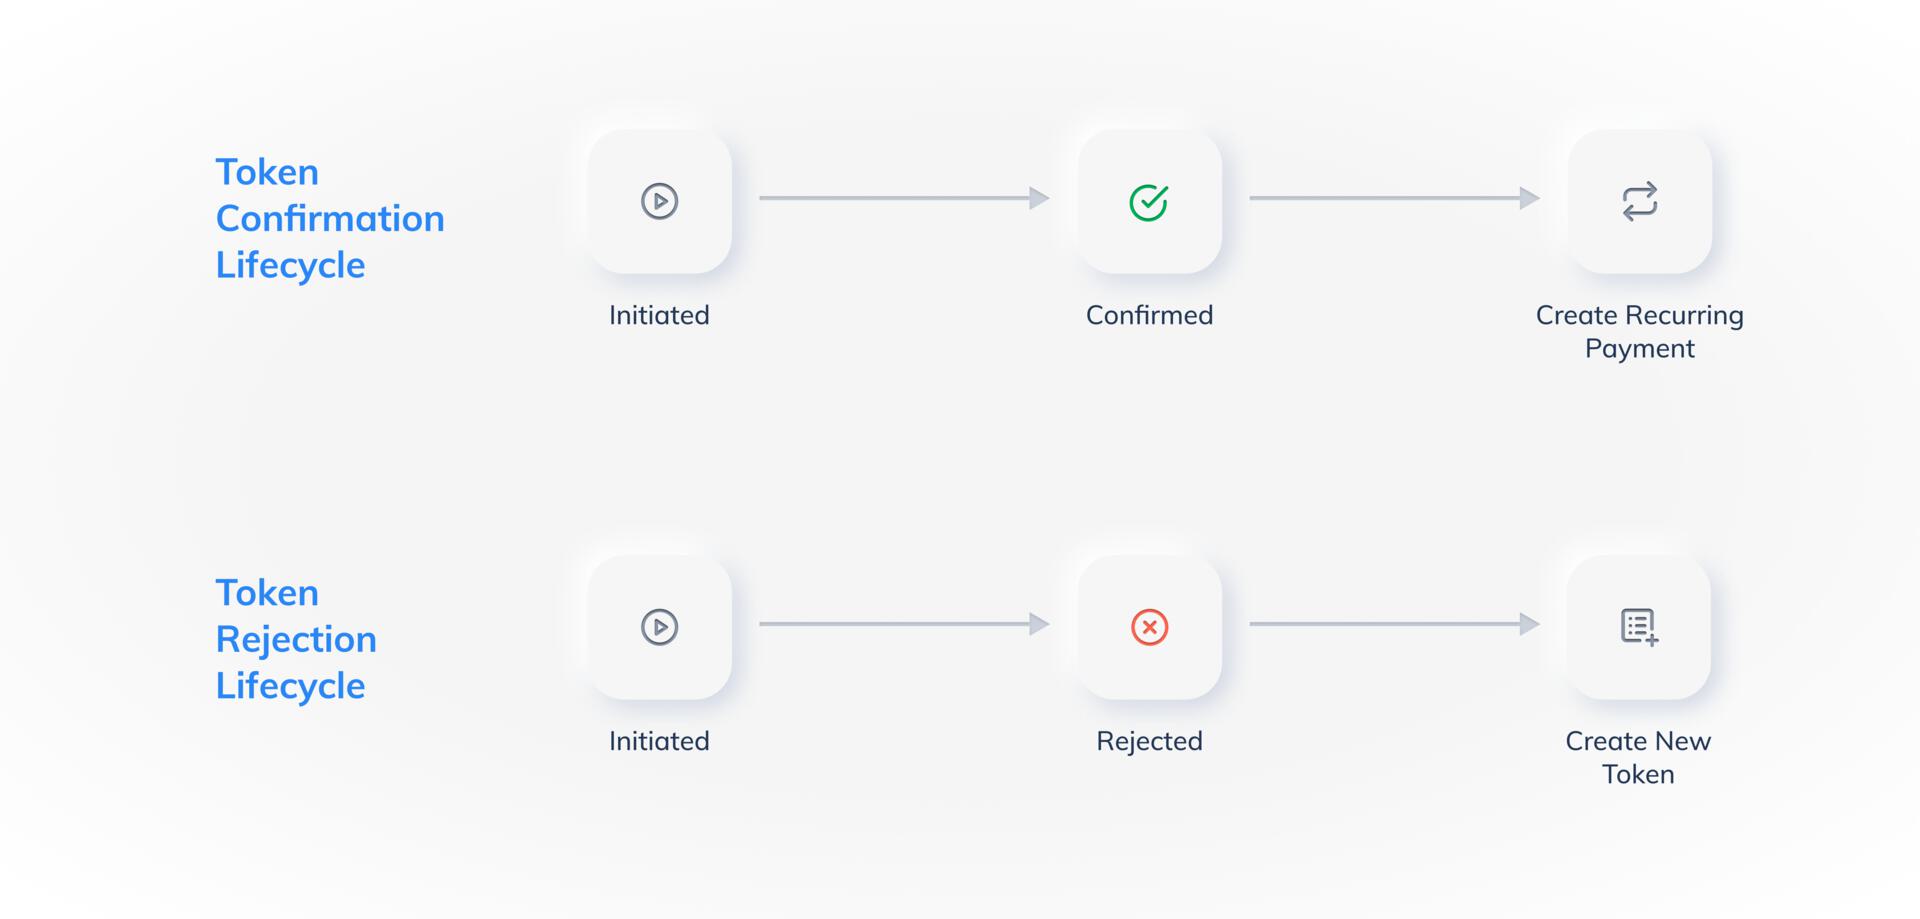
Tokens move through different states from creation to expiry:
| `token_status` | Description | Next Step |
| -------------- | --------------------------------------------------------------- | ------------------------------------------------------------------------------------------------------- |
| `initiated` | Indicates that the bank is processing the mandate registration. | Wait for the [token.confirmed](/docs/api/payments/recurring-payments/webhooks#token-confirmed) webhook. |
| `confirmed` | Indicates that the bank has completed the mandate registration. | [Create recurring payment](/docs/payments/recurring-payments/create) |
| `rejected` | Indicates that the mandate registration has failed. | Create the authorisation transaction again. |
| `cancelled` | Indicates that the token has been cancelled. | Create the authorisation transaction again if you want to charge the customer. |
| `paused` | Indicates that the token has been paused by your customer. | The token is inactive. Your customer has paused the token. Ask them to resume the token to charge them. |
## 3. Charge Customers
Once the token is in **confirmed** state, you can create recurring payments without customer intervention. Each subsequent payment requires you to create a new charge request.
**Important**
* Always ensure the charge amount does not exceed the `max_amount` specified during token creation. Charges exceeding this limit will fail.
* Ensure customers maintain sufficient balance in their Touch'n Go wallet for successful recurring charges.
### How to Charge Customers
**Step 1:** [**Find the Token**](/docs/payments/recurring-payments/create#3-search-for-the-token)
Use the Dashboard search to locate the customer's token. Verify the token status is **confirmed**.
**Step 2:** [**Create a Charge**](/docs/payments/recurring-payments/create#4-charge-the-token)
Click **Charge Token** and enter the payment amount. Razorpay automatically creates an order and processes the payment.
**Automatic Order Creation**
When charging via Dashboard, Razorpay automatically creates the order for you - no need to create it separately.
**Step 1:** [**Create an Order**](/docs/api/payments/recurring-payments/wallets/create-subsequent-payments#3-1-create-an-order-to-charge-the-customer)
Each subsequent payment must be associated with a unique order. This allows you to track payments and handle retries. Specify the charge amount, currency (MYR) and optional notes for tracking.
**Step 2:** [**Create a Recurring Payment**](/docs/api/payments/recurring-payments/wallets/create-subsequent-payments#3-2-create-a-recurring-payment)
Use the `token_id` to create a payment for the order. No customer action required. The payment is processed automatically against the customer's Touch'n Go wallet balance.
**Best Practice**
Set up webhooks to receive real-time notifications about payment status changes. This ensures you are immediately notified of successful or failed charges.
### Related Information
[List of Wallets APIs](/docs/payments/recurring-payments/wallets/apis)