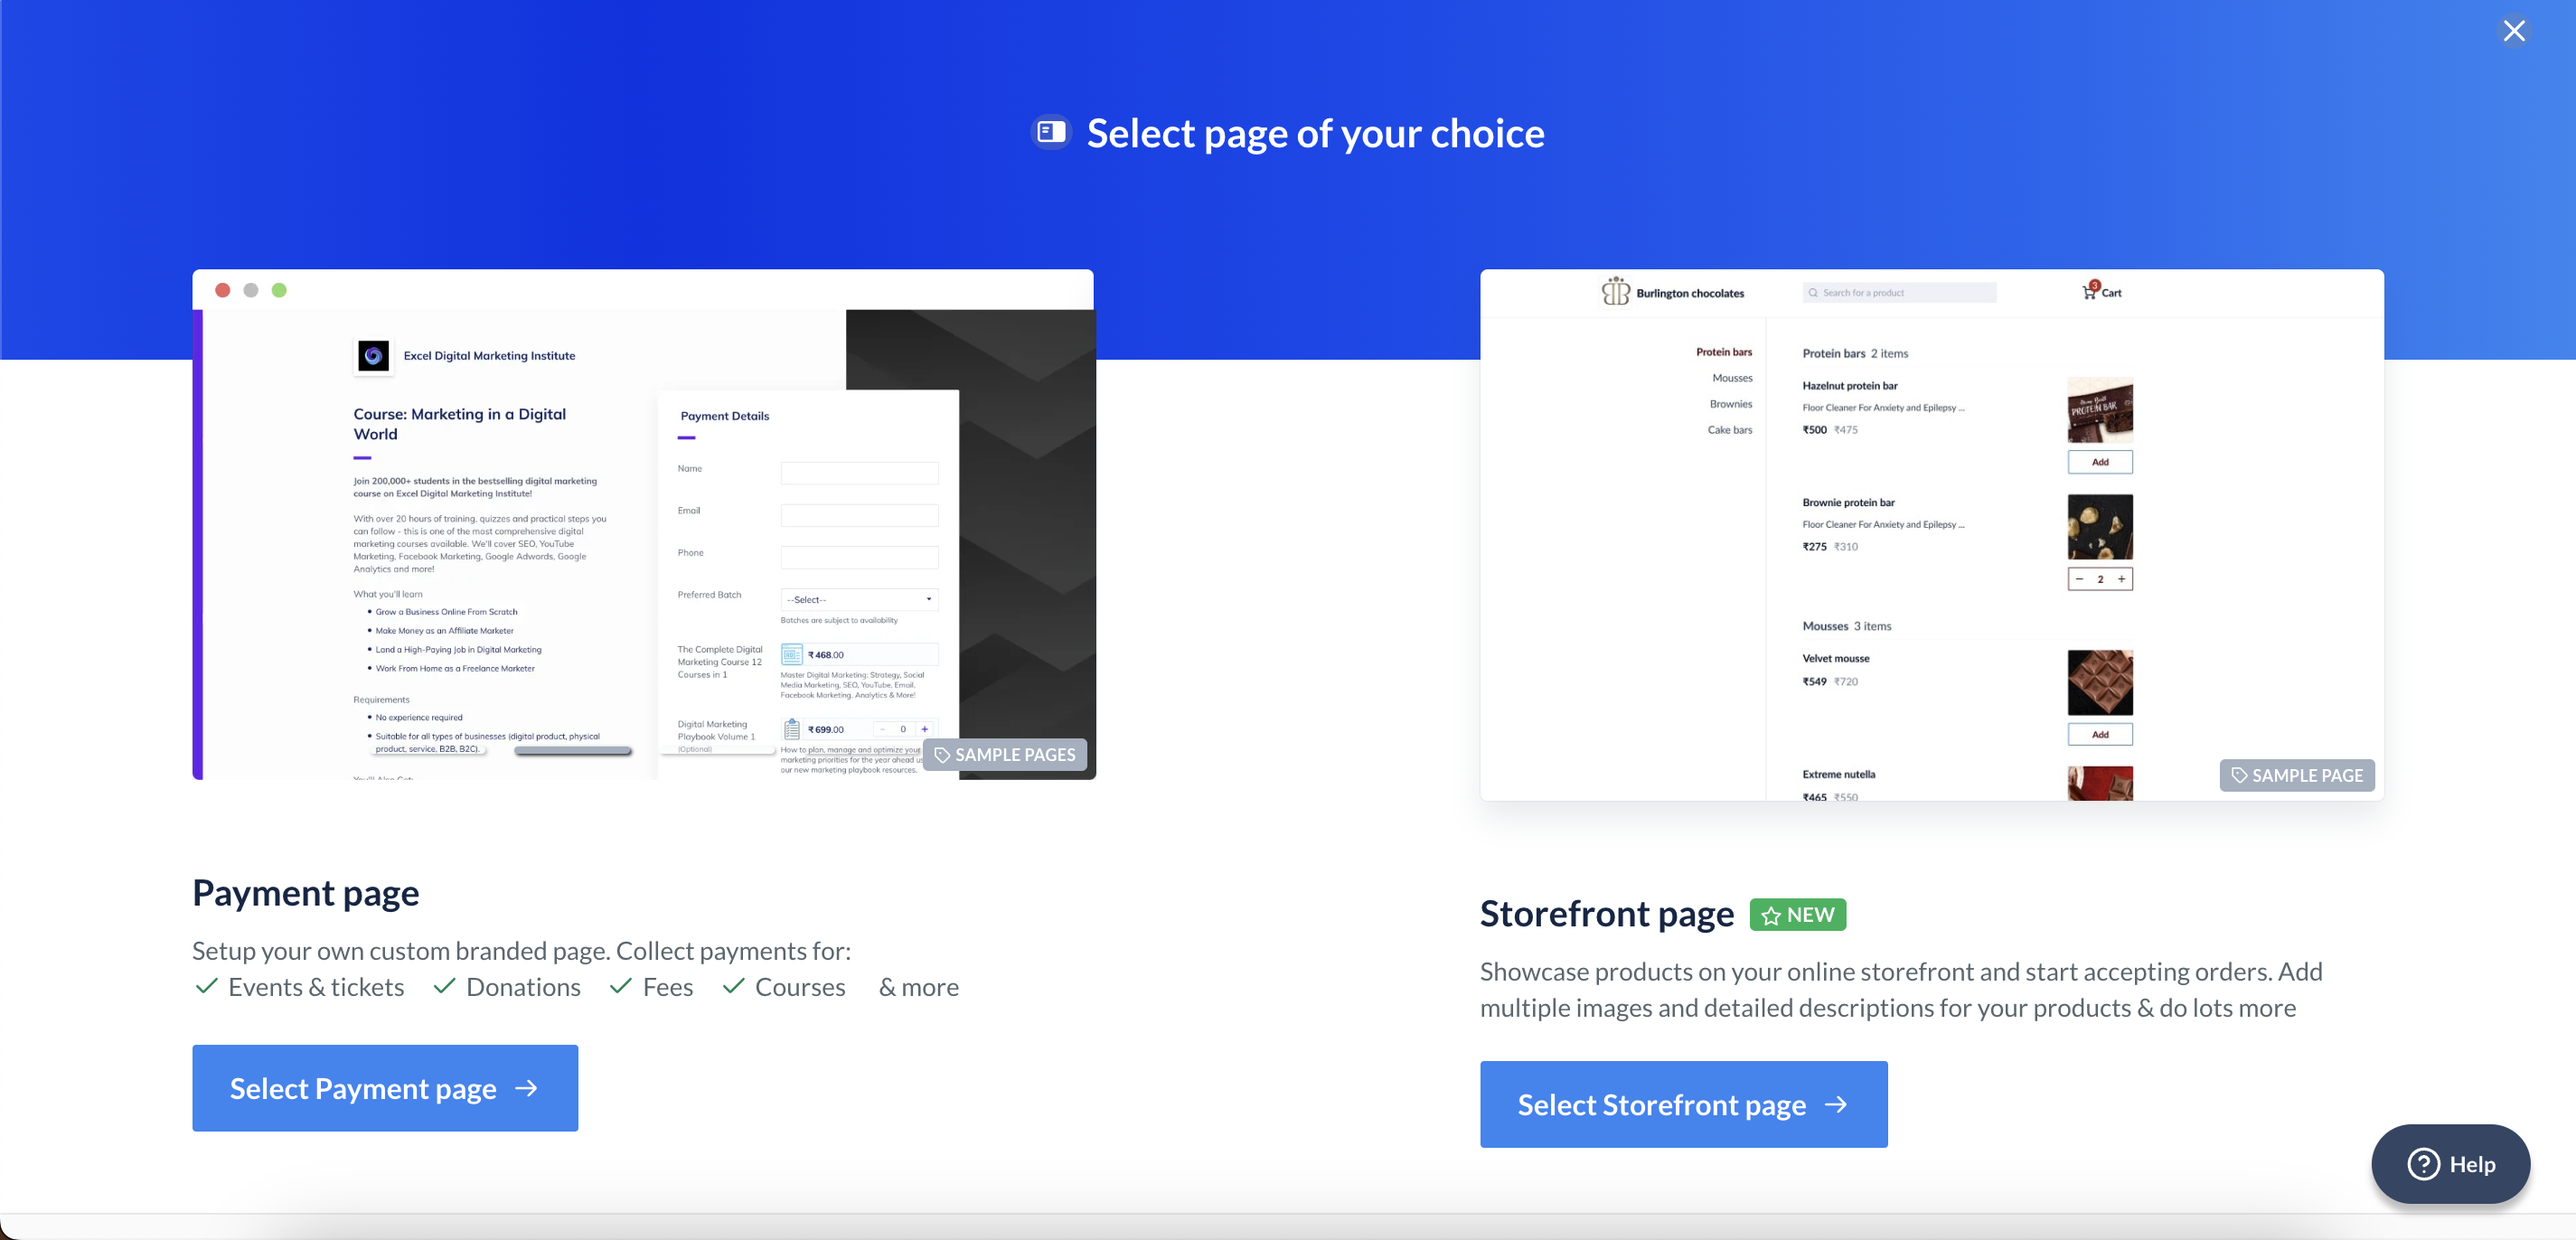
 3. Click **Add products to this page** and then click **Add a new product**.
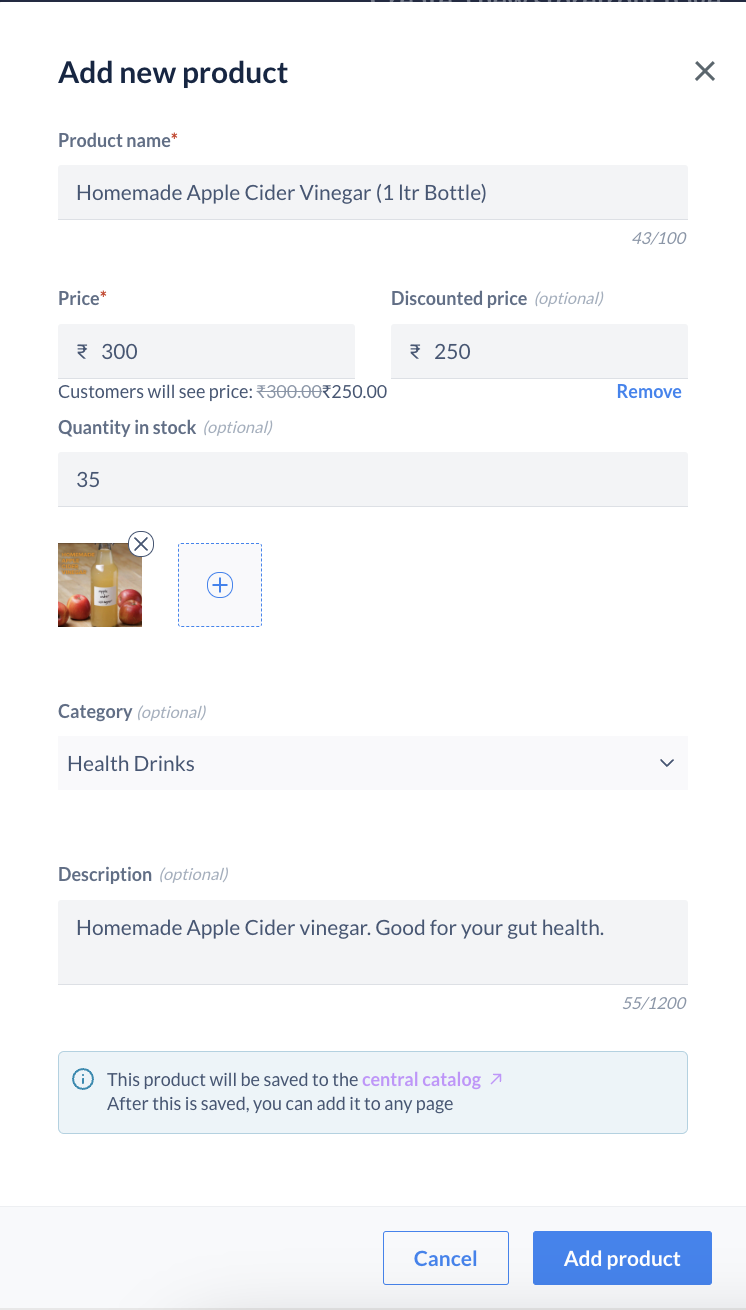
4. Add a **Product name**.
3. Click **Add products to this page** and then click **Add a new product**.
4. Add a **Product name**.
 6. Add **Quantity in stock** if you have a limited quantity.
7. You can also upload up to five product images.
8. You can also add your product to a Category:
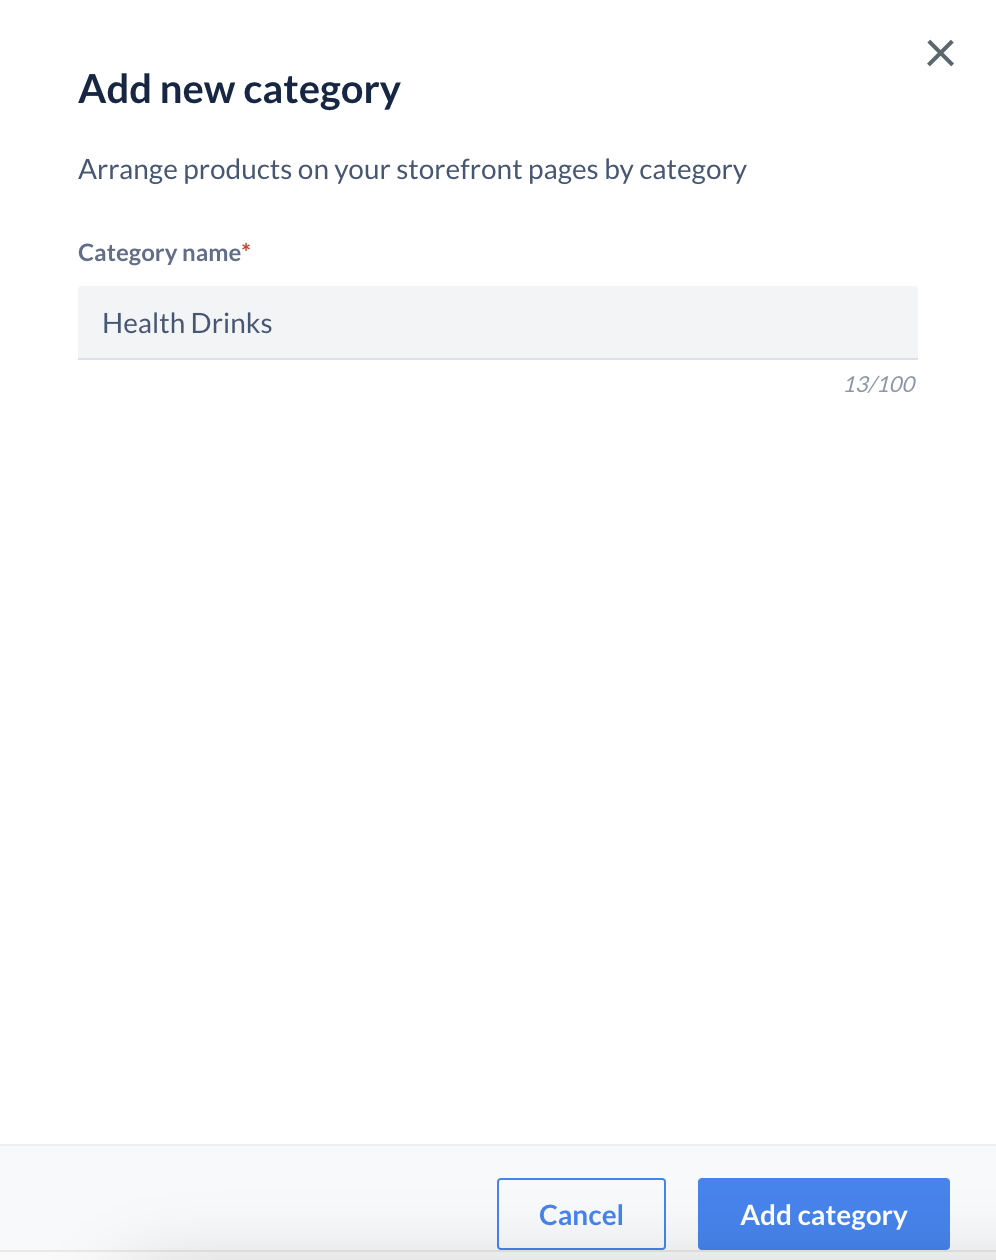
1. Click on the Category drop-down and click **+Create new category**.
2. Add a category name and click **Add category**.
6. Add **Quantity in stock** if you have a limited quantity.
7. You can also upload up to five product images.
8. You can also add your product to a Category:
1. Click on the Category drop-down and click **+Create new category**.
2. Add a category name and click **Add category**.
 9. Add a brief description for your product if needed and click **Add product**.
 ### Step 2: Add Business Details
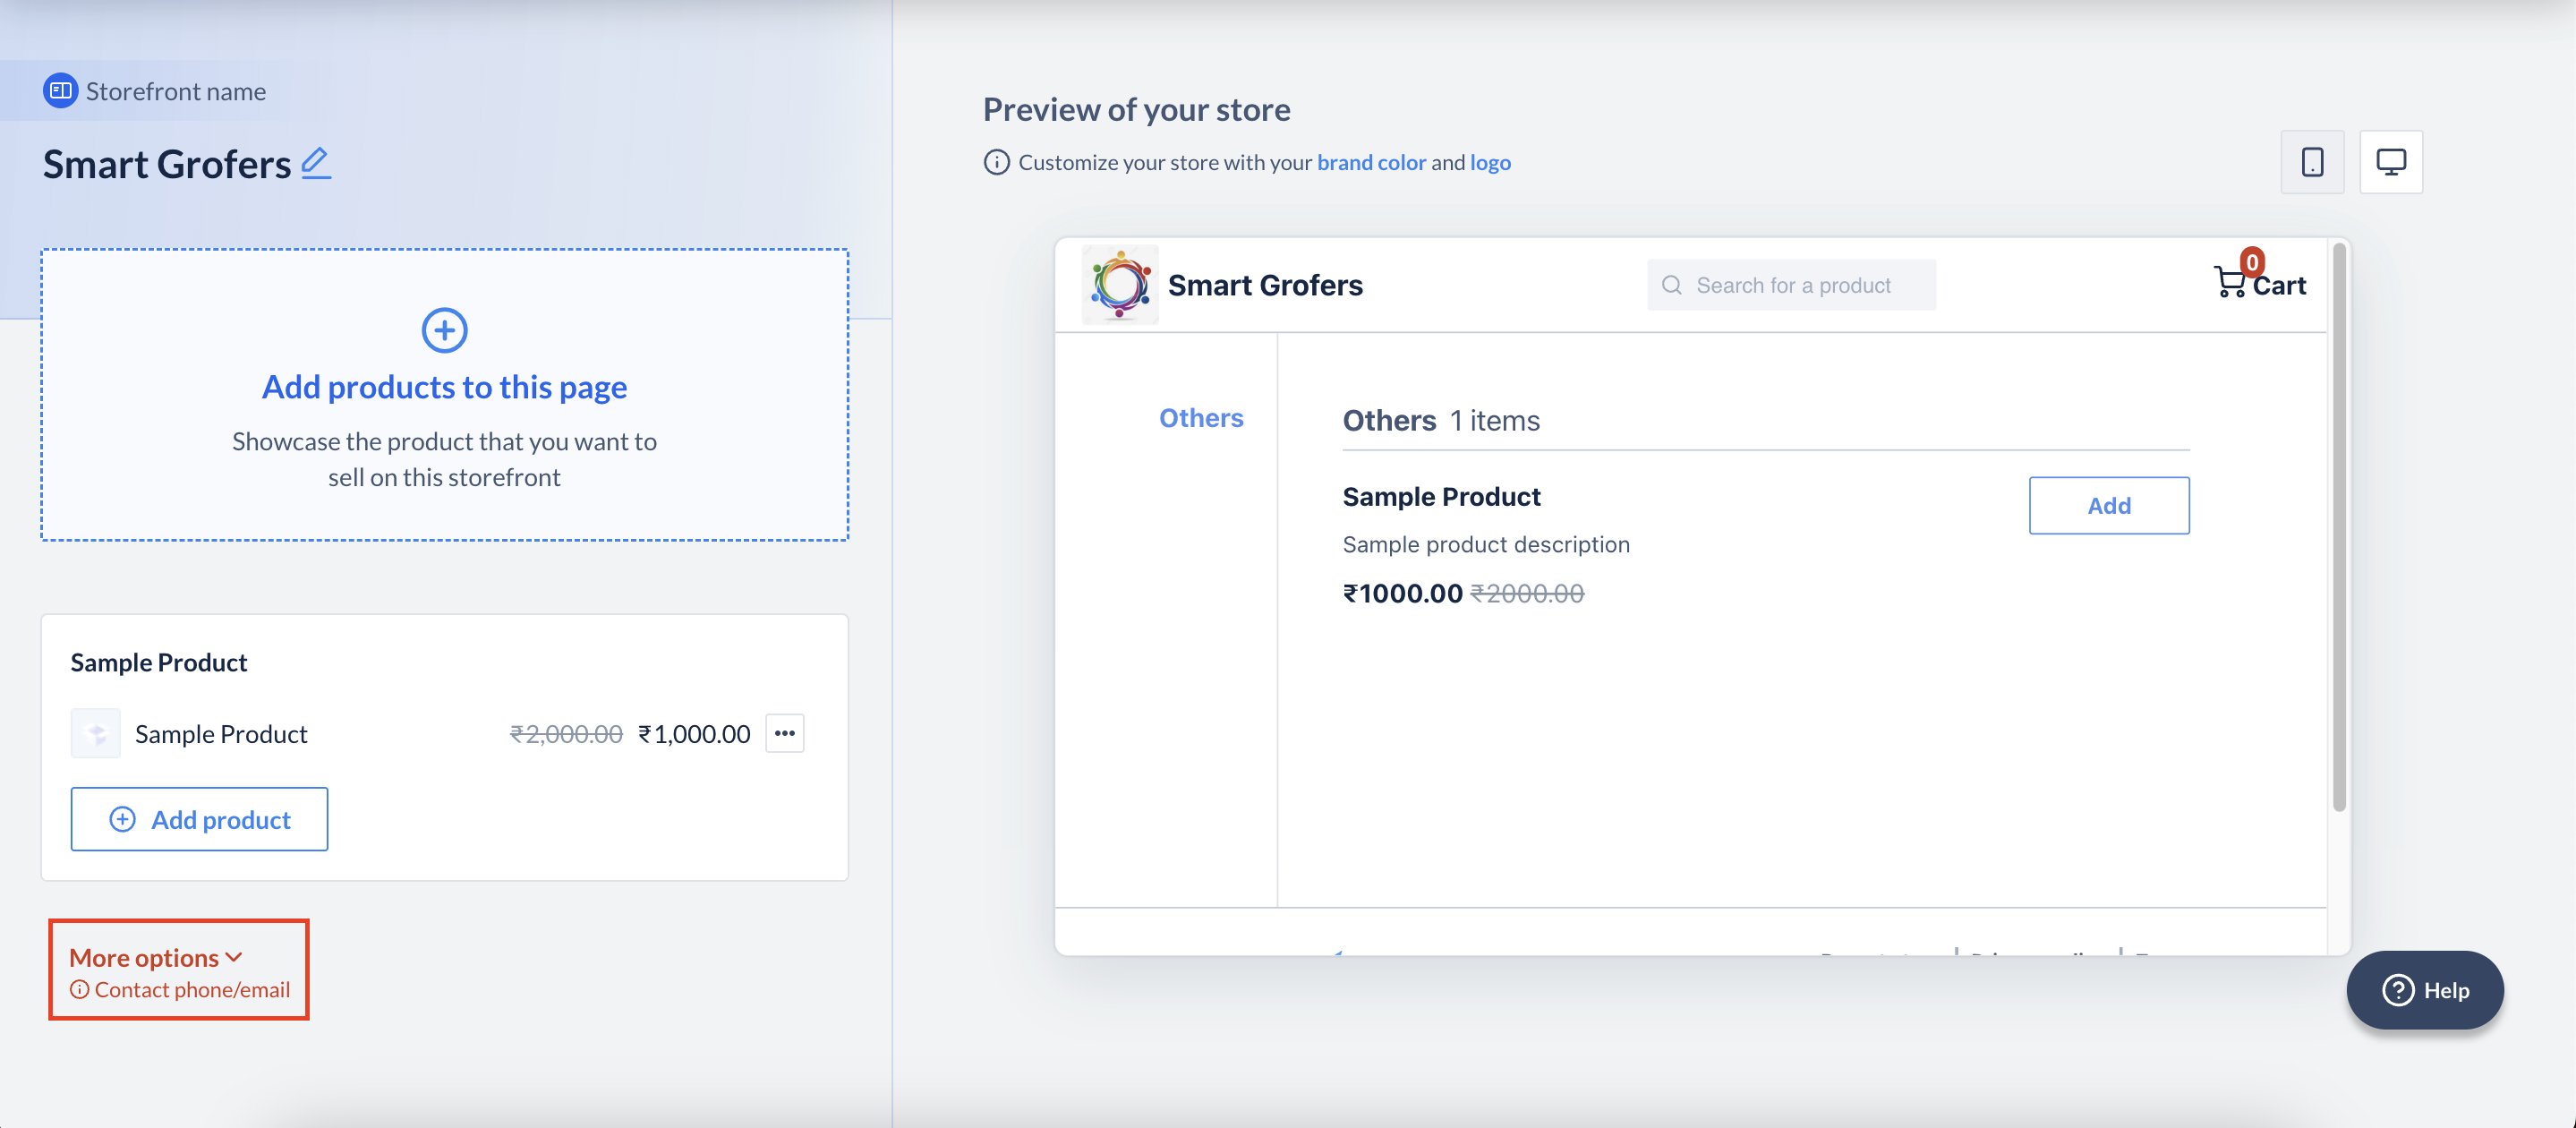
Add you contact details such as phone number and email in this section.
1. Click **More options**.
### Step 2: Add Business Details
Add you contact details such as phone number and email in this section.
1. Click **More options**.
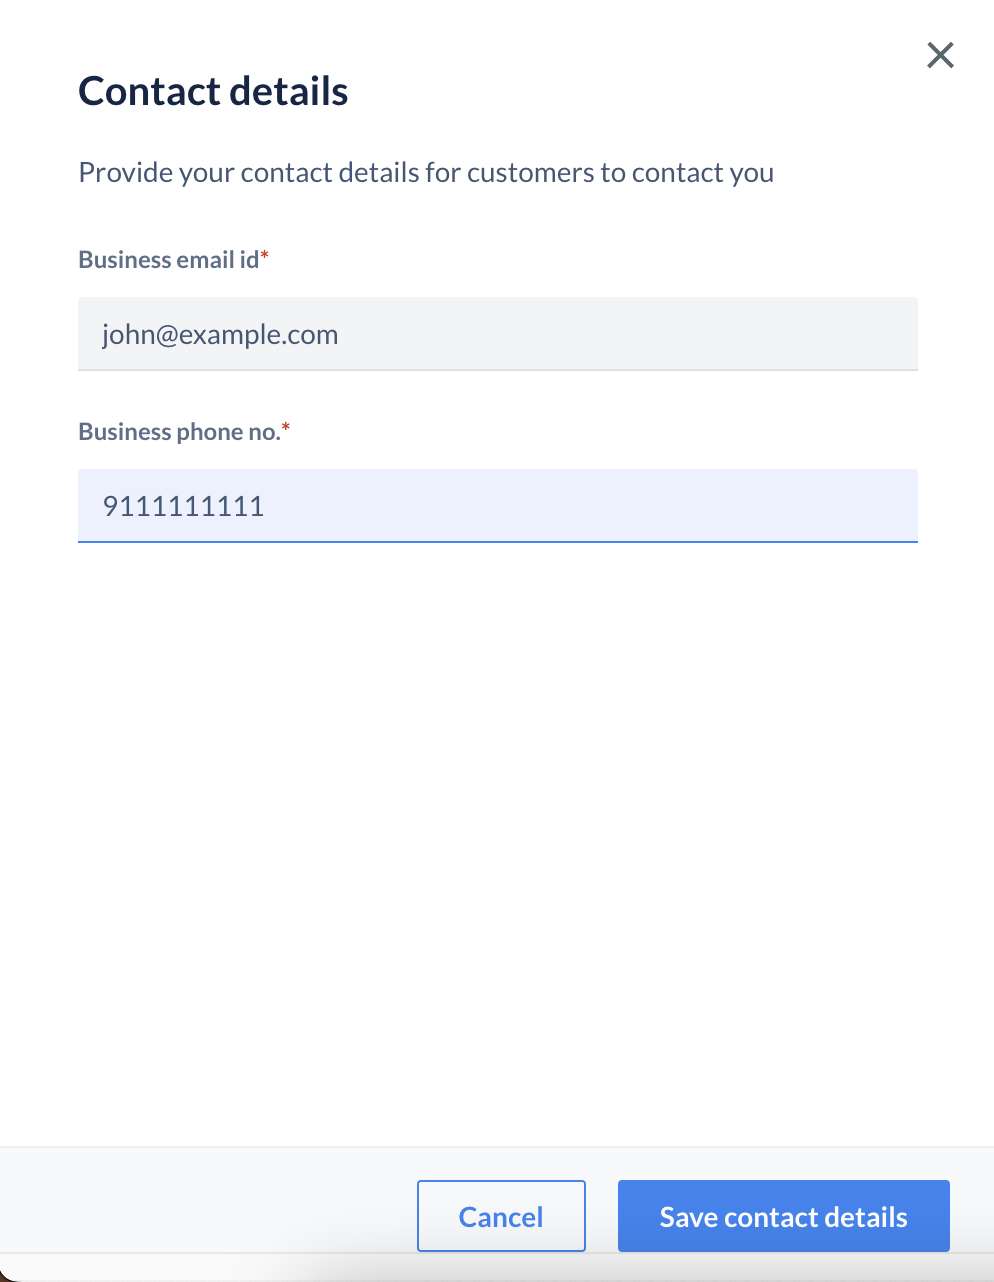
 2. Enter you **Business email id**.
3. Enter your **Business phone no.** and click **Save contact details**.
2. Enter you **Business email id**.
3. Enter your **Business phone no.** and click **Save contact details**.
 ### Step 3: Configure Page Settings
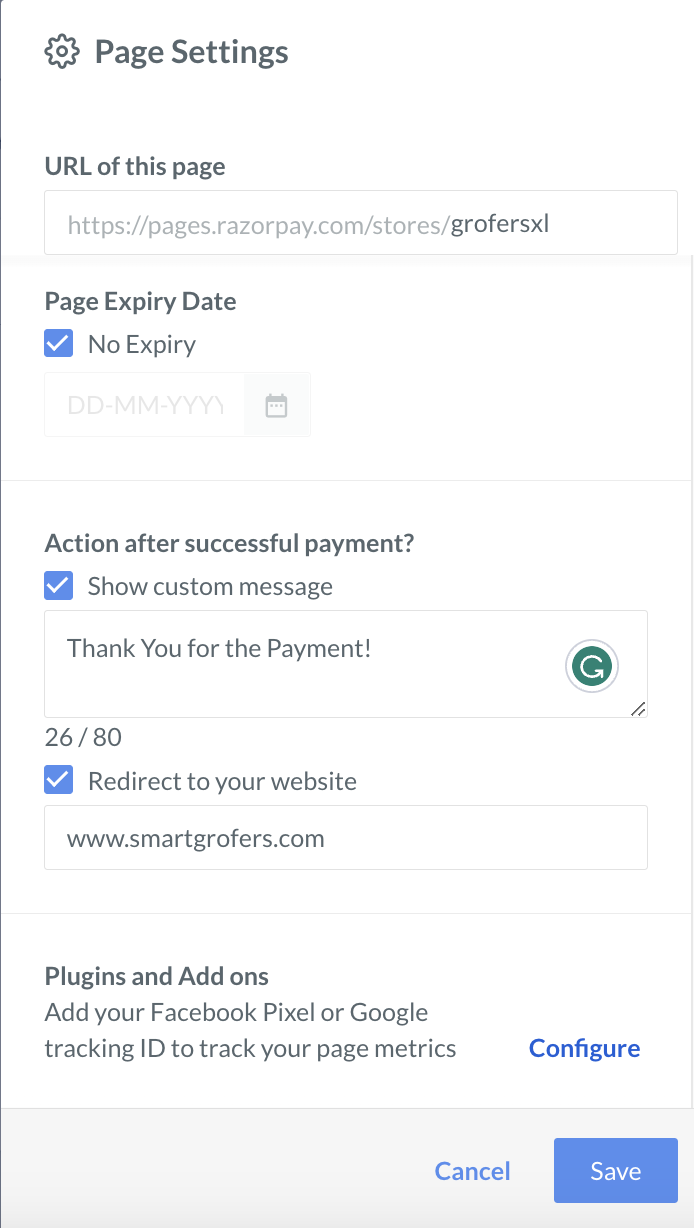
Customise your Webstore by adding a custom URL, adding an expiry date and so on through the **Page Settings** option.
1. Click **Page Settings**.
2. Add a unique URL slug in the **URL for this page** section.
### Step 3: Configure Page Settings
Customise your Webstore by adding a custom URL, adding an expiry date and so on through the **Page Settings** option.
1. Click **Page Settings**.
2. Add a unique URL slug in the **URL for this page** section.
 ### Step 4: Share and Start Accepting Payments
Share your Webstore with your customers and start accepting payments.
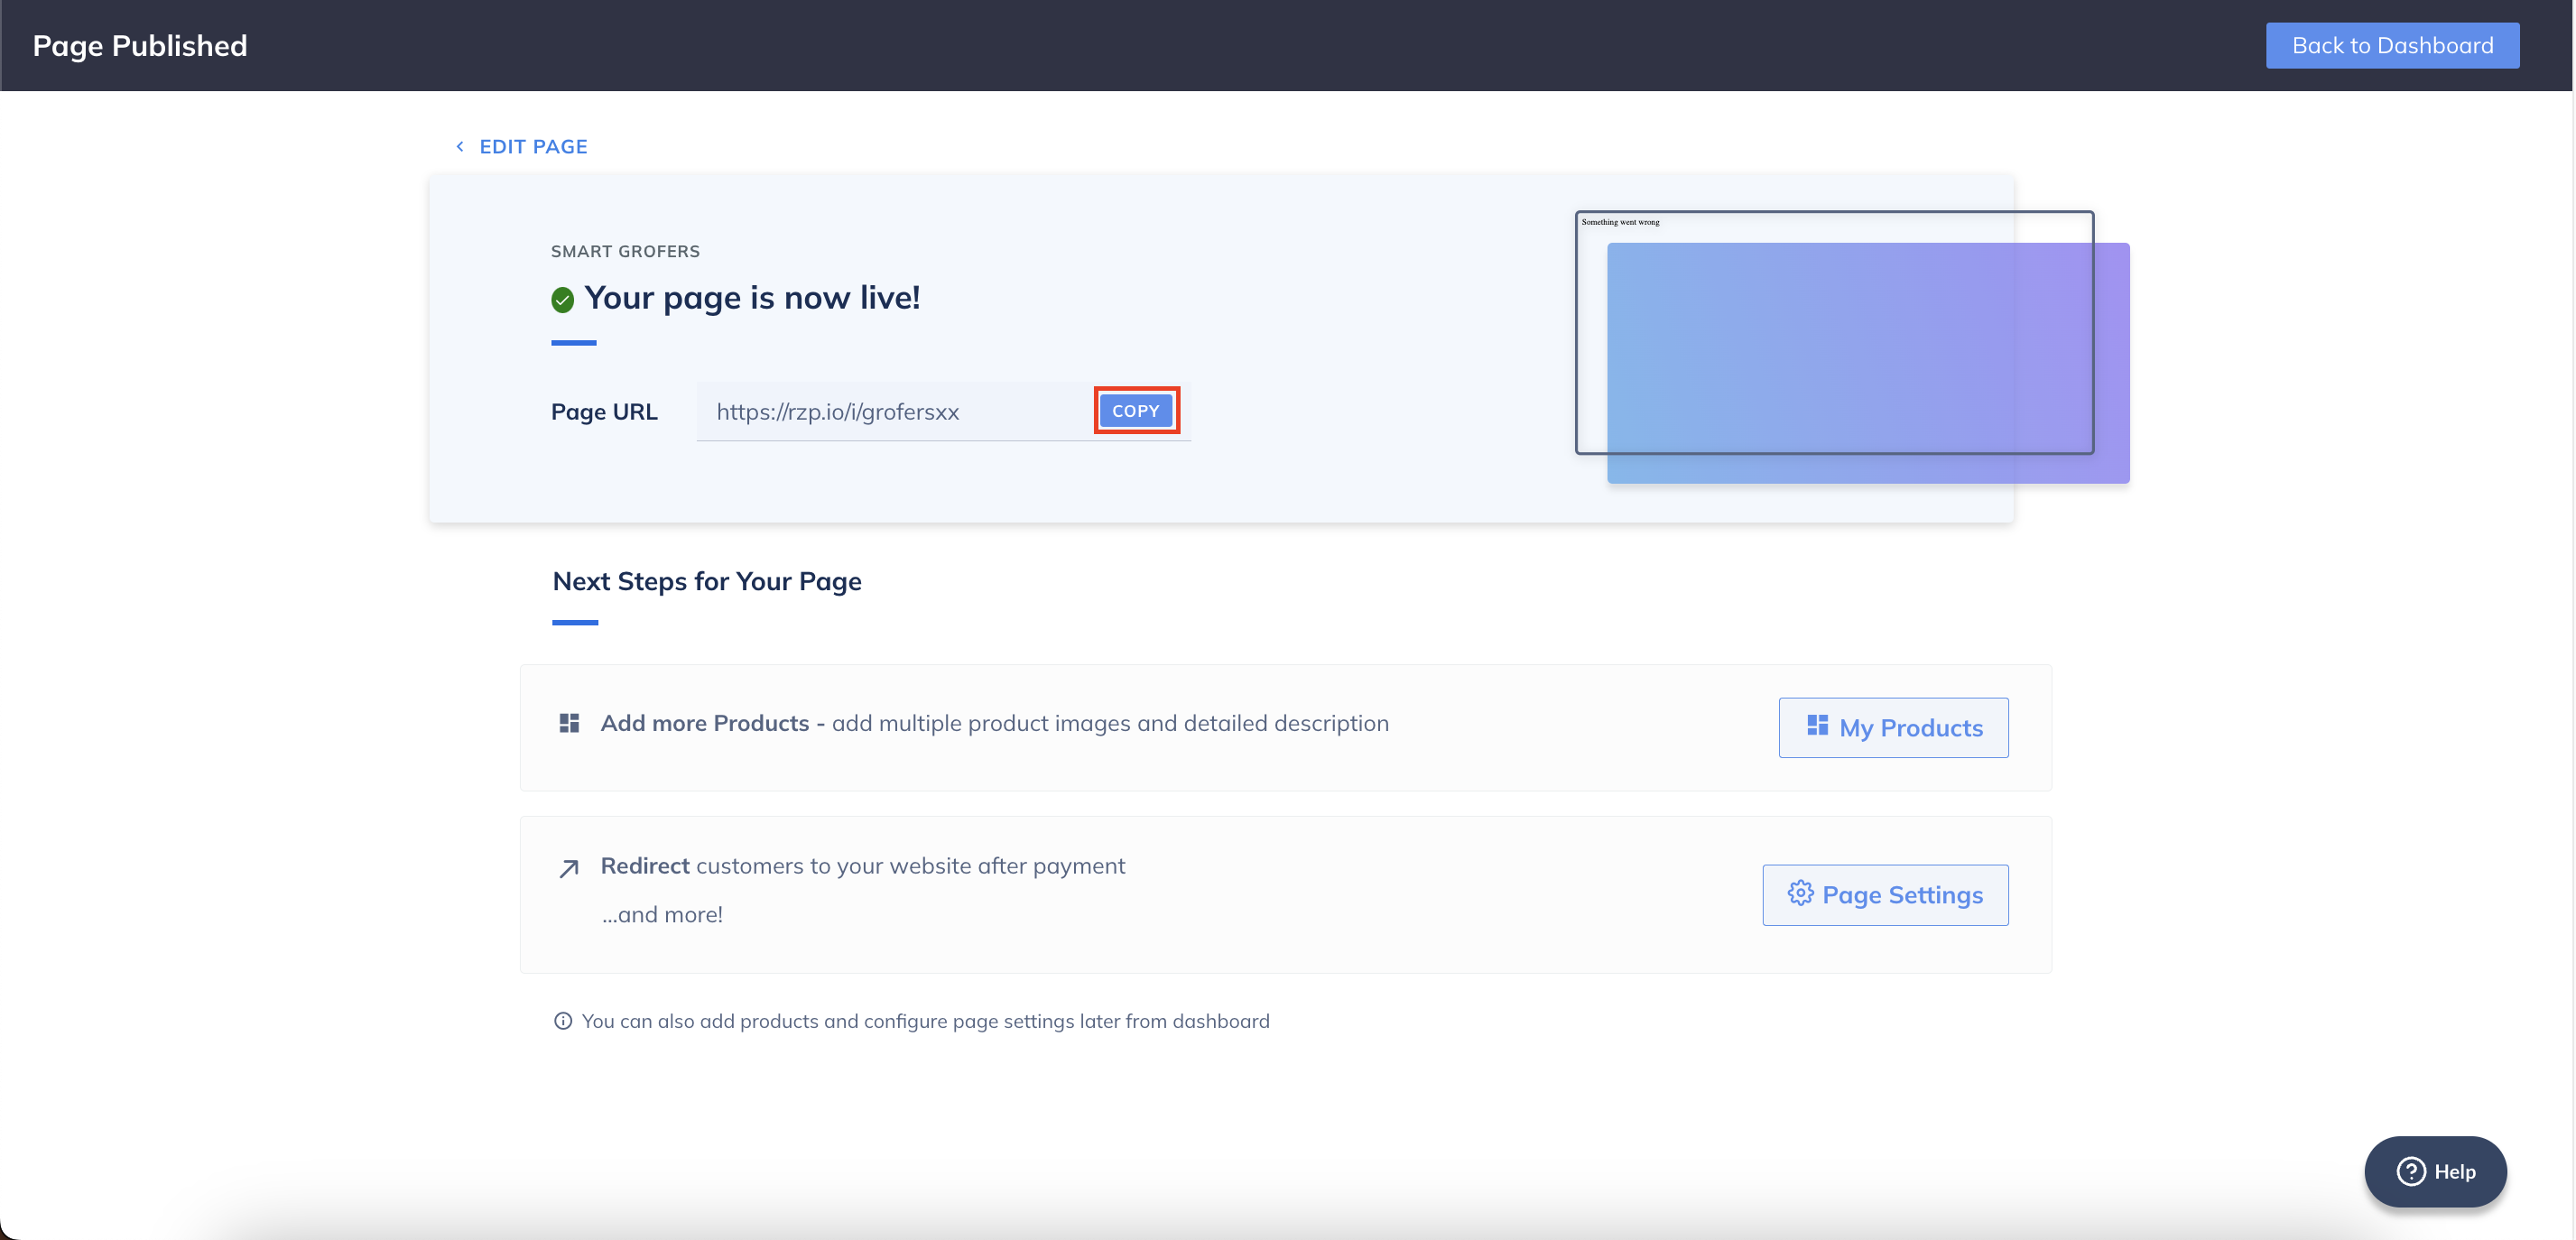
1. Click **Publish Page** to go live.
2. Click **Copy** to copy the URL to share with your customers. You can also find the URL on the Dashboard in the Webstore list.
### Step 4: Share and Start Accepting Payments
Share your Webstore with your customers and start accepting payments.
1. Click **Publish Page** to go live.
2. Click **Copy** to copy the URL to share with your customers. You can also find the URL on the Dashboard in the Webstore list.
 #### View Transaction Details on Dashboard
You can view the payments as and when they are made in the **Transactions** section.
1. Navigate to **Payment Pages** on the Dashboard and select **Razorpay Webstore**.
2. From the list, click the Webstore you wish to view.
3. Select the payment id you wish to check.
#### View Transaction Details on Dashboard
You can view the payments as and when they are made in the **Transactions** section.
1. Navigate to **Payment Pages** on the Dashboard and select **Razorpay Webstore**.
2. From the list, click the Webstore you wish to view.
3. Select the payment id you wish to check.
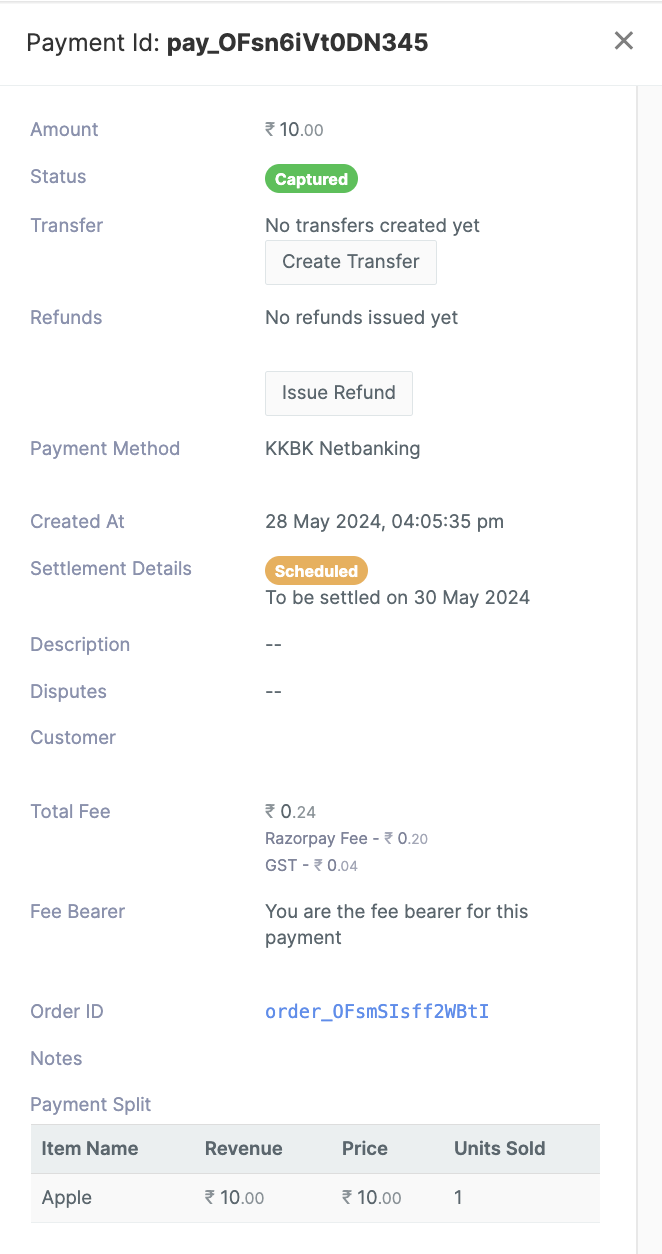
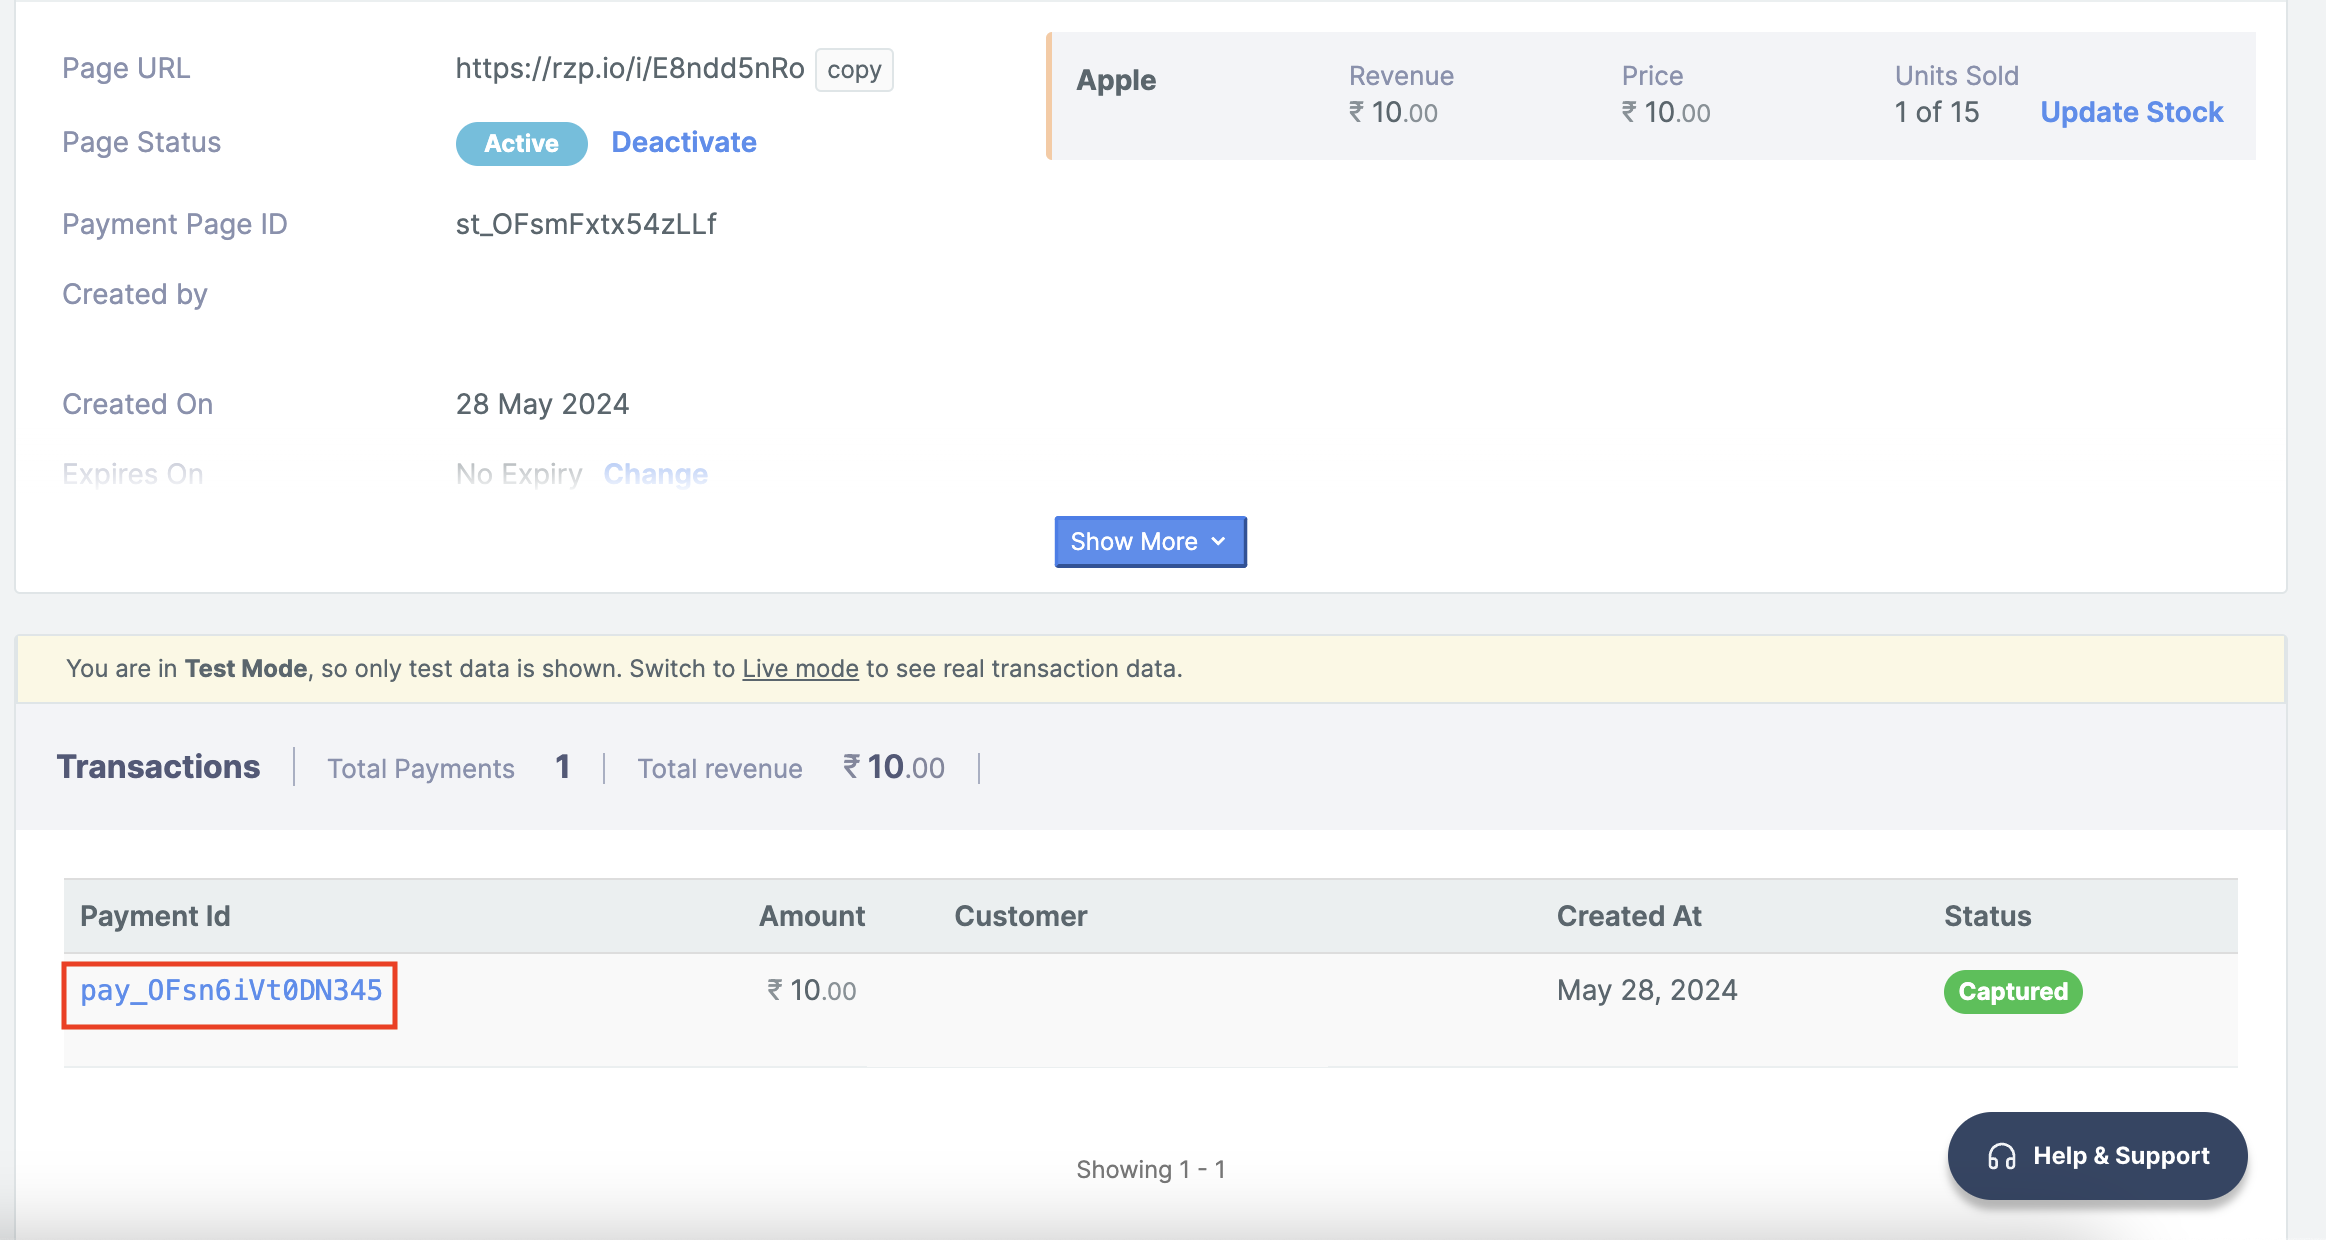 4. Once you open the payment id, you can check out the order details.
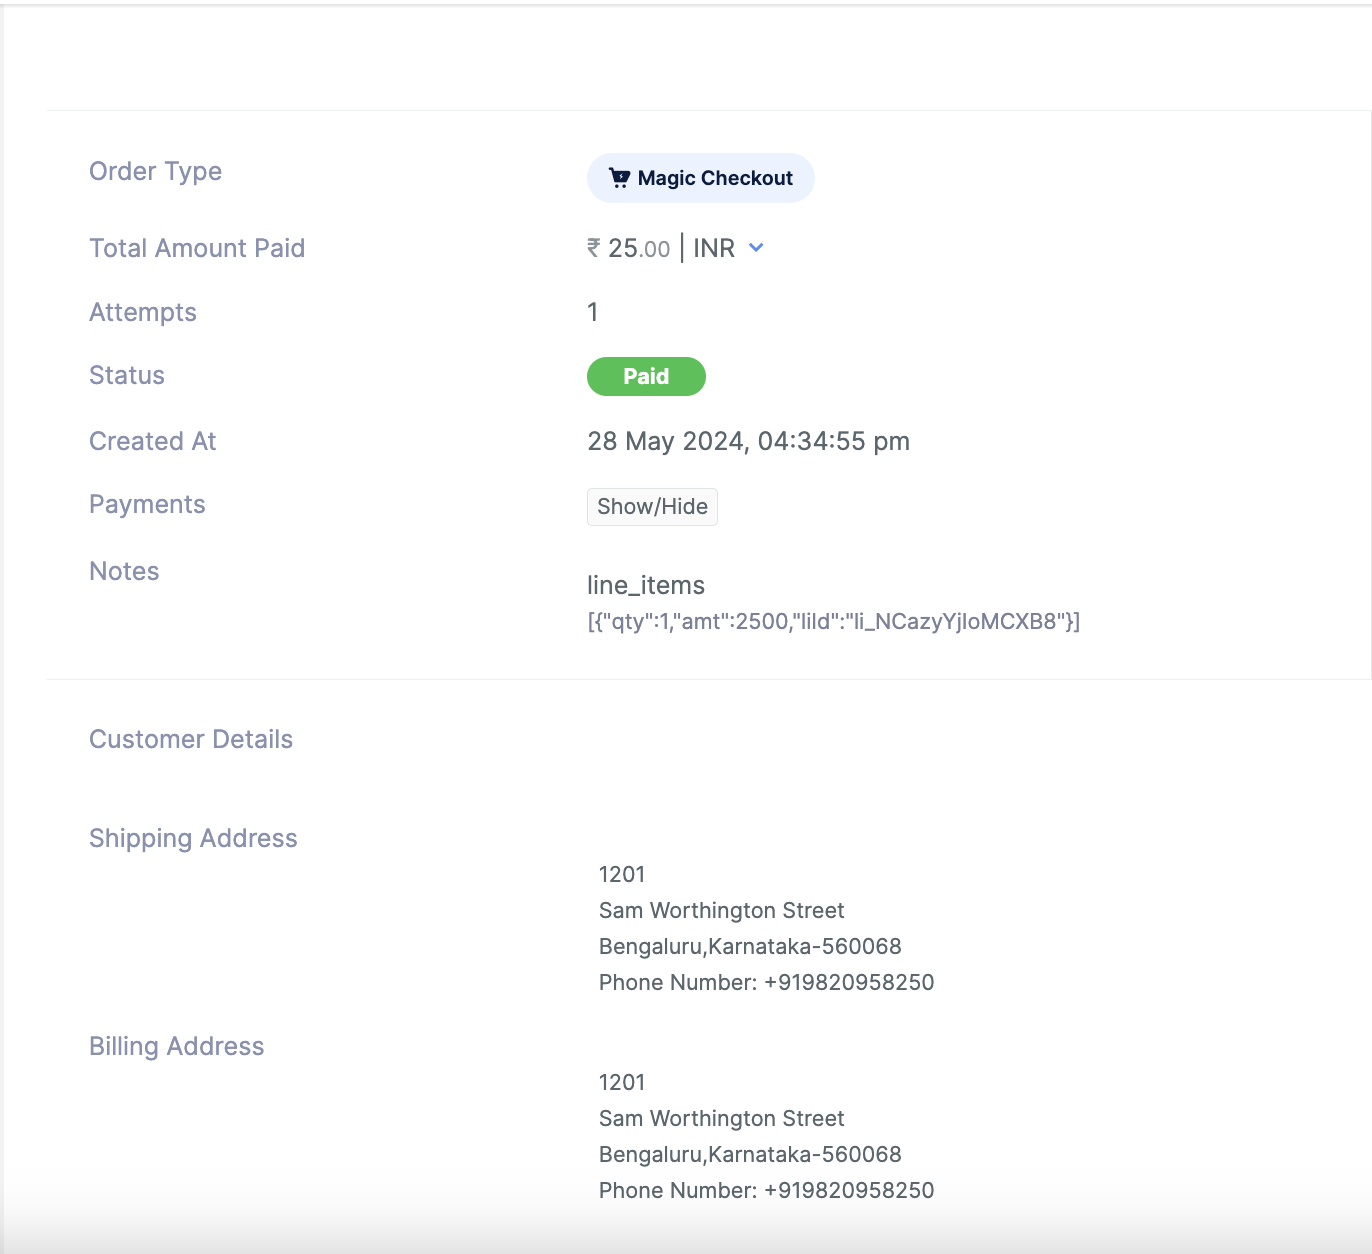
 5. Click the order id to view the address details of the customer.
 ### Related Information
* [About Razorpay Webstore](/docs/payments/webstore)
* [How Razorpay Webstore Works](/docs/payments/webstore/how-it-works)
* [Webstore States](/docs/payments/webstore/states)
* [Search for Webstore](/docs/payments/webstore/search)
* [Manage Webstore](/docs/payments/webstore/manage)
### Related Information
* [About Razorpay Webstore](/docs/payments/webstore)
* [How Razorpay Webstore Works](/docs/payments/webstore/how-it-works)
* [Webstore States](/docs/payments/webstore/states)
* [Search for Webstore](/docs/payments/webstore/search)
* [Manage Webstore](/docs/payments/webstore/manage)