> ## Documentation Index
> Fetch the complete documentation index at: https://razorpay-881012b3.mintlify.site/llms.txt
> Use this file to discover all available pages before exploring further.

# Integrate Razorpay Buyer Protection With Shopify

> Enhance your customers' shopping experience with Razorpay Buyer Protection widget on your Shopify website's product page.

<div style={{display:"flex",flexWrap:"wrap",alignItems:"center",gap:"0.35rem 0.9rem",border:"1px solid rgba(128,128,128,0.28)",borderRadius:"0.5rem",padding:"0.45rem 0.75rem",margin:"0 0 1.25rem",fontSize:"0.875rem"}}>
  <span style={{fontWeight:600}}>Available in</span>
  <span>🇮🇳 India</span>
</div>

<CardGroup cols={2}>
  <Card title="Razorpay Buyer Protection Widget on Shopify Changelog" href="/docs/payments/changelog#widgets">
    Discover new features, updates and deprecations related to RazorpayBuyer Protection Widget on Shopify (since Jan 2024).
  </Card>

  <Card title="Troubleshooting & FAQs" href="/docs/payments/widgets/buyer-protection/faqs">
    Find answers to frequently asked questions about Razorpay Buyer Protection.
  </Card>
</CardGroup>

Integrate Razorpay Buyer Protection widget into your Shopify website's product pages.

**Before you proceed:**

* Sign up for a [Razorpay account](https://dashboard.razorpay.com/signup).
* Log in to the Dashboard and [generate the API keys](/docs/api/authentication#generate-api-keys) in Live mode.
* Sign up for a [Shopify account](https://www.shopify.in).

<Info>
  **Feature Request**

  This is an on-demand feature. Fill in the [form](https://razorpay.typeform.com/to/YpJfvpE6#name=xxxxx) or raise a request with our [support team](https://razorpay.com/support/) to get this feature enabled on your account.
</Info>

Follow these integration steps:

<CardGroup cols={3}>
  <Card title="1. Build Integration" href="/docs/payments/widgets/buyer-protection/shopify#1-build-integration">
    Integrate Buyer Protection Widget
  </Card>

  <Card title="2. Test Integration" href="/docs/payments/widgets/buyer-protection/shopify#2-test-integration">
    Test the integration by making a test payment.
  </Card>

  <Card title="3. Go-live Checklist" href="/docs/payments/widgets/buyer-protection/shopify#3-go-live-checklist">
    Check the go-live checklist.
  </Card>
</CardGroup>

<AccordionGroup>
  <Accordion title="Video Tutorial">
    Watch this video to know how to integrate Razorpay Buyer Protection Widget on your Shopify Store.

    <iframe width="560" height="315" src="https://www.youtube.com/embed/Lyangg3UhXg?si=jk_5nrkVcwMixdRc" title="Buyer Protection Widget Shopify Store" frameBorder="0" allow="accelerometer; autoplay; clipboard-write; encrypted-media; gyroscope; picture-in-picture" allowFullScreen />
  </Accordion>
</AccordionGroup>

## 1. Build Integration

Follow the steps given below:

1. Log in to your [Shopify account](https://www.shopify.in).
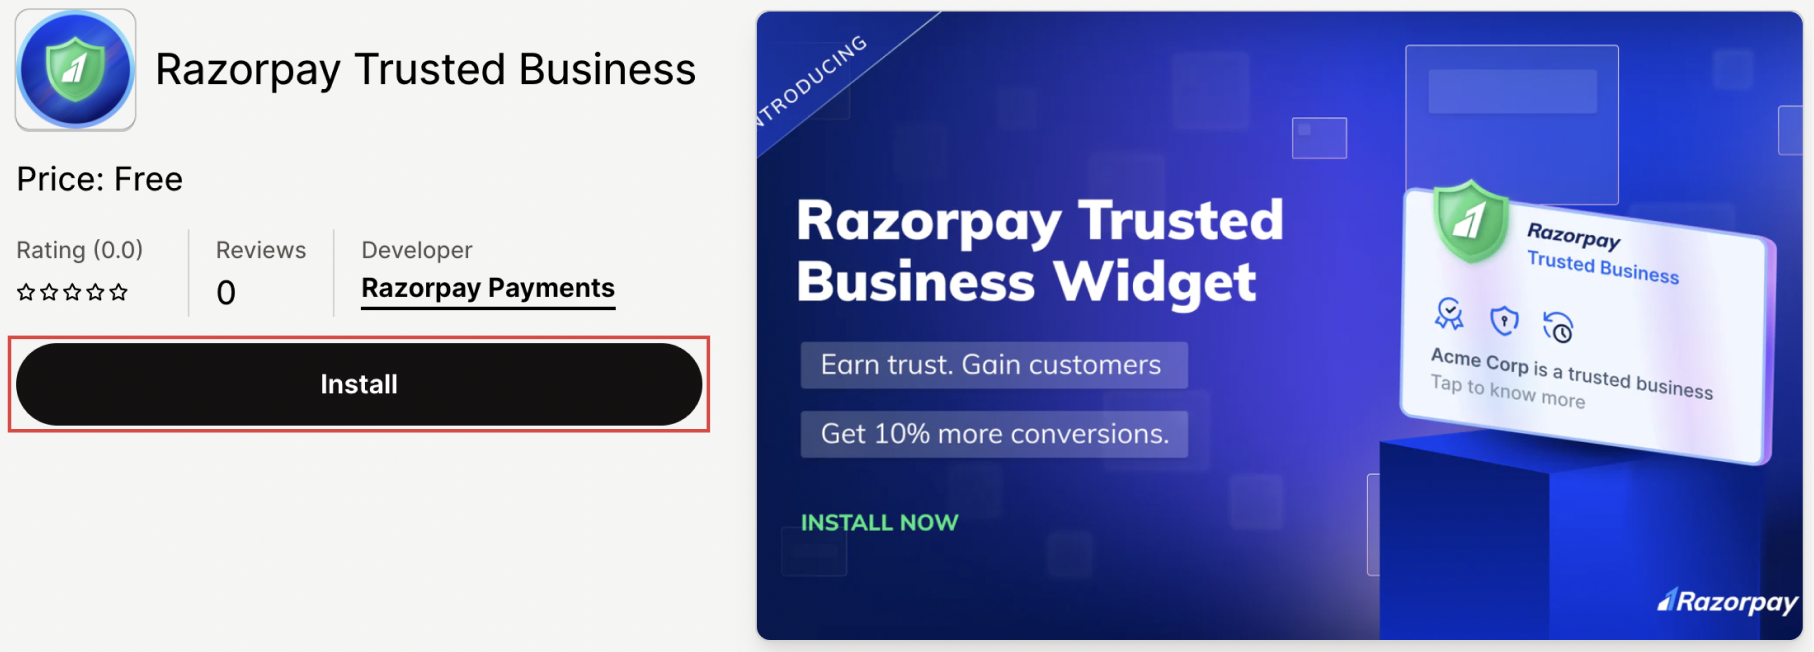
2. Search for Razorpay Trusted Business or install the app directly from the [Shopify app store](https://apps.shopify.com/razorpay-trusted-badges).
   <img src="https://razorpay.com/docs/build/browser/assets/images/shopify-rtb-app-install.jpg" class="click-zoom" alt="Shopify RTB App Install" width="600" />

<Info>
  **Handy Tips**

  * If you have multiple stores, select the store for which you want to install the Razorpay Trusted Business.
  * In case you have already installed the app, navigate to **Apps** and search for **Razorpay Trusted Business** on the Shopify Dashboard.
</Info>

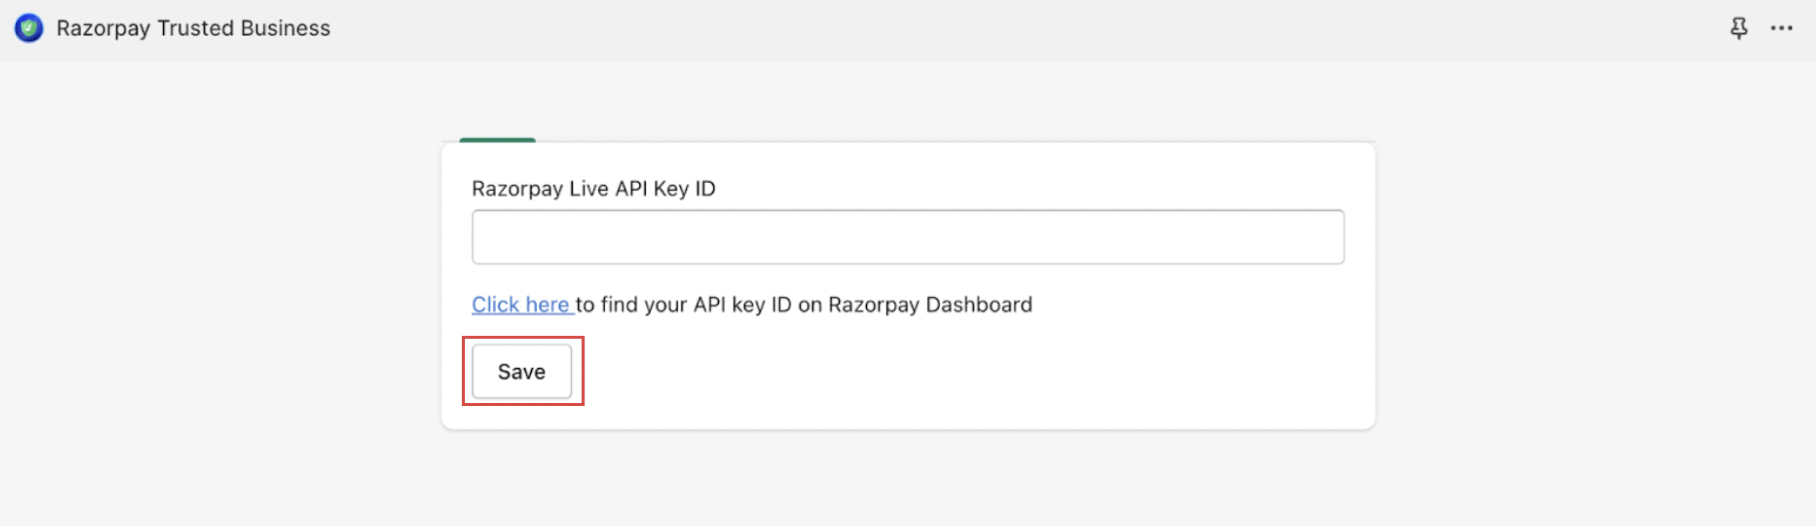
3. After installing the app, you will be directed to your Shopify store. Enter your Razorpay Live API Key ID and click **Save**. This step is necessary to verify your eligibility for the widget. Know how to [generate API Keys](/docs/api/authentication#generate-api-keys) from the Dashboard.
   <img src="https://razorpay.com/docs/build/browser/assets/images/live-api-key-id.jpg" class="click-zoom" alt="Live api key id" width="600" />

<Info>
  **Handy Tips**

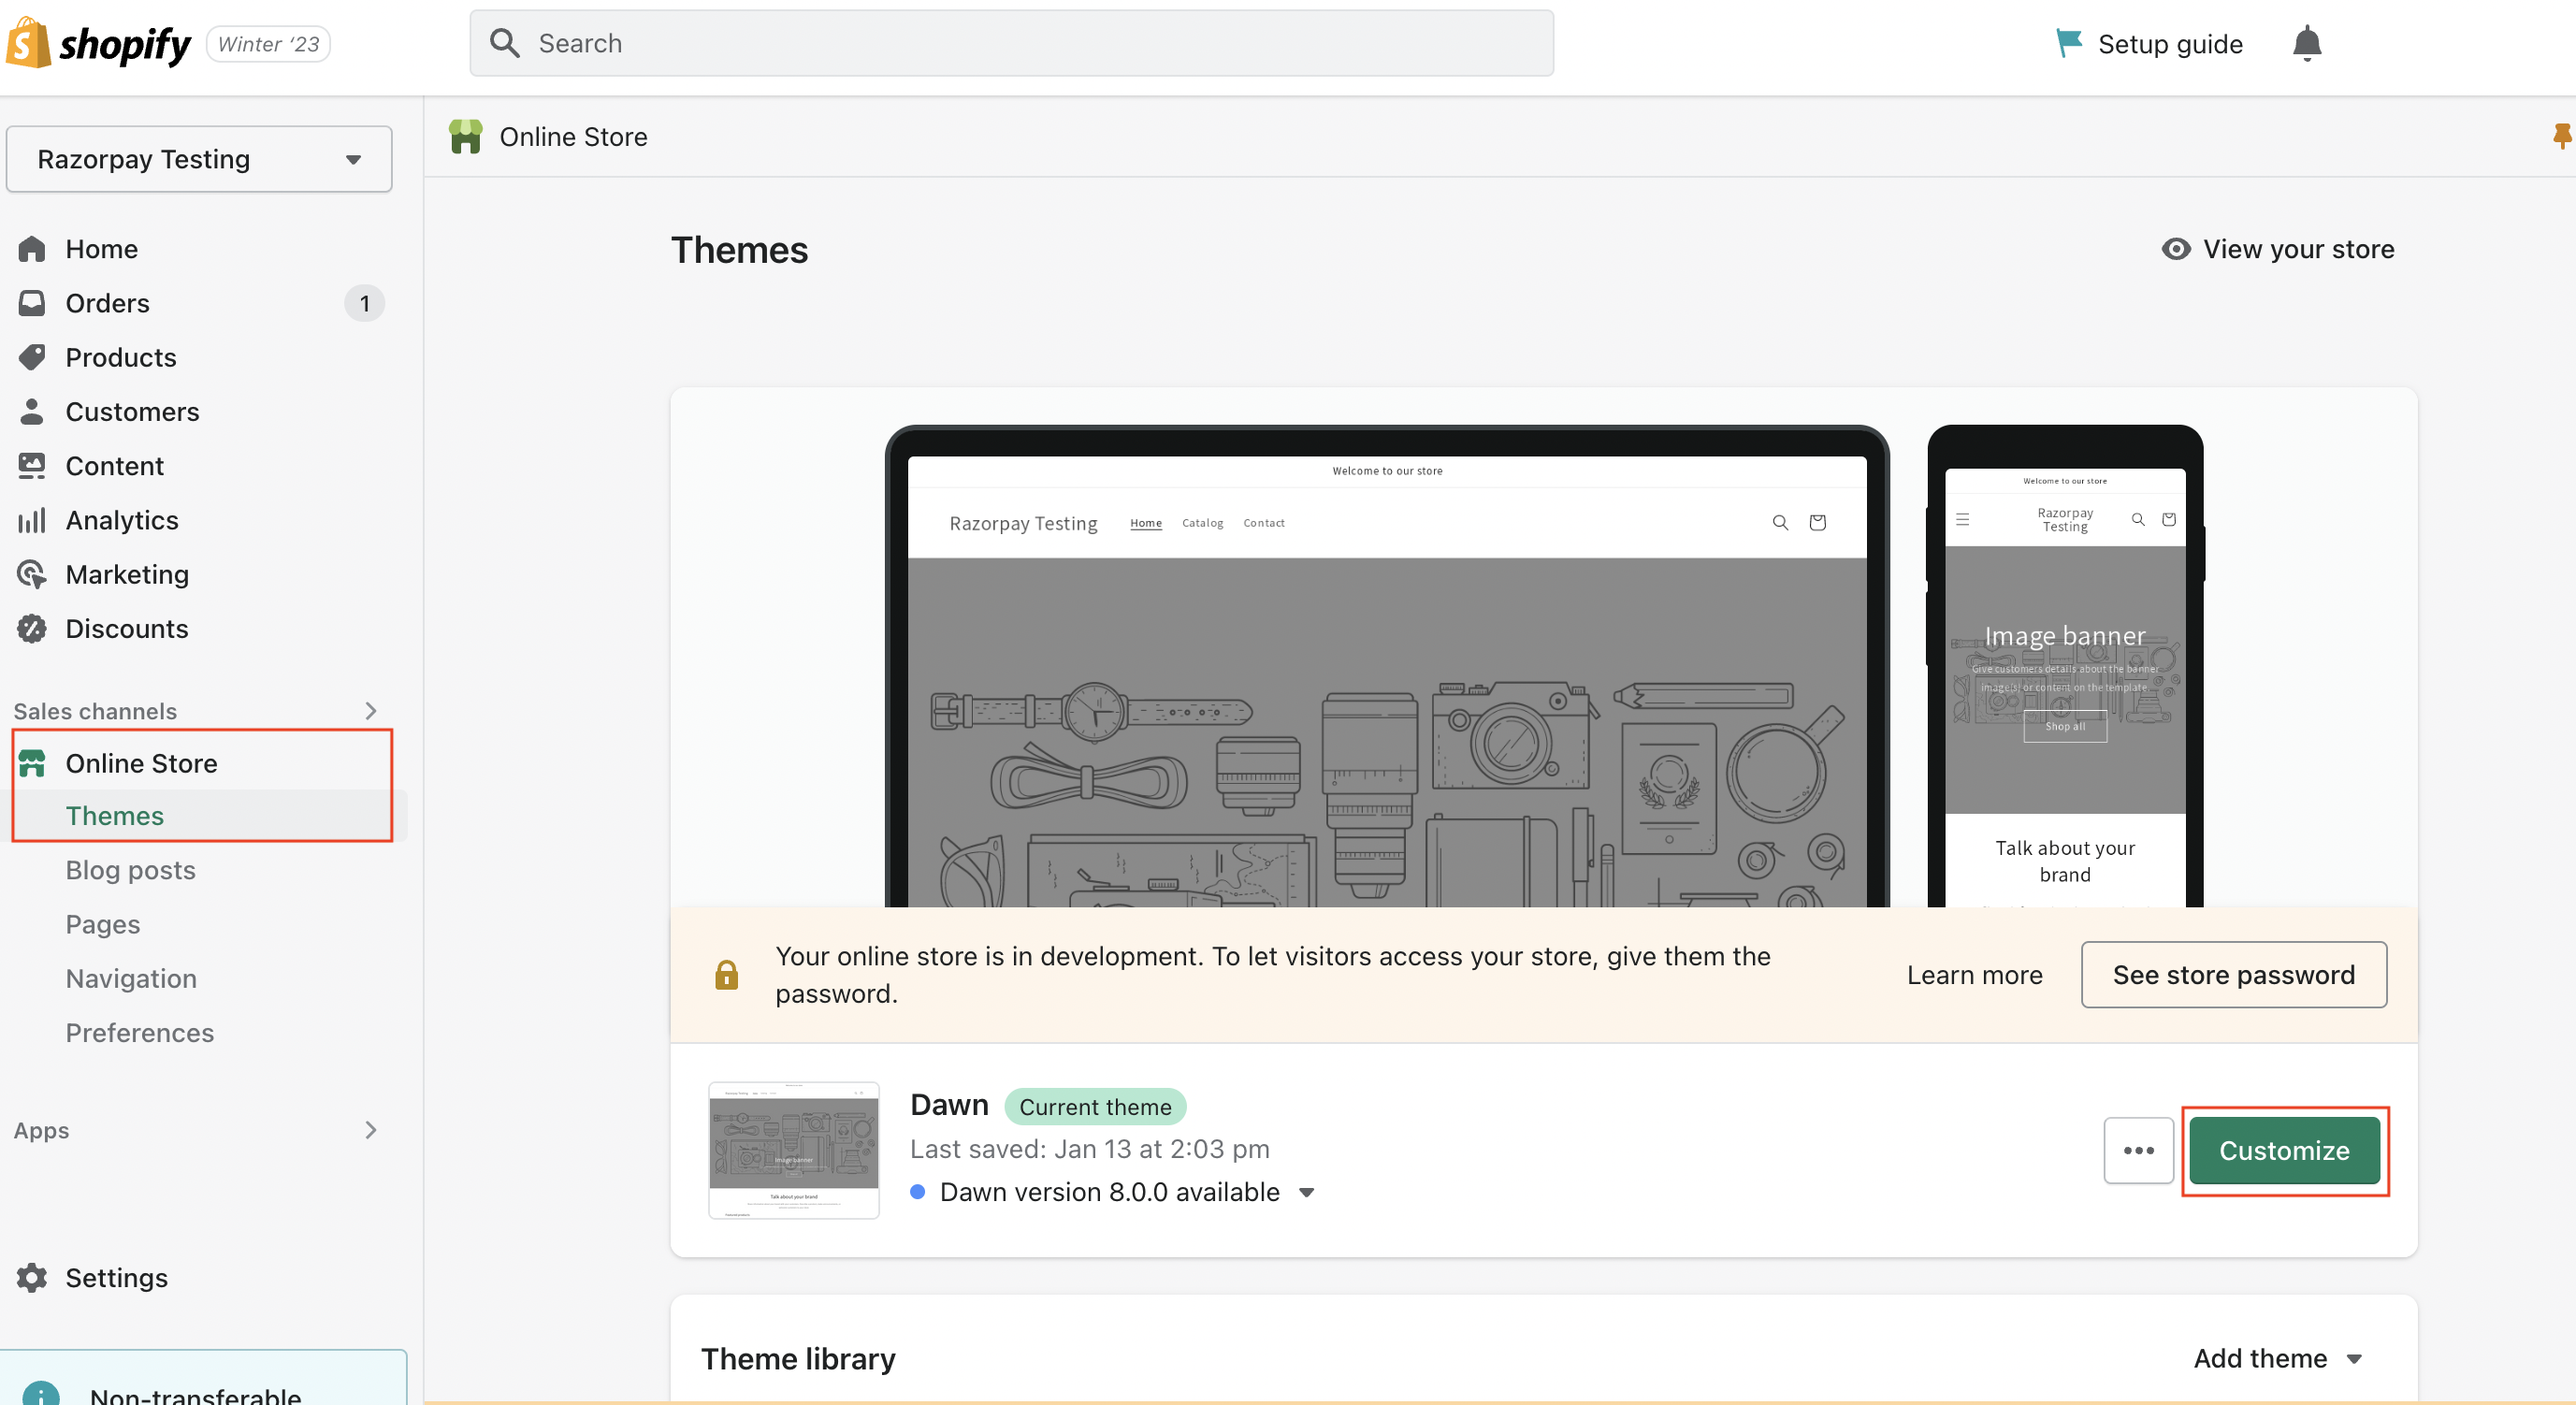
  In case you are not redirected to the theme editor page, then navigate to **Online Store** in the **Sales channels** section and click **Themes**. Click **Customize**.

  <img src="https://razorpay.com/docs/build/browser/assets/images/shopify-widget-theme-editor.jpg" alt="Shopify theme editor page" width="800" />
</Info>

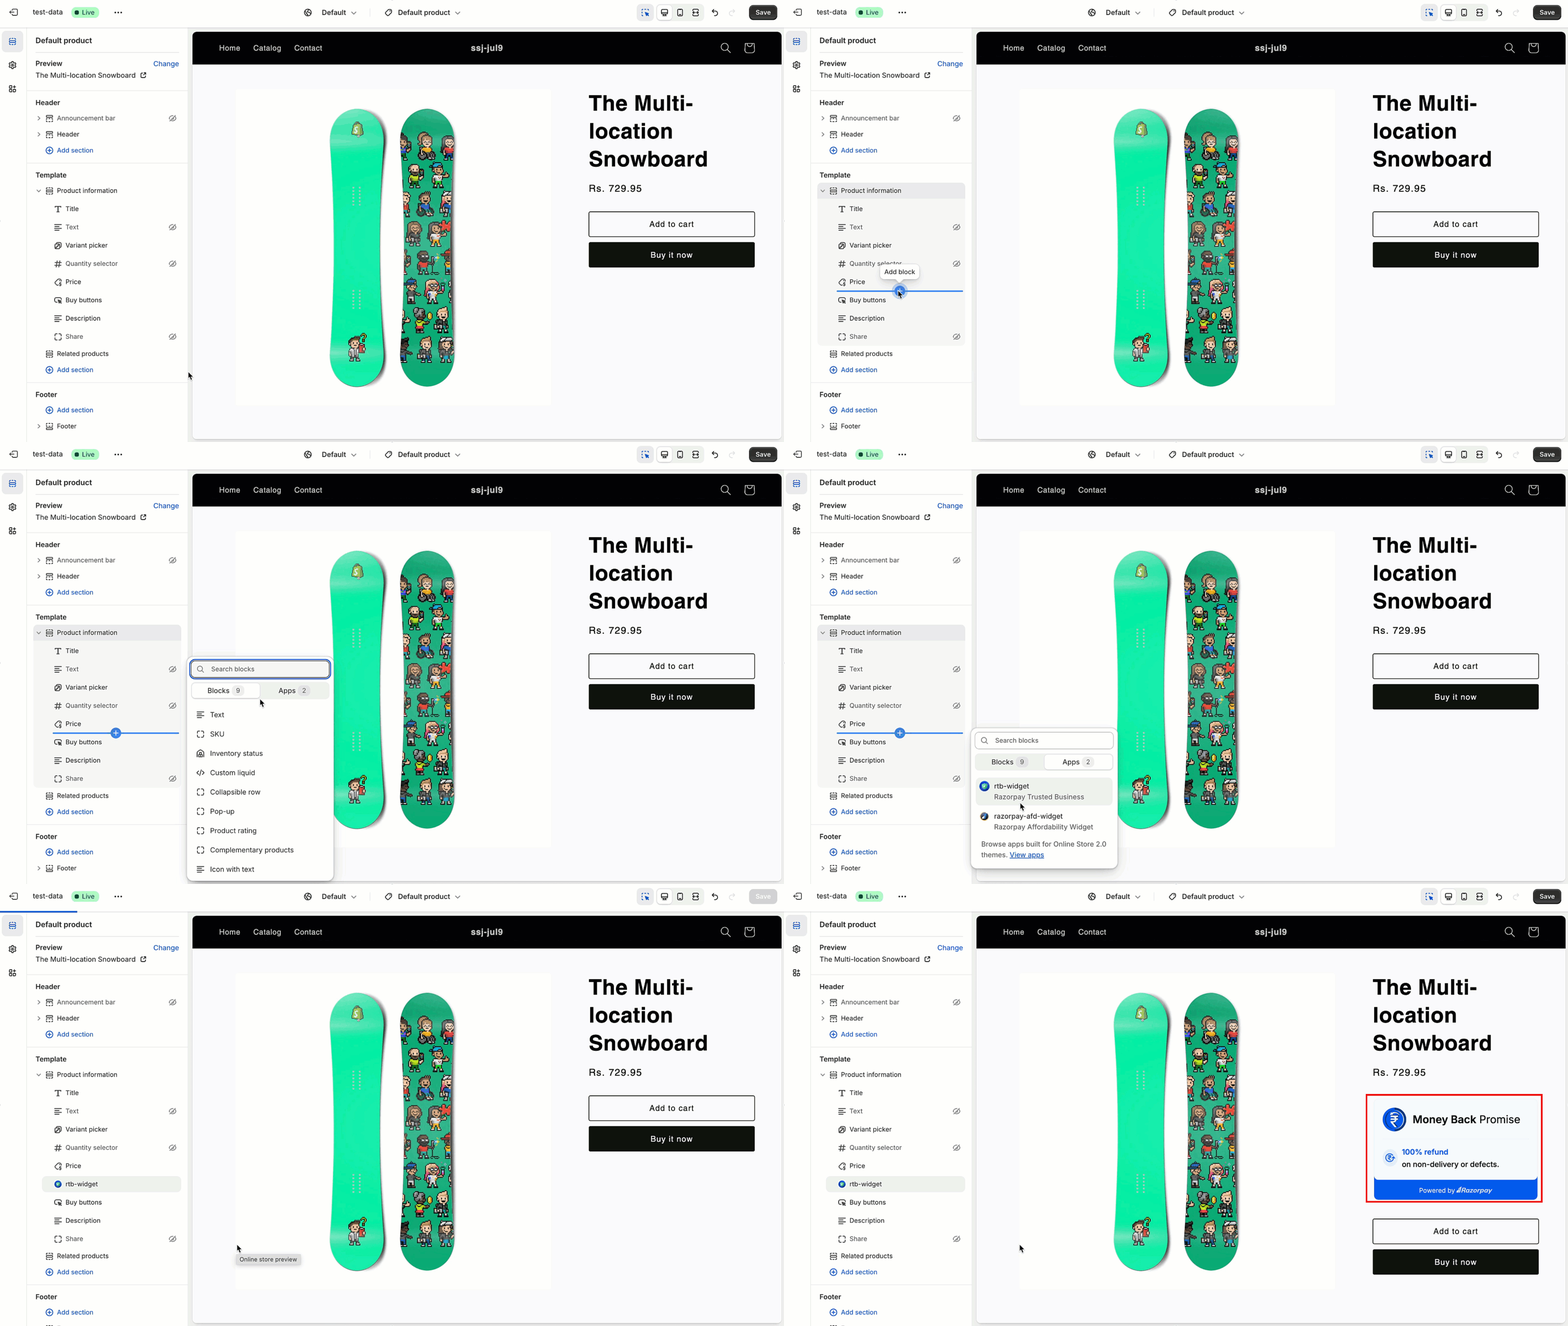
4. You will be redirected to the Shopify product configuration page. Under the **Template** section, hover below the **Price** and click on the icon to **Add block**. We recommend adding the widget below the product price.
5. Navigate to **Apps** and select **rtb-widget** (Razorpay Trusted Business). The customers will be able to view the widget below the product price.
   <img src="https://razorpay.com/docs/build/browser/assets/images/buyer-protect.gif" class="click-zoom" alt="Shopify default product page - buyer protect widget" width="800" />
6. Click **Save** in the top right corner.

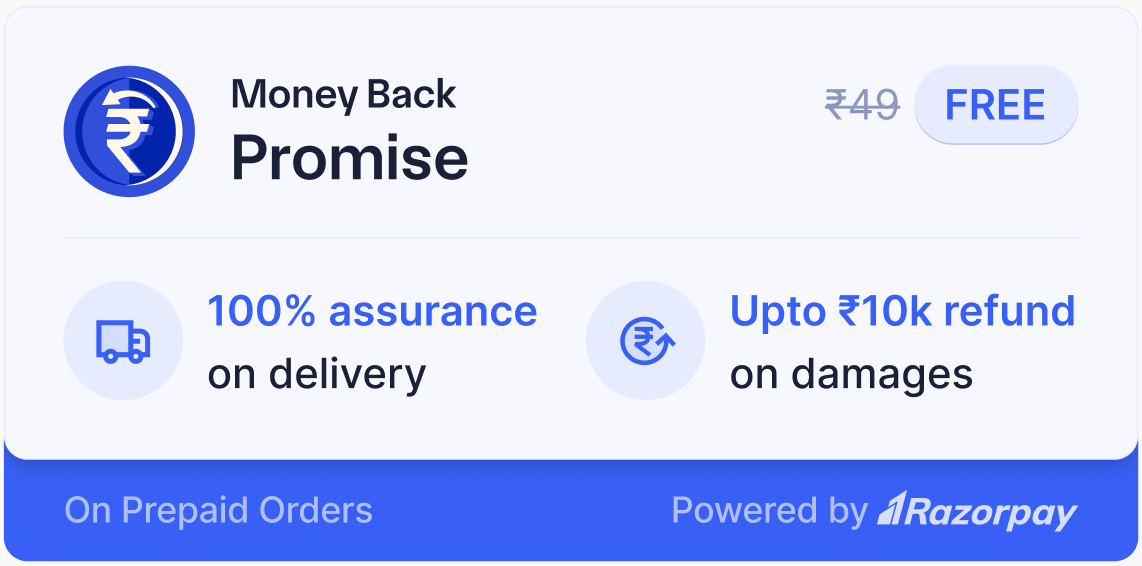
#### Successful Activation

Here is a glimpse of the default widget with offers and payment method options enabled.
<img src="https://razorpay.com/docs/build/browser/assets/images/widgets-buyer-protect.jpg" alt="Glimpse of the default widget" width="400" />

## 2. Test Integration

You can now preview and test the widget on the page where you integrated it. Follow the checklist:

* **Widget Rendering**: Confirm that the RTB widget renders correctly on the decided location of the desired page.
* **Widget Interaction**: Interact with the widget to verify that users can click the widget to access additional information on the RTB website.
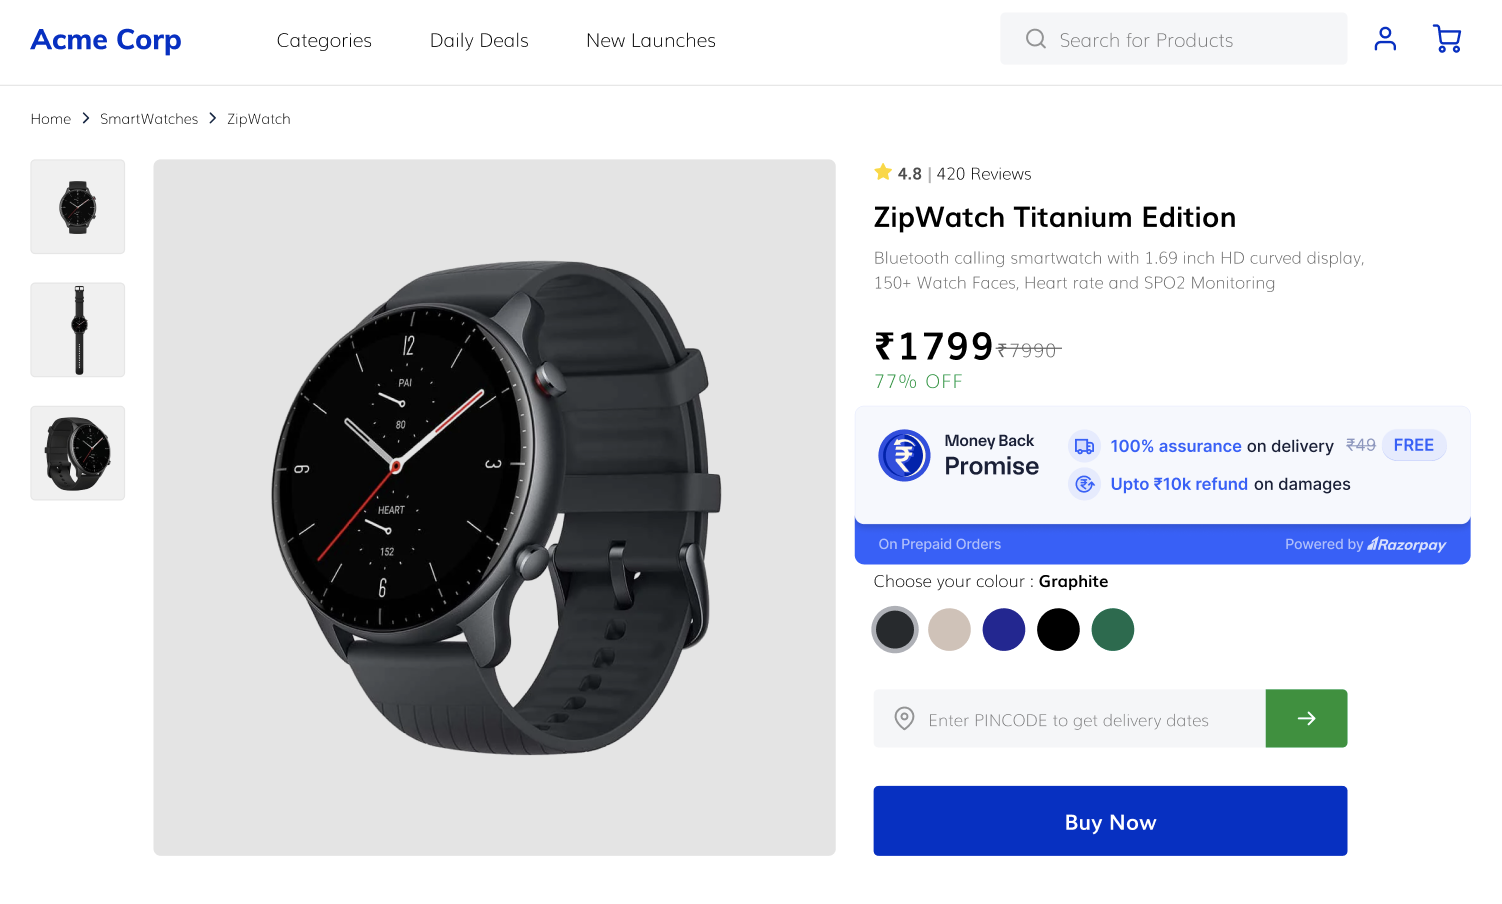
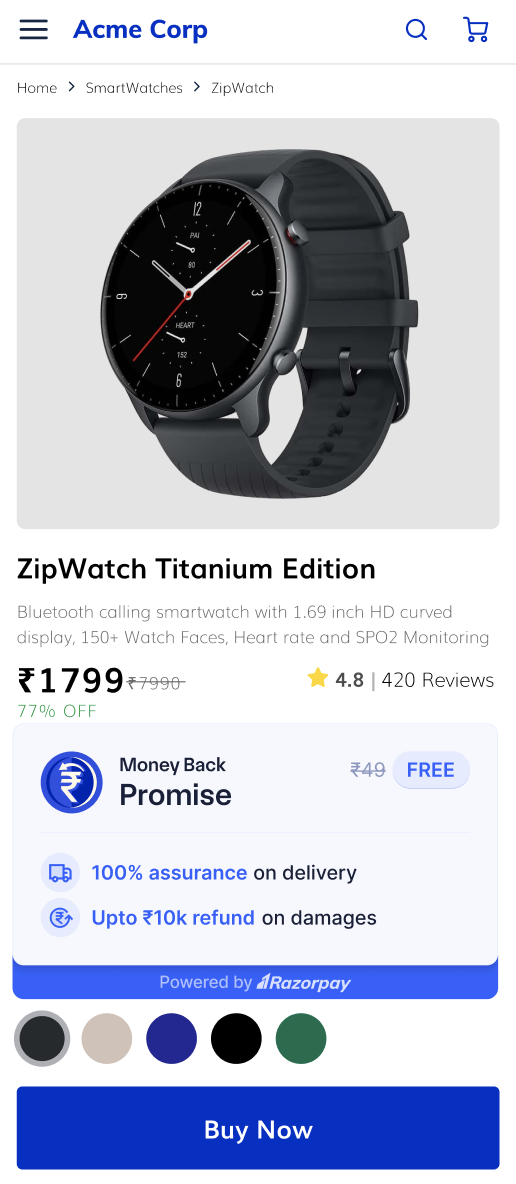
* **Responsive Design**: Resize the browser window or access the page on different devices to test the widget's responsiveness.
* **Widget Loading**: Ensure the widget loads quickly and smoothly without causing any delays or disruptions on the page it is integrated.

## 3. Go-live Checklist

You can now preview the widget on your product description page. Here is a glimpse of the default widget.
<AccordionGroup>
  <Accordion title="On Web">
    <img src="https://razorpay.com/docs/build/browser/assets/images/buyer-widget-desktop.jpg" alt="View the Buyer Protect widget on desktop" width="800" />
  </Accordion>

  <Accordion title="On Mobile">
    <img src="https://razorpay.com/docs/build/browser/assets/images/buyer-widget-mobile.jpg" alt="View the Buyer Protect widget on mobile" width="300" />
  </Accordion>
</AccordionGroup>

### Related Information

* [Money Back Promise](/docs/payments/widgets/buyer-protection/money-back-promise)
* [FAQs](/docs/payments/widgets/buyer-protection/faqs)
