> ## Documentation Index
> Fetch the complete documentation index at: https://razorpay-881012b3.mintlify.site/llms.txt
> Use this file to discover all available pages before exploring further.
# Integrate Razorpay Trusted Business Widget on Shopify
> Enhance brand trust, boost conversions, and display Razorpay Trusted Business widget on your Shopify website's product page.
Available in
🇮🇳 India
Discover new features, updates and deprecations related to Razorpay Trusted Business Widget on Shopify (since Jan 2024).
Integrate Razorpay Trusted Business (RTB) widget into your Shopify website's product pages.
Download Plugin
## Get Started
Follow the [integration steps](#integration-steps) to integrate the RTB on your [Shopify](https://www.shopify.in/) website.
## Prerequisites
* Sign up for a [Razorpay account](https://dashboard.razorpay.com/signup).
* Sign up for a [Shopify account](https://www.shopify.in).
## Integration Steps
Follow these steps to proceed with the integration:
Install the plugin.
Test the RTB widget.
Check the go-live checklist.
### 1. Build Integration
Follow the below steps to install the plugin:
**Handy Tips**
If you are an existing Razorpay user, you can directly begin the integration process from step 4.
1. Create a [Razorpay Account](https://dashboard.razorpay.com/signup).
2. Submit your KYC, and if we need any further clarification, we will reach out to you on WhatsApp, SMS and email. Once our team completes KYC verification and you are enabled to accept payments, we will send a confirmation on WhatsApp, SMS and email.
3. Log in to your [Shopify account](https://www.shopify.in).
4. **Install** [Razorpay Trusted Business](https://apps.shopify.com/razorpay-trusted-badges) from the Shopify app store.
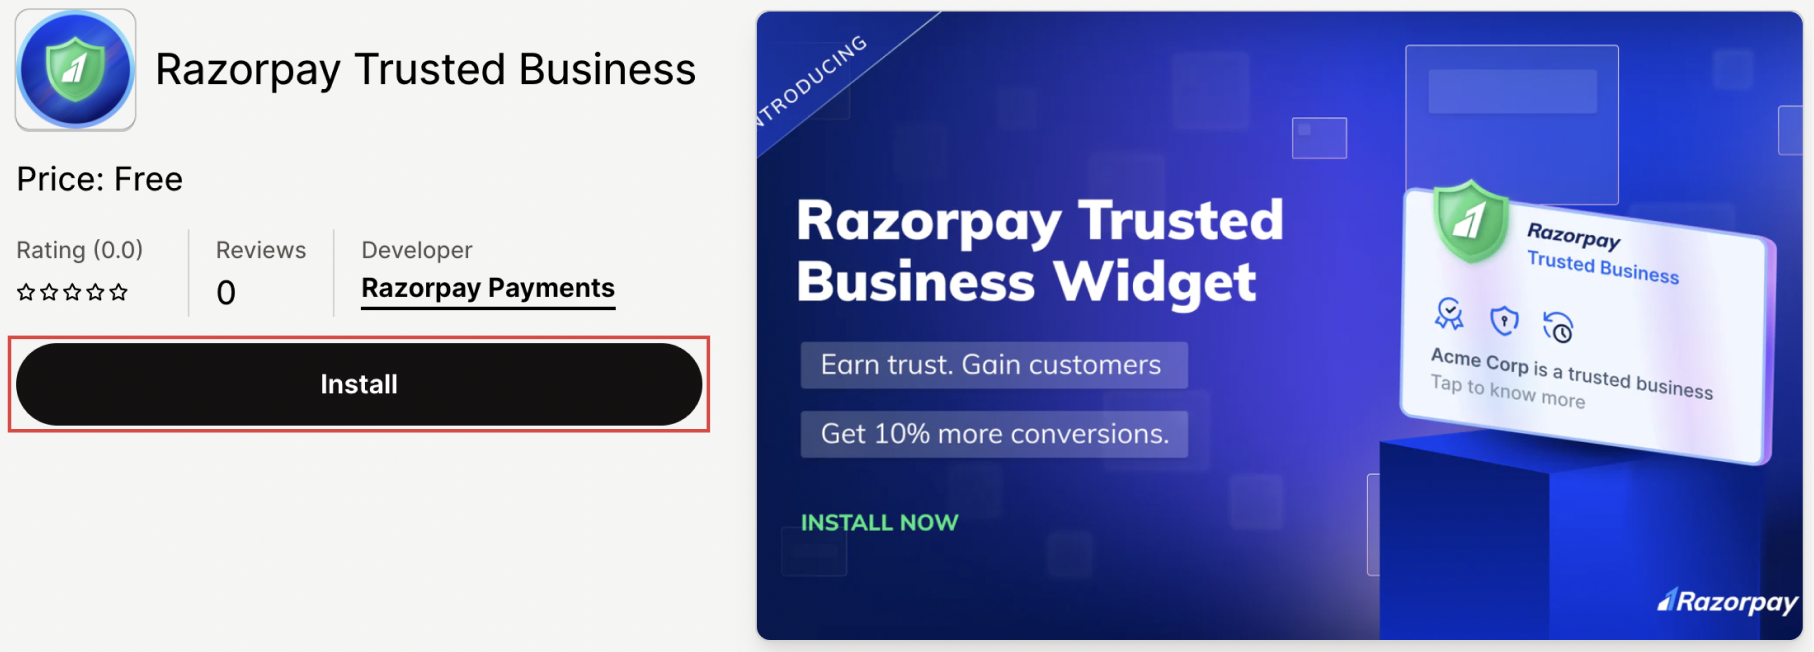 **Handy Tips**
If you have multiple stores, select the store for which you want to install the RTB widget.
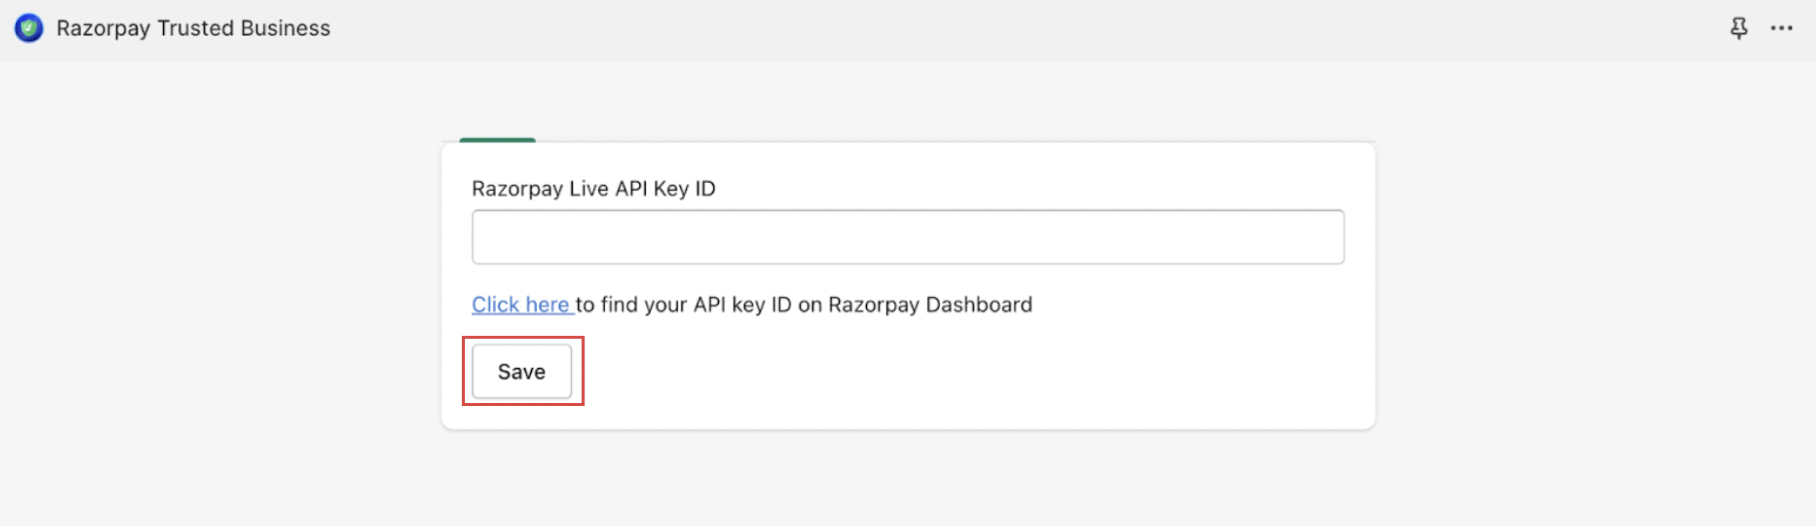
5. After installing the app, you will be directed to your Shopify store and asked to enter your Razorpay Live API Key ID. This step is necessary to verify your eligibility for the RTB badge. Know how to [generate API Keys](/docs/api/authentication#generate-api-keys) from the Dashboard.
6. After getting your Live API Key ID, go to your Shopify store, enter your live key and click **Save**. If you are eligible, you will be redirected to your theme page.
**Handy Tips**
If you have multiple stores, select the store for which you want to install the RTB widget.
5. After installing the app, you will be directed to your Shopify store and asked to enter your Razorpay Live API Key ID. This step is necessary to verify your eligibility for the RTB badge. Know how to [generate API Keys](/docs/api/authentication#generate-api-keys) from the Dashboard.
6. After getting your Live API Key ID, go to your Shopify store, enter your live key and click **Save**. If you are eligible, you will be redirected to your theme page.
 7. Perform the following steps on the theme page:
1. Select the **Default product** from the drop-down list.
2. Click **Add block** under **Product information** from the left menu.
7. Perform the following steps on the theme page:
1. Select the **Default product** from the drop-down list.
2. Click **Add block** under **Product information** from the left menu.
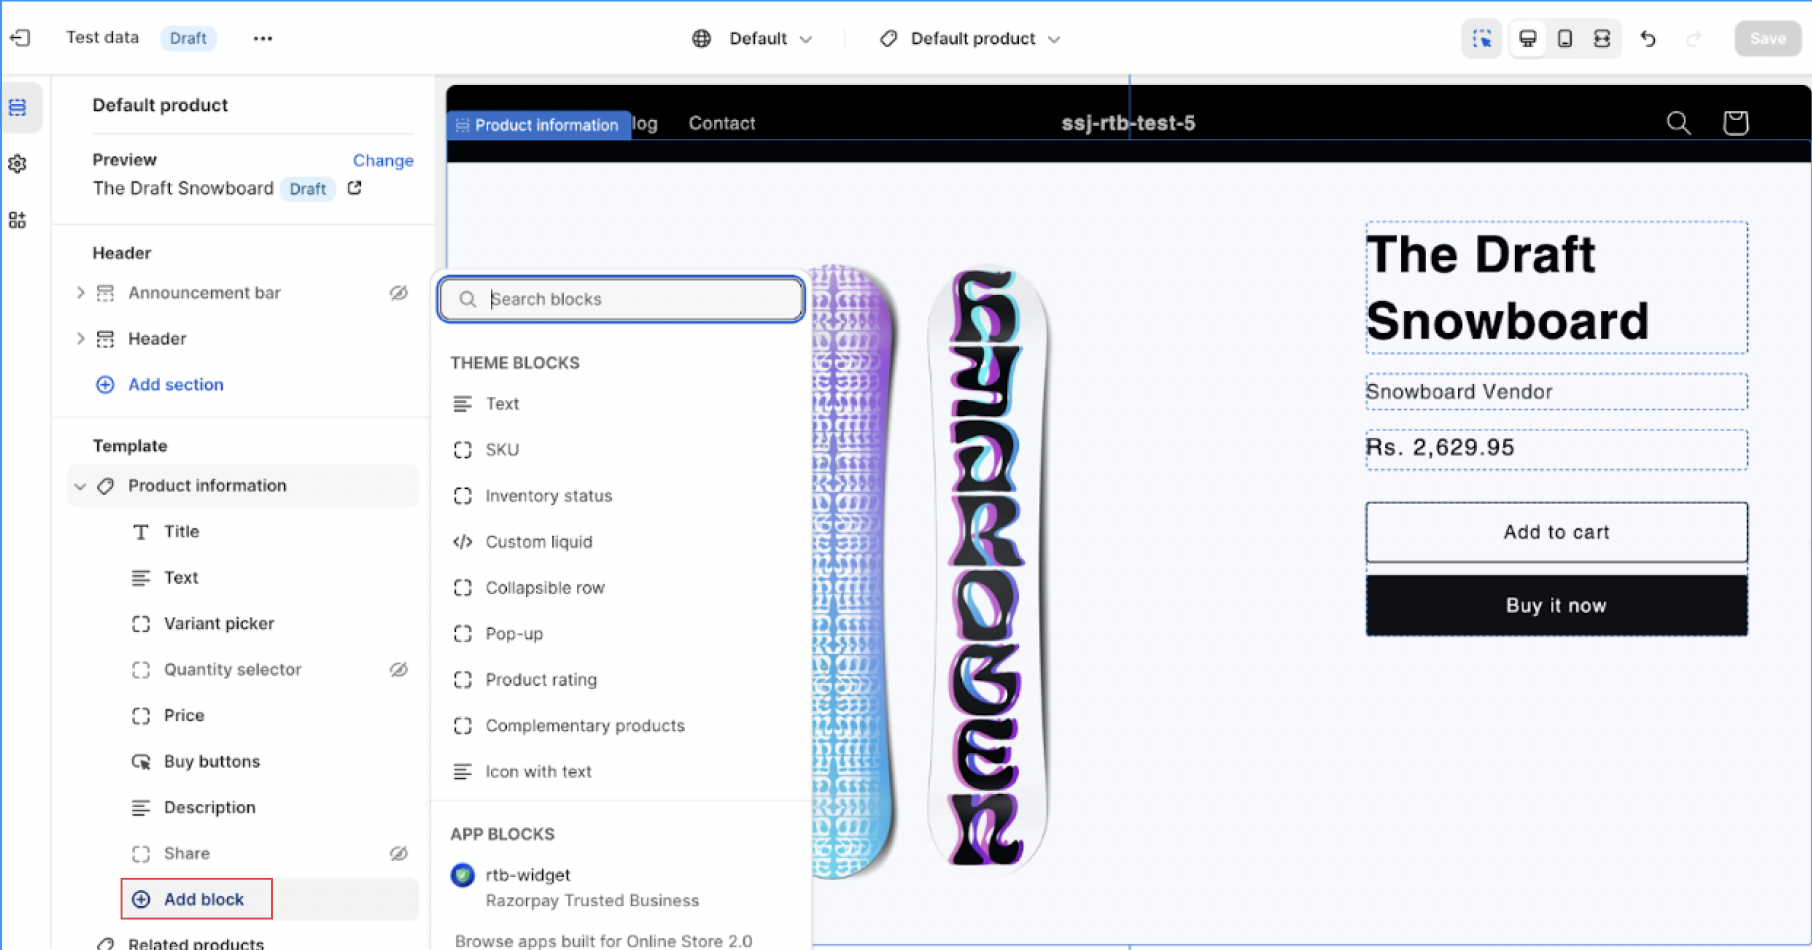 3. Select the **rtb-widget** to insert the RTB widget in your product page.
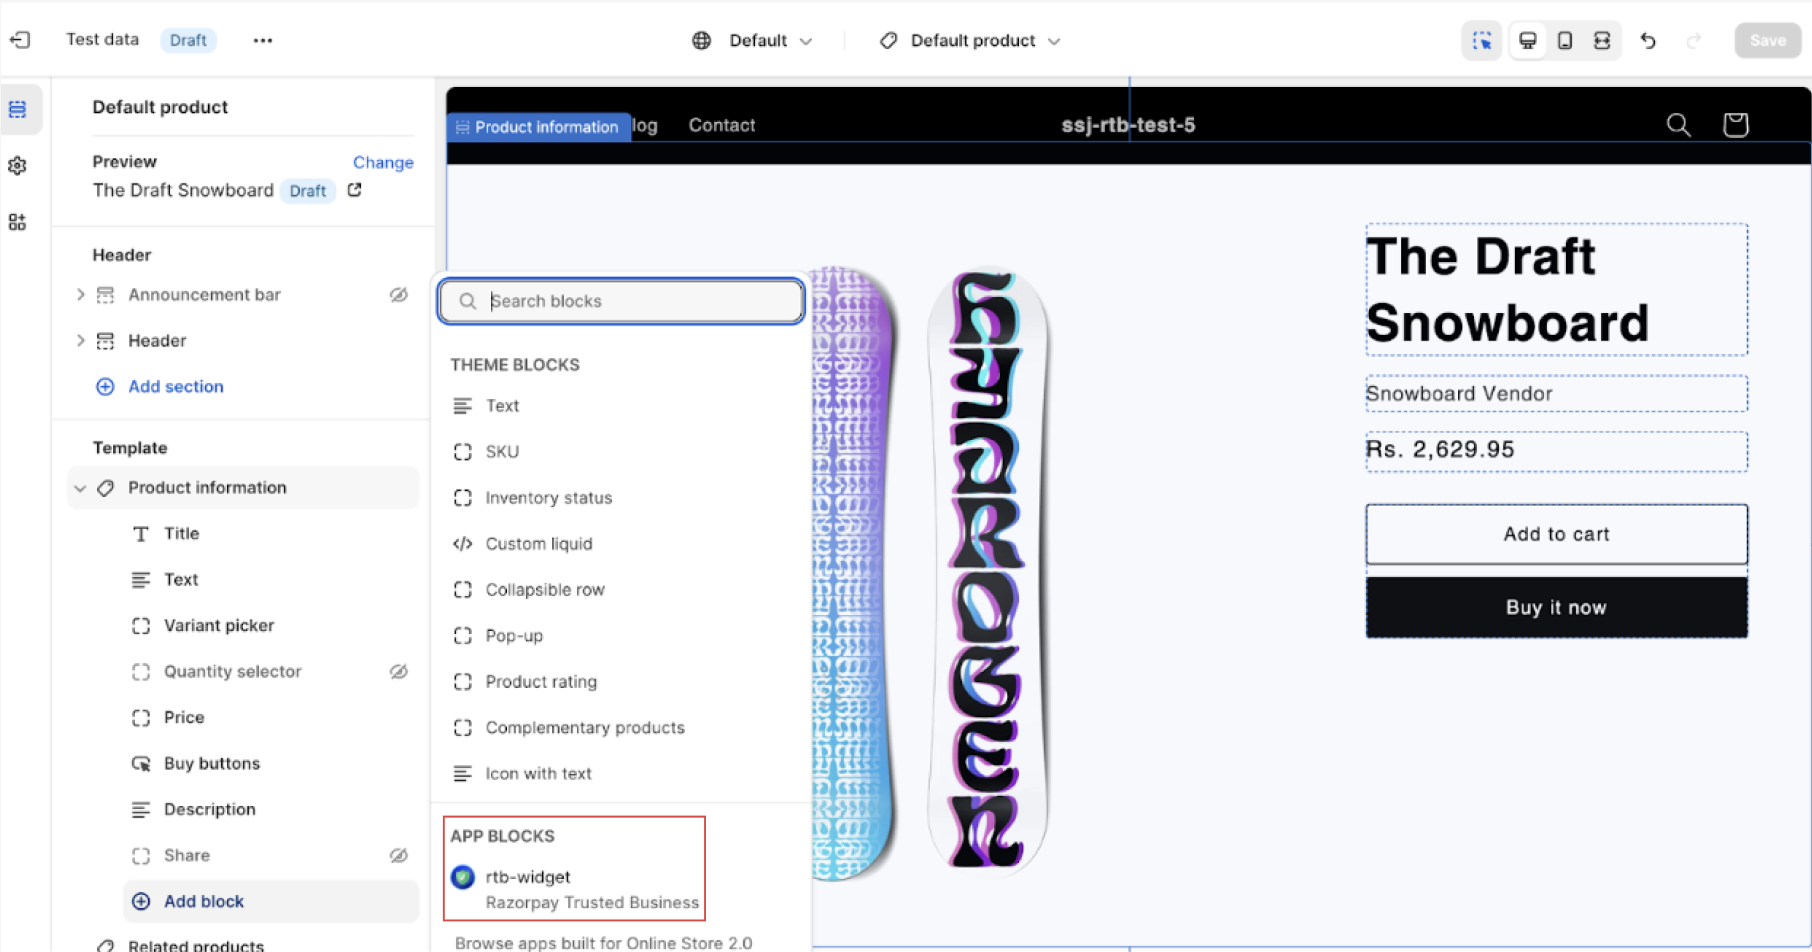 8. The RTB widget appears on your product page. You can drag and drop it to relocate, depending on your requirements. Click **Save** at the top right of your screen after adjusting.
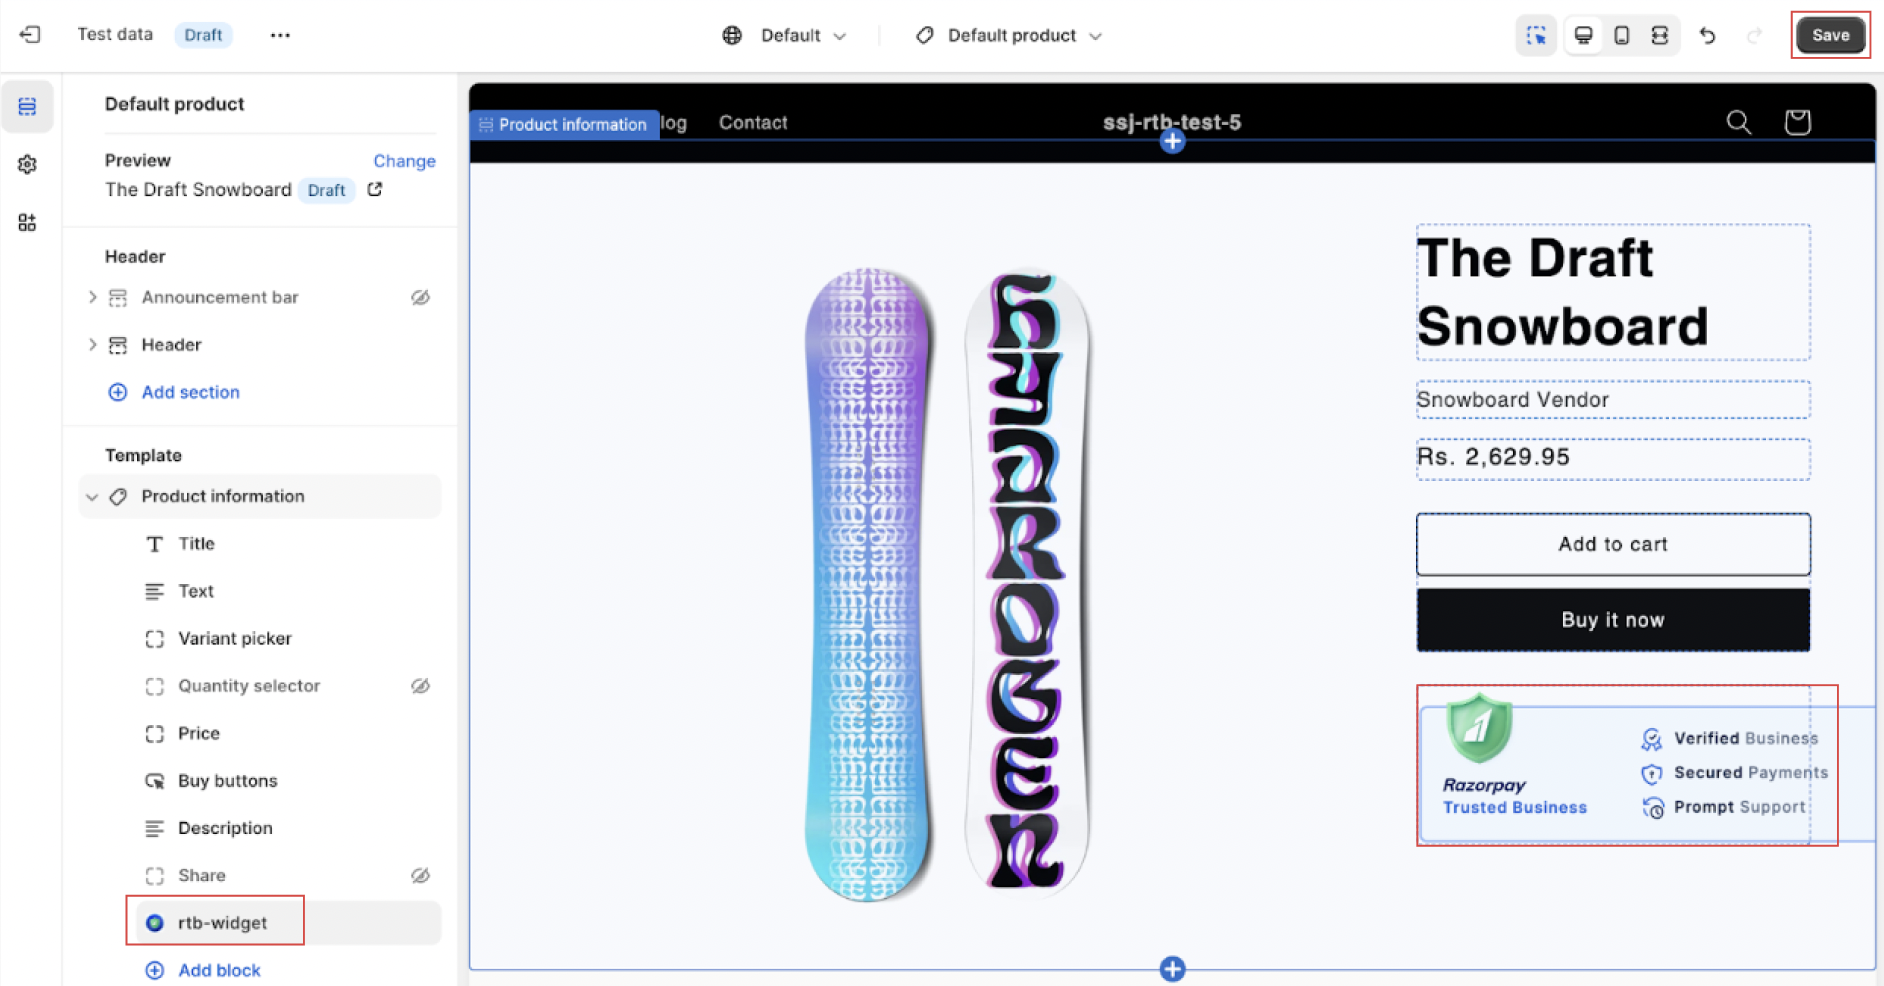 9. Visit your website, access one of the product pages, and preview the widget to see how it appears to your buyers.
This completes your integration.
### 2. Test Integration
You can now preview and test the widget on the page where you integrated it. Follow the checklist:
* **Widget Rendering**: Confirm that the RTB widget renders correctly on the decided location of the desired page.
* **Widget Interaction**: Interact with the widget to verify that users can click the widget to access additional information on the RTB website.
* **Responsive Design**: Resize the browser window or access the page on different devices to test the widget's responsiveness.
* **Widget Loading**: Ensure the widget loads quickly and smoothly without causing any delays or disruptions on the page it is integrated.
### 3. Go-live Checklist
After previewing and testing the widget on your Shopify Dashboard, you must replace the test mode API keys with the live mode API keys. You can generate the [live mode API keys](/docs/api/authentication#live-mode-api-keys). from the Dashboard.
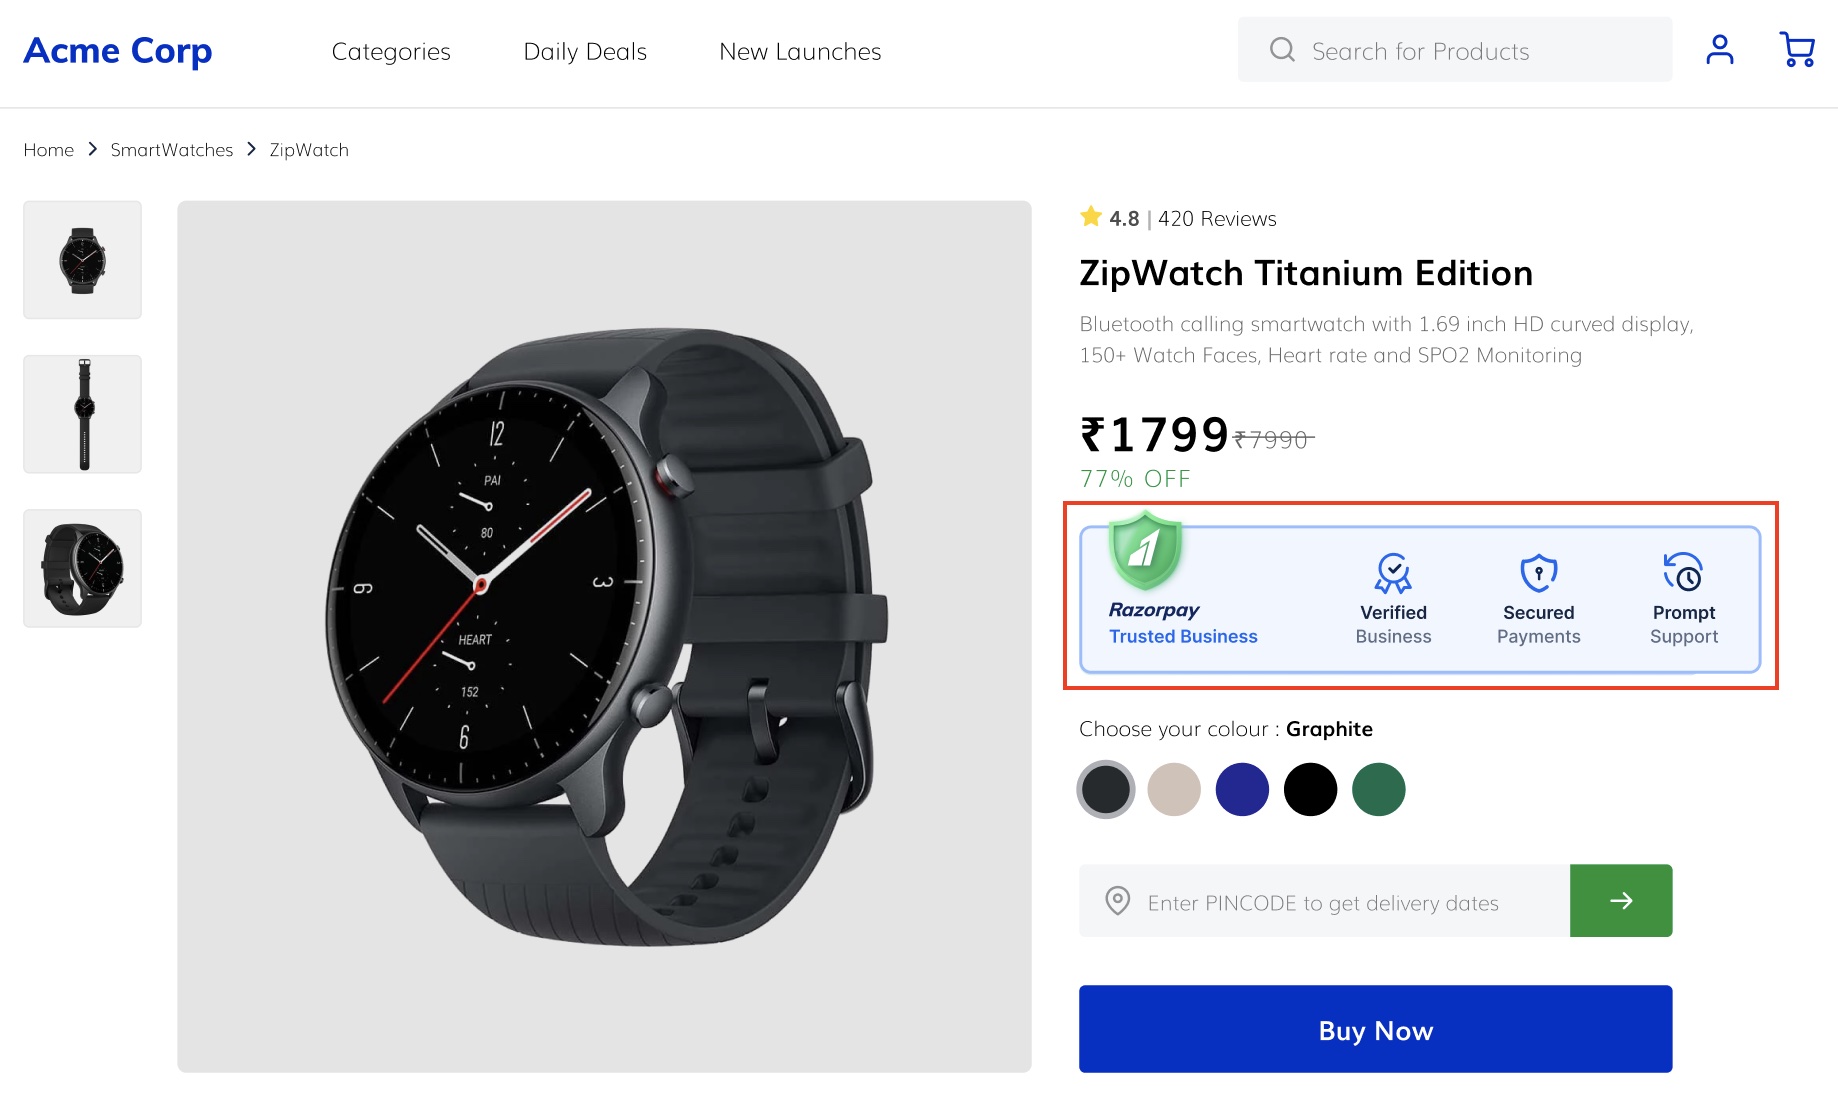
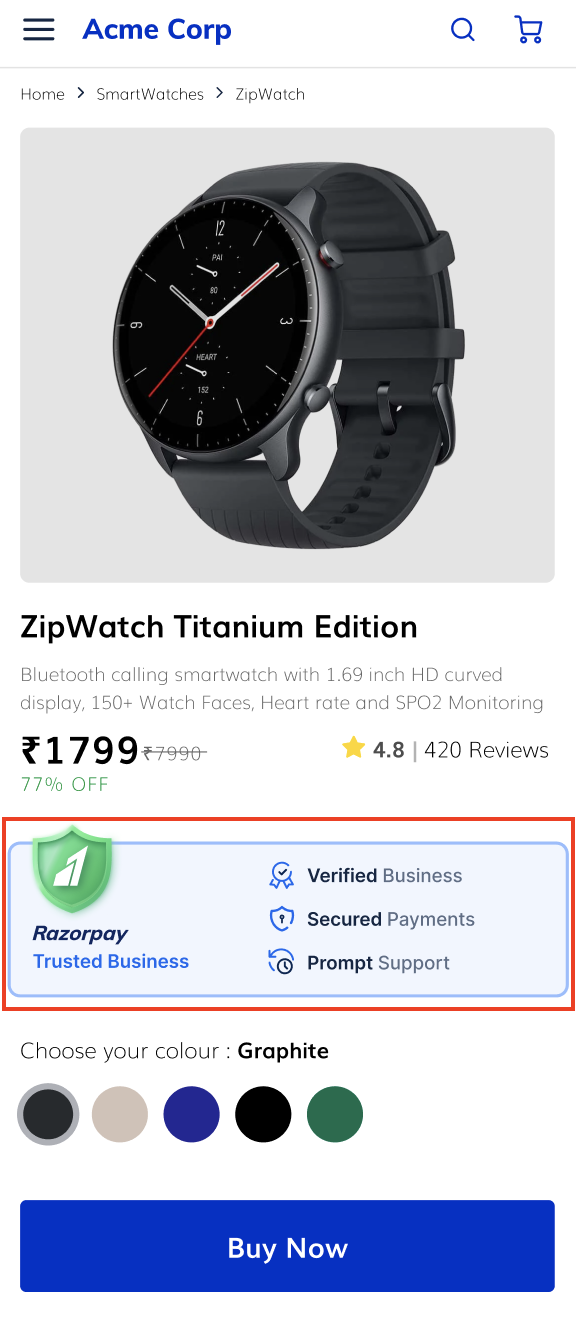
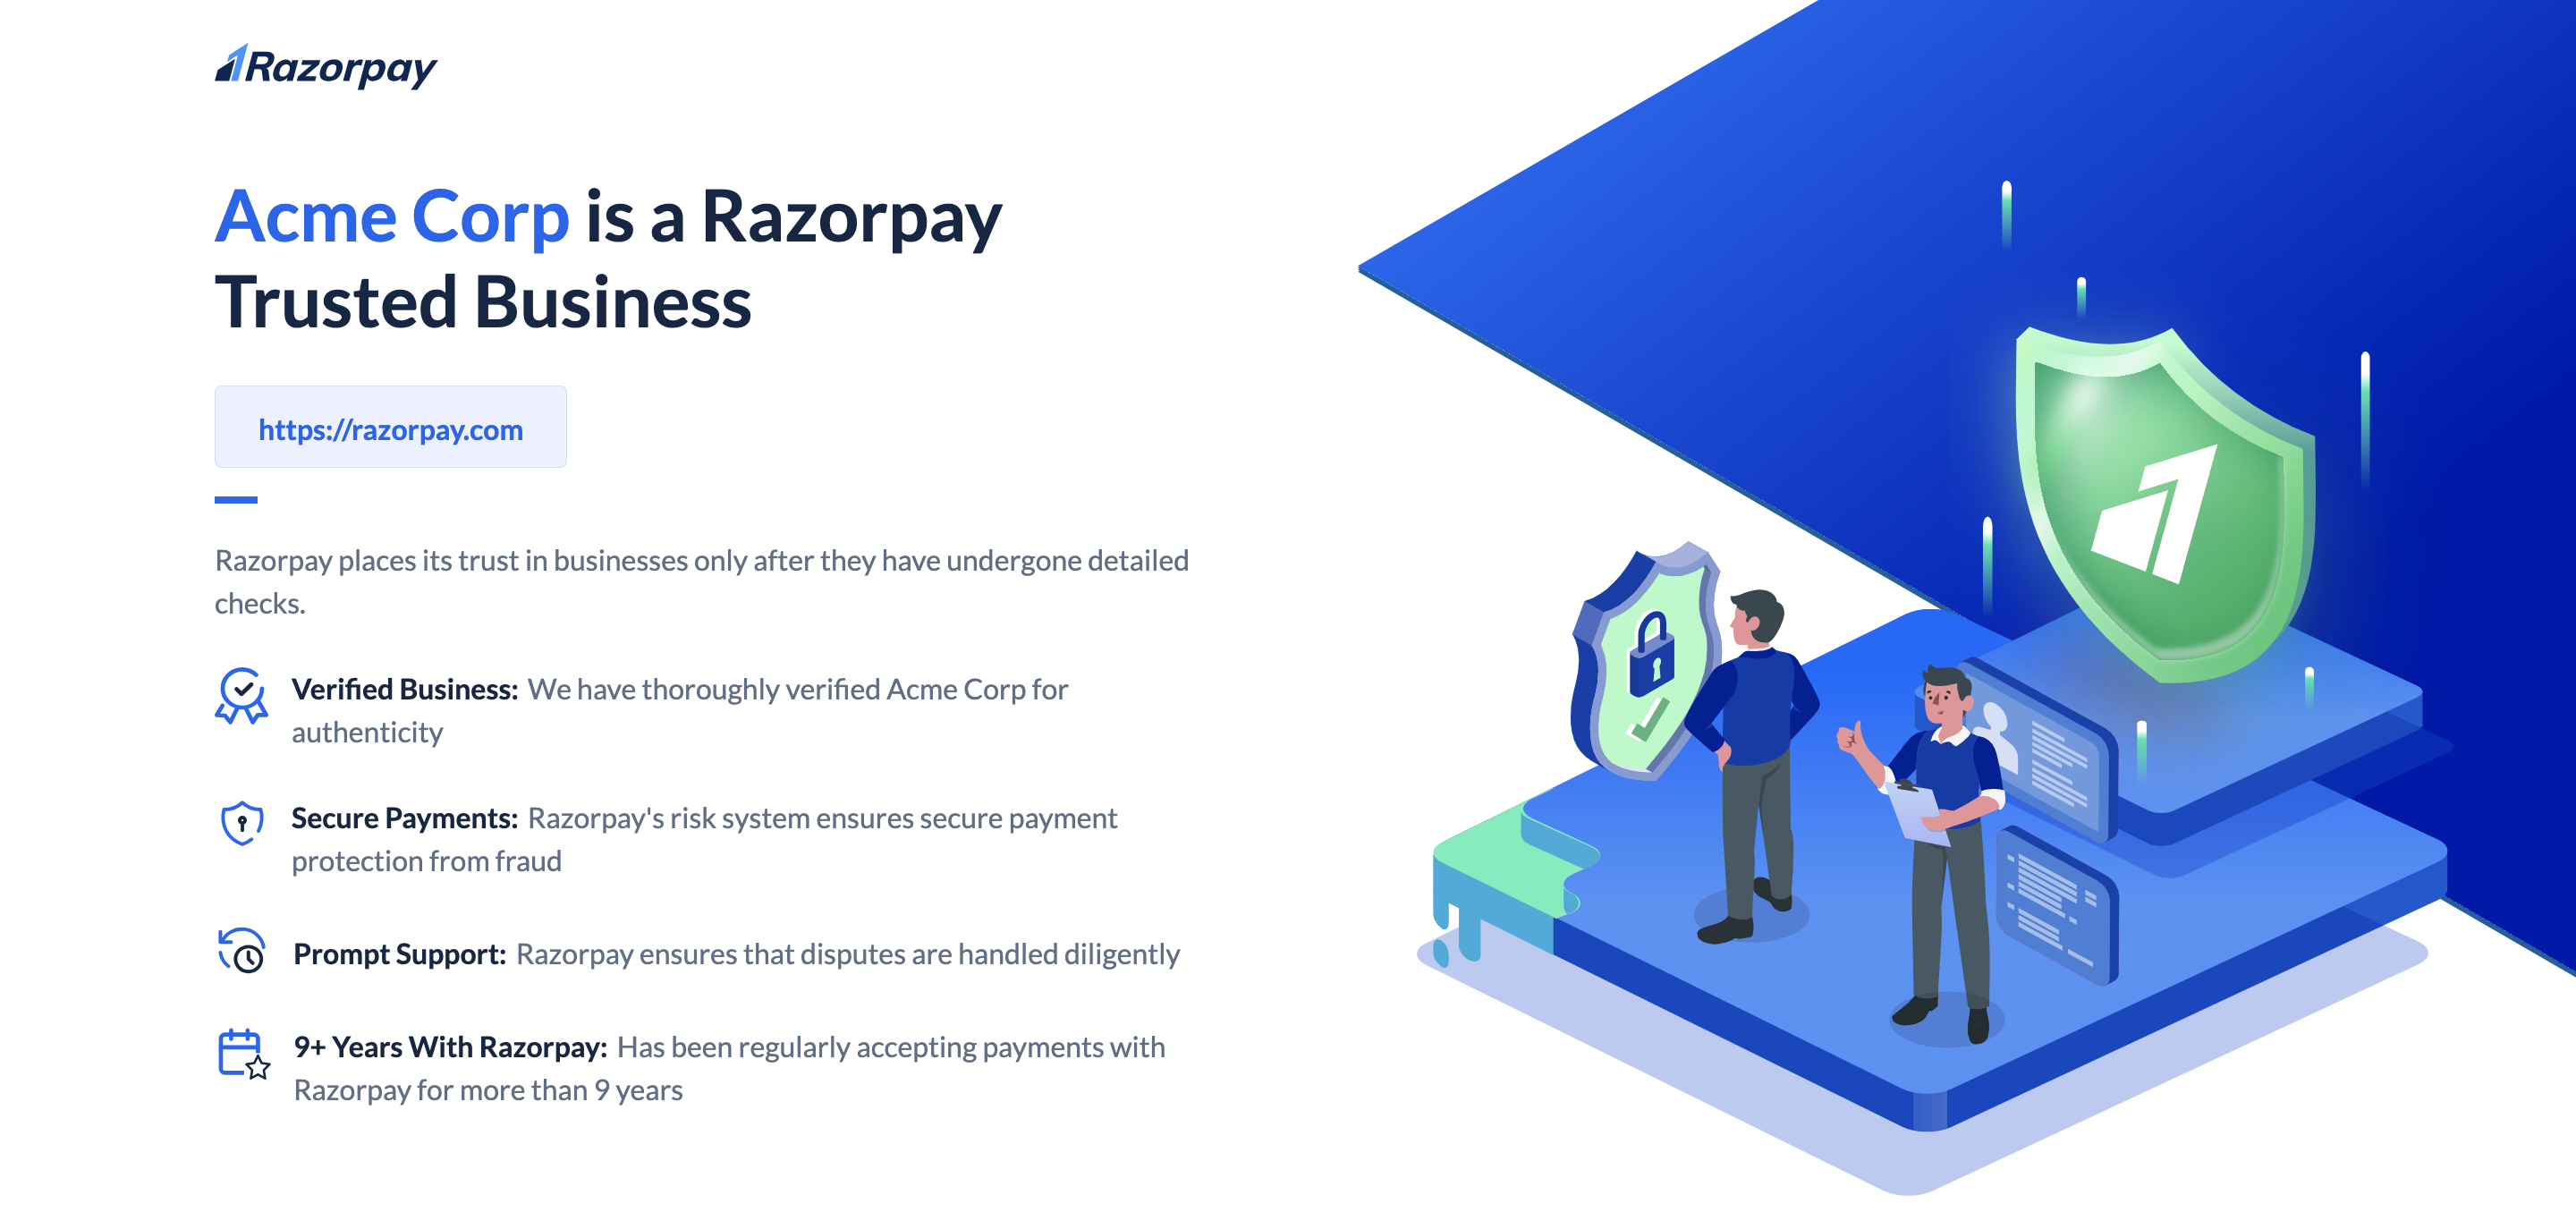
Your customers can view the widget on your website. After they click the widget, it redirects them to the RTB website to access more information.
* Here is a glimpse of the default widget:
9. Visit your website, access one of the product pages, and preview the widget to see how it appears to your buyers.
This completes your integration.
### 2. Test Integration
You can now preview and test the widget on the page where you integrated it. Follow the checklist:
* **Widget Rendering**: Confirm that the RTB widget renders correctly on the decided location of the desired page.
* **Widget Interaction**: Interact with the widget to verify that users can click the widget to access additional information on the RTB website.
* **Responsive Design**: Resize the browser window or access the page on different devices to test the widget's responsiveness.
* **Widget Loading**: Ensure the widget loads quickly and smoothly without causing any delays or disruptions on the page it is integrated.
### 3. Go-live Checklist
After previewing and testing the widget on your Shopify Dashboard, you must replace the test mode API keys with the live mode API keys. You can generate the [live mode API keys](/docs/api/authentication#live-mode-api-keys). from the Dashboard.
Your customers can view the widget on your website. After they click the widget, it redirects them to the RTB website to access more information.
* Here is a glimpse of the default widget:
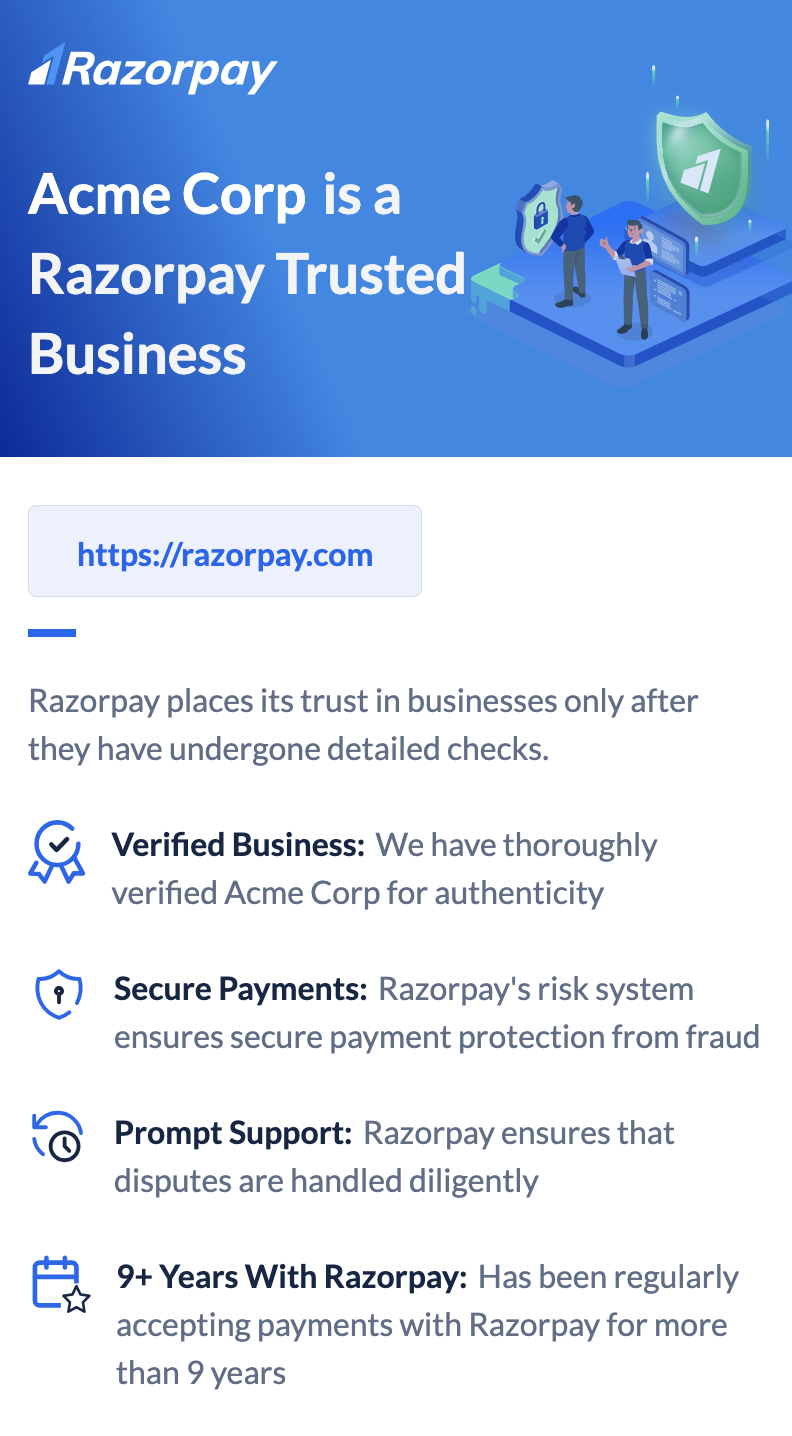
 * Here is a glimpse of the RTB webpage:
 ## Support
Queries: If you have queries, raise a ticket on the [Razorpay Support Portal](https://razorpay.com/support/).
## Support
Queries: If you have queries, raise a ticket on the [Razorpay Support Portal](https://razorpay.com/support/).