> ## Documentation Index
> Fetch the complete documentation index at: https://razorpay-881012b3.mintlify.site/llms.txt
> Use this file to discover all available pages before exploring further.
# Integrate with Jibble
> Integrate RazorpayX Payroll with Jibble to manage employees' attendance and loss of pay calculations.
Available in
🇮🇳 India
Integrate your RazorpayX Payroll account with Jibble and enhance time and attendance management for your employees. Jibble syncs your employees' leaves and shifts data with Payroll and automatically calculates [Loss of Pay](/docs/payroll/leaves#loss-of-pay-for-unpaid-excessive-leave-work) when executing payroll.
The RazorpayX Payroll - Jibble integration offers the following benefits:
* **Automatic Data Import and Syncing**:
When you onboard or offboard employees and contractors on Payroll, the data is automatically imported and synced between Jibble and Payroll after the integration.
* **Automated Loss of Pay (LOP) Calculations**:
Loss of Pay is a critical salary calculation based on employees' attendance. After integrating, Payroll syncs time and attendance data from Jibble to provide accurate LOP calculations. All of this is automated.
## How it Works
1. Log in to the [Payroll Dashboard](https://payroll.razorpay.com/dashboard).
2. [Set up the integration](#integration-steps) using Jibble's API keys.
3. [Sync the monthly Loss of Pay report](#verify-lop-in-payroll) before executing payroll.
## Integration Steps
To integrate with Jibble:
1. Log in to the [Payroll Dashboard](https://payroll.razorpay.com/dashboard).
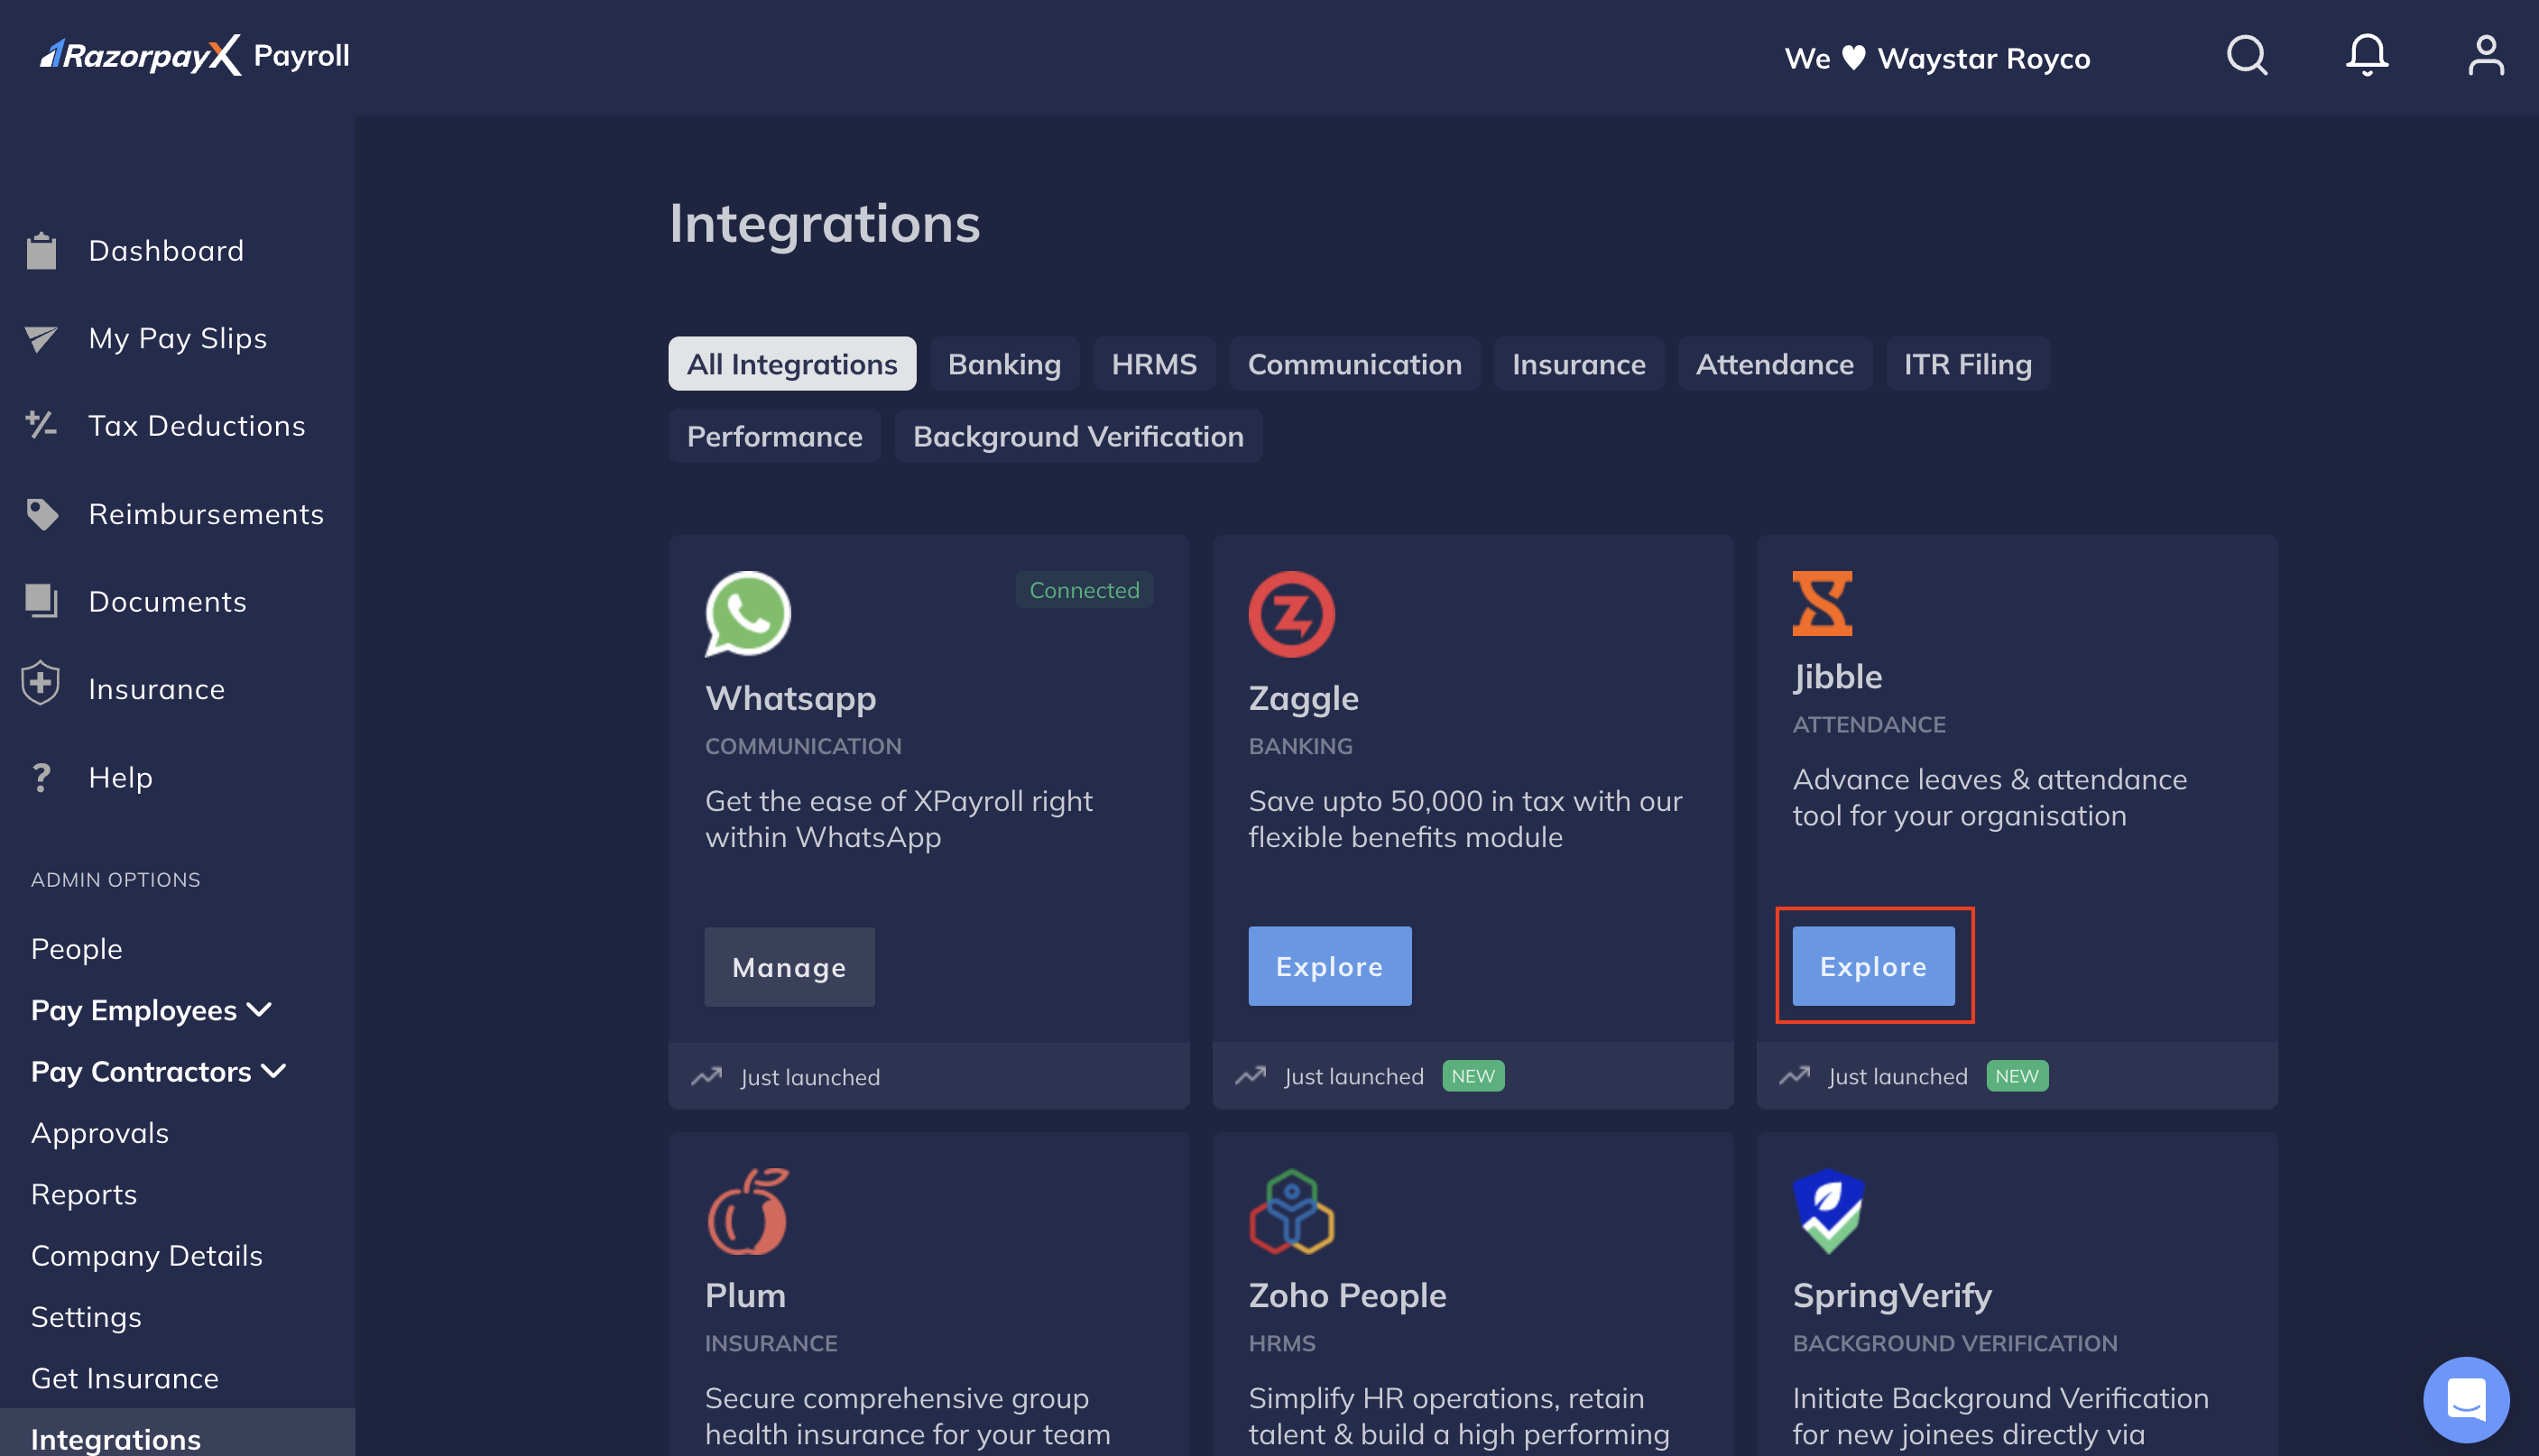
2. Navigate to **Integrations** in the left menu under **ADMIN OPTIONS**.
3. Look for **Jibble** and click **Explore**.
 4. Click **START INTEGRATION** on the Jibble Integration page.
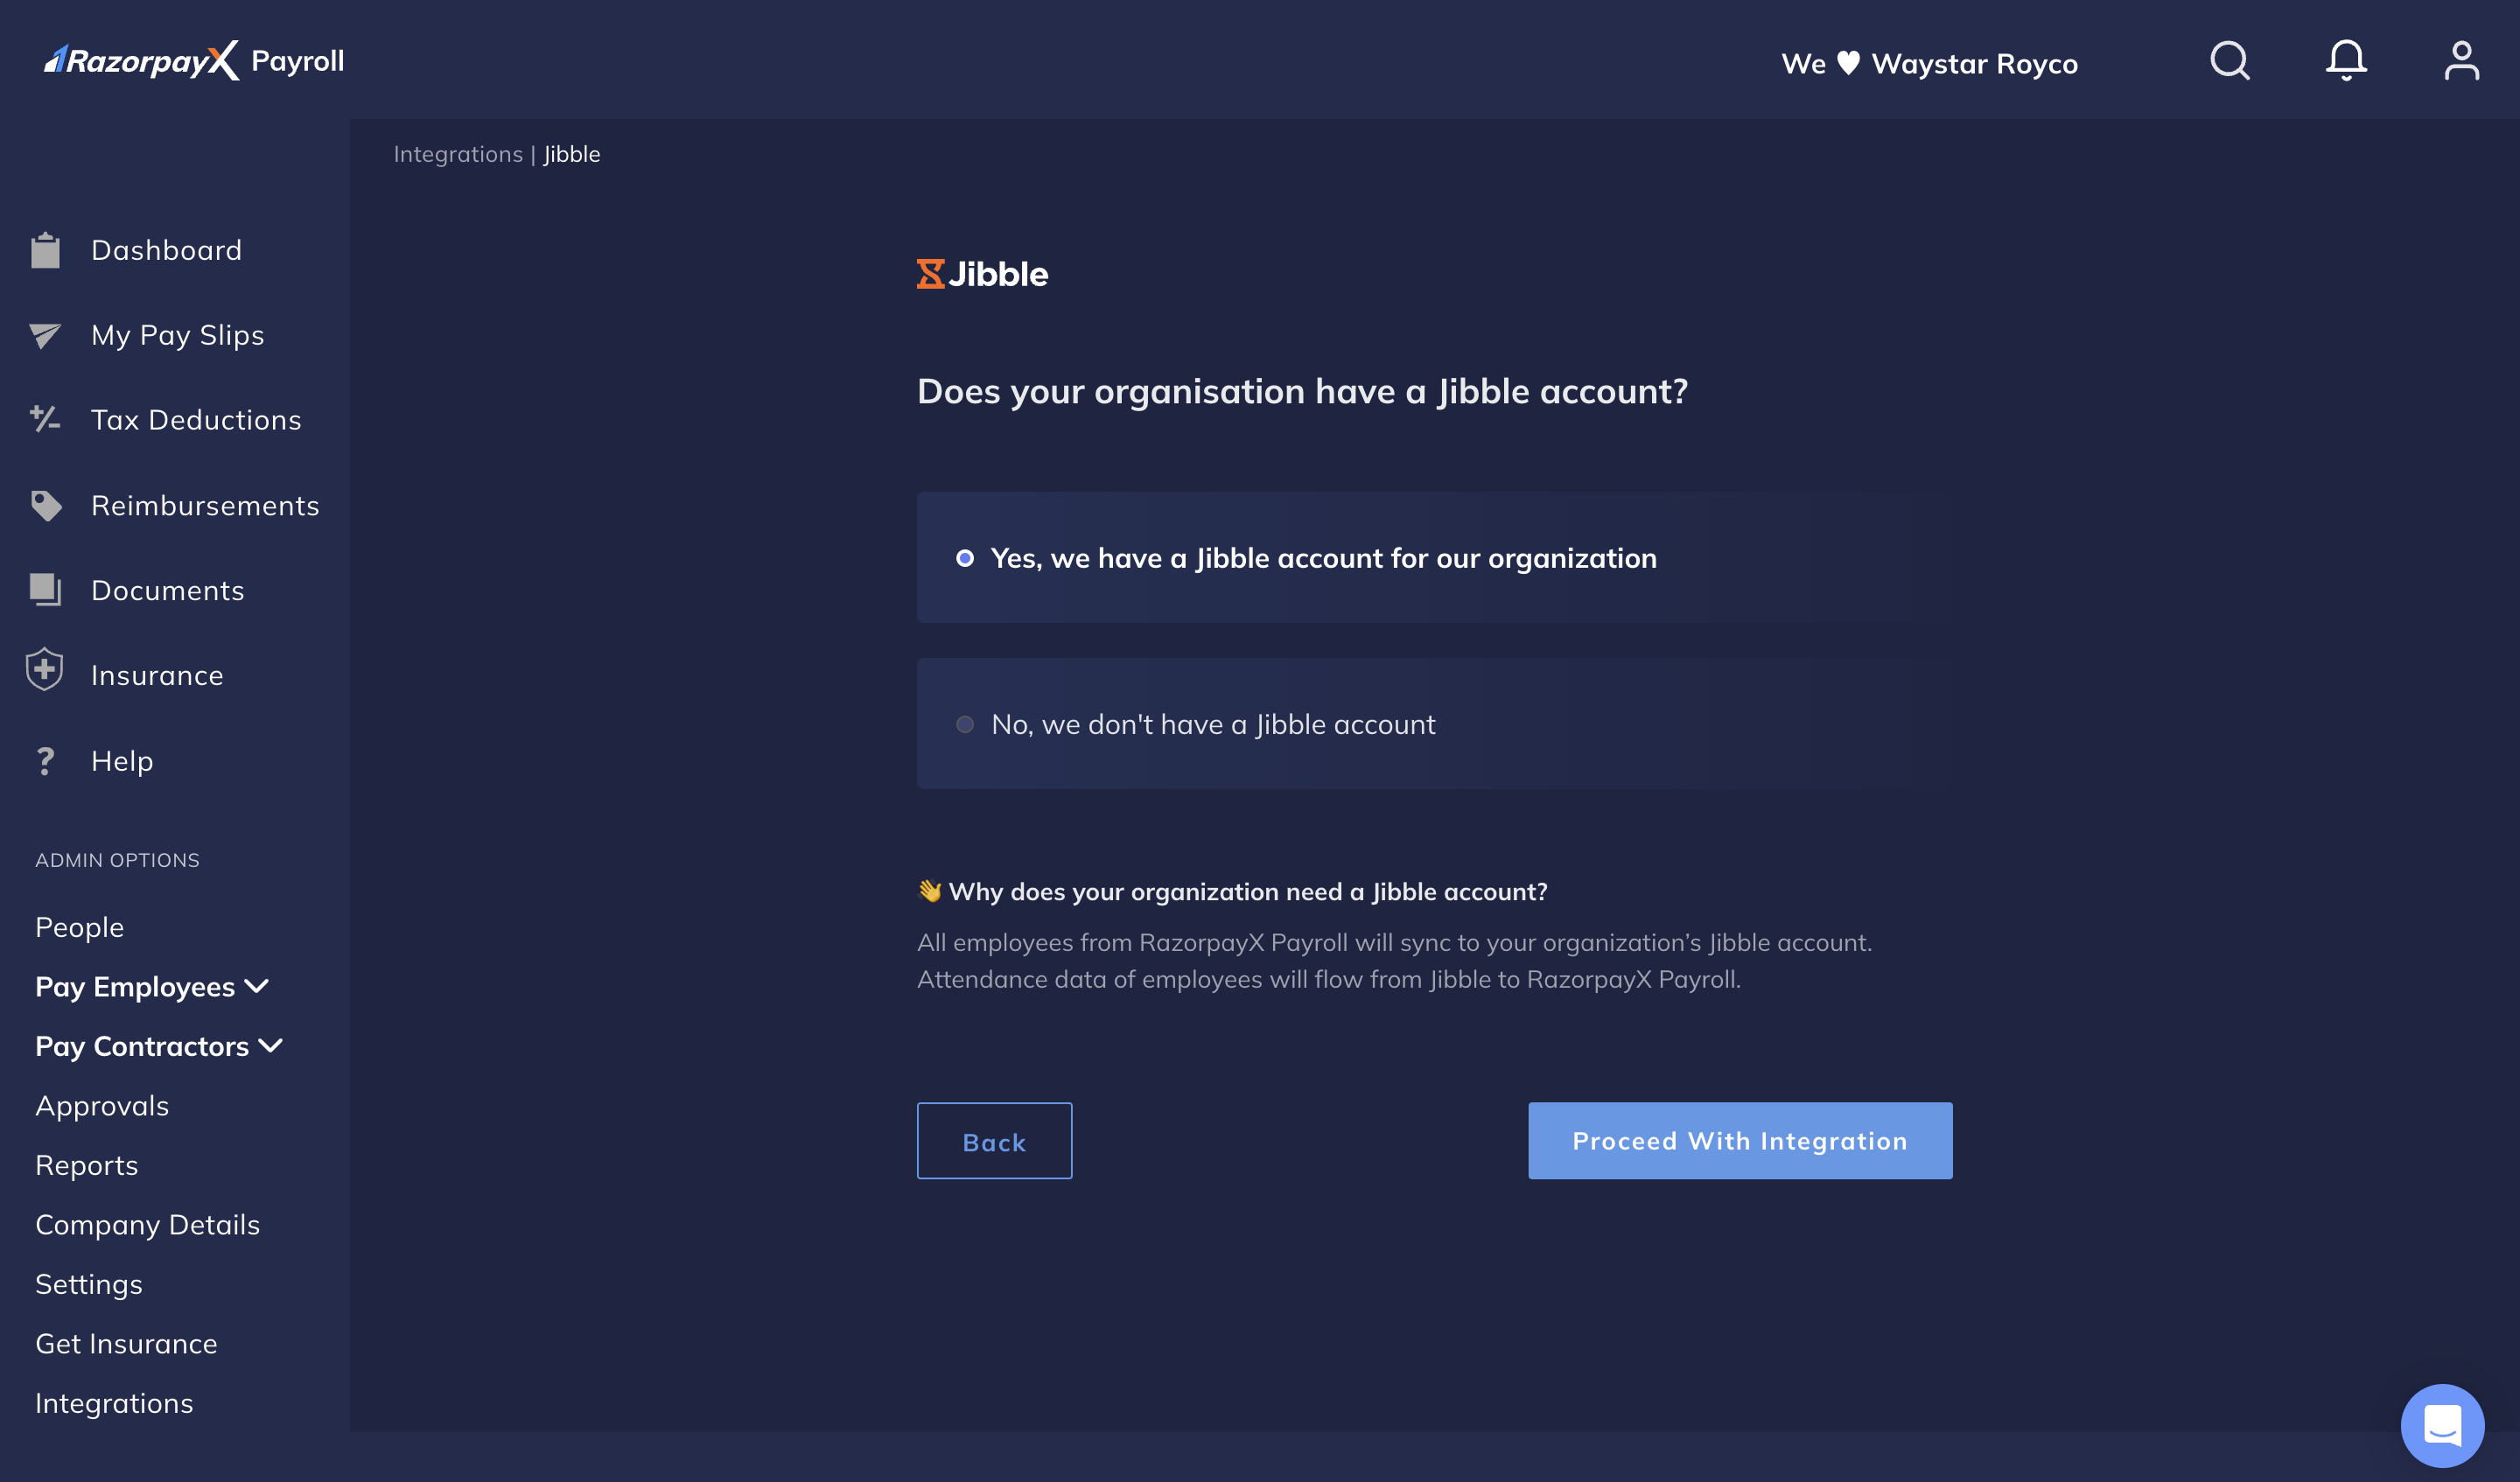
5. You can choose to either create a new Jibble account or use an existing one. Select **Yes, we have a Jibble account for our organisation**.
6. Click **Proceed With Integration**.
4. Click **START INTEGRATION** on the Jibble Integration page.
5. You can choose to either create a new Jibble account or use an existing one. Select **Yes, we have a Jibble account for our organisation**.
6. Click **Proceed With Integration**.
 After you create a Jibble account, you can set up the integration with Jibble.
1. On the **Jibble Integration** page (on the [Payroll Dashboard](https://payroll.razorpay.com/dashboard)), enter the Jibble API keys. To find the API keys, refer to the [Jibble Help](https://www.jibble.io/help/using-jibbles-api-for-your-custom-needs) article.
2. Click **VERIFY ACCOUNT**.
3. Select the minimum shift durations for a full day and half day as applicable to your organisation in the **Attendance Configuration** page. Click **CONTINUE**.
4. On the **Sync employees to Jibble** page, verify the number of employees. Click **SYNC EMPLOYEES AND COMPLETE INTEGRATION**.
Payroll automatically creates Jibble accounts for your employees, post which your employees can authenticate and avail the [benefits](#advantages-of-integration).
You have successfully integrated Payroll with Jibble. Set up your organisation's [leave and attendance](/docs/payroll/leaves) policy on Jibble. Know how Payroll [retrieves the Loss of Pay data](#verify-lop-in-payroll) to calculate the monthly payroll.
After you create a Jibble account, you can set up the integration with Jibble.
1. On the **Jibble Integration** page (on the [Payroll Dashboard](https://payroll.razorpay.com/dashboard)), enter the Jibble API keys. To find the API keys, refer to the [Jibble Help](https://www.jibble.io/help/using-jibbles-api-for-your-custom-needs) article.
2. Click **VERIFY ACCOUNT**.
3. Select the minimum shift durations for a full day and half day as applicable to your organisation in the **Attendance Configuration** page. Click **CONTINUE**.
4. On the **Sync employees to Jibble** page, verify the number of employees. Click **SYNC EMPLOYEES AND COMPLETE INTEGRATION**.
Payroll automatically creates Jibble accounts for your employees, post which your employees can authenticate and avail the [benefits](#advantages-of-integration).
You have successfully integrated Payroll with Jibble. Set up your organisation's [leave and attendance](/docs/payroll/leaves) policy on Jibble. Know how Payroll [retrieves the Loss of Pay data](#verify-lop-in-payroll) to calculate the monthly payroll.
 ### Manage Integration
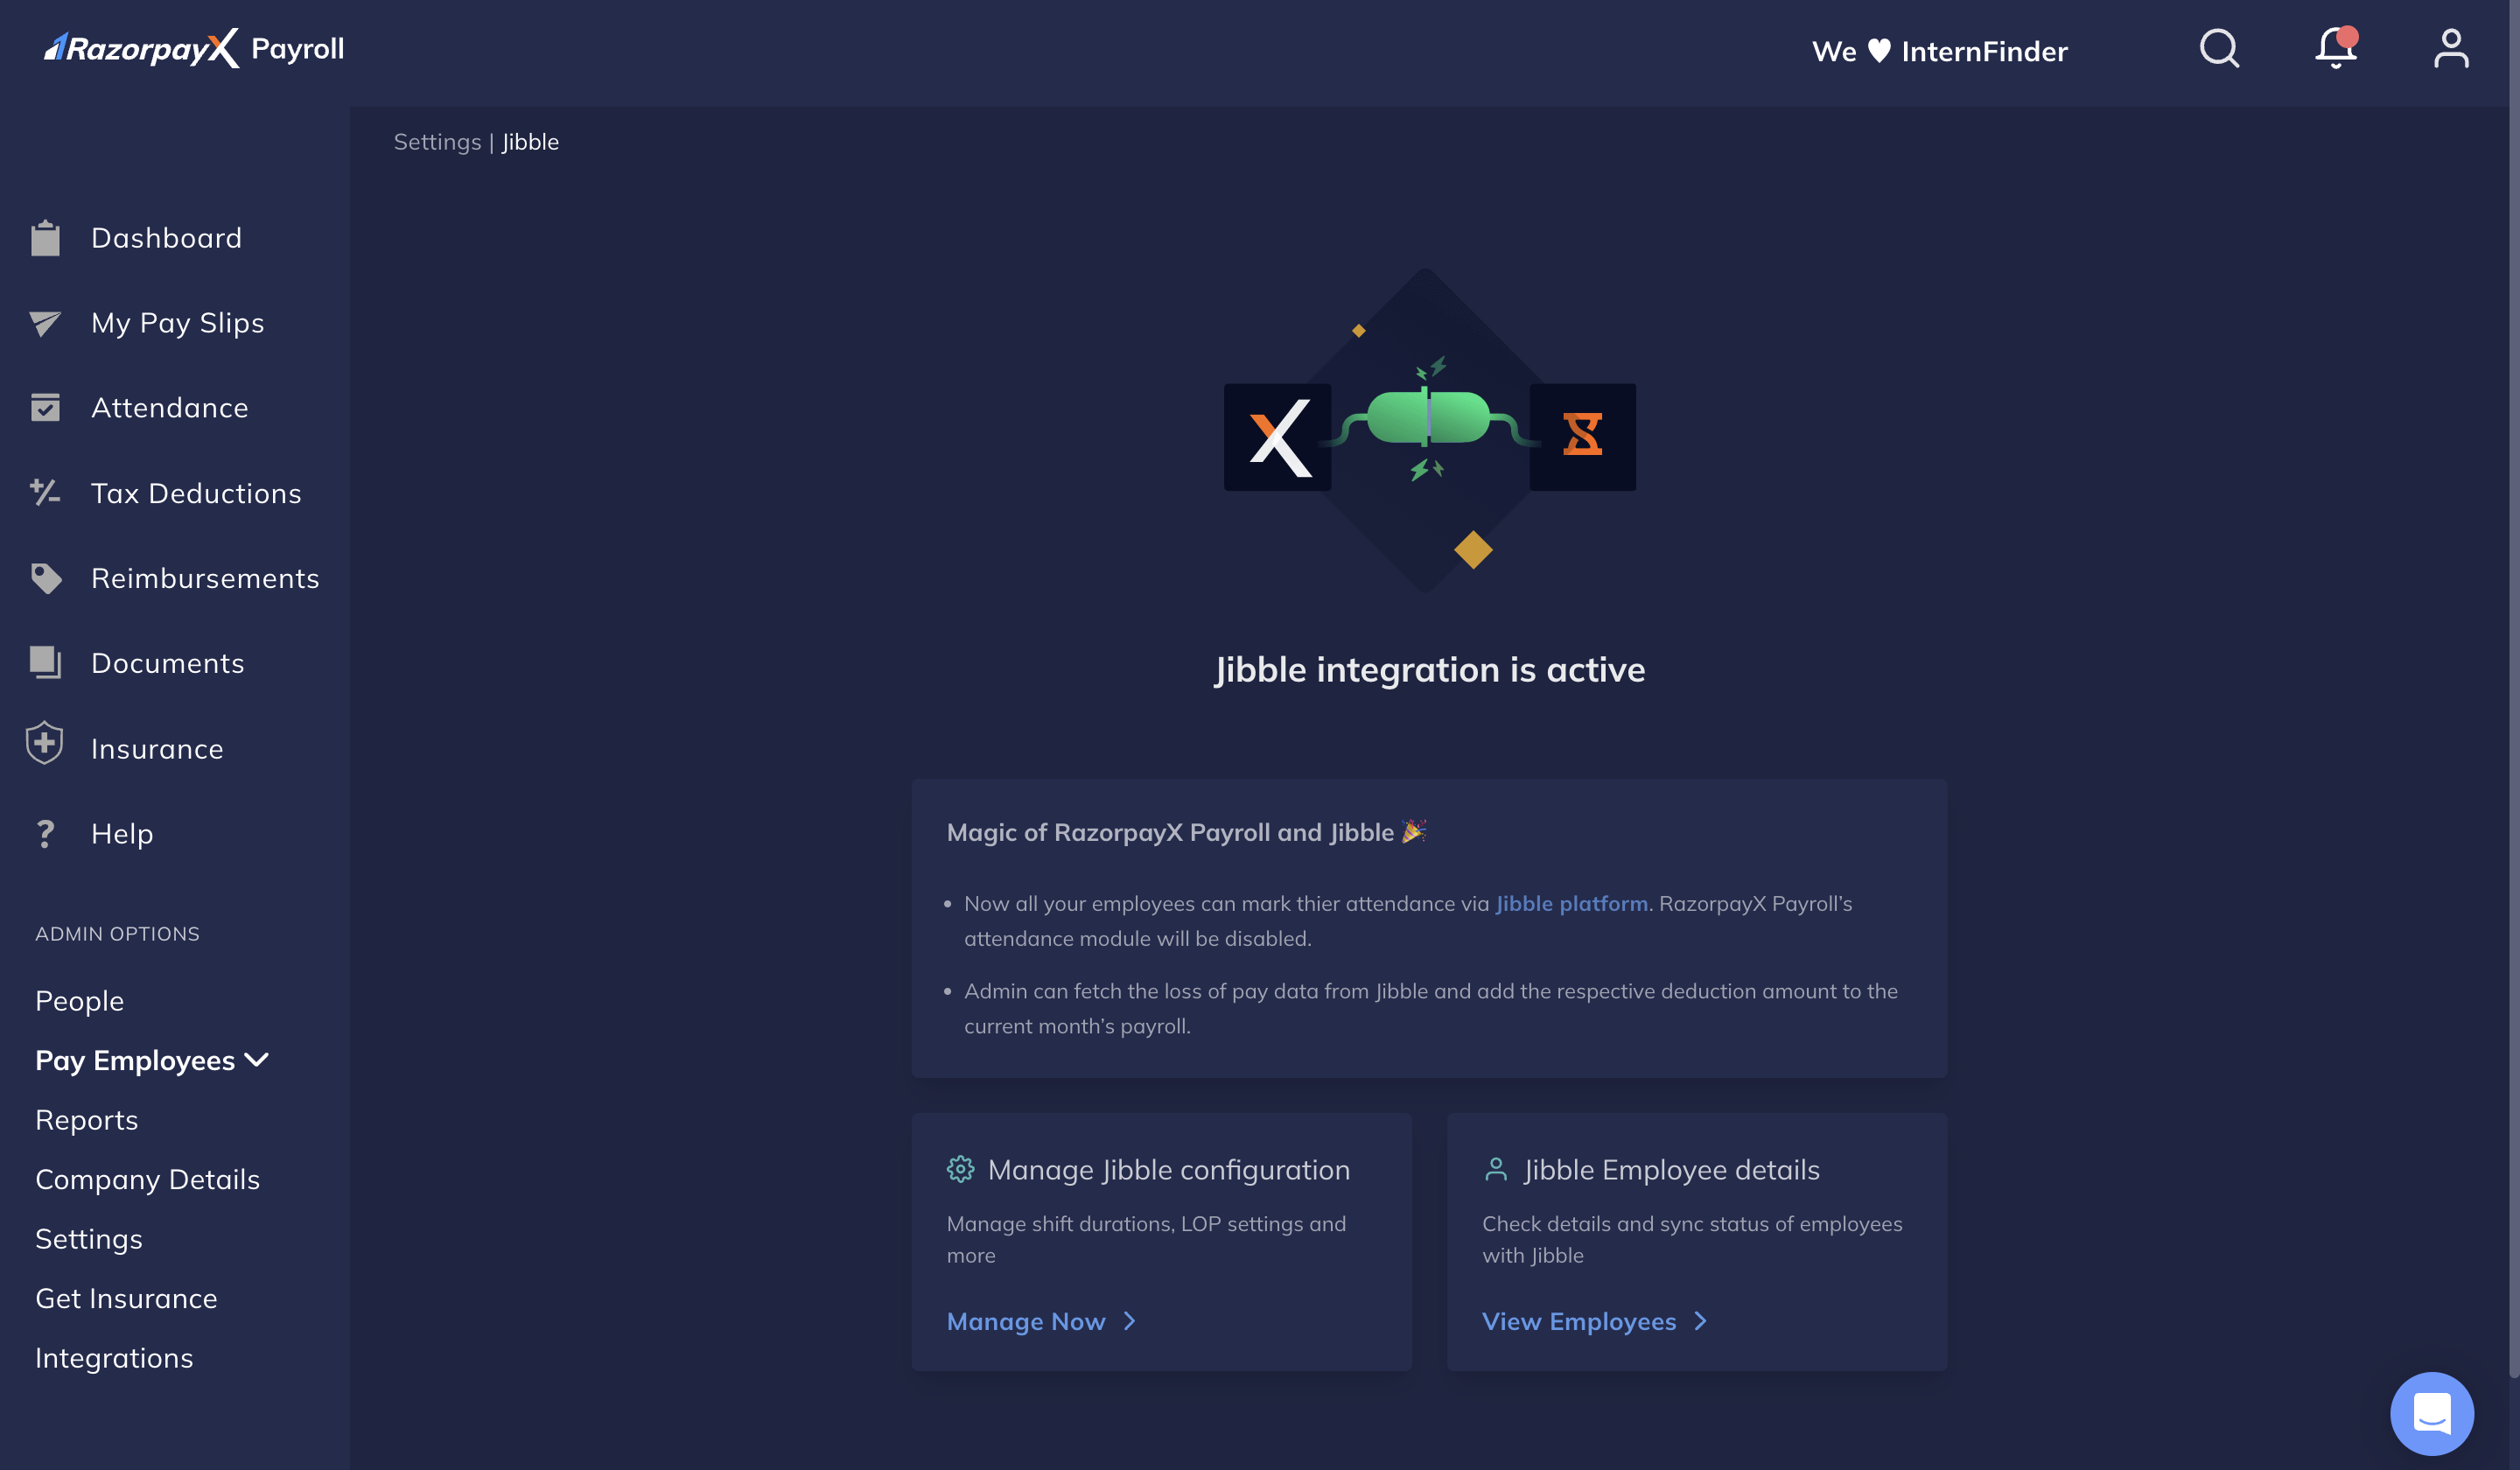
Once you complete the integration, you can manage the integration from **ADMIN OPTIONS** → **Integrations** → **MANAGE** on the Jibble card. On the configuration page, you can:
* Modify the full and half-day working hours applicable to your organisation.
* Select whether Payroll should calculate loss of pay using on the total days in a month or the total working days.
* View the Jibble account integration status of your employees. Payroll regularly syncs data from Jibble and you can view that status at an employee level here. You can also:
* Find the Jibble code for your employees.
* Filter the employee details by their name or their integration status.
## Verify LOP in Payroll
Once your employees mark their attendance on Jibble, you can sync the loss of pay details from Jibble before you [execute payroll](/docs/payroll/run-payroll). To verify the loss of pay data:
1. Log in to the [Payroll Dashboard](https://payroll.razorpay.com/dashboard).
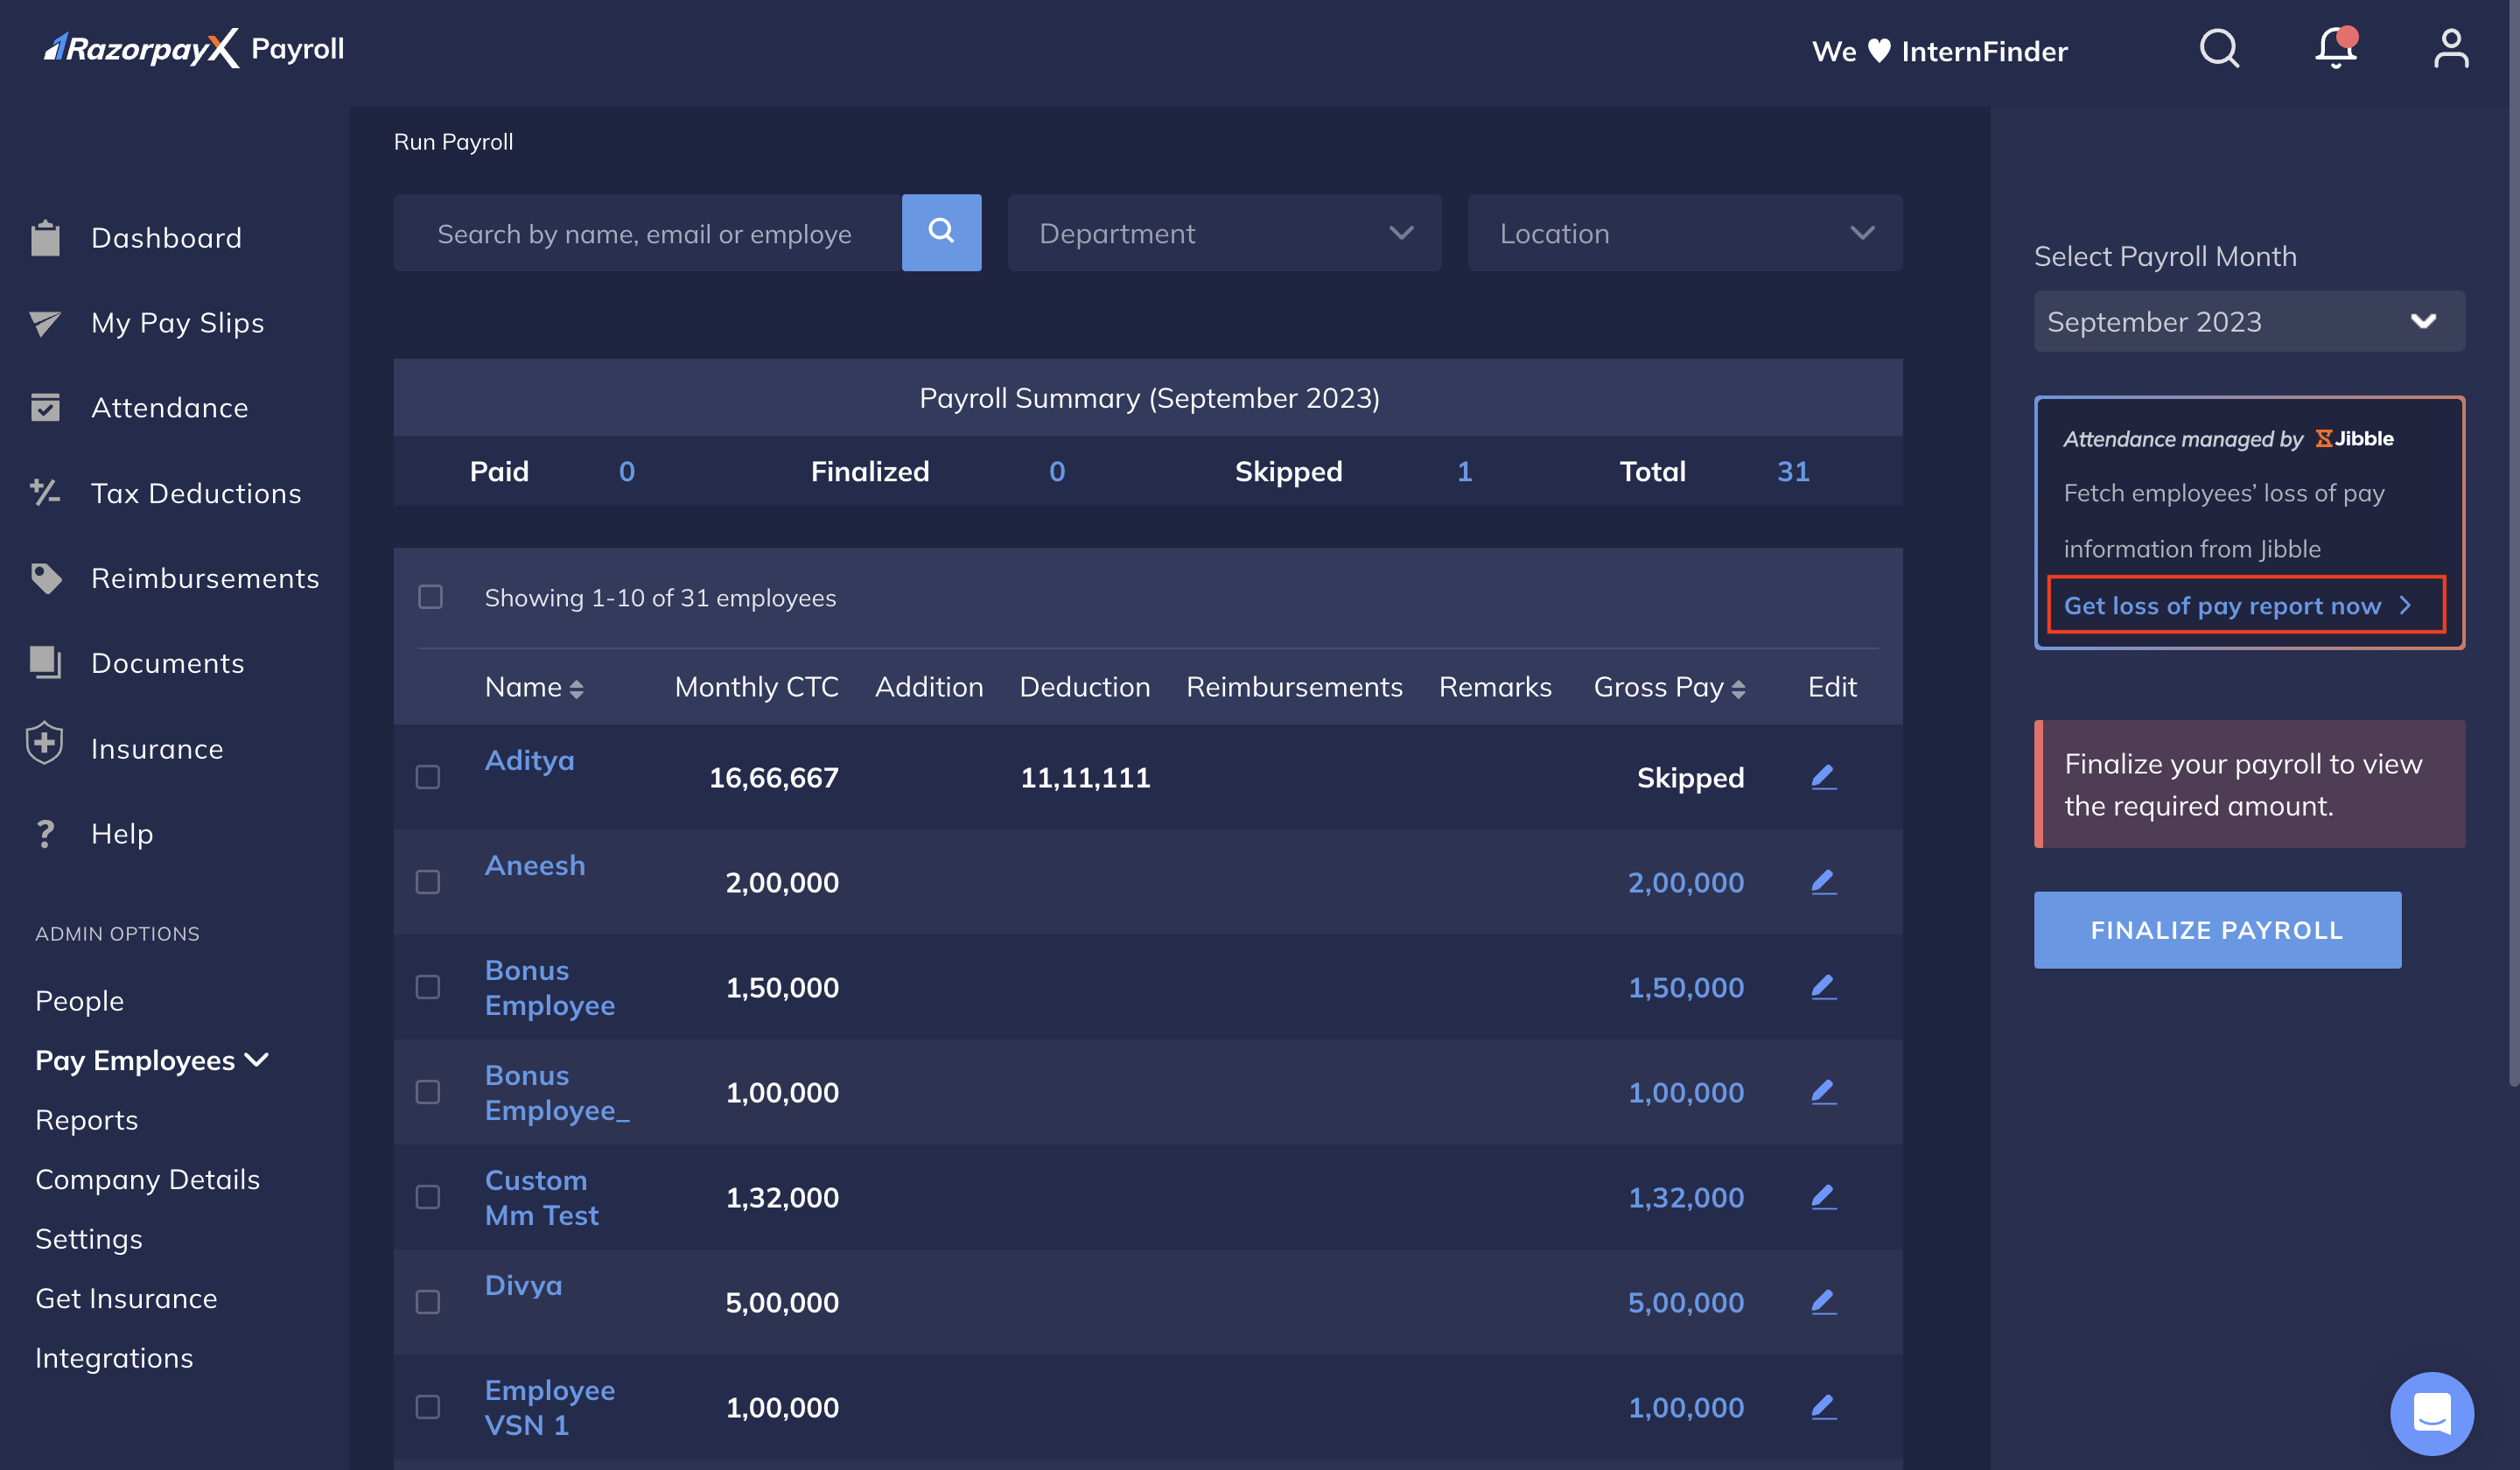
2. Go to **ADMIN OPTIONS** in the left menu → **Pay Employees** → **Run Payroll**.
3. Select the payroll month from the drop-down list in the right pane.
4. Click **Get loss of pay report now >**. This opens the Loss of Pay report for the selected month.
### Manage Integration
Once you complete the integration, you can manage the integration from **ADMIN OPTIONS** → **Integrations** → **MANAGE** on the Jibble card. On the configuration page, you can:
* Modify the full and half-day working hours applicable to your organisation.
* Select whether Payroll should calculate loss of pay using on the total days in a month or the total working days.
* View the Jibble account integration status of your employees. Payroll regularly syncs data from Jibble and you can view that status at an employee level here. You can also:
* Find the Jibble code for your employees.
* Filter the employee details by their name or their integration status.
## Verify LOP in Payroll
Once your employees mark their attendance on Jibble, you can sync the loss of pay details from Jibble before you [execute payroll](/docs/payroll/run-payroll). To verify the loss of pay data:
1. Log in to the [Payroll Dashboard](https://payroll.razorpay.com/dashboard).
2. Go to **ADMIN OPTIONS** in the left menu → **Pay Employees** → **Run Payroll**.
3. Select the payroll month from the drop-down list in the right pane.
4. Click **Get loss of pay report now >**. This opens the Loss of Pay report for the selected month.
 5. Modify the date range upto 31 days and click **Sync Loss of Pay Report**. Payroll retrieves the employees' leaves and shifts data from Jibble for the updated range.
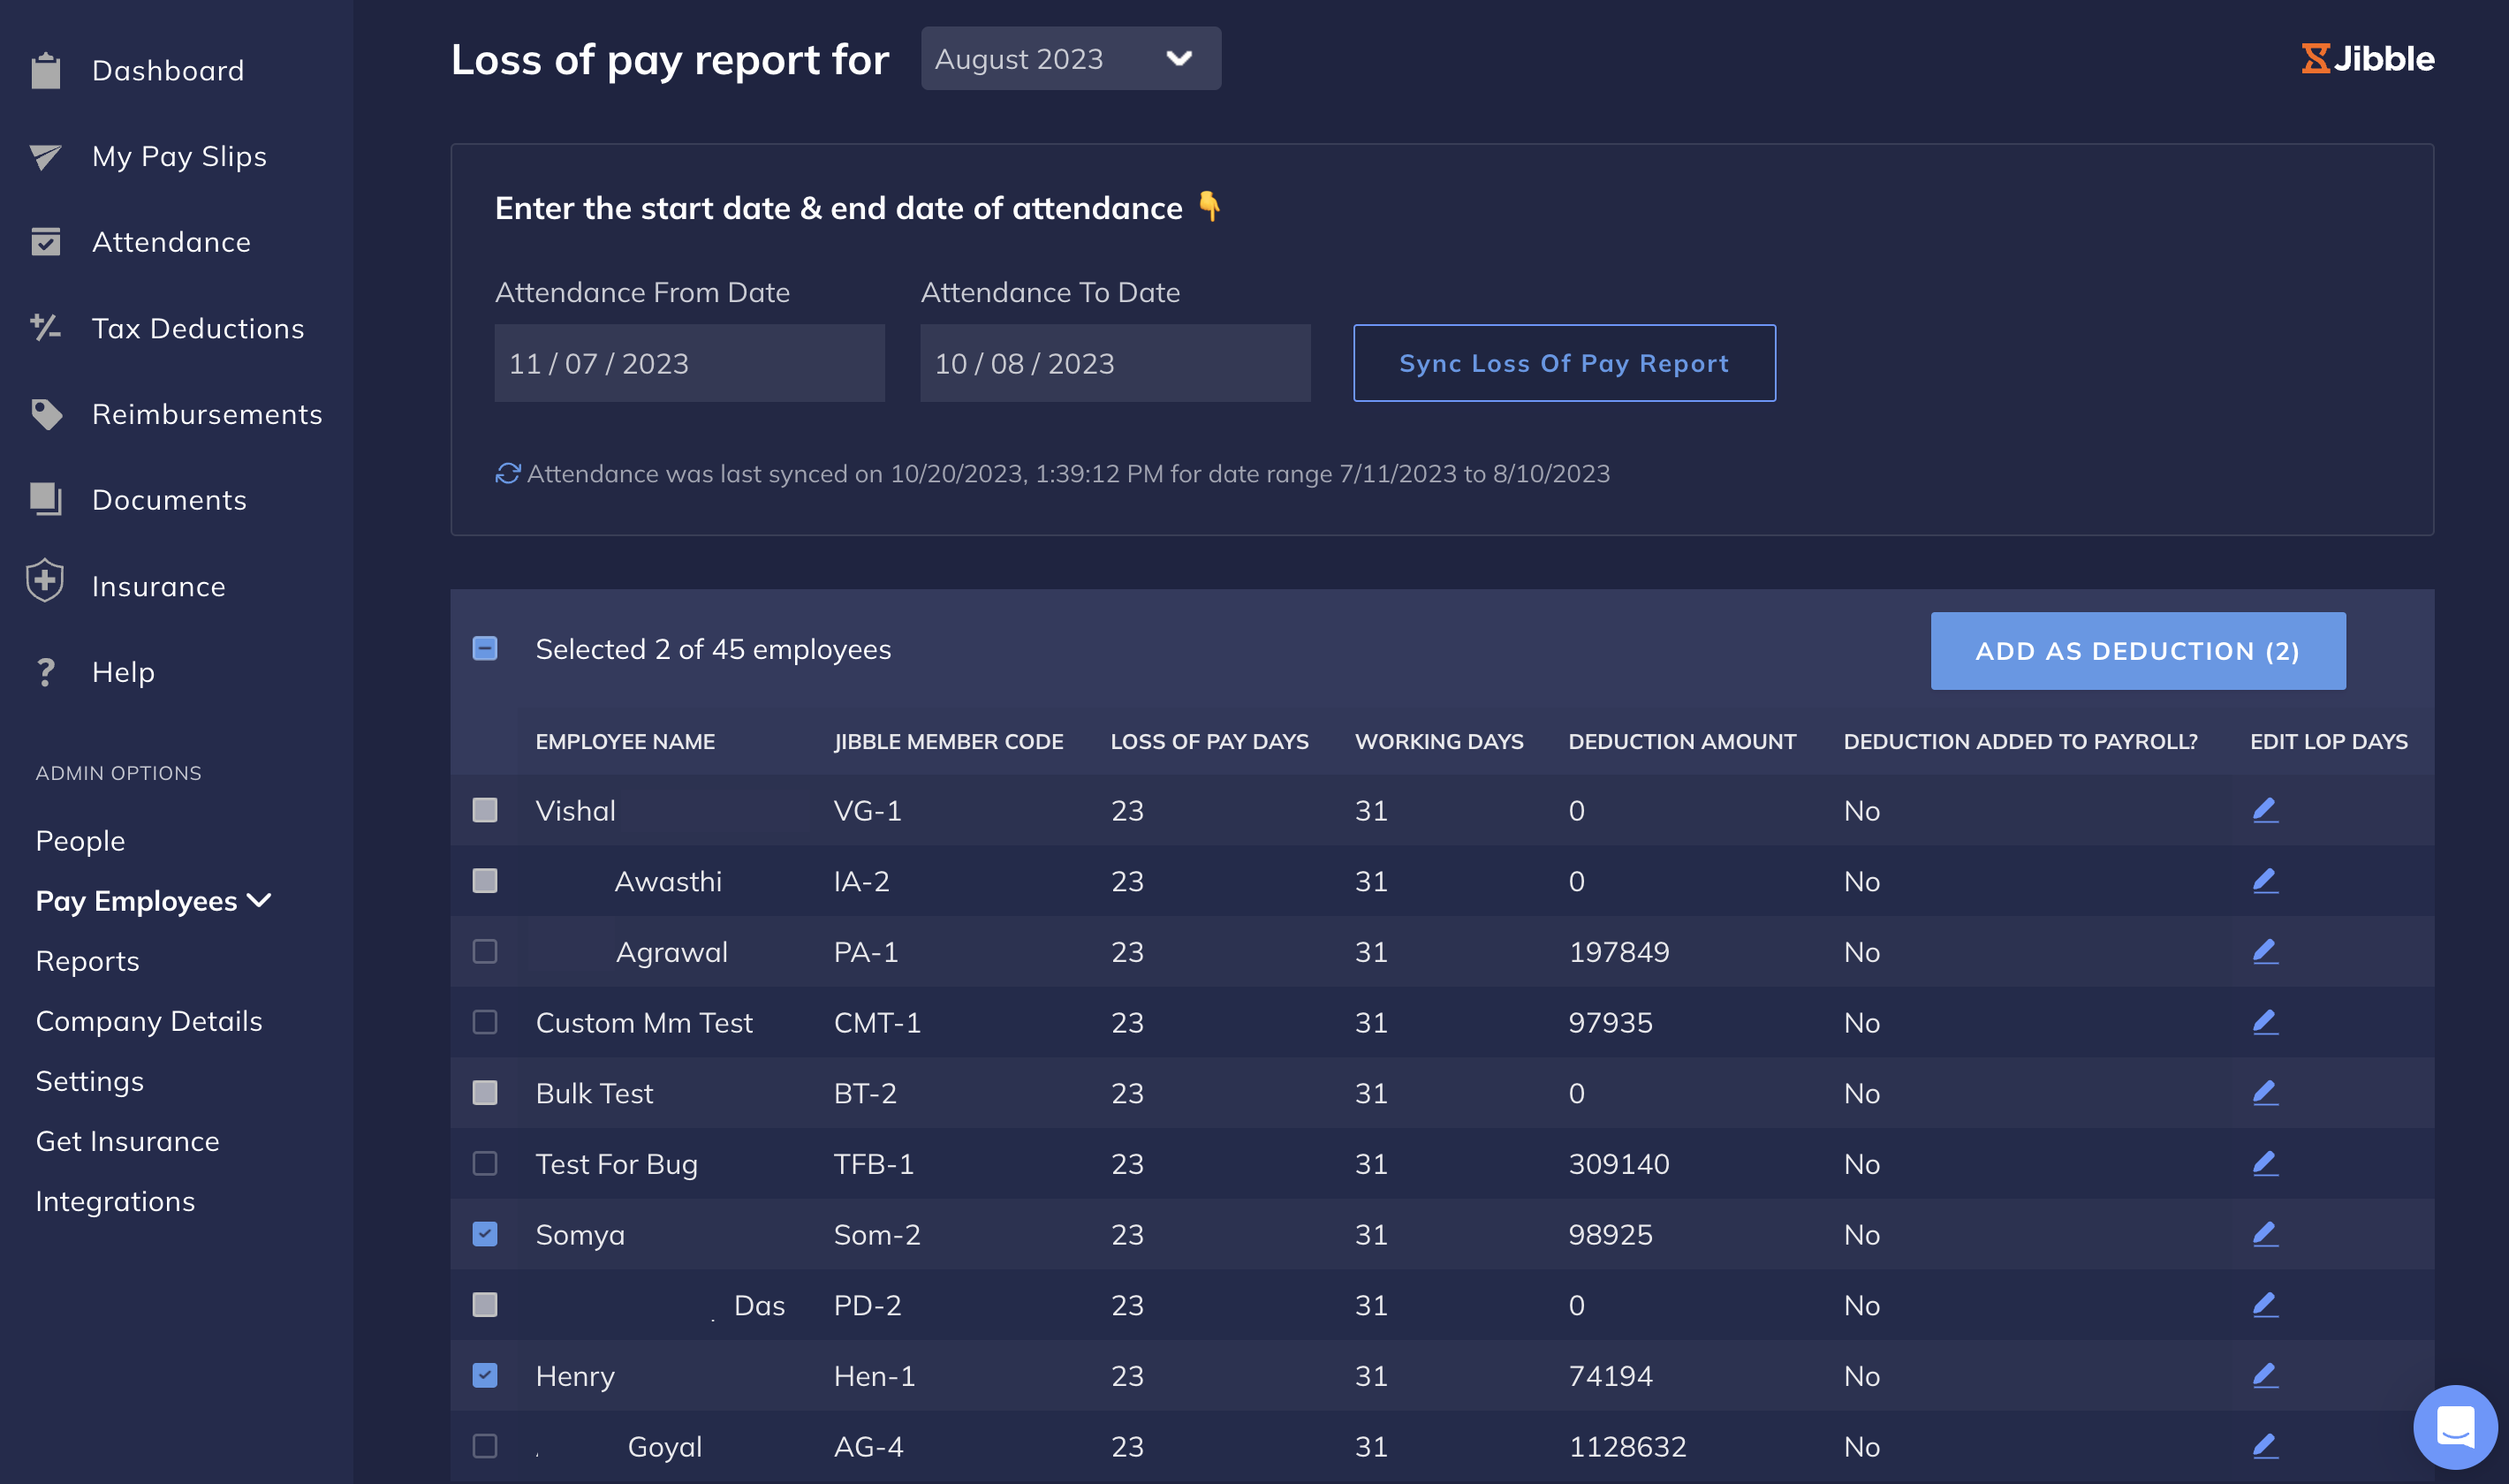 6. Verify the data report and the deduction amount.
* Click the edit icon against the employee's name in the **EDIT LOP DAYS** column to change the Loss of Pay days as required. Click **Save**.
* Select and clear check boxes against the employees' names to skip deducting the loss of pay amount for that month.
7. Click **ADD AS DEDUCTIONS ()** → **Add Deductions Now** in the confirmation pop-up modal.
8. Click **Go To Run Payroll Page** on the success modal.
You have successfully added your employees' Loss of Pay amount as a deduction to the monthly payroll. To verify the deductions:
1. Go to the Loss of Pay report page.
2. Check the **DEDUCTION ADDED TO PAYROLL?** column.
You can edit the loss of pay days and deductions until you execute payroll. Know more about the [execute payroll checklist](/docs/payroll/execute-payroll).
### Related Information
* [About Integrations](/docs/payroll/integrations)
* [Leaves and Attendance](/docs/payroll/leaves)
* [Whatsapp Integration](/docs/payroll/integrations/whatsapp)
6. Verify the data report and the deduction amount.
* Click the edit icon against the employee's name in the **EDIT LOP DAYS** column to change the Loss of Pay days as required. Click **Save**.
* Select and clear check boxes against the employees' names to skip deducting the loss of pay amount for that month.
7. Click **ADD AS DEDUCTIONS ()** → **Add Deductions Now** in the confirmation pop-up modal.
8. Click **Go To Run Payroll Page** on the success modal.
You have successfully added your employees' Loss of Pay amount as a deduction to the monthly payroll. To verify the deductions:
1. Go to the Loss of Pay report page.
2. Check the **DEDUCTION ADDED TO PAYROLL?** column.
You can edit the loss of pay days and deductions until you execute payroll. Know more about the [execute payroll checklist](/docs/payroll/execute-payroll).
### Related Information
* [About Integrations](/docs/payroll/integrations)
* [Leaves and Attendance](/docs/payroll/leaves)
* [Whatsapp Integration](/docs/payroll/integrations/whatsapp)