> ## Documentation Index
> Fetch the complete documentation index at: https://razorpay-881012b3.mintlify.site/llms.txt
> Use this file to discover all available pages before exploring further.
# Set up Tax Windows
> Check how to set up declaration and proof upload windows for employees in RazorpayX Payroll.
Available in🇮🇳 India
After you enable tax deductions for your organisation, you can set up the following:
Window to declare investments at the start of the year.
Window to upload proof of investments at the end of the year.
Custom windows set up for specific employees in exceptional cases.
## Declaration Window
After you [enable the declaration settings](/docs/payroll/tax-deductions-setup#enable-set-up), you can choose the declaration window period for the year your employees can declare their investments. This usually happens at the beginning of the year.
To set up the declaration window:
1. Log in to the [Payroll Dashboard](https://payroll.razorpay.com/dashboard) → **Settings** → **Tax Deductions Setup**.
2. Go to the Declaration Window tab on the **IT Declaration & Proof Upload** page.
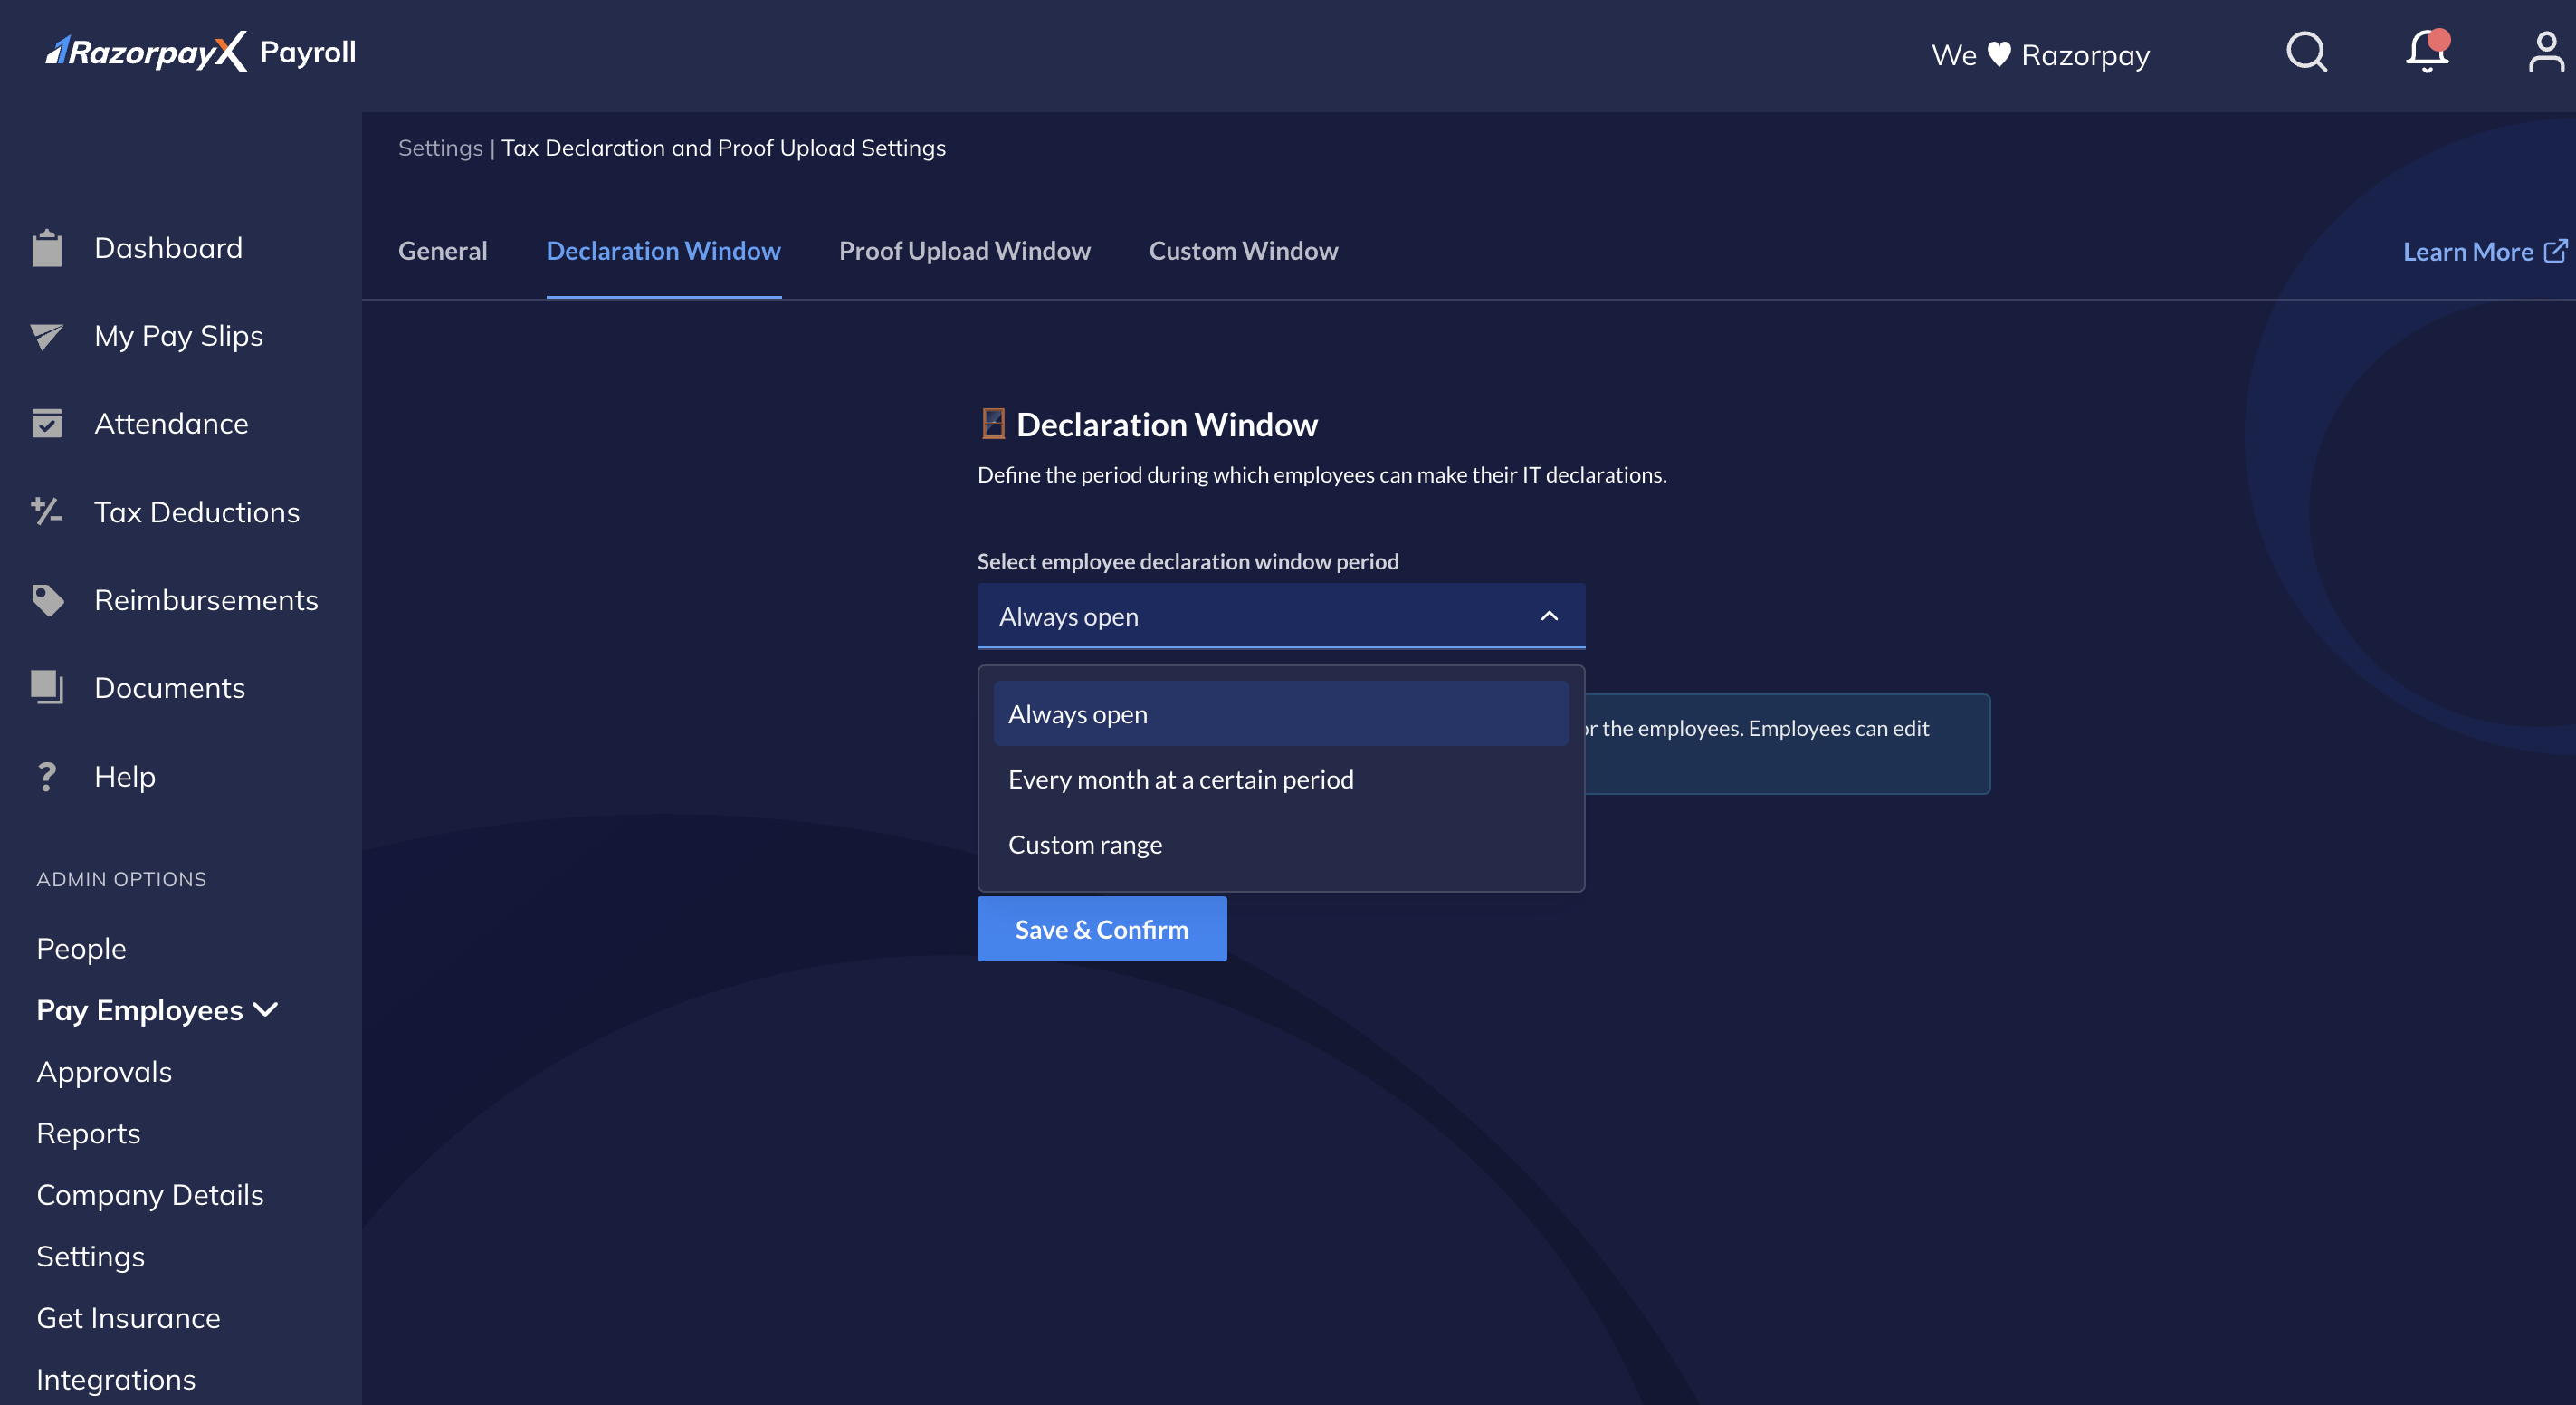
3. Select any of the following options from the **Select employee IT declaration window period** drop-down menu:
* **Always open**: The declaration window remains open throughout the year for employees to declare and edit their declarations at any time.
* **Every month for a certain period**: The declaration window regularly opens for a certain period every month. To choose the date range, select the **Month start date** and **Month end date**.
* **Custom range**: The declaration window opens as defined by the date and month ranges specified in the **Start date** and **End date** drop-down menu. You can also click **+ Add new range** to add more than one declaration window.
1. Click **Save & Confirm** to save the declaration settings.
You have successfully created declaration window/s for the financial year.
* You can edit the window at any time throughout the year.
* Your employees cannot to declare investments when the window is unavailable, unless you create a [custom window](#advancecustom-settings).
## Proof Upload Window
The proof upload window opens towards the end of the year when employees upload their proof of investments to validate their investment declarations. You can customise this period as necessary.
**Watch Out!**
You can edit the Proof Upload Window only if you select **Let Organisation Verify** in **Opt for Verification**.
To select the proof upload window:
1. Log in to the [Payroll Dashboard](https://payroll.razorpay.com/dashboard) → **Settings** → **Tax Deductions Setup**.
2. Go to the **Proof Upload Window** tab.
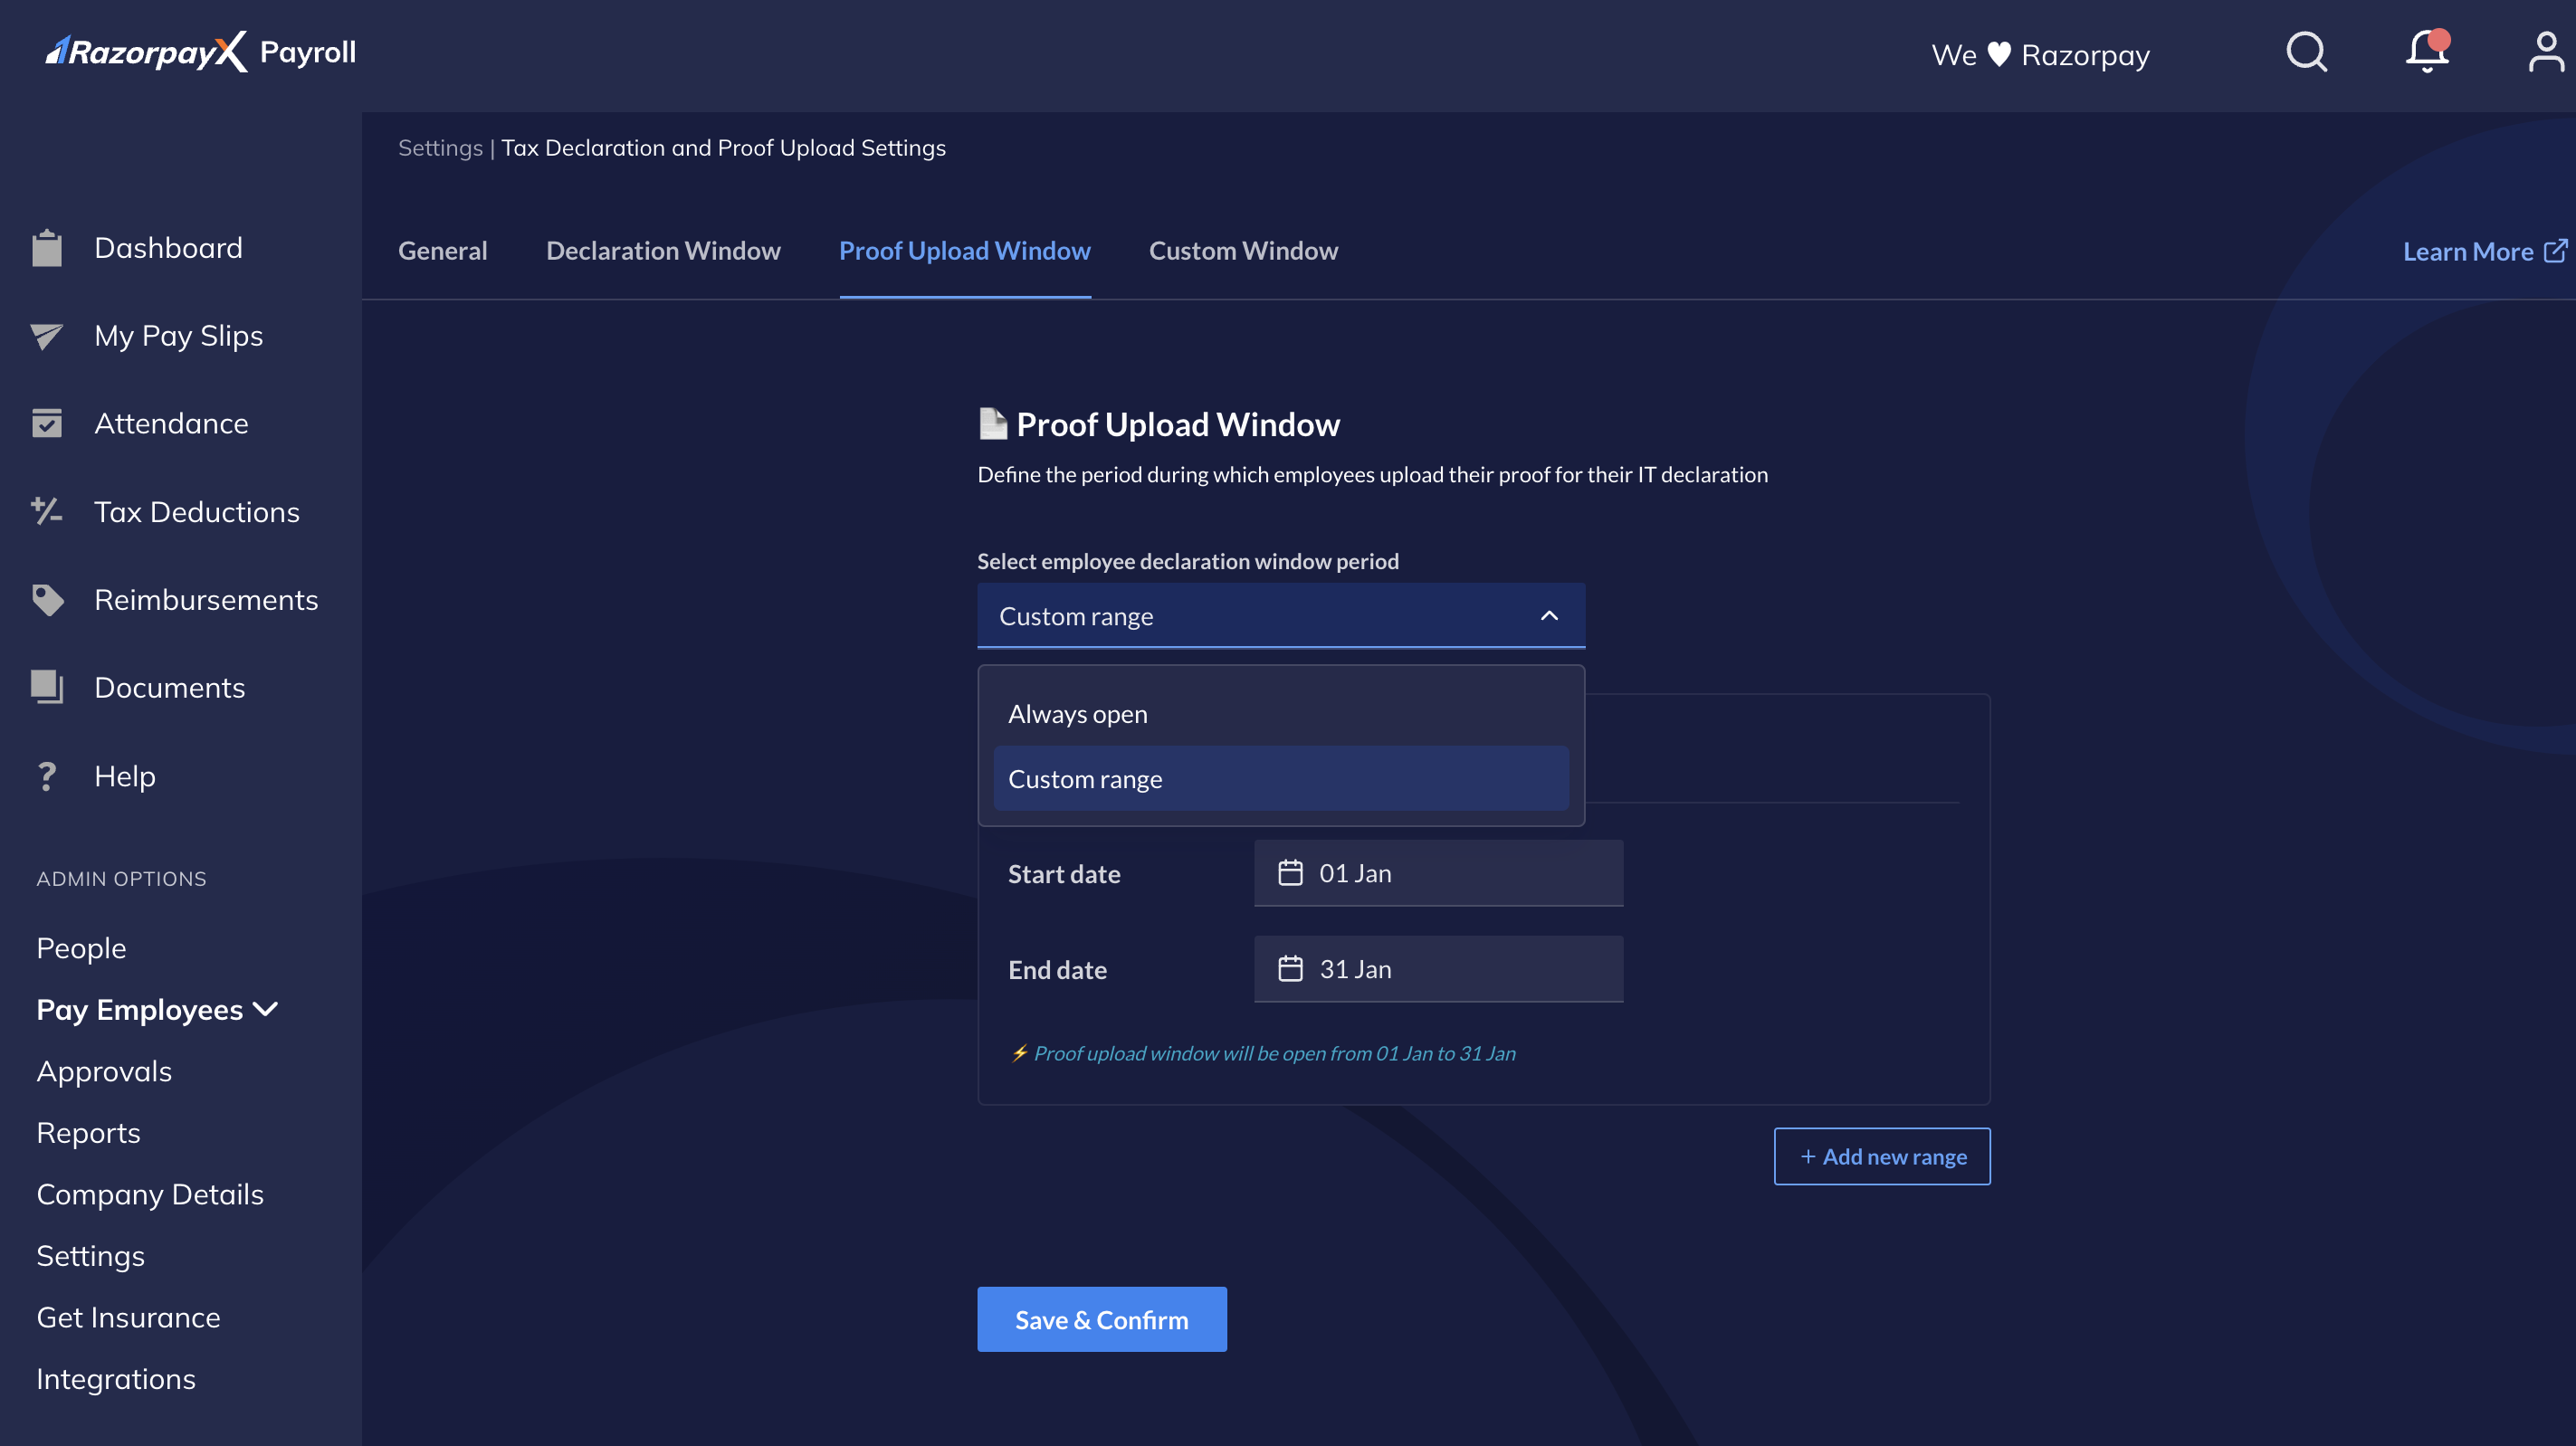
3. Confirm any of the following options from the **Select proof upload window period** drop-down menu:
* **Always open**: The proof upload window remains open throughout the year for employees to upload their investment proofs at any time.
* **Custom range**: The proof upload window opens as defined by the date and month ranges specified in the **Start date** and **End date** drop-down menu. You can also click **+ Add new range** to add more than one proof upload window.
1. Click **Save & Confirm** to save the declaration settings.
You have successfully created a proof upload window.
* When the window is open, we communicate the availability to your employees via email.
* Your employees cannot upload proofs when the window is unavailable, unless you create a [custom window](#advancecustom-settings).
## Advance/Custom Settings
If your employees are unable to declare/submit proofs within the window duration, you can create custom windows for specific employees.
To create custom windows:
1. Log in to the [Payroll Dashboard](https://payroll.razorpay.com/dashboard) → **Settings** → **Tax Deductions Setup**.
2. Click **+ Create new window**.
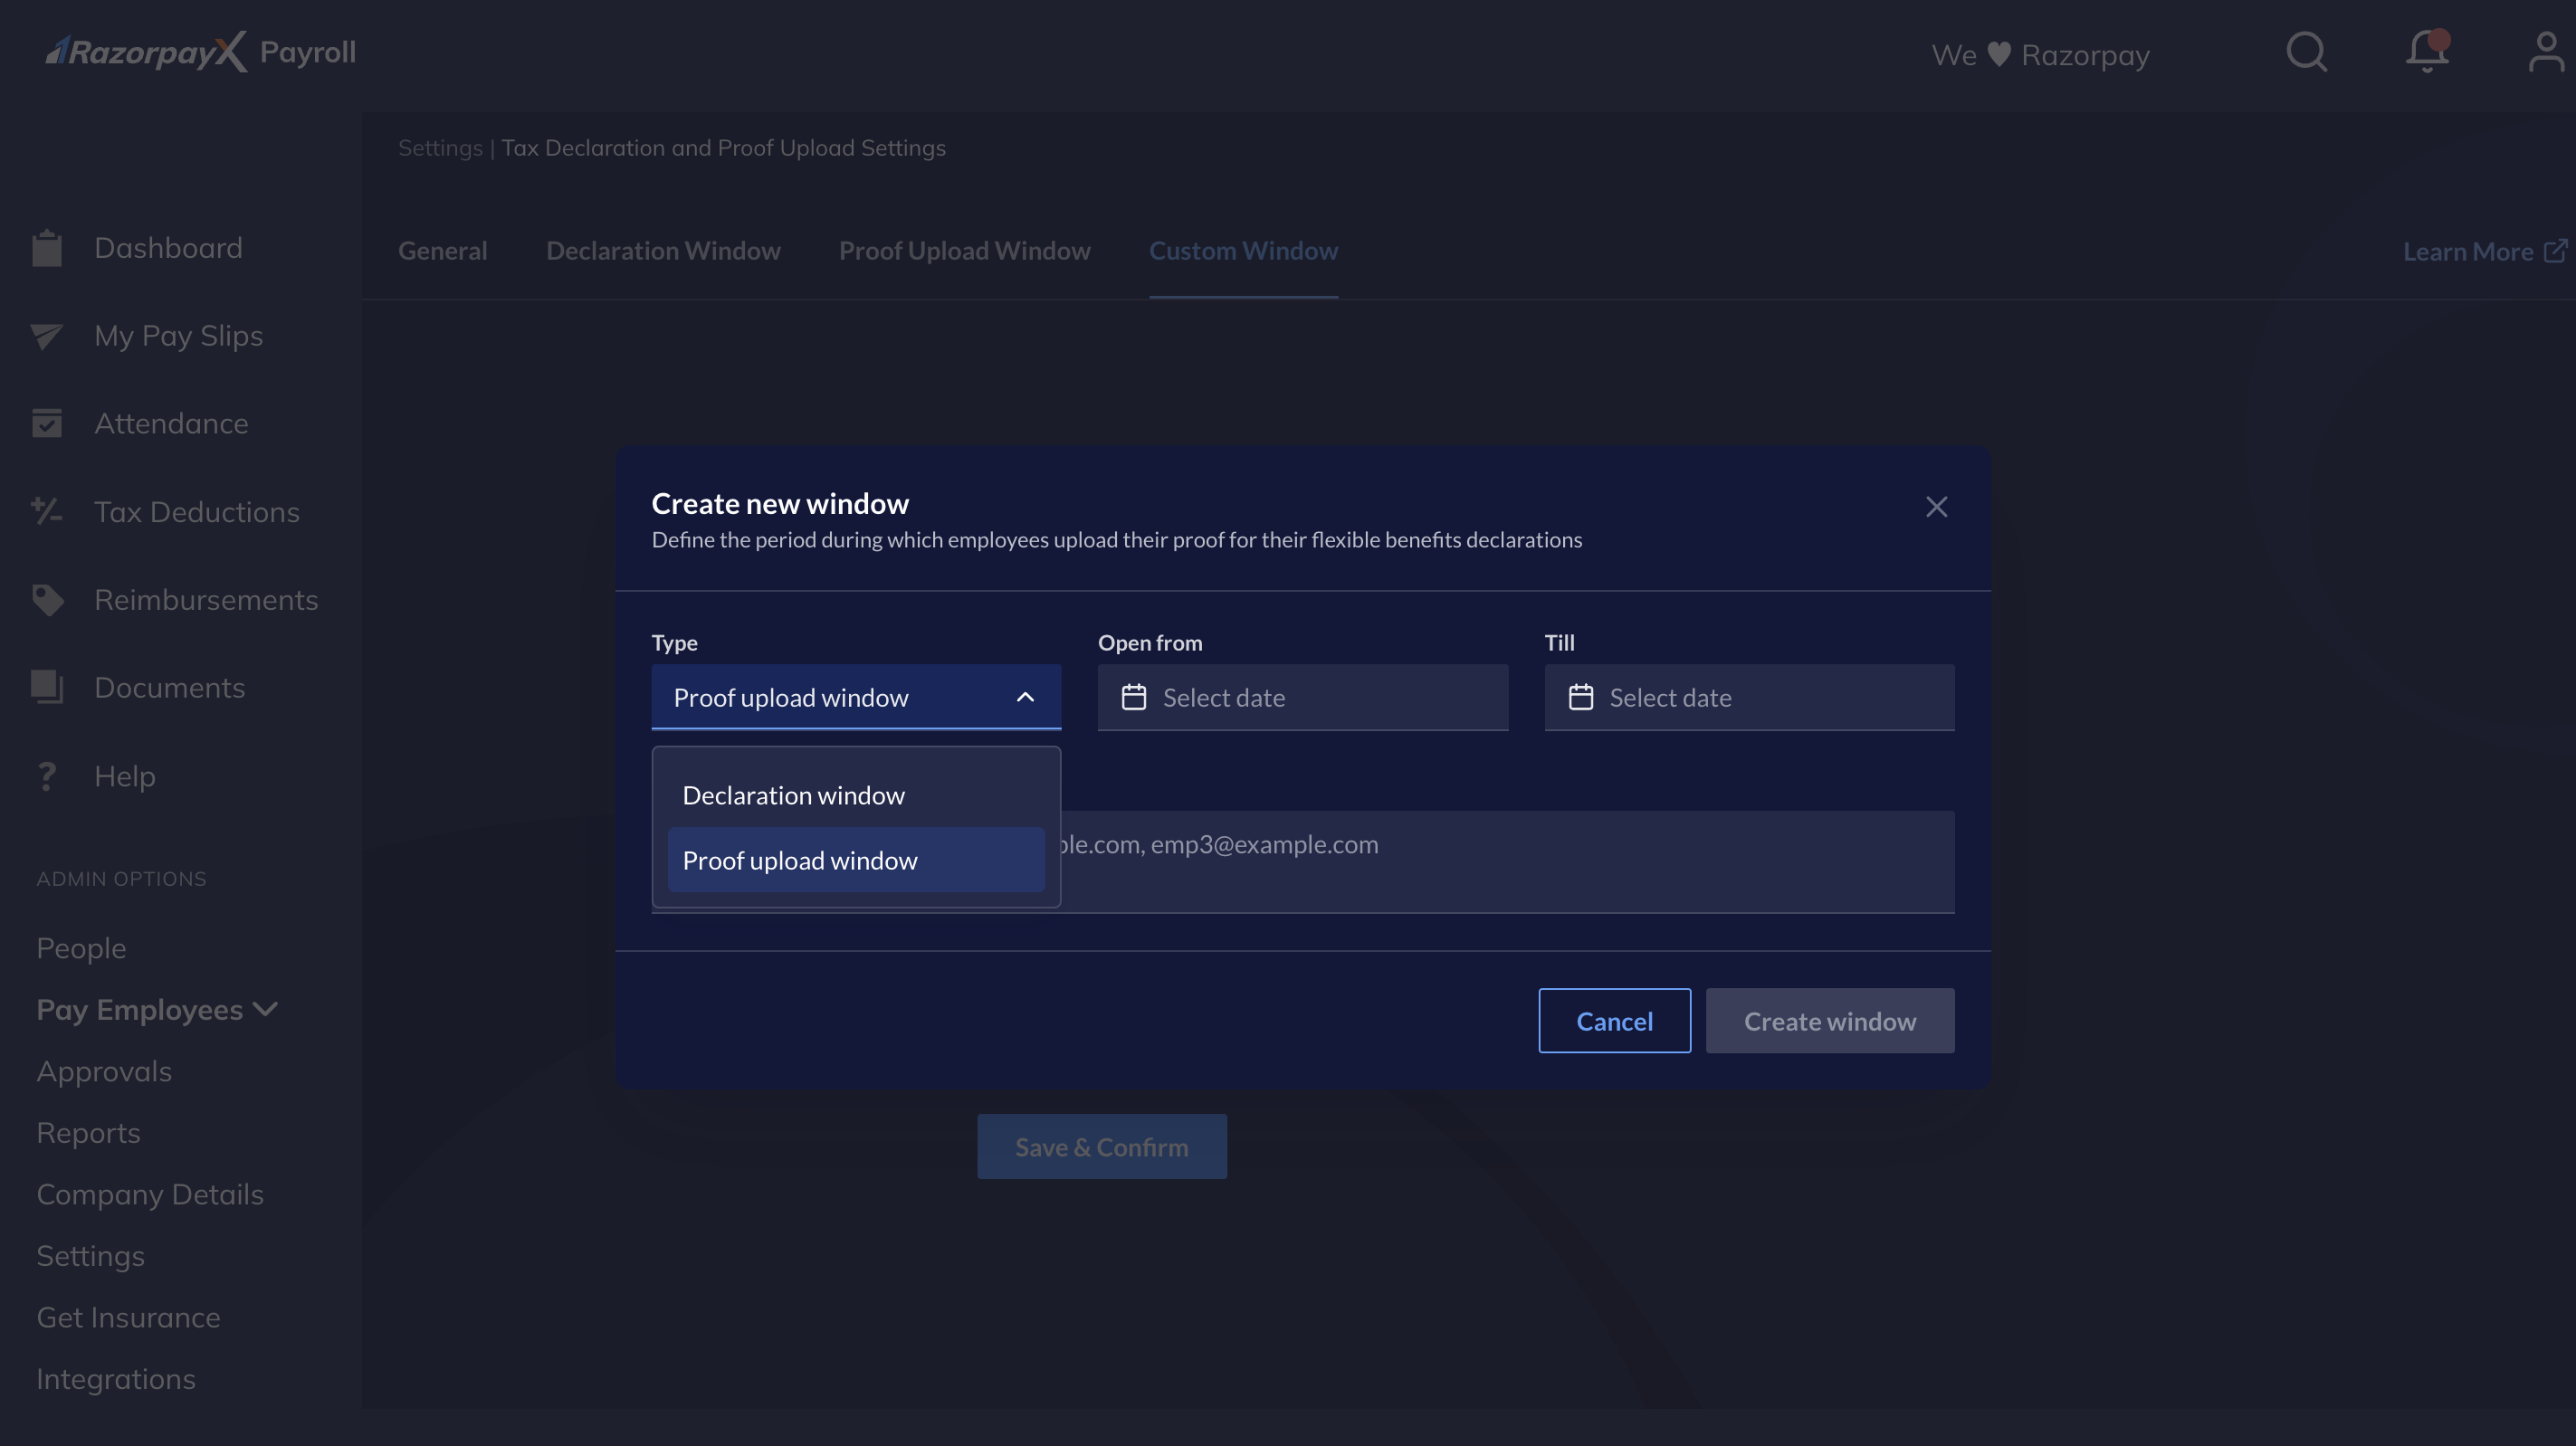
3. In the **Create new window** pop-up window:
1. Select between the Declaration or Proof upload window from the **Select window** drop-down menu.
2. Select the date range using the **Open from** and **Till** drop-down calendars. The respective windows will remain open for this selected duration.
3. Add the employees' email ids in the **Add employee(s) email IDs** text box. This enables the specific declaration/proof upload window for the chosen employees.
4. Click **Create window**.
1. Click **Save & Confirm**.
You have successfully created a custom window for particular employees. You can also:
* Create additional windows using **+ Create new window**.
* Delete the created windows using the delete icon against the specific window.
* Click the number of employees to view the employees' names for which the window is enabled.
### Related Information
* [About Tax Deductions Setup](/docs/payroll/tax-deductions-setup)
* [Verify Tax Proofs](/docs/payroll/tax-verifications)
 1. Click **Save & Confirm** to save the declaration settings.
 1. Click **Save & Confirm** to save the declaration settings.
 1. Click **Save & Confirm**.