> ## Documentation Index
> Fetch the complete documentation index at: https://razorpay-881012b3.mintlify.site/llms.txt
> Use this file to discover all available pages before exploring further.
# Popup Over Bill
> Add attention-grabbing popups to digital bills for time-sensitive offers, loyalty signups and important announcements with custom design options.
Available in
🇮🇳 India
Display a full-screen popup immediately after customers view their bill to capture instant attention for important offers or announcements. Perfect for time-sensitive deals, loyalty program signups or urgent updates that need immediate visibility. Customise the popup design with images, buttons and forms, plus control when and how often customers see them.
## Create New Popup Over Bill Campaign
To create a new Popup Over Bill Campaign:
1. Click **Popup Over Bill** under **Digital Bills**. The **Popup Over Bill** page appears with the list of all Popup Over Bill campaigns.
2. Click **+ New Popup Over Bill Campaign**. The **Popup Over Bill - New Campaign** page appears.
3. Enter the **Campaign Details**, select company and click **Next Step**. The **Popup** page appears.
* You can add ad components such as images, Carousels, GIFs, Videos or YouTube Videos.
* You can choose media directly from your recent uploads.
* You can also add any coupons on the ad.
4. Select an image for more options such as adding redirect url, survey url or custom url. Click **Next Step**.
The **Popup Settings** page appears.
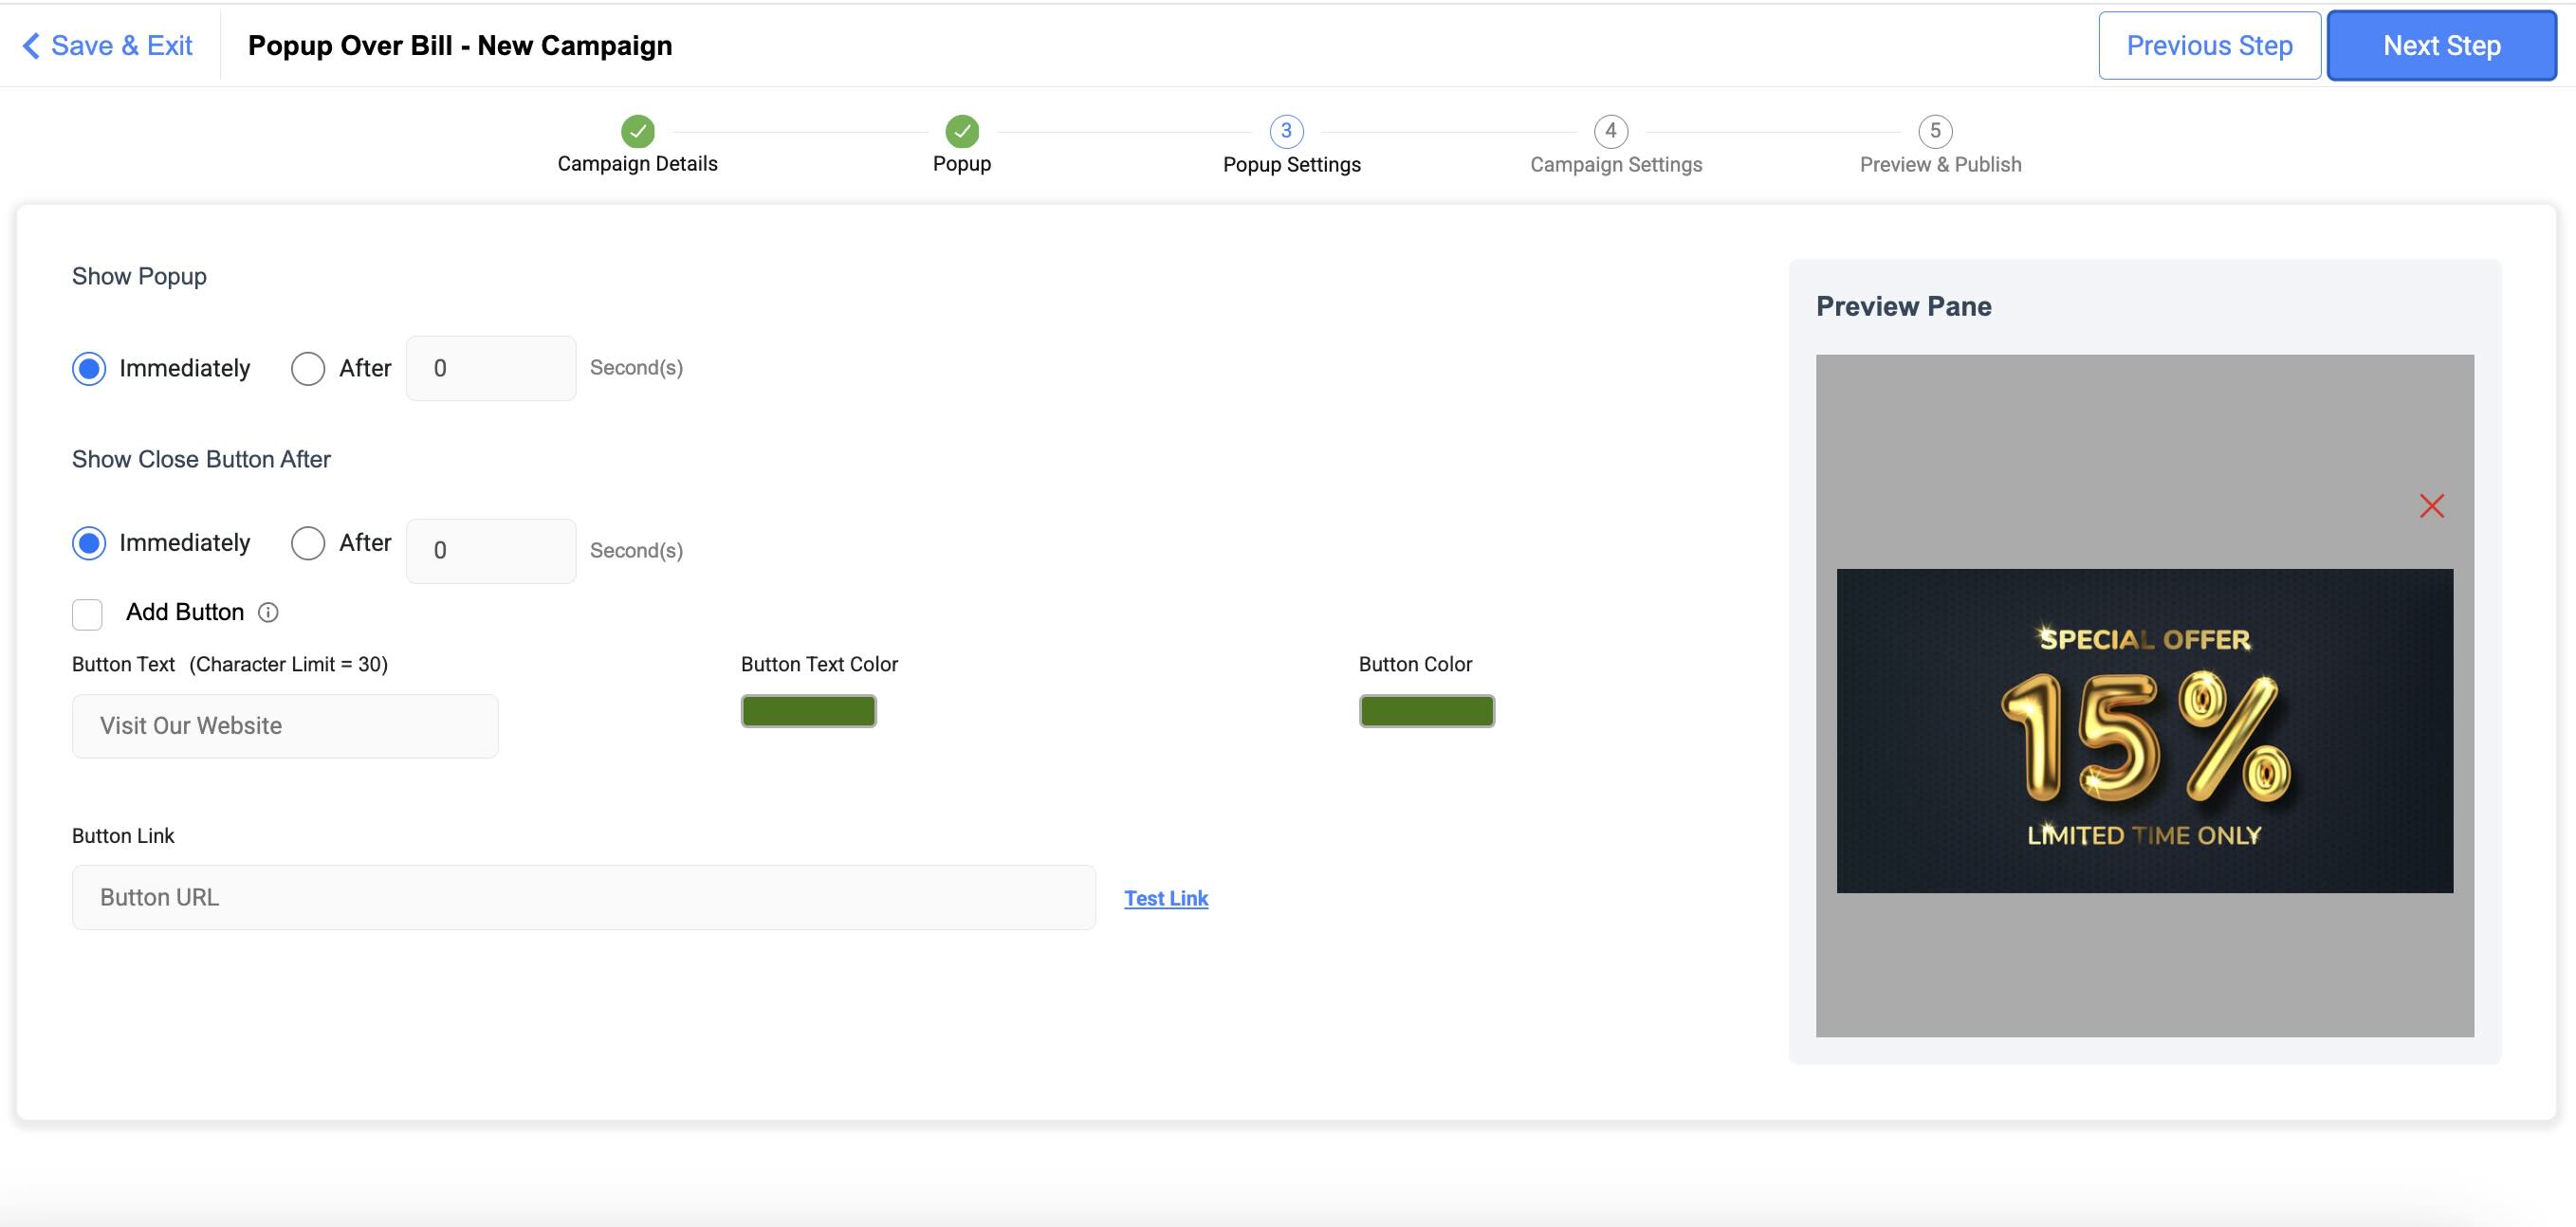 5. On the **Popup Settings** page, you can:
* configure when to show the popup - immediately or after 'n' seconds.
* configure when to show the close popup button.
* add a custom redirect button.
6. On the **Campaign Settings** page, select your **Brand** and **Stores**. You can also choose to publish the campaign immediately or schedule it. Click **Next Step**.
7. On the **Preview & Publish** page you can check all campaign details. Click **Export Report** and enter your email to opt for exporting campaign reports. Click **Publish**.
Your **Popup Over Bill** Campaign is published and appears in the list of campaigns.
5. On the **Popup Settings** page, you can:
* configure when to show the popup - immediately or after 'n' seconds.
* configure when to show the close popup button.
* add a custom redirect button.
6. On the **Campaign Settings** page, select your **Brand** and **Stores**. You can also choose to publish the campaign immediately or schedule it. Click **Next Step**.
7. On the **Preview & Publish** page you can check all campaign details. Click **Export Report** and enter your email to opt for exporting campaign reports. Click **Publish**.
Your **Popup Over Bill** Campaign is published and appears in the list of campaigns.