> ## Documentation Index
> Fetch the complete documentation index at: https://razorpay-881012b3.mintlify.site/llms.txt
> Use this file to discover all available pages before exploring further.
# Media Bank
> Store and manage your marketing assets like banners, images and videos for quick access in campaigns.
Available in
🇮🇳 India
The **Media Bank** lets you upload, store and manage images, banners, videos and logos in one central place. These media files can be used across **Billme Dashboard** for creating or designing user journeys, surveys, digital bills, campaigns and so on.
 ## Key Features
* Upload and tag creative assets for easy reuse
* Use media across campaigns, banners and popups
* Preview formats and sizes before inserting
* Share media access with specific roles or teams
## Upload and Manage New Media
To upload a new media file:
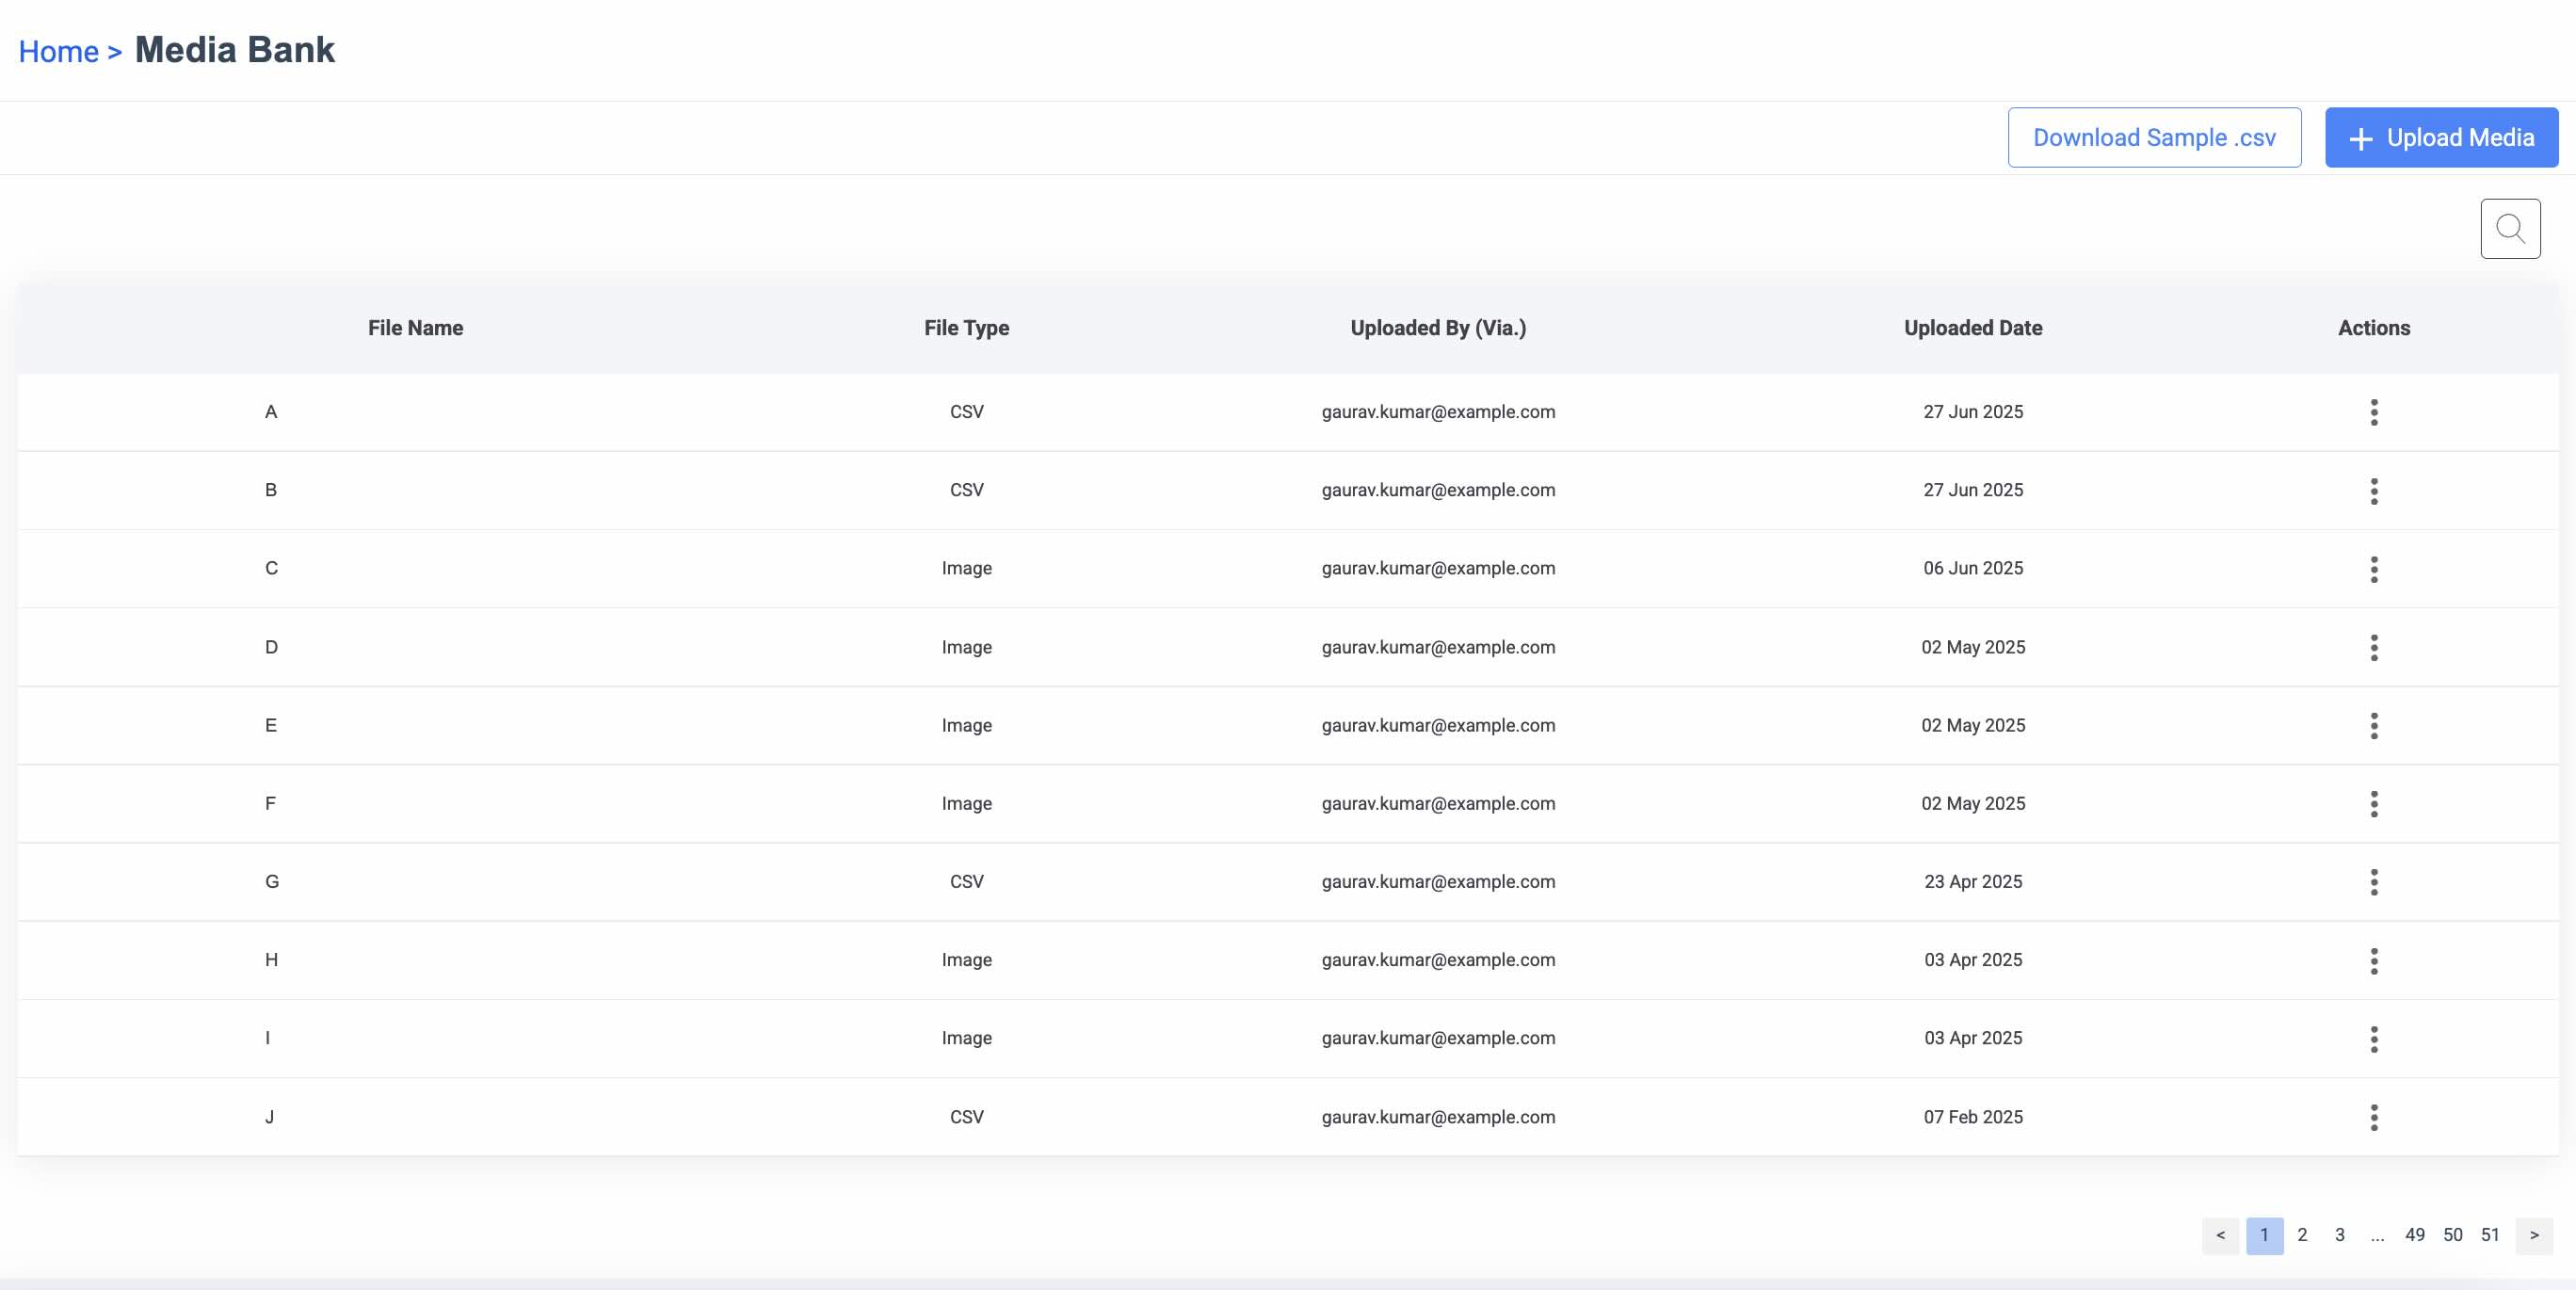
1. Under **Manage** section, click **Media Bank**. The **Media Bank** page appears.
## Key Features
* Upload and tag creative assets for easy reuse
* Use media across campaigns, banners and popups
* Preview formats and sizes before inserting
* Share media access with specific roles or teams
## Upload and Manage New Media
To upload a new media file:
1. Under **Manage** section, click **Media Bank**. The **Media Bank** page appears.
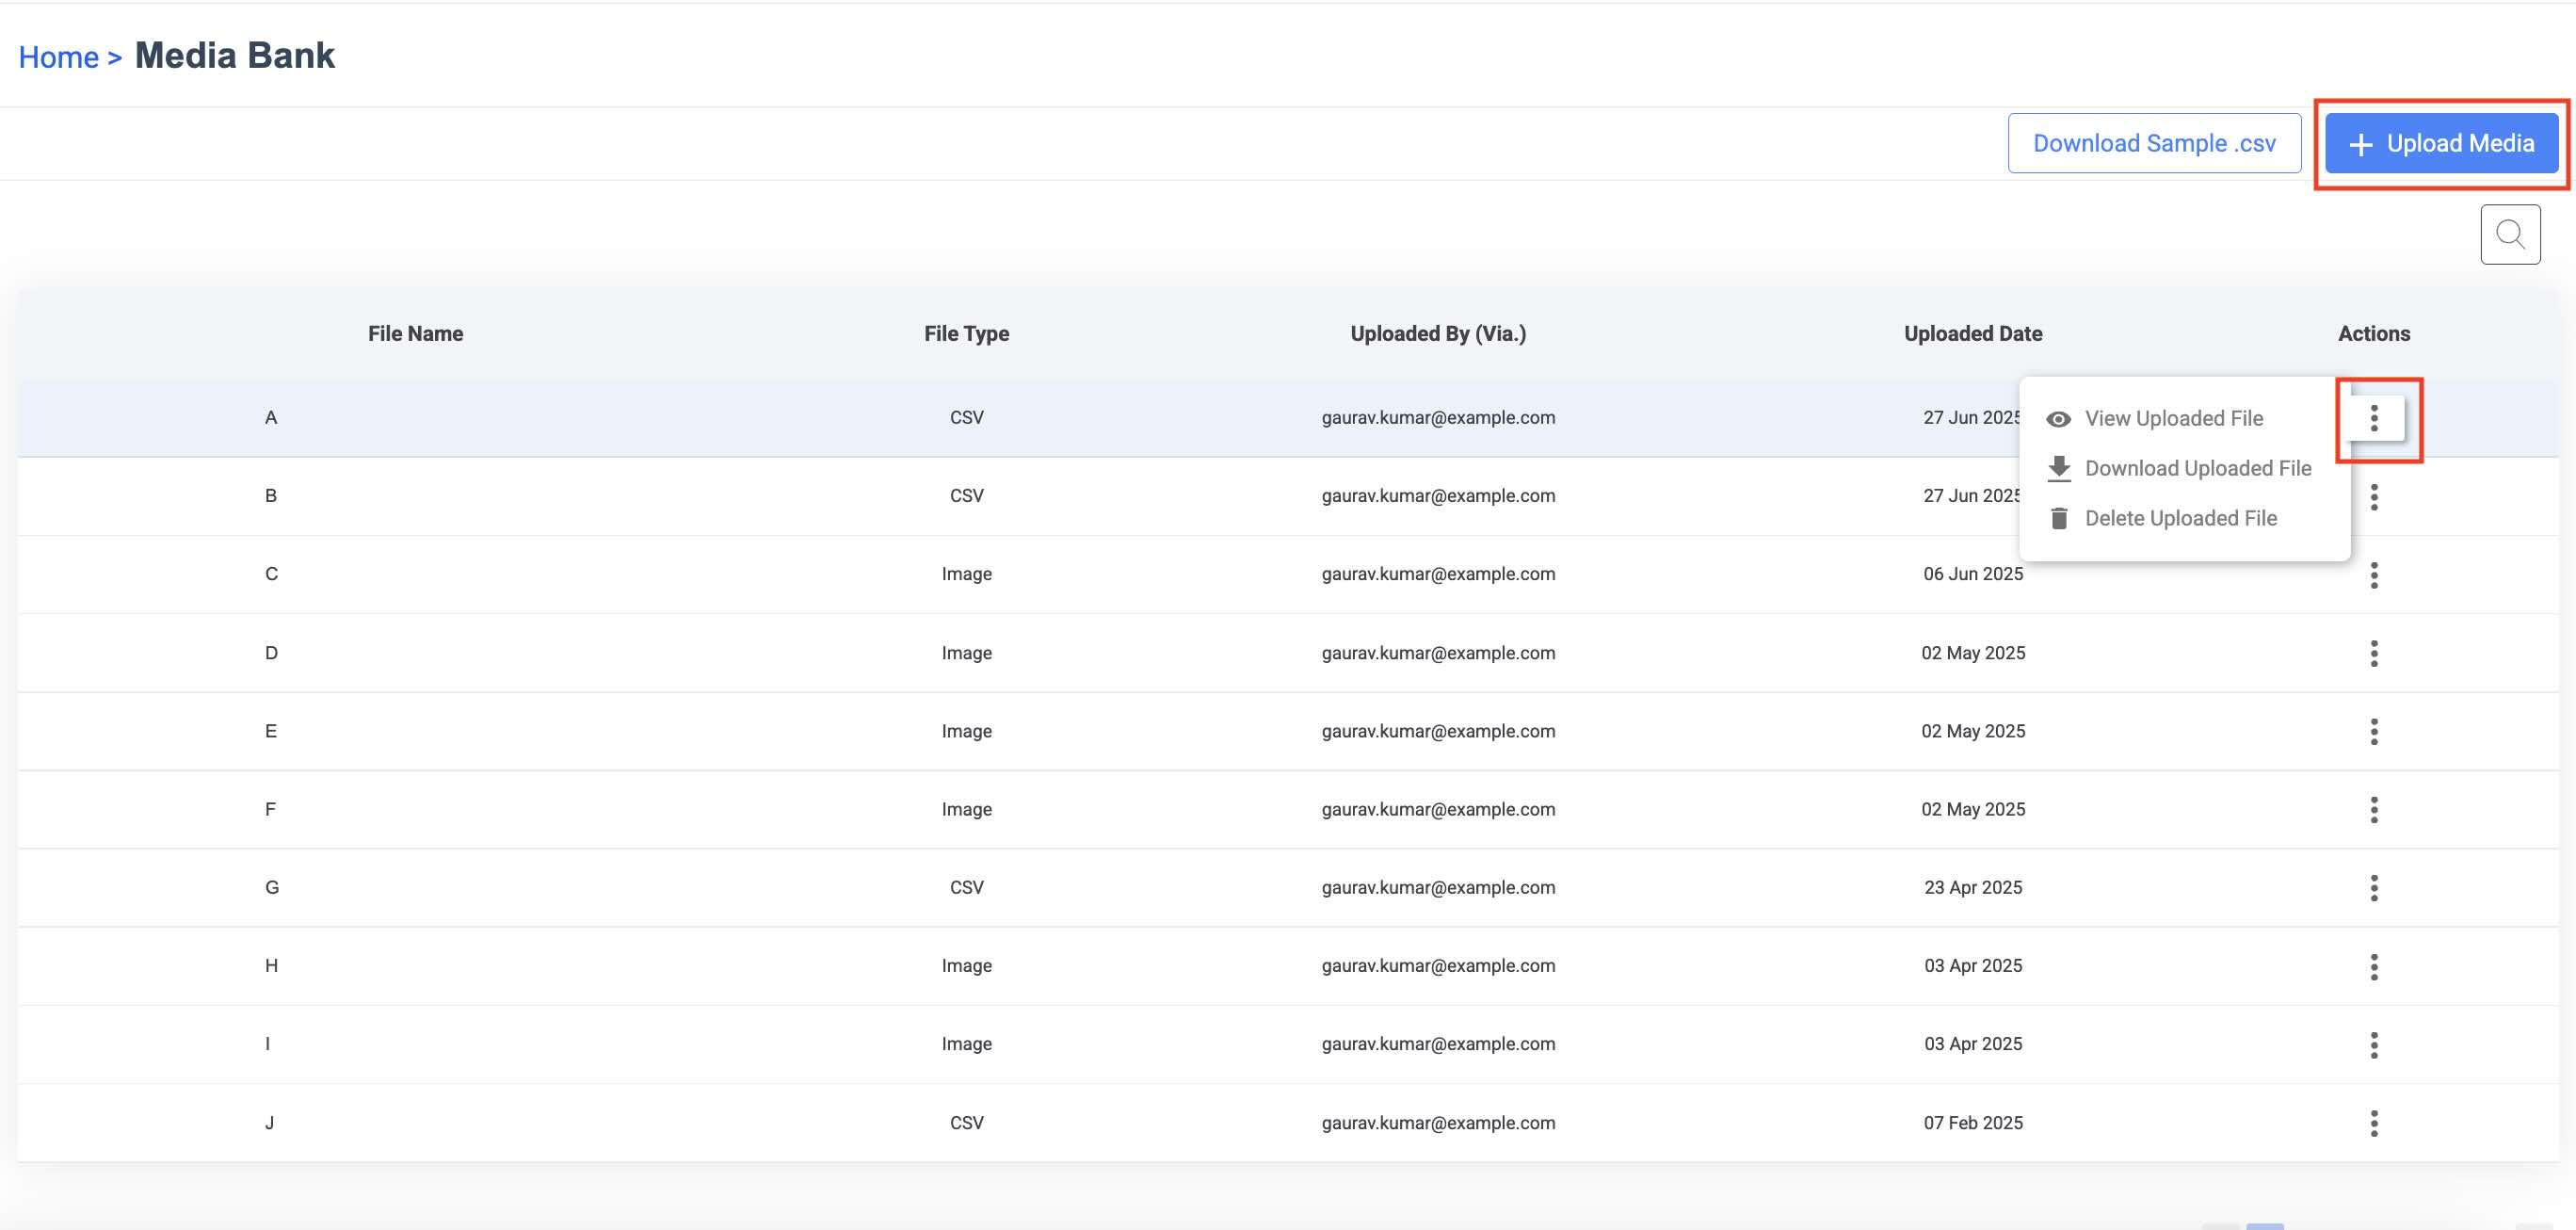 2. Click **+ Upload Media**. The **Upload New Data** page appears.
3. Upload your file and enter a file name and description.
4. Click **Import Data**. The new media file is uploaded and stored in the **Media Bank**.
5. Hover over to **Actions** against the file you want to manage.
* You can view and download the files.
* You can delete the files.
2. Click **+ Upload Media**. The **Upload New Data** page appears.
3. Upload your file and enter a file name and description.
4. Click **Import Data**. The new media file is uploaded and stored in the **Media Bank**.
5. Hover over to **Actions** against the file you want to manage.
* You can view and download the files.
* You can delete the files.