> ## Documentation Index
> Fetch the complete documentation index at: https://razorpay-881012b3.mintlify.site/llms.txt
> Use this file to discover all available pages before exploring further.
# Quickstart Guide
> Complete guide to get started with Razorpay's POS.
Available in
🇮🇳 India
Create a Razorpay POS account to get started.
Submit the KYC details for account verification.
Upload front and interior images of your shop to order a Razorpay POS device.
Explore the different Razorpay POS devices available and place an order.
## 1. Sign Up
Go to the [Razorpay website](https://accounts.razorpay.com/auth/).
To create a Razorpay account:
1. Enter your 10-digit **Mobile Number**. Click **Continue**.
2. Enter the **OTP** sent to your mobile number. Select the check box below to receive updates on WhatsApp. Click **Verify**. If you did not receive the OTP, click **Resend OTP**.
 3. Enter your **Name** and click **Continue**.
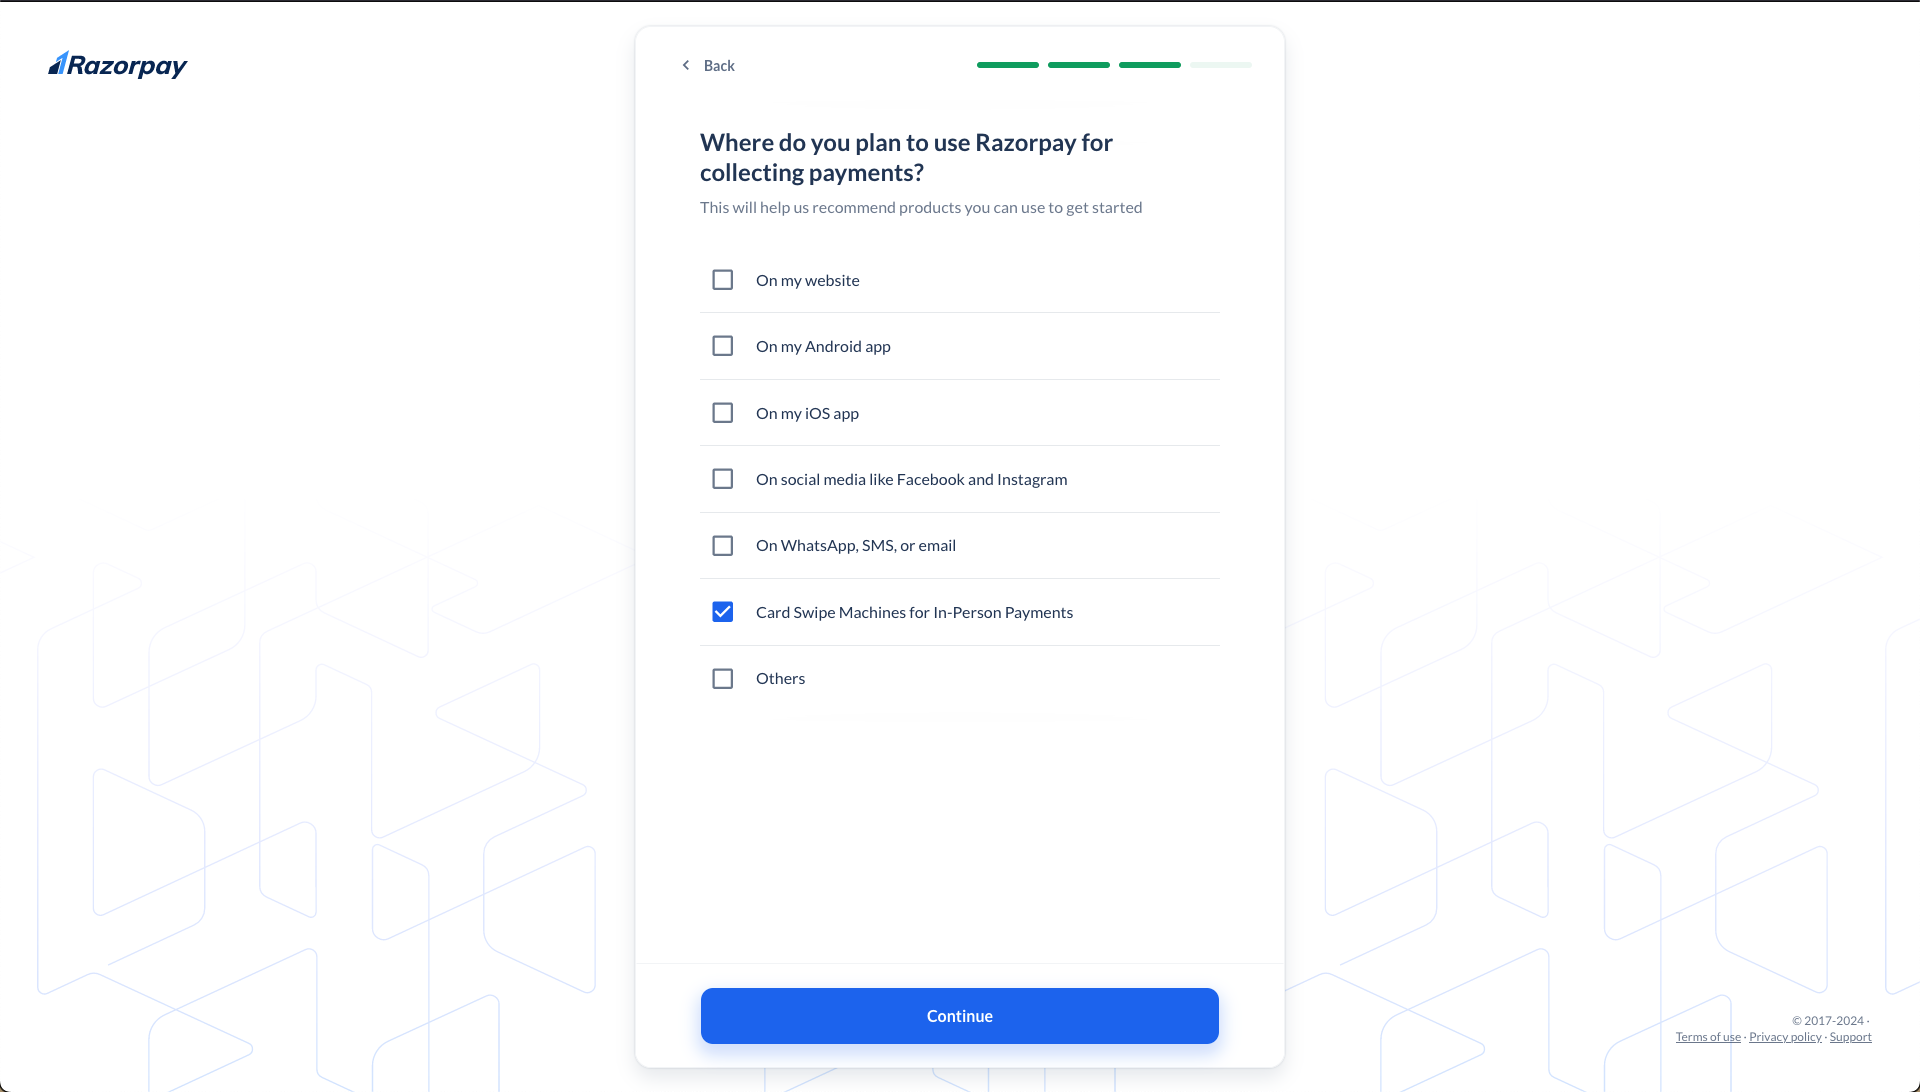
4. Select where you want to accept payments from the given options. You can also select multiple options if relevant.
3. Enter your **Name** and click **Continue**.
4. Select where you want to accept payments from the given options. You can also select multiple options if relevant.
 5. Select your business type from the list. Know more about [different business types](/docs/payments/set-up#2-submit-kyc-details).
**Watch Out!**
Currently, Razorpay POS is not supported for unregistered businesses.
6. Click **Continue**.
7. Enter your **PAN**/**Business PAN** and click **Continue**. We will verify the details with the Central PAN database.
8. Enter the name associated with the PAN and click **Continue**.
9. Enter your **Brand Name**. This should be the name of your business that your customers recognise. Click **Continue**.
10. Select the relevant **Business Category** from the list.
5. Select your business type from the list. Know more about [different business types](/docs/payments/set-up#2-submit-kyc-details).
**Watch Out!**
Currently, Razorpay POS is not supported for unregistered businesses.
6. Click **Continue**.
7. Enter your **PAN**/**Business PAN** and click **Continue**. We will verify the details with the Central PAN database.
8. Enter the name associated with the PAN and click **Continue**.
9. Enter your **Brand Name**. This should be the name of your business that your customers recognise. Click **Continue**.
10. Select the relevant **Business Category** from the list.
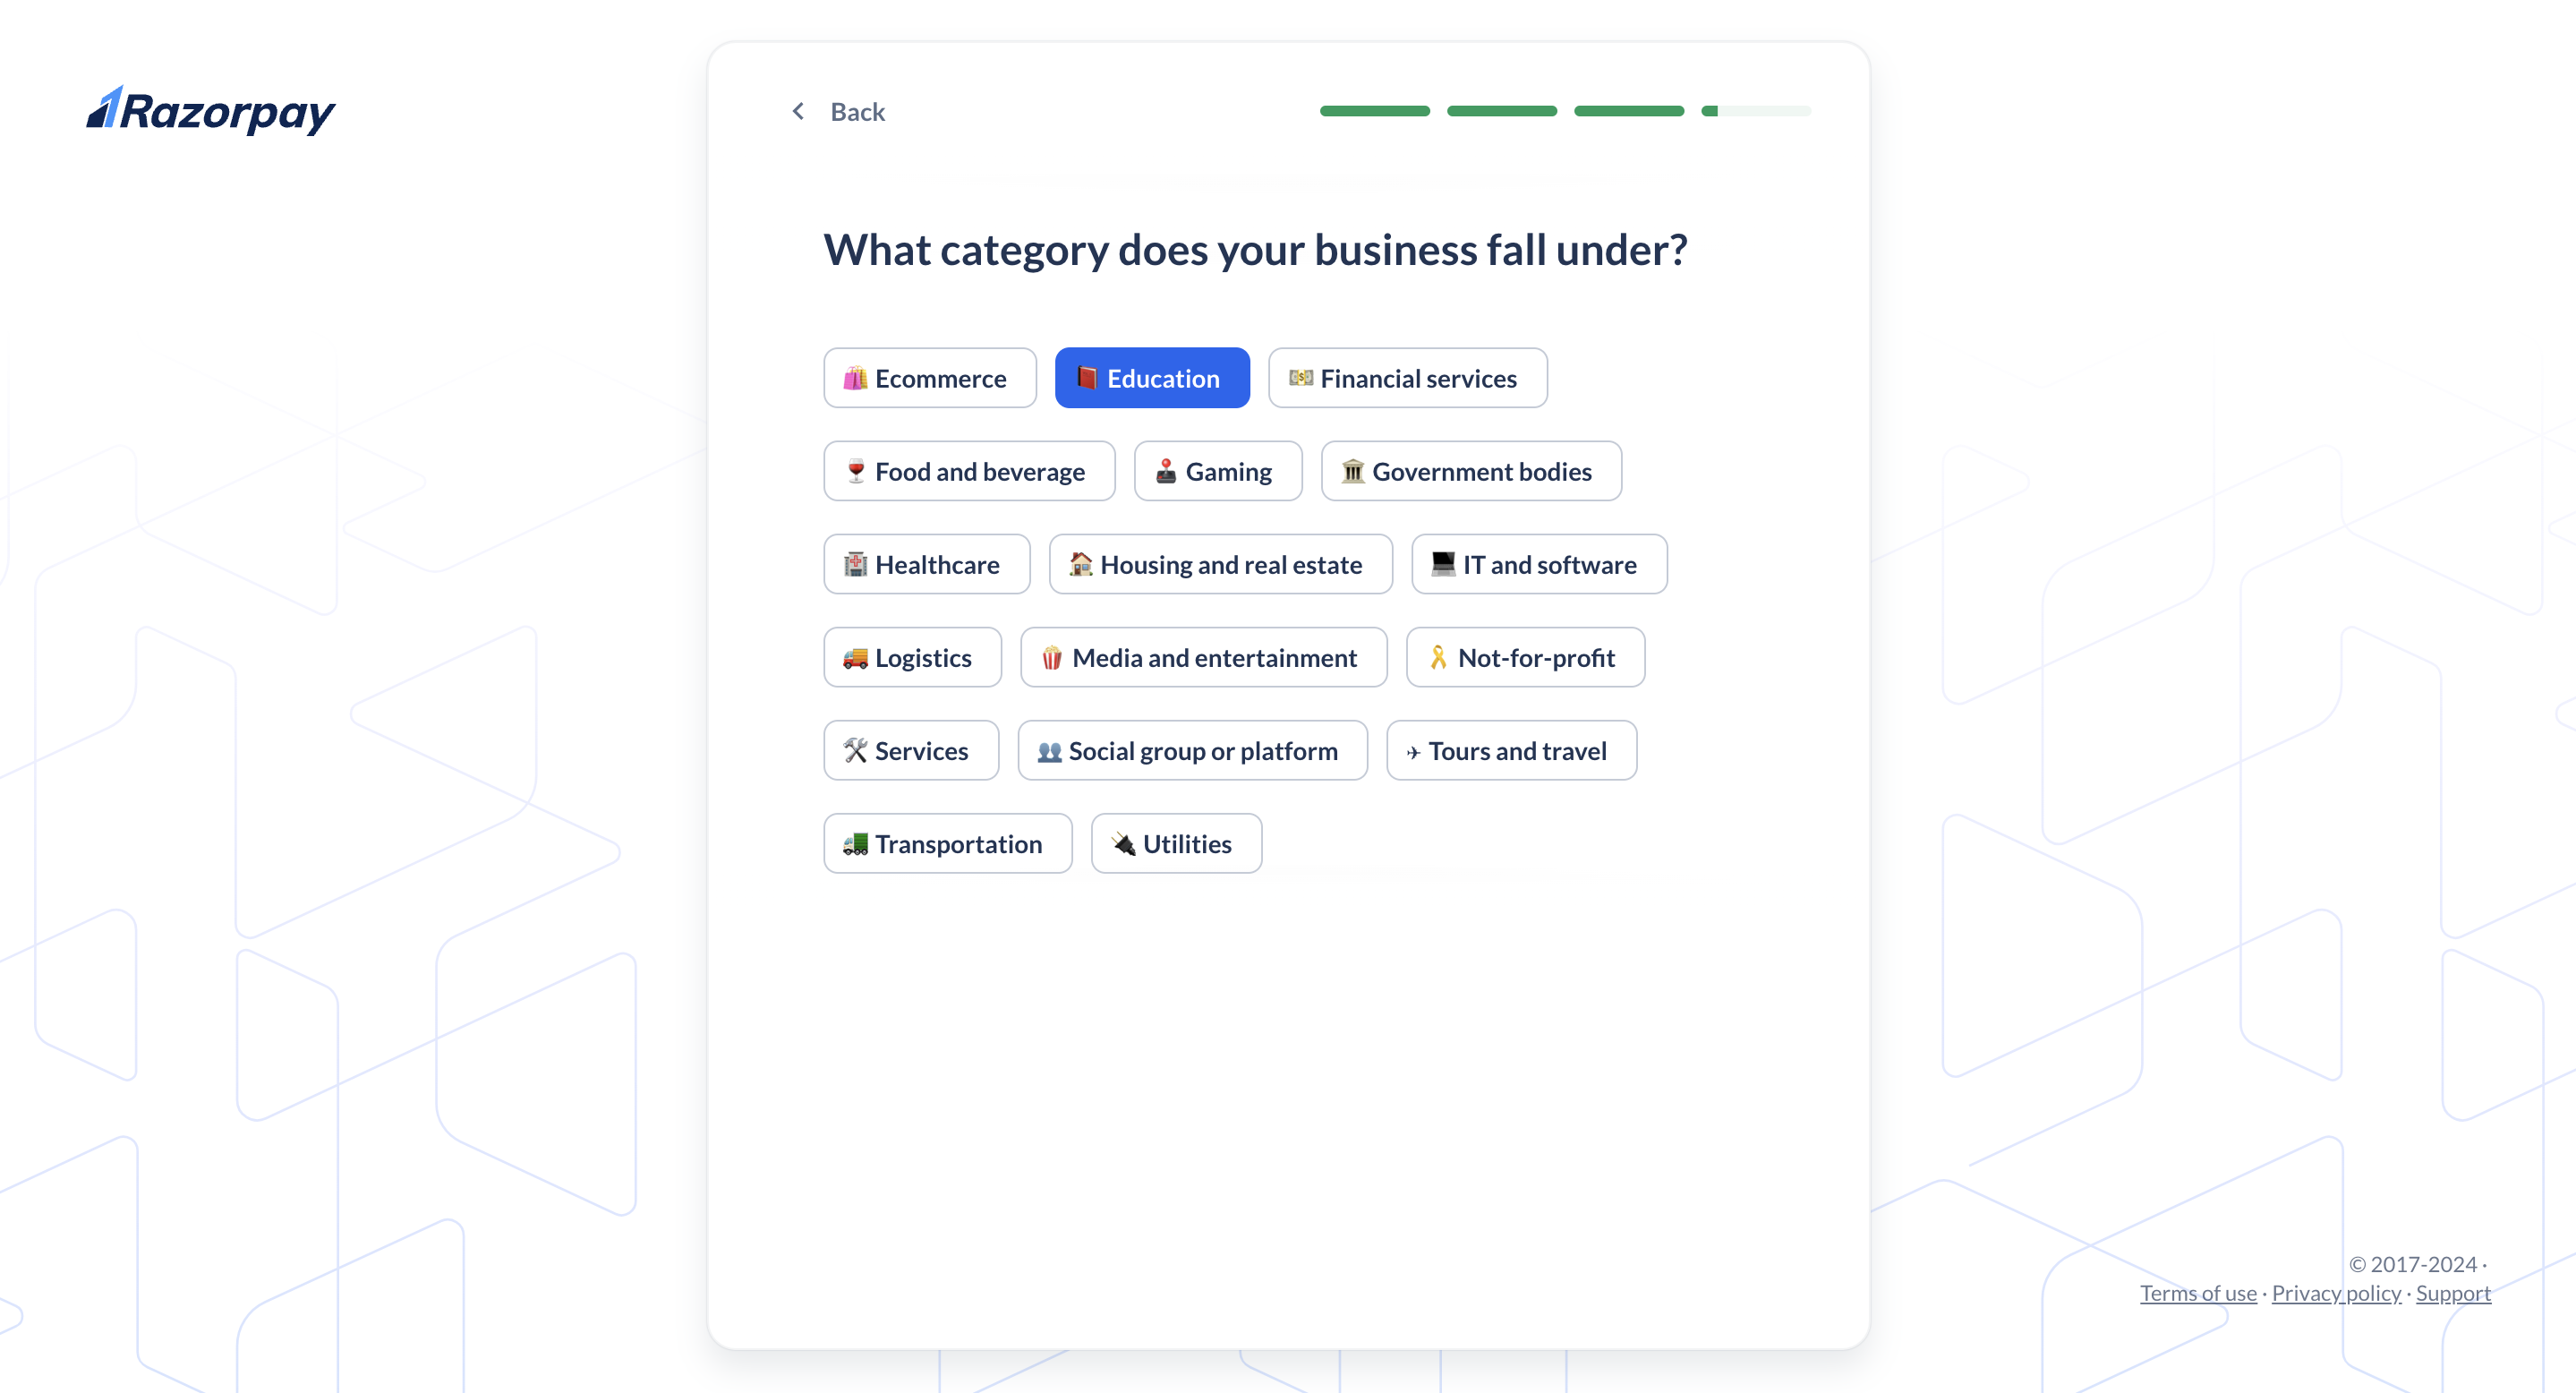 11. Choose a **Subcategory** from the list. For example, if you selected **Education**, specify the category under it from the list.
12. . Depending on the category and sub-category, choose the additional details as required.
## 2. Submit KYC Details
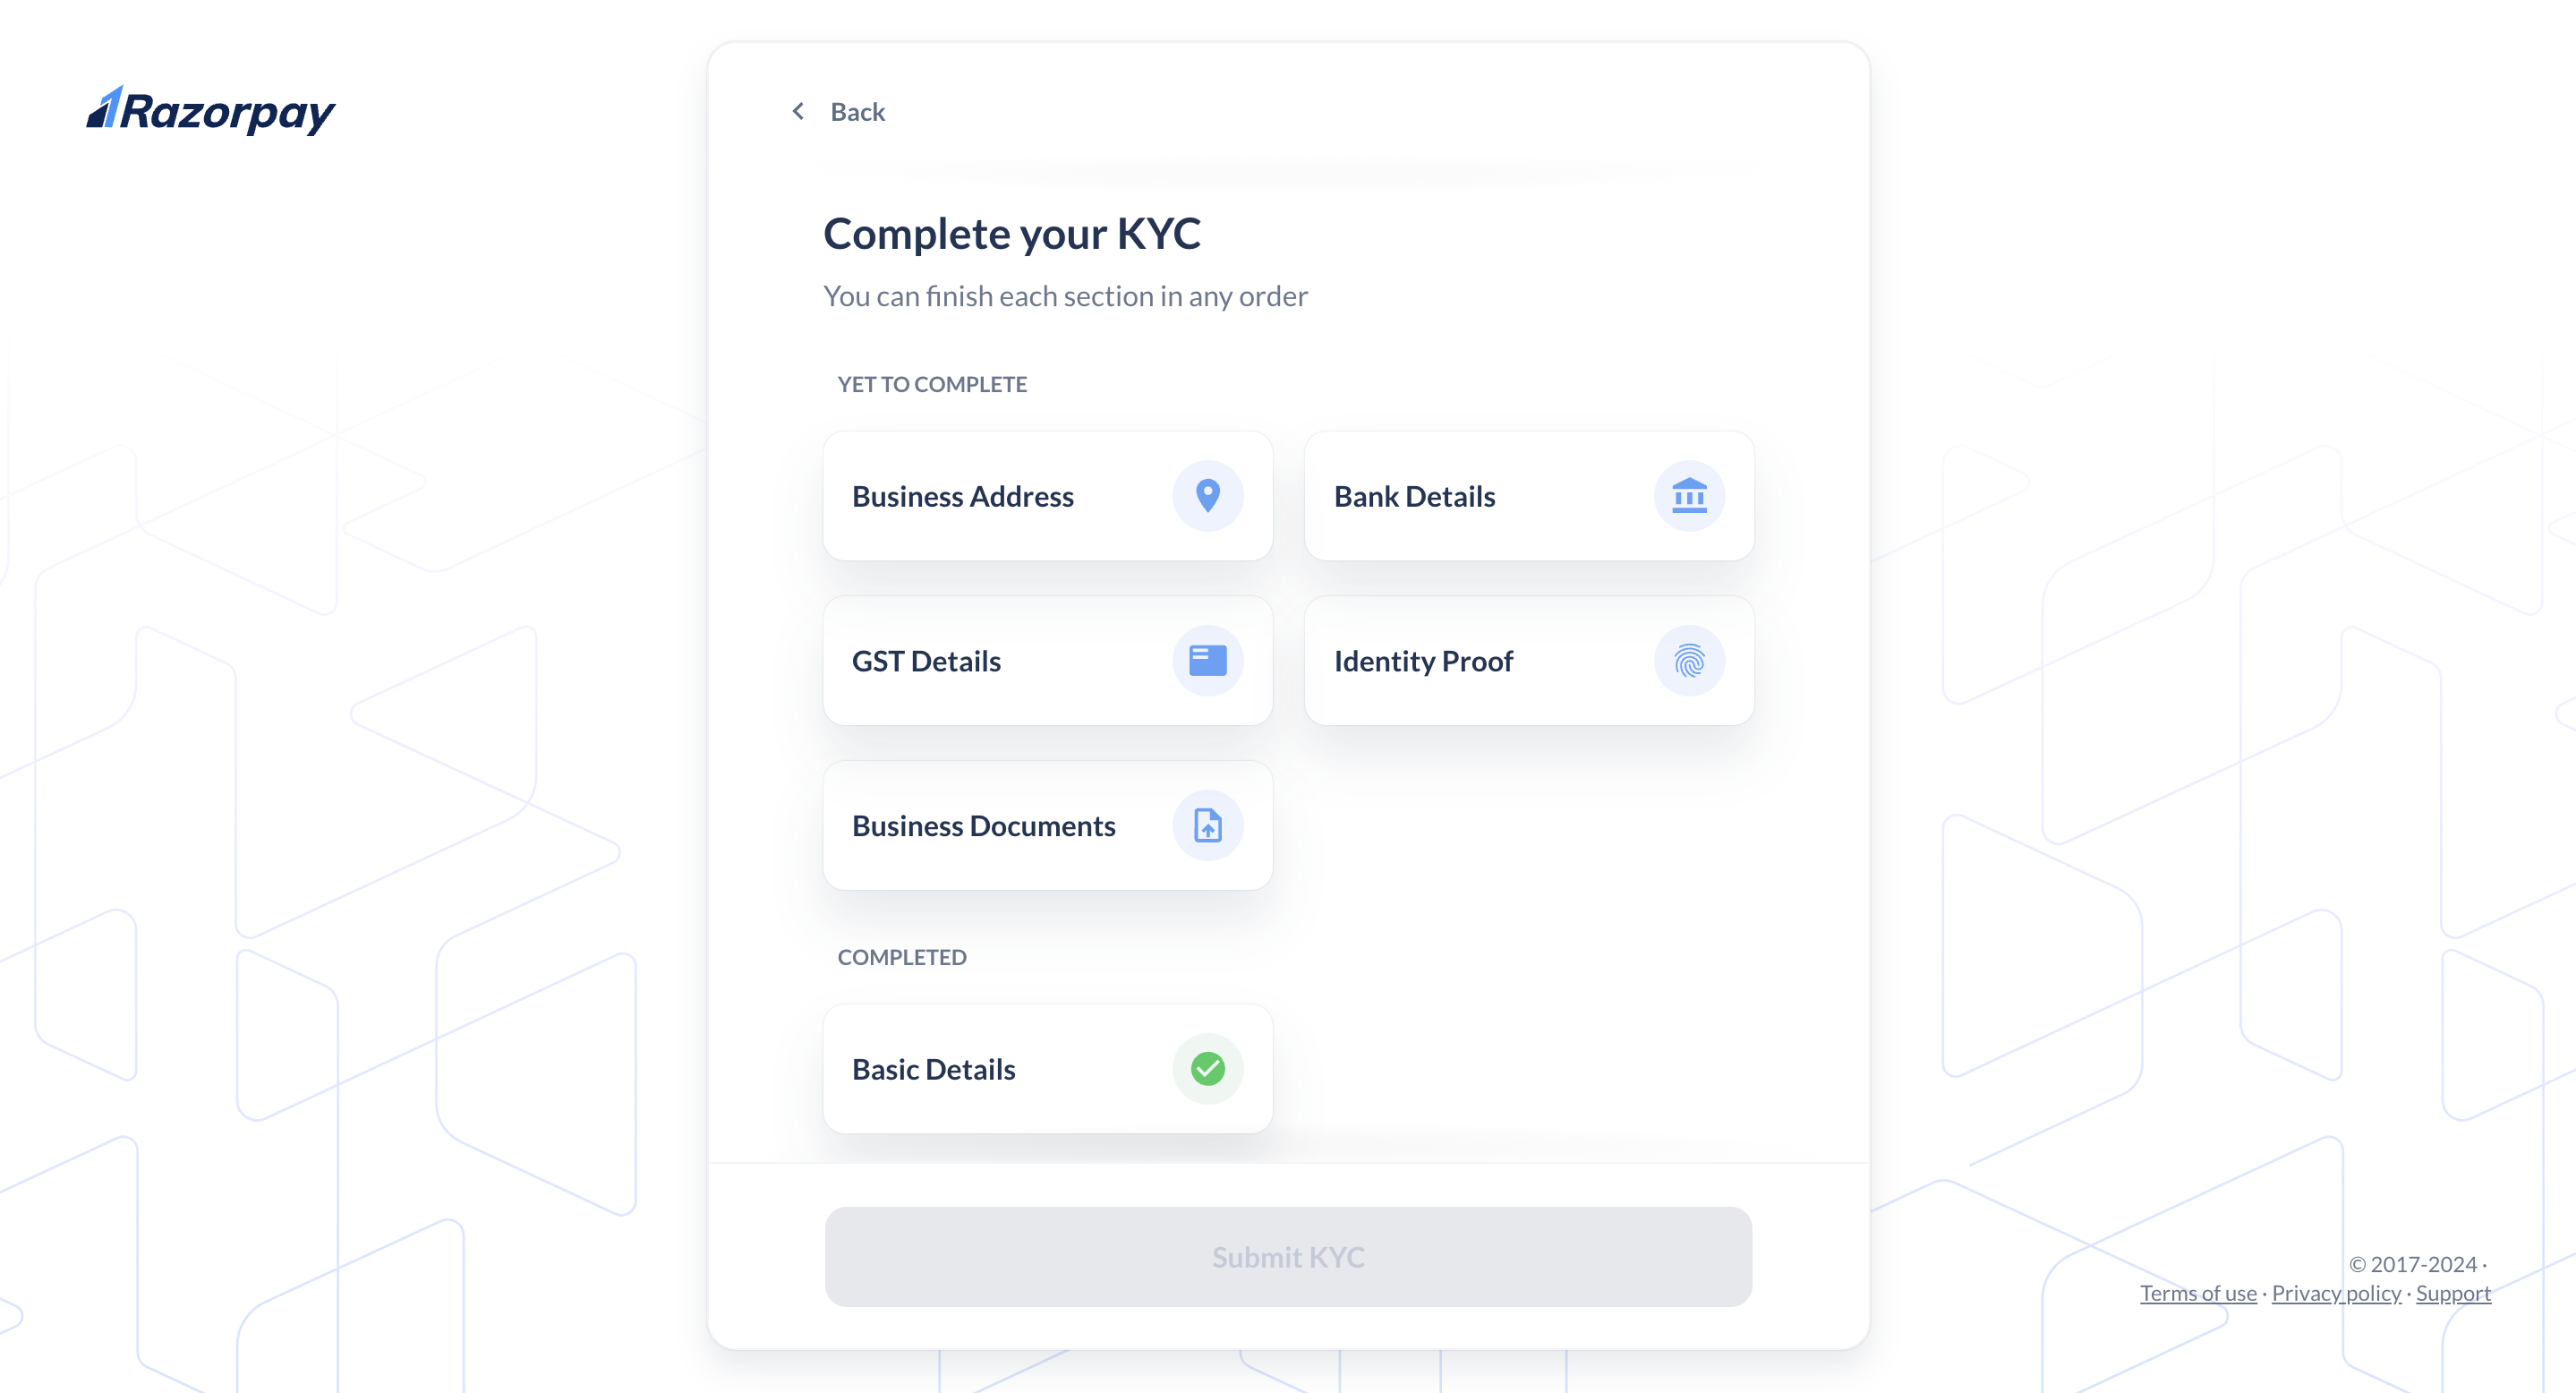
Provide the following information to complete KYC.
11. Choose a **Subcategory** from the list. For example, if you selected **Education**, specify the category under it from the list.
12. . Depending on the category and sub-category, choose the additional details as required.
## 2. Submit KYC Details
Provide the following information to complete KYC.
 **Watch Out!**
The fields under Bank Details, GST Details, and Business Documents will differ based on your business type.
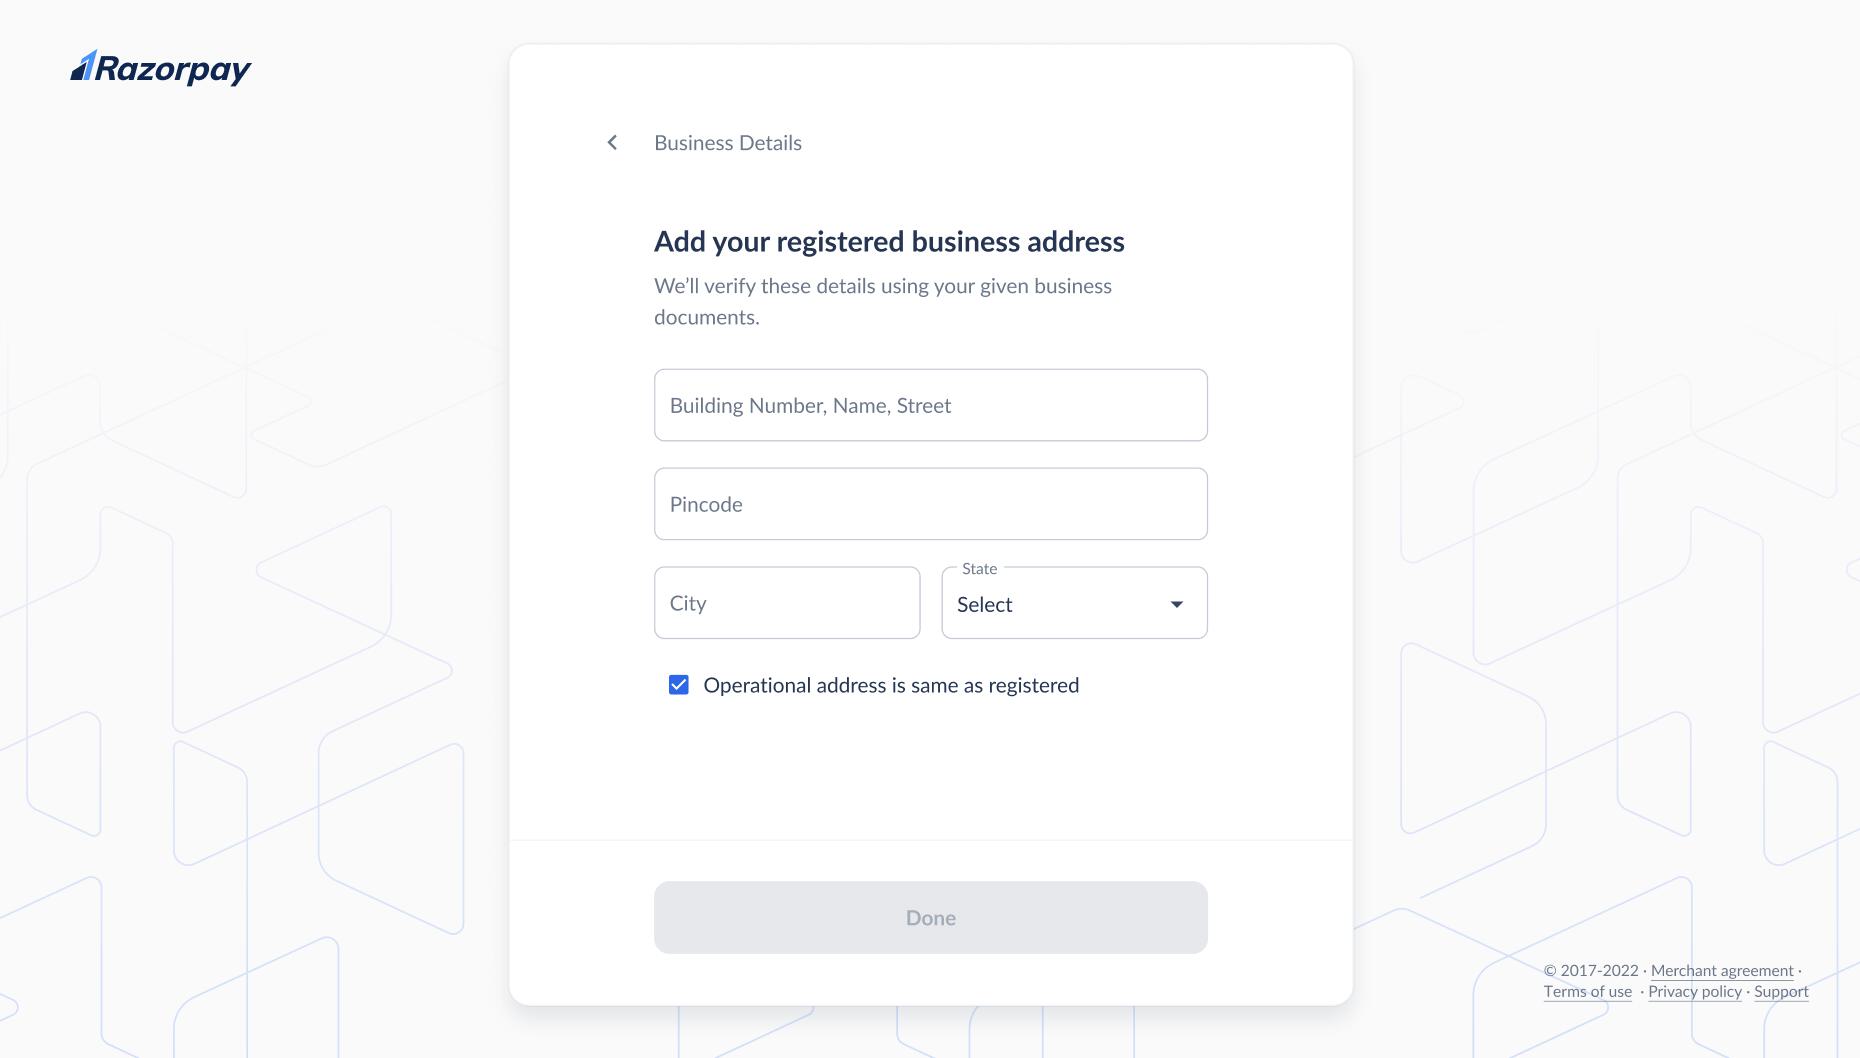
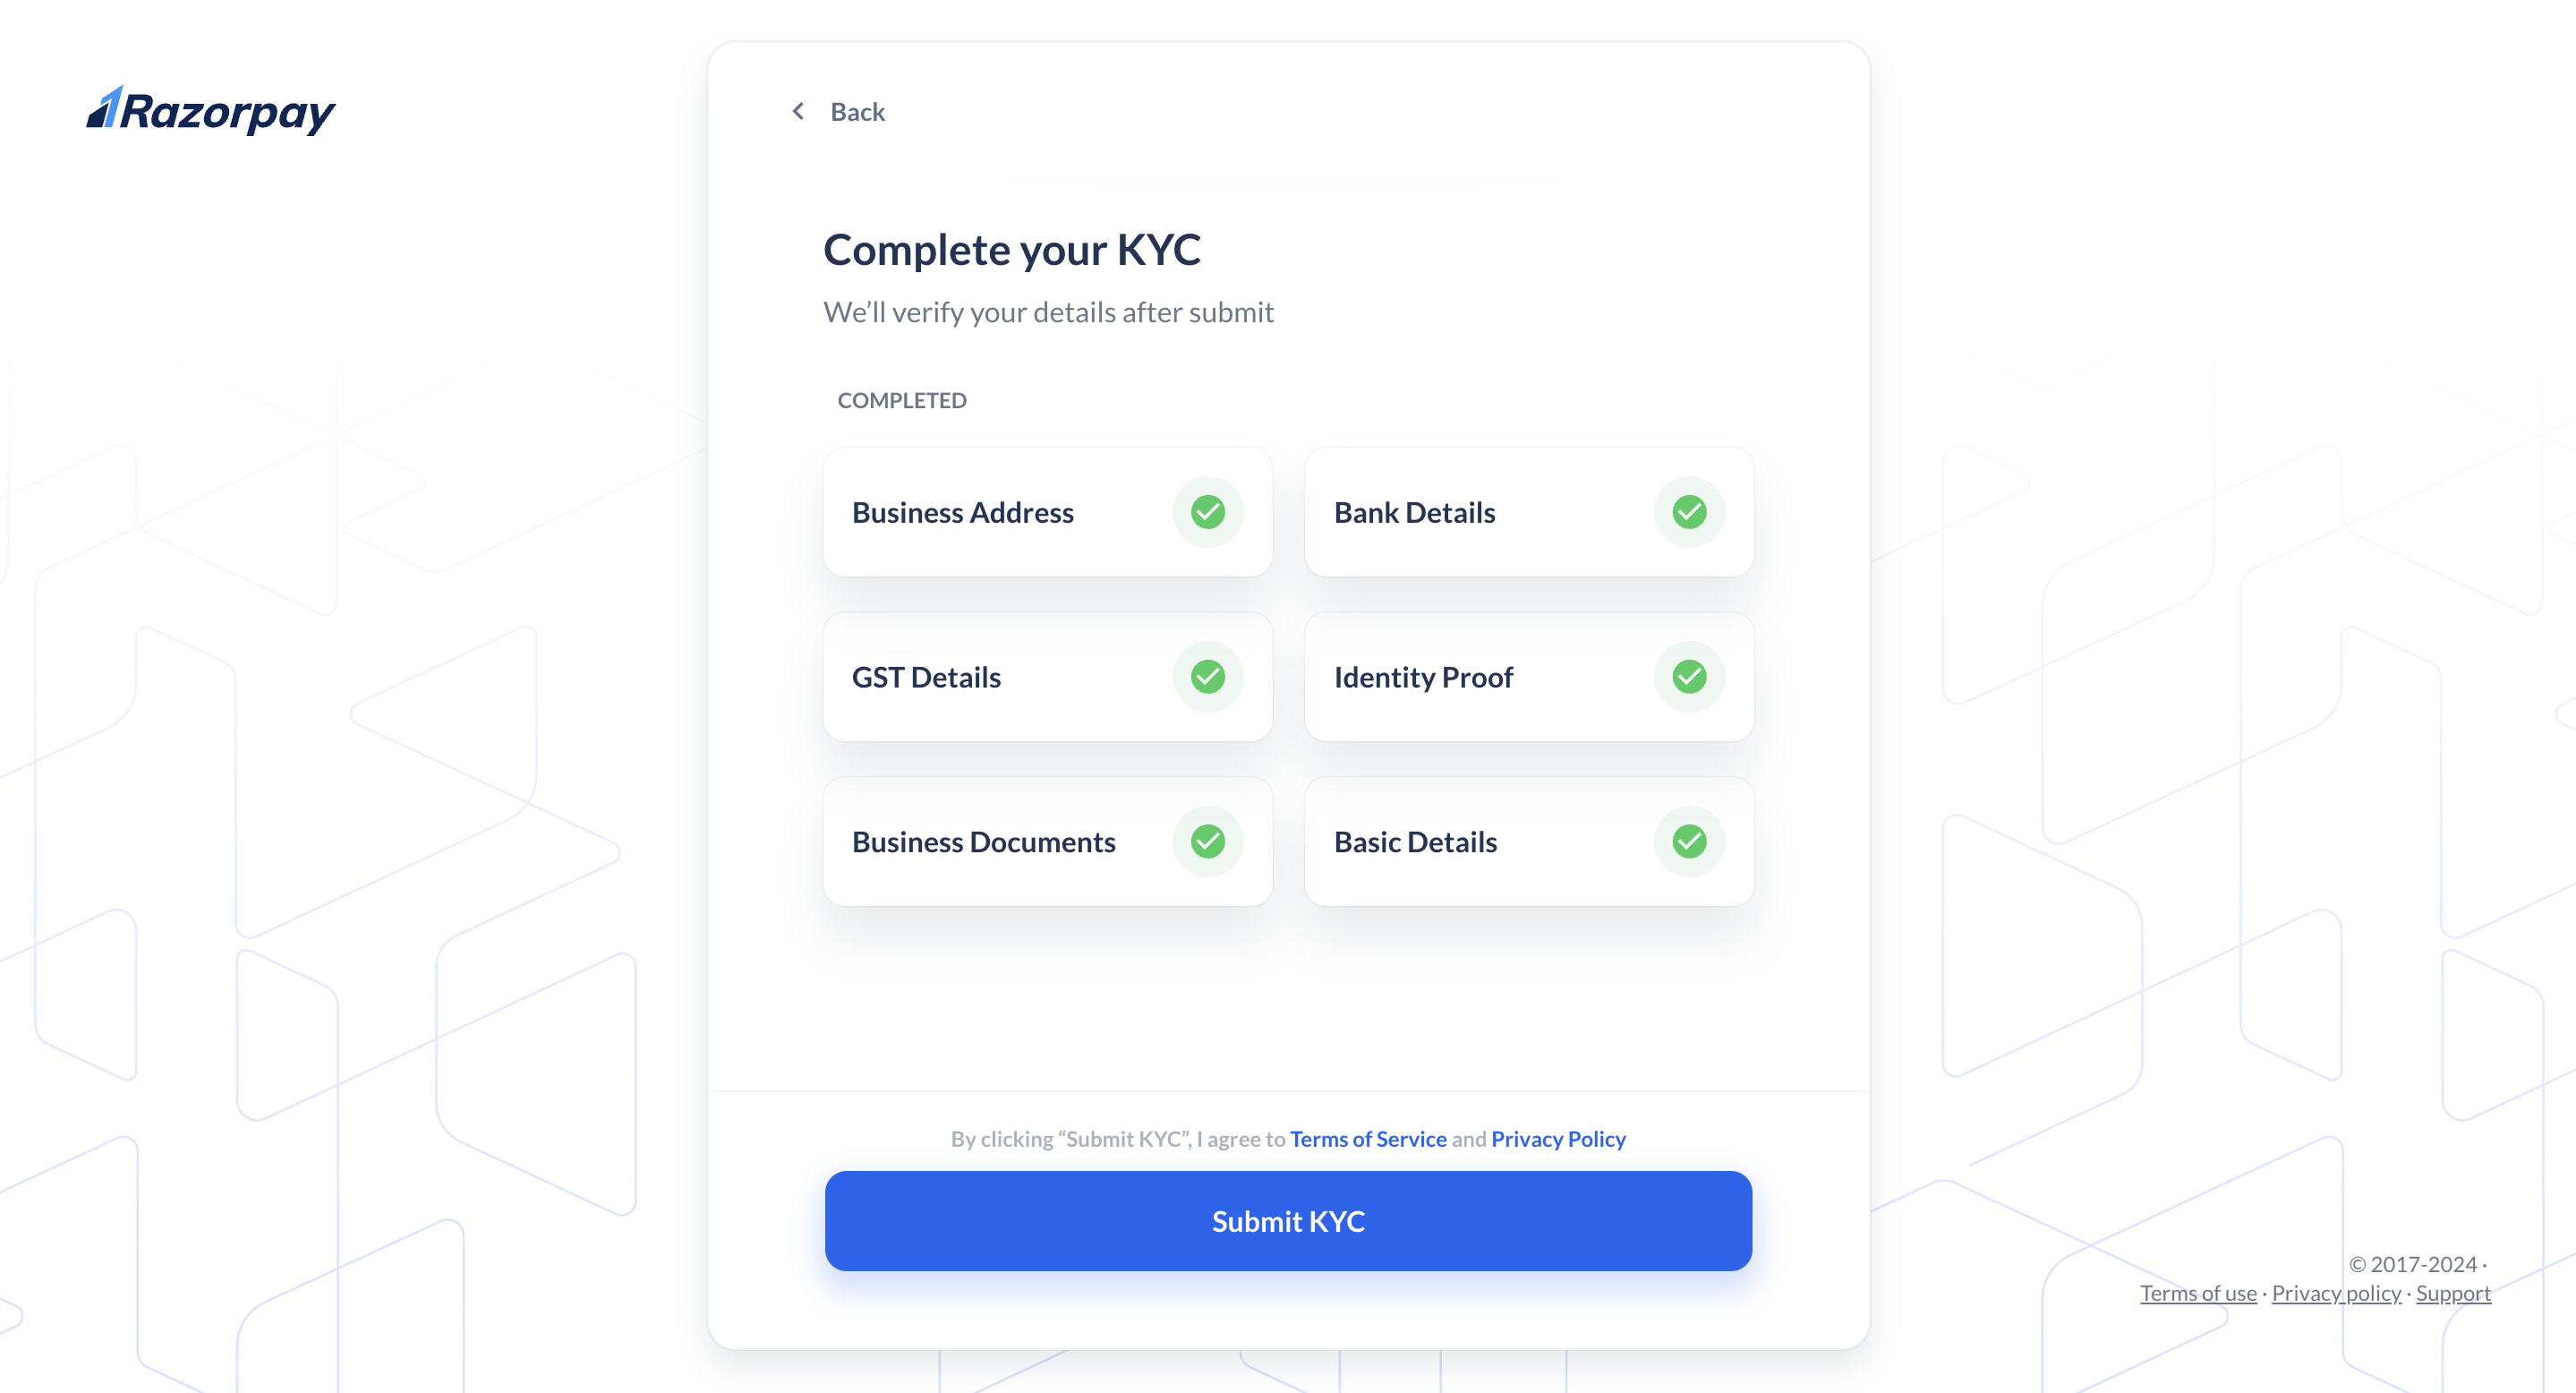
1. **Business Address**: Add your business address. Select the check box if your **Operational address is the same as your Business address**. Click **Done**. This will be verified against your business documents.
**Handy Tips**
Operational Address is the current address from where you are operating your business. On the other hand, a Business Address is an address you register when you start your business.
**Watch Out!**
The fields under Bank Details, GST Details, and Business Documents will differ based on your business type.
1. **Business Address**: Add your business address. Select the check box if your **Operational address is the same as your Business address**. Click **Done**. This will be verified against your business documents.
**Handy Tips**
Operational Address is the current address from where you are operating your business. On the other hand, a Business Address is an address you register when you start your business.
 2. **Business Documents**: Upload the relevant [business documents](/docs/payments/business-types-kyc-documents) based on your business type. Click **Continue**.
3. **Bank Details**: Fill in your bank account details such as **Account Number** and **IFSC Code**. This will be the account to which Razorpay settles your funds. Click **Done**.
4. **Identity Proof**: You can upload your Aadhar Card, Passport or Voter ID. Upload the required documents and click **Continue**.
**Handy Tips**
Select **Upload another ID proof** in case your Aadhar is not linked to your mobile number, and select a document from the list to submit your address proof. Upload the required documents.
2. **Business Documents**: Upload the relevant [business documents](/docs/payments/business-types-kyc-documents) based on your business type. Click **Continue**.
3. **Bank Details**: Fill in your bank account details such as **Account Number** and **IFSC Code**. This will be the account to which Razorpay settles your funds. Click **Done**.
4. **Identity Proof**: You can upload your Aadhar Card, Passport or Voter ID. Upload the required documents and click **Continue**.
**Handy Tips**
Select **Upload another ID proof** in case your Aadhar is not linked to your mobile number, and select a document from the list to submit your address proof. Upload the required documents.
5. **GST Details**: This will be auto-filled in case your PAN verification is successful. If not, add your GST details for taxation and compliance. Select the check box if you do not have a GSTIN. Click **Done**.
**Watch Out!**
You cannot claim GST input credit if GSTIN is not shared.
**Handy Tips**
Extra fields may appear based on your business type.
* For LLP: LLPIN (Limited Liability Partnership Identification Number)
* For Public and Private Ltd: CIN (Corporate Identification Number)
6. Once you provide all the required details for verification, click **Submit KYC**.
 ## 3. Add Shop Images
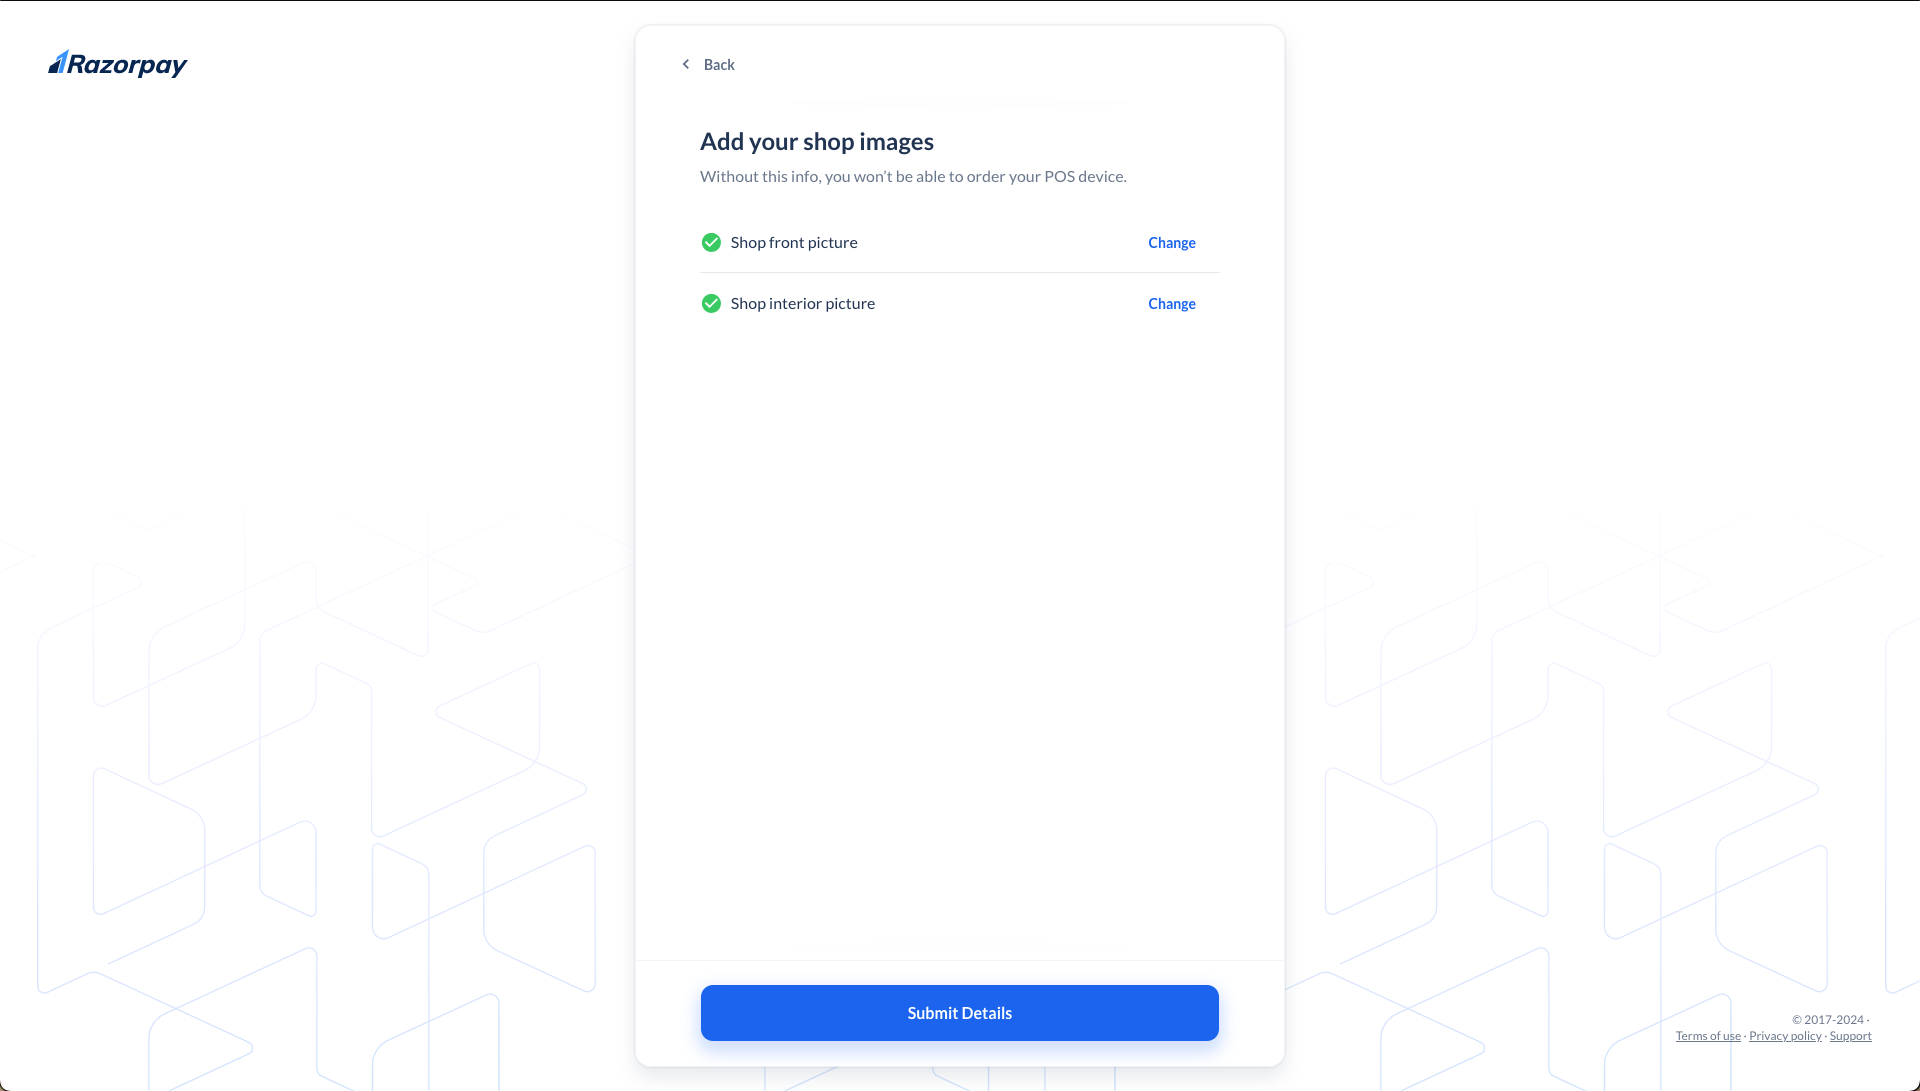
Upload two images of your workplace:
* An image of your shop from the front.
* An image of the interior of your shop.
## 3. Add Shop Images
Upload two images of your workplace:
* An image of your shop from the front.
* An image of the interior of your shop.
 **Watch Out!**
You will not be able to order a POS device without completing the steps mentioned above. However, you can choose to **Add Later**.
After uploading both the images, click **Submit Details**. Our team will review the information submitted by you. It takes approximately 3-4 working days to complete the review process.
## 4. Buy Razorpay POS Devices
To buy a Razorpay POS device:
1. Log in to the Dashboard.
2. Navigate to **POS** from the left navigation.
3. Explore the [POS device options](/docs/pos#explore-pos-device-suite), select one and click **Add to cart**.
**Watch Out!**
You will not be able to order a POS device without completing the steps mentioned above. However, you can choose to **Add Later**.
After uploading both the images, click **Submit Details**. Our team will review the information submitted by you. It takes approximately 3-4 working days to complete the review process.
## 4. Buy Razorpay POS Devices
To buy a Razorpay POS device:
1. Log in to the Dashboard.
2. Navigate to **POS** from the left navigation.
3. Explore the [POS device options](/docs/pos#explore-pos-device-suite), select one and click **Add to cart**.
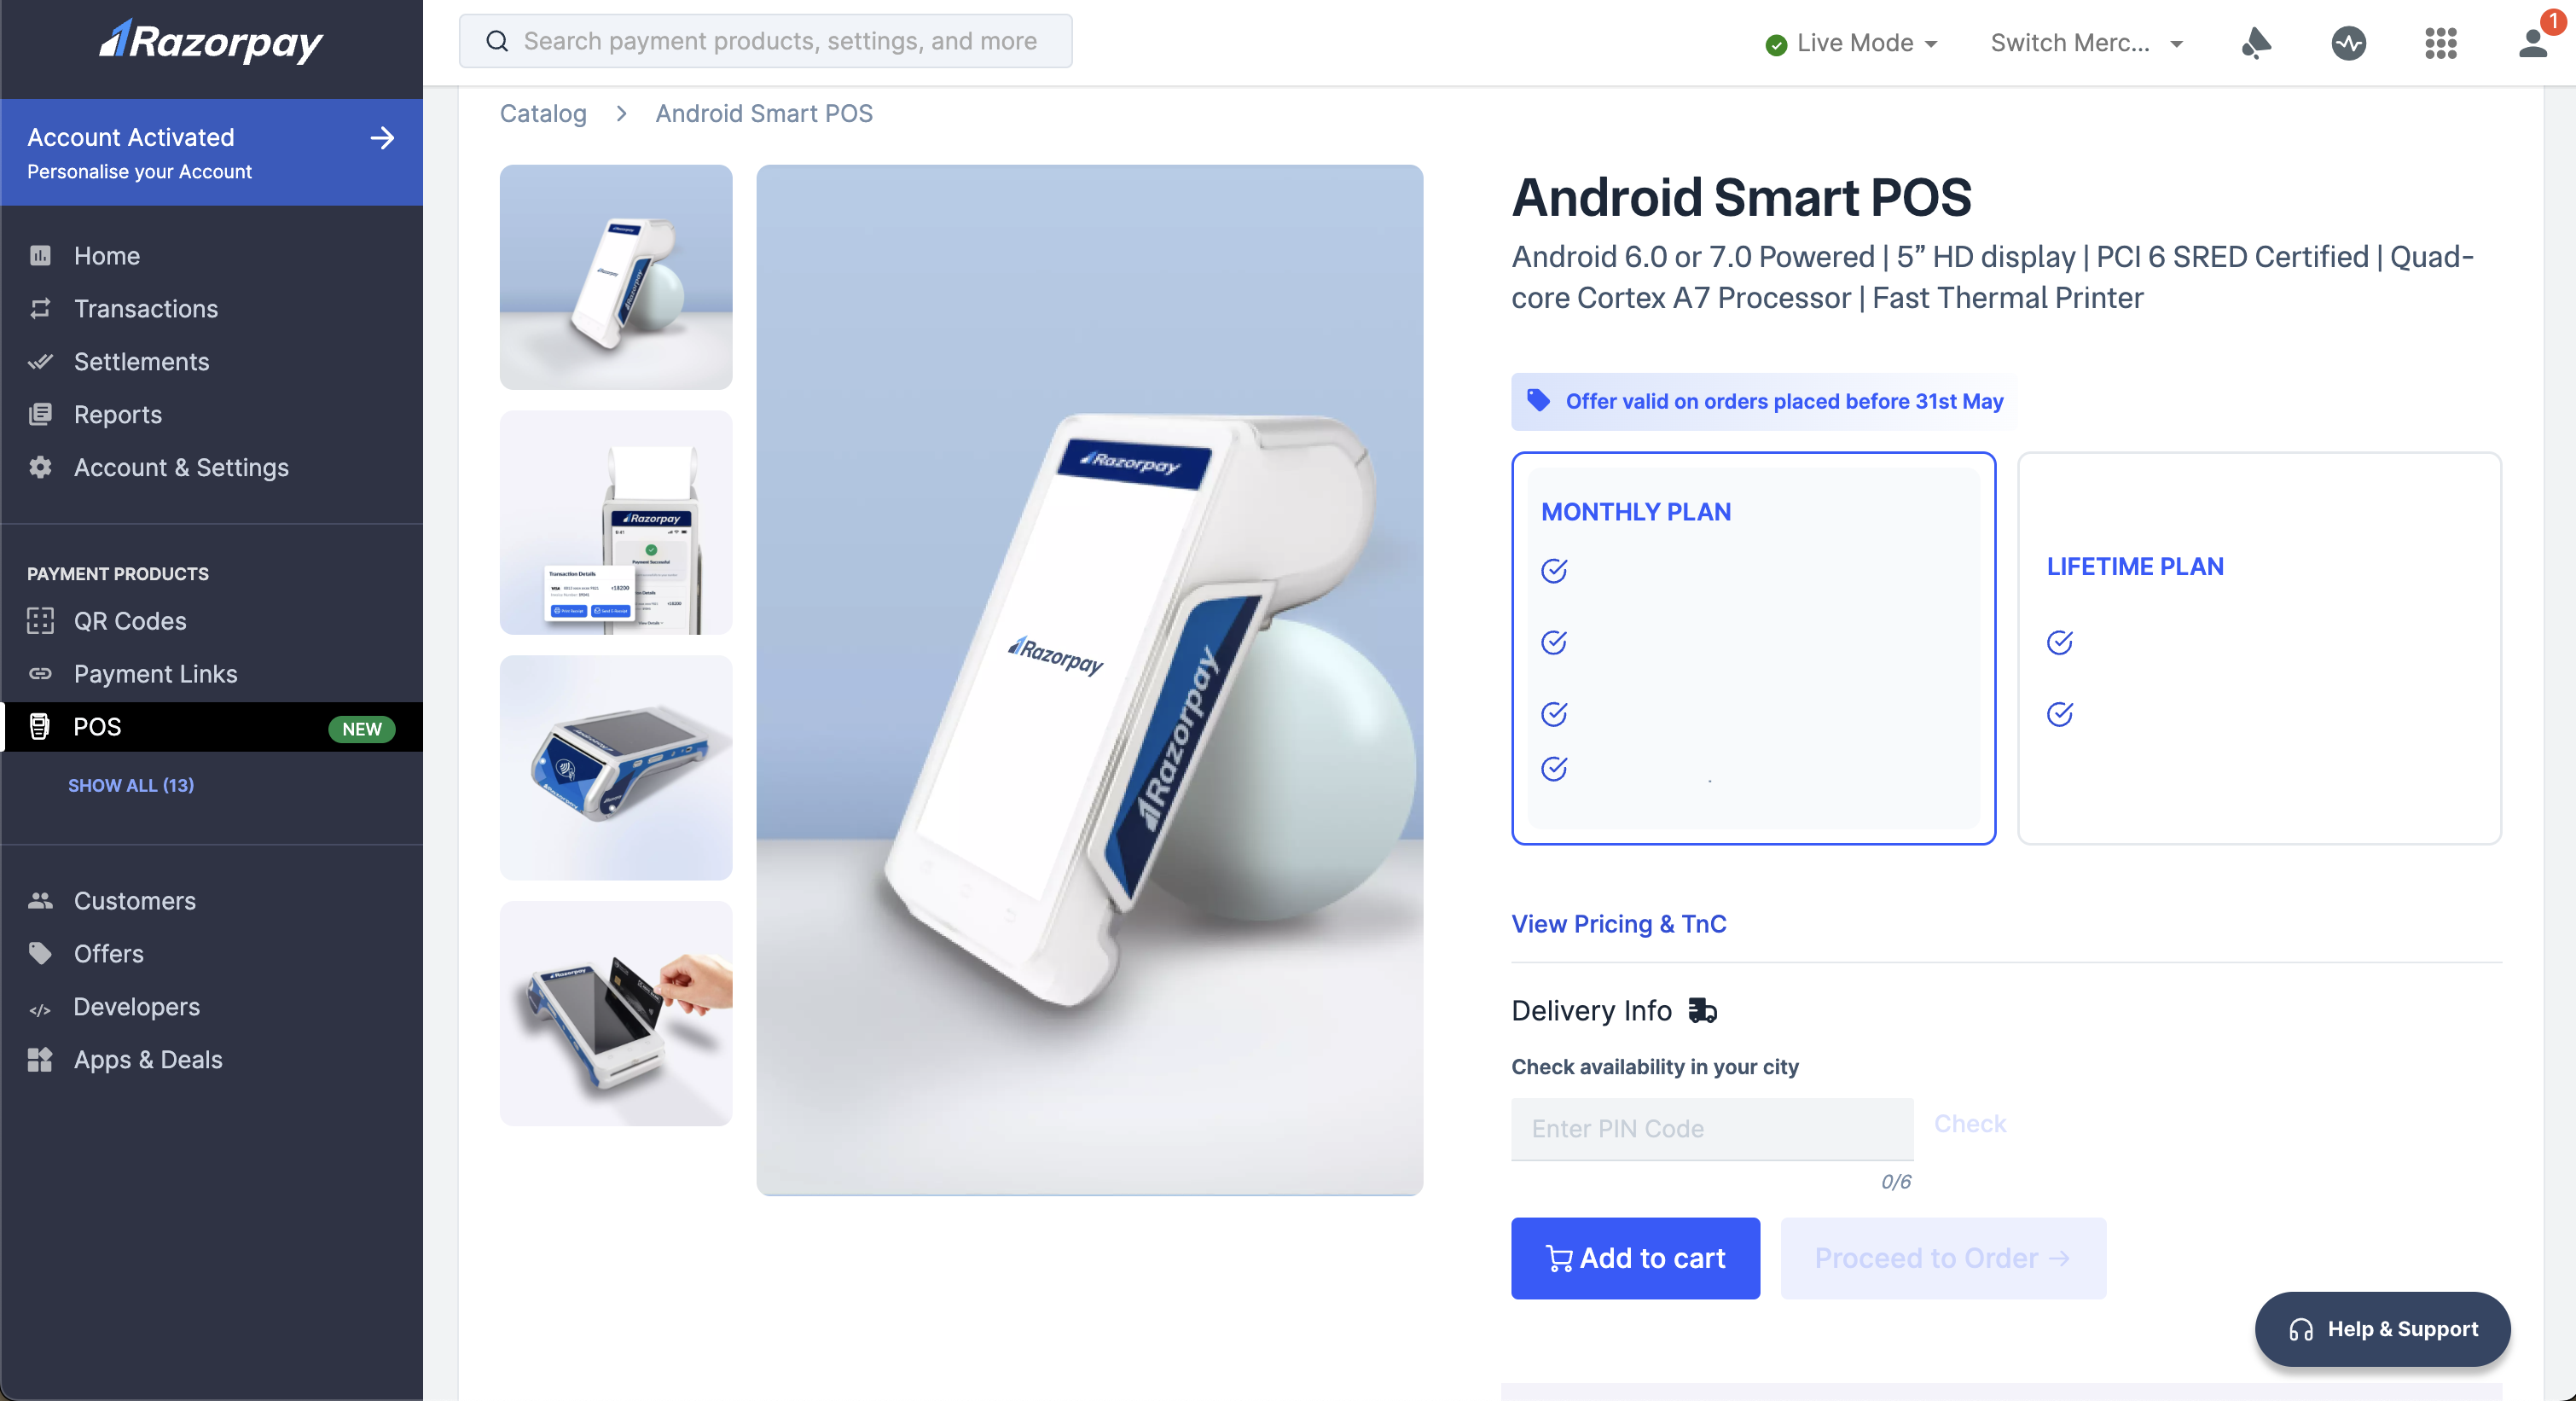 4. You can click **+** to add a combination of devices you want to order.
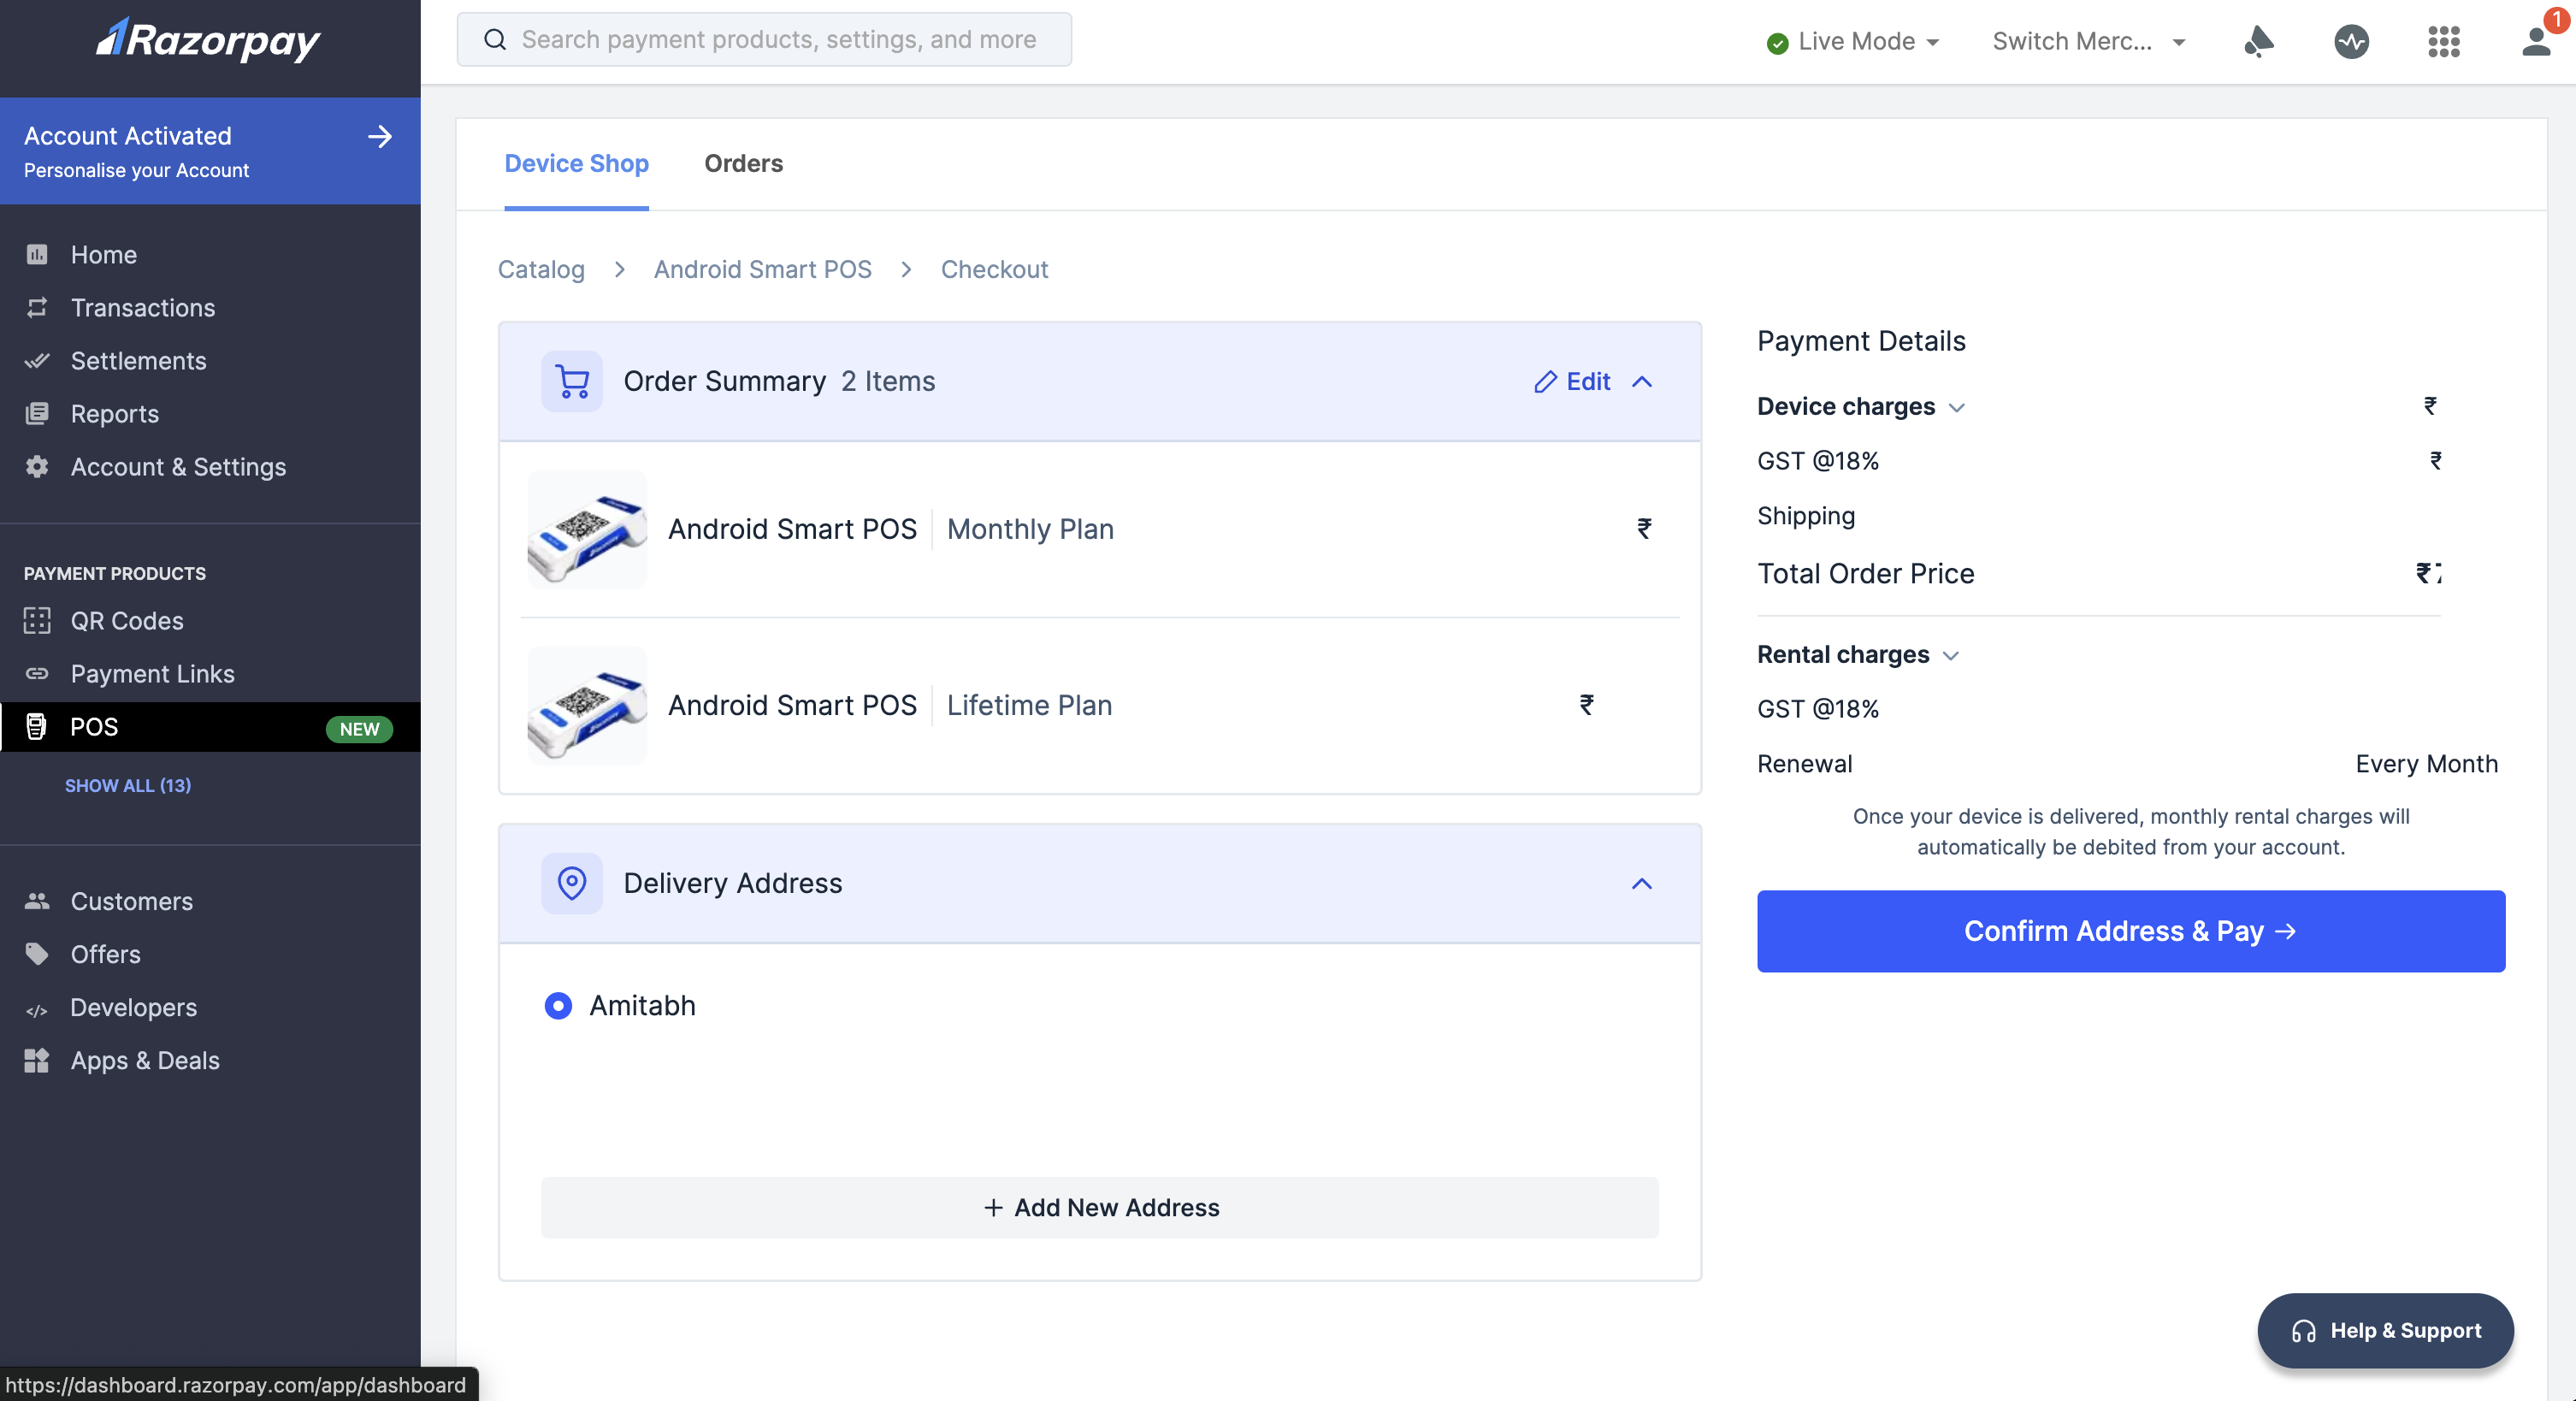
5. Click **Proceed to Order**. Review your order. You can **Edit** your order and **+ Add New Address** if required.
6. Click **Confirm Address & Pay**.
4. You can click **+** to add a combination of devices you want to order.
5. Click **Proceed to Order**. Review your order. You can **Edit** your order and **+ Add New Address** if required.
6. Click **Confirm Address & Pay**.
 7. Select your preferred payment method and click **Pay Now**.
Once the order is placed, you can find it in the **POS** → **Orders** tab.
7. Select your preferred payment method and click **Pay Now**.
Once the order is placed, you can find it in the **POS** → **Orders** tab.