> ## Documentation Index
> Fetch the complete documentation index at: https://razorpay-881012b3.mintlify.site/llms.txt
> Use this file to discover all available pages before exploring further.
# Integration Steps
> Steps to integrate your PrestaShop website with Razorpay Payment Gateway.
Available in
🇮🇳 India
🇸🇬 Singapore
Follow the steps given below to integrate Razorpay Payment Gateway with your PrestaShop website.
Install and configure the PrestaShop plugin.
Test the integration by making a test payment.
Check the go-live checklist.
## 1. Build Integration
Follow the steps given below:
1. Download the Source code zip file of the required version of the plugin from the Releases section in GitHub.
* For PrestaShop 1.6, download releases tagged 1.x.y. The latest release for PrestaShop 1.6 is [version 1.3.1](https://github.com/razorpay/razorpay-prestashop/releases/download/1.3.1/razorpay.zip).
* For PrestaShop 1.7, download releases tagged 2.x.y. The latest release for PrestaShop 1.7 is [version 2.5.3](https://github.com/razorpay/razorpay-prestashop/releases/download/2.5.3/razorpay.zip).
* For PrestaShop 8.0 and 8.1, download releases tagged 2.x.y. The latest release for PrestaShop 8.0 and 8.1 is [version 2.5.4](https://github.com/razorpay/razorpay-prestashop/releases).
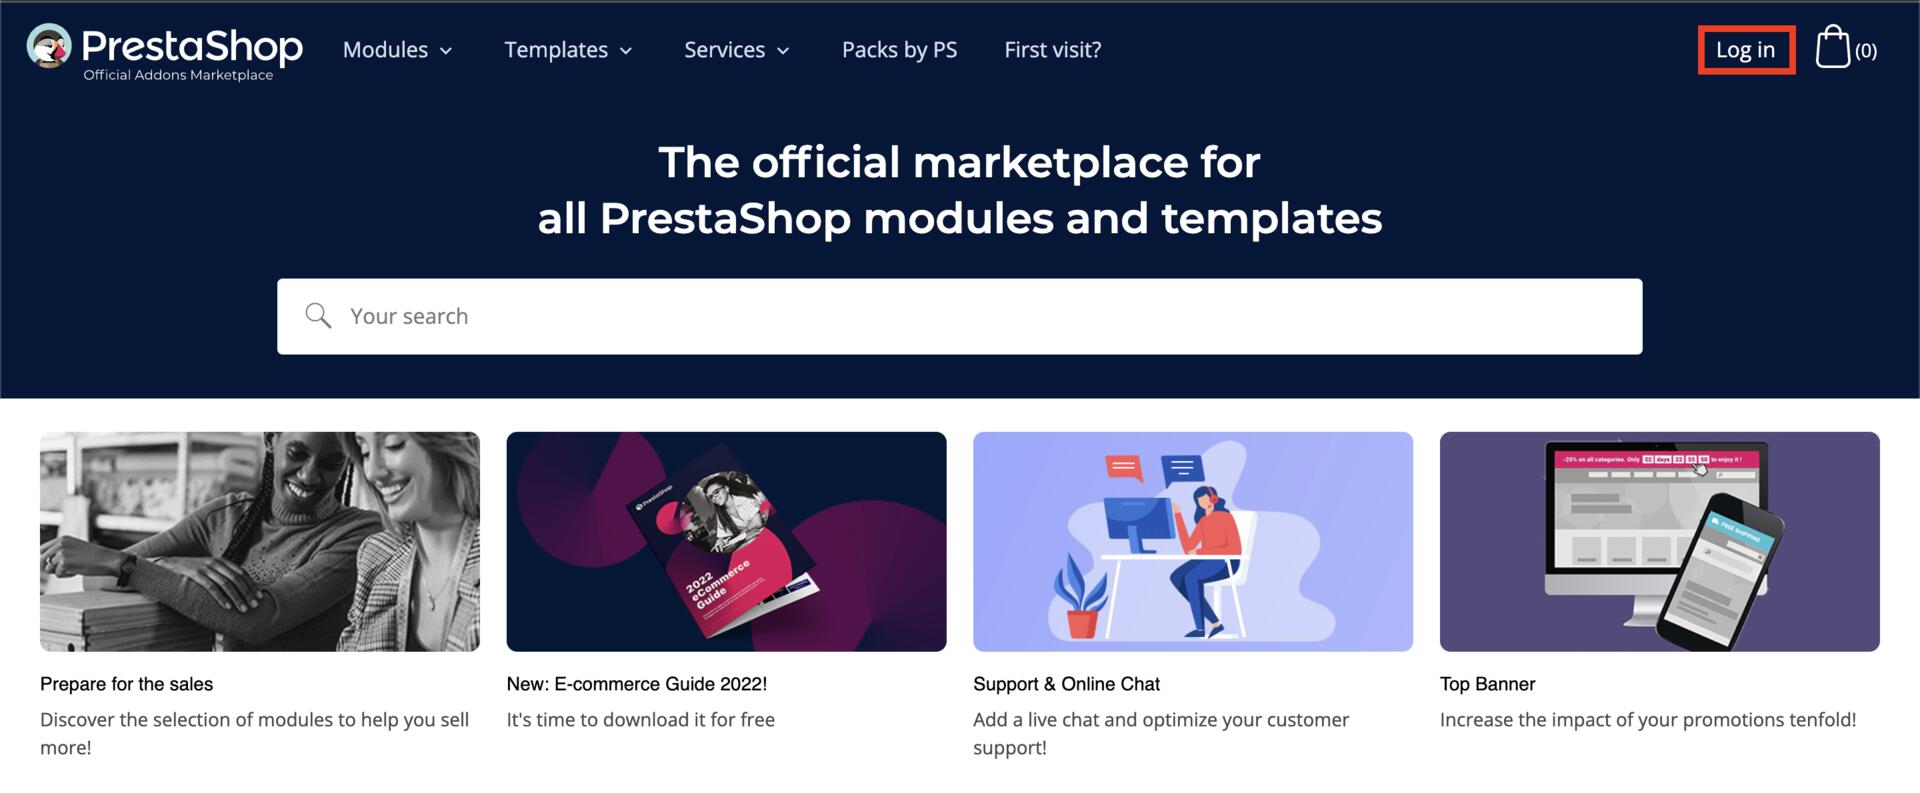
2. Log in to your [PrestaShop account](https://addons.prestashop.com/en/).
 3. Navigate to the **Modules** tab and click **Add a New Module**.
4. Click **Browse** to open the Windows search on your computer. Select the ZIP file that you have downloaded and click **OK**.
5. Click **Upload this Module**.
6. Click **Install** to install the module.
7. Click **Configure** to configure the module.
**Watch Out!**
If the store is open while the module is not fully configured, deactivate it by clicking the green check. Reactivate the store by clicking the red X after the module configuration.
**Handy Tips**
Webhook is auto-configured when you enter and save the API key ID and secret on the plugin settings page. You need to verify if webhooks are enabled on your Razorpay [Dashboard](/docs/sg/payments/payment-gateway/ecommerce-plugins/prestashop/troubleshooting-faqs#2-how-can-i-verify-if-webhooks-are). However, for versions lower than 2.5.0, you need to [configure webhooks manually](/docs/sg/payments/payment-gateway/ecommerce-plugins/prestashop/troubleshooting-faqs#1-my-webhooks-are-not-auto-configured-since-i).
If you face any errors, refer to the [PrestaShop guide](https://addons.prestashop.com/en/content/21-how-to).
## 2. Test Integration
After the integration is complete, a **Pay** button will appear on your web page/app. You need to click the button and make a test transaction to ensure that the integration is working as expected. You can start accepting actual payments from your customers once the test is successful.
You can make test payments using one of the payment methods configured at the Checkout.
* No money is deducted from the customer's account as this is a simulated transaction.
* Ensure you have entered the API keys generated in the test mode in the Checkout code.
After the integration is complete, a **Pay** button appears on your webpage/app.
Click the button and make a test transaction to ensure the integration is working as expected. You can start accepting actual payments from your customers once the test transaction is successful.
**Watch Out!**
This is a mock payment page that uses your test API keys, test card and payment details.
* Ensure you have entered only your [Test Mode API keys](/docs/sg/payments/dashboard/account-settings/api-keys#generate-api-keys) in the Checkout code.
* Test mode features a mock bank page with **Success** and **Failure** buttons to replicate the live payment experience.
* No real money is deducted due to the usage of test API keys. This is a simulated transaction.
Following are all the payment modes that the customer can use to complete the payment on the Checkout. Some of them are available by default, while others may require approval from us. Raise a request from the Dashboard to enable such payment methods.
| Payment Method | Code | Availability |
| ----------------------------------------------------------------- | -------- | ------------ |
| [Debit and Credit Cards](/docs/sg/payments/payment-methods/cards) | `card` | ✓ |
| [PayNow](/docs/sg/payments/payment-methods/paynow) | `paynow` | ✓ |
You can make test payments using one of the payment methods configured at the Checkout.
You can use one of the following test cards to test transactions for your integration in Test Mode.
| Card Network | Card Number | CVV & Expiry Date |
| ------------ | ------------------- | --------------------------------------- |
| Mastercard | 5272 0088 0623 5705 | Use a random CVV and any future date ^^ |
| Visa | 4111 1111 1111 1112 | |
Check the following lists:
* [Supported Card Networks](/docs/sg/payments/payment-methods/cards).
* [Cards Error Codes](/docs/sg/errors/payments/cards).
You can scan the QR code and make the payment using your PayNow-enabled bank app. Razorpay will redirect to a mock page where you can make the payment a success or a failure. Since this is Test Mode, we will not redirect you to the bank portals. Know more about [PayNow](/docs/sg/payments/payment-methods/paynow).
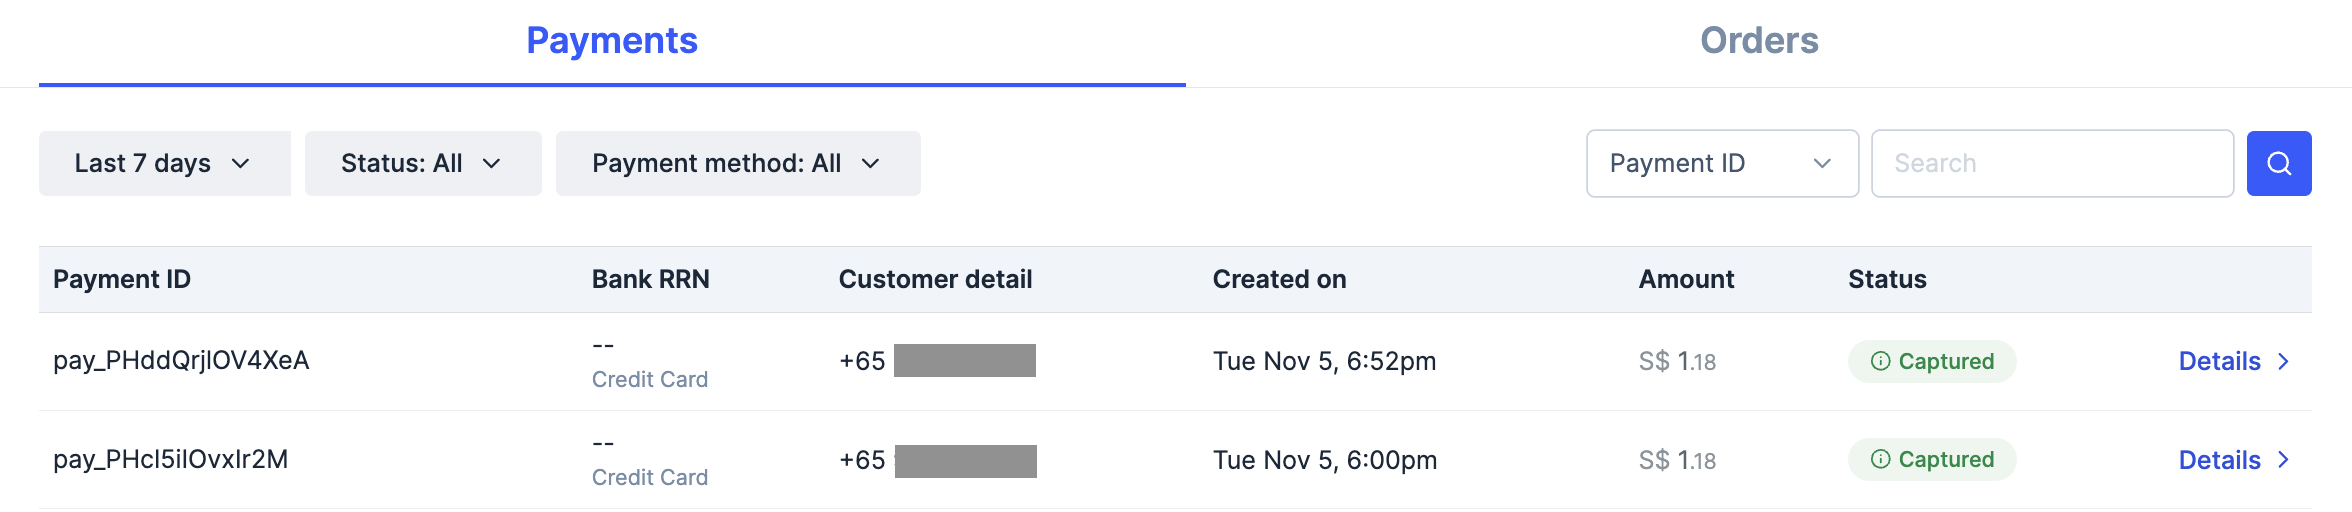
You can track the payment status from the Dashboard or by polling APIs.
1. Log in to the Razorpay Dashboard and navigate to **Transactions** → **Payments**.
2. Check if a `payment_ID` has been generated and note the status. In case of a successful payment, the status is marked as `captured`.
3. Navigate to the **Modules** tab and click **Add a New Module**.
4. Click **Browse** to open the Windows search on your computer. Select the ZIP file that you have downloaded and click **OK**.
5. Click **Upload this Module**.
6. Click **Install** to install the module.
7. Click **Configure** to configure the module.
**Watch Out!**
If the store is open while the module is not fully configured, deactivate it by clicking the green check. Reactivate the store by clicking the red X after the module configuration.
**Handy Tips**
Webhook is auto-configured when you enter and save the API key ID and secret on the plugin settings page. You need to verify if webhooks are enabled on your Razorpay [Dashboard](/docs/sg/payments/payment-gateway/ecommerce-plugins/prestashop/troubleshooting-faqs#2-how-can-i-verify-if-webhooks-are). However, for versions lower than 2.5.0, you need to [configure webhooks manually](/docs/sg/payments/payment-gateway/ecommerce-plugins/prestashop/troubleshooting-faqs#1-my-webhooks-are-not-auto-configured-since-i).
If you face any errors, refer to the [PrestaShop guide](https://addons.prestashop.com/en/content/21-how-to).
## 2. Test Integration
After the integration is complete, a **Pay** button will appear on your web page/app. You need to click the button and make a test transaction to ensure that the integration is working as expected. You can start accepting actual payments from your customers once the test is successful.
You can make test payments using one of the payment methods configured at the Checkout.
* No money is deducted from the customer's account as this is a simulated transaction.
* Ensure you have entered the API keys generated in the test mode in the Checkout code.
After the integration is complete, a **Pay** button appears on your webpage/app.
Click the button and make a test transaction to ensure the integration is working as expected. You can start accepting actual payments from your customers once the test transaction is successful.
**Watch Out!**
This is a mock payment page that uses your test API keys, test card and payment details.
* Ensure you have entered only your [Test Mode API keys](/docs/sg/payments/dashboard/account-settings/api-keys#generate-api-keys) in the Checkout code.
* Test mode features a mock bank page with **Success** and **Failure** buttons to replicate the live payment experience.
* No real money is deducted due to the usage of test API keys. This is a simulated transaction.
Following are all the payment modes that the customer can use to complete the payment on the Checkout. Some of them are available by default, while others may require approval from us. Raise a request from the Dashboard to enable such payment methods.
| Payment Method | Code | Availability |
| ----------------------------------------------------------------- | -------- | ------------ |
| [Debit and Credit Cards](/docs/sg/payments/payment-methods/cards) | `card` | ✓ |
| [PayNow](/docs/sg/payments/payment-methods/paynow) | `paynow` | ✓ |
You can make test payments using one of the payment methods configured at the Checkout.
You can use one of the following test cards to test transactions for your integration in Test Mode.
| Card Network | Card Number | CVV & Expiry Date |
| ------------ | ------------------- | --------------------------------------- |
| Mastercard | 5272 0088 0623 5705 | Use a random CVV and any future date ^^ |
| Visa | 4111 1111 1111 1112 | |
Check the following lists:
* [Supported Card Networks](/docs/sg/payments/payment-methods/cards).
* [Cards Error Codes](/docs/sg/errors/payments/cards).
You can scan the QR code and make the payment using your PayNow-enabled bank app. Razorpay will redirect to a mock page where you can make the payment a success or a failure. Since this is Test Mode, we will not redirect you to the bank portals. Know more about [PayNow](/docs/sg/payments/payment-methods/paynow).
You can track the payment status from the Dashboard or by polling APIs.
1. Log in to the Razorpay Dashboard and navigate to **Transactions** → **Payments**.
2. Check if a `payment_ID` has been generated and note the status. In case of a successful payment, the status is marked as `captured`.
 [Poll Payment APIs](/docs/sg/api/payments#fetch-multiple-payments) to check the payment status.
## 3. Go-live Checklist
Follow these steps before taking the integration live:
Perform an end-to-end simulation of funds flow in the Test Mode. Once confident that the integration is working as expected, switch to the Live Mode and start accepting payments from customers.
**Watch Out!**
Ensure you are switching your test API keys with API keys generated in Live Mode.
To generate API Keys in Live Mode on your Razorpay Dashboard:
1. Log in to the Razorpay Dashboard and switch to **Live Mode** on the menu.
2. Navigate to **Account & Settings** → **API Keys** → **Generate Key** to generate the API Key for Live Mode.
3. Download the keys and save them securely.
4. Replace the Test API Key with the Live Key in the Checkout code and start accepting actual payments.
[Poll Payment APIs](/docs/sg/api/payments#fetch-multiple-payments) to check the payment status.
## 3. Go-live Checklist
Follow these steps before taking the integration live:
Perform an end-to-end simulation of funds flow in the Test Mode. Once confident that the integration is working as expected, switch to the Live Mode and start accepting payments from customers.
**Watch Out!**
Ensure you are switching your test API keys with API keys generated in Live Mode.
To generate API Keys in Live Mode on your Razorpay Dashboard:
1. Log in to the Razorpay Dashboard and switch to **Live Mode** on the menu.
2. Navigate to **Account & Settings** → **API Keys** → **Generate Key** to generate the API Key for Live Mode.
3. Download the keys and save them securely.
4. Replace the Test API Key with the Live Key in the Checkout code and start accepting actual payments.
After payment is `authorized`, you need to capture it to settle the amount to your bank account as per the settlement schedule. Payments that are not captured are auto-refunded after a fixed time.
**Watch Out**
* You should deliver the products or services to your customers only after the payment is captured. Razorpay automatically refunds all the uncaptured payments.
* You can track the payment status using our [Fetch a Payment API](/docs/sg/api/payments#fetch-a-payment) or webhooks.
Authorized payments can be automatically captured. You can auto-capture all payments [using global settings](/docs/sg/payments/payments/capture-settings#auto-capture-all-payments) on the Razorpay Dashboard. Know more about [capture settings for payments](/docs/sg/payments/payments/capture-settings).
**Watch Out!**
Payment capture settings work only if you have integrated with Orders API on your server side. Know more about the [Orders API](/docs/sg/api/orders/create).
Each authorized payment can also be captured individually. You can manually capture payments using [Payment Capture API](/docs/sg/api/payments/capture) or [Dashboard](/docs/sg/payments/payments/dashboard#manually-capture-payments). Know more about [capture settings for payments](/docs/sg/payments/payments/capture-settings).