 ## Create RazorpayX Lite
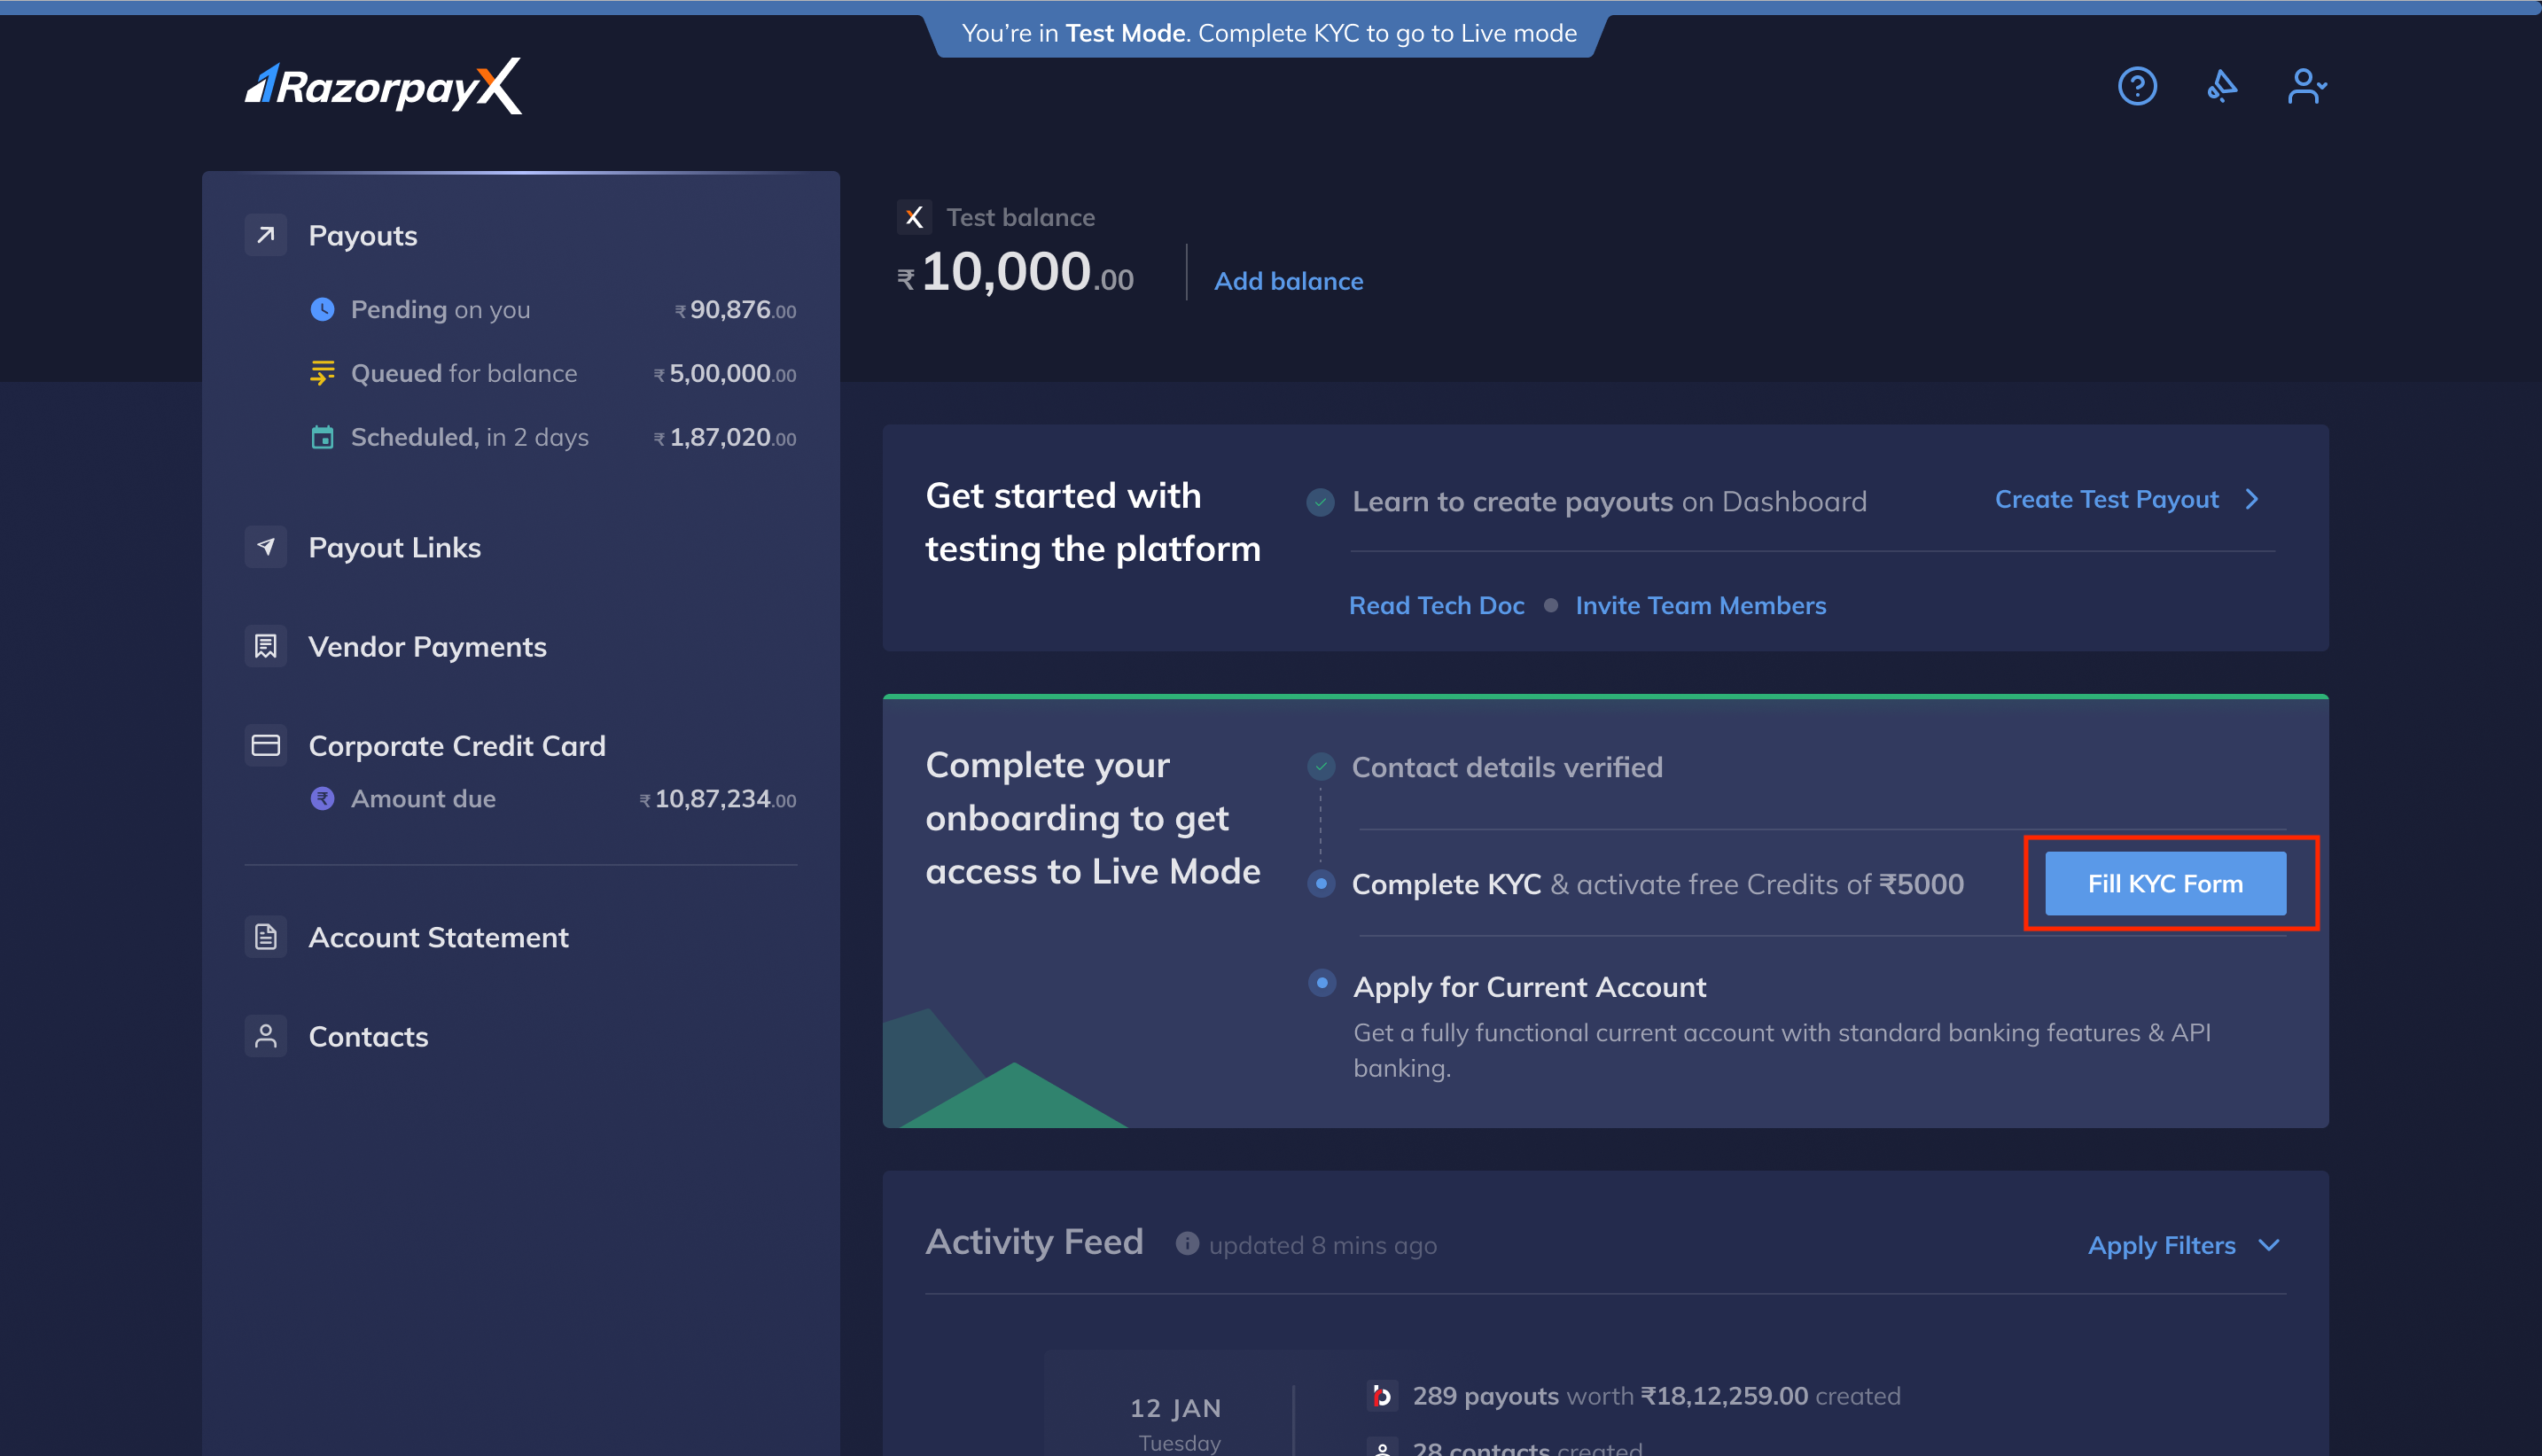
1. You can kick start the activation process by completing the KYC form. The KYC form can be accessed using the **Fill KYC Form** button from the RazorpayX Dashboard as shown here:
## Create RazorpayX Lite
1. You can kick start the activation process by completing the KYC form. The KYC form can be accessed using the **Fill KYC Form** button from the RazorpayX Dashboard as shown here:
 The KYC modal is displayed as shown here:
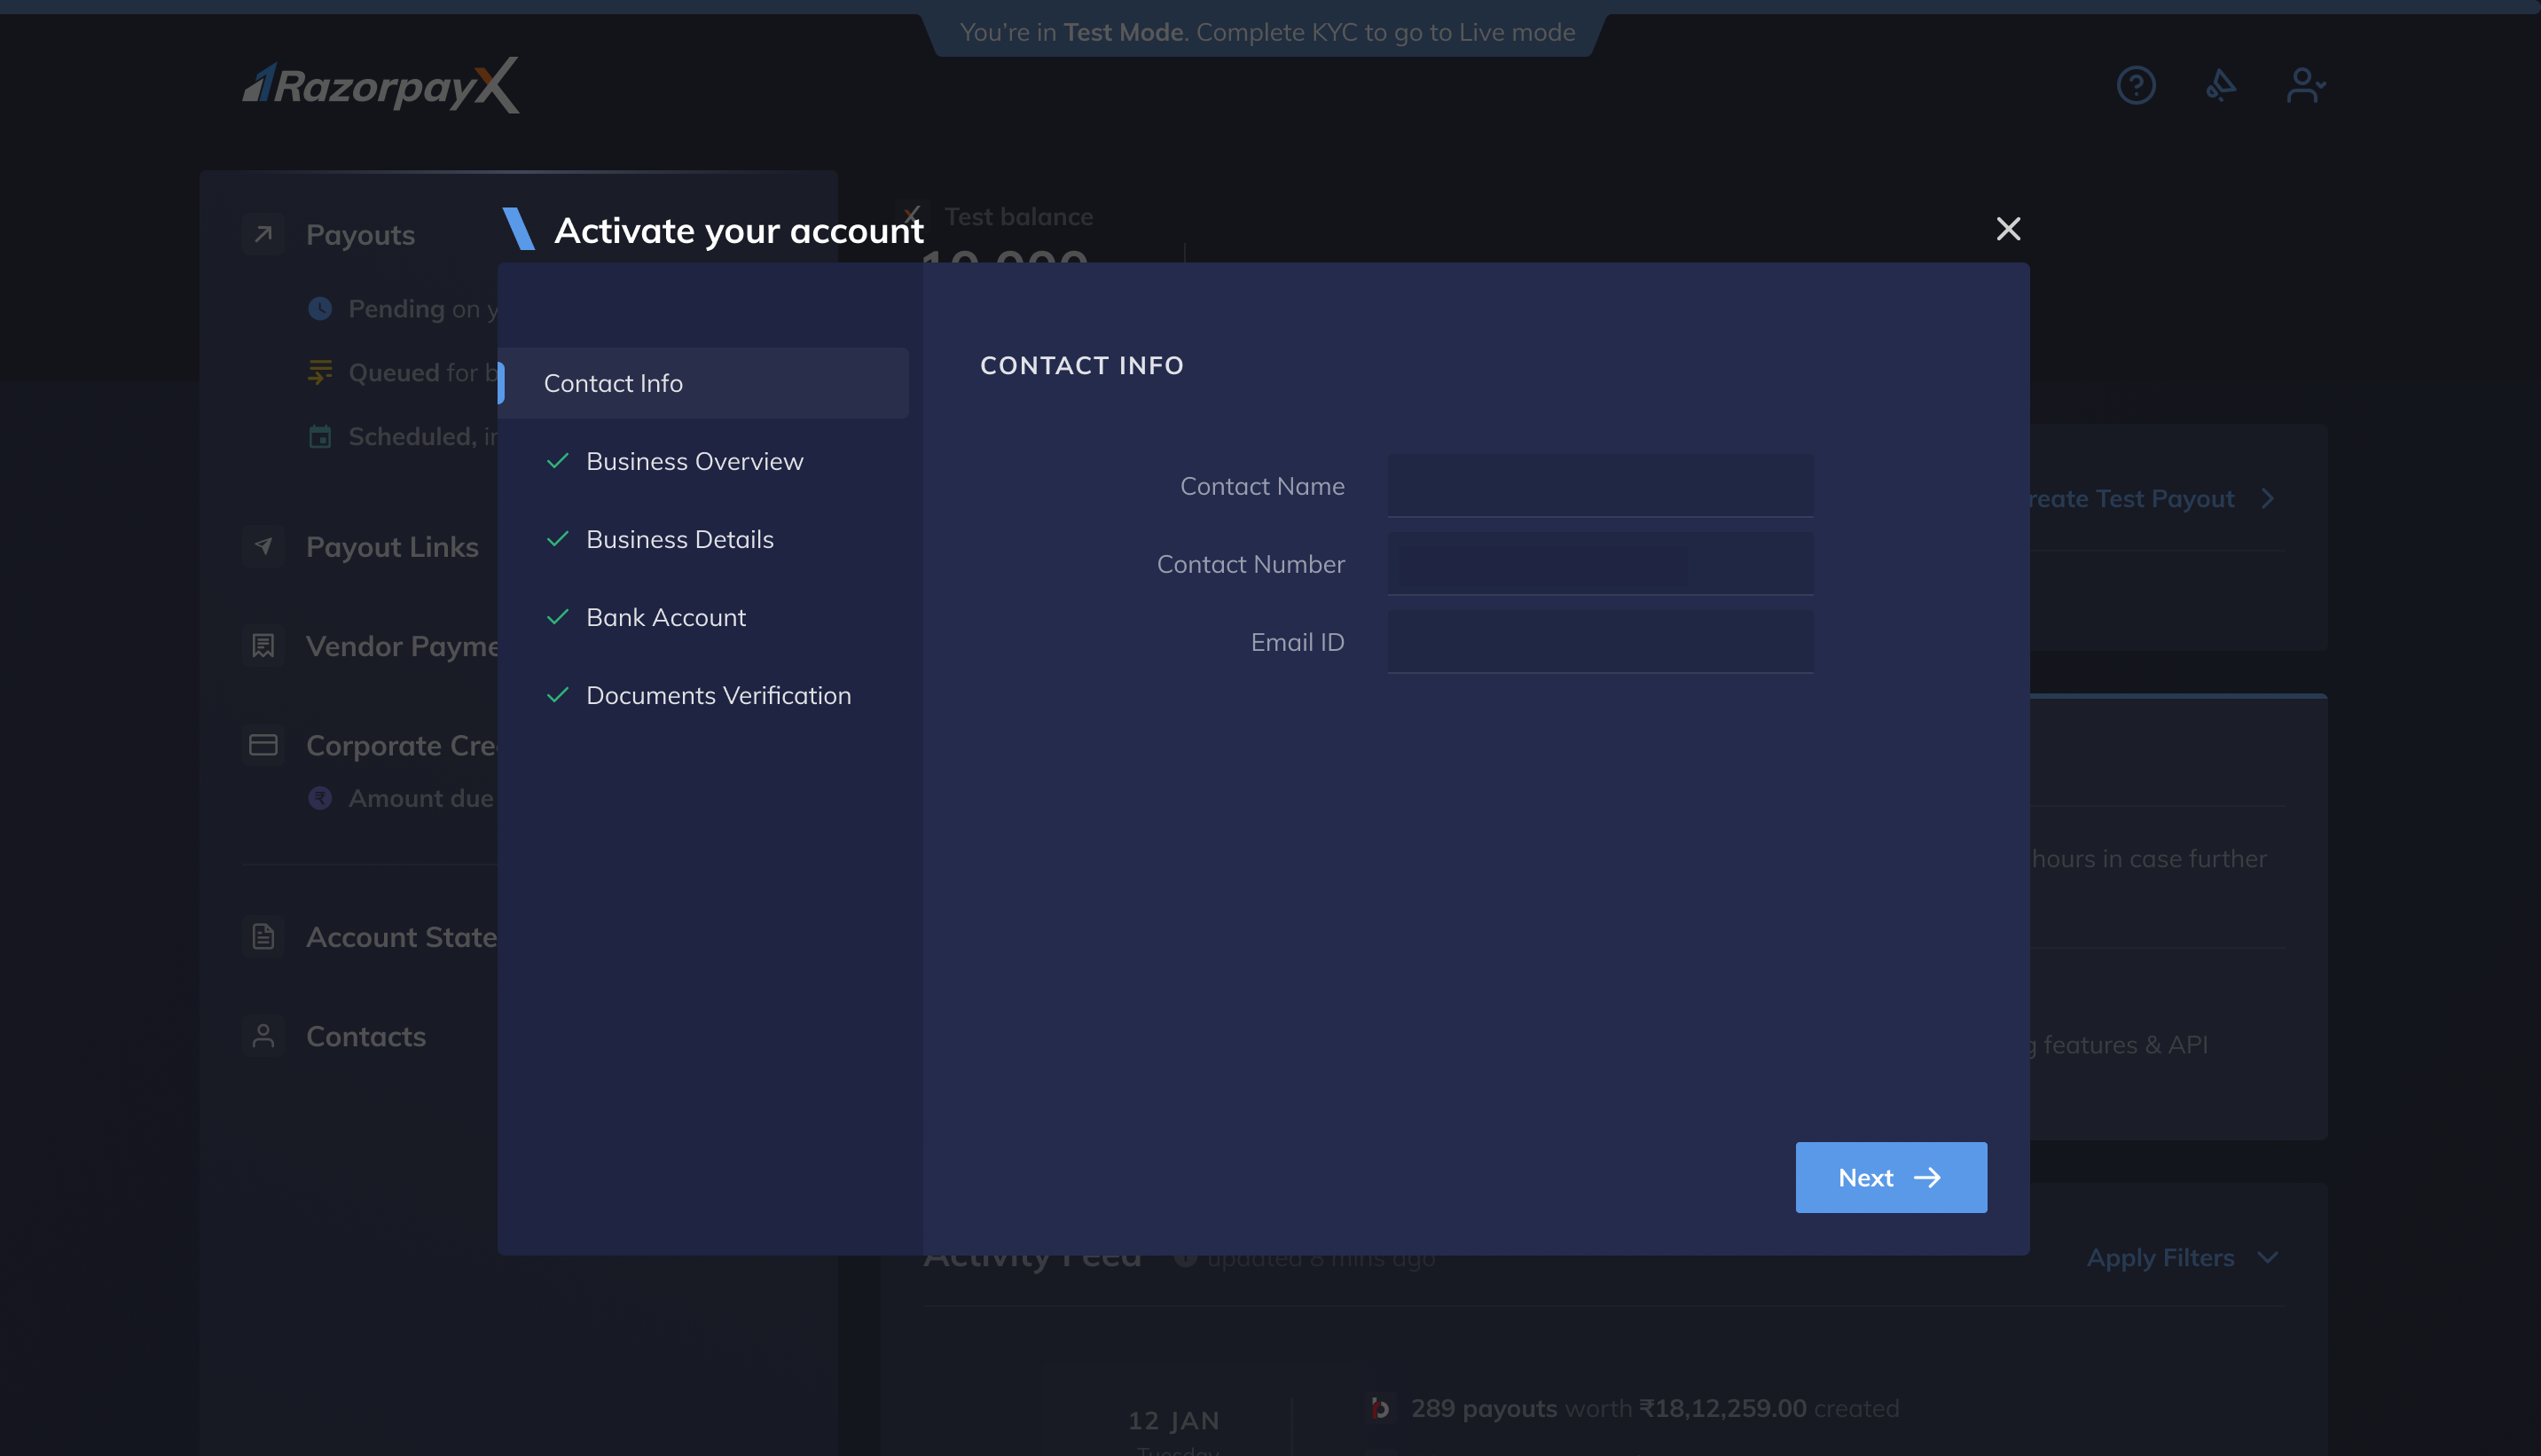 2. Enter the details in each section of the modal and click **Next**. Once the form is submitted, the Razorpay team reviews your details and activates your account within 2-3 business days.
## Add Funds
For a safer and secured banking experience, you must add funds to your RazorpayX Lite through [validated bank accounts only](/docs/x/account-types/source-account-validation). You can add upto 5 accounts for fund loading on the RazorpayX Dashboard.
## Direct Bank Transfers: Netbanking
To add funds to your RazorpayX Lite via a direct bank transfer:
1. Log in to your netbanking account.
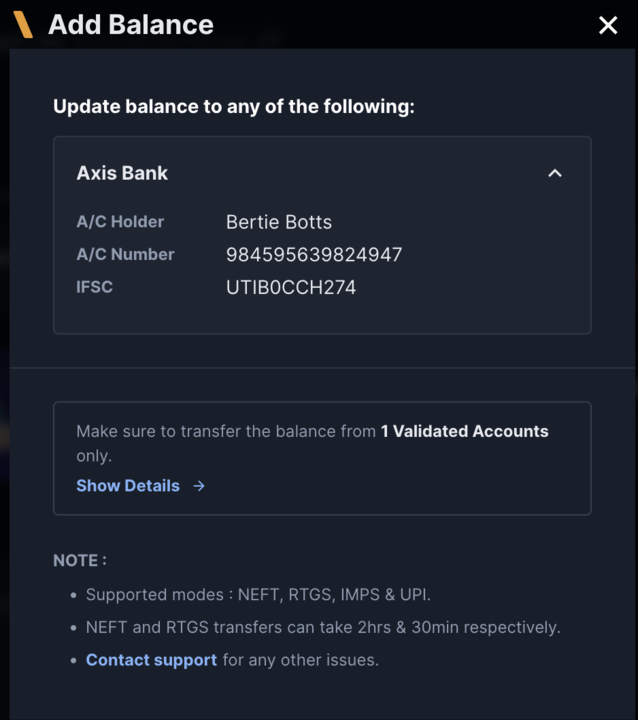
2. Copy your RazorpayX Lite details. Account details include your customer identifier and IFSC details.
3. Create a beneficiary using your account details.
4. Transfer funds via IMPS, NEFT or RTGS.
### Related Information
* [Set up your RazorpayX account](/docs/x/set-up)
* [Generate API Keys](/docs/x/dashboard/api-keys)
* [Test Mode](/docs/x/dashboard/test-mode)
2. Enter the details in each section of the modal and click **Next**. Once the form is submitted, the Razorpay team reviews your details and activates your account within 2-3 business days.
## Add Funds
For a safer and secured banking experience, you must add funds to your RazorpayX Lite through [validated bank accounts only](/docs/x/account-types/source-account-validation). You can add upto 5 accounts for fund loading on the RazorpayX Dashboard.
## Direct Bank Transfers: Netbanking
To add funds to your RazorpayX Lite via a direct bank transfer:
1. Log in to your netbanking account.
2. Copy your RazorpayX Lite details. Account details include your customer identifier and IFSC details.
3. Create a beneficiary using your account details.
4. Transfer funds via IMPS, NEFT or RTGS.
### Related Information
* [Set up your RazorpayX account](/docs/x/set-up)
* [Generate API Keys](/docs/x/dashboard/api-keys)
* [Test Mode](/docs/x/dashboard/test-mode)