> ## Documentation Index
> Fetch the complete documentation index at: https://razorpay-881012b3.mintlify.site/llms.txt
> Use this file to discover all available pages before exploring further.

# About Contacts

> Create, update and view Contacts on the RazorpayX Dashboard.

<div style={{display:"flex",flexWrap:"wrap",alignItems:"center",gap:"0.35rem 0.9rem",border:"1px solid rgba(128,128,128,0.28)",borderRadius:"0.5rem",padding:"0.45rem 0.75rem",margin:"0 0 1.25rem",fontSize:"0.875rem"}}>
  <span style={{fontWeight:600}}>Available in</span>
  <span>🇮🇳 India</span>
</div>

A Contact can be a vendor or a customer to whom you need to send payouts (similar to a *beneficiary* in your netbanking portal).

* You can add a Contact's name, email id, phone and [Fund Account](/docs/x/fund-accounts) details (bank account, UPI or both) while creating a Contact.
* You can start sending payouts once the Contact has been created.
* There is no limit to the number of Contacts you can add.

<Warning>
  **Contact Support**

  This page is not meant for contacting Razorpay Support. Visit our [contact support page](/docs/x/support) to contact our support team.
</Warning>

## Contact Types

When creating a Contact, you are required to assign a type to the Contact. This helps in categorisation of Contacts and analysis of the payouts made to each category. The following `types` are available:

* `vendor`
* `customer`
* `employee`
* `self`

You are not restricted to use only these `types`. You can create custom `types` for Contacts, as applicable to your business, from the RazorpayX Dashboard.

### Create and View Contact Types

<AccordionGroup>
  <Accordion title="To create a Contact Type:">
    1. Log in to the [RazorpayX Dashboard](https://x.razorpay.com/).
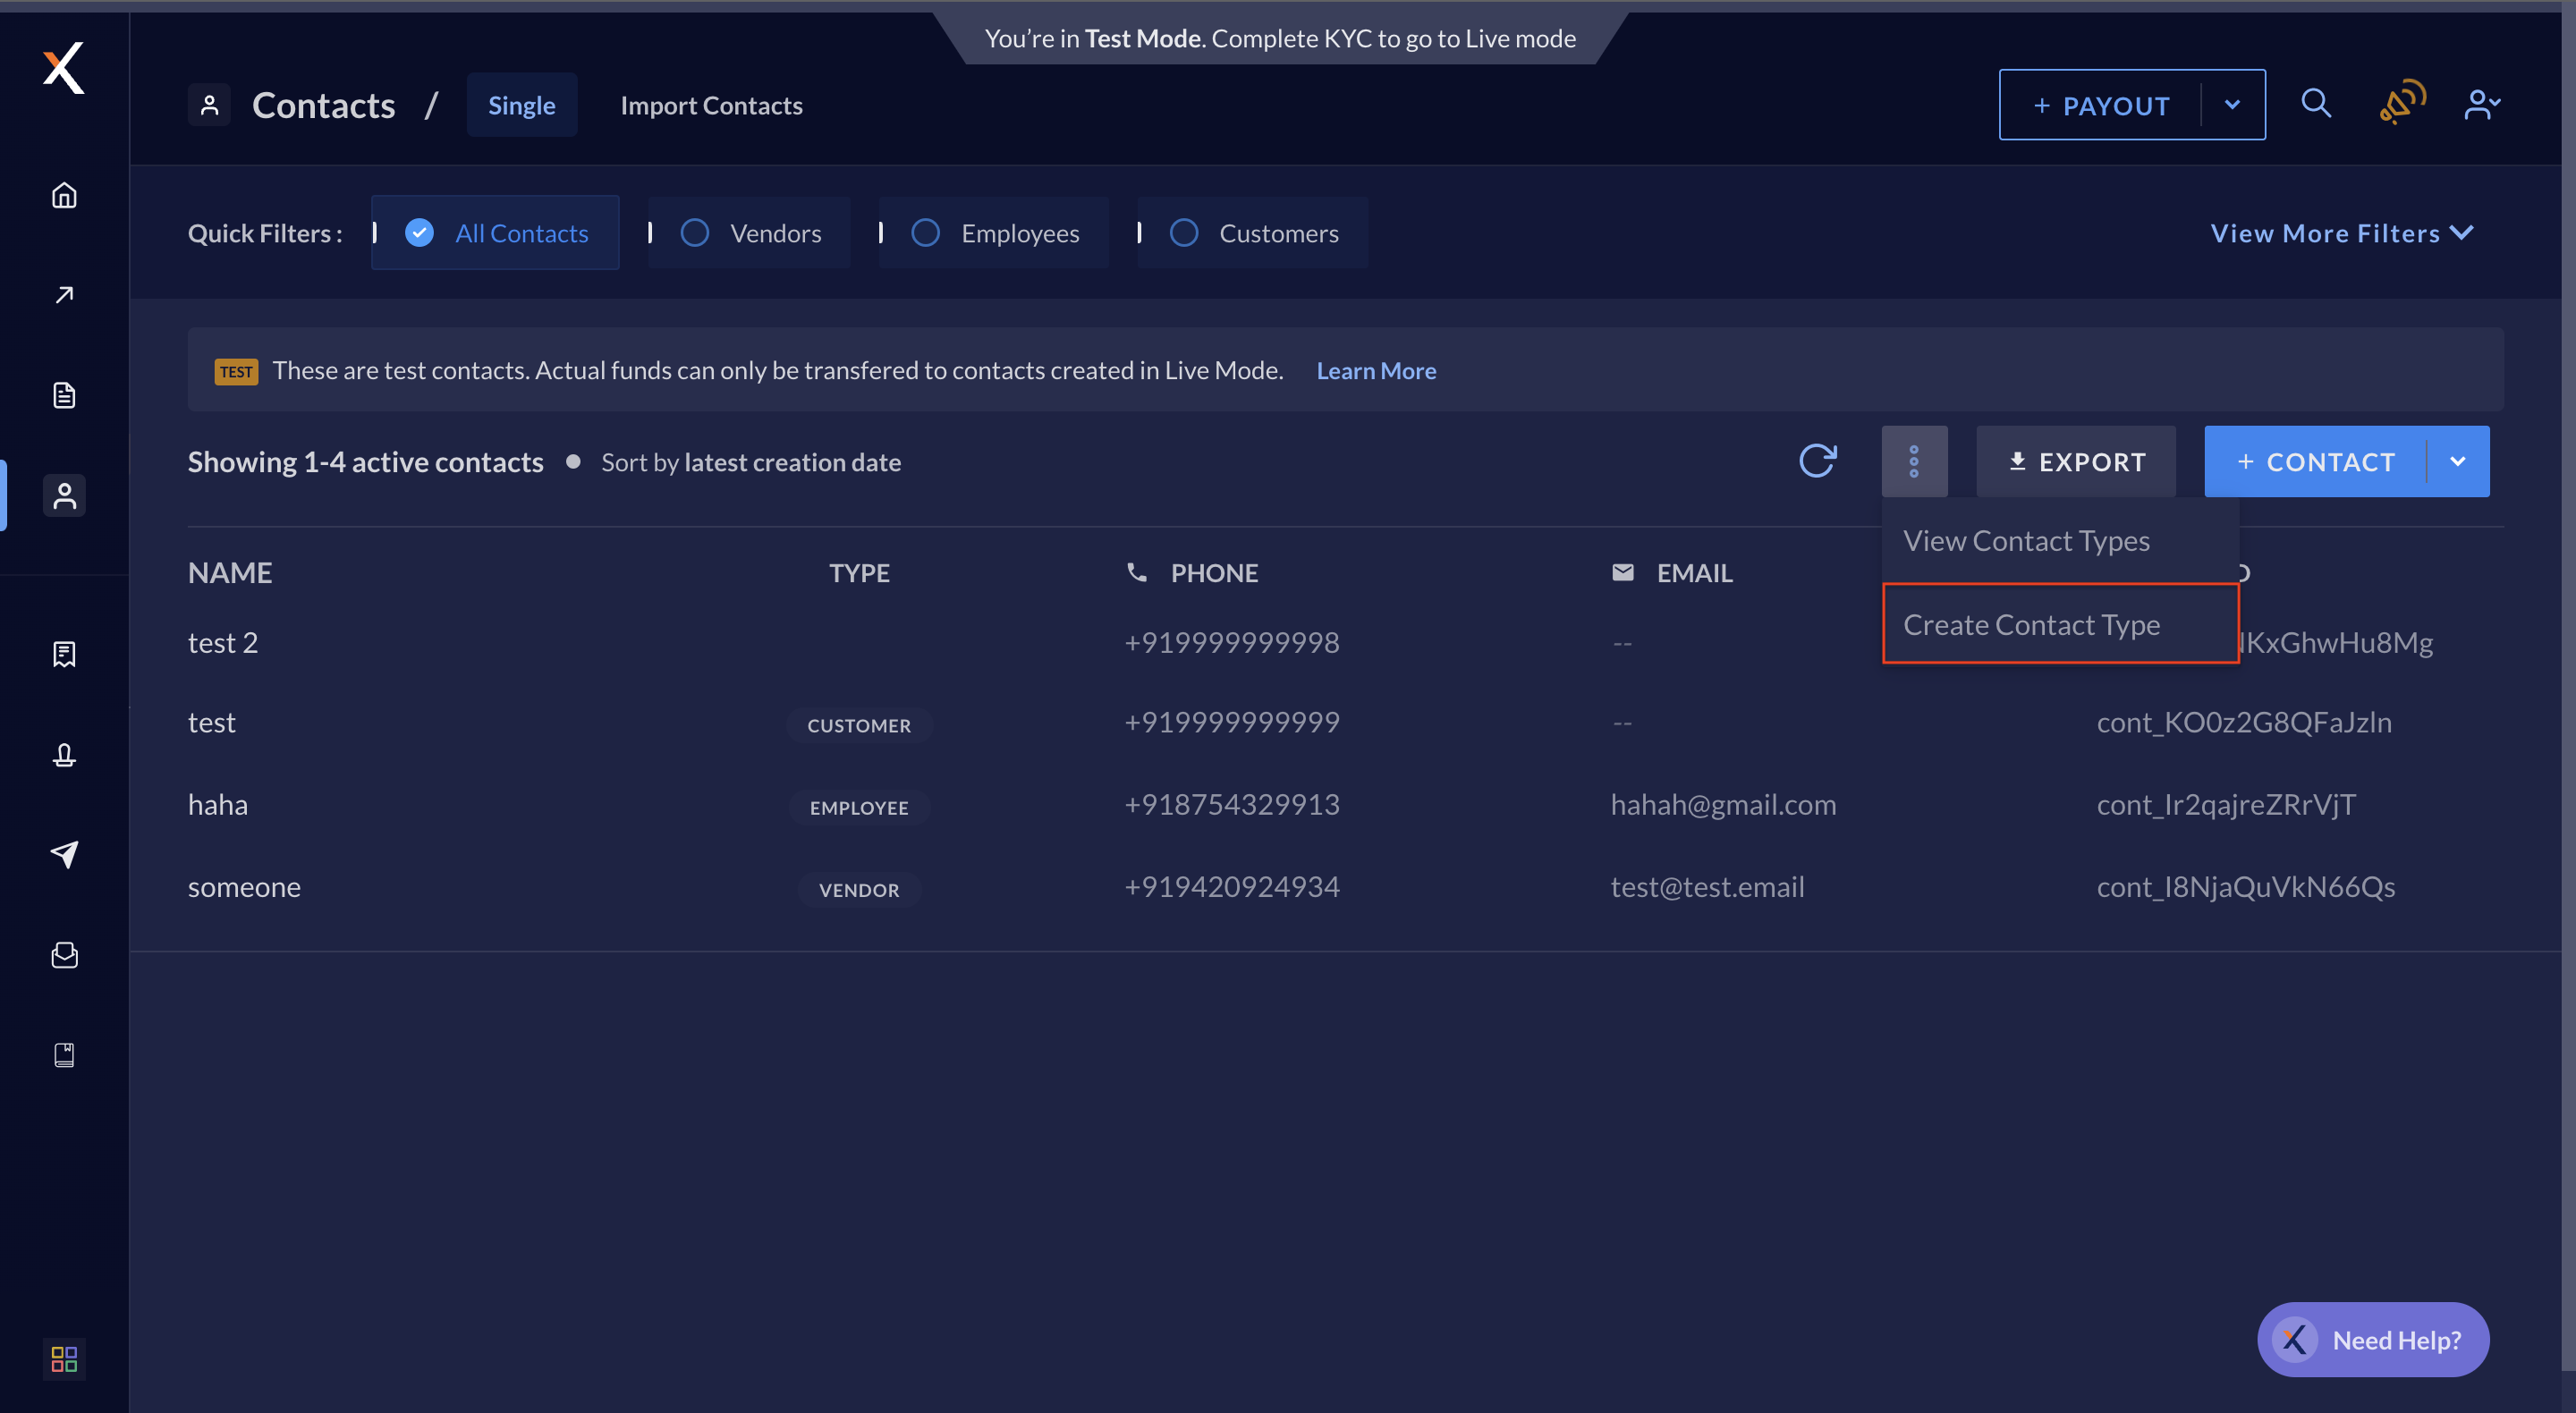
    2. Navigate to **Contacts** on the left navigation and click **︙**.
    3. Click **Create Contact Type**.
           <img src="https://razorpay.com/docs/build/browser/assets/images/x-contact-type-1.jpg" alt="Create Contact Type" width="800" />
    4. Enter the **Type Name** and click **CREATE CONTACT TYPE**.
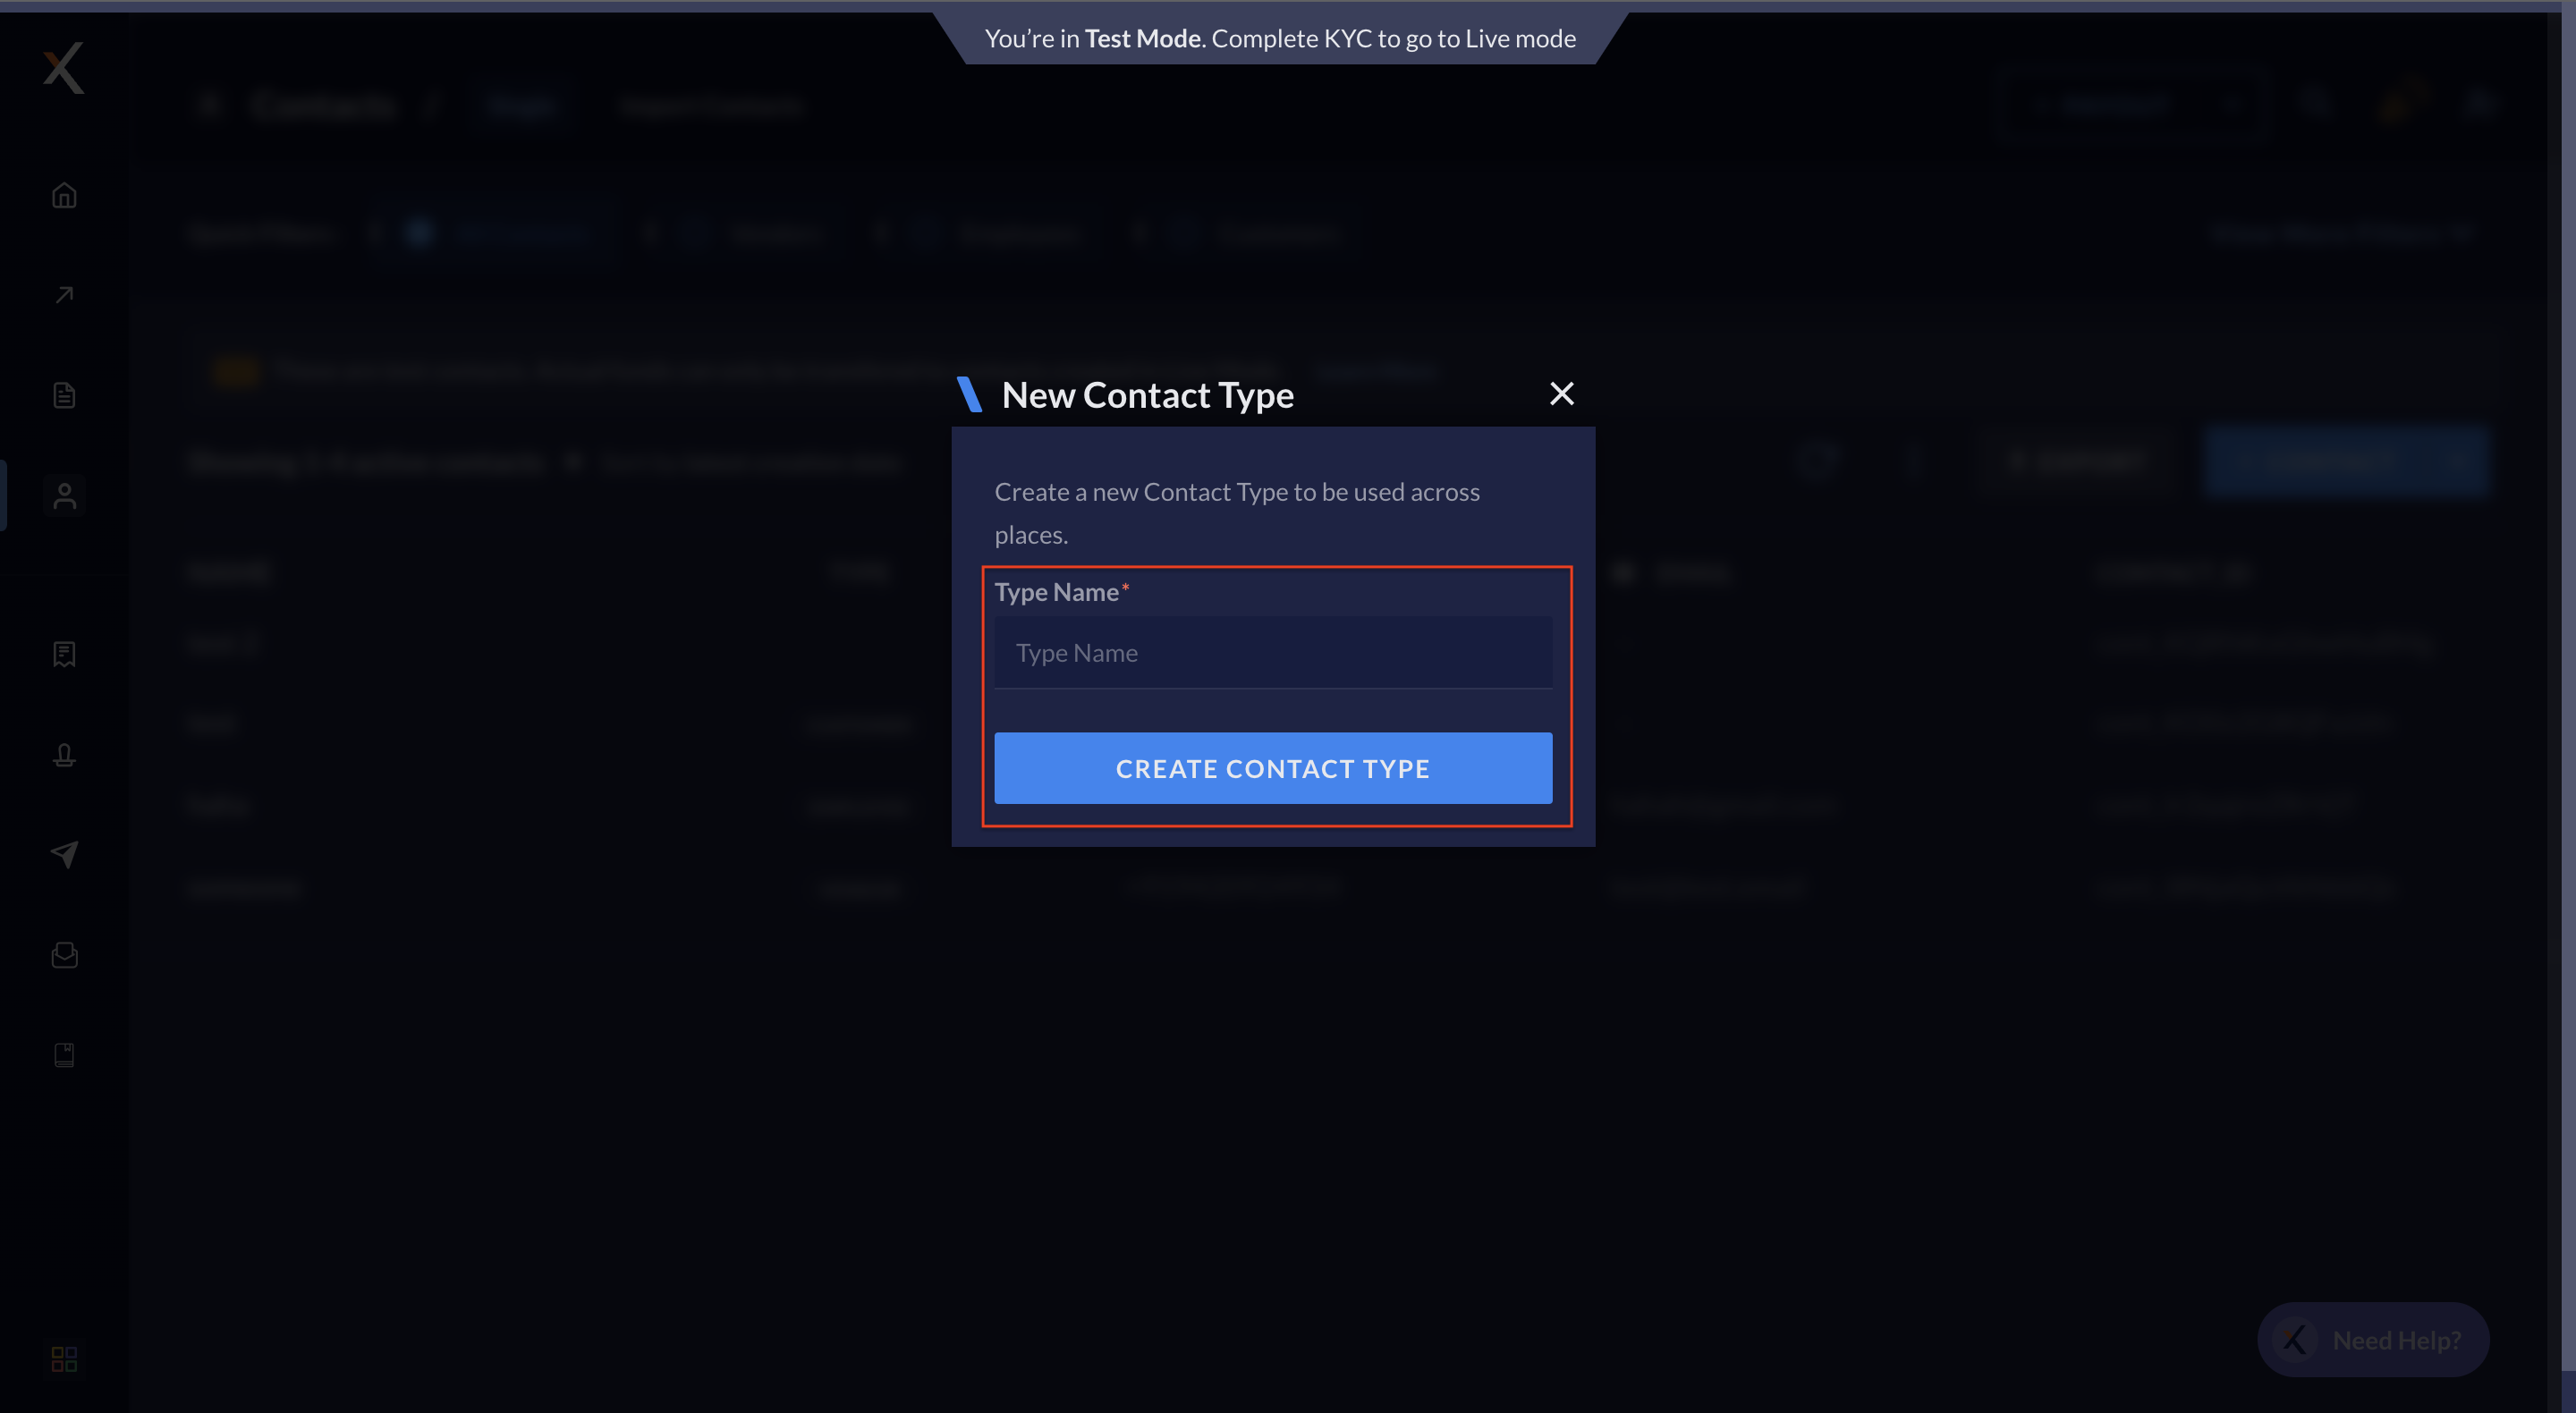
           <img src="https://razorpay.com/docs/build/browser/assets/images/x-contact-type-2.jpg" alt="Enter Contact Type name" width="800" />

    Or, first view the existing Contact Types and decide whether you want to create a new type.

    1. Log in to the [RazorpayX Dashboard](https://x.razorpay.com/).
    2. Navigate to **Contacts** on the left navigation and click **︙**.
    3. Click **View Contact Types**.
    4. Scroll to view all the available types or use search.
    5. Click **+ CREATE NEW CONTACT TYPE**.
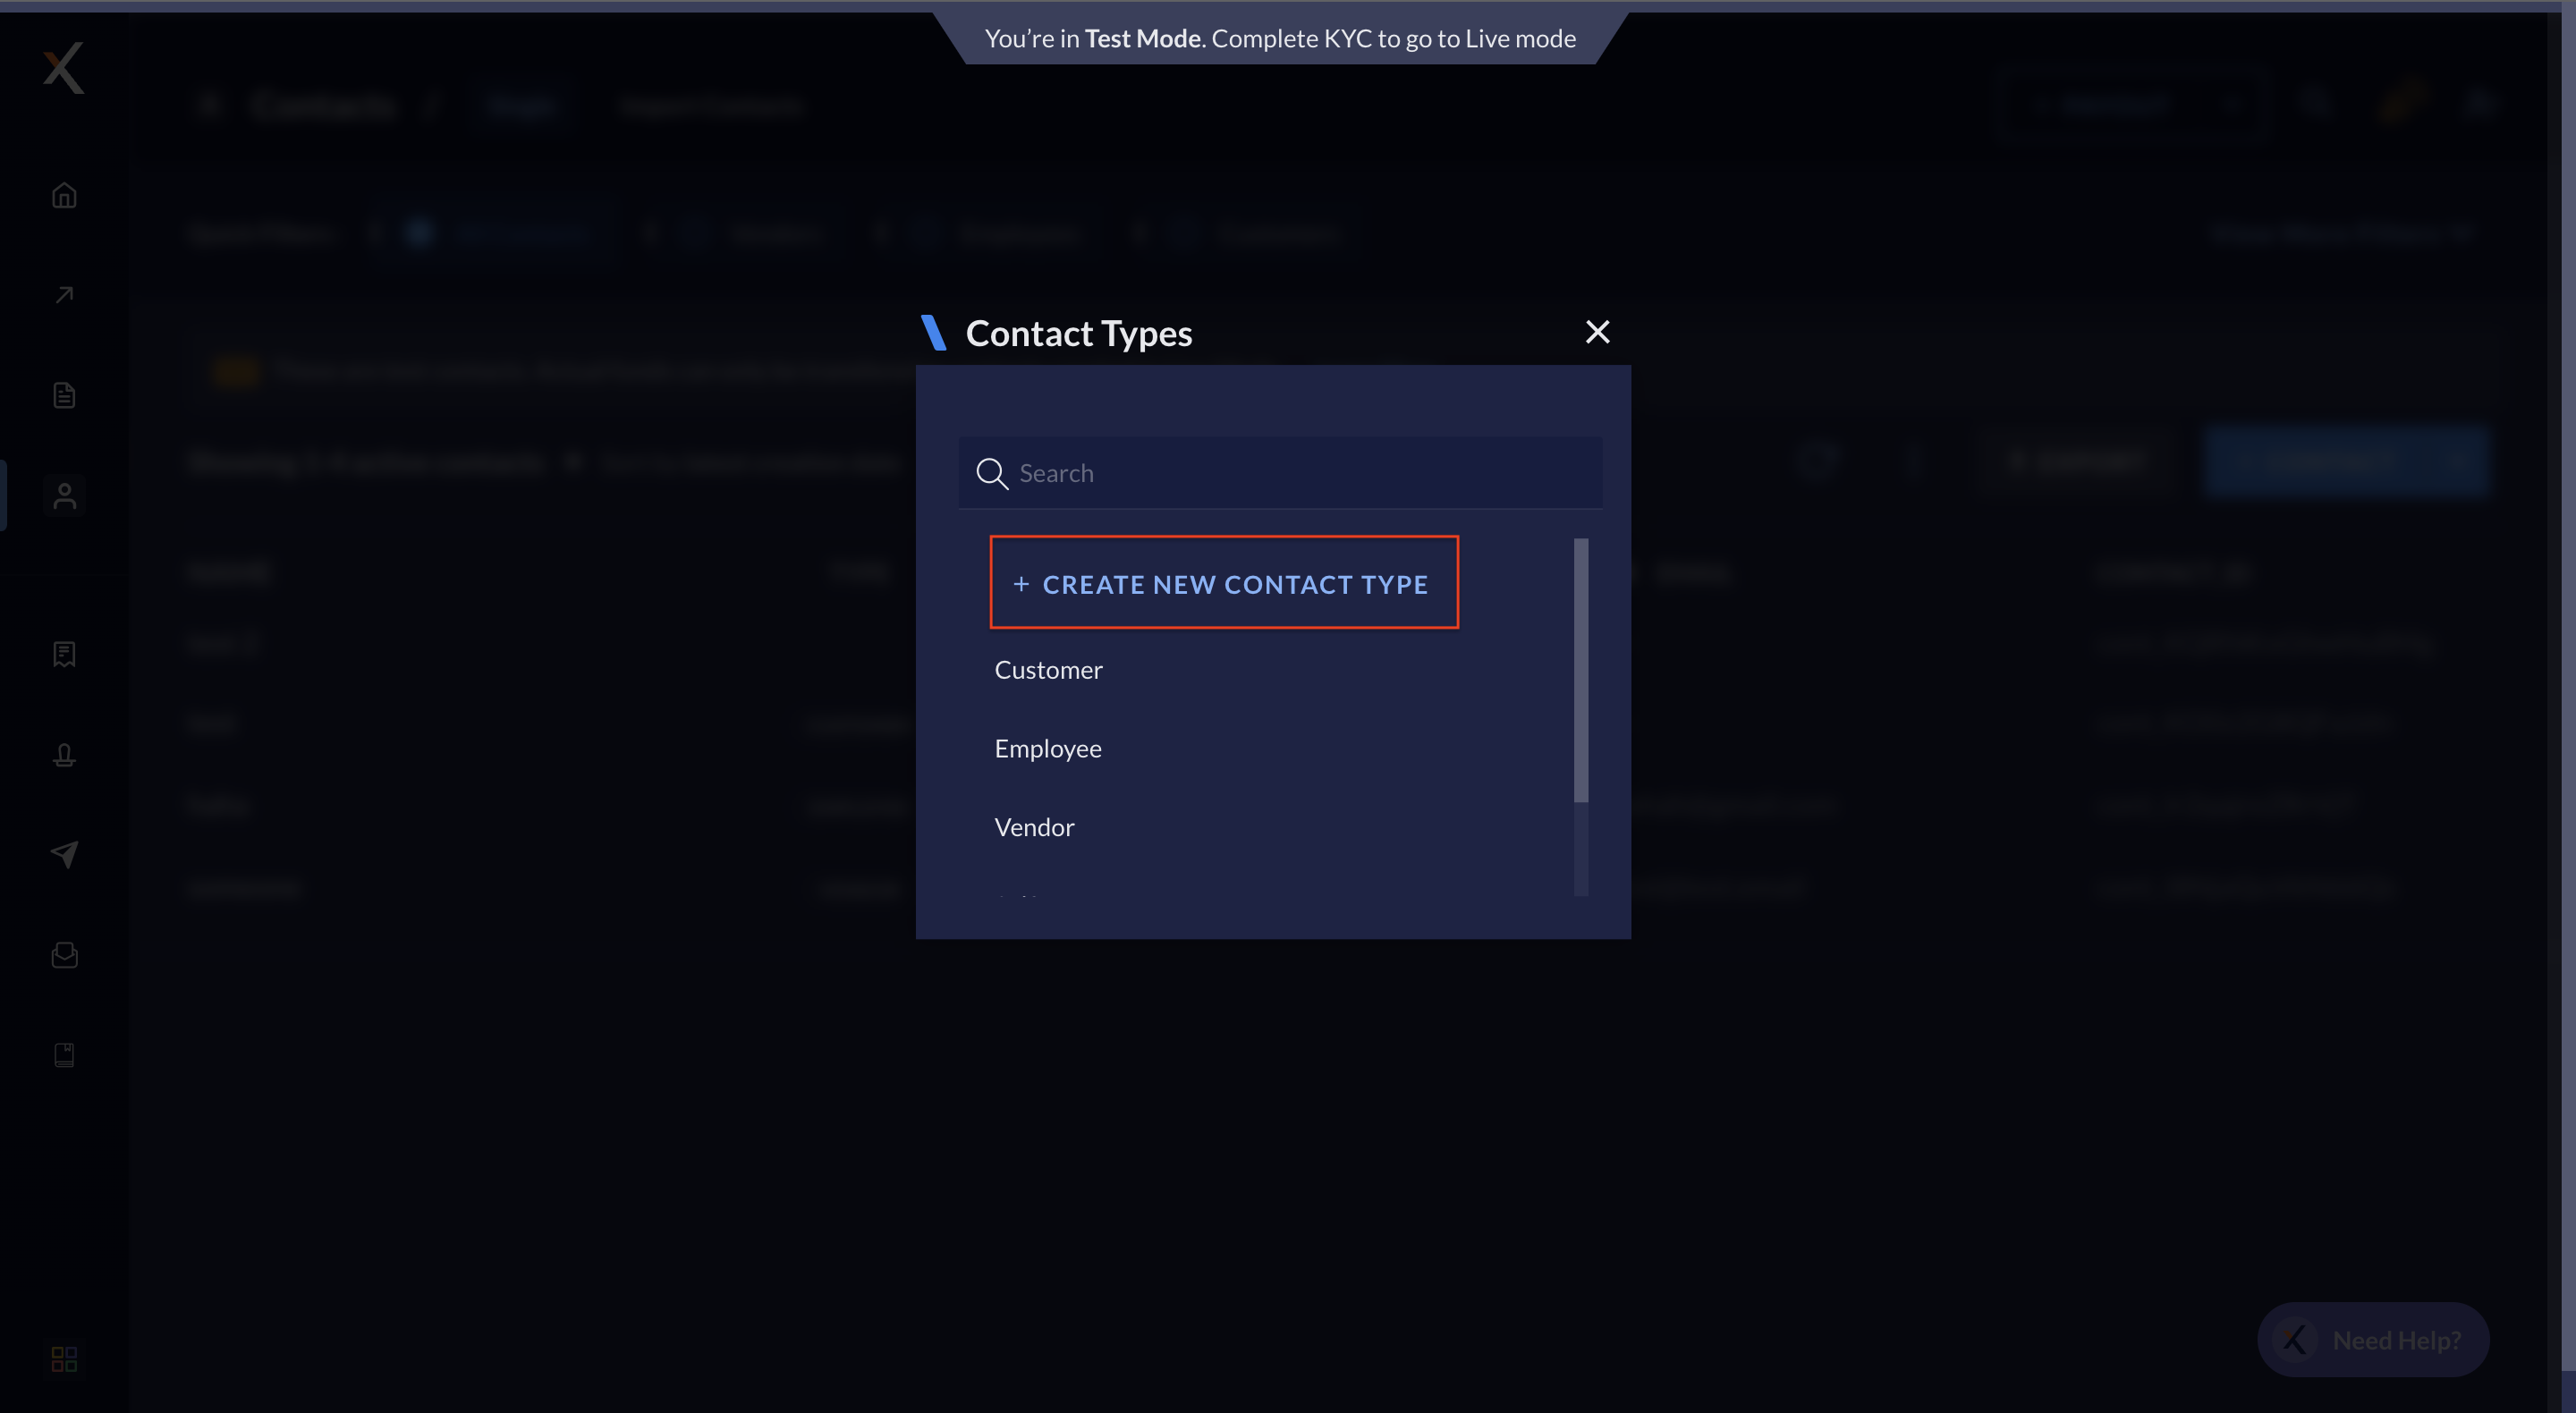
           <img src="https://razorpay.com/docs/build/browser/assets/images/x-contact-type-3.jpg" alt="View and create new Contact Type" width="800" />
    6. Enter the **Type Name** and click **CREATE CONTACT TYPE**.
  </Accordion>
</AccordionGroup>

## Contacts Actions

The following table lists down the actions that can be performed on Contacts using APIs, Dashboard and Bulk Upload:

| Action               | API | Dashboard | Bulk Upload |
| -------------------- | --- | --------- | ----------- |
| Create a Contact     | ✓   | ✓         | ✓           |
| Update a Contact     | ✓   | ✓         | x           |
| View Contact details | ✓   | ✓         | x           |
| Mark as inactive     | ✓   | ✓         | x           |

You can [create Contacts using APIs](/docs/api/x/contacts/create) or [create Contacts in bulk](/docs/x/contacts/bulk-uploads).

## Create a Contact

<AccordionGroup>
  <Accordion title="To create a Contact with Fund Account from the Dashboard:">
    1. Log in to the [RazorpayX Dashboard](https://x.razorpay.com/).
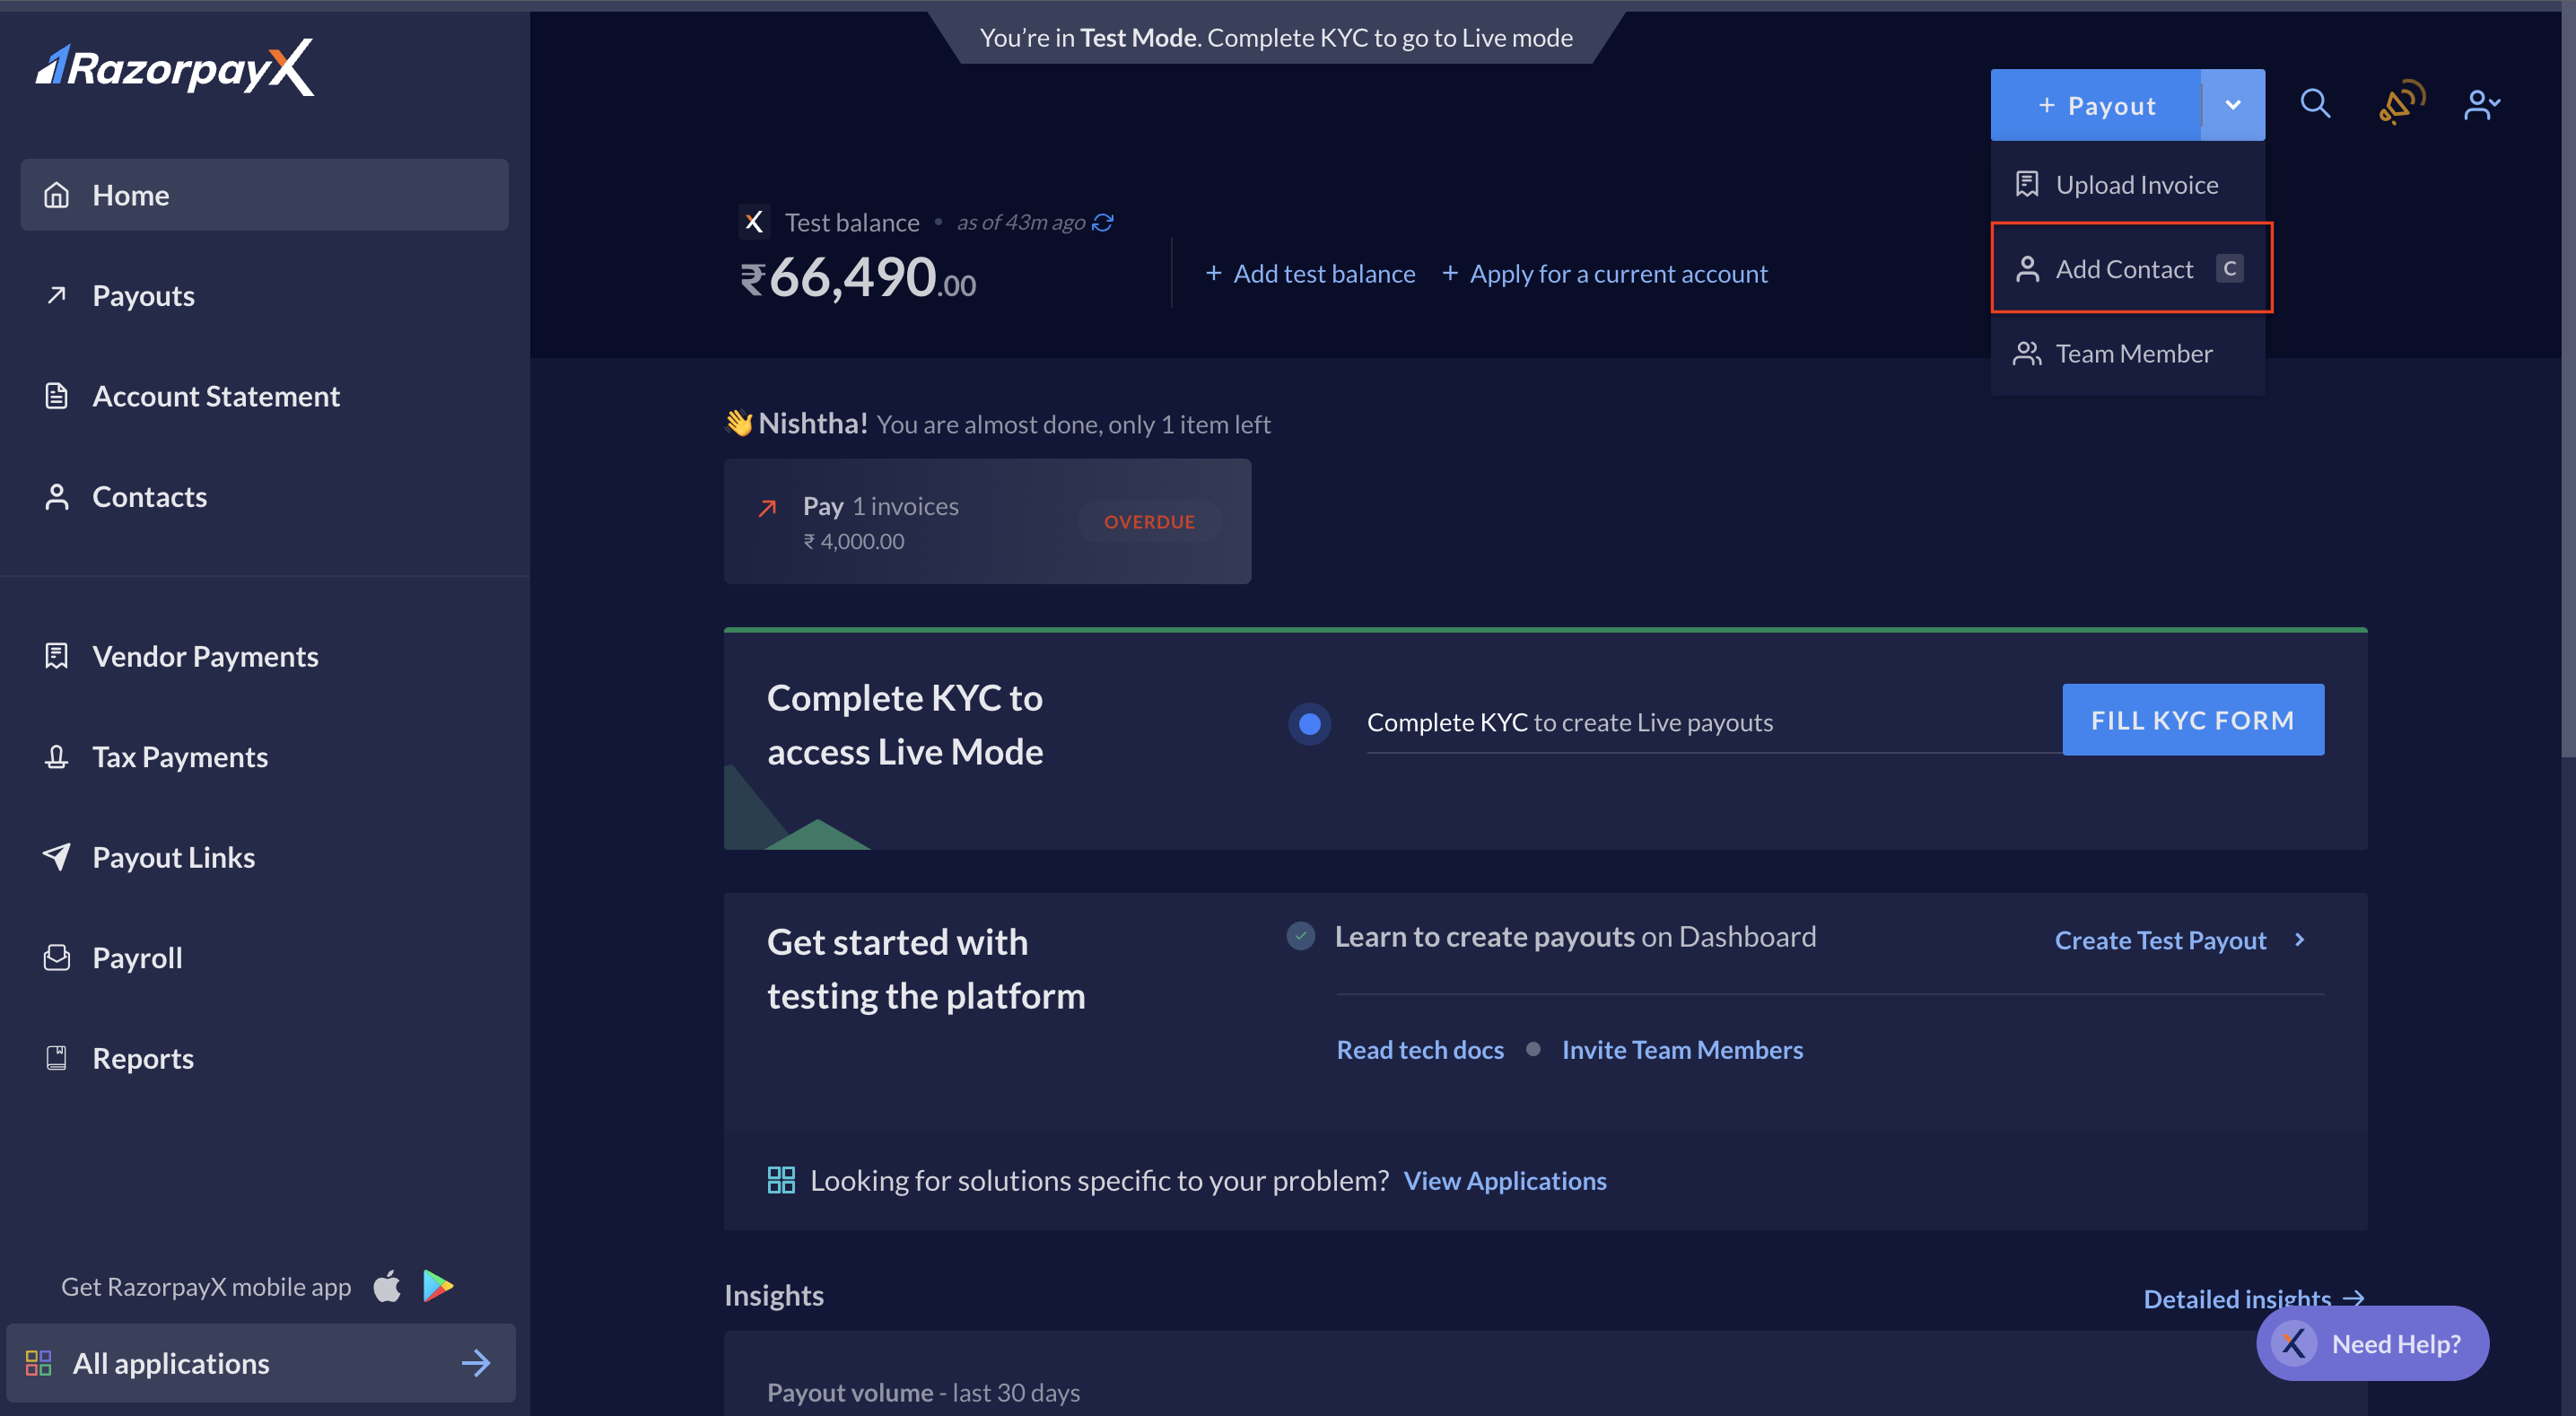
    2. You can create a Contact in two ways:
       * Navigate to the drop-down menu next to **+ Payouts** and click **Add Contact**.
             <img src="https://razorpay.com/docs/build/browser/assets/images/x-create-contact.jpg" alt="Create new Contact" width="800" />
       * Hover over **Contacts** on the left navigation and click **+**.
       * Press C on your keyboard.
       * Navigate to **Contacts** on the left navigation and click **+ CONTACT**.
    3. Enter contact details.
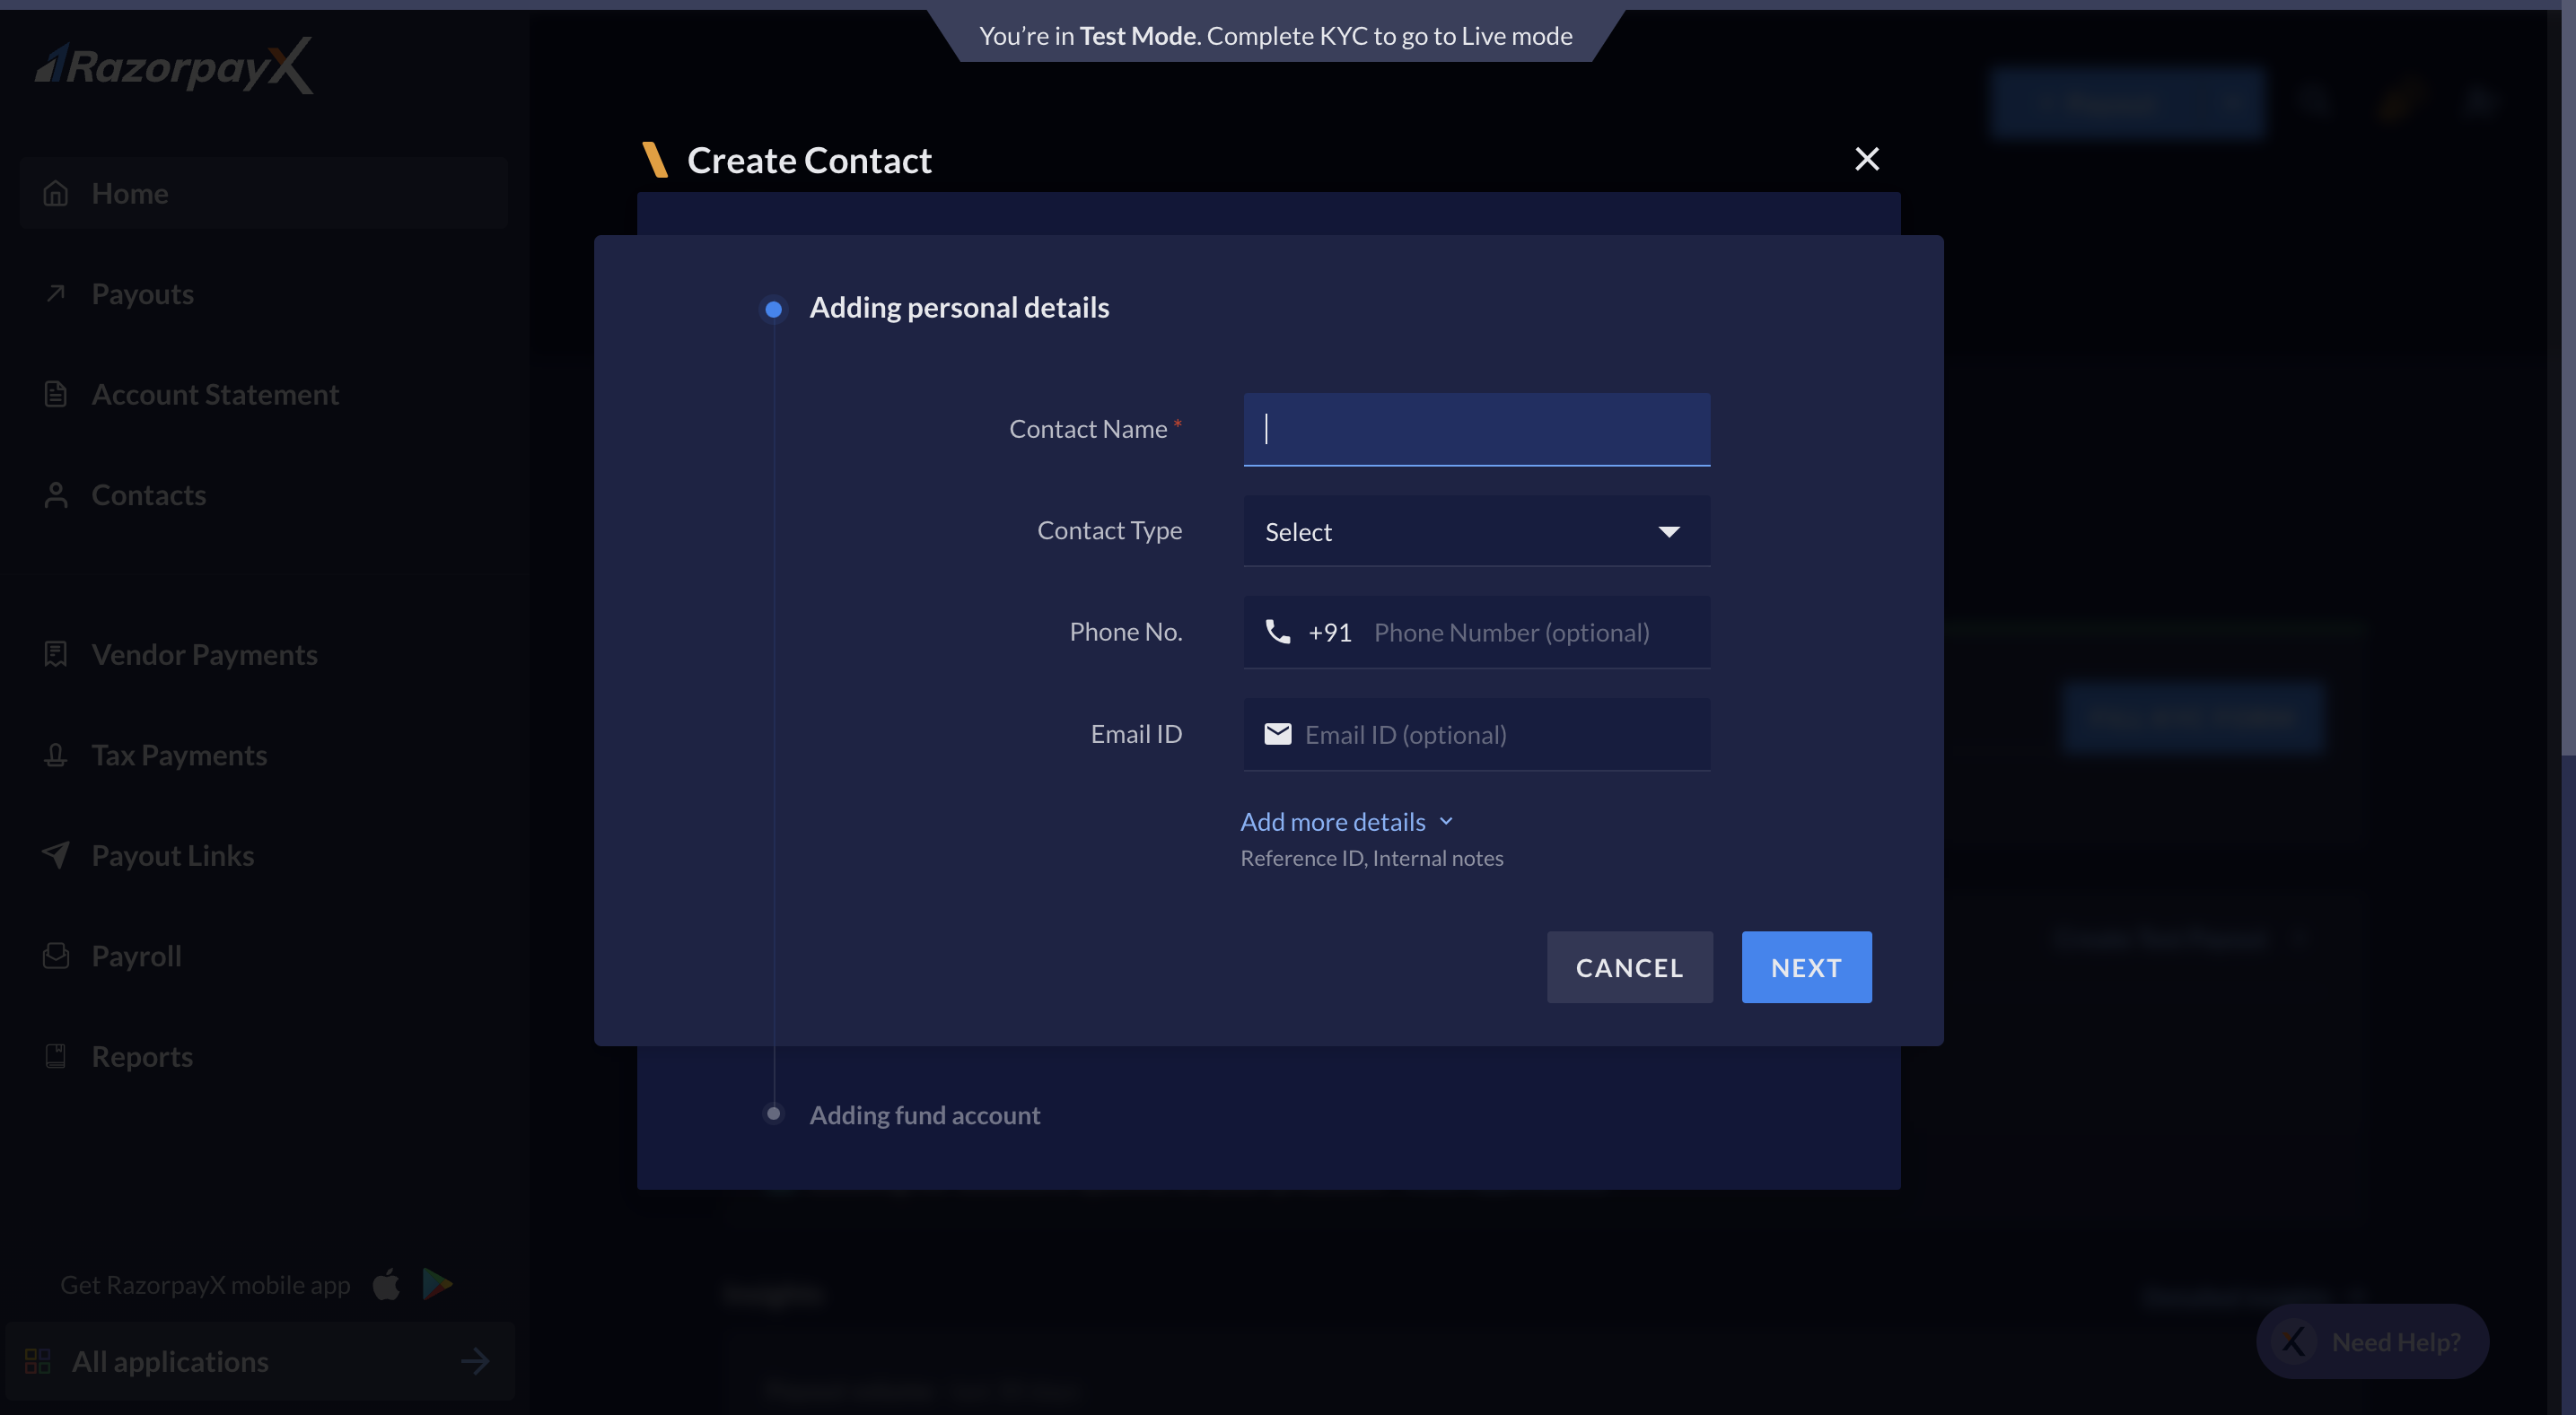
           <img src="https://razorpay.com/docs/build/browser/assets/images/x-contact-details.jpg" alt="Contact Details" width="800" />
    4. Click **SAVE AND CLOSE**.
  </Accordion>
</AccordionGroup>

## Update a Contact

<AccordionGroup>
  <Accordion title="To update a Contact from the Dashboard:">
    1. Log in to the [RazorpayX Dashboard](https://x.razorpay.com/).
    2. Navigate to **Contacts**.
    3. Select the Contact you want to edit.
    4. Navigate to **Options** → **Edit Contact**.
    5. Edit Contact details and click **NEXT**.
    6. Click **SAVE AND CLOSE**.
  </Accordion>
</AccordionGroup>

You can also [create](/docs/api/x/contacts/create) and [update](/docs/api/x/contacts/update) contacts using APIs.

## Mark Contact Inactive

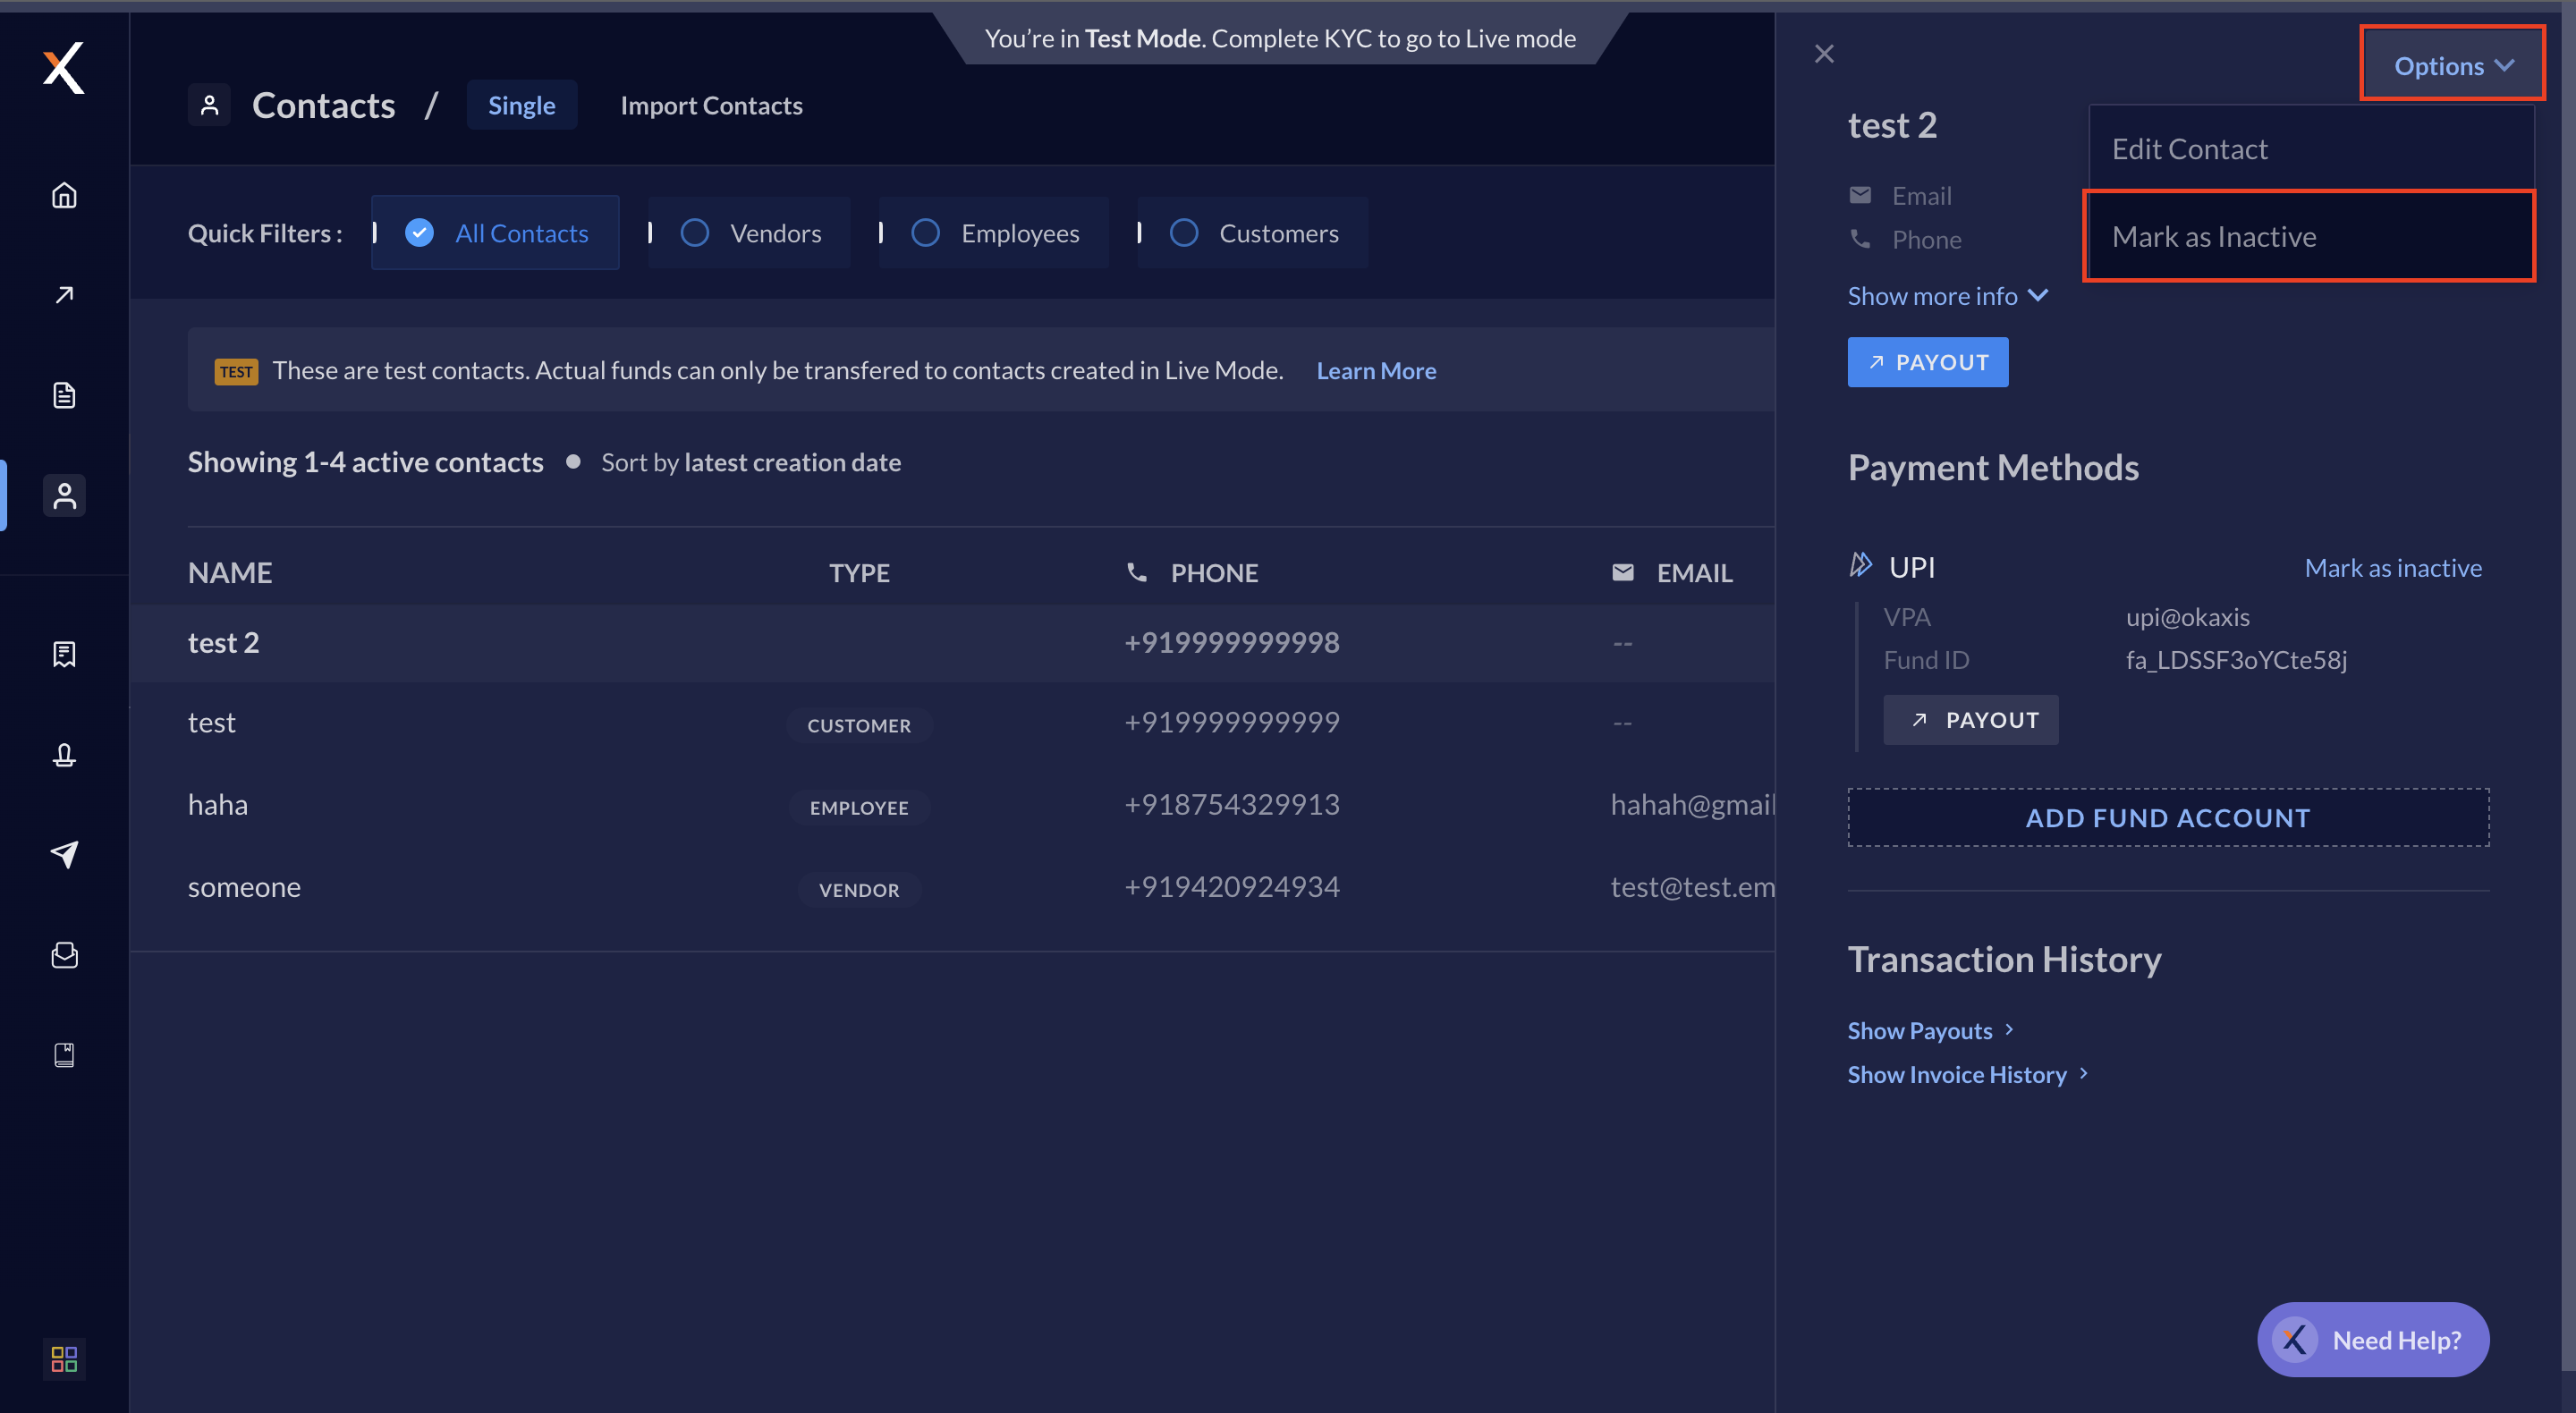
Mark Contacts inactive instead of deleting them when you do not require them. You can also activate them following the same steps.

<AccordionGroup>
  <Accordion title="To mark a Contact inactive from the Dashboard:">
    1. Log in to the [RazorpayX Dashboard](https://x.razorpay.com/).
    2. Navigate to **Contacts**.
    3. Select the Contact you want to mark inactive. A right-pane opens up.
    4. Click **Options** → **Mark as Inactive**.
           <img src="https://razorpay.com/docs/build/browser/assets/images/x-mark-contact-inactive.jpg" alt="Mark Contact Inactive" width="800" />
  </Accordion>
</AccordionGroup>

## Next Steps

Add [Fund Accounts](/docs/x/fund-accounts).

### Related Information

* [Payouts](/docs/x/payouts)
* [Fund Accounts](/docs/x/fund-accounts/faqs)