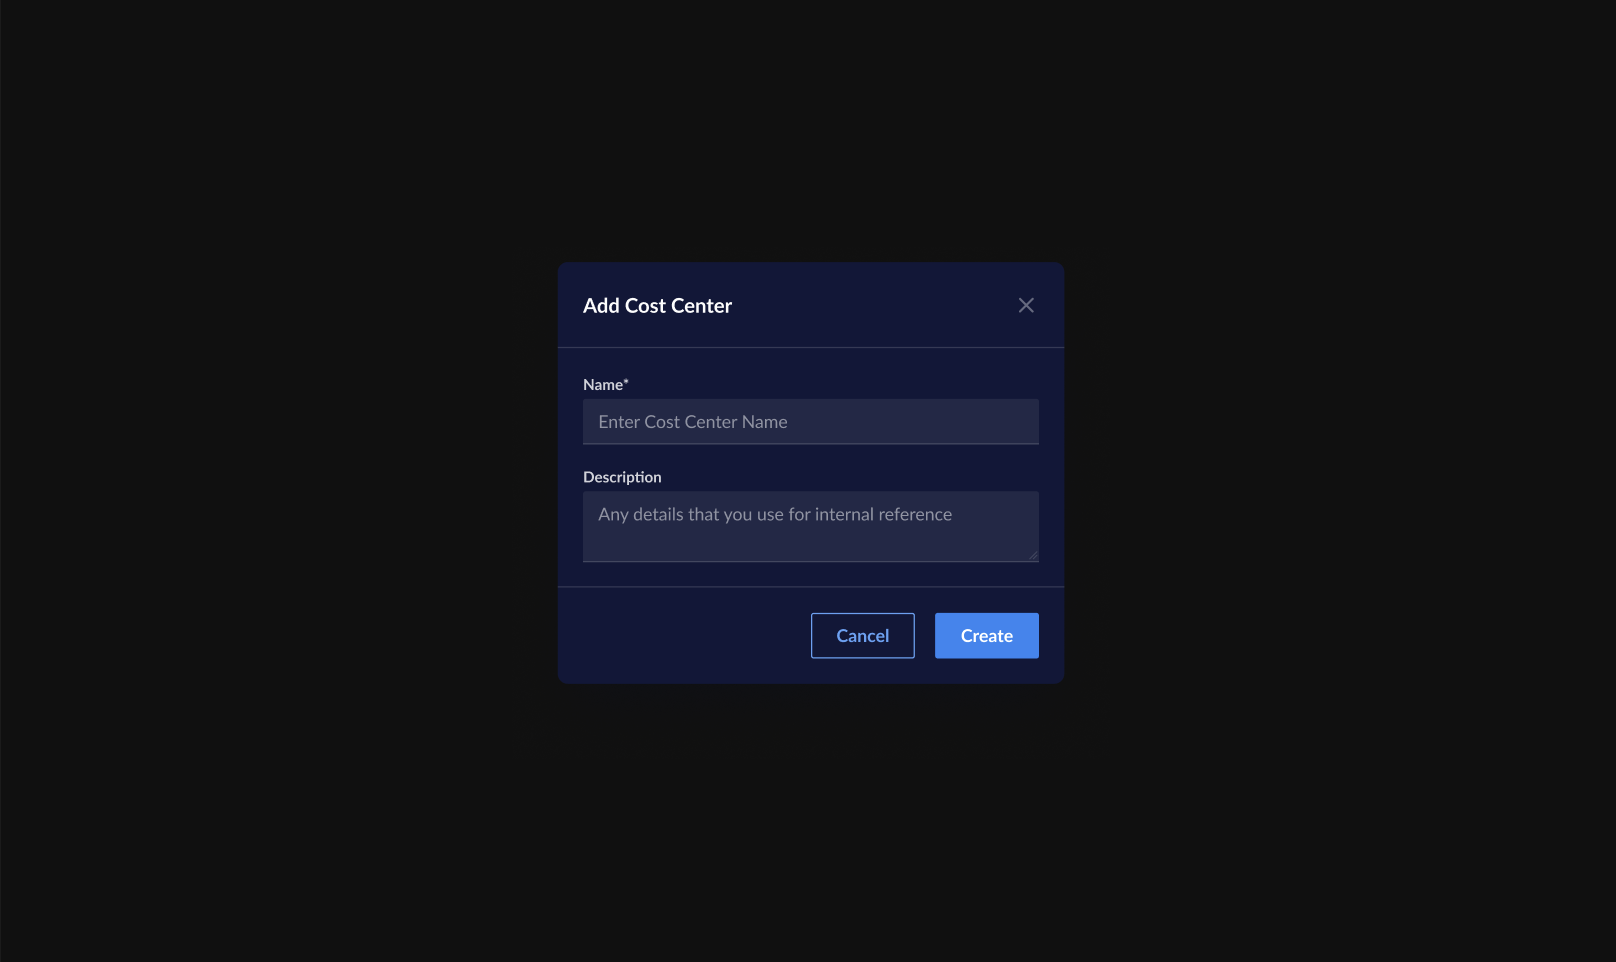
 3. Enter a unique **Name** and **Description** of the cost center and click **Create**.
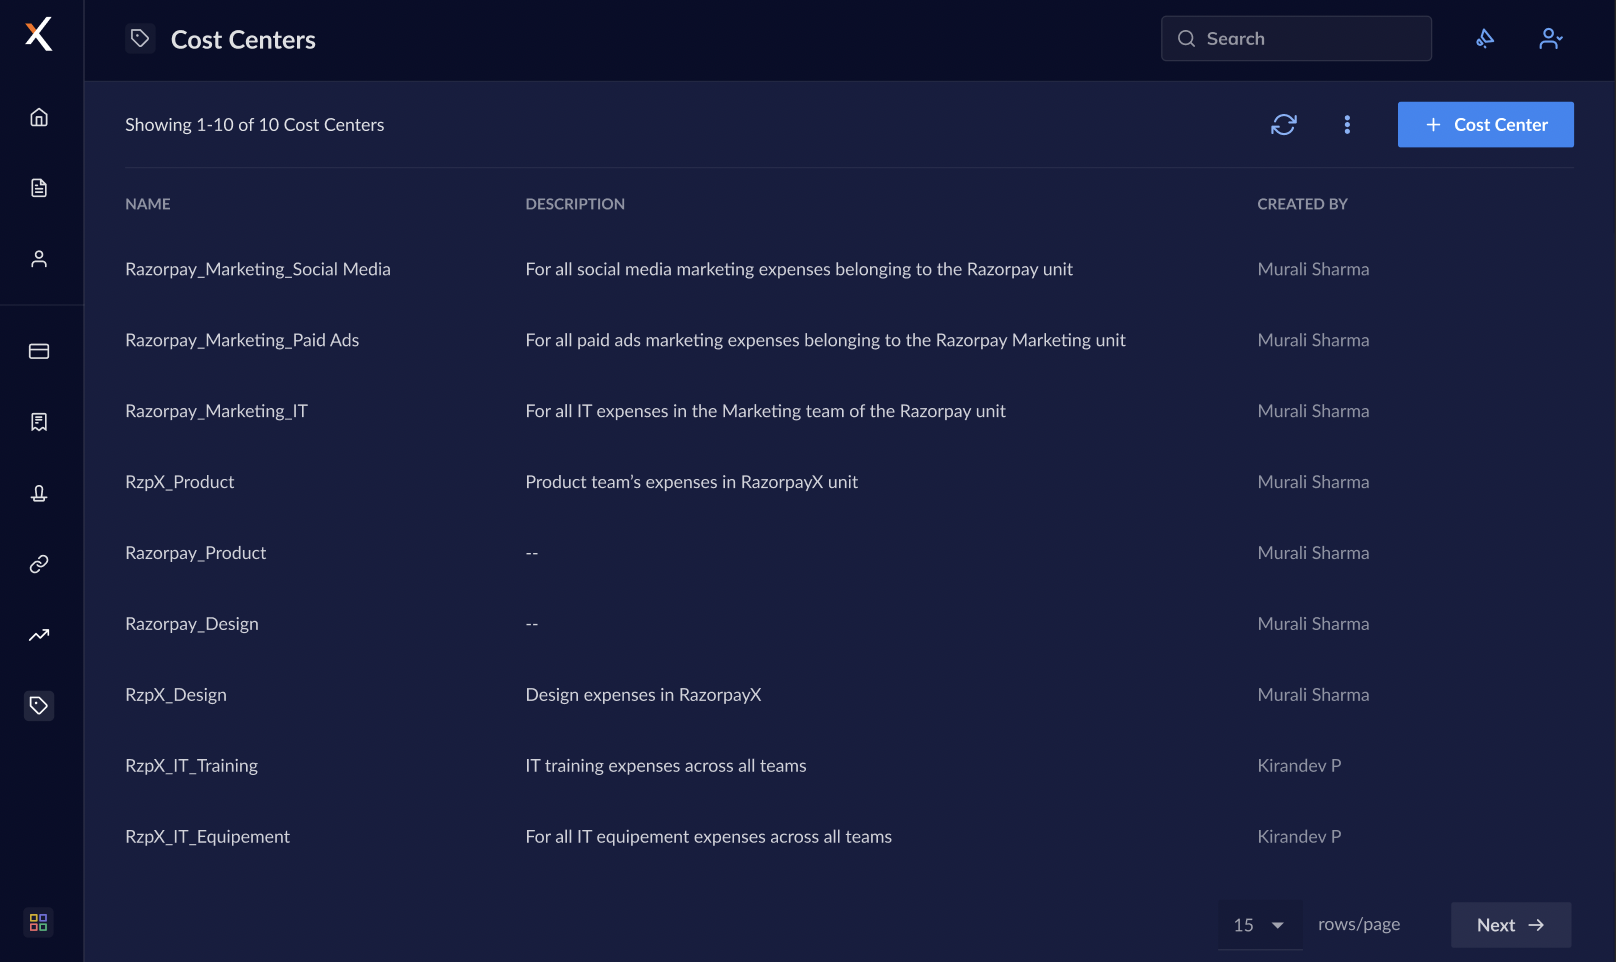
 Your cost center is created and ready to use. You can view the **Name**, **Description** and by whom the cost center was **Created By** on the Cost Center Dashboard.
## Edit a Cost Center
To edit a cost center:
1. Log in to the [RazorpayX Dashboard](http://x.razorpay.com/auth).
2. Navigate to **Cost Centers** and hover over the cost center you want to edit.
Your cost center is created and ready to use. You can view the **Name**, **Description** and by whom the cost center was **Created By** on the Cost Center Dashboard.
## Edit a Cost Center
To edit a cost center:
1. Log in to the [RazorpayX Dashboard](http://x.razorpay.com/auth).
2. Navigate to **Cost Centers** and hover over the cost center you want to edit.
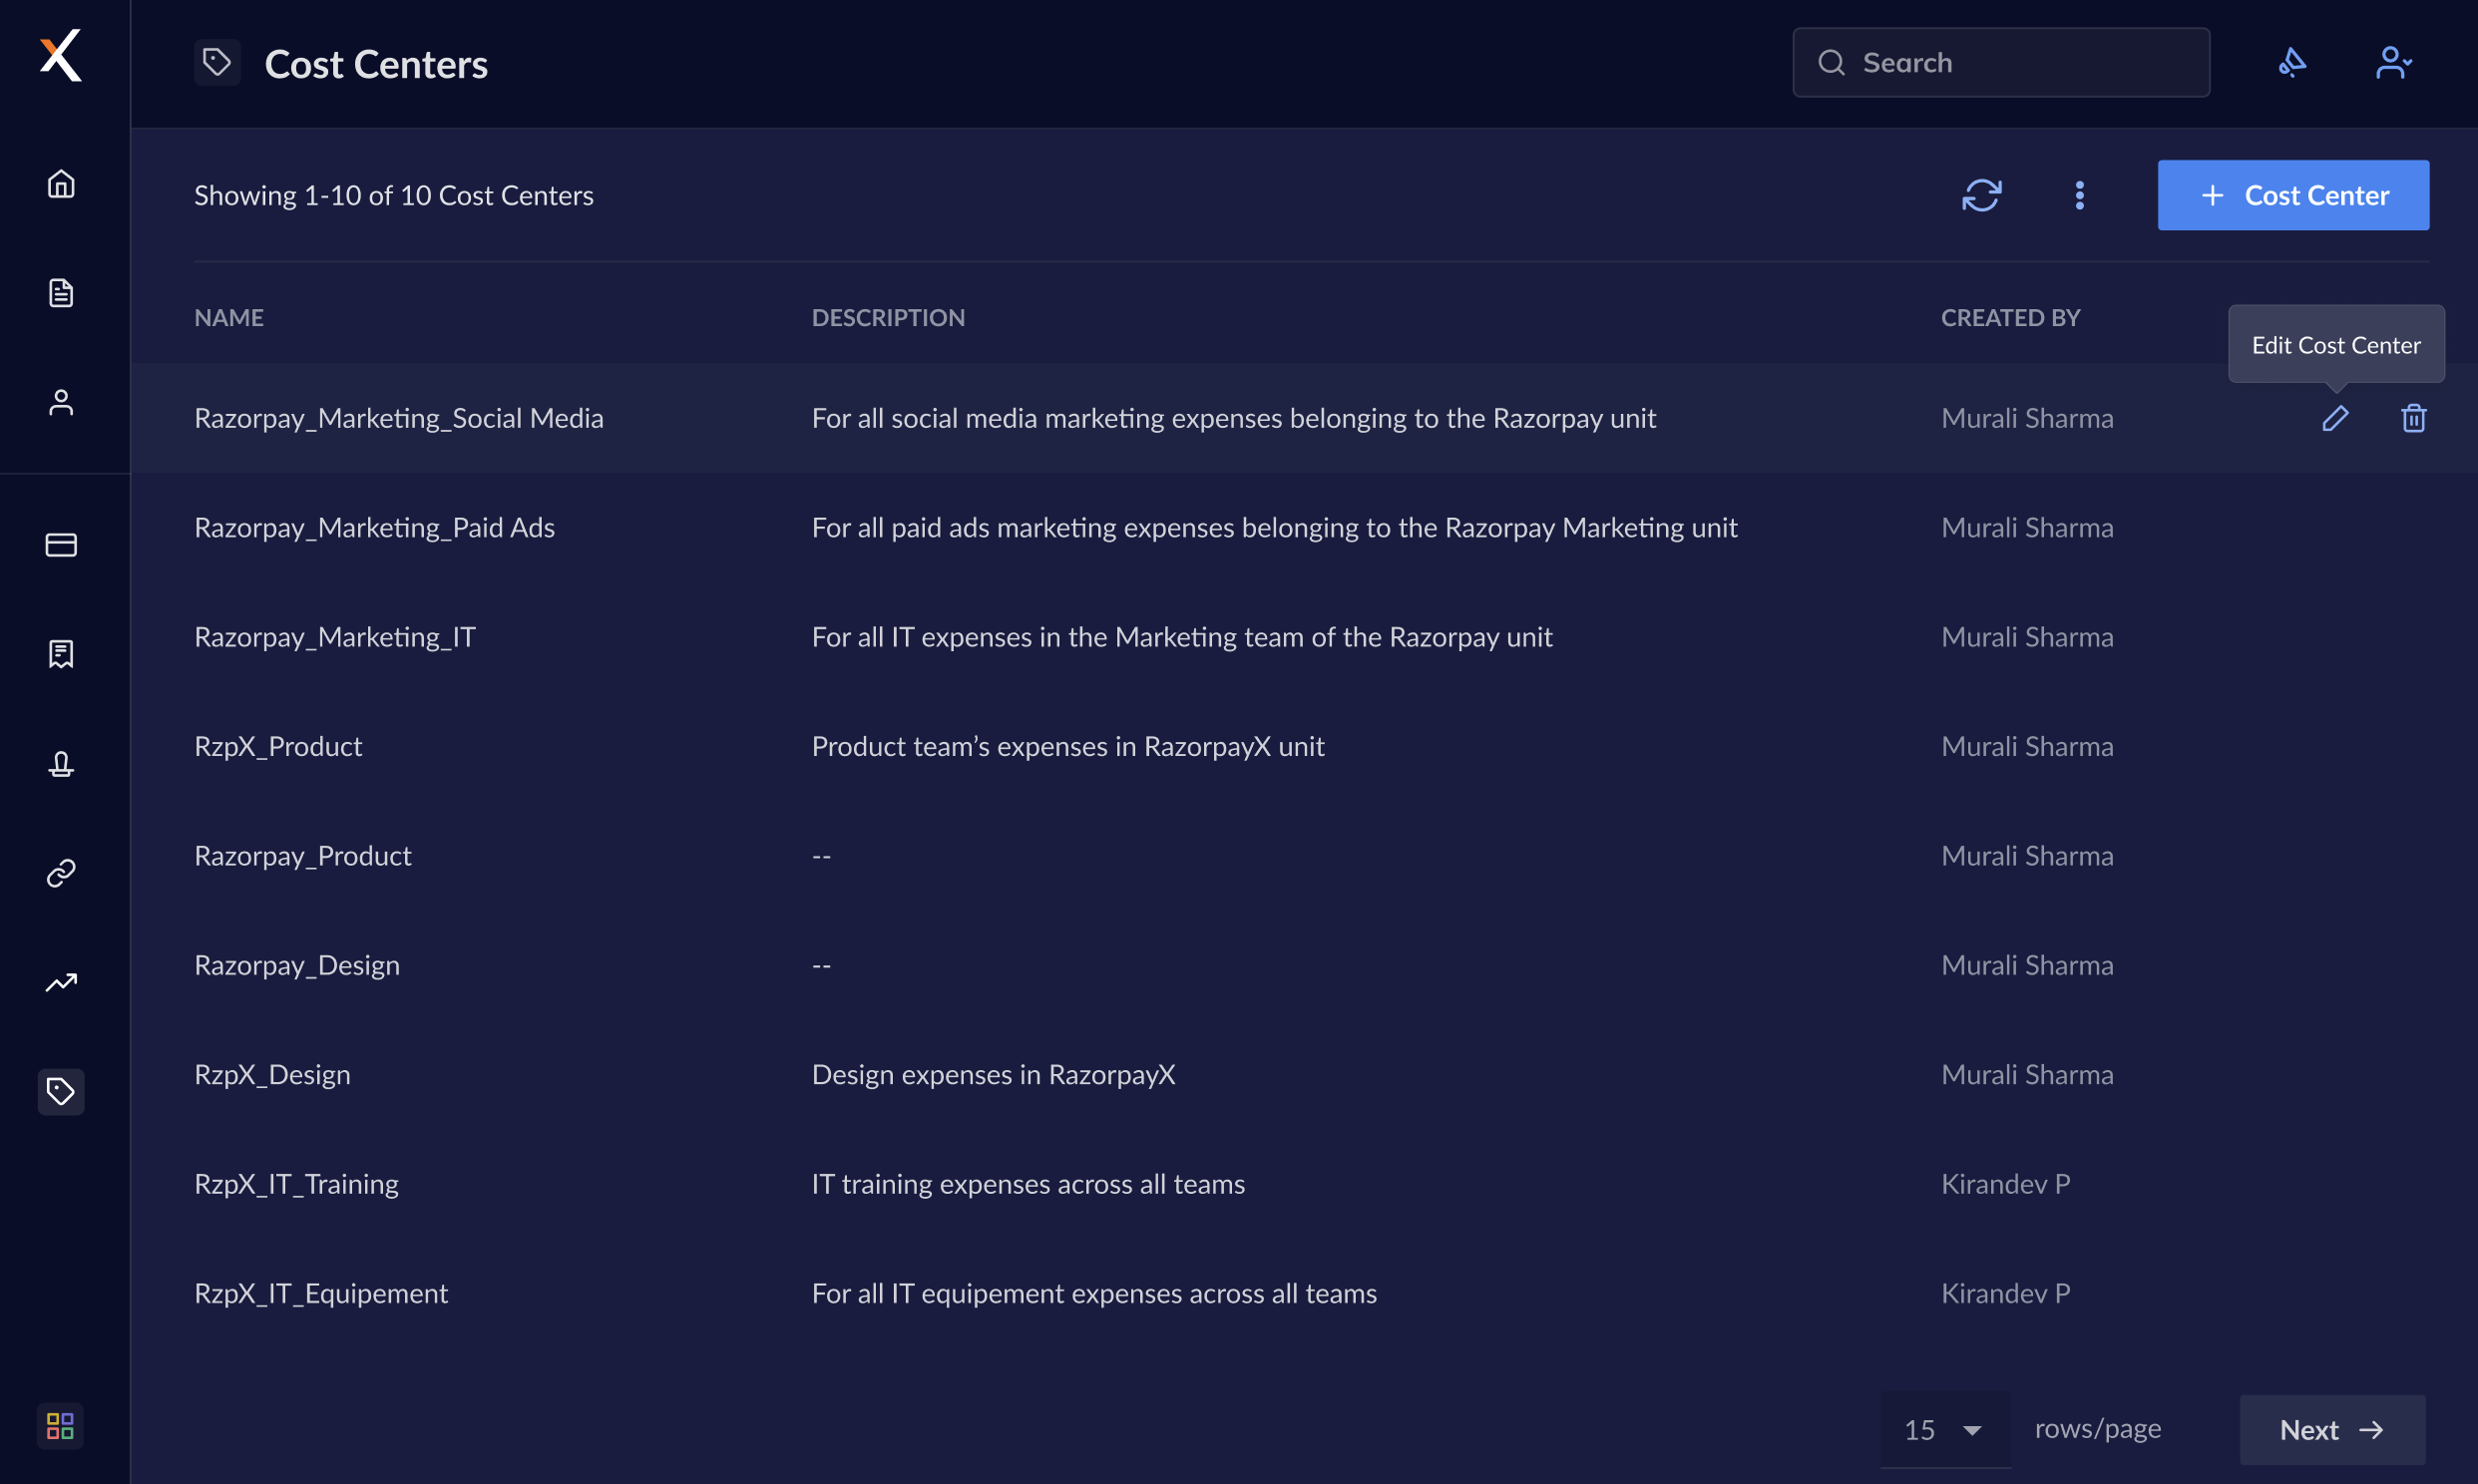 3. Click on the pencil icon that appears.
4. You can enter **New name** or **New description** and click **Save Changes**.
3. Click on the pencil icon that appears.
4. You can enter **New name** or **New description** and click **Save Changes**.
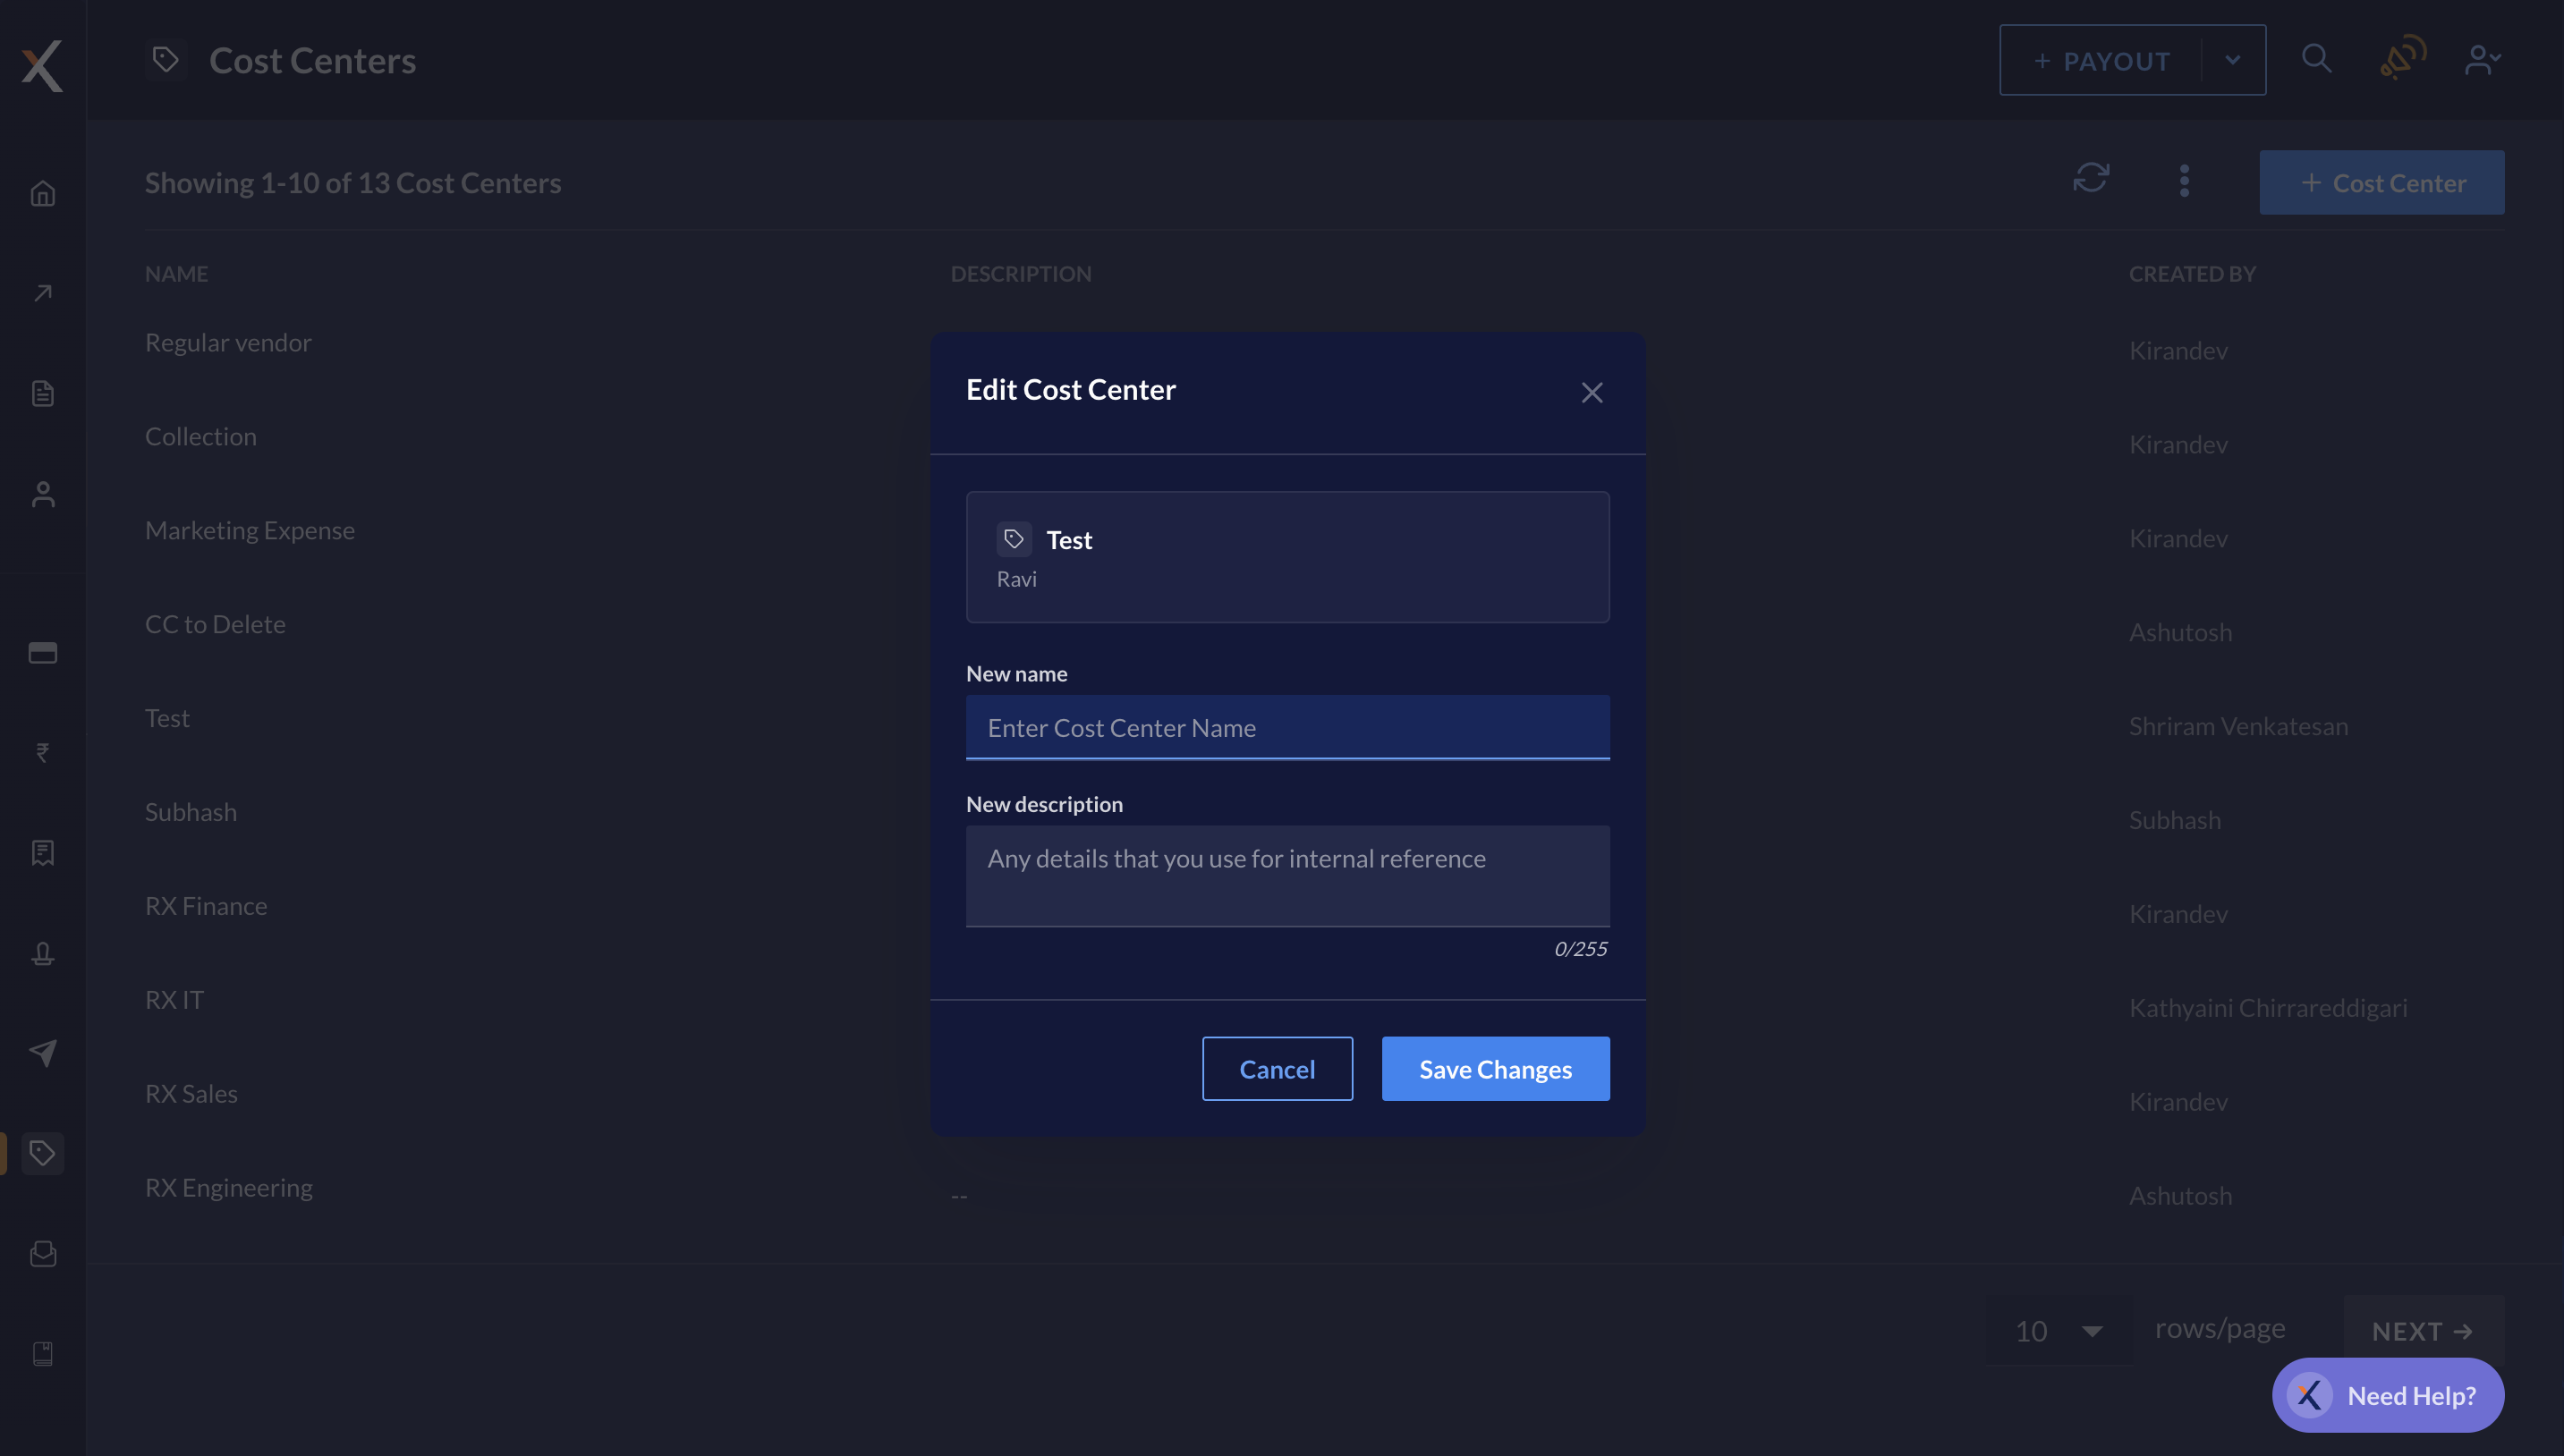 5. Review and click **Confirm** and your changes are saved.
## Deactivate a Cost Center
You can deactivate a cost center if you do not want to tag any purchase order or invoice to it anymore. To deactivate a cost center:
1. Log in to the [RazorpayX Dashboard](http://x.razorpay.com/auth).
2. Navigate to **Cost Centers** and hover over the cost center you want to deactivate.
5. Review and click **Confirm** and your changes are saved.
## Deactivate a Cost Center
You can deactivate a cost center if you do not want to tag any purchase order or invoice to it anymore. To deactivate a cost center:
1. Log in to the [RazorpayX Dashboard](http://x.razorpay.com/auth).
2. Navigate to **Cost Centers** and hover over the cost center you want to deactivate.
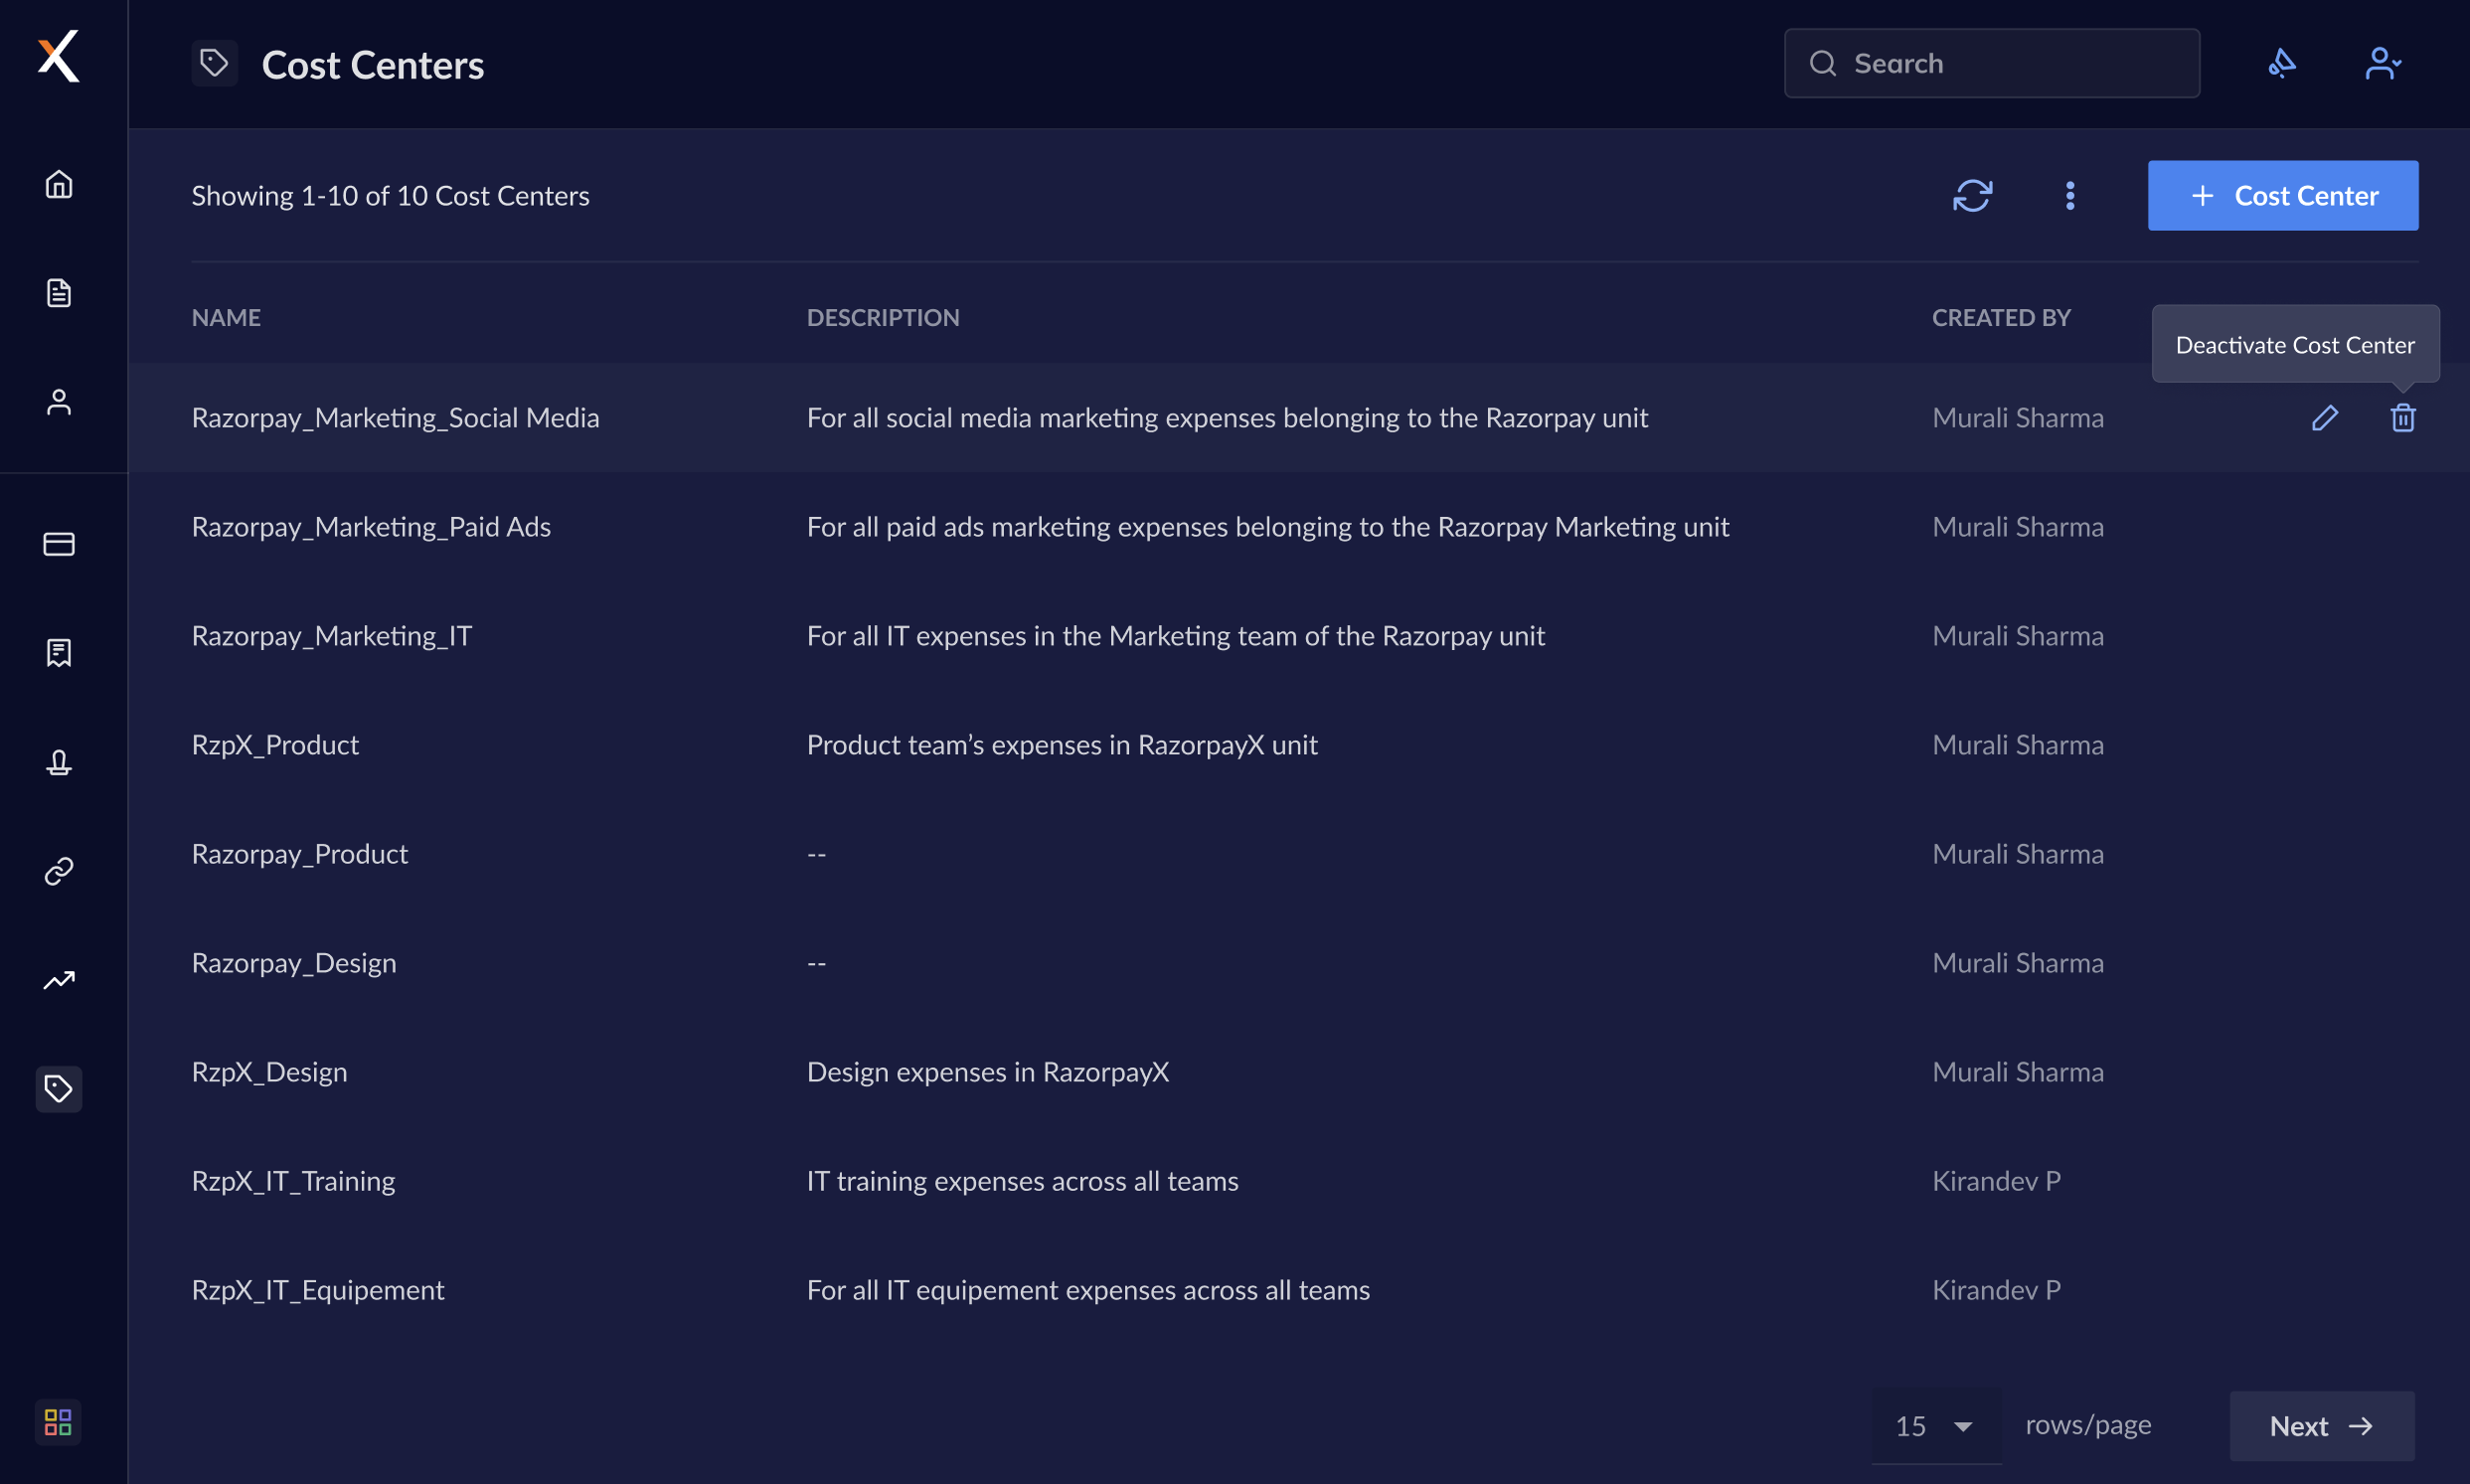 3. Click on the trash bin icon that appears.
4. Click **Deactivate** to confirm your action.
3. Click on the trash bin icon that appears.
4. Click **Deactivate** to confirm your action.
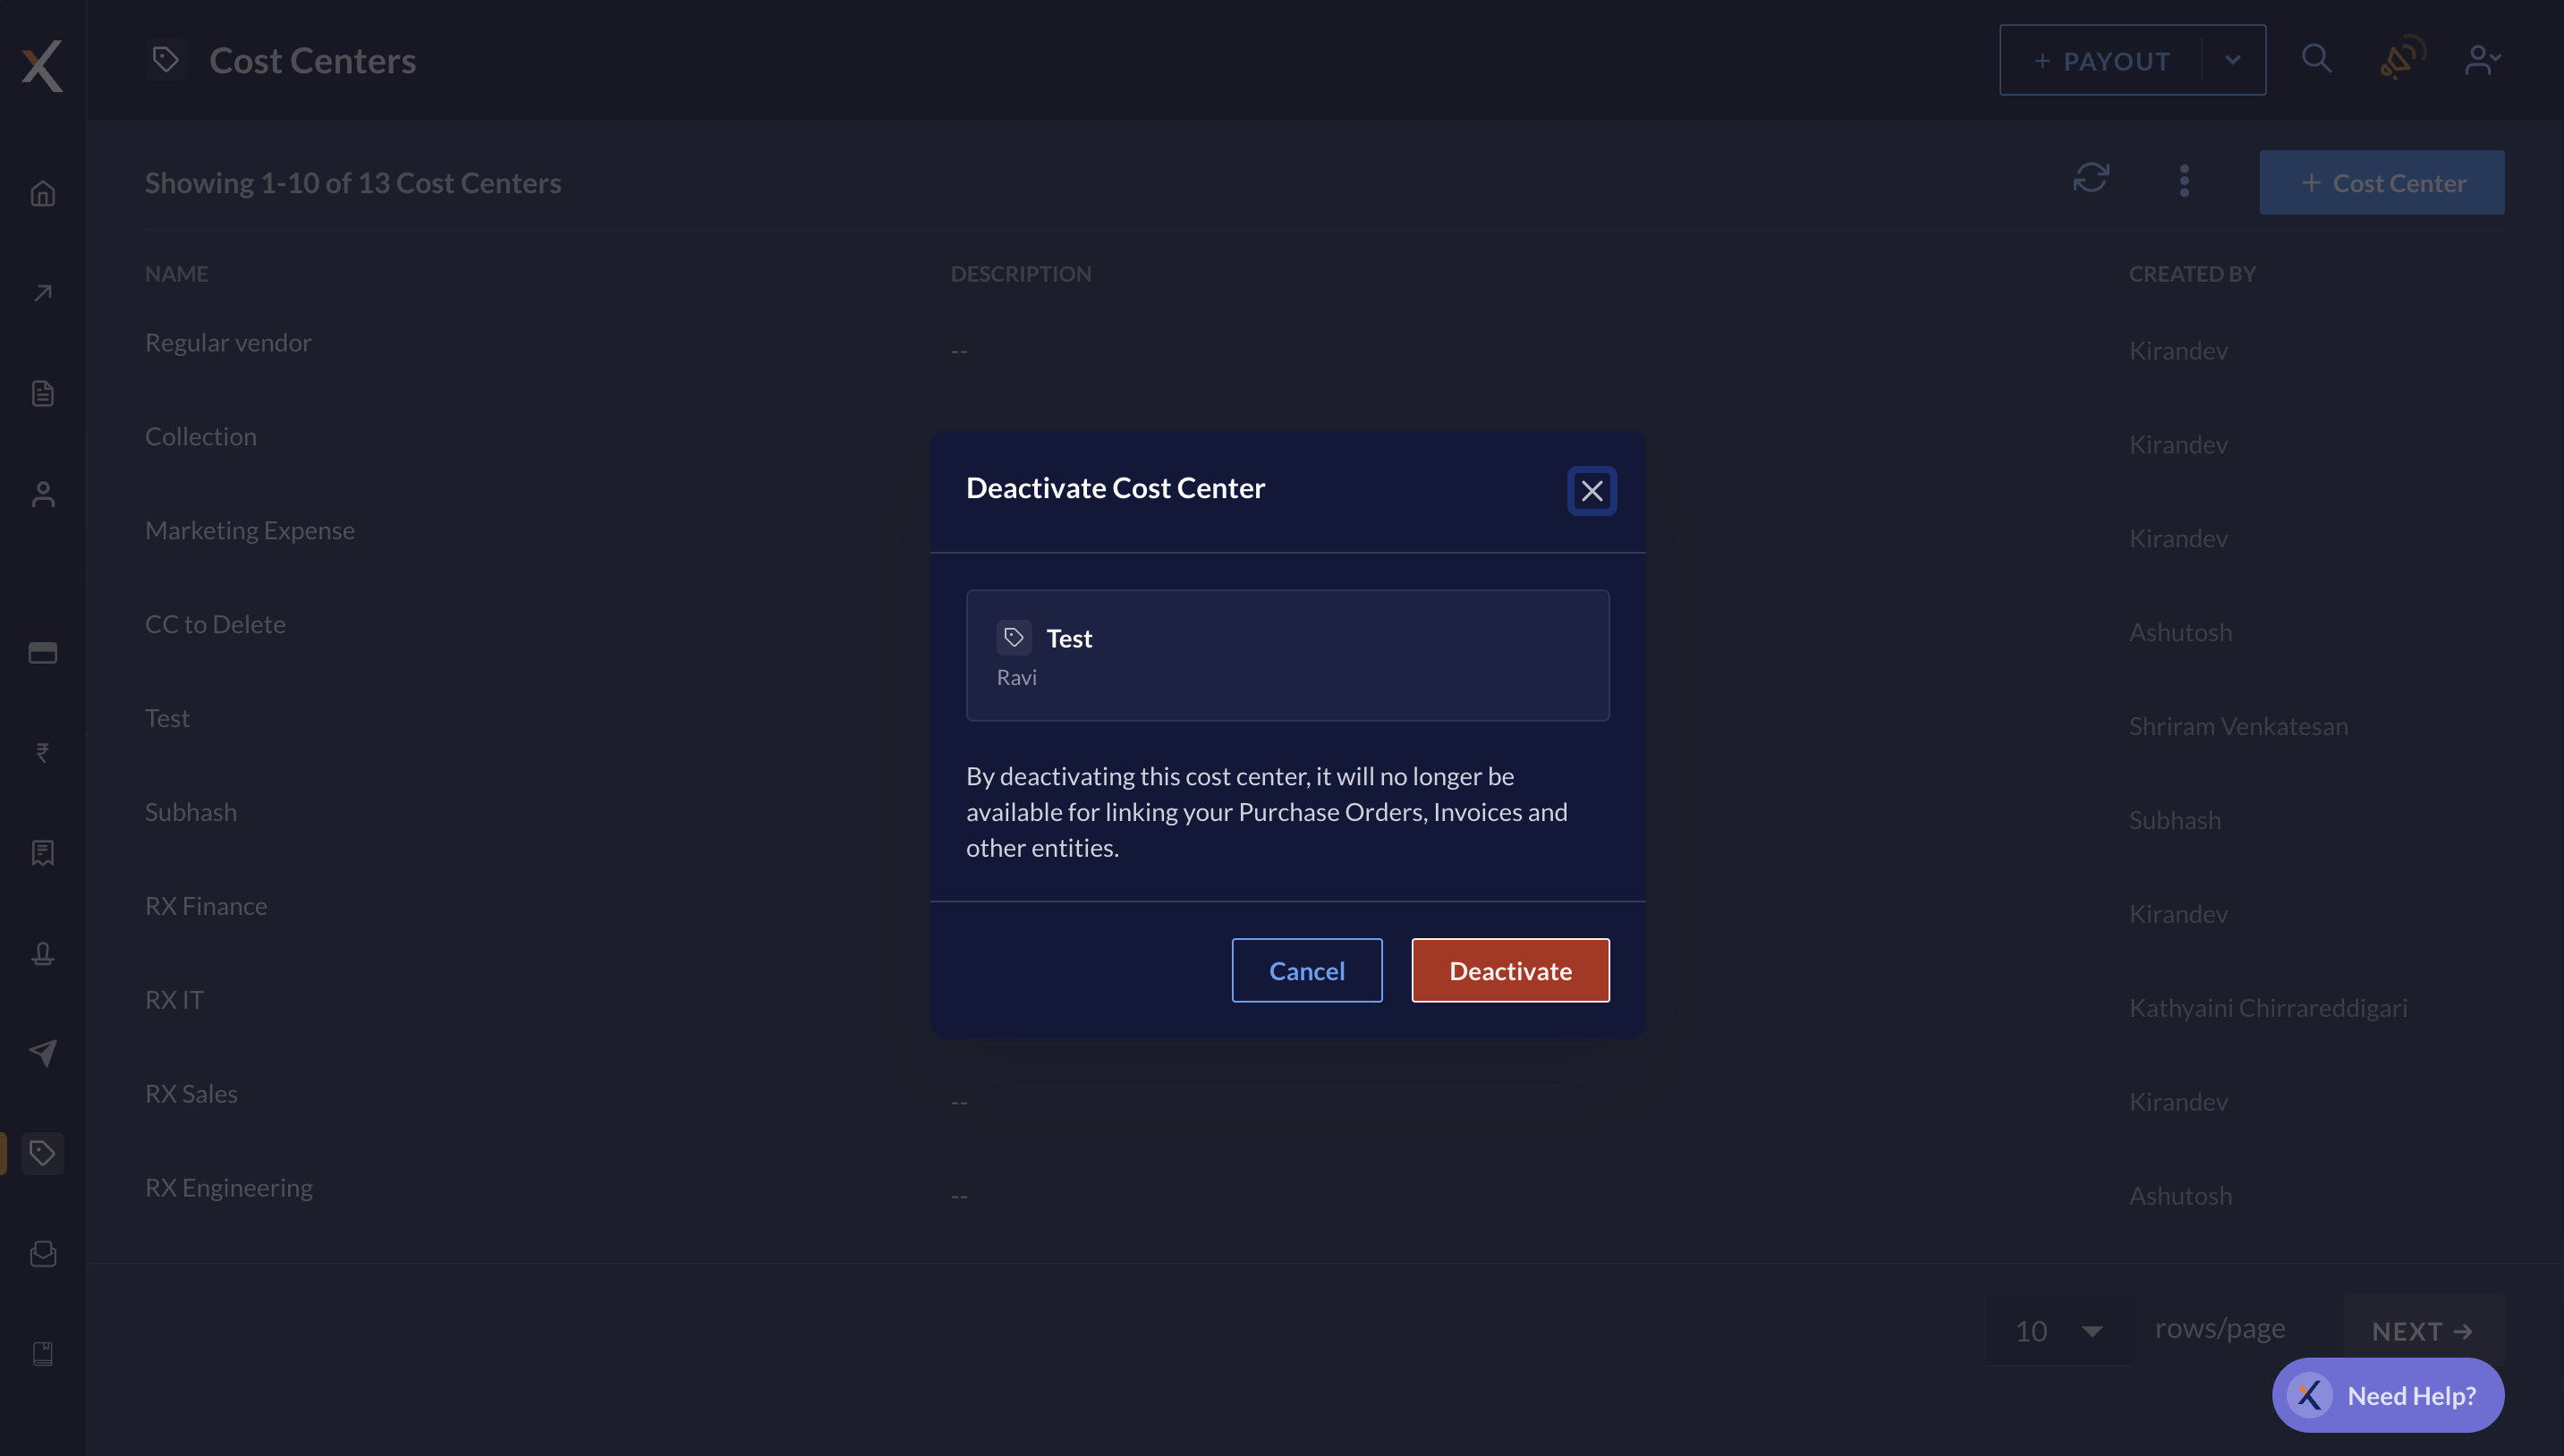 5. Review and click **Got it**. Your cost center is deactivated.
The cost center continues to appear on the list as deactivated. This action cannot be reversed.
## Related Information
* [Purchase Orders](/docs/x/vendor-payments/purchase-order)
* [Invoices Approval Workflow](/docs/x/vendor-payments/invoices/approval-workflow)
5. Review and click **Got it**. Your cost center is deactivated.
The cost center continues to appear on the list as deactivated. This action cannot be reversed.
## Related Information
* [Purchase Orders](/docs/x/vendor-payments/purchase-order)
* [Invoices Approval Workflow](/docs/x/vendor-payments/invoices/approval-workflow)