> ## Documentation Index
> Fetch the complete documentation index at: https://razorpay-881012b3.mintlify.site/llms.txt
> Use this file to discover all available pages before exploring further.
# Create Payout Links
> Create Payout Links via the Dashboard, API and explore the other Payout Links Dashboard actions available in RazorpayX.
Available in🇮🇳 India
You can create Payout Links in two ways:
* [Via the Dashboard](#create-a-payout-link).
* [Via Payout Links APIs](/docs/x/payout-links/api).
You can also [create Payout Links in bulk](/docs/x/payout-links/bulk).
**Watch Out!**
You cannot create Payout Links in [Test mode](/docs/x/dashboard/test-mode) on the Dashboard and APIs. Switch to Live mode and use [Live API keys](/docs/x/dashboard/api-keys) to create a successful Payout Link.
## Create a Payout Link
Watch this video to know how to create a Payout Link or read along.
To create a Payout Link:
1. Log in to your [RazorpayX Dashboard](https://x.razorpay.com/).
2. Navigate to **Payout Links** from the left menu.
3. Click **+PAYOUT LINK**.
4. Fill in the necessary details such as:
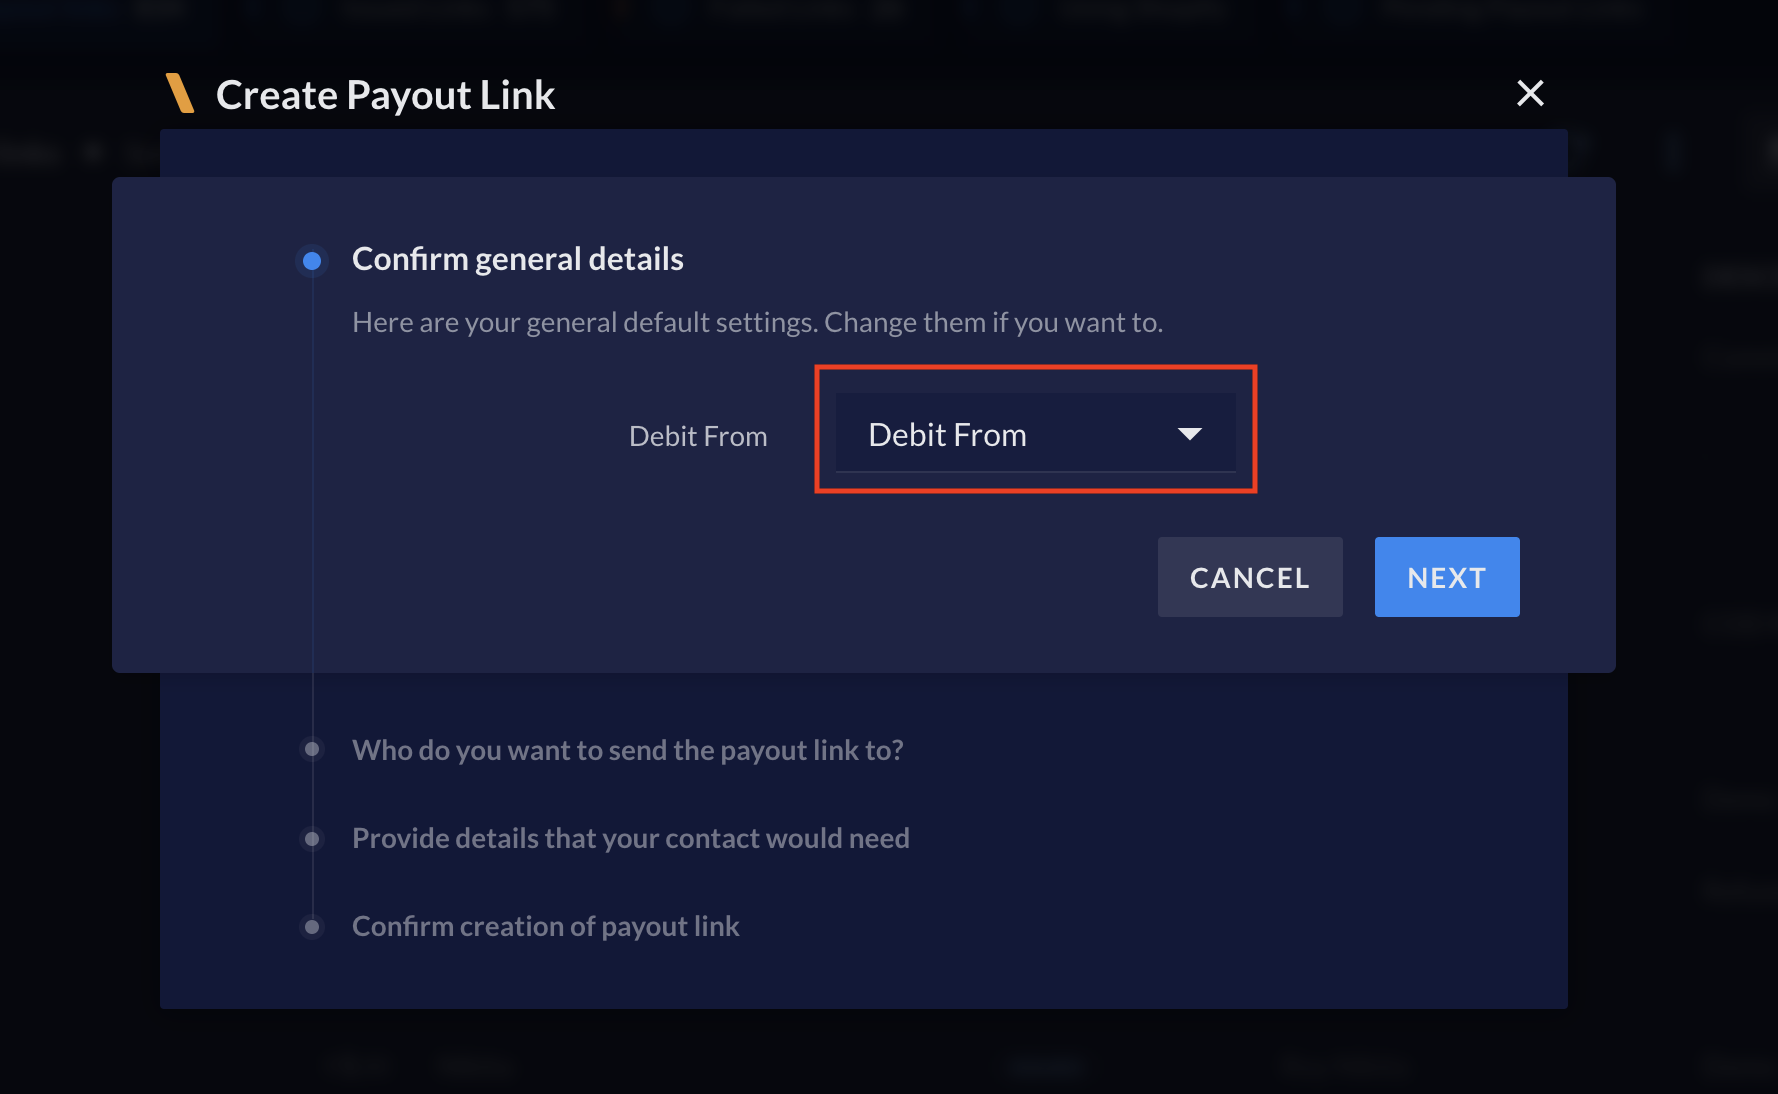
* The account from which the money must be debited.
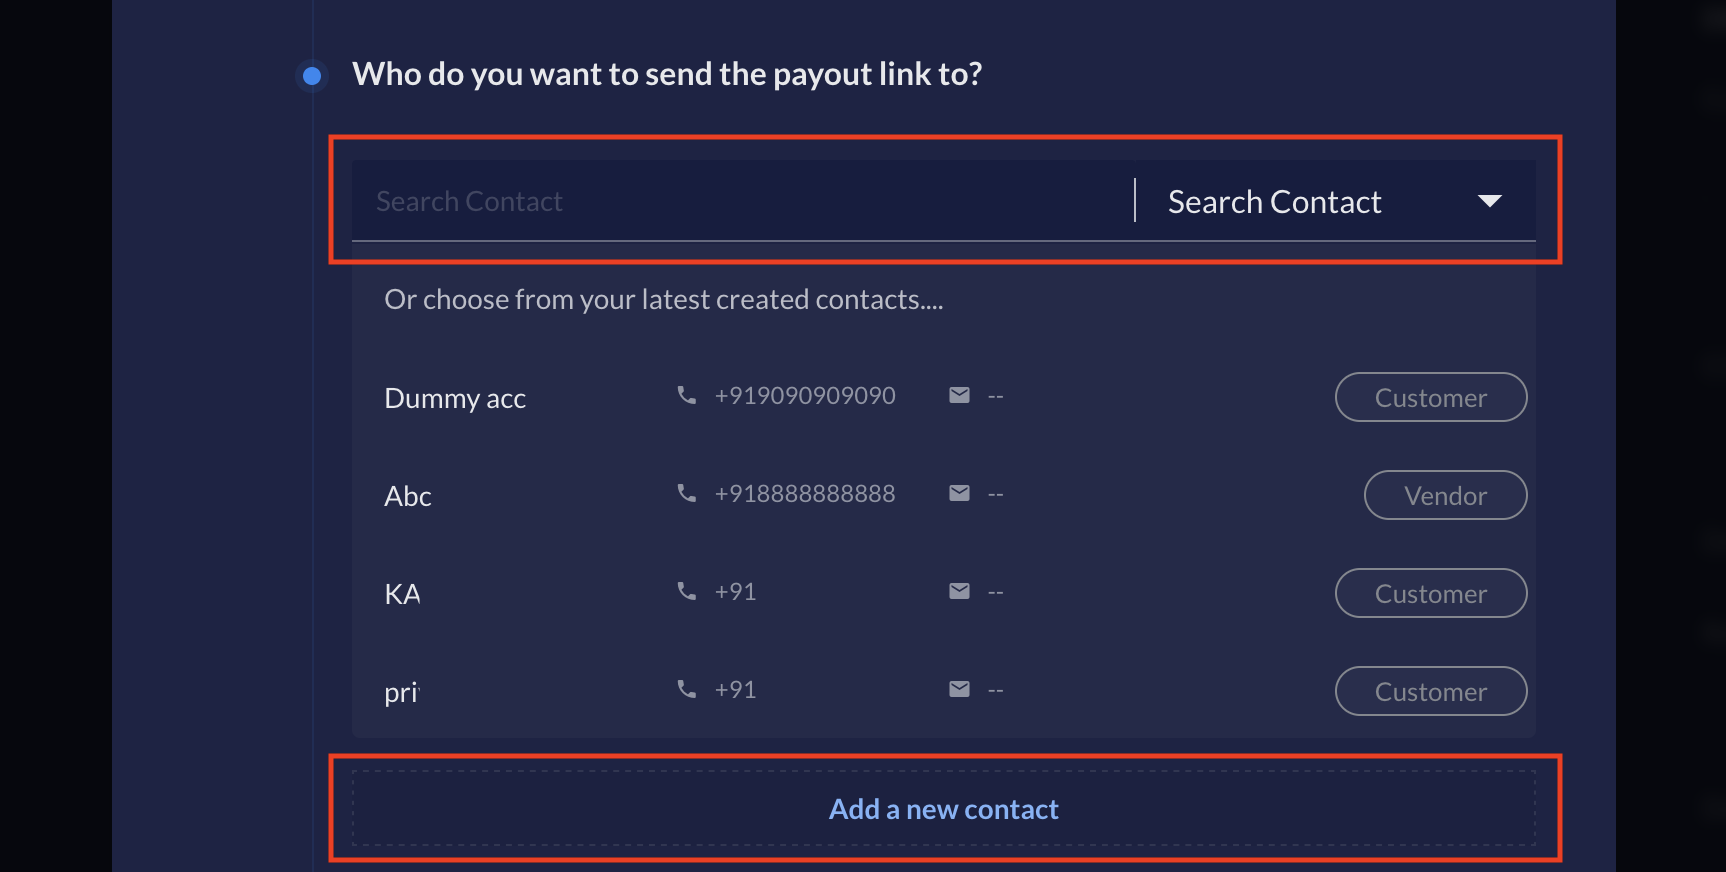
* The Contact to whom you are making the payout. Or, click **Add a new contact** to [create a new Contact](/docs/x/contacts#create-a-contact).
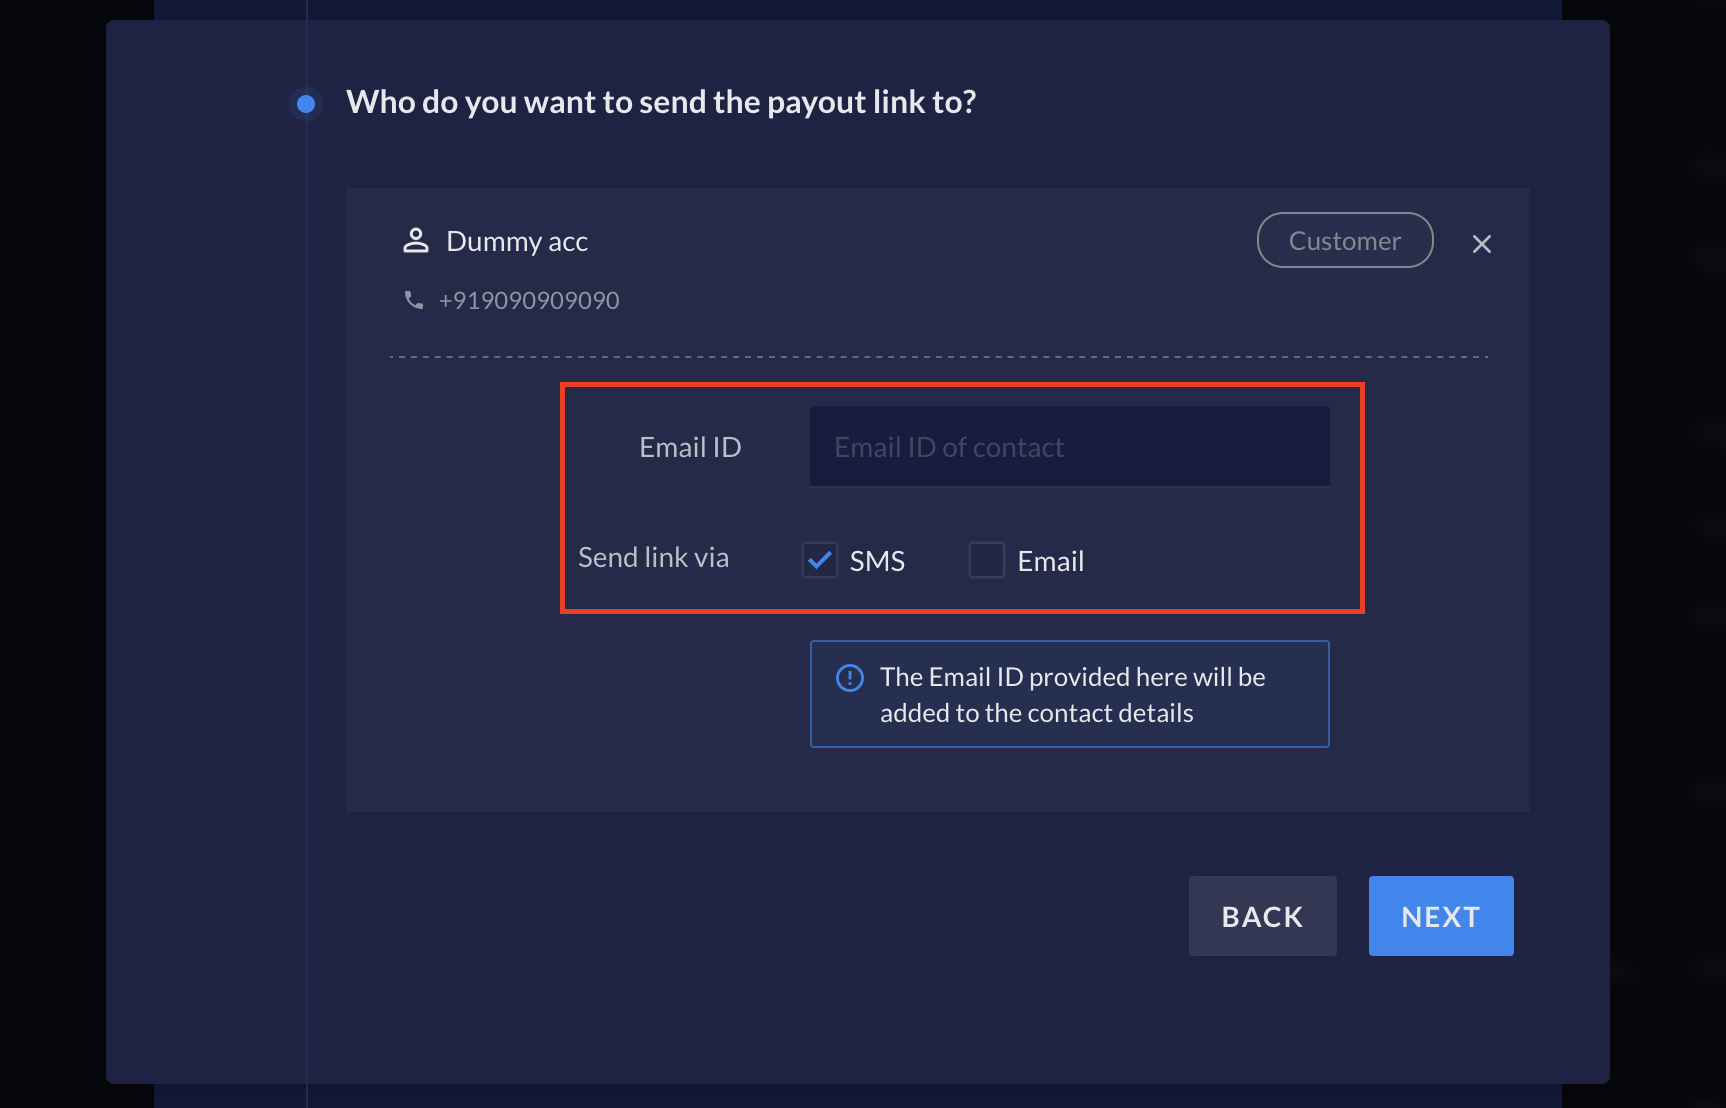
* The contact's email id and phone number. Choose where of the two you want to send the Payout Link to.
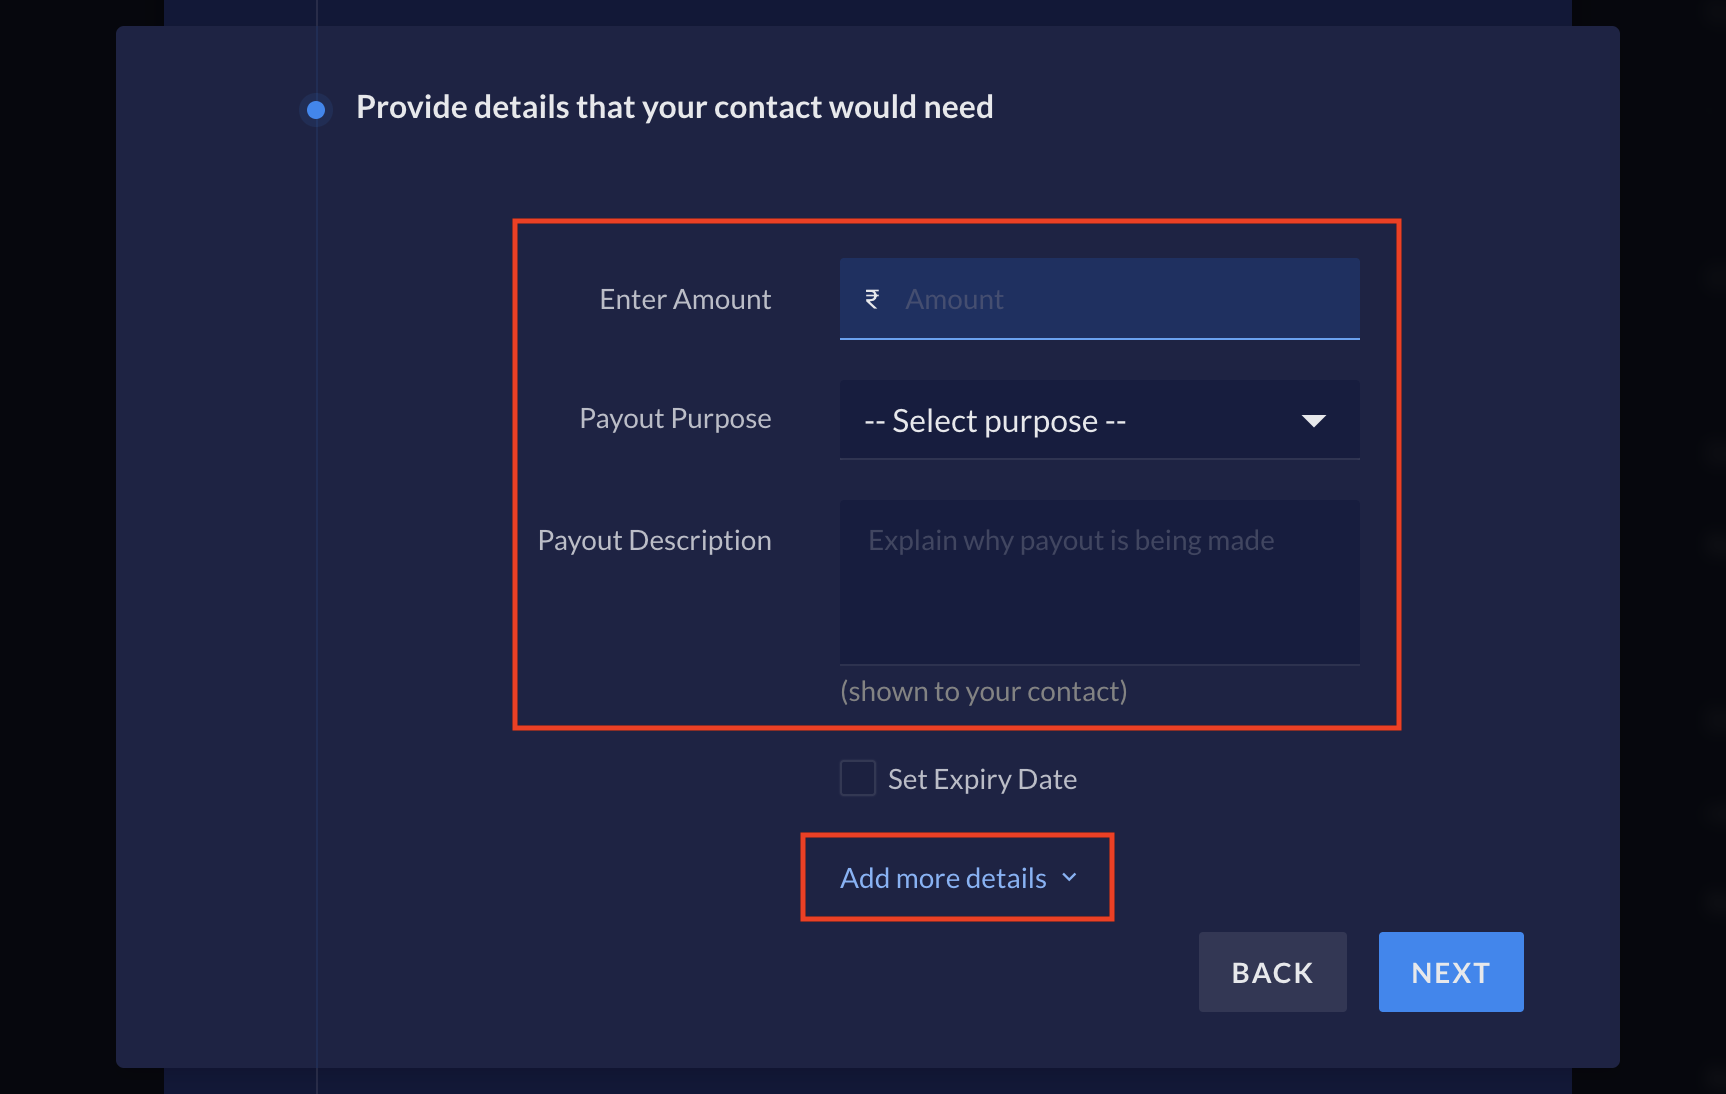
* Mandatory details like the Payout Link Amount, Purpose and Description. [Set expiry](/docs/x/payout-links/set-expiry) for the link if applicable.
* Additional optional details such as reference id and internal notes under **Add more details**.
1. Enter the OTP sent to your registered mobile number or email address, and confirm creation of the Payout Link.
You have successfully created a Payout Link.
**Handy Tips**
When selecting a contact, you need not specify the associated fund account. If the fund account is already present then the payout amount is immediately transferred.
### When Approval Workflow is Enabled
In some use cases, you can send the Payout Link for approval from the approver and then forward the link to the contact. Given below is the Payout Link creation flow when If [Approval Workflow](/docs/x/manage-teams/approval-workflow) is enabled.
1. [Create a Payout Link](#create-a-payout-link) on the Dashboard.
2. The Payout Link is then sent to the **Approver** for approval.
3. Once approved, the Payout Link is sent to the Contact on the number and email provided.
**Handy Tips**
You can set [expiry on Payout Links](/docs/x/payout-links/set-expiry).
## Other Actions
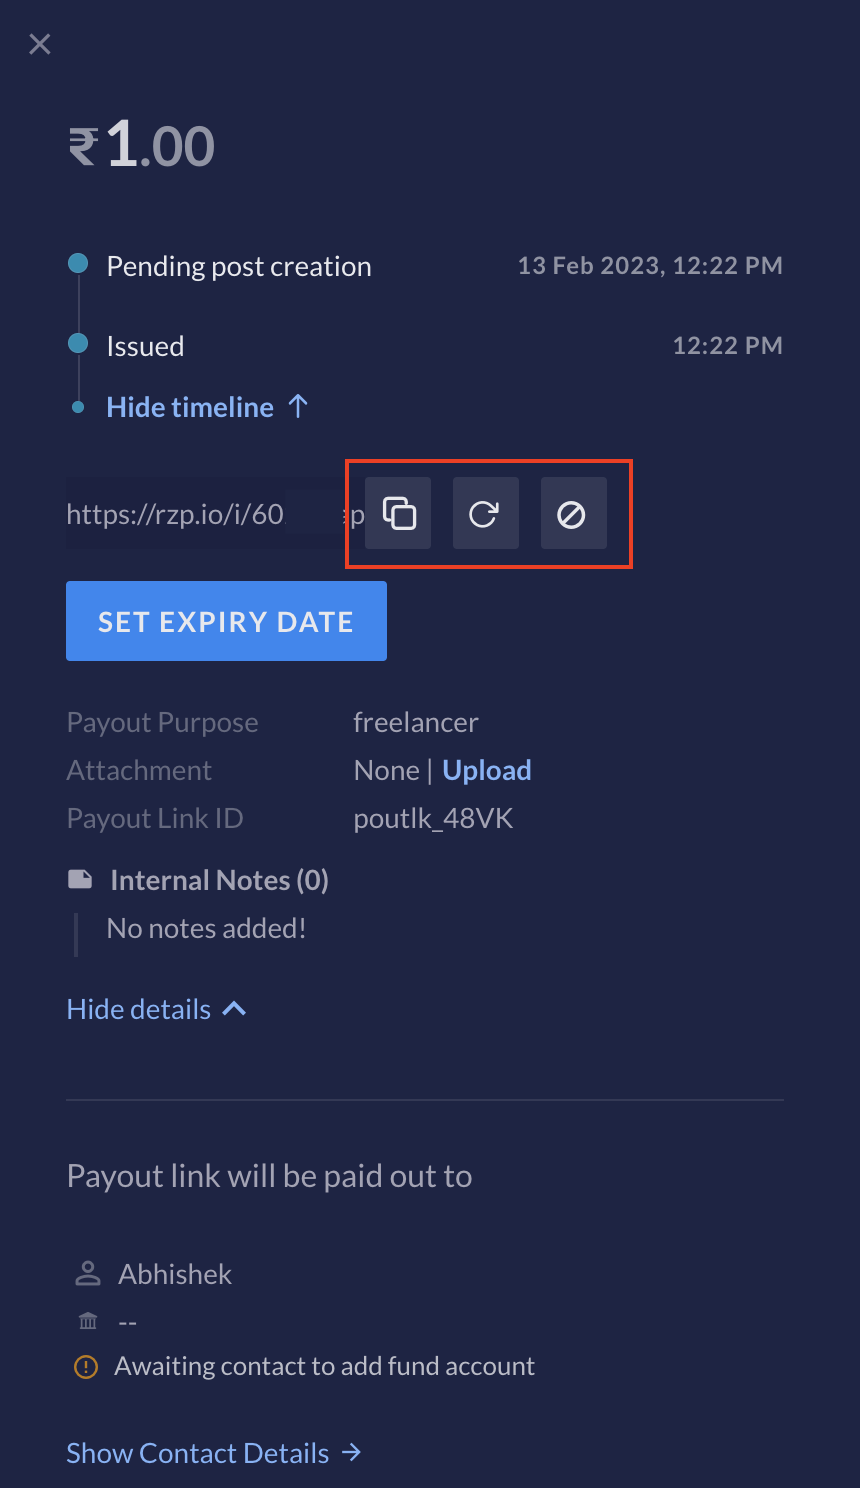
From the Overview page, click on the specific Payout Link and view its details. In the summary pop-up page, you can also:
* Copy the Payout Link.
* Resend the Payout Link to the same contact and repeat the transaction.
* Cancel the Payout Link.
You can also hover over the Payout Link row and access the copy, resend and cancel Payout Link options.
* Using the **Quick Filters** menu, filter out the Payout Links and transactions based on their status and other details.
* As an [Owner/Approver](/docs/x/manage-teams/approval-workflow), view the Payout Links pending on you from the same menu. Also view the Payout Links pending on a specific [user role](/docs/x/manage-teams).
* Click the download icon to download the Payout Links report for a specific time range. Download as a `CSV` or an `XLS` file or email it.
### Related Information
* [Payout Links API](/docs/api/x/payout-links)
* [Create Bulk Payout Links](/docs/x/payout-links/bulk)
* [Shopify Payout Links](/docs/x/payout-links/shopify)
 4. Fill in the necessary details such as:
* The account from which the money must be debited.
4. Fill in the necessary details such as:
* The account from which the money must be debited.
 * The Contact to whom you are making the payout. Or, click **Add a new contact** to [create a new Contact](/docs/x/contacts#create-a-contact).
 * The contact's email id and phone number. Choose where of the two you want to send the Payout Link to.
 * Mandatory details like the Payout Link Amount, Purpose and Description. [Set expiry](/docs/x/payout-links/set-expiry) for the link if applicable.
* Additional optional details such as reference id and internal notes under **Add more details**.
* Mandatory details like the Payout Link Amount, Purpose and Description. [Set expiry](/docs/x/payout-links/set-expiry) for the link if applicable.
* Additional optional details such as reference id and internal notes under **Add more details**.
 1. Enter the OTP sent to your registered mobile number or email address, and confirm creation of the Payout Link.
You have successfully created a Payout Link.
1. Enter the OTP sent to your registered mobile number or email address, and confirm creation of the Payout Link.
You have successfully created a Payout Link.
 * Using the **Quick Filters** menu, filter out the Payout Links and transactions based on their status and other details.
* As an [Owner/Approver](/docs/x/manage-teams/approval-workflow), view the Payout Links pending on you from the same menu. Also view the Payout Links pending on a specific [user role](/docs/x/manage-teams).
* Click the download icon to download the Payout Links report for a specific time range. Download as a `CSV` or an `XLS` file or email it.
* Using the **Quick Filters** menu, filter out the Payout Links and transactions based on their status and other details.
* As an [Owner/Approver](/docs/x/manage-teams/approval-workflow), view the Payout Links pending on you from the same menu. Also view the Payout Links pending on a specific [user role](/docs/x/manage-teams).
* Click the download icon to download the Payout Links report for a specific time range. Download as a `CSV` or an `XLS` file or email it.
 ### Related Information
* [Payout Links API](/docs/api/x/payout-links)
* [Create Bulk Payout Links](/docs/x/payout-links/bulk)
* [Shopify Payout Links](/docs/x/payout-links/shopify)
### Related Information
* [Payout Links API](/docs/api/x/payout-links)
* [Create Bulk Payout Links](/docs/x/payout-links/bulk)
* [Shopify Payout Links](/docs/x/payout-links/shopify)