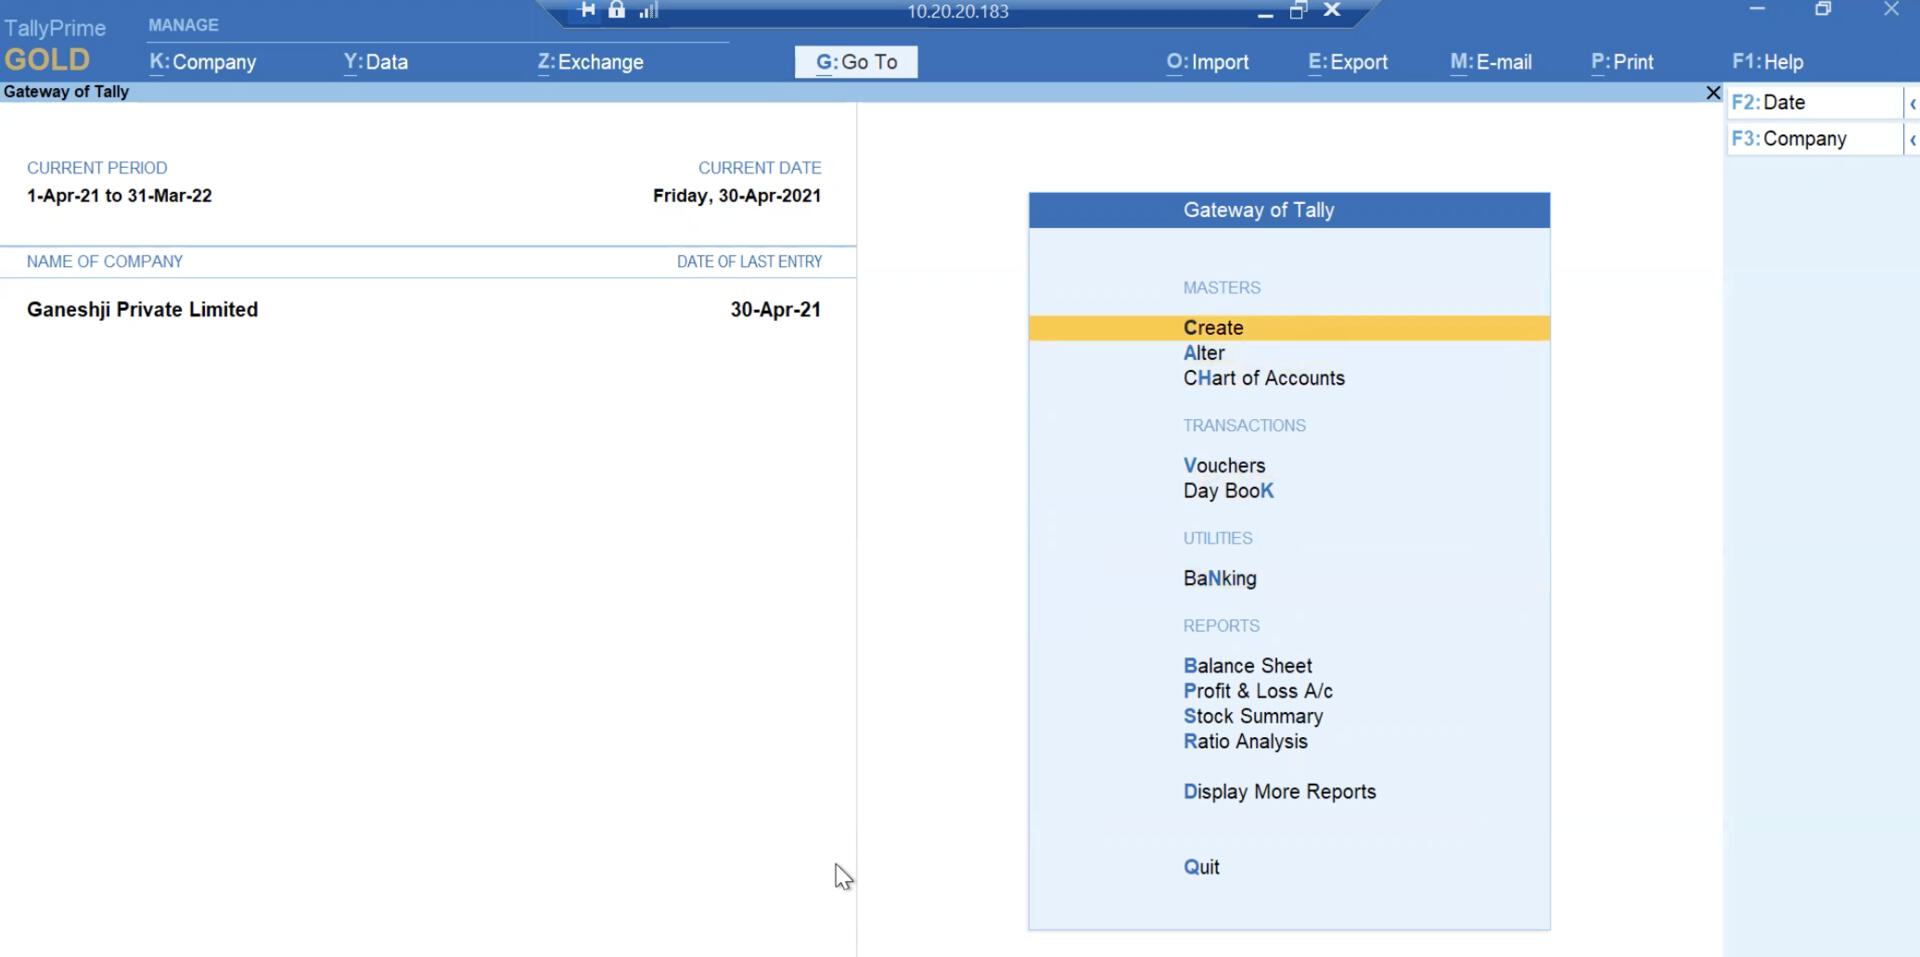
 3. Select **Ledgers** and enter a name for the ledger.
4. In the **Bank Accounts Details** section, type RAZ in the **Bank Name** field. A **List of Banks** pop-up page is displayed.
3. Select **Ledgers** and enter a name for the ledger.
4. In the **Bank Accounts Details** section, type RAZ in the **Bank Name** field. A **List of Banks** pop-up page is displayed.
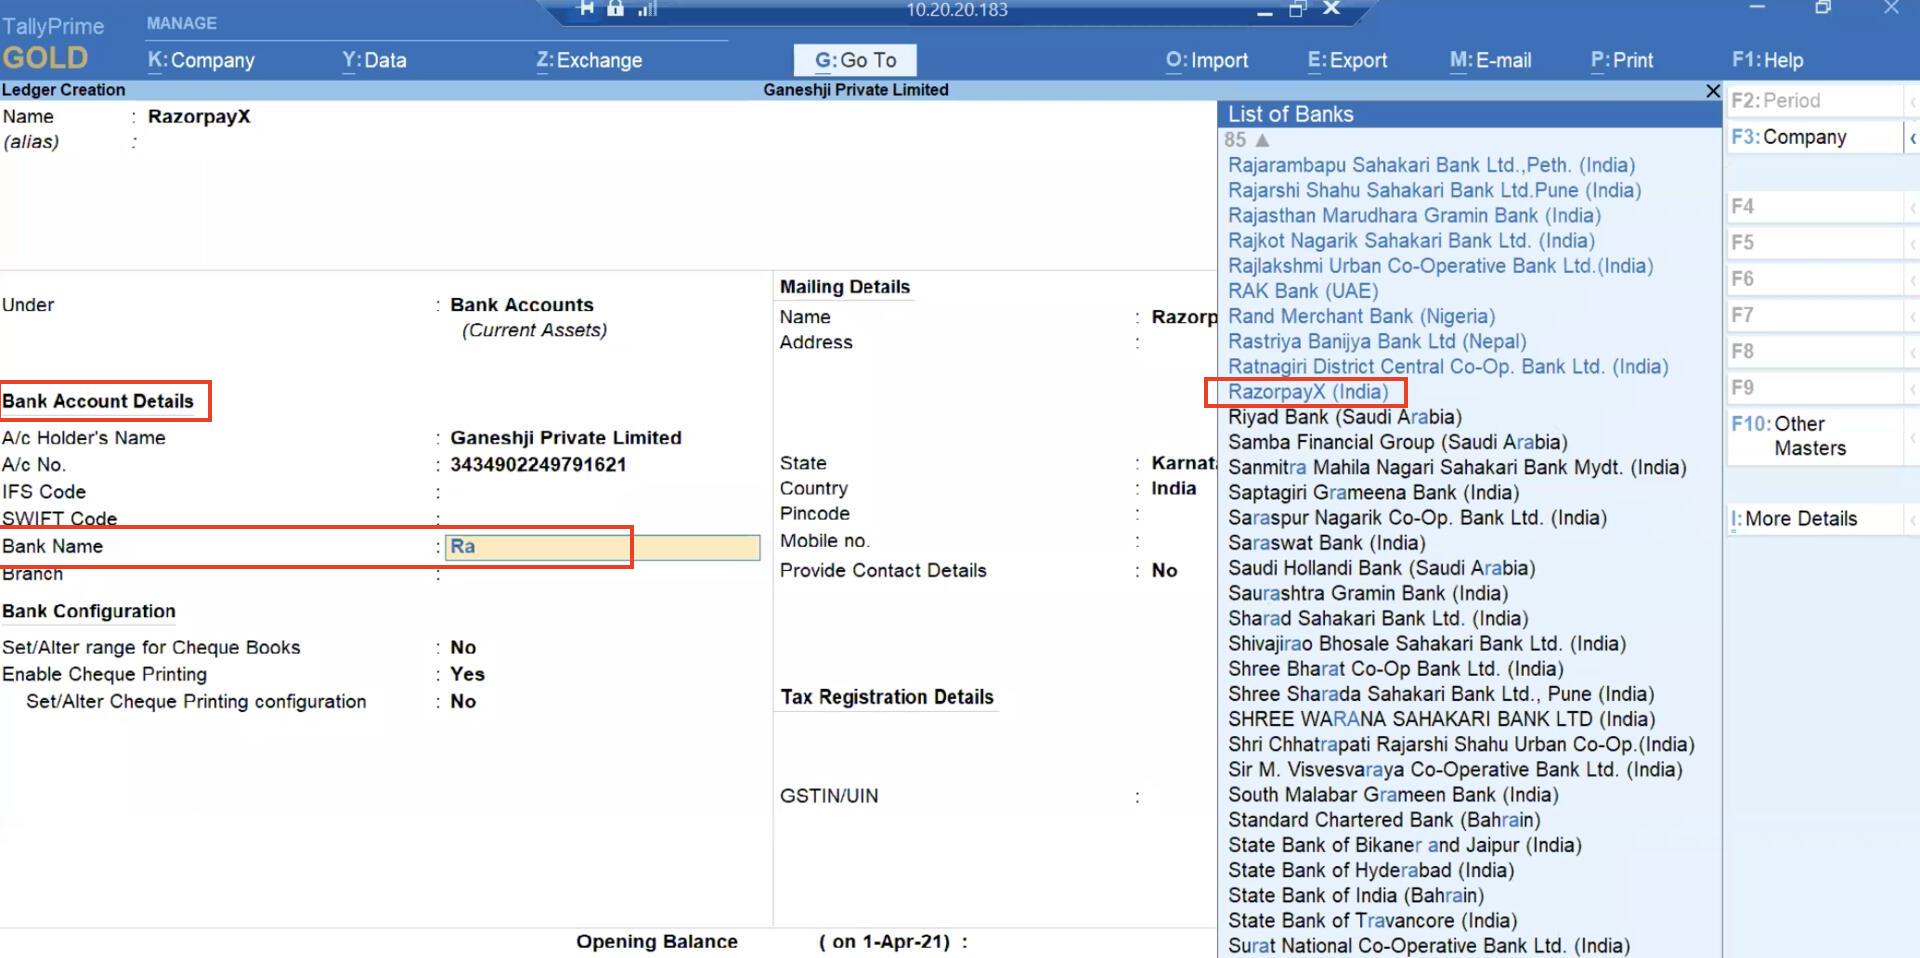 5. Select **RazorpayX (India)**.
6. Set the fields under **Bank Configuration** to **Yes** or **No** as required.
5. Select **RazorpayX (India)**.
6. Set the fields under **Bank Configuration** to **Yes** or **No** as required.
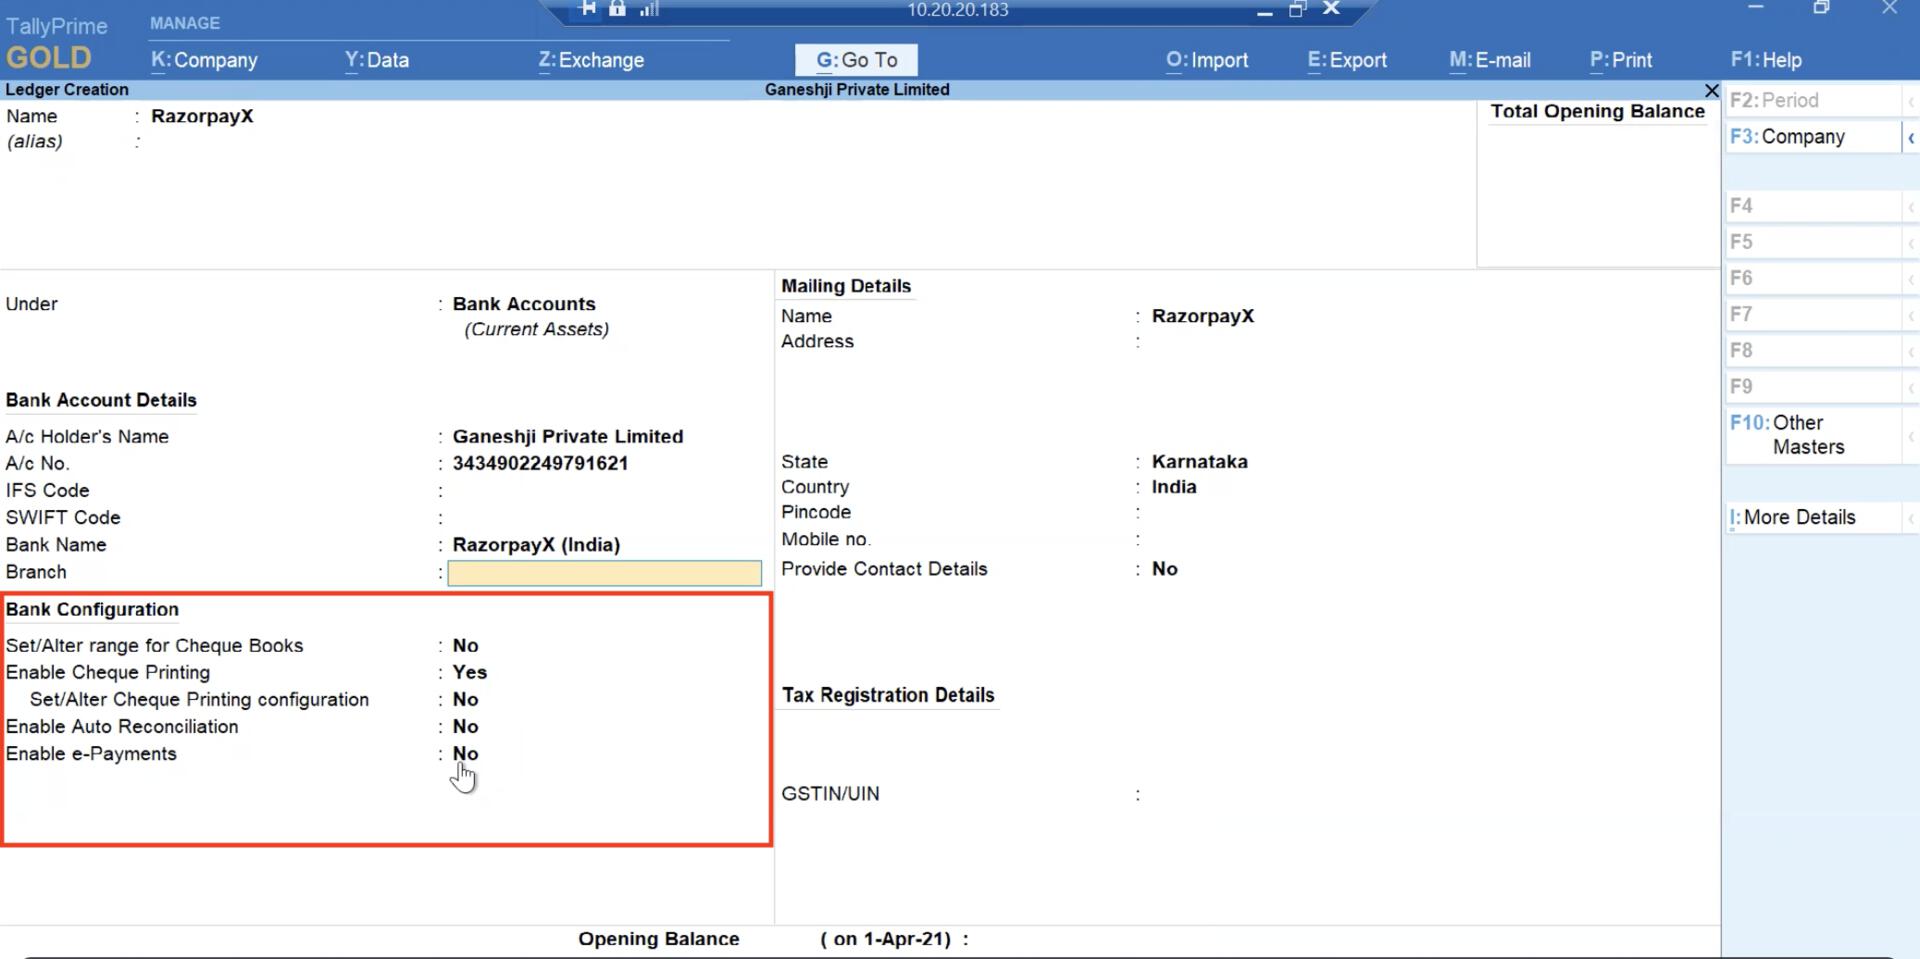 * Set **Enable e-Payments** under **Bank Configuration** to **Yes**. This is mandatory.
* Under Enable e-Payments, select **Set/alter e-Payments configuration**. Select the requisite parameters for e-Payment.
7. Click **Yes** in the Accept window to save your selection.
8. Click **Yes** in the **Confirm RazorpayX ledger creation** window.
You have successfully created a ledger for RazorpayX. There are other ledger features available in Tally, which you can use to [map the expenses and taxes to the ledgers](/docs/x/vendor-payments/tally/bring-bills#ledger-and-mapping) as per the transactions made.
### Related Information
* Keyboard shortcuts in [Tally Prime](https://help.tallysolutions.com/tally-prime/keyboard-shortcuts/keyboard-shortcuts-tally-prime/)
* Set **Enable e-Payments** under **Bank Configuration** to **Yes**. This is mandatory.
* Under Enable e-Payments, select **Set/alter e-Payments configuration**. Select the requisite parameters for e-Payment.
7. Click **Yes** in the Accept window to save your selection.
8. Click **Yes** in the **Confirm RazorpayX ledger creation** window.
You have successfully created a ledger for RazorpayX. There are other ledger features available in Tally, which you can use to [map the expenses and taxes to the ledgers](/docs/x/vendor-payments/tally/bring-bills#ledger-and-mapping) as per the transactions made.
### Related Information
* Keyboard shortcuts in [Tally Prime](https://help.tallysolutions.com/tally-prime/keyboard-shortcuts/keyboard-shortcuts-tally-prime/)