> ## Documentation Index
> Fetch the complete documentation index at: https://razorpay-881012b3.mintlify.site/llms.txt
> Use this file to discover all available pages before exploring further.
# Vendor Advances
> Make advance payments to vendors for easy reconciliation with RazorpayX Dashboard.
Available in
🇮🇳 India
Advance payments, often referred to as upfront payments or prepayments, are financial transactions in which a party makes a payment in advance of receiving goods, services or fulfilling contractual obligations. These payments serve various purposes, such as securing reservations, ensuring commitment or providing working capital.
Advance payments play a crucial role in managing cash flow and risk mitigation for both parties involved. Pay and track advance payments to vendors and avoid double payments with RazorpayX Advance Payments.
## Create Vendor Advance
To create an advance payment for a vendor:
1. Log in to the [RazorpayX Dashboard](https://x.razorpay.com/auth).
2. Navigate to **Vendor Payments** → **Advances** at the top of the screen.
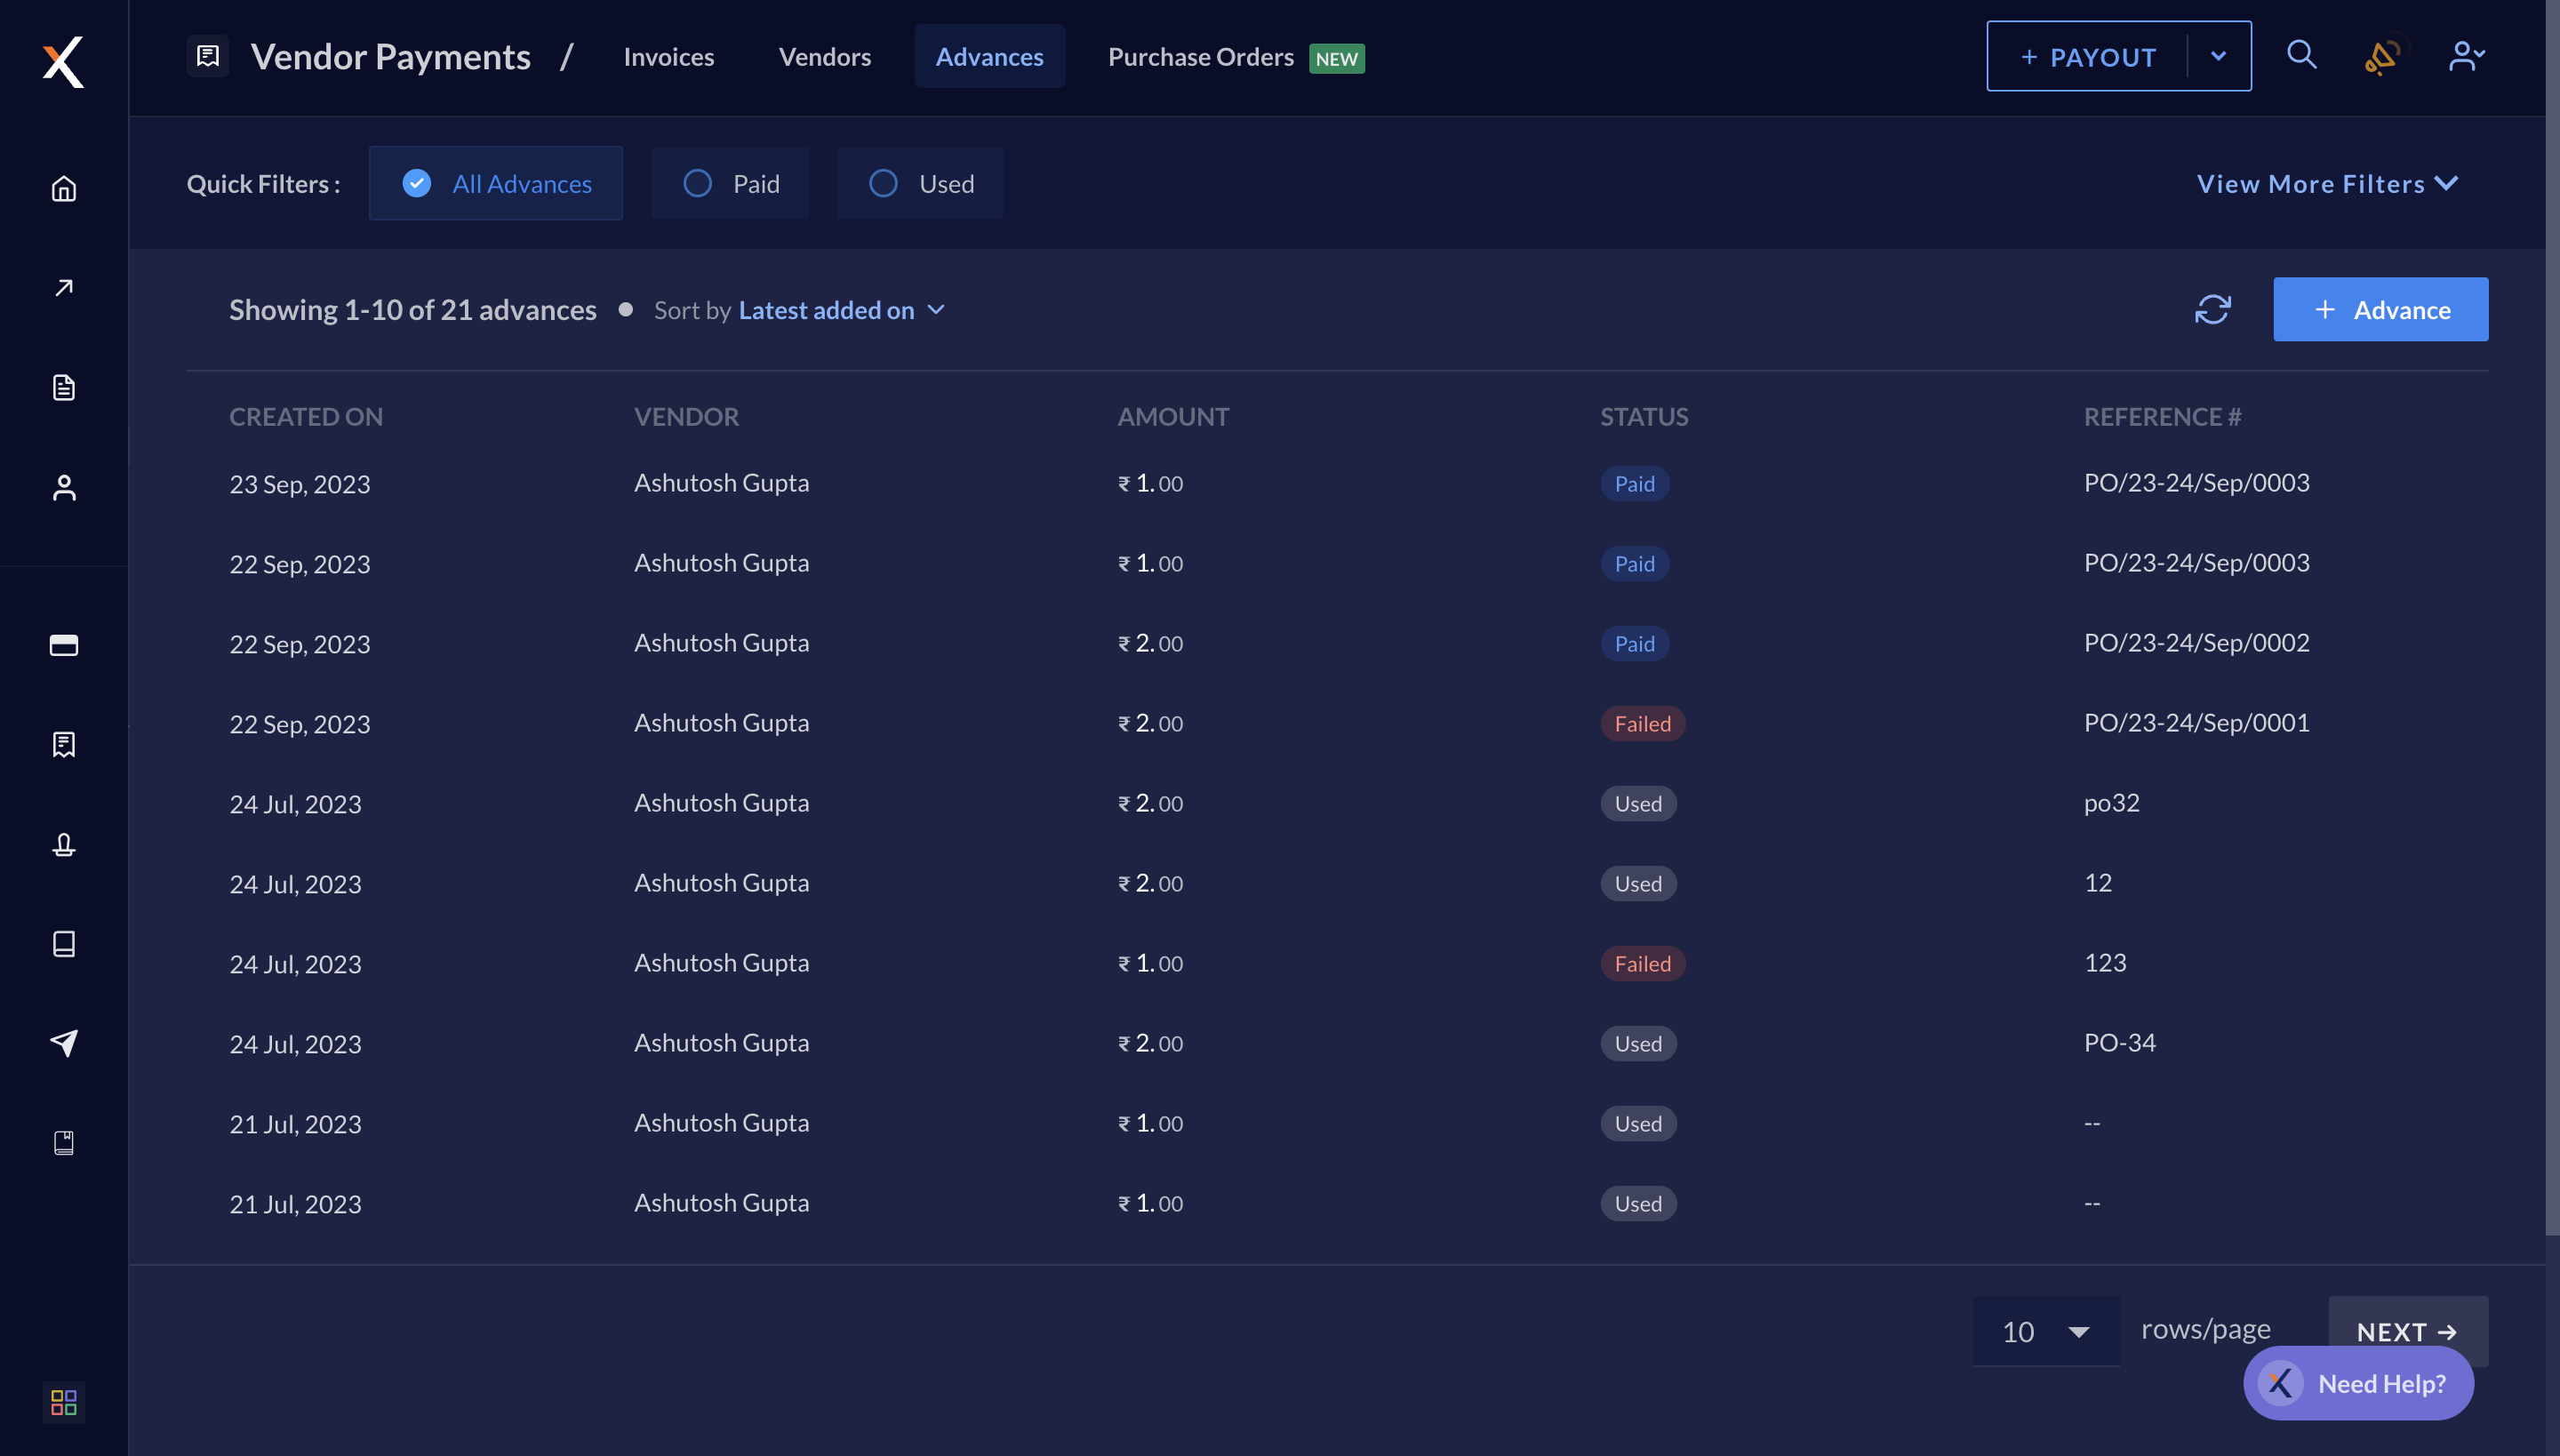 3. Click **+ Advance** to make an advance payment to a vendor.
4. Search and select from existing contacts or create [**+ NEW CONTACT**](/docs/x/contacts#create-a-contact).
5. Select the fund account of the chosen vendor to which you want to make the payment.
6. In the **Advance Details** section, enter the **Advance Amount**.
7. You can choose to **Attach** an existing Purchase Order and enter the **PO Number**, and add **+ NOTES**, as required.
3. Click **+ Advance** to make an advance payment to a vendor.
4. Search and select from existing contacts or create [**+ NEW CONTACT**](/docs/x/contacts#create-a-contact).
5. Select the fund account of the chosen vendor to which you want to make the payment.
6. In the **Advance Details** section, enter the **Advance Amount**.
7. You can choose to **Attach** an existing Purchase Order and enter the **PO Number**, and add **+ NOTES**, as required.
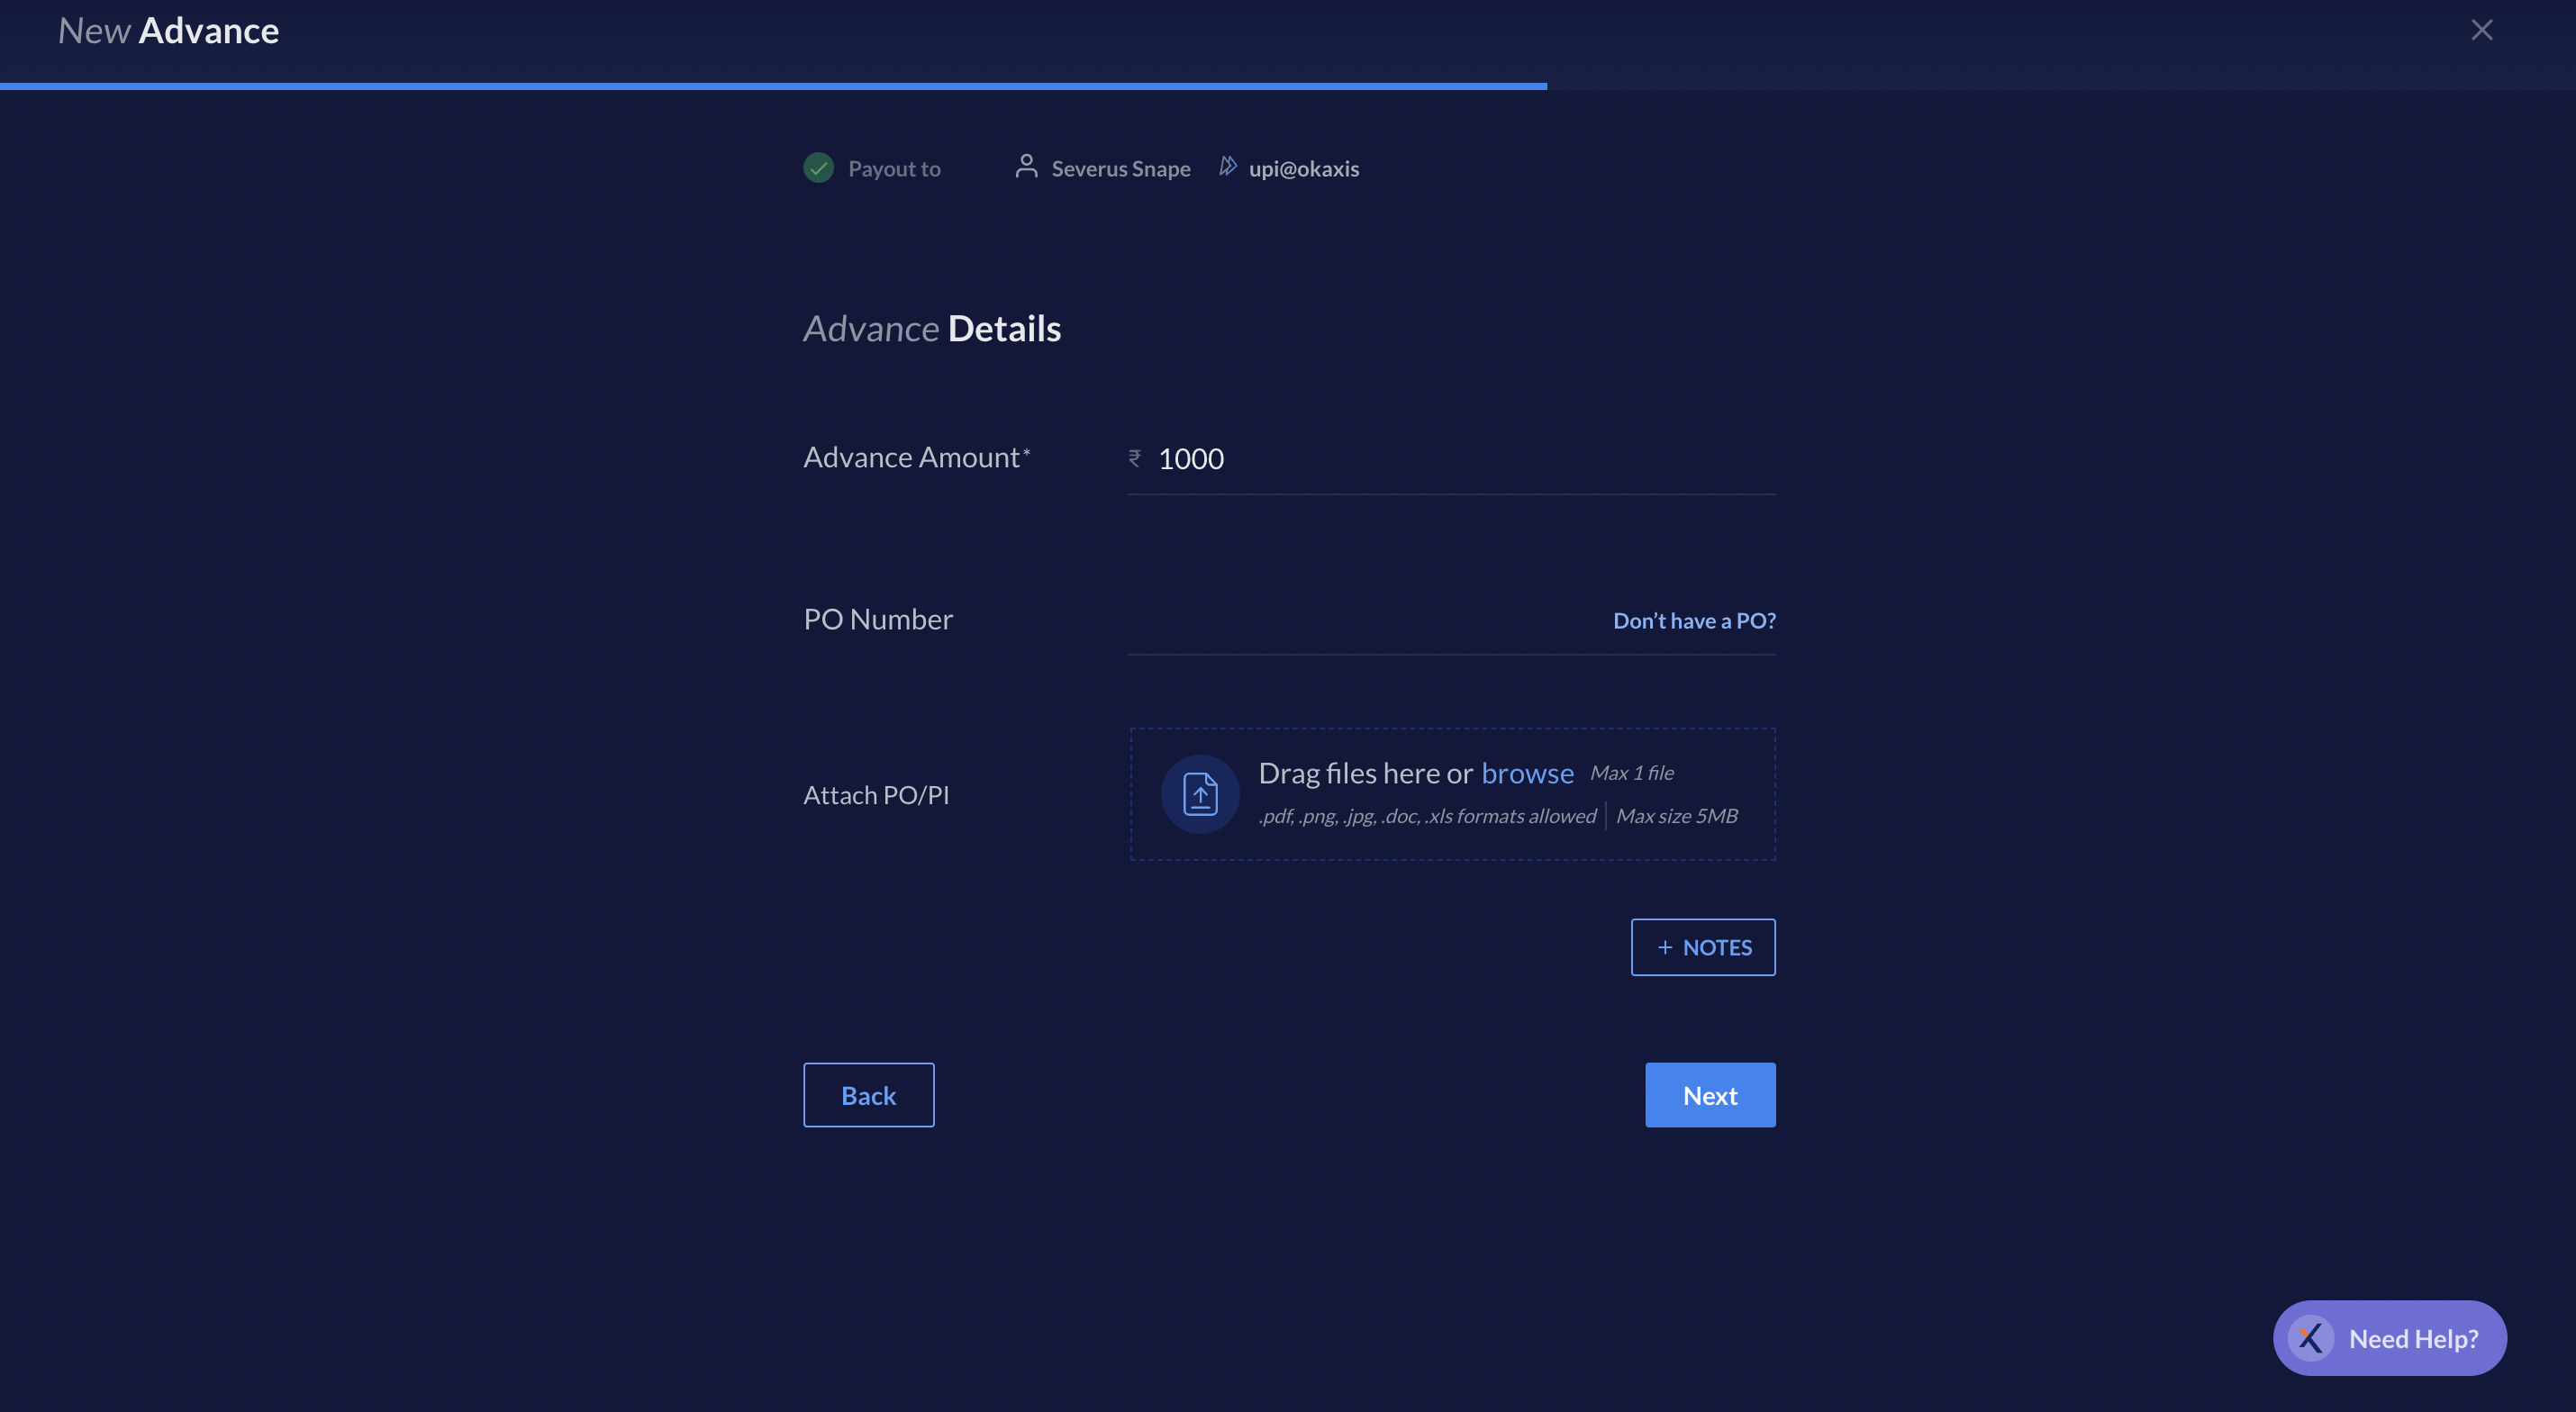 8. Click **Next** and review the details. You can Schedule Payout or click **Next** to pay instantly.
9. Enter the OTP sent to your registered mobile number and email id. Click **Pay**.
The advance is created and recorded.
## Settling Advance Payments
How it Works:
* When you [add an invoice](/docs/x/vendor-payments/invoices#add-invoices) for a vendor to whom you have already paid an advance, RazorpayX recognises it and asks you if that particular advance is relevant to the current invoice.
* If it is relevant, select the checkbox against the row and the payable amount reduces as the advance is subtracted from the invoice.
8. Click **Next** and review the details. You can Schedule Payout or click **Next** to pay instantly.
9. Enter the OTP sent to your registered mobile number and email id. Click **Pay**.
The advance is created and recorded.
## Settling Advance Payments
How it Works:
* When you [add an invoice](/docs/x/vendor-payments/invoices#add-invoices) for a vendor to whom you have already paid an advance, RazorpayX recognises it and asks you if that particular advance is relevant to the current invoice.
* If it is relevant, select the checkbox against the row and the payable amount reduces as the advance is subtracted from the invoice.
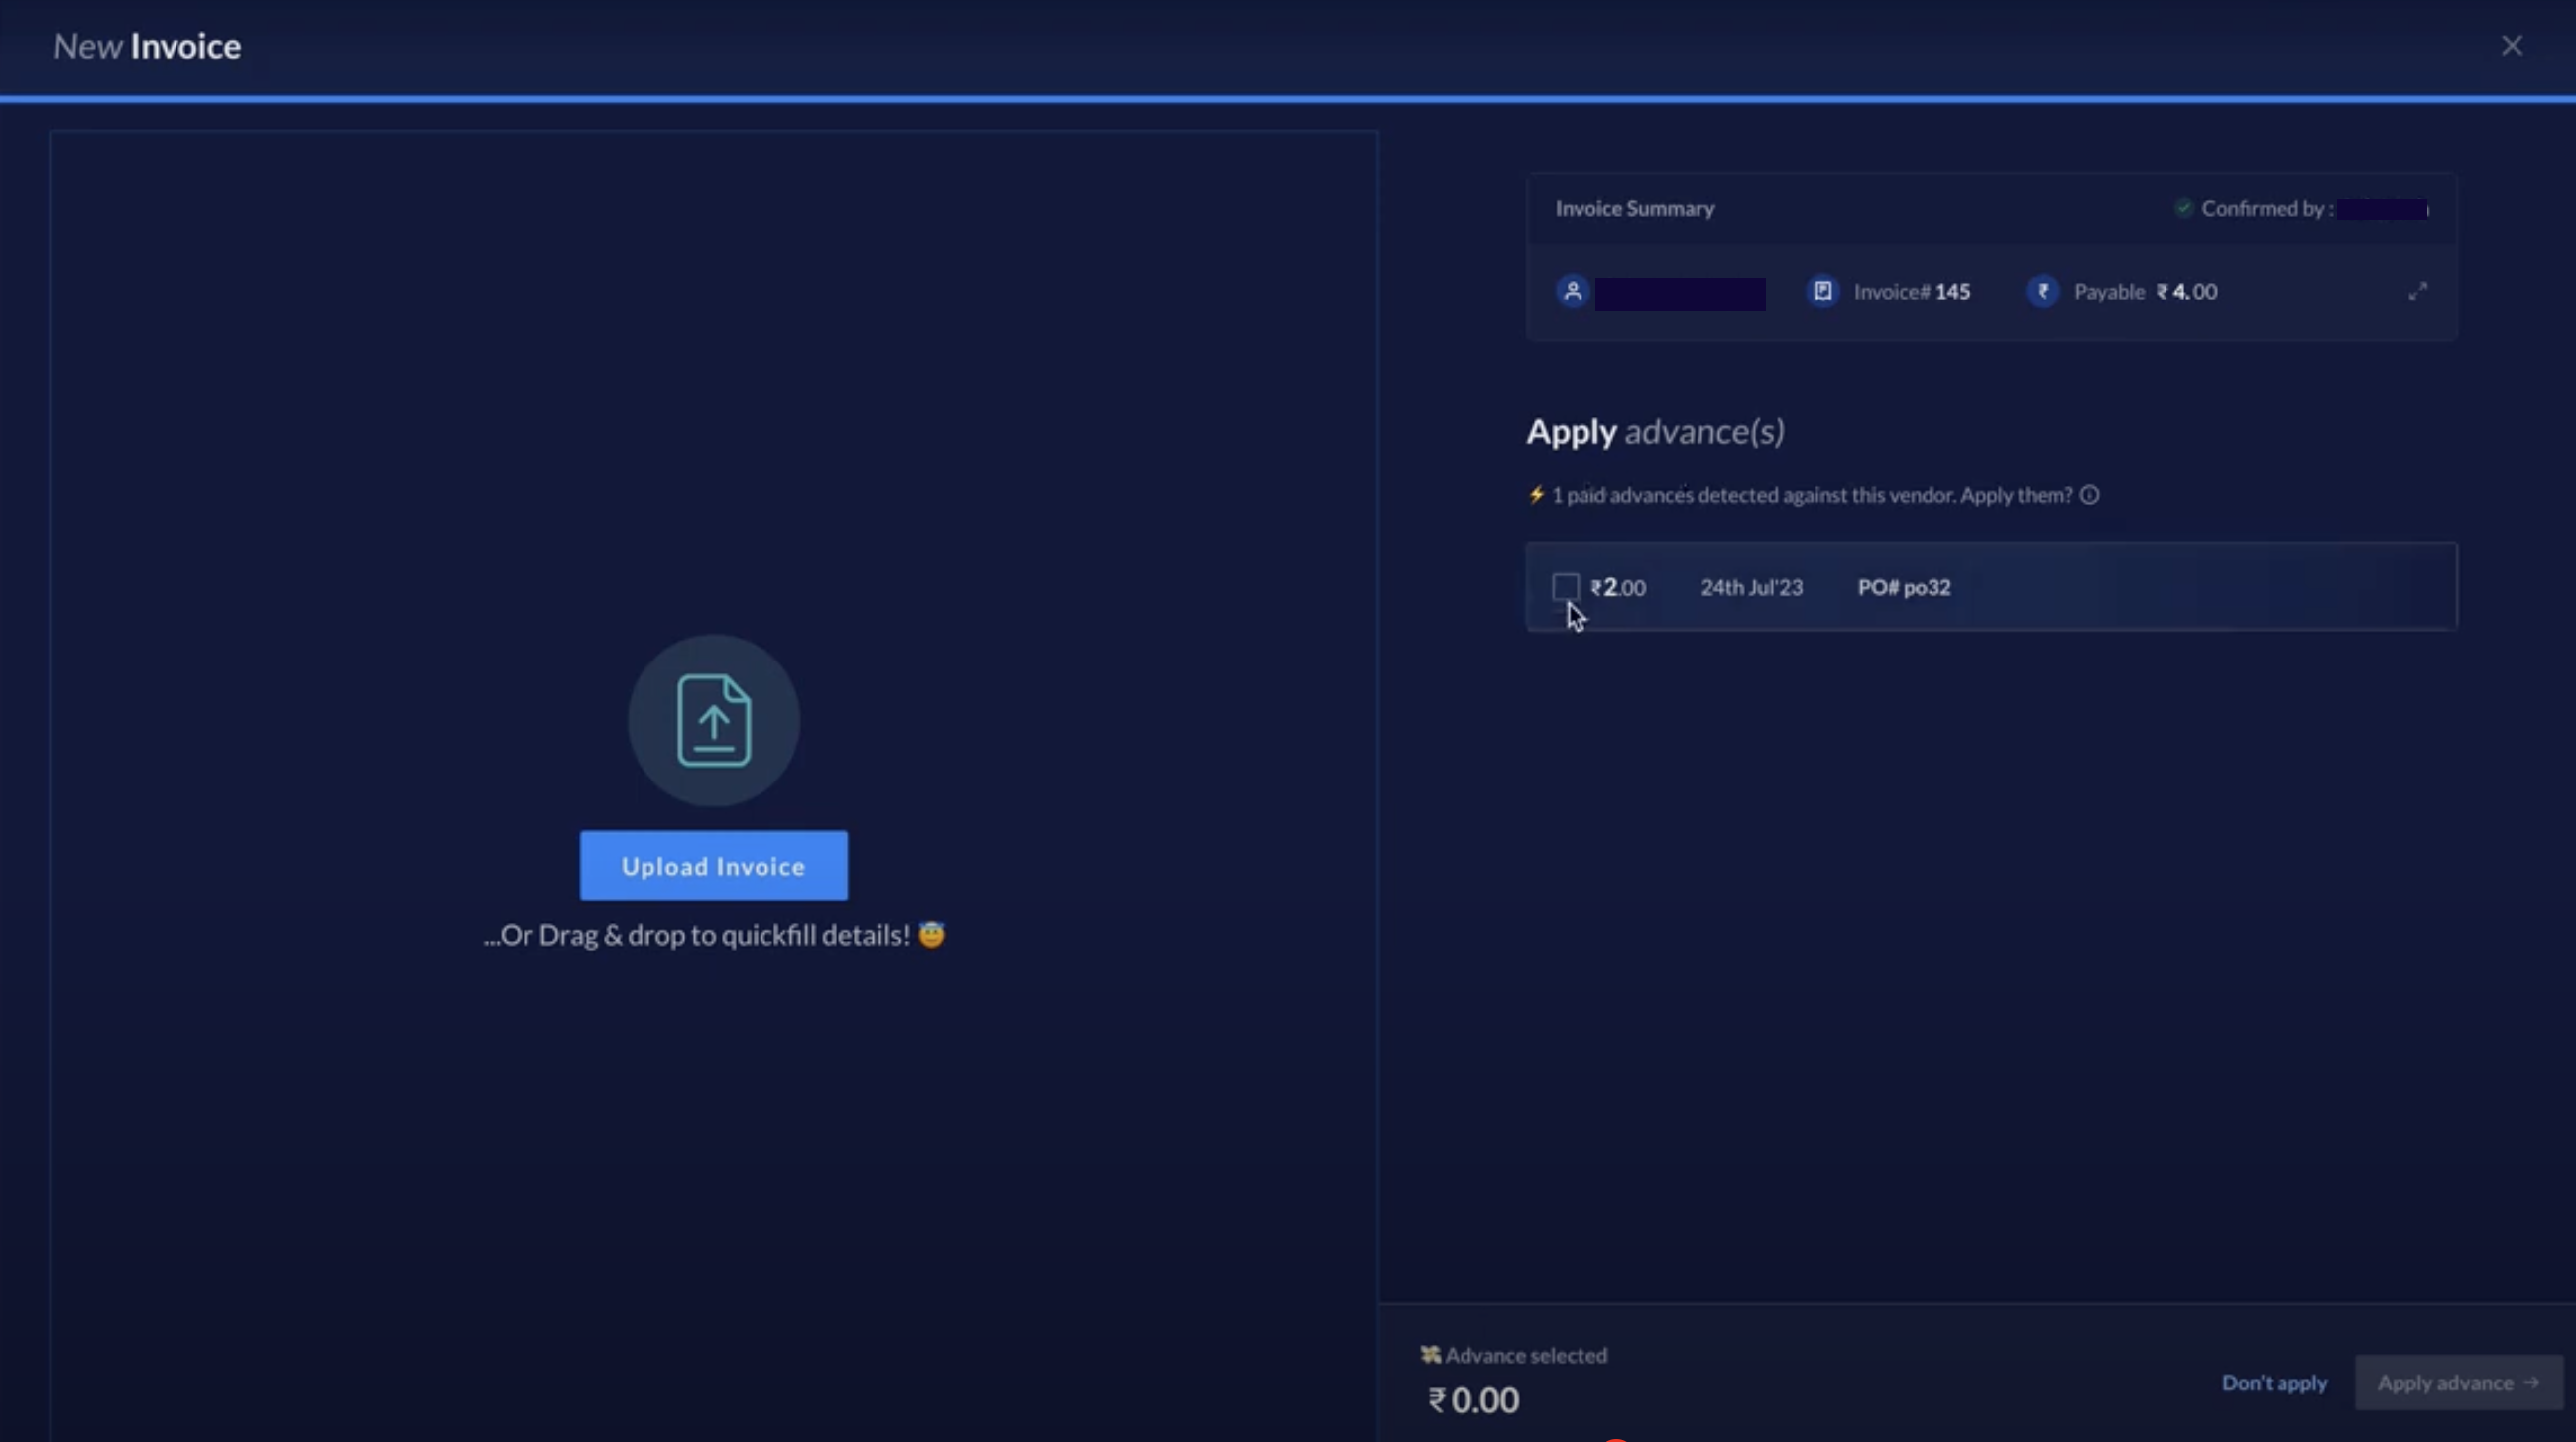 You can make the payment instantly, schedule it or save and close the invoice. The invoice status will appear as `PARTIALLY PAID` once you map it to the advance payment.
## Advance Payment State
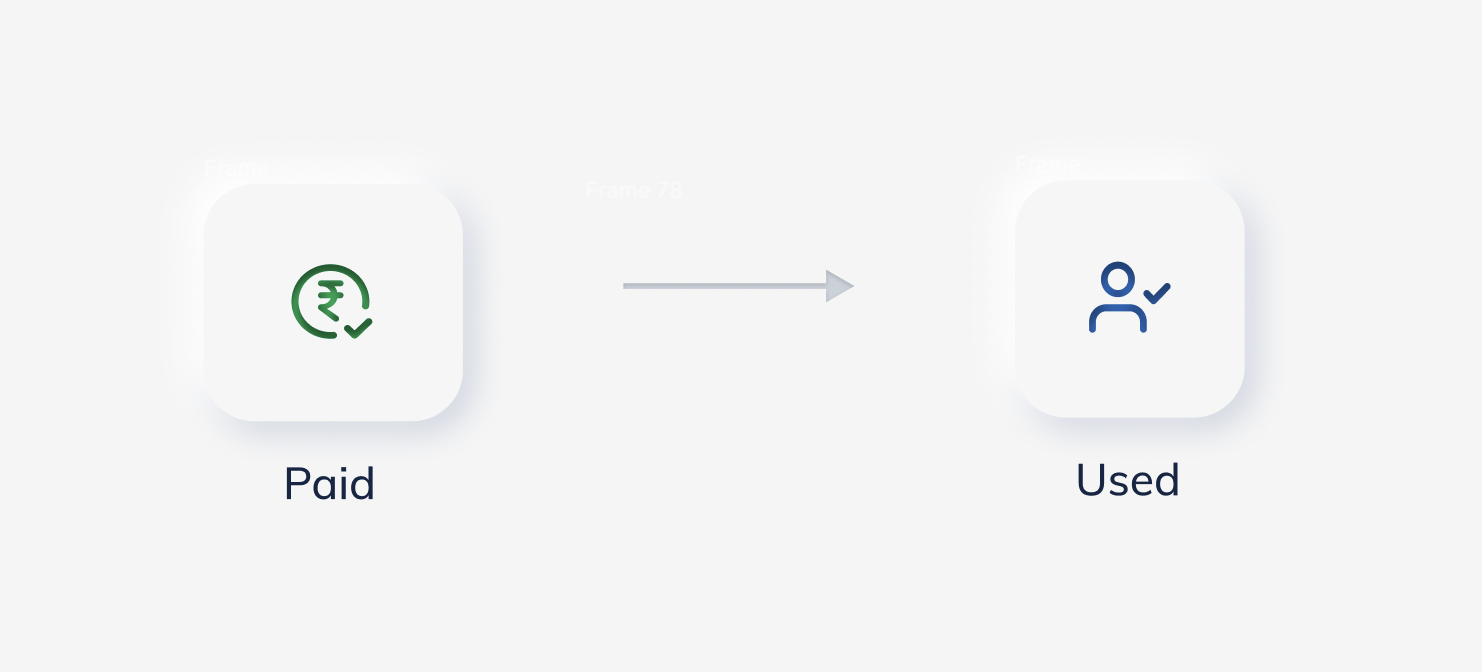
After the advance payment is mapped with the invoice, the status of the advance changes from `PAID` to `USED`.
You can make the payment instantly, schedule it or save and close the invoice. The invoice status will appear as `PARTIALLY PAID` once you map it to the advance payment.
## Advance Payment State
After the advance payment is mapped with the invoice, the status of the advance changes from `PAID` to `USED`.