> ## Documentation Index
> Fetch the complete documentation index at: https://razorpay-881012b3.mintlify.site/llms.txt
> Use this file to discover all available pages before exploring further.

# Add Invoices in Bulk

> Import a large number of invoices to your RazorpayX Dashboard.

<div style={{display:"flex",flexWrap:"wrap",alignItems:"center",gap:"0.35rem 0.9rem",border:"1px solid rgba(128,128,128,0.28)",borderRadius:"0.5rem",padding:"0.45rem 0.75rem",margin:"0 0 1.25rem",fontSize:"0.875rem"}}>
  <span style={{fontWeight:600}}>Available in</span>
  <span>🇮🇳 India</span>
</div>

Businesses deal with a large number of invoices every month. To manually upload invoices one after the other is time consuming and prone to errors. Added to that is the time taken by OCRs to read data one by one.

To overcome this problem, you can use the Bulk Invoices feature to create a large number of invoices from the [RazorpayX Dashboard](https://x.razorpay.com/).

## Upload Invoices in Bulk

Watch this video to know how to upload invoices in bulk or read along.

<iframe width="1425" height="646" src="https://www.youtube.com/embed/61f4pVZVxg0" title="Upload Invoices in Bulk | RazorpayX" frameBorder="0" allow="accelerometer; autoplay; clipboard-write; encrypted-media; gyroscope; picture-in-picture; web-share" allowFullScreen />

To upload invoices in bulk:

1. Log in to your [RazorpayX Dashboard](https://x.razorpay.com/).
2. Navigate to **Menu** → **Vendor Payments**.
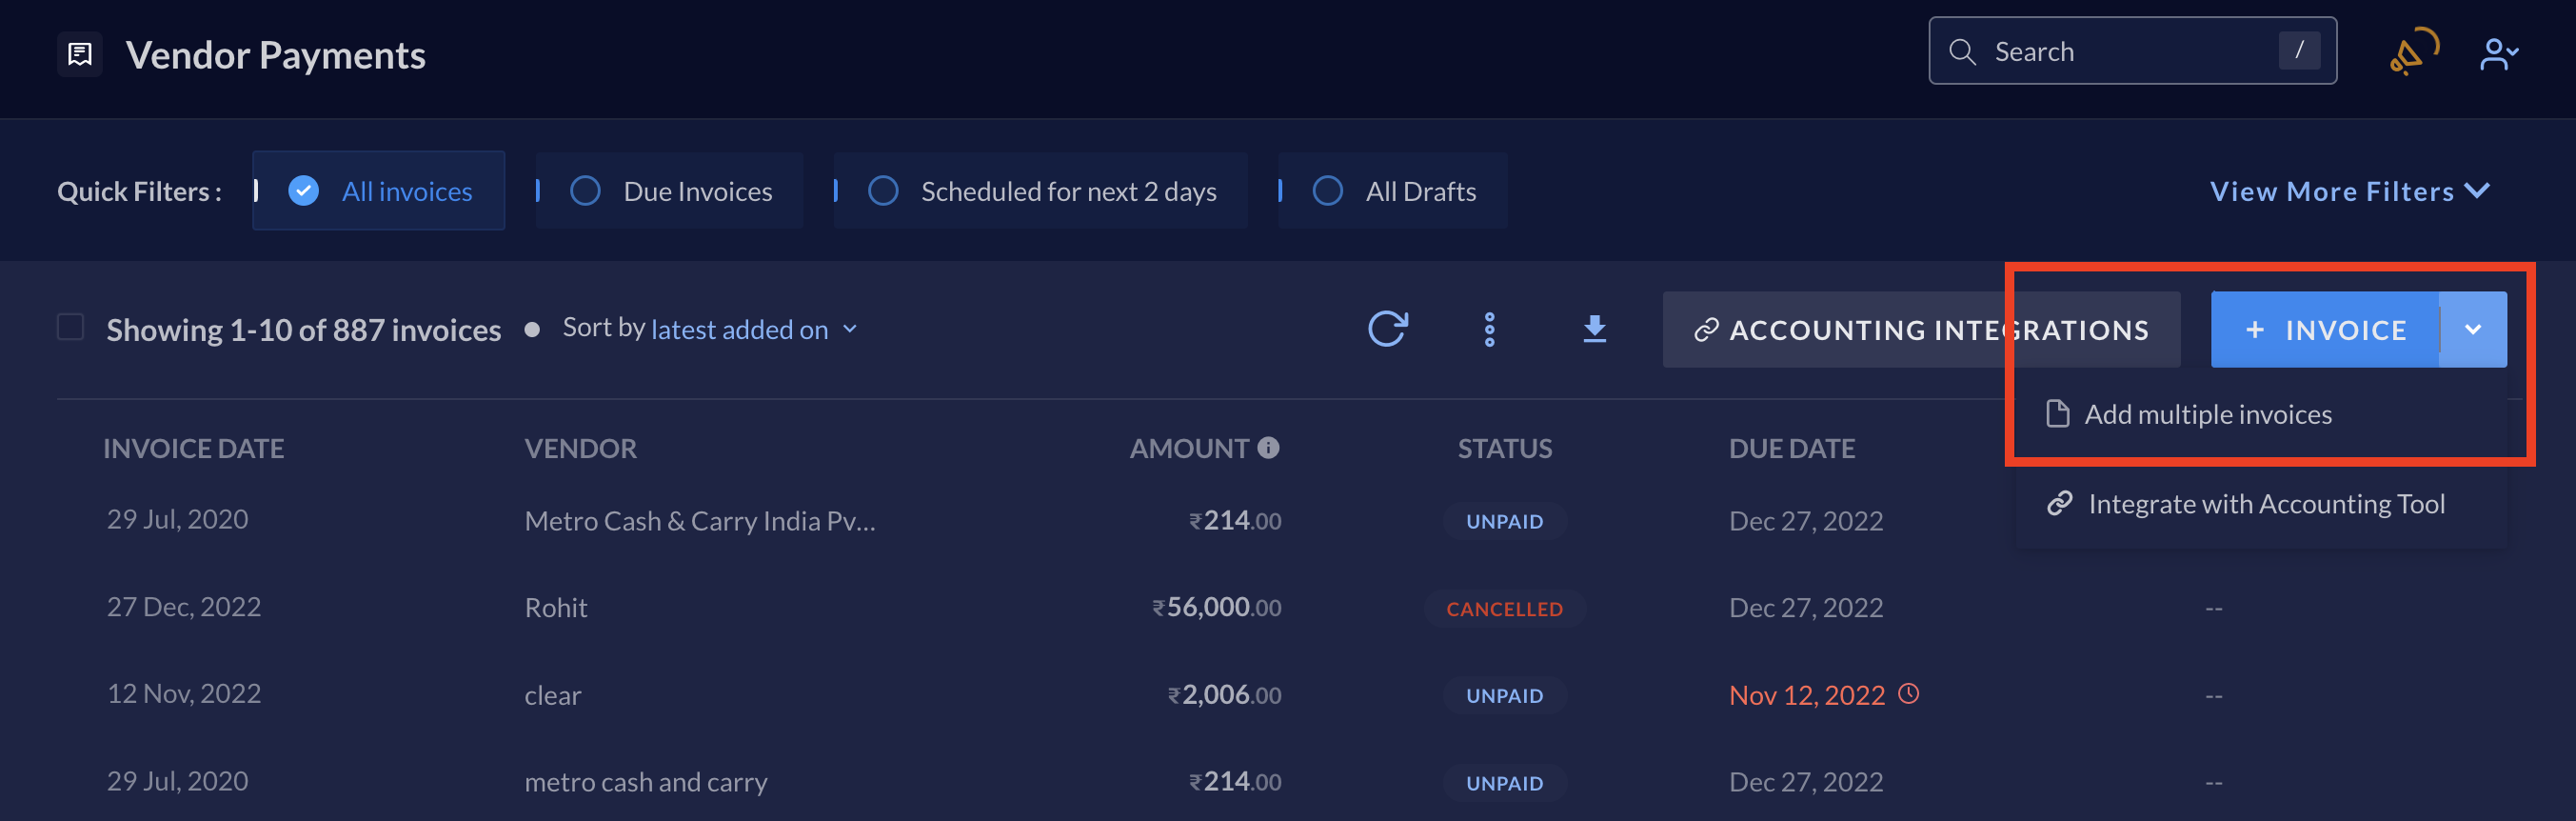
3. Click the drop-down icon in the  **+ INVOICE** button and click **Add multiple invoices** as shown below:
   <img class="click-zoom" src="https://razorpay.com/docs/build/browser/assets/images/x-bulk-invoices-add-multiple.jpg" width="800" alt="Add multiple invoices option in RazorpayX Vendor Payments" />
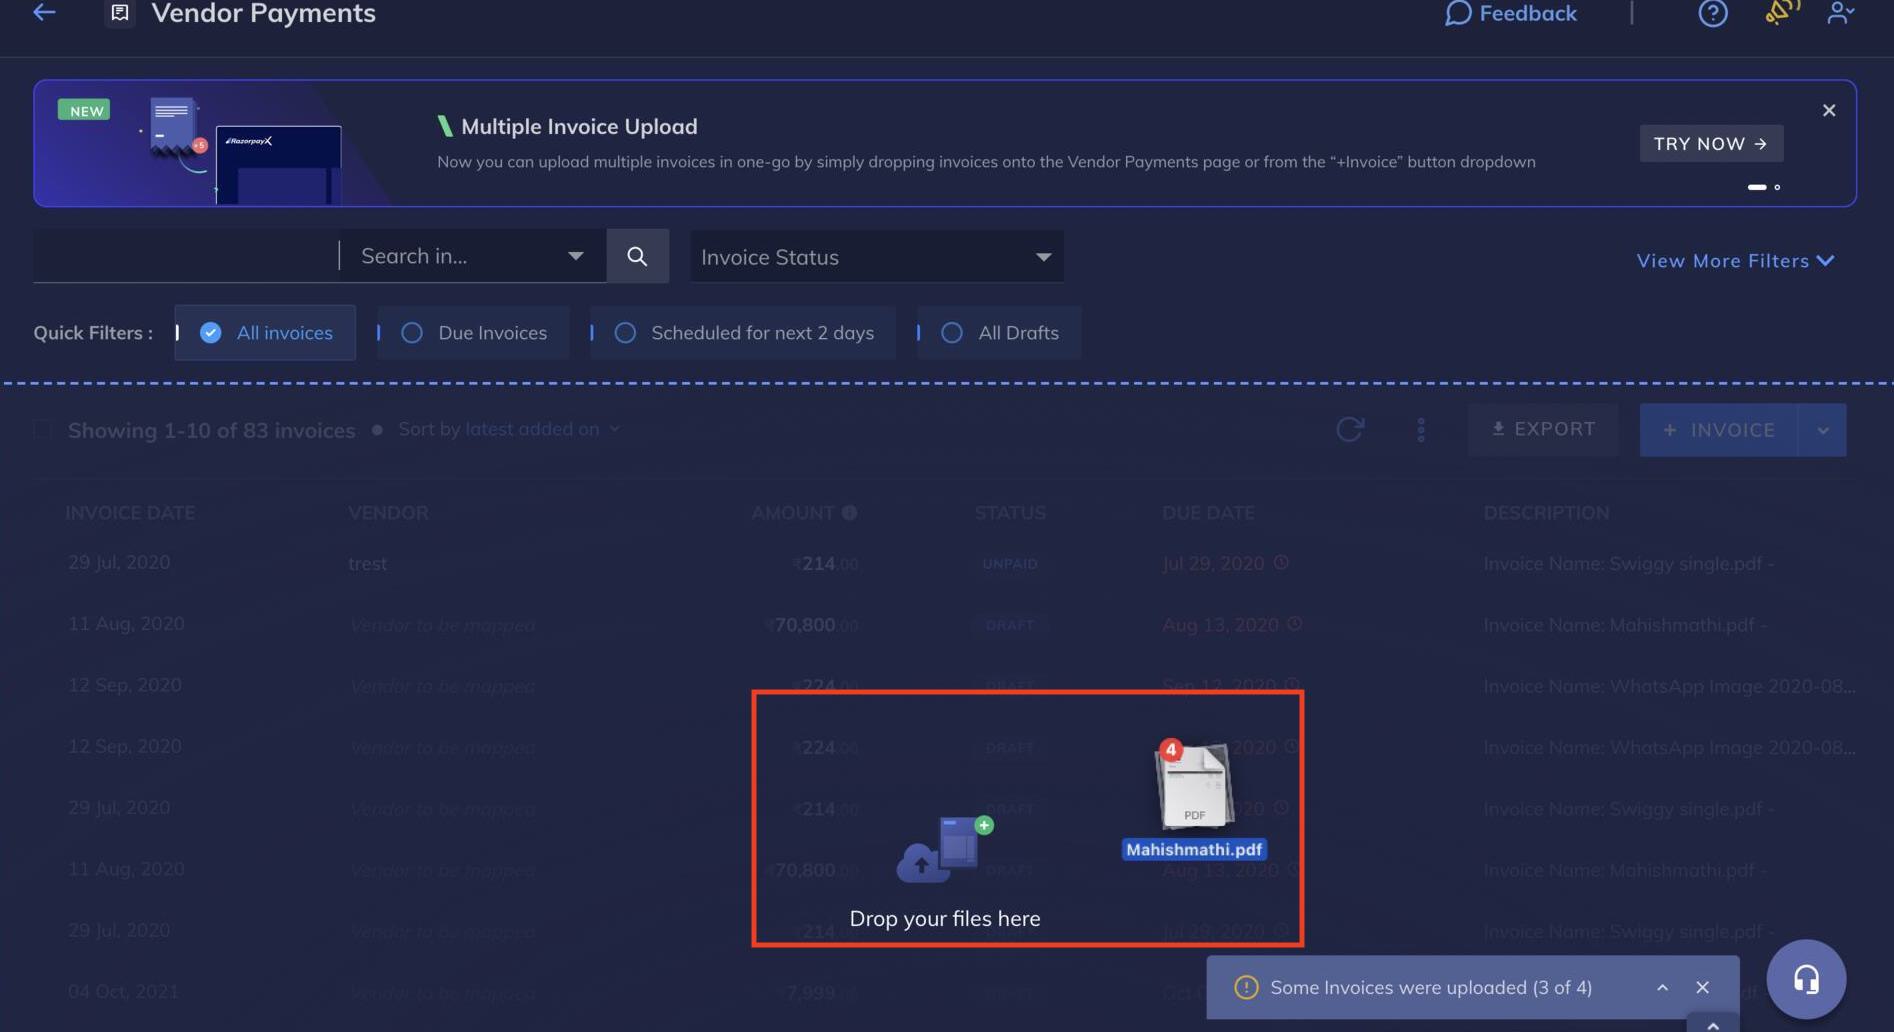
4. Alternatively, you can also drag and drop invoices from your computer to Vendor Payments as shown here:
   <img class="click-zoom" src="https://razorpay.com/docs/build/browser/assets/images/x-bulk-invoices-drag-drop.jpg" width="800" alt="Process depicting dragging a Mahishmati.pdf file into RazorpayX Dashboard" />

## Invoice Upload Status

The invoices are assigned `DRAFT` status after successful upload. You can add further details to these invoices by clicking **OPEN DRAFT** and proceed to add details using the **COMPLETE INVOICE** button.

* **Successful Upload**:
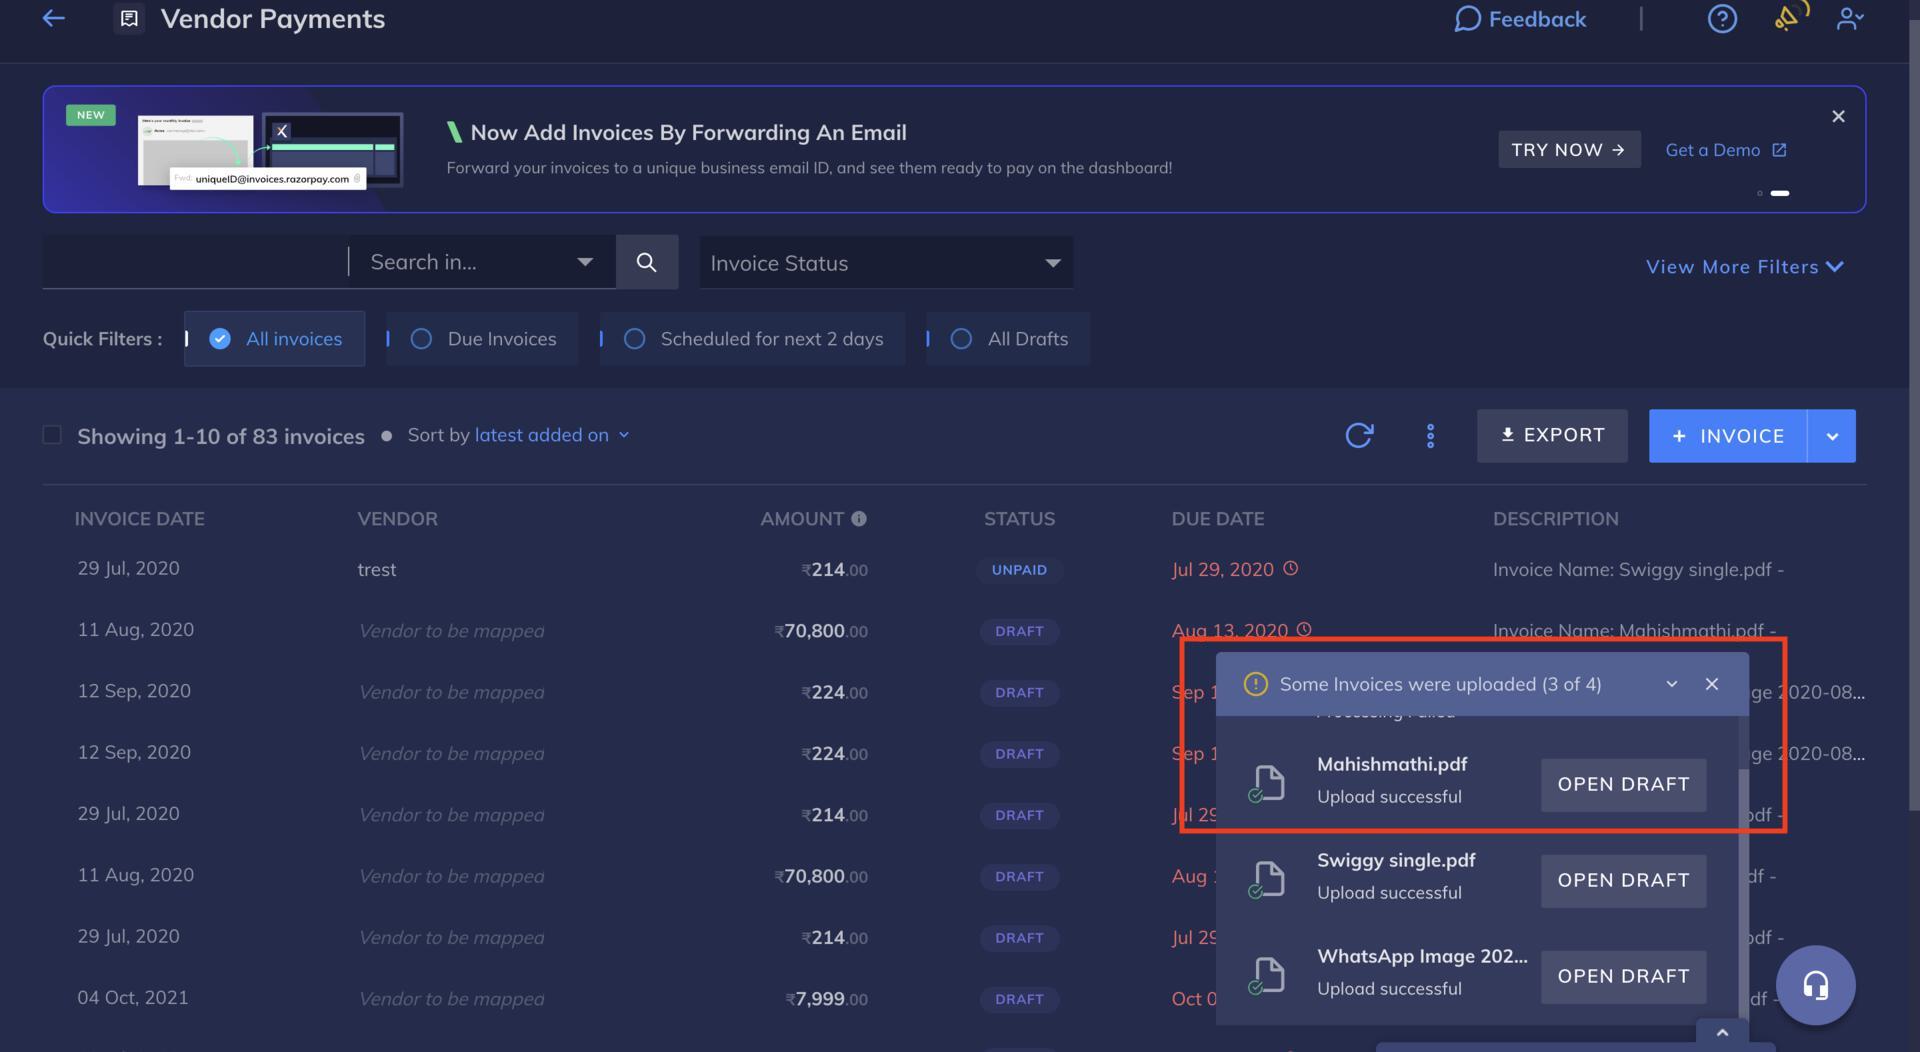
  The invoices are uploaded automatically and an **Upload successful** message is displayed as shown:
  <img class="click-zoom" src="https://razorpay.com/docs/build/browser/assets/images/x-bulk-invoices-upload-success.jpg" alt="Bulk Invoices Upload message against the file reading Upload Successful" width="800" />

* **Processing Failed**:
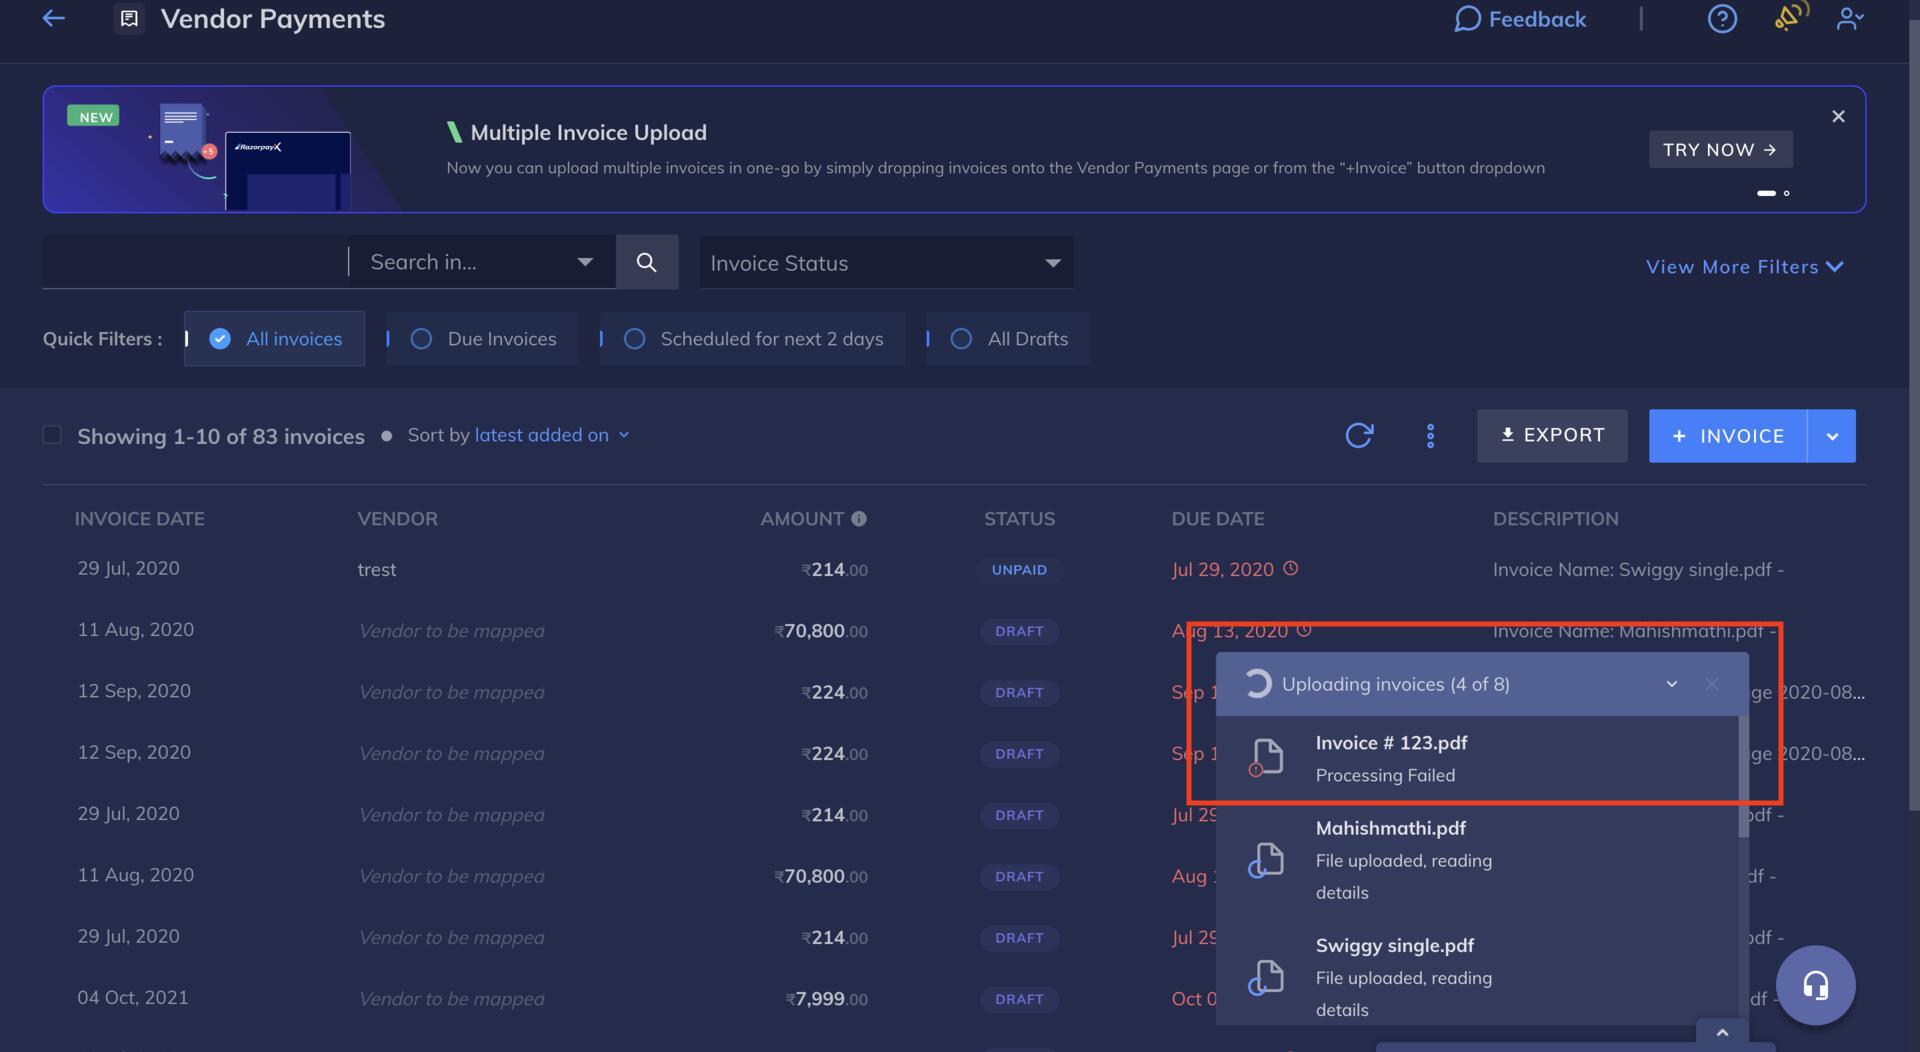
  If the invoices fail to upload for some reason, then a failure message is displayed as shown here:
  <img class="click-zoom" src="https://razorpay.com/docs/build/browser/assets/images/x-bulk-invoices-upload-failed.jpg" alt="Bulk Invoices Upload message against the file reading Processing Failed" width="800" />

### Related Information

* [Invoice Life Cycle](/docs/x/vendor-payments/life-cycle)
* [Vendor Reports](/docs/x/vendor-payments/reports)
* [Tally Accrual](/docs/x/vendor-payments/tally/sync-purchase-vouchers)
