> ## Documentation Index
> Fetch the complete documentation index at: https://razorpay-881012b3.mintlify.site/llms.txt
> Use this file to discover all available pages before exploring further.

# Input Tax Credit Checker

> RazorpayX automatically checks if your vendors have filed their GST, identify discrepancies in the filing and control your vendor payouts to recover previously lost credit dues.

<div style={{display:"flex",flexWrap:"wrap",alignItems:"center",gap:"0.35rem 0.9rem",border:"1px solid rgba(128,128,128,0.28)",borderRadius:"0.5rem",padding:"0.45rem 0.75rem",margin:"0 0 1.25rem",fontSize:"0.875rem"}}>
  <span style={{fontWeight:600}}>Available in</span>
  <span>🇮🇳 India</span>
</div>

Enabling GST Input Credit allows RazorpayX to use GSTR-2A data and check if your vendors have reported GST correctly and reports if there are discrepancies. This helps you optimise your GST input claim.

<Warning>
  **Watch Out!**

  This feature is available only for GST registered businesses. If you want to update your GSTIN on RazorpayX, [contact support](/docs/x/support).
</Warning>

## Set up GST Input Credit

To set up the GST Input Credit integration:

1. Log in to the [RazorpayX Dashboard](https://x.razorpay.com/auth).
2. Navigate to the profile icon at the top right and click **My Accounts & Settings** → **Integrations**.
3. Find **GST Input Credit** and click **Get Started**.
4. Log in to your [GST portal](https://gst.gov.in).<br />

<AccordionGroup>
  <Accordion title="GST Portal">
    After logging in to the GST portal, perform the following steps:

    1. Click **My Profile** on the GST dashboard.
    2. Navigate to **Quick Links** → **Manage API Access**.
    3. Select **Yes** to **Enable API Request**.
    4. Select **30 days** from the **Duration** drop-down and click **Confirm**.
  </Accordion>
</AccordionGroup>

5. Select the **I have completed above steps** checkbox and click **Next**.
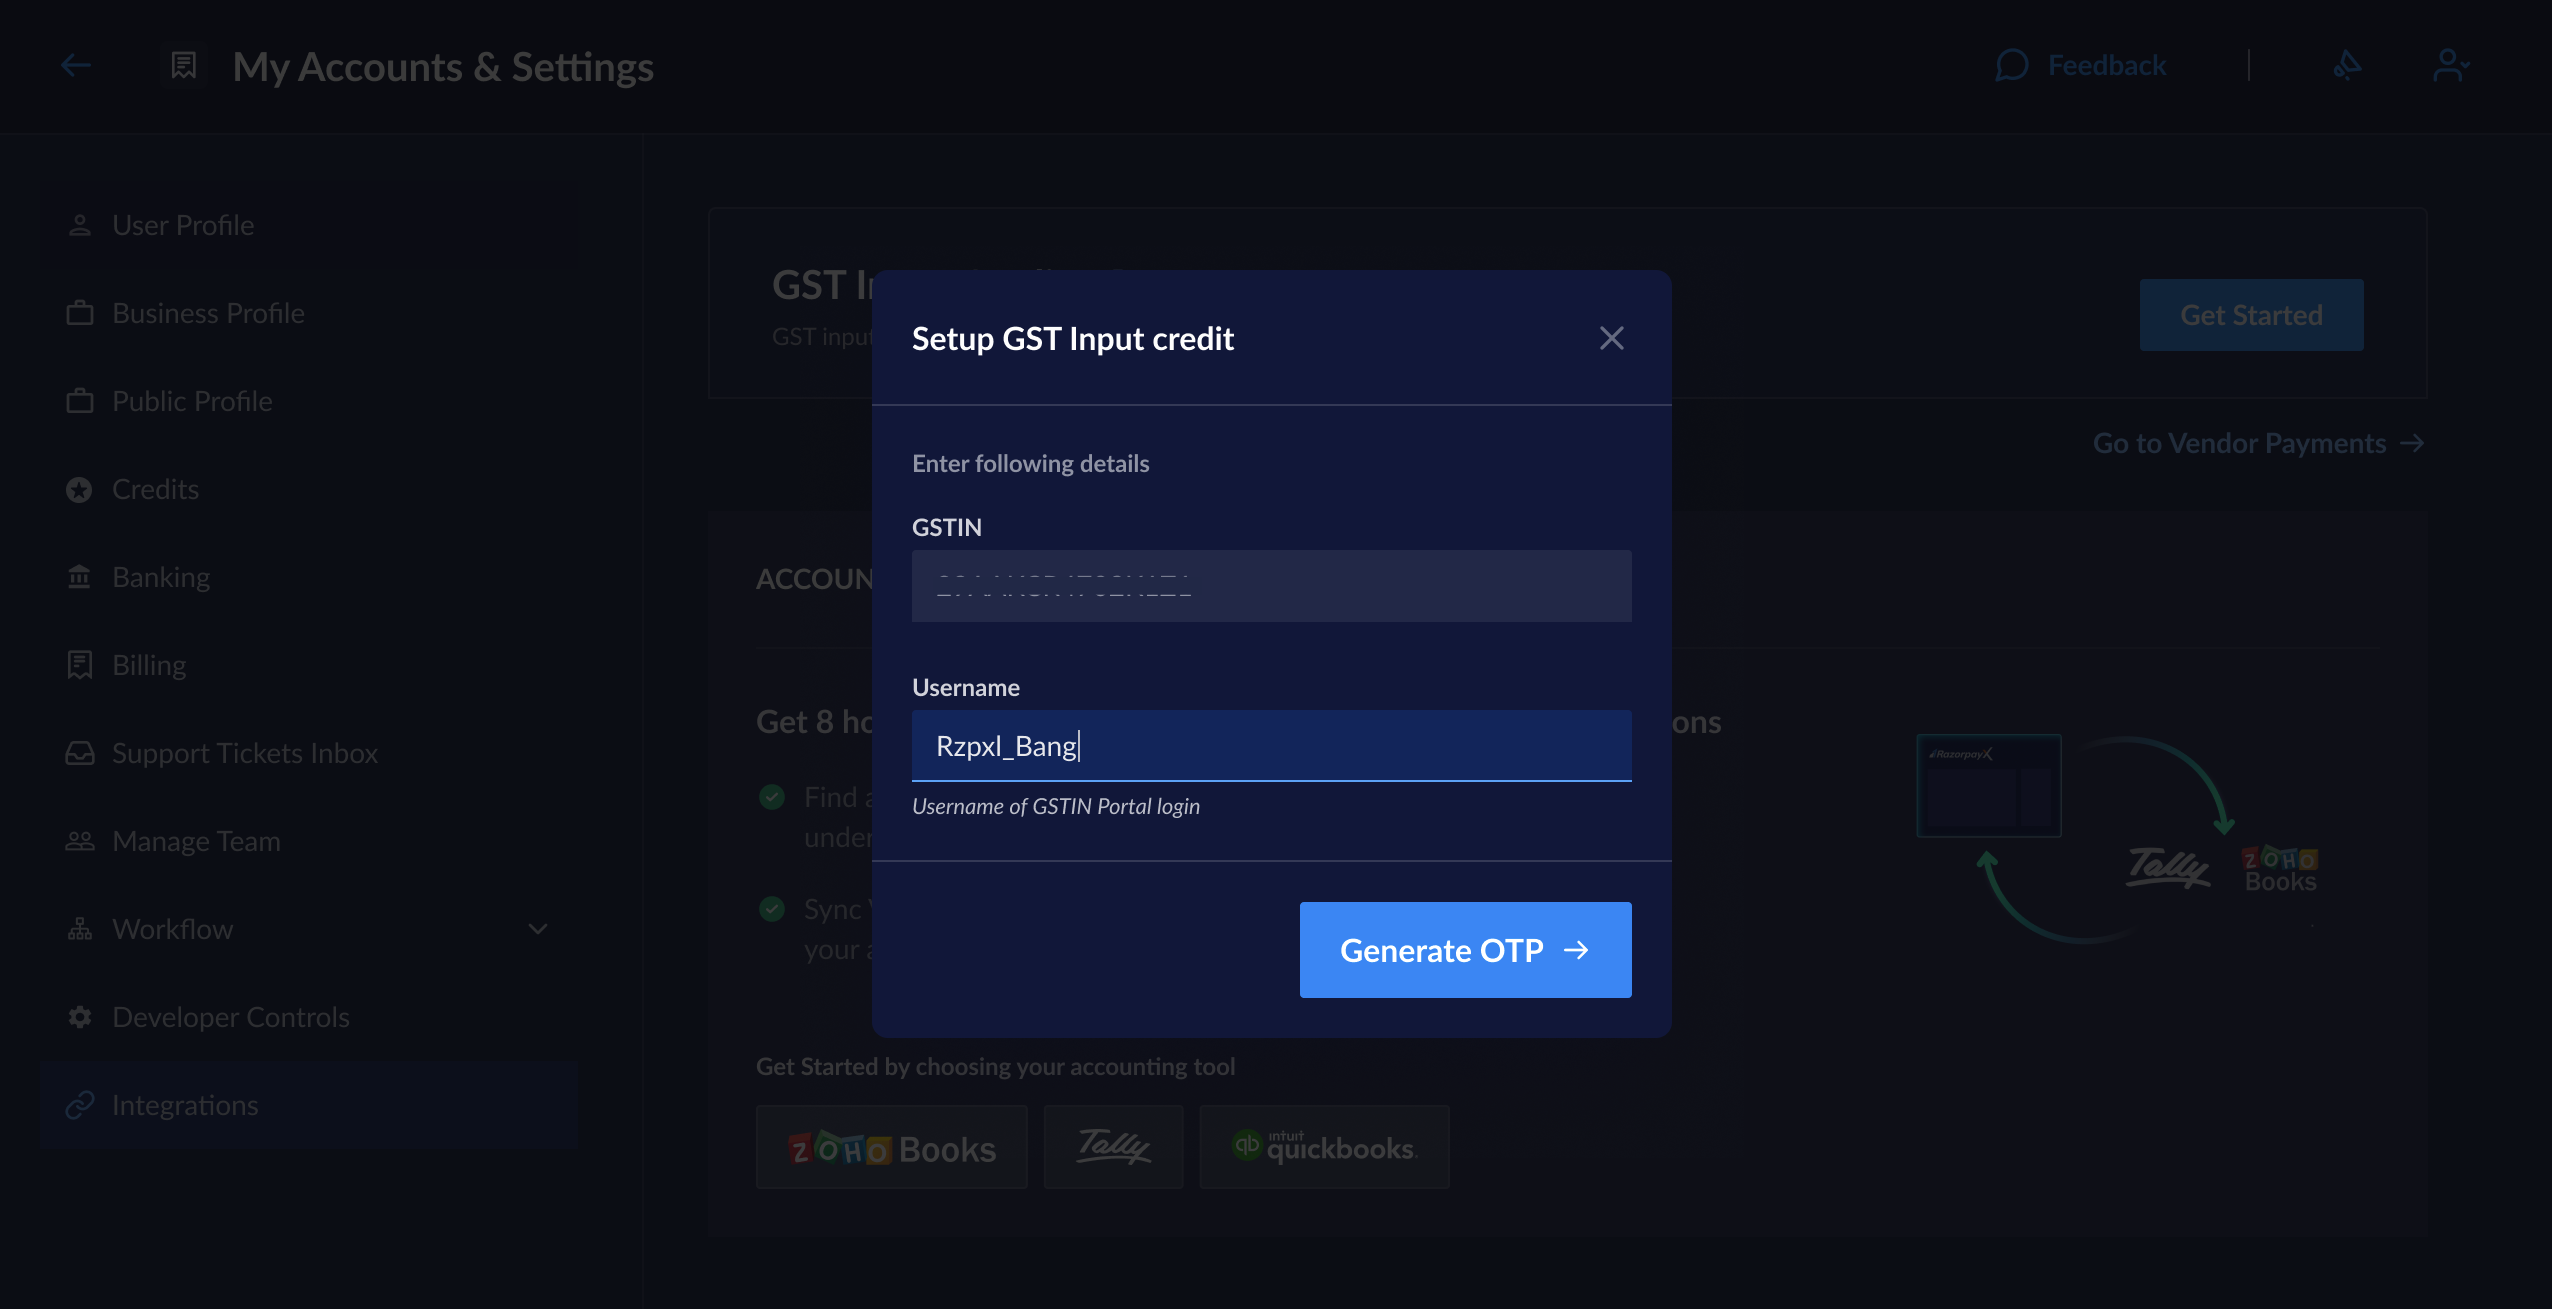
6. Your GSTIN is displayed. Enter the GSTIN portal **Username** and click **Generate OTP**.
   <img src="https://razorpay.com/docs/build/browser/assets/images/x-vp-gst-otp.jpg" alt="Generate OTP" width="800" />
7. Enter the OTP sent to your registered mobile number on the GSTIN portal and click **Next**.

As soon as you setup the GST credit checker, the data syncs for the current financial year. Post set up, the data syncs every 24 hours. You can also [manually refresh](/docs/x/vendor-payments/gst-credit-checker#refresh-gstr-2a-data) the data. The integration lasts for 30 days at once. After 30 days, you must [**Re-authenticate**](/docs/x/vendor-payments/gst-credit-checker#re-authenticate-gst-input-credit) for the system to access your GSTR-2A data. <br />
<AccordionGroup>
  <Accordion title="Re-authenticate GST Input Credit">
    <Info>
      **Handy Tips**

      You will receive an email and a Dashboard notification when re-authentication is required. You can directly re-authenticate from the banner or email, or you can follow the steps given below.
    </Info>

    To re-authenticate the GST Input Credit integration:

    1. Log in to the [RazorpayX Dashboard](https://x.razorpay.com/auth).
    2. Navigate to the profile icon at the top right and click **My Accounts & Settings** → **Integrations**.
    3. Find **GST Input Credit** and click **Re-authenticate**.
    4. Enter the GSTIN portal **Username** and click **Generate OTP**.
    5. Enter the OTP sent to your registered mobile number on the GSTIN portal and click **Next**.

    Your re-authentication is successful.
  </Accordion>
</AccordionGroup>

## GST Input Credit on Dashboard

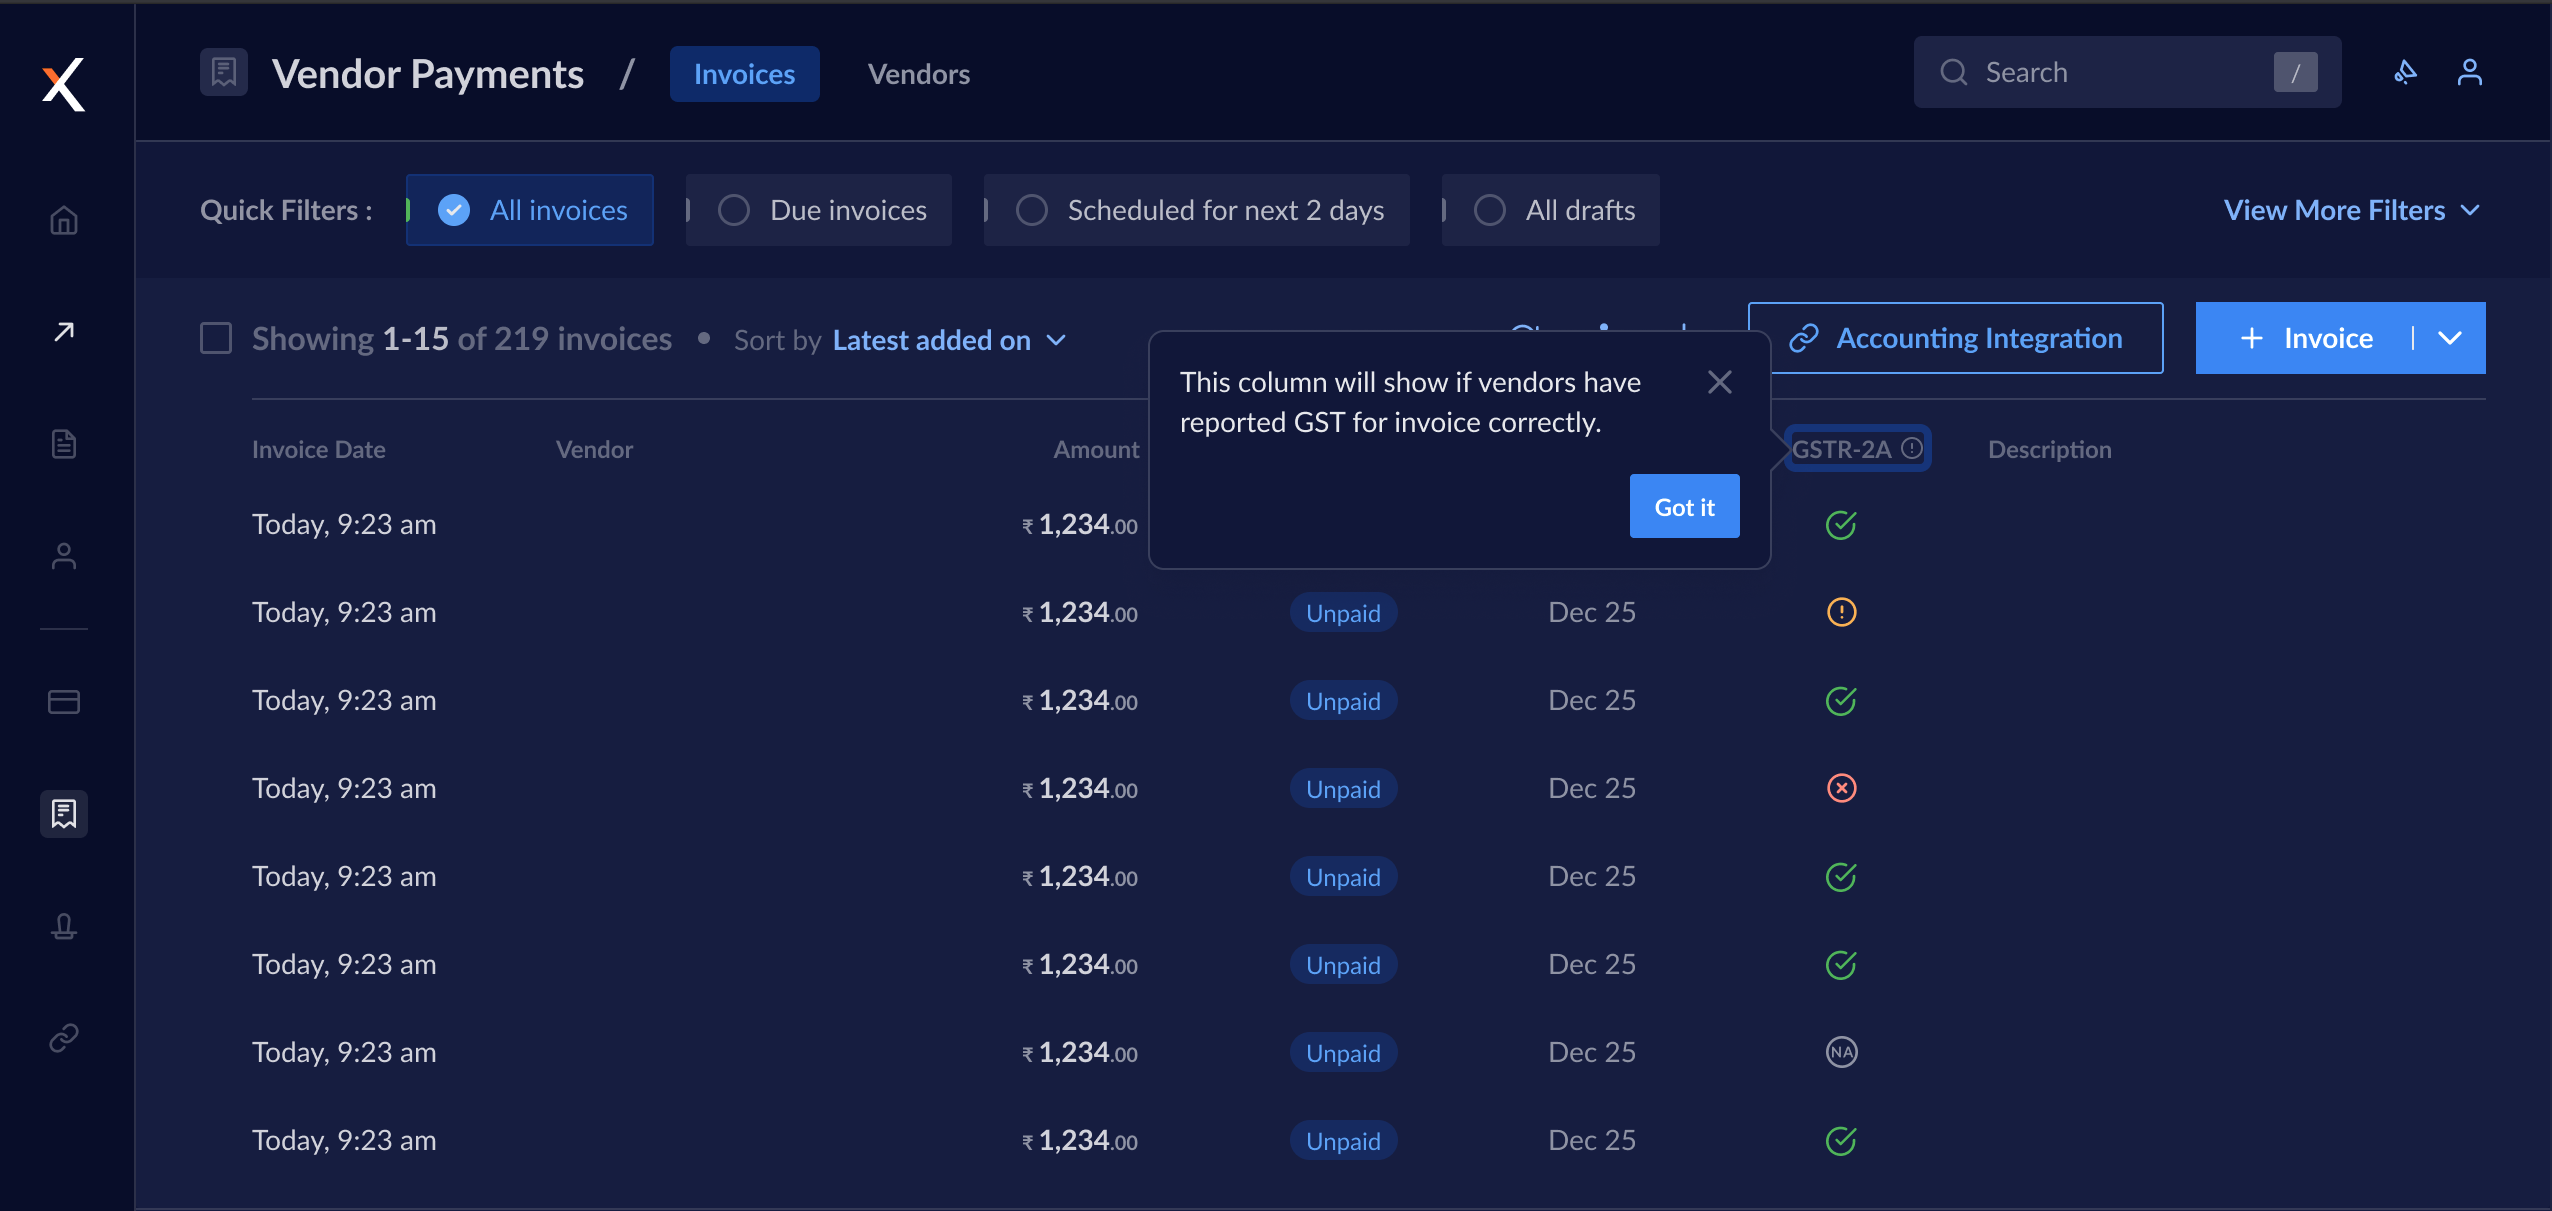
You can view whether the vendor has reported GST for the respective invoice on the [RazorpayX Dashboard](https://x.razorpay.com/auth) → **Vendor Payments** → **Invoices**. The GSTR-2A coloumn displays the status.

<img src="https://razorpay.com/docs/build/browser/assets/images/x-vp-gst-status.jpg" alt="GST status on RazorpayX dashboard" width="800" />

To view more information, select the required invoice. The relevant information is available in the right-pane.
<AccordionGroup>
  <Accordion title="Refresh GSTR-2A Data">
    To refresh the GSTR-2A data on RazorpayX Dashboard:

    1. Log in to the [RazorpayX Dashboard](https://x.razorpay.com/auth).
    2. Navigate to the profile icon at the top right and click **My Accounts & Settings** → **Integrations**.
    3. Find **GST Input Credit** and click **Refresh**.
  </Accordion>
</AccordionGroup>

## Disable GST Input Credit

To disable the GST Input Credit integration:

1. Log in to the [RazorpayX Dashboard](https://x.razorpay.com/auth).
2. Navigate to the profile icon at the top right and click **My Accounts & Settings** → **Integrations**.
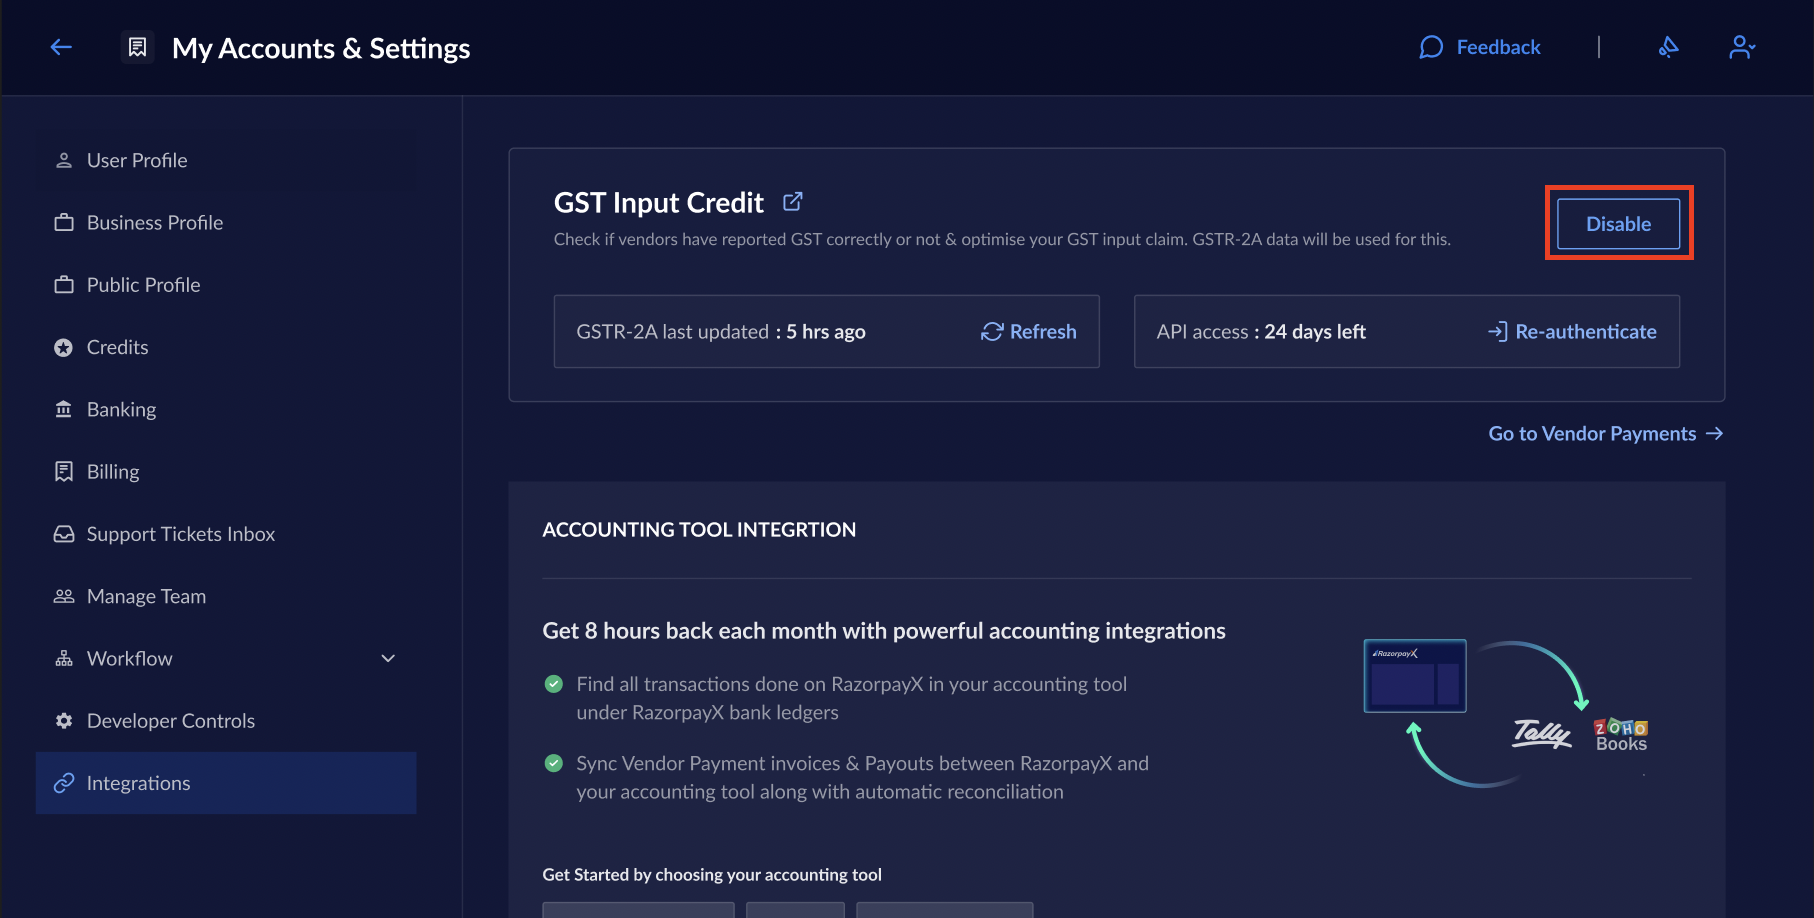
3. Find **GST Input Credit** and click **Disable**.
   <img src="https://razorpay.com/docs/build/browser/assets/images/x-vp-gst-disable.jpg" alt="Disable GST integration" width="800" />
4. In the pop-up, click **Disable**.

This integration is disabled.

## Related Information

* [Invoices](/docs/x/vendor-payments/invoices)
