> ## Documentation Index
> Fetch the complete documentation index at: https://razorpay-881012b3.mintlify.site/llms.txt
> Use this file to discover all available pages before exploring further.

# Invoices Approval Workflow

> Set up an approval workflow for your invoices through the cost center on the RazorpayX Dashboard.

<div style={{display:"flex",flexWrap:"wrap",alignItems:"center",gap:"0.35rem 0.9rem",border:"1px solid rgba(128,128,128,0.28)",borderRadius:"0.5rem",padding:"0.45rem 0.75rem",margin:"0 0 1.25rem",fontSize:"0.875rem"}}>
  <span style={{fontWeight:600}}>Available in</span>
  <span>🇮🇳 India</span>
</div>

This approval workflow is based on the [cost center](/docs/x/cost-centers) that you have linked to your invoice. You can add a cost center to your invoice at the time of creation and the workflow linked to that cost center for an invoice will become applicable to your invoice.

You can [contact support](/docs/x/support) to setup this approval workflow and assign it to relevant team members.

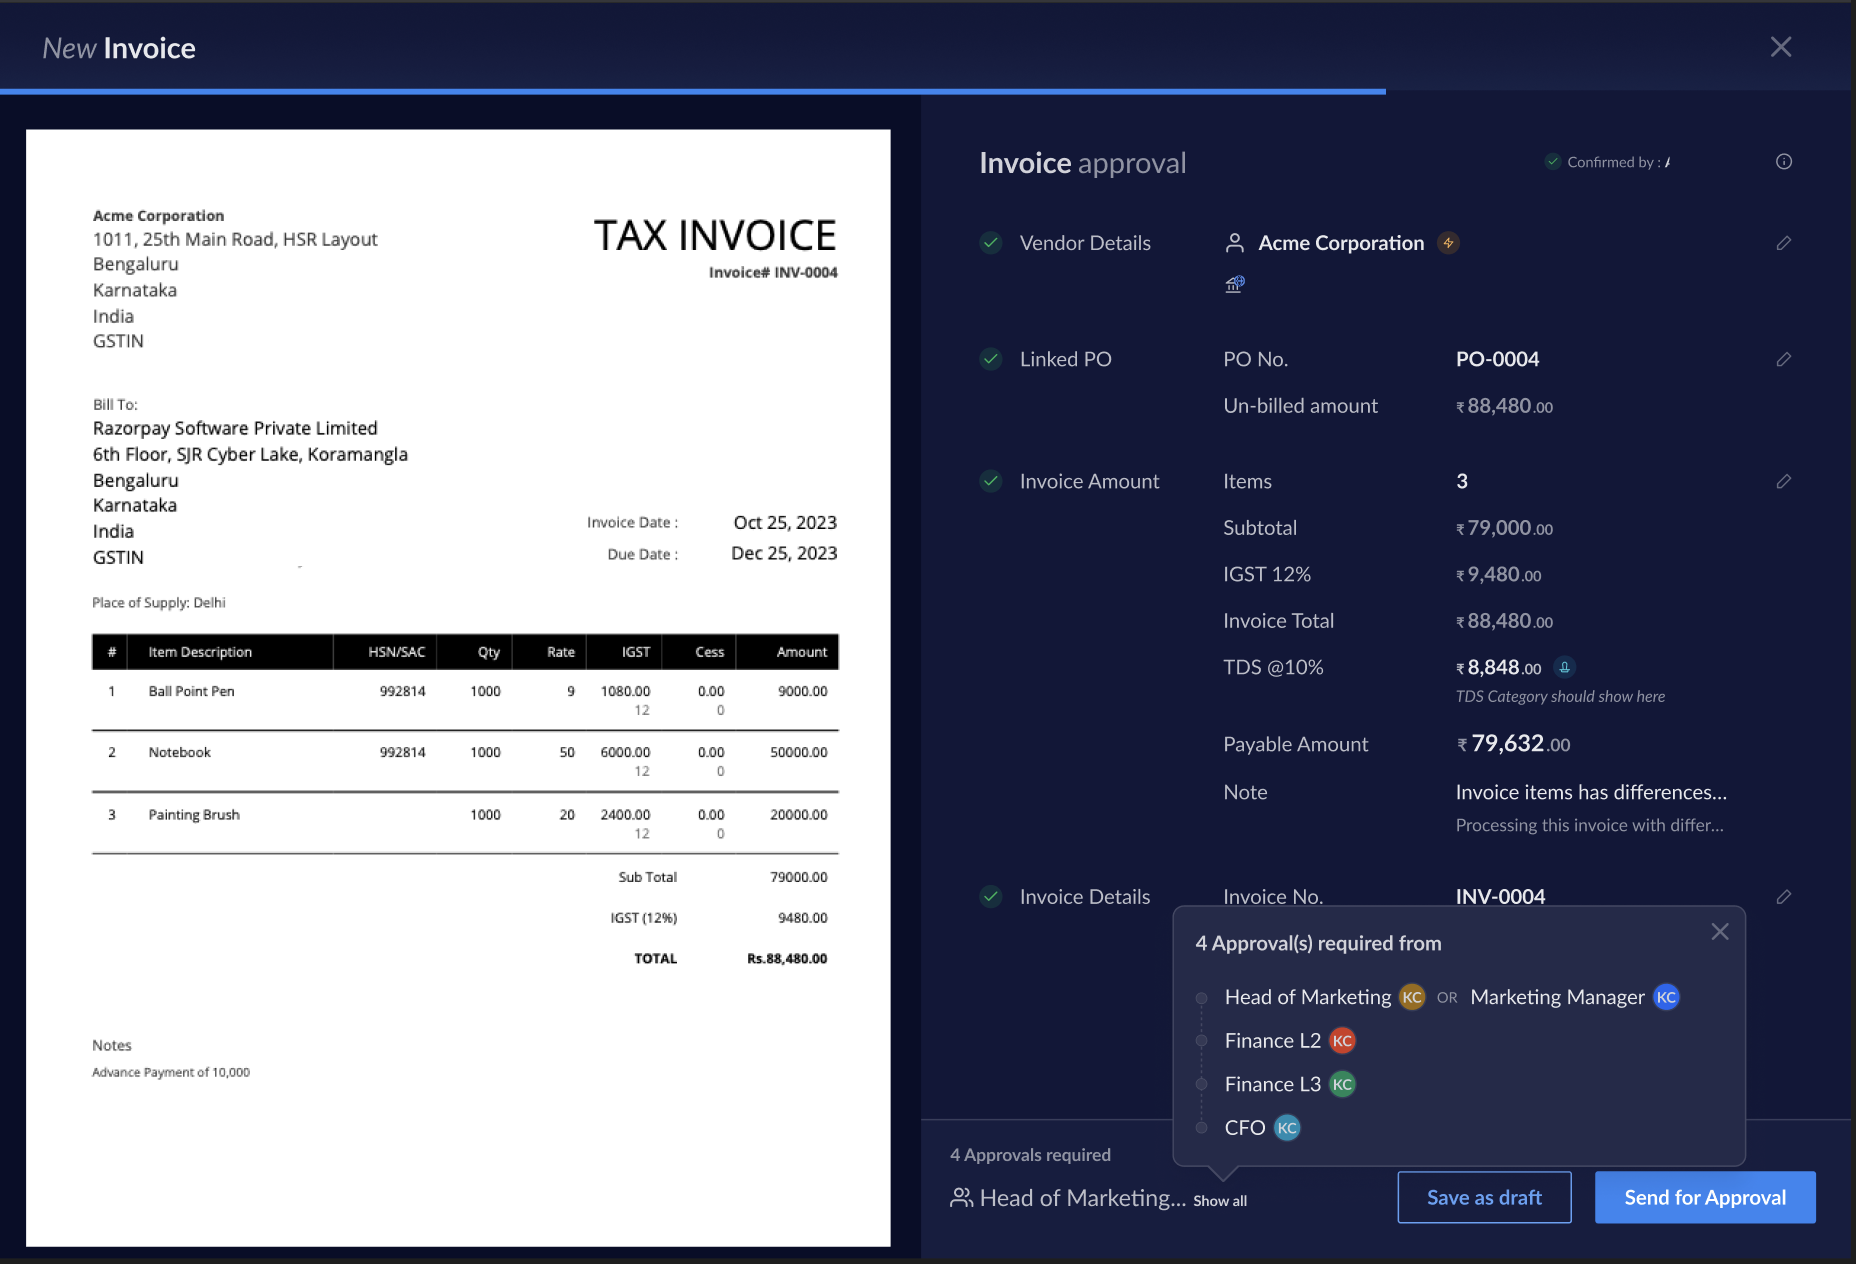
While [creating or adding an invoice](/docs/x/vendor-payments/invoices#add-invoices), you can **Link PO** and add a **Cost Center** in the **Invoice Details** section.

<img src="https://razorpay.com/docs/build/browser/assets/images/x-invoices-tag-cost-center.jpg" alt="specific and meaningful image title" width="800" />

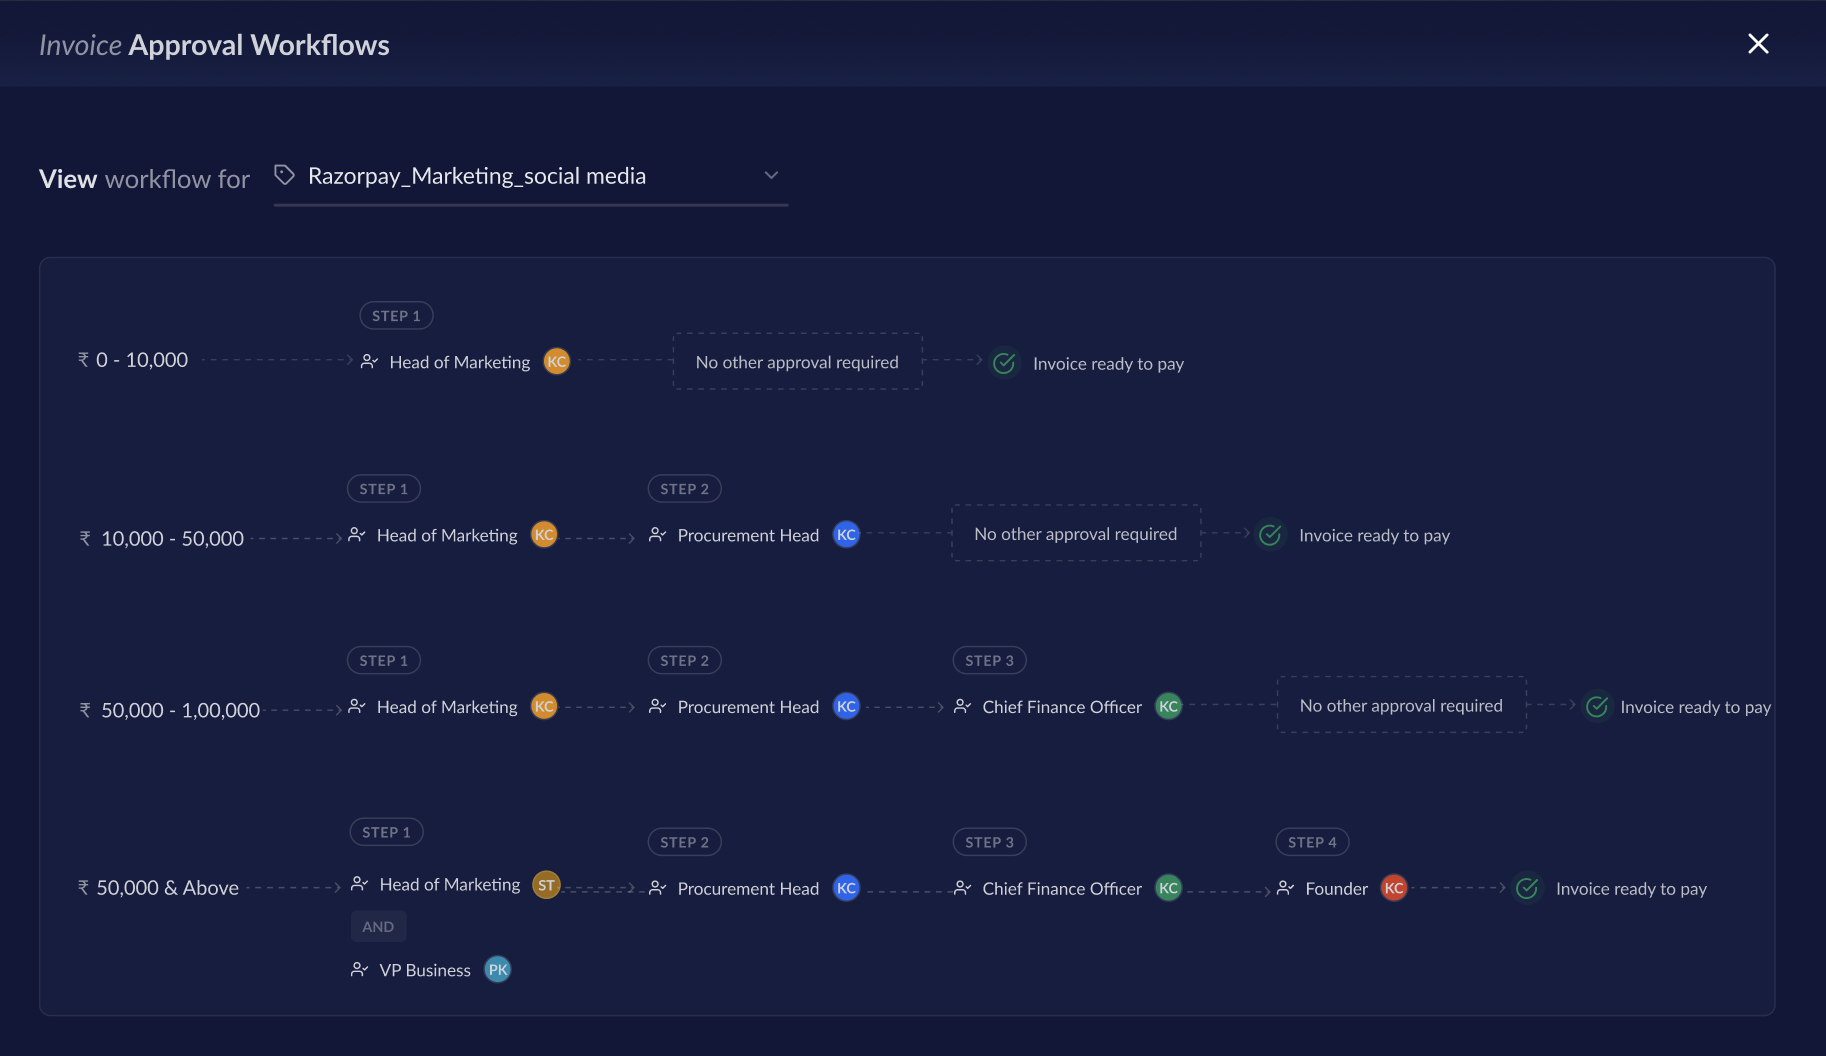
After adding the cost center when you review the final invoice details, you can hover over **Show all** at the right-bottom of your screen to view the set approval cycle. Click **Send for Approval**.

<img src="https://razorpay.com/docs/build/browser/assets/images/x-invoices-send-for-approval.jpg" alt="specific and meaningful image title" width="800" />

<AccordionGroup>
  <Accordion title="Approving an Invoice">
    To approve or reject an Invoice:

    1. Log in to the [RazorpayX Dashboard](https://x.razorpay.com/auth).

    <Info>
      **Handy Tips**

      You can either find the Invoices waiting for your approval on the Dashboard or follow the steps below.
    </Info>

    2. Navigate to **Vendor Payments** → **Invoices**.
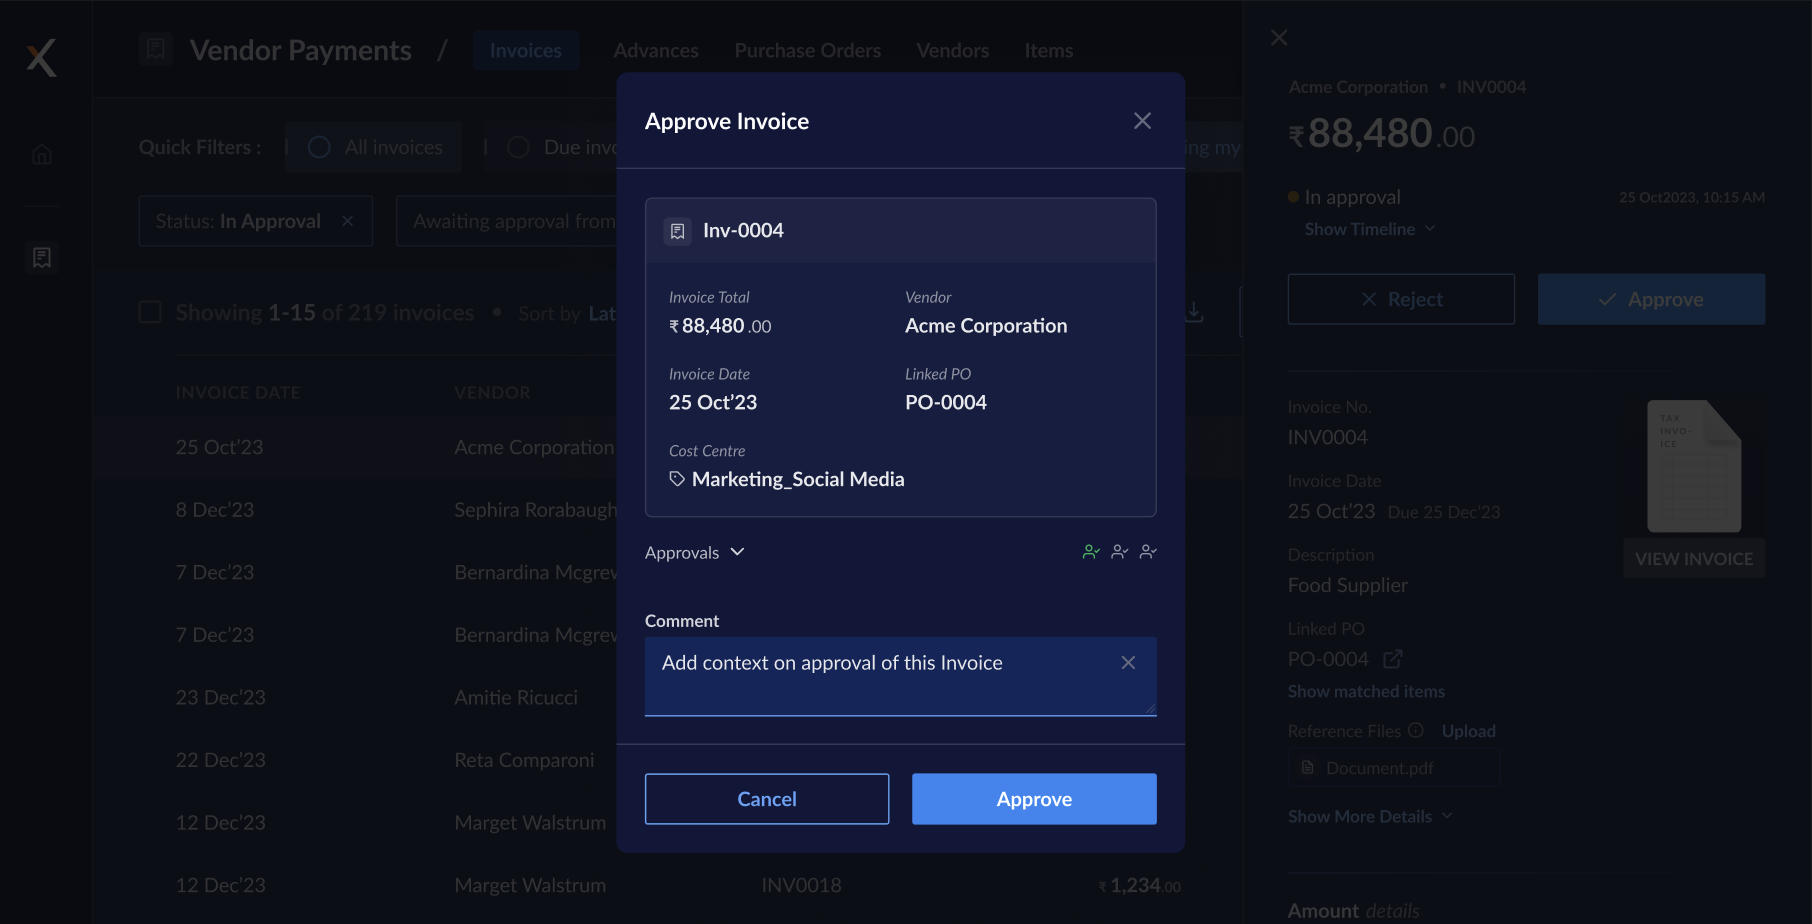
    3. Hover over the required Invoice `In Approval` and click **APPROVE** or **REJECT** or select it to view more details and click **APPROVE** or **REJECT** on the right-pane.
       1. If you click **APPROVE**, the following screen appears. Enter comments and click **Approve**.
              <img src="https://razorpay.com/docs/build/browser/assets/images/x-invoices-approve.jpg" alt="Approve purchase order" width="800" />
       2. If you click **REJECT**, enter the reason for rejection and click **Reject**.
  </Accordion>
</AccordionGroup>

Once your invoice is approved or rejected, you receive a mail from RazorpayX.

### View the Invoices Workflow

To view the approval workflow after the setup:

1. Log in to the [RazorpayX Dashboard](http://x.razorpay.com/auth).
2. Navigate to the profile icon → **My Accounts & Settings** → **Workflow** → **Invoices**.
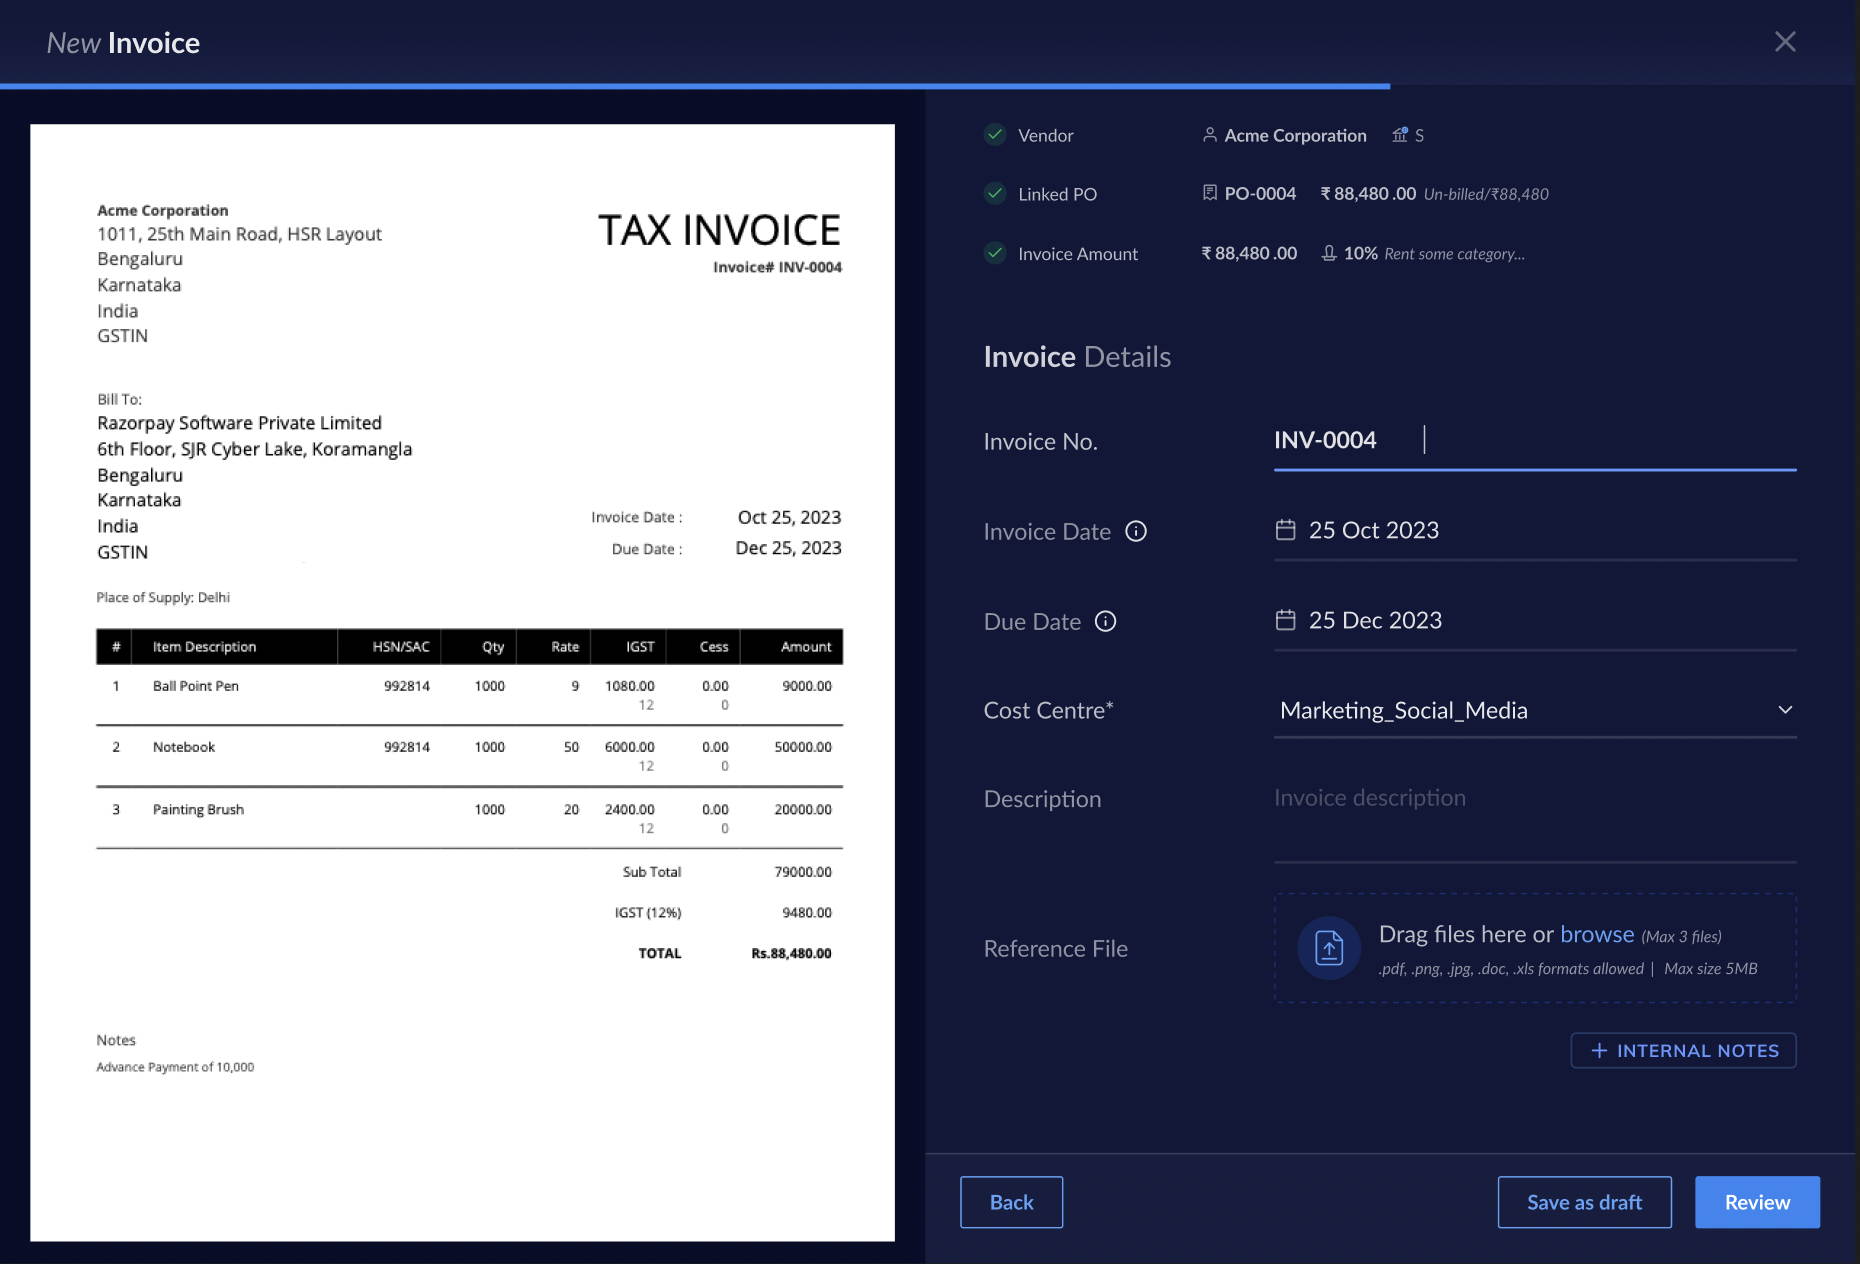
3. Click **View Workflows** and select the cost center for which you want to view the workflow.

<img src="https://razorpay.com/docs/build/browser/assets/images/x-invoices-workflow.jpg" alt="Invoices approval workflow" width="800" />

### Related Information

* [Purchase Orders](/docs/x/vendor-payments/purchase-order)