> ## Documentation Index
> Fetch the complete documentation index at: https://razorpay-881012b3.mintlify.site/llms.txt
> Use this file to discover all available pages before exploring further.
# Set Up Vendor Portal
> Let your vendors set up RazorpayX Vendor Portal to upload invoices for vendor payments and track them in one place.
Available in🇮🇳 India
The RazorpayX Vendor Portal is a platform created for your vendors where they can upload the invoices and receive updates of the payment upon your invitation. You can:
* Automate the collection of invoices from different vendors in one portal, eliminating the manual process.
* Save your time and help in better tracking of the vendor payments.
* `accept`, `reject`, `schedule` or `pay` the payment requests from vendors as per your convenience. The vendor is also notified of your action.
Watch this video to know how to set up the Vendor Portal or read along.
Following are the steps to set up and invite vendors to the Vendor Portal:
1. [Setup Vendor Portal](#setup-vendor-portal)
2. [Invite Vendors](#invite-vendors)
## Setup Vendor Portal
To setup the Vendor Portal:
1. Log in to the [RazorpayX Dashboard](https://x.razorpay.com/).
2. Click **Vendor Payments**.
3. Navigate to the three dots menu between the **Refresh** and **Download** icons and click **Setup Vendor Portal**.
4. Click **Setup Vendor Portal**.
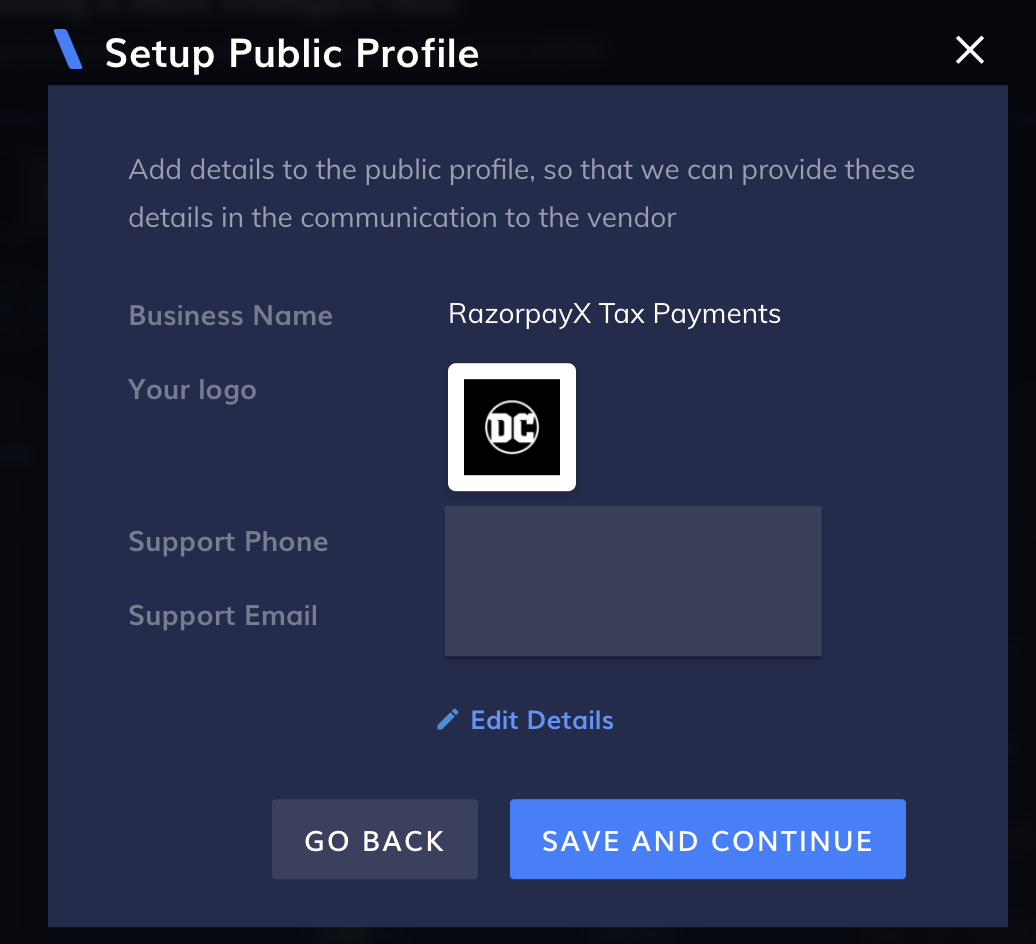
5. Review your public profile details that will be visible to the vendor:
* Business name
* Logo
* Phone
* Email
**Edit details** if required or click **Save And Continue**.
6. You can either **Invite all vendors** or **Select vendors** from the contact list. Only the [Contact type](/docs/x/contacts#contact-types) saved as **vendor** is eligible to use the portal.
## Invite Vendors
After you set up the portal, you can invite your vendors.
1. On your [RazorpayX Dashboard](https://x.razorpay.com/), navigate to **Menu** → **Contacts**.
2. Using Quick Filters, choose `vendor` as the contact type.
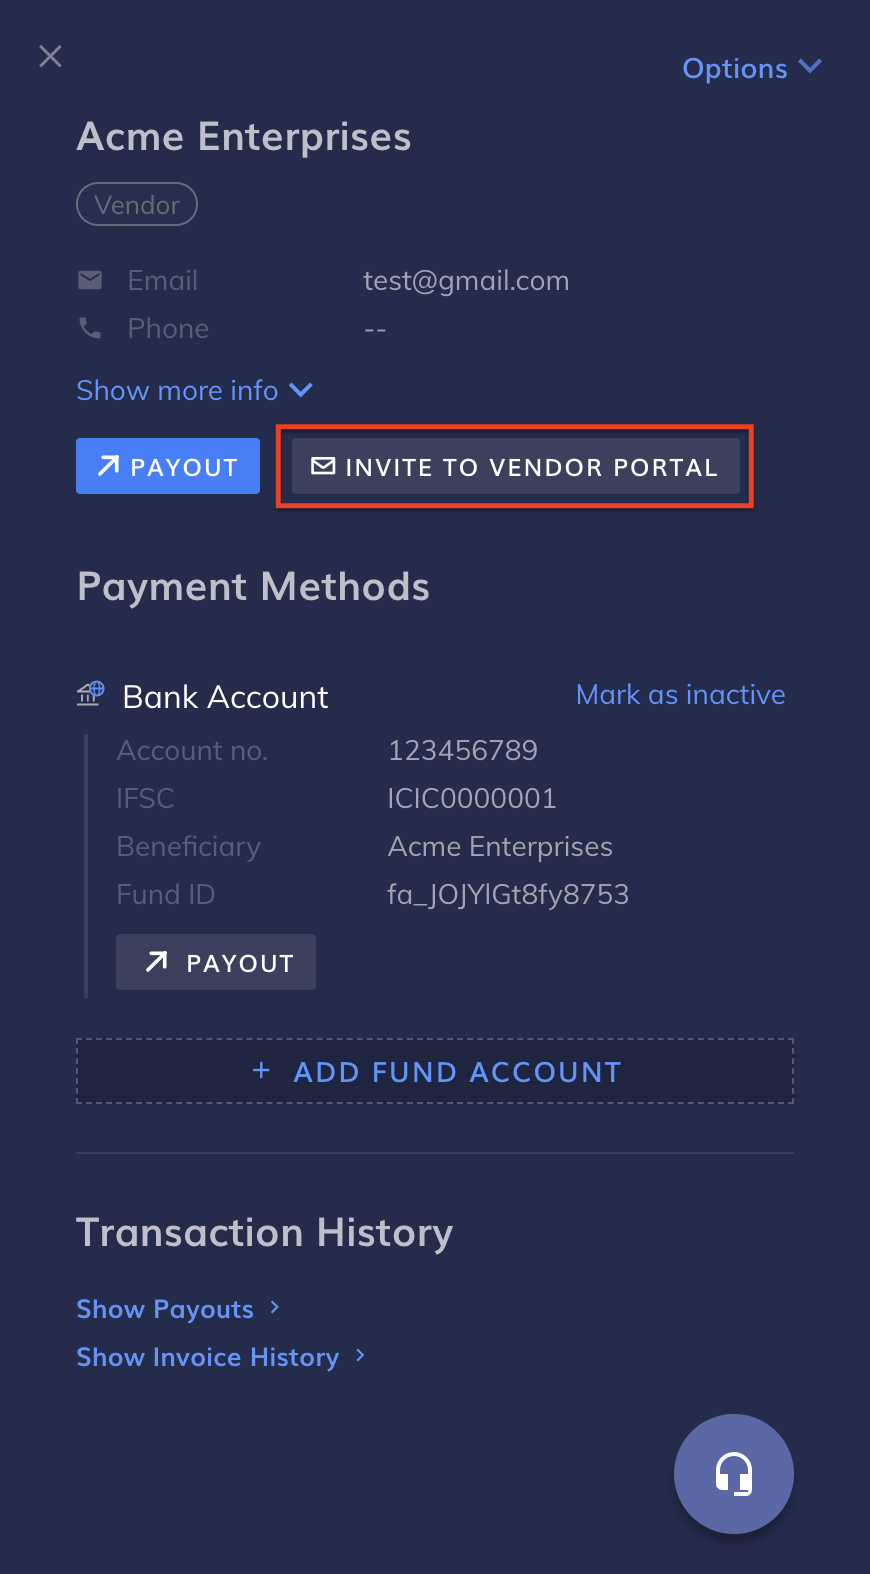
3. Select the contact that you want to invite to the portal. In the pop-up that appears to the right, click **Invite To Vendor Portal**, as shown.
When you do so, the vendor receives an invite on their email address. Once the vendor accepts the invite to join the portal, the label under their contact changes from **INVITE SENT** to **PORTAL ENABLED**.
**Handy Tips**
Check and share the url: [https://razorpay.com/docs/x/vendor-payments/portal](/docs/x/vendor-payments/portal) with your vendors for them to see the activities they can perform on the portal.
## Disable Portal
1. Select and open the `vendor` contact of whom you want to disable the portal.
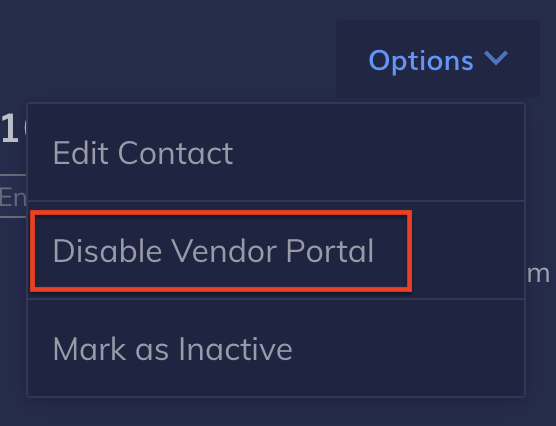
2. Click **Options**.
3. Click **Disable Vendor Portal**.
The vendor loses their access to the portal.
## Invoice Status
When the vendor makes a payment request, it is visible on your dashboard, under **Vendor Payments**.
Watch this video to know how to accept or reject invoices uploaded by your vendors, or read on.
1. Log in to the [RazorpayX Dashboard](https://x.razorpay.com/).
2. Click **Vendor Payments**.
3. Click **View More Filters** on the top right. Find **Source** and select **From Vendor Portal** to view only those invoices uploaded by vendors.
4. New requests have `PENDING REVIEW` status. Hover over the the payment to **ACCEPT** or **REJECT** the invoice. You can also click on the invoice to **ACCEPT INVOICE** or **REJECT** the payment.
5. **PAY** instantly or **SCHEDULE** the payment for later, based on your convenience.
When you accept the invoice, the invoice status changes from `pending review` to `unpaid`. When you make the payment, `unpaid` status moves to `paid`. If you have made the payment outside of RazorpayX Vendor Payment App, you can come back to this invoice and [mark it as paid](/docs/x/vendor-payments#mark-inovice-as-paid).
### Related Information
* [About Vendor Payments](/docs/x/vendor-payments)
* [Partial Payouts](/docs/x/vendor-payments/vendor-payouts/partial-payouts)
* [Scheduled Payouts](/docs/x/vendor-payments/vendor-payouts/scheduled-payouts)
* [Bulk Payouts](/docs/x/vendor-payments/vendor-payouts/bulk)
 When you do so, the vendor receives an invite on their email address. Once the vendor accepts the invite to join the portal, the label under their contact changes from **INVITE SENT** to **PORTAL ENABLED**.
 3. Click **Disable Vendor Portal**.
The vendor loses their access to the portal.
## Invoice Status
When the vendor makes a payment request, it is visible on your dashboard, under **Vendor Payments**.
Watch this video to know how to accept or reject invoices uploaded by your vendors, or read on.
1. Log in to the [RazorpayX Dashboard](https://x.razorpay.com/).
2. Click **Vendor Payments**.
3. Click **View More Filters** on the top right. Find **Source** and select **From Vendor Portal** to view only those invoices uploaded by vendors.
4. New requests have `PENDING REVIEW` status. Hover over the the payment to **ACCEPT** or **REJECT** the invoice. You can also click on the invoice to **ACCEPT INVOICE** or **REJECT** the payment.
5. **PAY** instantly or **SCHEDULE** the payment for later, based on your convenience.
When you accept the invoice, the invoice status changes from `pending review` to `unpaid`. When you make the payment, `unpaid` status moves to `paid`. If you have made the payment outside of RazorpayX Vendor Payment App, you can come back to this invoice and [mark it as paid](/docs/x/vendor-payments#mark-inovice-as-paid).
### Related Information
* [About Vendor Payments](/docs/x/vendor-payments)
* [Partial Payouts](/docs/x/vendor-payments/vendor-payouts/partial-payouts)
* [Scheduled Payouts](/docs/x/vendor-payments/vendor-payouts/scheduled-payouts)
* [Bulk Payouts](/docs/x/vendor-payments/vendor-payouts/bulk)
3. Click **Disable Vendor Portal**.
The vendor loses their access to the portal.
## Invoice Status
When the vendor makes a payment request, it is visible on your dashboard, under **Vendor Payments**.
Watch this video to know how to accept or reject invoices uploaded by your vendors, or read on.
1. Log in to the [RazorpayX Dashboard](https://x.razorpay.com/).
2. Click **Vendor Payments**.
3. Click **View More Filters** on the top right. Find **Source** and select **From Vendor Portal** to view only those invoices uploaded by vendors.
4. New requests have `PENDING REVIEW` status. Hover over the the payment to **ACCEPT** or **REJECT** the invoice. You can also click on the invoice to **ACCEPT INVOICE** or **REJECT** the payment.
5. **PAY** instantly or **SCHEDULE** the payment for later, based on your convenience.
When you accept the invoice, the invoice status changes from `pending review` to `unpaid`. When you make the payment, `unpaid` status moves to `paid`. If you have made the payment outside of RazorpayX Vendor Payment App, you can come back to this invoice and [mark it as paid](/docs/x/vendor-payments#mark-inovice-as-paid).
### Related Information
* [About Vendor Payments](/docs/x/vendor-payments)
* [Partial Payouts](/docs/x/vendor-payments/vendor-payouts/partial-payouts)
* [Scheduled Payouts](/docs/x/vendor-payments/vendor-payouts/scheduled-payouts)
* [Bulk Payouts](/docs/x/vendor-payments/vendor-payouts/bulk)