> ## Documentation Index
> Fetch the complete documentation index at: https://razorpay-881012b3.mintlify.site/llms.txt
> Use this file to discover all available pages before exploring further.
# Partial Payouts
> Make and understand how partial payouts work on RazorpayX Vendor Payments.
Available in
🇮🇳 India
Using RazorpayX, you can make partial payouts on a given invoice. The Partial Payouts feature eliminates the need for mulitple invoices and allows you to make many smaller payments on the same invoice.
## How it Works
Here is a typical business use case that explains how partial payments work:
1. You receive either a **proforma invoice** (an invoice which is provided before delivery of the goods/services) or **payment terms** (details of advances, due date, delivery date, and so on) before accepting/confirming the order.
2. Create a vendor payment with or without uploading a proforma invoice.
3. Pay an advance to the vendor based on payment terms.
4. You receive a second invoice post-delivery of goods/services.
5. Replace/Upload the latest invoice after receiving it.
6. Make a partial payment because one of the goods was not delivered or because of service quality issues.
7. The vendor rectifies/completes the pending transaction and sends an updated invoice.
8. Pay the remaining amount to match the new invoice amount.
## Make Partial Payouts
To make a partial payout:
1. Log in to your [RazorpayX Dashboard](https://x.razorpay.com/).
2. Navigate to **Menu** → **Vendor Payments**.
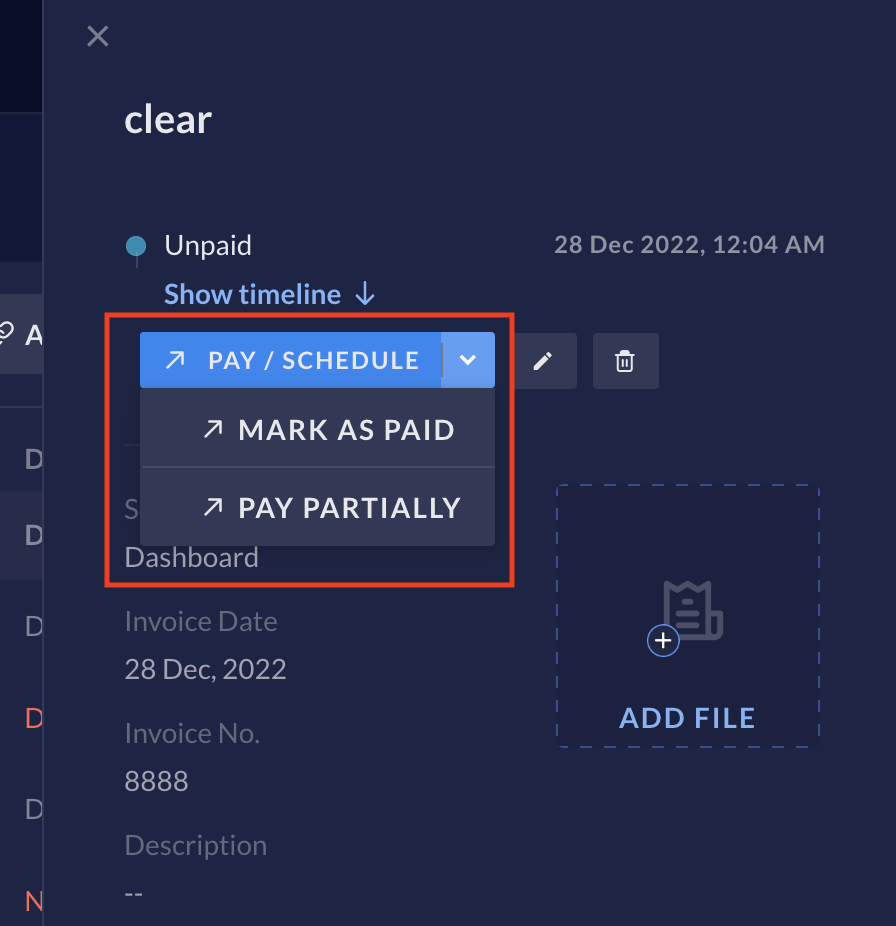
3. Select the invoice you want to pay partially. A pop-up screen appears to the right side of the screen.
4. In this window, click or hover over the options arrow next to the **PAY/SCHEDULE** button for the drop-down menu to appear. Here, click **PAY PARTIALLY**.
 5. You must now create a payout.
* In the **New Payout** window, enter the Contact's valid details and [create a Fund Account](/docs/x/fund-accounts#create-a-contact-with-fund-account) if the Contact doesn't have one. You can also select the [Contact type](/docs/x/contacts#contact-types) to be `Vendor`.
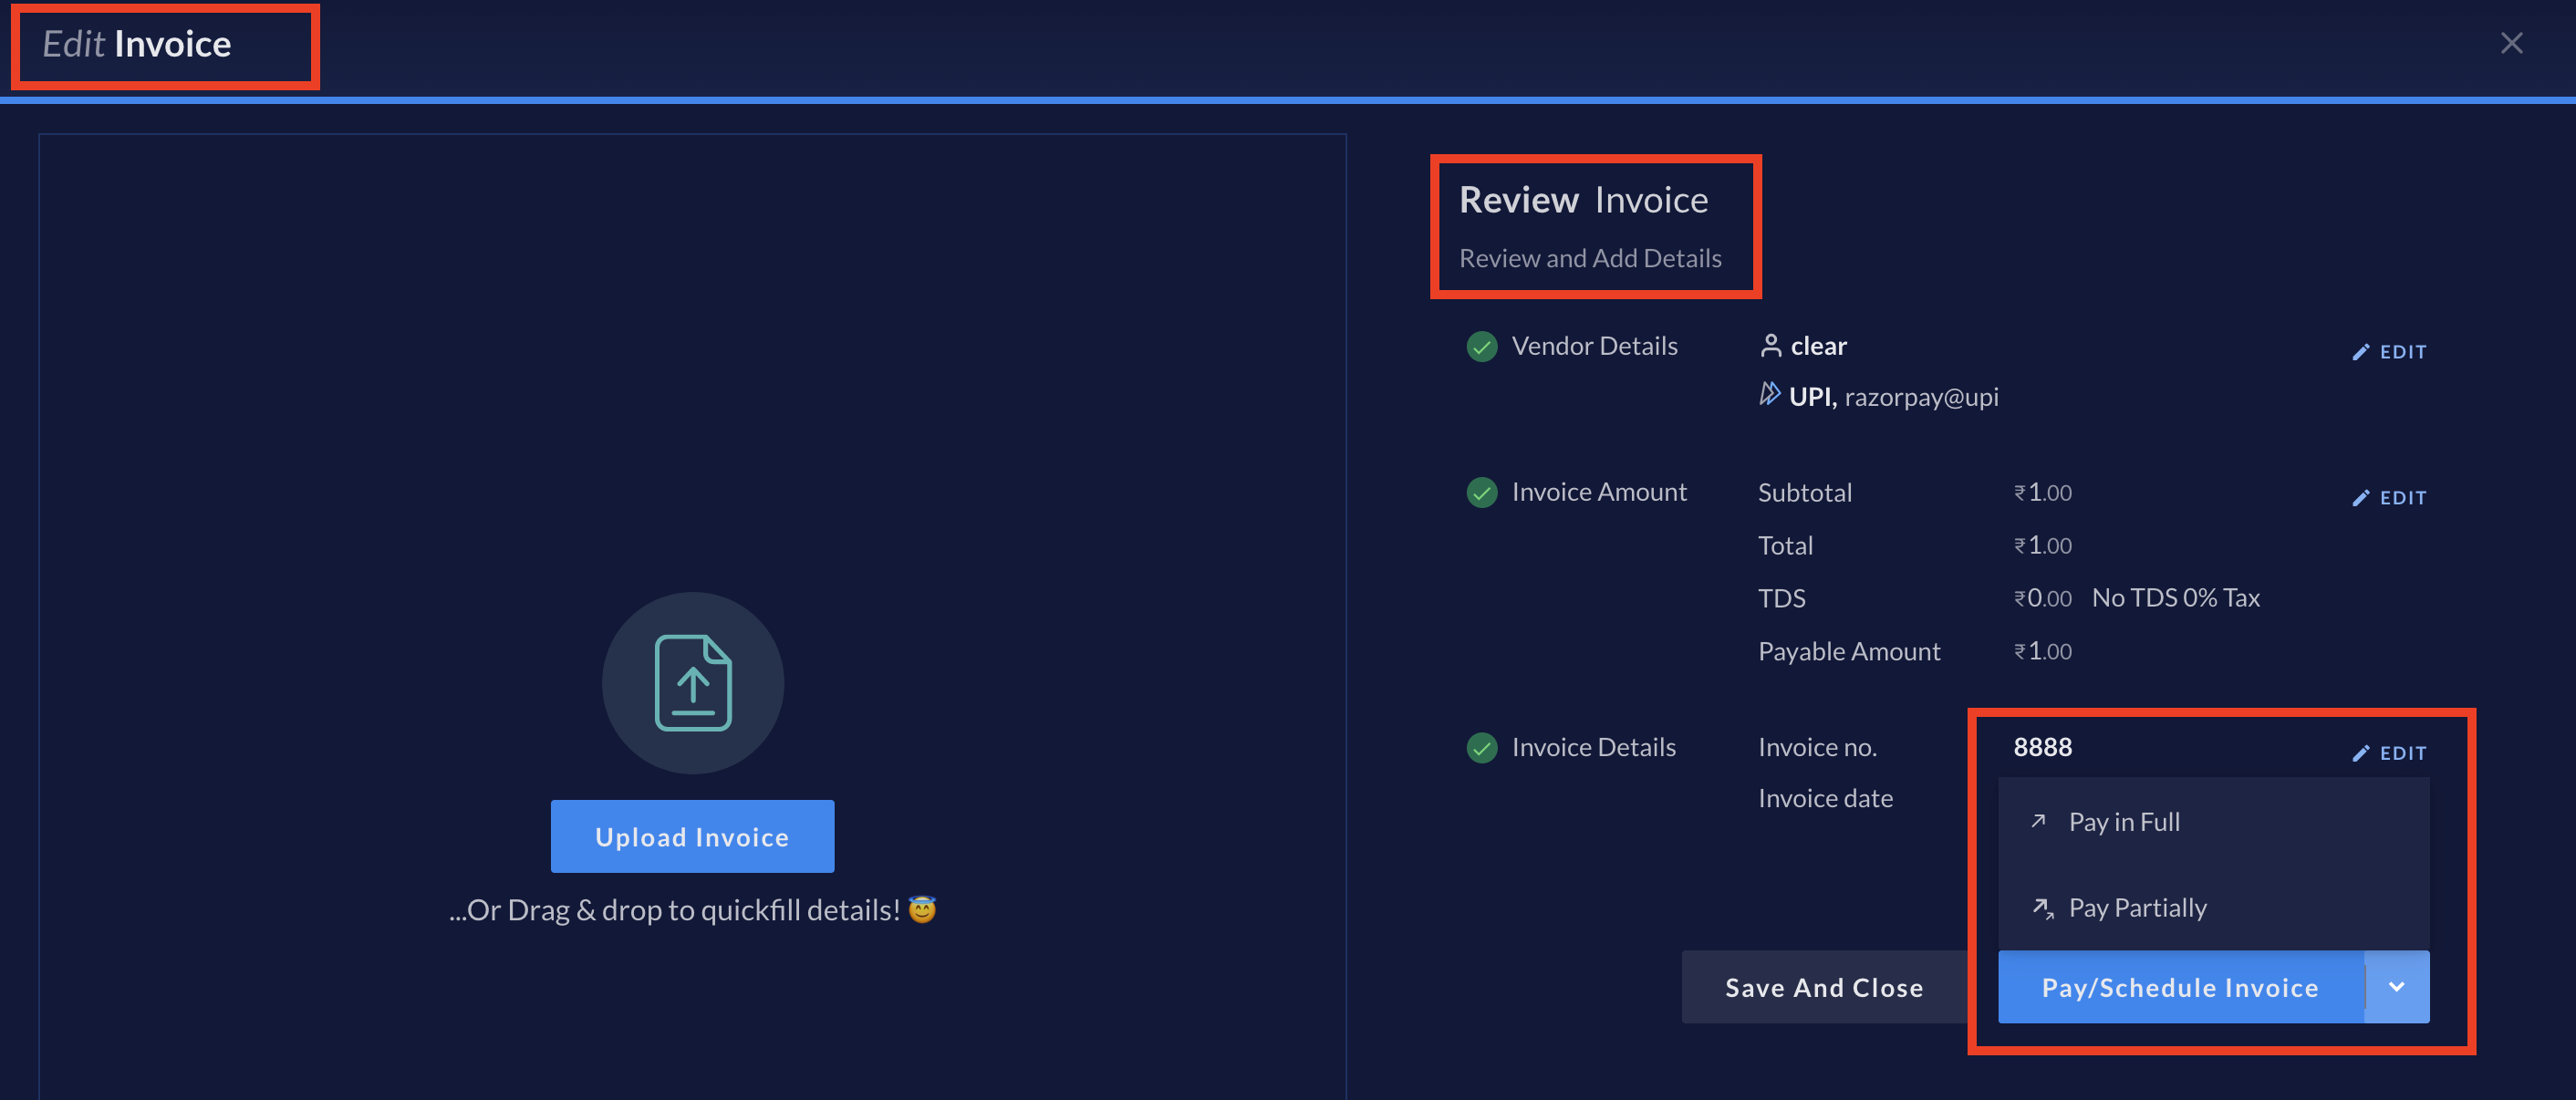
* Your contact, fund account and payout progress is automatically saved in RazorpayX. If you quit the **New Payout** window, or click **BACK**, you can always restart from the **Edit Invoice Screen**, as shown.
5. You must now create a payout.
* In the **New Payout** window, enter the Contact's valid details and [create a Fund Account](/docs/x/fund-accounts#create-a-contact-with-fund-account) if the Contact doesn't have one. You can also select the [Contact type](/docs/x/contacts#contact-types) to be `Vendor`.
* Your contact, fund account and payout progress is automatically saved in RazorpayX. If you quit the **New Payout** window, or click **BACK**, you can always restart from the **Edit Invoice Screen**, as shown.
 6. Finalise all the payout details and click **Next**.
**Handy Tips**
* If you click on **Pay in Full** instead of paying partially, the invoice gets updated to match the same. You can select **Pay Partially** once again to update the invoice.
* Ensure to enter the correct amount when making partial payout. This amount should **always** be less than the actual payment to be made.
7. Enter OTP and complete the payment.
After you make a Partial Payout, the invoice status changes to `Partially Paid`.
### Related Information
* [Bulk Payouts](/docs/x/vendor-payments/vendor-payouts/bulk)
* [Scheduled Payouts](/docs/x/vendor-payments/vendor-payouts/scheduled-payouts)
* [Invoices](/docs/x/vendor-payments/invoices)
* [Invoice Life Cycle](/docs/x/vendor-payments/life-cycle)
* [Advances](/docs/x/vendor-payments/advances)
* [Purchase Orders](/docs/x/vendor-payments/purchase-order)
6. Finalise all the payout details and click **Next**.
**Handy Tips**
* If you click on **Pay in Full** instead of paying partially, the invoice gets updated to match the same. You can select **Pay Partially** once again to update the invoice.
* Ensure to enter the correct amount when making partial payout. This amount should **always** be less than the actual payment to be made.
7. Enter OTP and complete the payment.
After you make a Partial Payout, the invoice status changes to `Partially Paid`.
### Related Information
* [Bulk Payouts](/docs/x/vendor-payments/vendor-payouts/bulk)
* [Scheduled Payouts](/docs/x/vendor-payments/vendor-payouts/scheduled-payouts)
* [Invoices](/docs/x/vendor-payments/invoices)
* [Invoice Life Cycle](/docs/x/vendor-payments/life-cycle)
* [Advances](/docs/x/vendor-payments/advances)
* [Purchase Orders](/docs/x/vendor-payments/purchase-order)