> ## Documentation Index
> Fetch the complete documentation index at: https://razorpay-881012b3.mintlify.site/llms.txt
> Use this file to discover all available pages before exploring further.
# Create a Payment Link
> Create Standard Payment Links and UPI Payment Links.
Available in🇮🇳 India🇸🇬 Singapore🇺🇸 United States
You can create 2 types of Payment Links using the Razorpay Dashboard:
* [Standard Payment Links](#create-a-standard-payment-link-from-dashboard)
* [UPI Payment Links](#create-a-upi-payment-link-from-dashboard)
## Create a Standard Payment Link From Dashboard
You can create a Standard Payment Link to accept payments from your customers. When you create a Payment Link, it moves to **Issued** state by default.
Watch this video to see how to create a Standard Payment Link.
1. Log in to the Dashboard.
2. Go to the **PAYMENT PRODUCTS** section and click **Payment Links**.
3. Click **+ Create Payment Link**.
4. Enter the required details in the Standard Payment Link pop-up page.
**Amount** (Mandatory): Select the currency and amount for the Payment Link. For example, select `₹` and enter`1000` for ₹1,000. You can also accept payments in international currencies.
**Payment For** (Optional): Enter a description entered. For example, `School fees for Gaurav Kumar - Class XII B`.
**Customer Details** (Optional): Enter the customer's email and phone number. For example, `9876543210` and `gaurav.kumar@example.com`.

**Notify via Email** (Optional): Select this option if you want us to send the Payment Link to the customer via email. Available only if you have entered the customer's email.
Customers receive email in the following format:
**Notify via SMS** (Optional): Select this option if you want us to send the Payment Link to the customer via SMS. Available only if you have entered the customer's phone number. Customers receive SMS in the following format:
For example, `Acme Corp has requested payment of INR 100. You can pay through this link: https://rzp.io/rzp/D6W1Xk3u - Razorpay`
**Reference Id** (Optional): Provide a unique reference number for the link. For example, `Adbb001`.
**Link Expiry** (Optional): The date and time at which the Payment Link should expire.
**Notes** (Optional): Provide the internal notes for the Payment Link. For example:
Title (key): Acme Corp.
Description (value): Birthday cake Feb.
Review the details and click **Create Payment Link**.
## Create a UPI Payment Link From Dashboard
You can create a UPI Payment Link to collect funds from your customers via the Dashboard. When you create a Payment Link, it moves to the **Issued** state by default.
Watch this video to see how to create a UPI Payment Link.
1. Log in to the Dashboard.
2. Navigate to **Payment Links**.
3. Click **Create Payment Link**.
4. Click **UPI Payment Link**.
5. Enter the required details in the UPI Payment Link pop-up page.
**Amount** (Mandatory): Select the currency and amount for the Payment Link. For example, select `₹` and enter`1000` for ₹1,000.
**Payment For**: Enter a description entered. For example, `School fees for Gaurav Kumar - Class XII B`.
**Customer Details**: Enter the customer's email and phone number. For example, `9876543210` and `gaurav.kumar@example.com`.
**Notify via Email** (Optional): Select this option if you want us to send the Payment Link to the customer via email. Available only if you have entered the customer's email.
Customers receive email in the following format:
**Notify via SMS** (Optional): Select this option if you want us to send the Payment Link to the customer via SMS. Available only if you have entered the customer's phone number. Customers receive SMS in the following format:
For example, `Acme Corp has requested payment of INR 100. You can pay through this link: https://rzp.io/rzp/D6W1Xk3u - Razorpay`
**Reference Id**: Provide a unique reference number for the link. For example, `Adbb001`.
**Link Expiry**: The date and time at which the Payment Link should expire.
**Internal Notes**: Provide the internal notes for the Payment Link. For example:
Title (key): Acme Corp.
Description (value): Birthday cake Feb.
6. Review the details and click **Create Payment Link**.
After a UPI Payment Link created, it appears in the list of Payment Links.
## Make Test Payments for Payment Links
**Handy Tips**
We recommend you to create Payment Links in **Test Mode** for testing purposes.
**Test Mode Limit**
In test mode, you can create up to 30 Payment Links per business. If you need to create more than 30 Payment Links for testing purposes, contact [Razorpay Support](https://razorpay.com/support/).
1. Log in to the Dashboard.
2. Navigate to **Payment Links**.
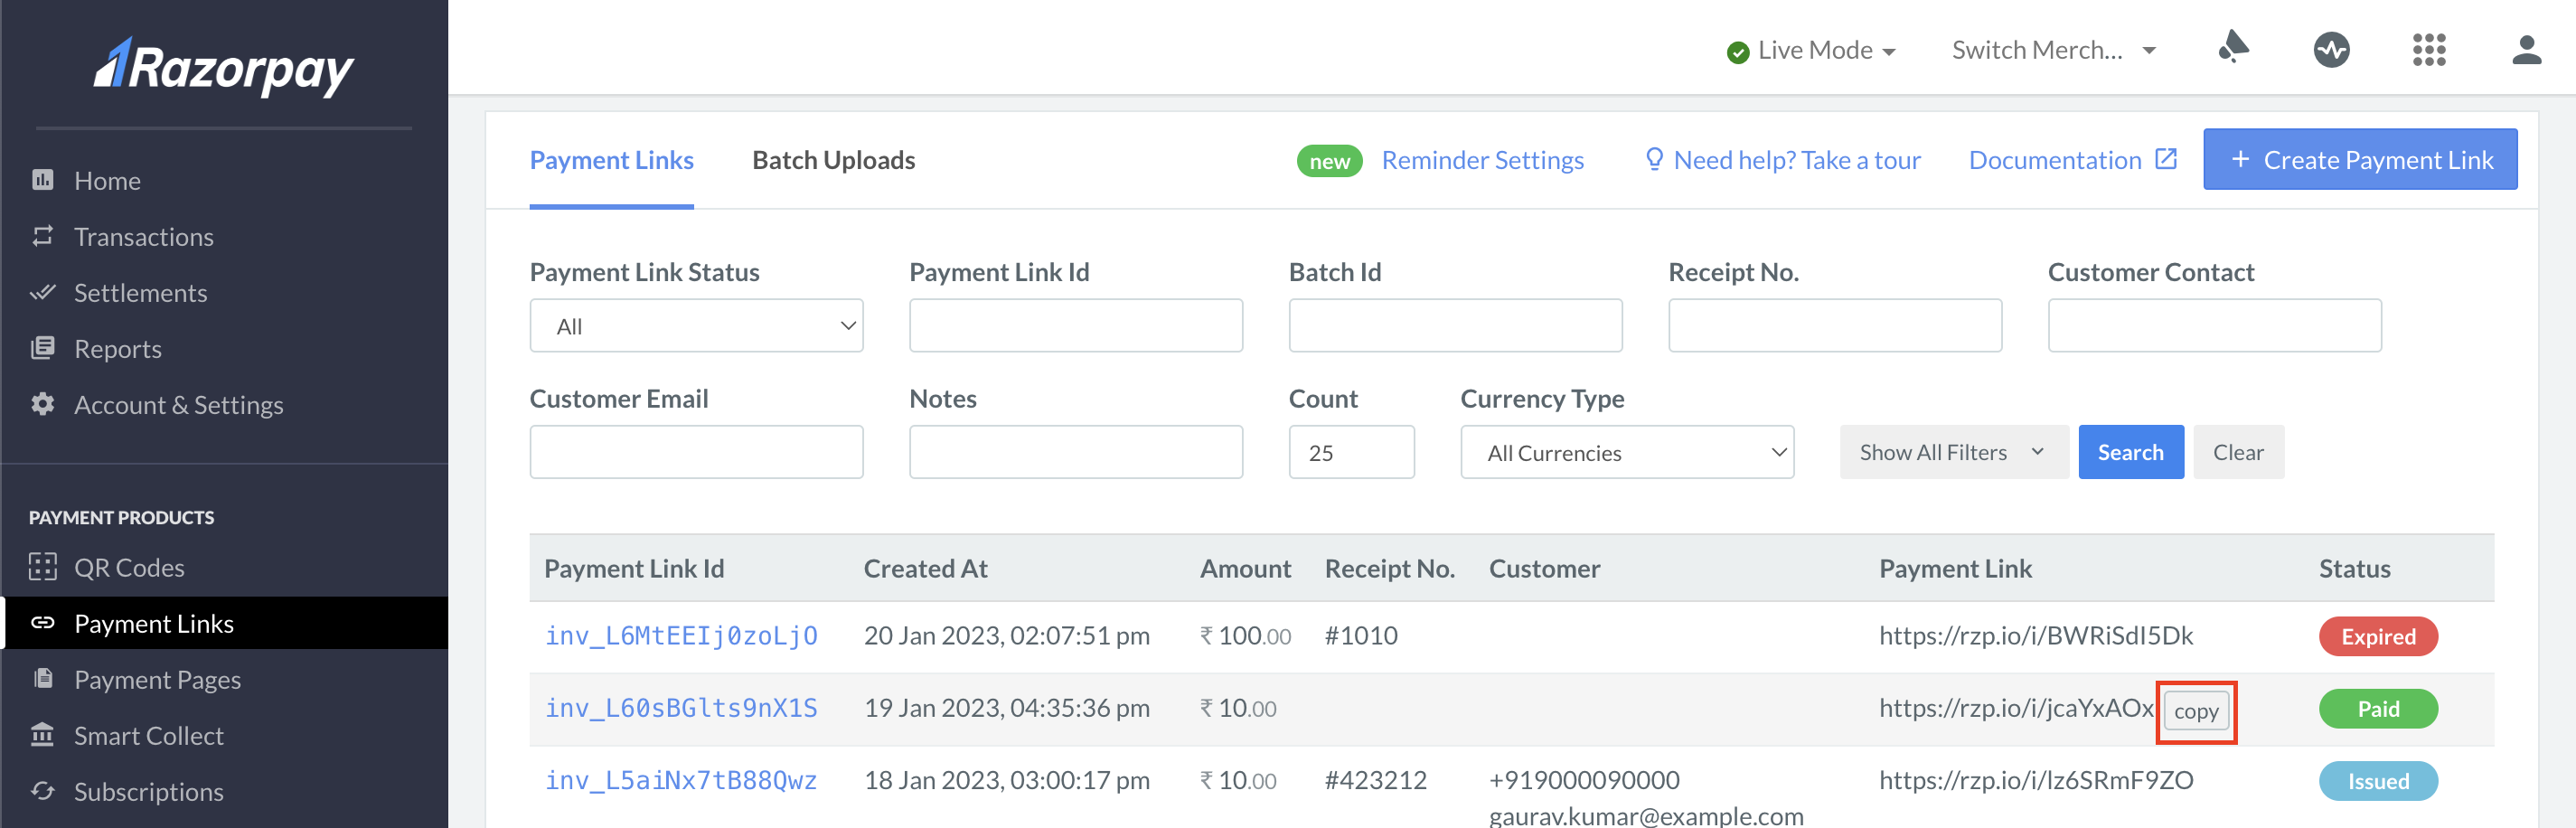
3. Select the Payment Links you wish to test.
4. Copy the link URL and open it in your browser.
5. Select the payment method of your choice and proceed with the payment.
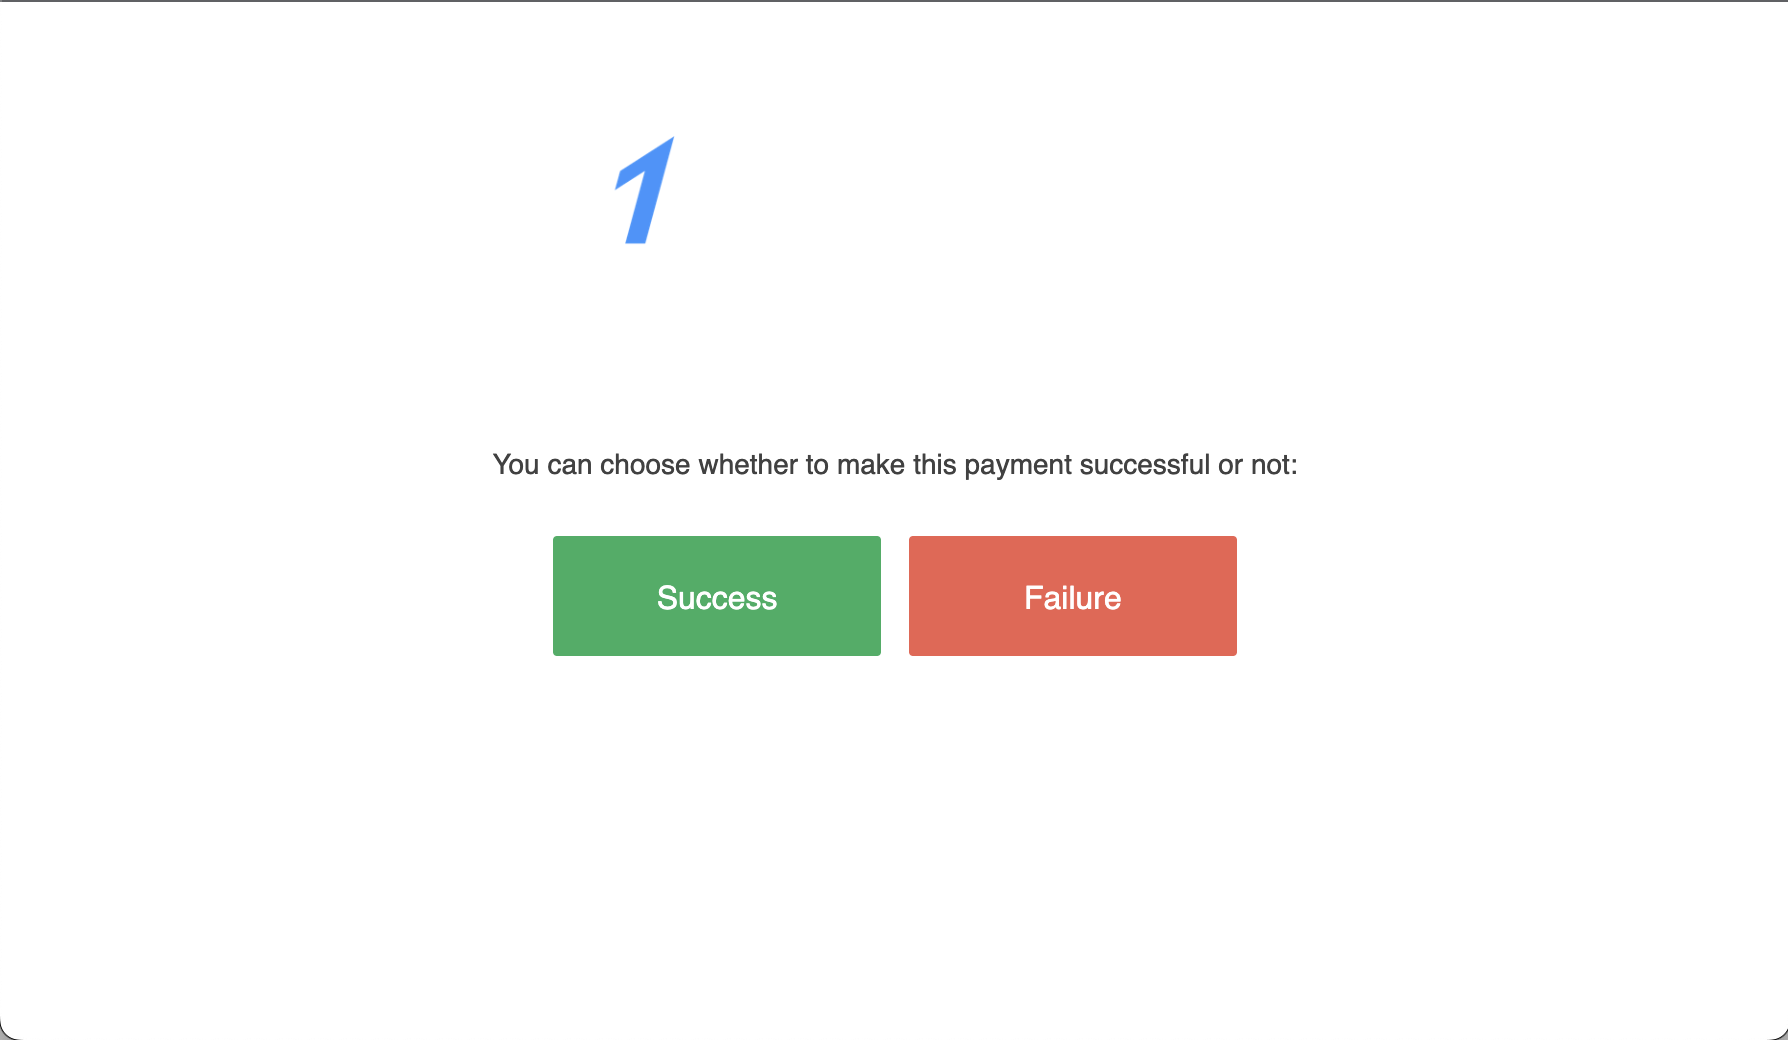
6. Select **Success** or **Failure**, depending on which flow you wish to test.
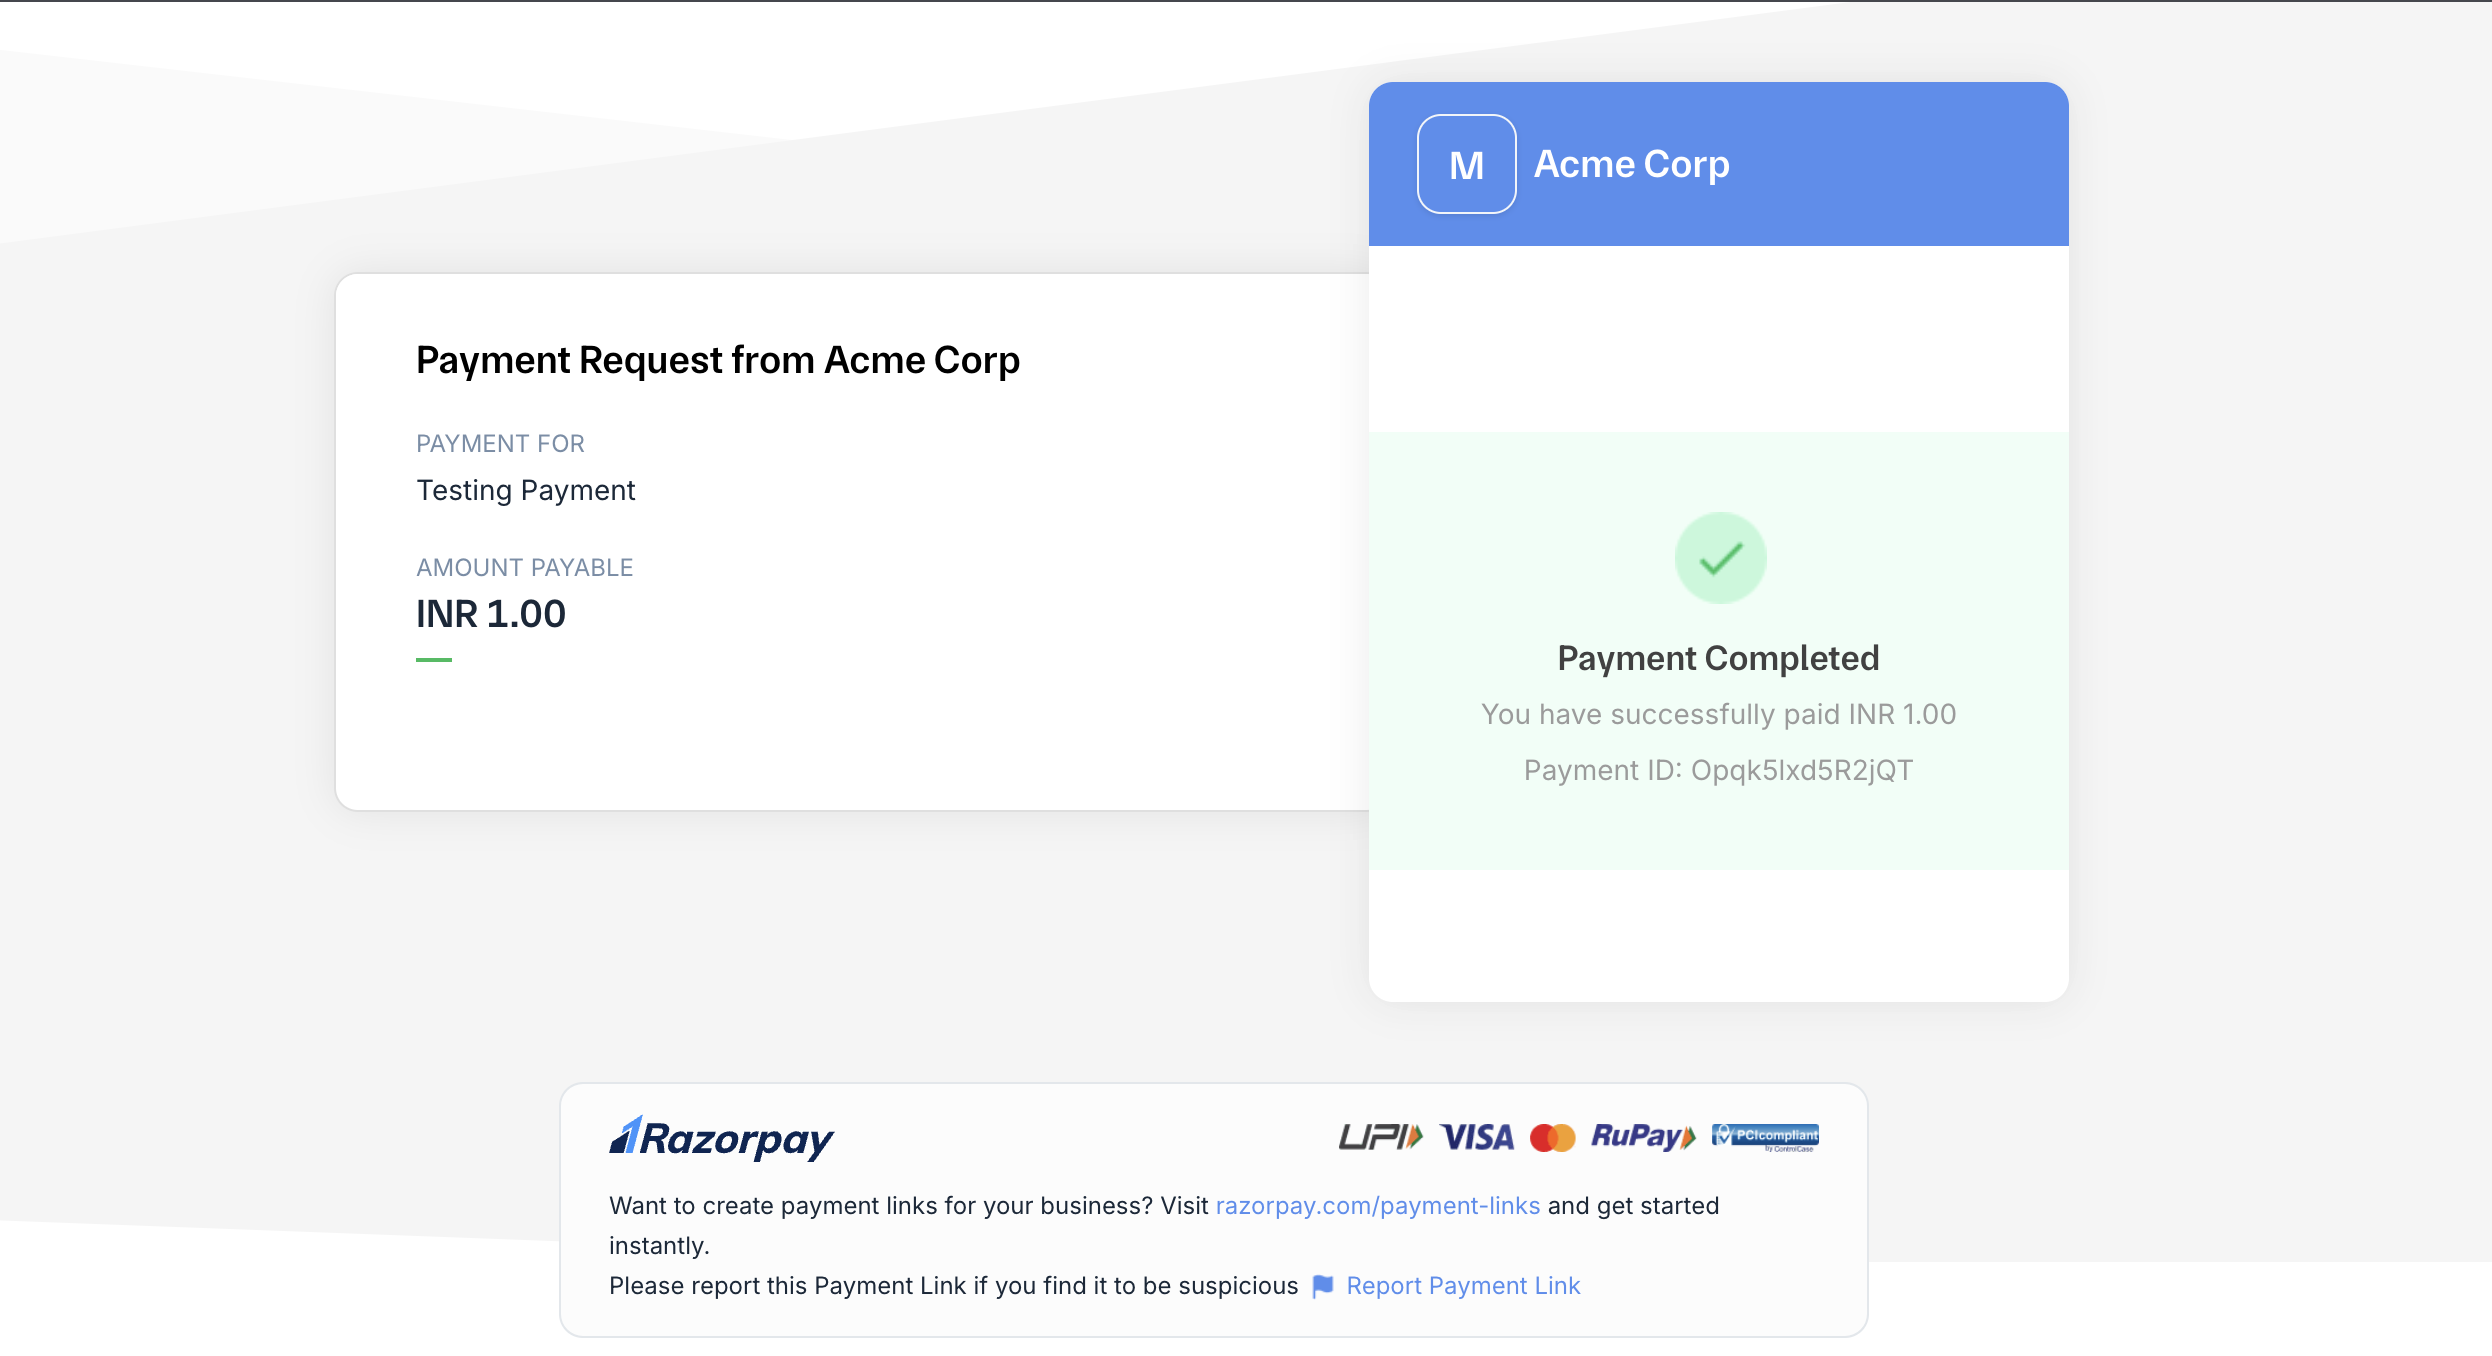
7. You should see a confirmation message depending on the flow you have selected.
## Create a Payment Link Using API
You can create a Payment Link using:
* [Create a Standard Payment Link API](/docs/api/payments/payment-links/create-standard)
* [Create a UPI Payment Link API](/docs/api/payments/payment-links/create-upi)
#### Related Information
* [FAQs](/docs/payments/payment-links/faqs)
* [Payment Links APIs](/docs/payments/payment-links/apis)
 5. Select the payment method of your choice and proceed with the payment.
6. Select **Success** or **Failure**, depending on which flow you wish to test.
5. Select the payment method of your choice and proceed with the payment.
6. Select **Success** or **Failure**, depending on which flow you wish to test.
 7. You should see a confirmation message depending on the flow you have selected.