

Edit Login Information
How do I change the login/registered email ID of my account?
How do I change the login/registered email ID of my account?
How do I change the password of my account?
How do I change the password of my account?
How do I change the phone number registered with my account?
How do I change the phone number registered with my account?
- Log in to the Dashboard.
- Navigate to Account & Settings.
- Click the edit icon next to the Phone number field.
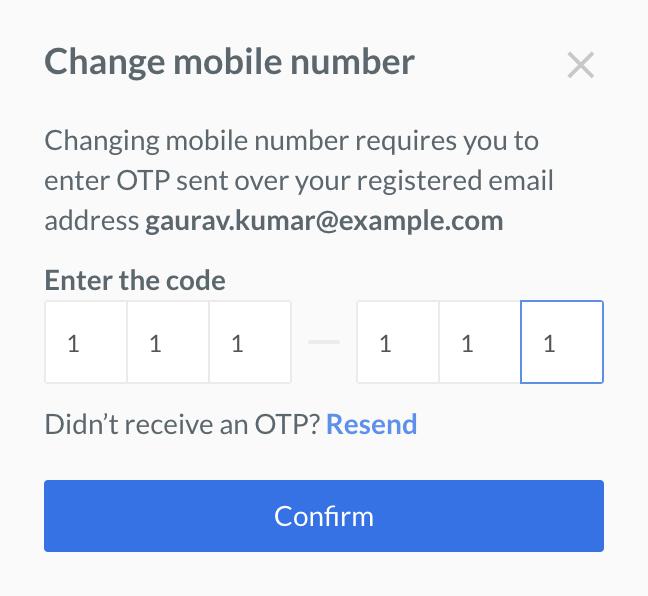
- Enter the OTP sent to your registered email address and click Confirm.
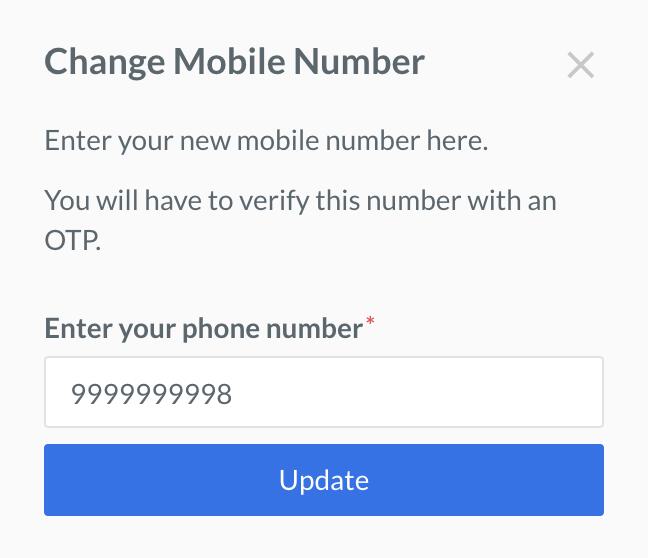
- Enter the new phone number and click Update.
Edit Business Information
How do I change the account details displayed on the Dashboard?
How do I change the account details displayed on the Dashboard?
How do I change my business Website URL?
How do I change my business Website URL?
How can I update my bank account information?
How can I update my bank account information?
- Log in to the Dashboard.
- Navigate to Account & Settings.
- Click Bank account details details under the Bank accounts and settlements section.
- Click Change bank account.
- Enter the OTP sent to your registered mobile device on the 2-Step Verification pop-up page.
- On the Change Bank Account Details pop-up page, add bank details and upload your business’ bank statement or a cancelled cheque.
- Click Save.
How can I update my business name on the payment confirmation mail sent to customers by Razorpay?
How can I update my business name on the payment confirmation mail sent to customers by Razorpay?
- If you are a registered business, you can use the brand name and logo feature on the Dashboard to update the business name.
- If you are an individual, for example, a freelancer, raise a request with our Support Team.
How long does it take to get a new or updated website/domain approved?
How long does it take to get a new or updated website/domain approved?
- Bank Verification System (BVS) Checks: These initial automated checks typically take 3–5 minutes.
- Agent Resolution/Final Approval: Once the BVS checks are complete and the workflow is created, it takes an agent approximately 24–48 hours for final review and resolution.
My website verification request has been pending for a long time. What should I do?
My website verification request has been pending for a long time. What should I do?
- Your Razorpay account id/Merchant id.
- Website URL submitted for verification.
- Date of submission.
Integration Related
What is RazorpayHDFC VAS Dashboard?
What is RazorpayHDFC VAS Dashboard?
I have added my RazorpayHDFC VAS Dashboard account to my website domain. Can I also add it to a sub-domain?
I have added my RazorpayHDFC VAS Dashboard account to my website domain. Can I also add it to a sub-domain?
How do I integrate RazorpayHDFC VAS?
How do I integrate RazorpayHDFC VAS?
What is a webhook? How do I use it?
What is a webhook? How do I use it?
How do I close my RazorpayHDFC VAS Dashboard account?
How do I close my RazorpayHDFC VAS Dashboard account?
I already have one website integrated. How do I add a second (additional) website for payments?
I already have one website integrated. How do I add a second (additional) website for payments?
- Log in to the Dashboard.
- Navigate to Account & Settings → Business website detail.
- Click Add additional website/app details.
Reports
How can I generate reports?
How can I generate reports?
Can I generate an annual report?
Can I generate an annual report?
Miscellaneous
My account is activated. How do I switch to live mode?
My account is activated. How do I switch to live mode?
I cannot generate Live mode API keys even though my account is activated. How do I generate the API keys?
I cannot generate Live mode API keys even though my account is activated. How do I generate the API keys?
- Log in to the Dashboard.
- Navigate to Account & Settings.
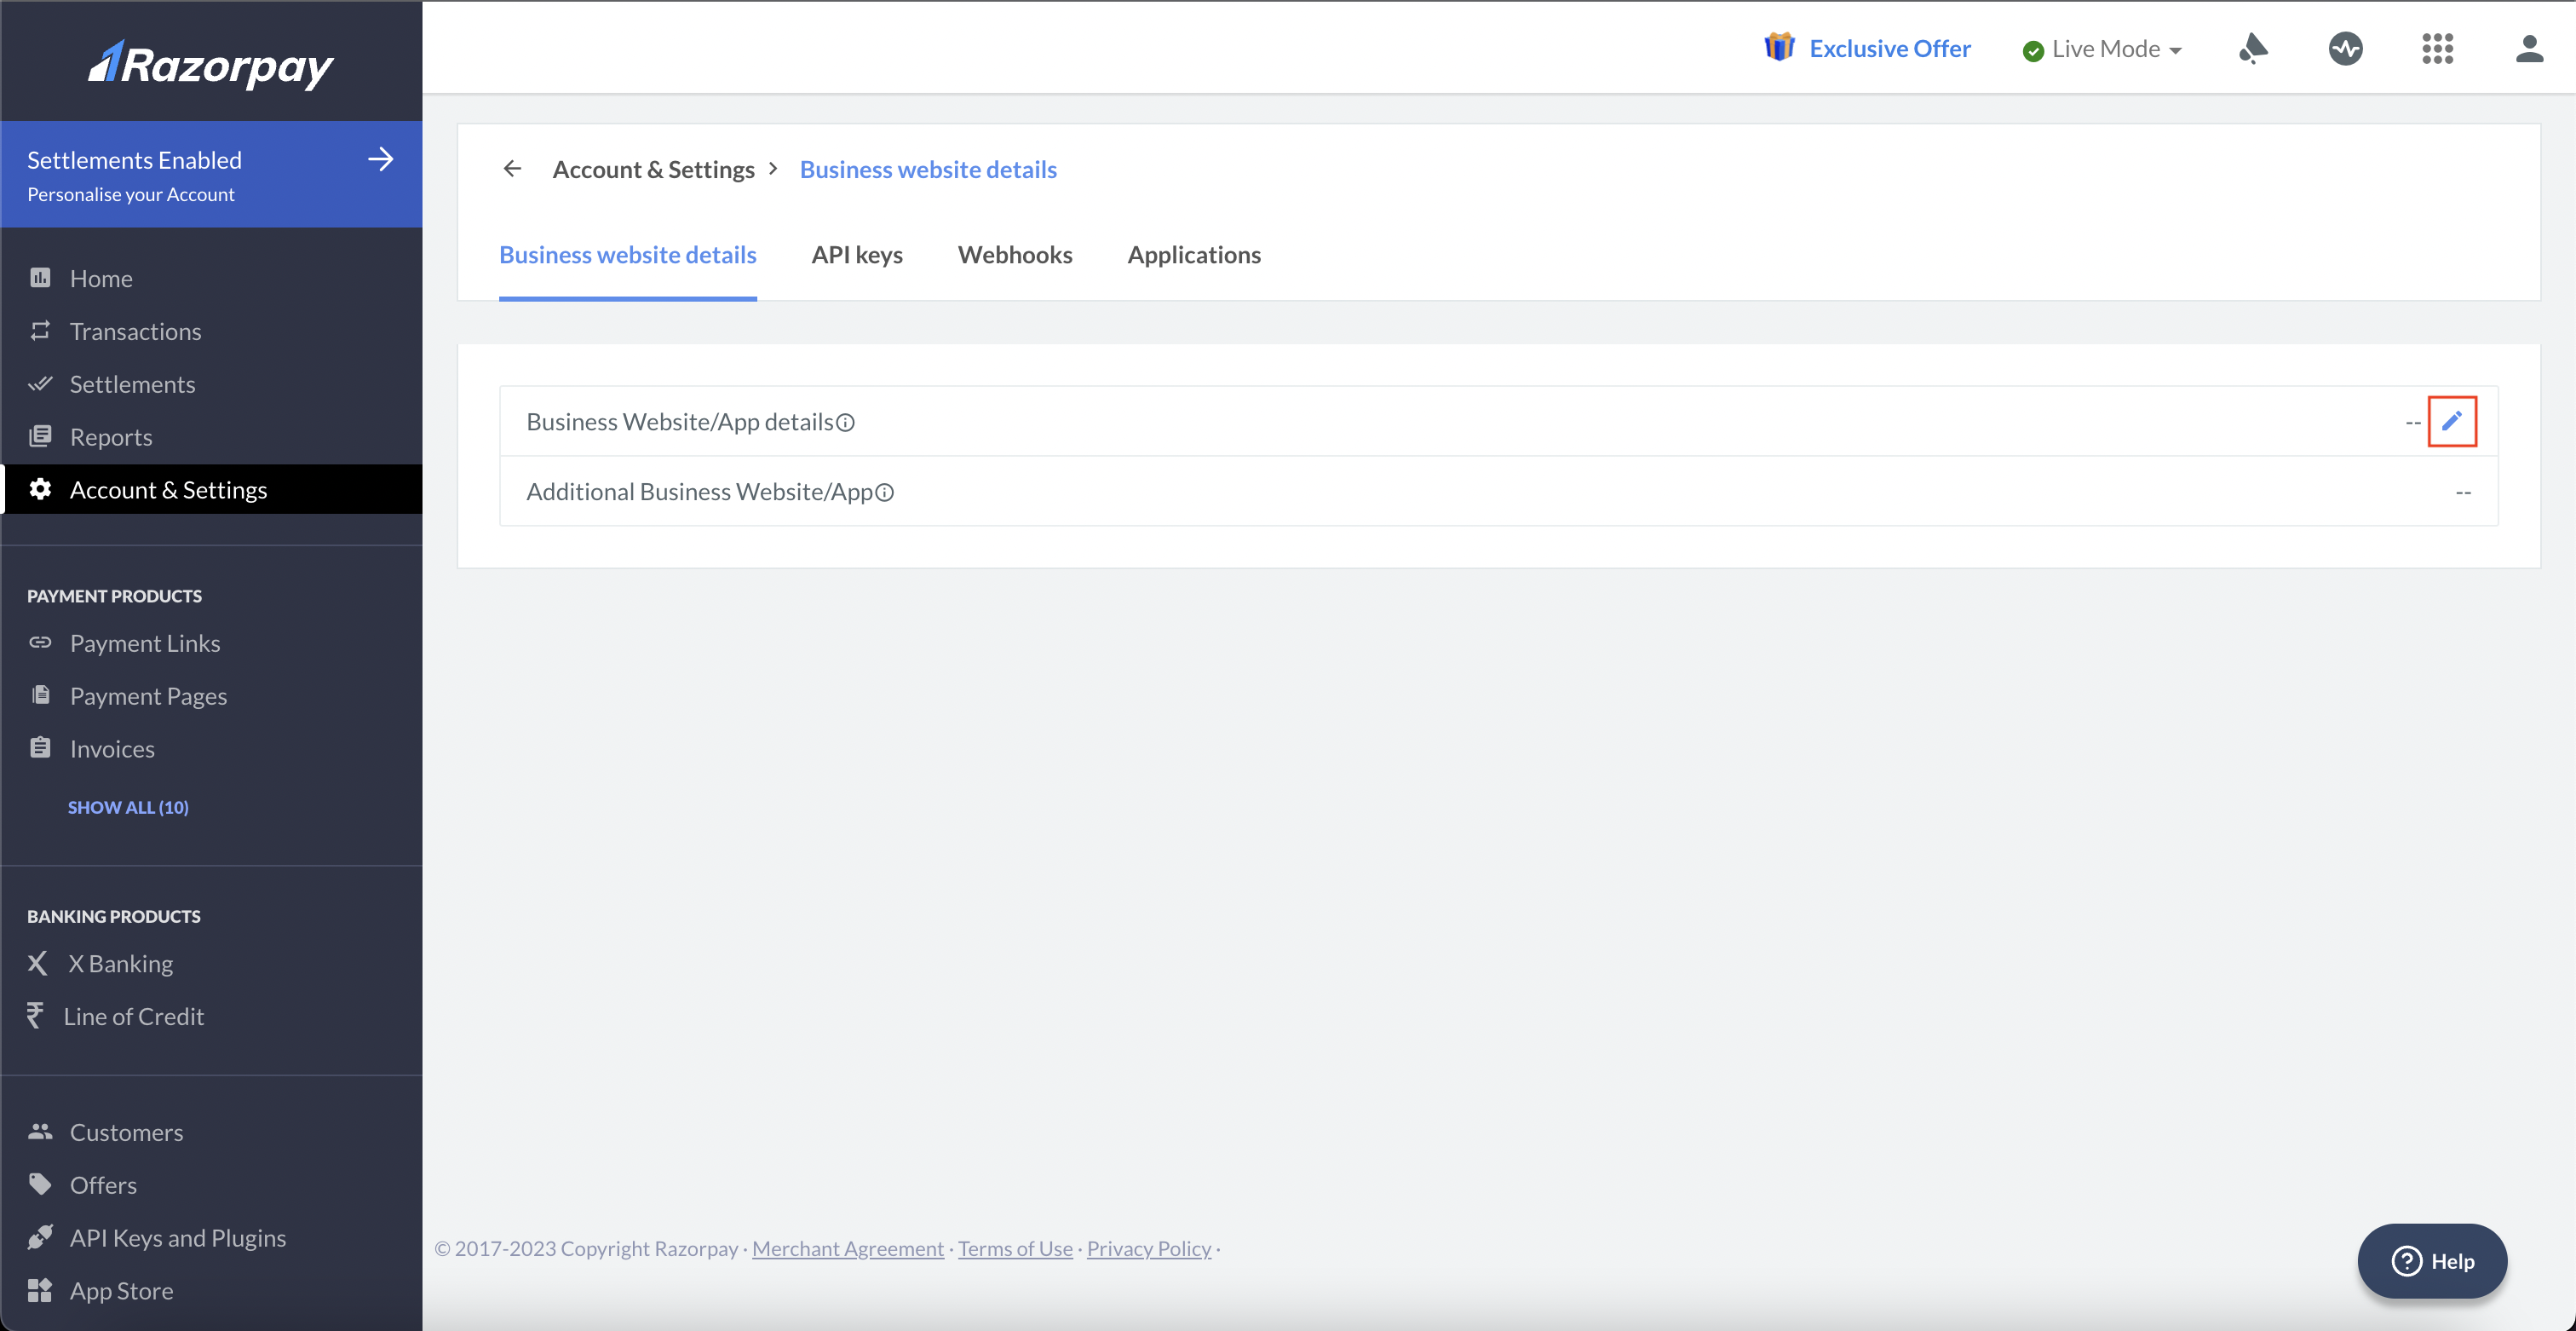
- Click Business website detail under the Website and app settings section.
- Click Add website/app details.
- In the Update Website/App screen, click Proceed to update website/app.
- Enter your website URL and click Add Details.
- Our team will review your website/app URL details. Post review, your website details are updated, and you should be able to generate API keys in the Live Mode.
What is a Chargeback?
What is a Chargeback?
How do I report a fraud/cybercrime?
How do I report a fraud/cybercrime?
Where can I find my Account ID/Merchant ID on the Dashboard?
Where can I find my Account ID/Merchant ID on the Dashboard?