

Available in🇮🇳 India
Turbo UPI Flutter Standard SDK
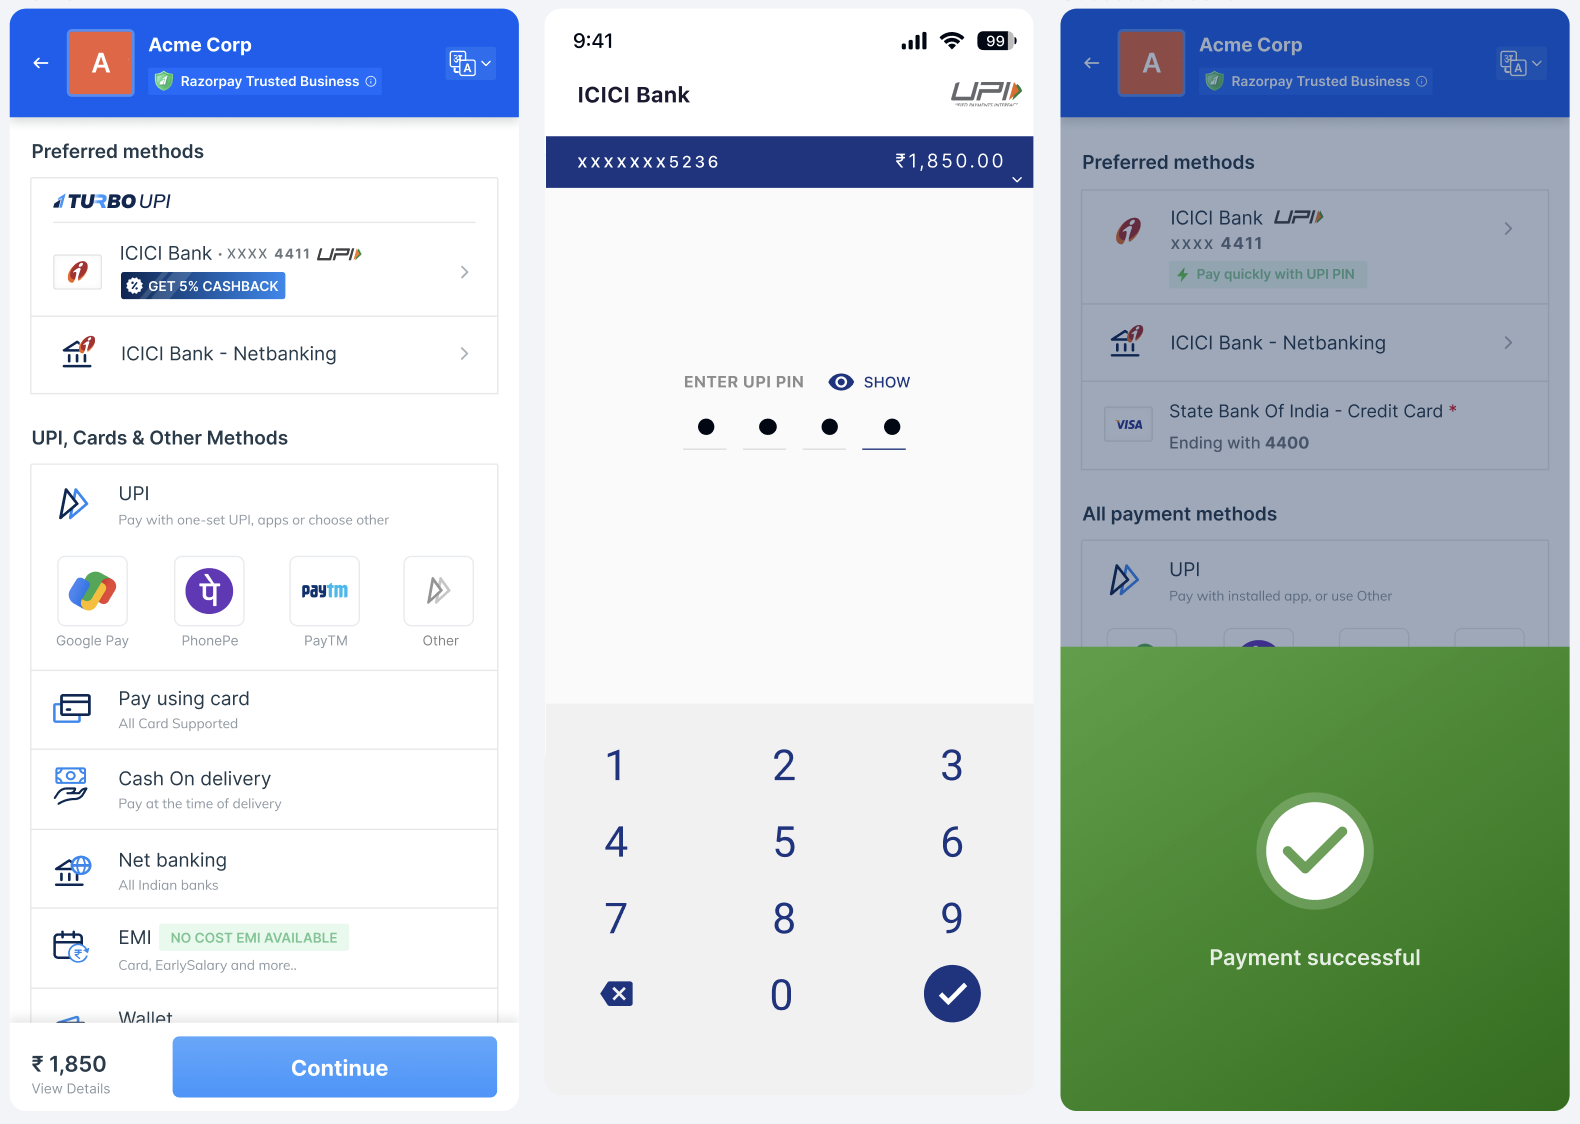
Discover new features, updates and deprecations related to Turbo UPI on Flutter Standard Checkout (since Jan 2024).
Prerequisites
Prerequisites
-
Contact our integrations team to get your mobile number, app, and GitHub account whitelisted for access to the
https://github.com/upi-turbo/razorpay-turbo-fluttersample app repository. - Review the Razorpay Flutter Standard SDK documentation for integration guidelines.
-
Add Location Dependency: The SDK requires location permission to complete device onboarding. Ensure you have added the necessary location dependencies as described below.
- For iOS:
Update yourInfo.plistfile with the following keys to request location permissions:
- For iOS:
plist
- For Android-specific integrations, add the following dependencies to your
build.gradlefile:
gradle
<checkout_version>, <razorpay-turbo_version>, and <turbo-ui_version> with the latest versions available.You can find the latest versions here:Enable viewBinding and dataBinding:gradle
Library Dependencies
Library Dependencies
To integrate Turbo UPI, you must add the required library dependencies to your Flutter project:
- Add the following entry to the
dependenciessection of yourpubspec.yamlfile:
- Run the following command in your terminal to fetch and install the new dependency:
Onboarding Flow
Ensure your customers onboard with Razorpay Turbo UPI to get started.1. Integration Steps
Follow these steps to integrate with Razorpay Turbo UPI:1.1 Import Razorpay Package
To integrate Turbo UPI with your Flutter app, start by importing the required packages. This sets up the SDK and enables your app to handle UPI payments. Use the code snippet below to import the package:dart
1.2 Initialise Razorpay and Register Event Listeners
Set up the Razorpay instance and register event listeners to handle payment success, failure, and session token refresh. This ensures your app can respond appropriately to payment outcomes and keep session tokens up to date for a smooth user experience. Add the following method during initialisation:dart
1.3. Create a Session Token
To enhance security, you must create a session token via a server-to-server (S2S) call between your backend and Razorpay’s backend. This session token ensures secure communication between the Turbo SDK and Razorpay’s systems.How to Create a Session Token
- Trigger the S2S API from your Backend. Use the following API to generate a session token:
Request Parameter
Request Parameter
customer_reference mandatory
: string A unique identifier for the customer provided by the business. The recommended value is mobile number. For example, 9000090000.Response Parameters
Response Parameters
token
: string A session token to be used in subsequent session-protected APIs.expire_at
: long Expiry time (in seconds) for the session token, used to optimise session handling and reduce unnecessary reinitialisations.error
: object The request failure due to business or technical failure.Errors
Errors
Given below is a list of errors you may face during session token.
-
Create/Retry Session Token Mechanism
To ensure a smooth experience during token expiry, the Turbo SDK provides the
updateSessionTokenmethod. This method dynamically fetches and updates the session token without reinitialising the session. This allows you to seamlessly refresh the session by retrieving a new token via a server-to-server (S2S) call. Below is an example of usingupdateSessionToken.- Handle the event using the code given below:
dart
1.4. Handle UPI Account Linking and Payment Flow
You can link a customer’s UPI account and initiate payments using the methods described below.1.4.1 Link Customer’s UPI Account
To link a customer’s UPI account with your app, use the following code sample. This will prompt the customer to add and link their UPI account.dart
Request Parameters
Request Parameters
customerMobile mandatory
: string Mobile number of the customer.color optional
: string Colour in HEX format.Response Parameters
Response Parameters
1.4.2 Initiate Payment Using Standard Checkout
To initiate a payment, call the Standard Checkout’sopen method with the required payload:
dart
Request Parameters
Request Parameters
payload mandatory
: Map<String, dynamic> Payload for initiating the transaction.1.4.3 Handle Payment Events
Handle payment success and failure responses:- Handle Payment Failure: Log and display error details such as error code, description, and metadata.
dart
- Handle Payment Success: Log and display key information like order ID, payment ID, and signature.
dart
Non-Transactional Flow
Razorpay provides a single exposed function that allows you to manage linked UPI accounts and access all non-transactional flows seamlessly.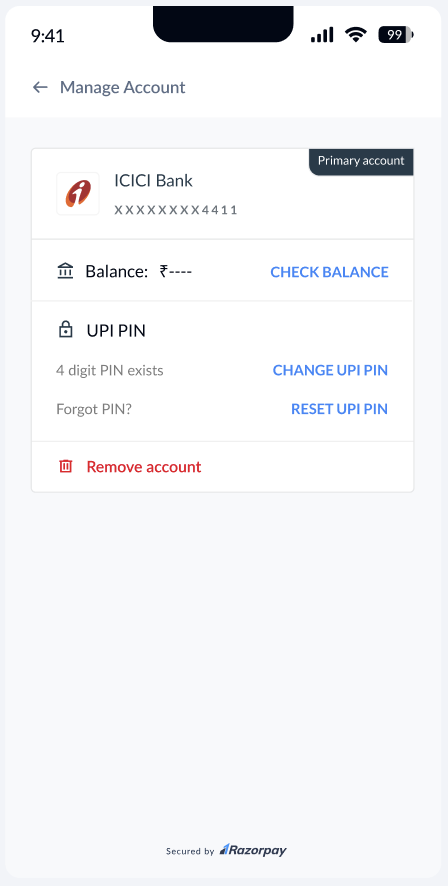
Manage UPI Accounts
Manage UPI Accounts
The SDK manages the linked
UpiAccounts on the application by triggering manageUpiAccounts(). The sequence of steps is as given below:- Fetch balance: Check the customer’s account balance.
- Change UPI PIN: Provide the customer the ability to change their UPI PIN.
- Reset UPI PIN: Let your customers reset the PIN for their account.
- Delete the account from the application: Let your customers delink, that is, remove a selected UPI account from your application.
dart
Request Parameters
Request Parameters
customerMobile mandatory
: string Mobile number of the customer.color optional
: string Colour in HEX format.Response Parameter
Response Parameter
Models Exposed from the SDKs
The SDKs given below provide access to exposed models for seamless integration.UpiAccount
UpiAccount