Available in🇮🇳 India
The Recurring Payment integration involves the following steps:
Prerequisites
- Raise a request with our Support team to get Recurring Payments activated on your account you are trying to integrate.
- Check if the UPI is enabled using the Fetch Supported Methods API. Also, check the list of supported banks and apps for UPI Recurring and enable it for your account.
1. Mandate Registration
Mandate registration is a process of creating a payment checkout form for customers to make Authorisation Transaction and register their UPI. A token will be generated once a customer makes this transaction. Using this authorisation transaction, we can authenticate the customer’s UPI and ensure that we can charge them recurring payments. The authorisation transaction can be created using Razorpay Standard Checkout or Registration Link.Handy TipsThe lending businesses can restrict their customers from pausing and cancelling the mandate by enabling OC125 functionality. Raise a request with our Support team to enable the same.
- Using Razorpay Standard Checkout
- Using a Registration Link
Following is the authorisation transaction flow for Razorpay Standard Checkout method.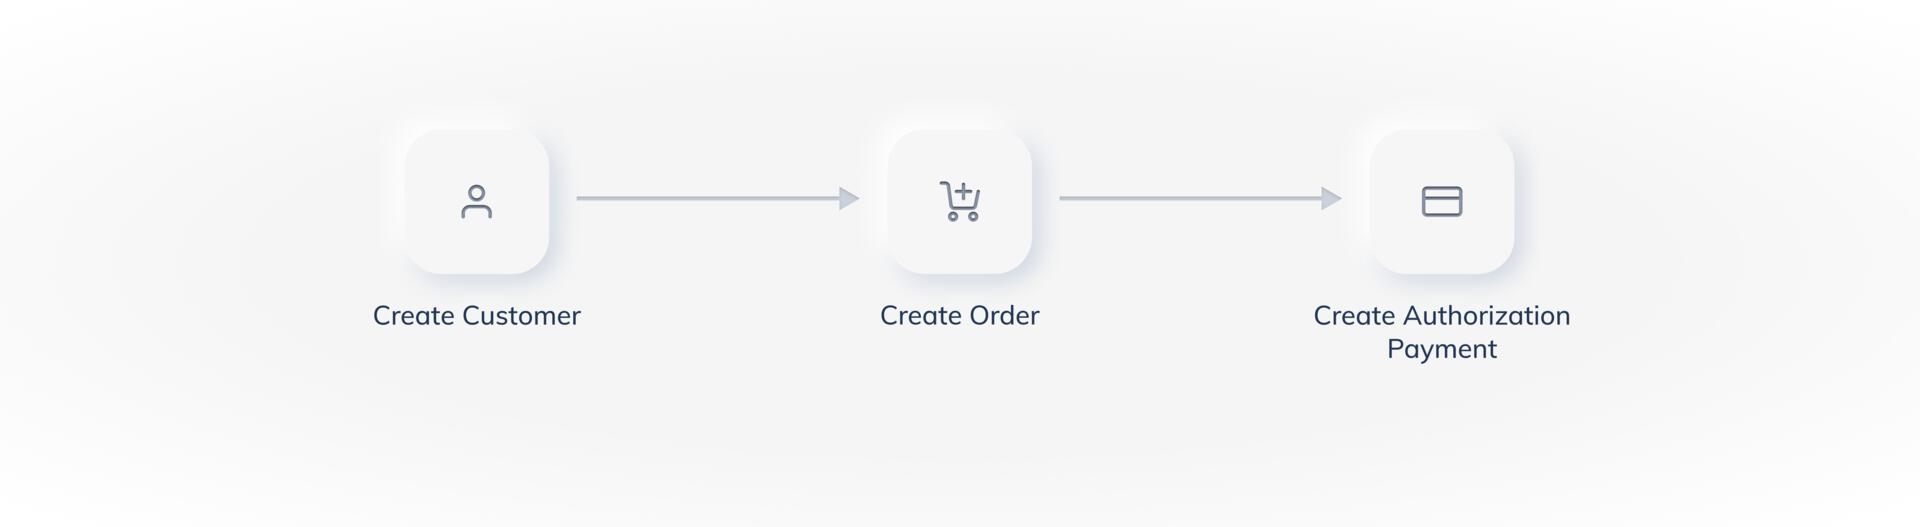 To create checkout form for customers to complete authorisation transaction using the Razorpay Standard Checkout method:
To create checkout form for customers to complete authorisation transaction using the Razorpay Standard Checkout method:- Create a customer
This returns acustomer_id. - Create an order
This returns anorder_id. The order must be created for: - Create authorisation transaction
Pass thecustomer_id,order_idand a few additional parameters in your checkout to create the authorization payment. The customer completes the authorization payment, which generates atoken.
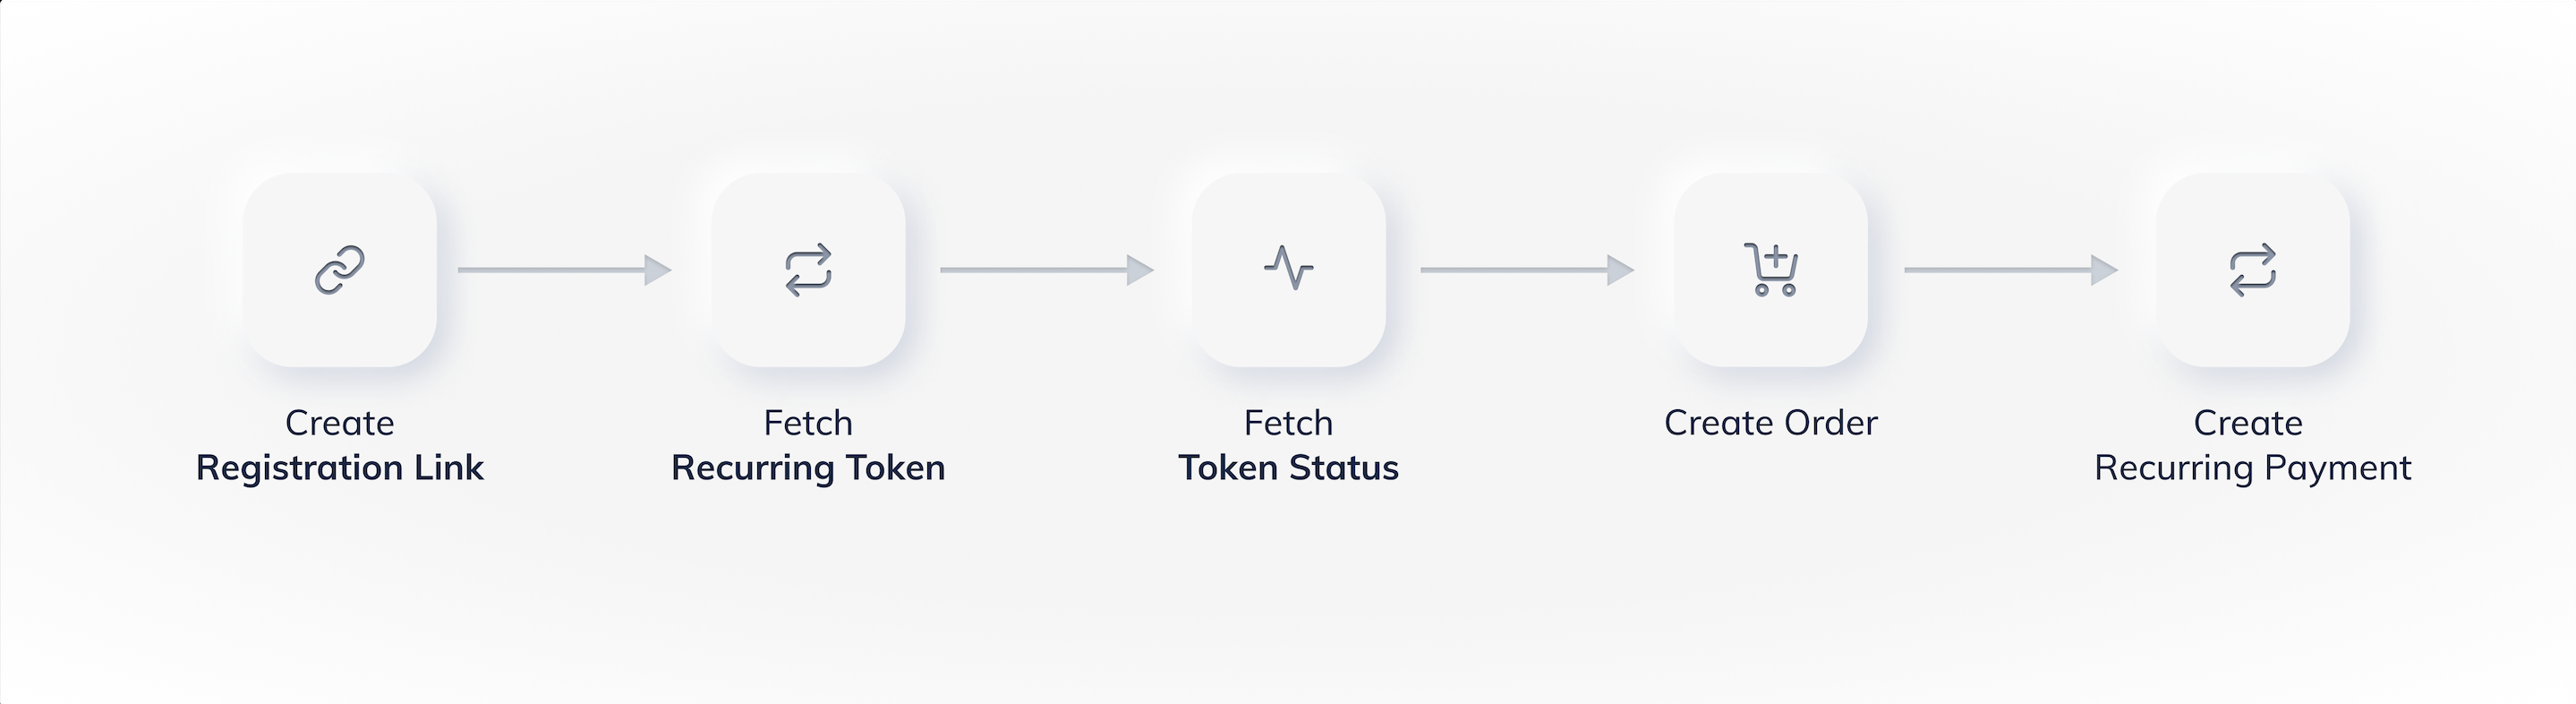
Authorisation Payment Statuses
Once the customer has made the Authorisation Payment, it moves through the following states as per the payment flow:2. Fetch Mandate Registration Details
This is a process of fetching the token that contains the registration details of the customer and checking its status. A token represents a mandate registration and is generated after the authorisation transaction is successfully captured. A token contains customer’s payment details stored by Razorpay and is used to create a recurring payment.Handy TipsFor simplicity, tokens are considered to be mandates. Hence, the status of the token determines the status of the mandate registration.
Token Statuses
As the authorisation transaction moves through its different states, the token that is generated also undergoes state changes. Following is the life cycle of a token: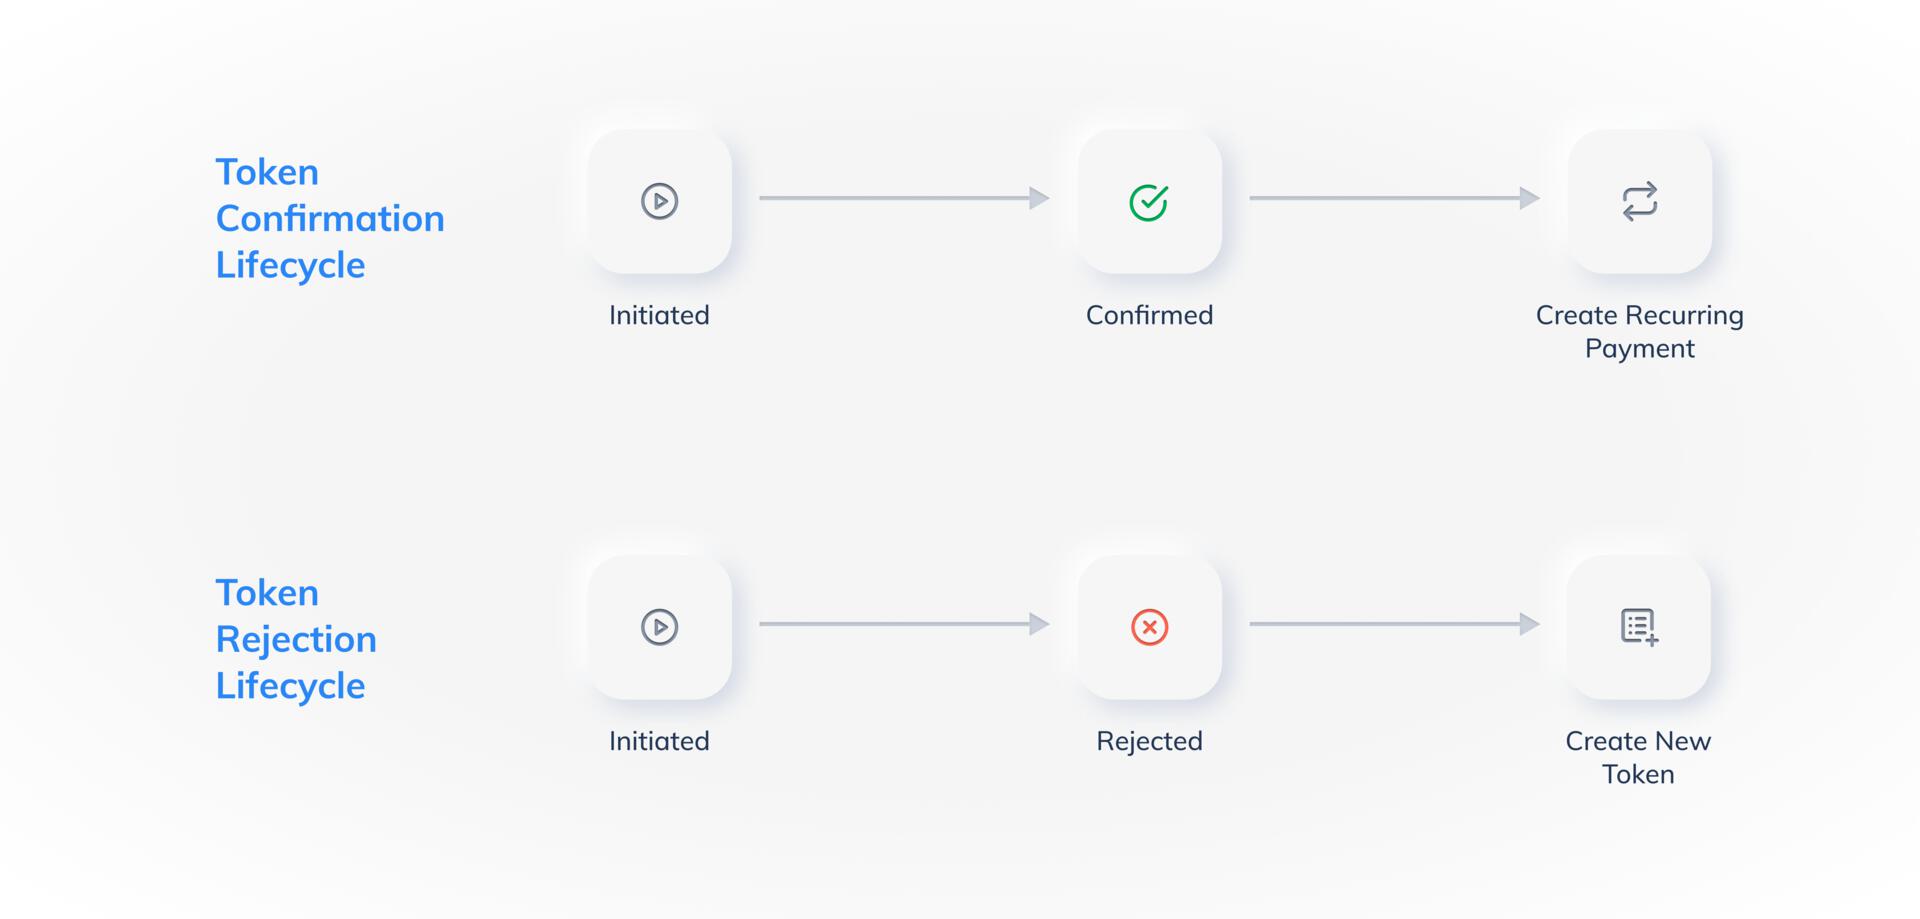
Know more about the turnaround time (TAT) for UPI from the FAQs.
3. Charge Customers
This is the process of charging customers the actual subsequent amount using the fetched token and customer details. Once a token goes to the confirmed state, you can start creating recurring payments for the customer as per your business requirements. You can create subsequent payments using Dashboard or APIs.- Using Dashboard
- Using APIs
To create subsequent payments using the Dashboard:
- Search for the token and check its status
After the authorisation transaction is complete, a token is generated. You can use the search feature on the Dashboard to find the required token and check its status. - Charge the token
After you have found the required confirmed token, you can create a subsequent payment by charging the token according to your business needs.
Order is Created AutomaticallyWhile creating a subsequent charge using the Dashboard, Razorpay automatically creates an order for you when you charge a token. There is no need to create an order separately.