

Available in🇮🇳 India
Integrate TPAP Pro by following these steps:
1. TPAP Pro Flows
Following are the flows available on our TPAP stack:Customer Onboarding
Customer Onboarding
Customer onboarding is a process of binding and registering the customer device by validating the mobile number. The customer’s payment sources are linked to ensure seamless and hassle-free transactions. Additionally, You must create a fingerprint that acts as a unique identifier generated based on various attributes of the device. Know more about customer onboarding.
Create a Device Fingerprint
Create a Device Fingerprint
Create an unique identifier using various attributes of the device. This identifier is used to recognise the specific device during subsequent transactions.To generate a device fingerprint for the customer:
- Create a string with the following fields separated by a pipe (|).
Code
- Hash this string using the SHA-256 algorithm.
Java
- Send the timestamp within the headers.
Device Binding Status
Device Binding Status
The following table lists the different device binding status and their description. Know more about device binding.
Funds and Accounts Management
Funds and Accounts Management
Funds and accounts management helps you manage payment sources and providers. The Razorpay APIs let you add more accounts, delete existing accounts and change PINs for accounts for hassle-free transactions. Know more about managing funds and accounts.
Payments
Payments
The Payment module enables you to make various transactions using payment APIs. Below are the supported transaction types:
-
Make Payments: Facilitate P2P (peer-to-peer) or P2M (peer-to-merchant) payments. The supported payment transfer types are:
- Pay from a VPA to VPA.
- Pay from a VPA to a payment source.
- Pay from a payment source to a VPA.
- Pay from one payment source to another.
- Scan and Pay (UPI QR & Bharat QR): Customers can QR codes and make payments.
- Intent Payment: Customers can make payment through an intent link.
- Payment to a PSP merchant: Customers can make a payment using the merchant VPA.
- P2P Pay (VPA and Account+IFSC): A person can pay to another person using a TPAP.
- Self Pay: Customers can make transactions between their own accounts.
- Collect Payments: This API lets you collect payments from others.
- Approve Collect Requests: This API lets you approve payment collect requests.
- Reject Collect Requests: This API lets you reject payment collect requests.
Mandates
Mandates
You can create and manage mandates using the Razorpay APIs. Know more about managing mandates.
Complaints API
Complaints API
The Complaints API enables efficient handling of transaction-related issues.
Raise Complaint
Raise Complaint
Submit complaints about transactions to ensure prompt resolution.
Check Complaint Status
Check Complaint Status
Track the progress and status of submitted complaints.
UPI Mapper
UPI Mapper
UPI Mapper provides a 1:1 mapping between VPAs and mobile or UPI numbers, enabling efficient and streamlined identification.
Credit Card on UPI
Credit Card on UPI
Enable credit card payments via UPI for enhanced flexibility. All features of account management apply to credit cards as well.
UPI One-time Mandate
UPI One-time Mandate
Authorise one-time payments for specific transactions, offering greater flexibility and control.
Credit Lines on UPI
Credit Lines on UPI
Enable transactions using pre-approved credit lines, helping users manage finances more effectively.
UPI Lite
UPI Lite
Support low-value transactions with a simplified process, ensuring quick and seamless payments.
Activation of Lite Service
Activation of Lite Service
The user enables UPI Lite through their UPI app, and the request is processed via PSP, NPCI, and the bank, ensuring activation.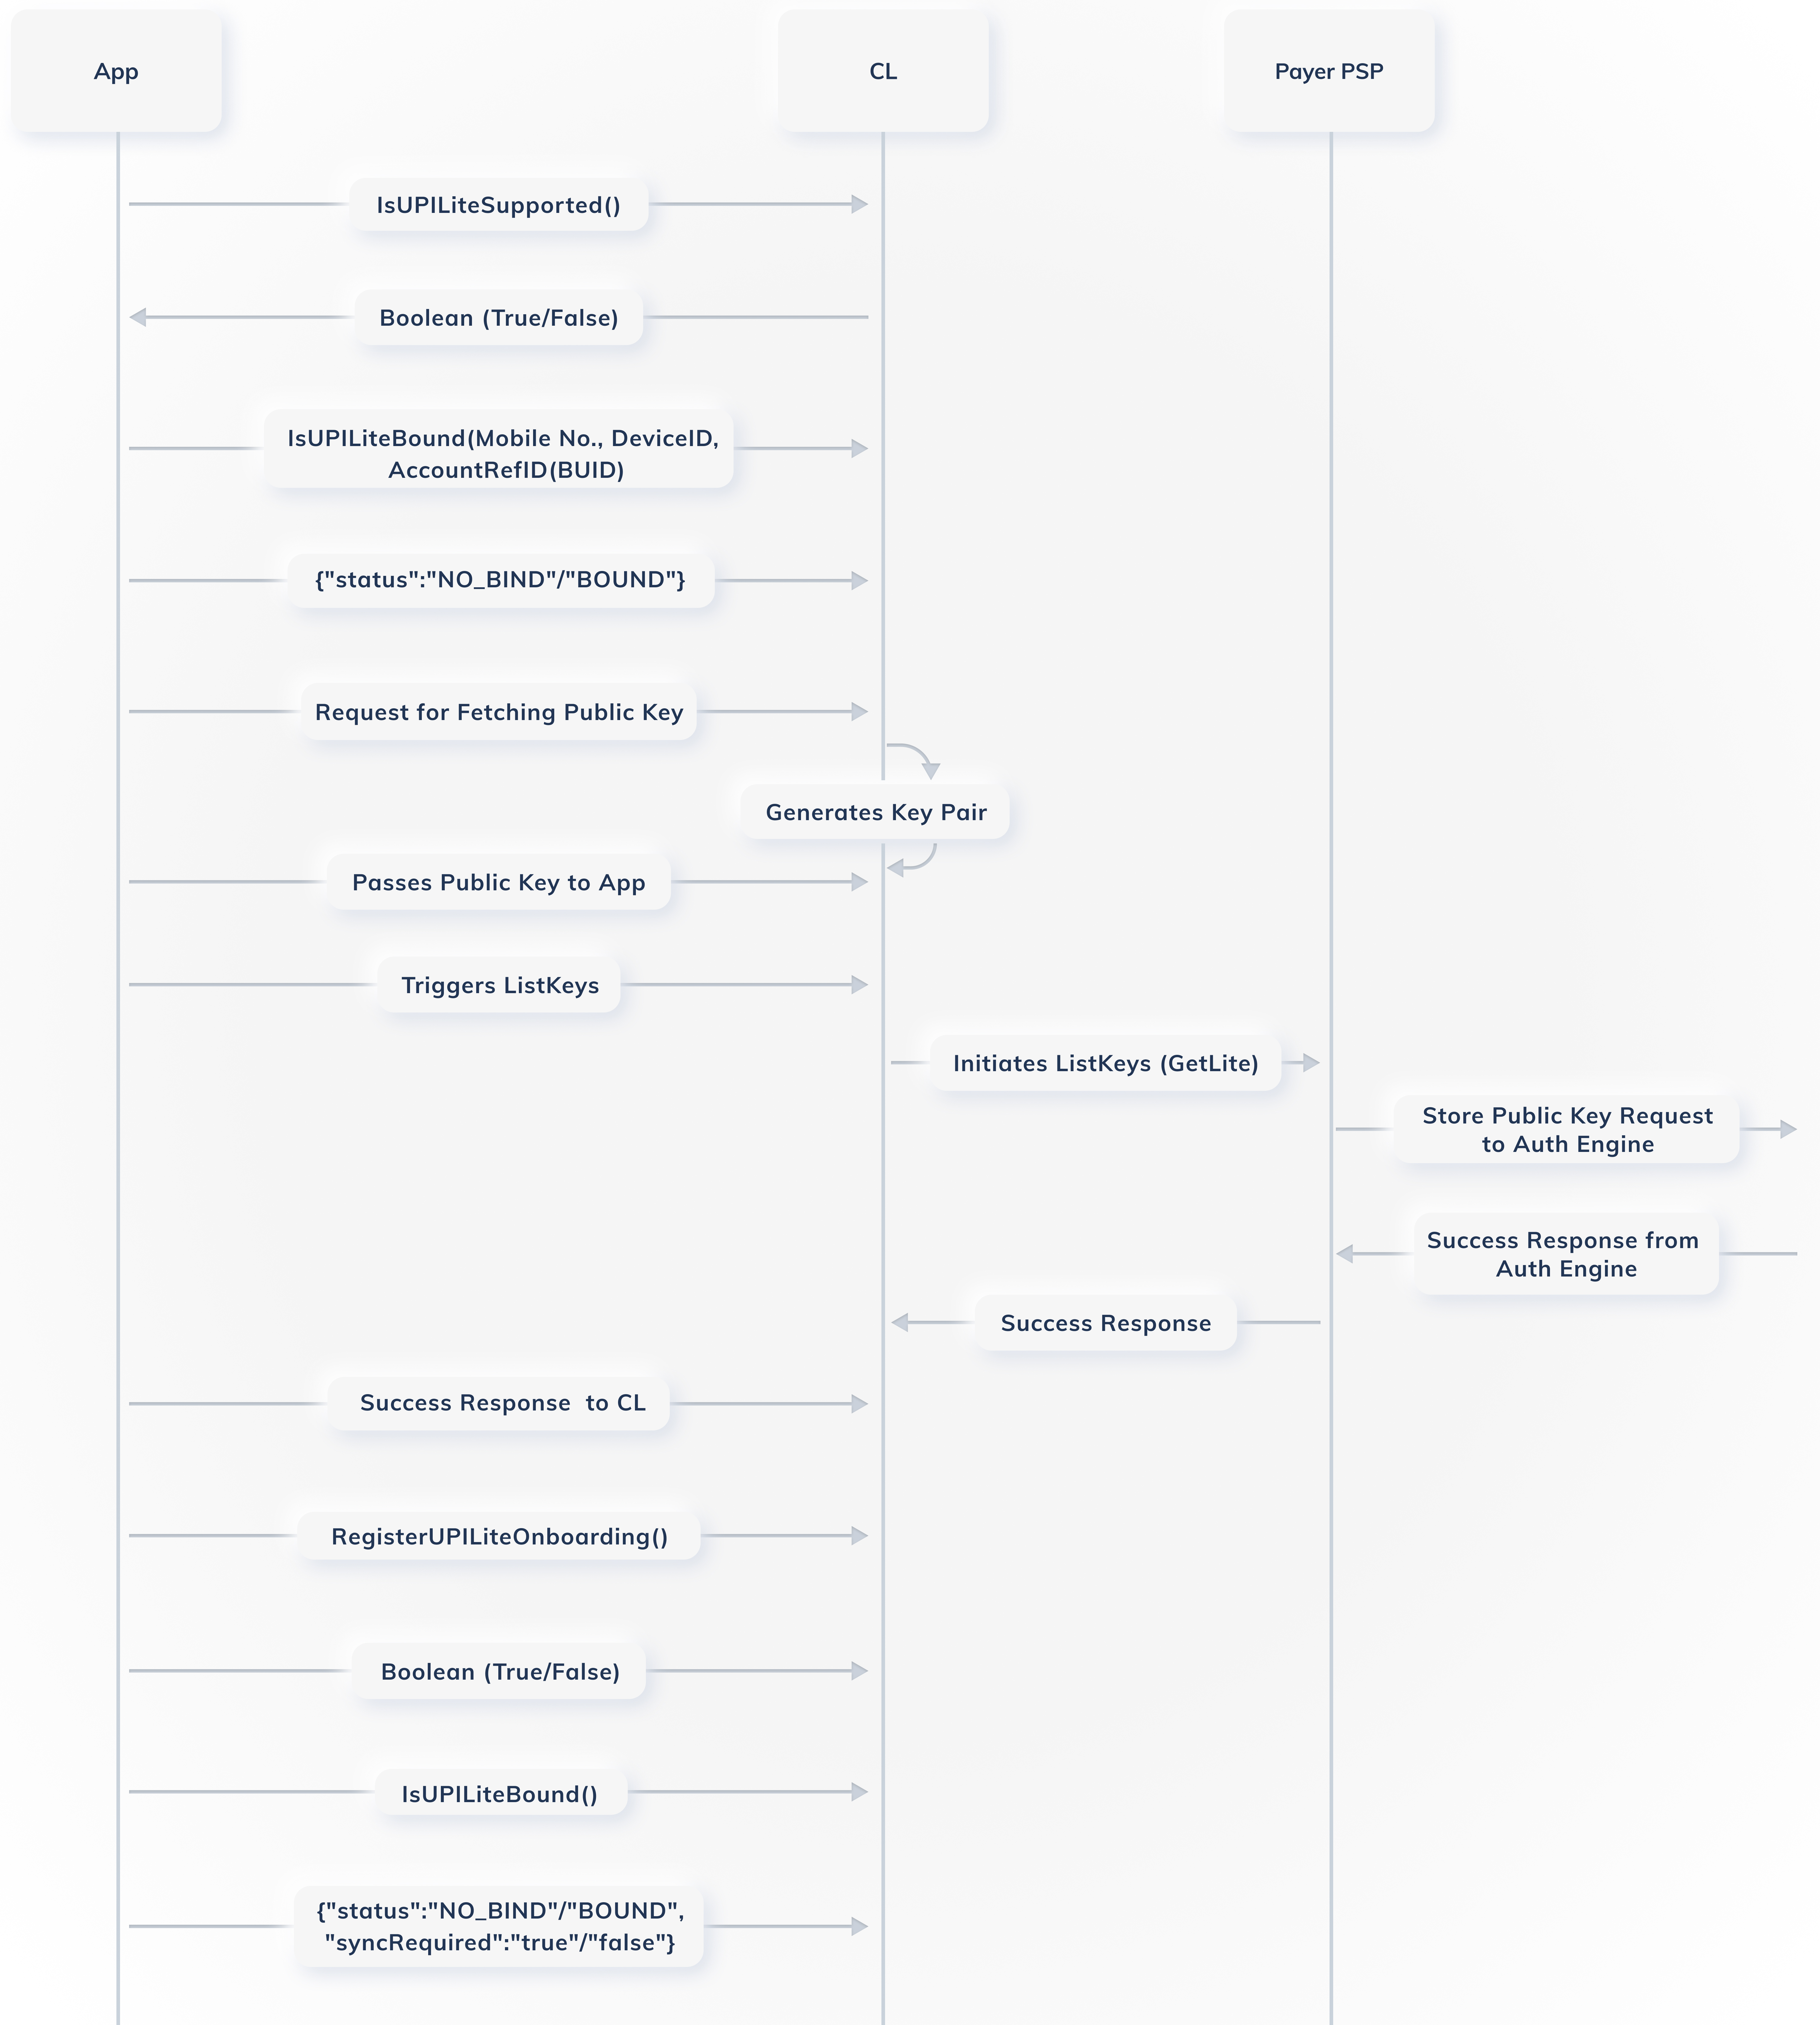
Payment via UPI Lite
Payment via UPI Lite
The user makes a low-value transaction using UPI Lite, where the amount is deducted instantly from their Lite balance without requiring bank authentication.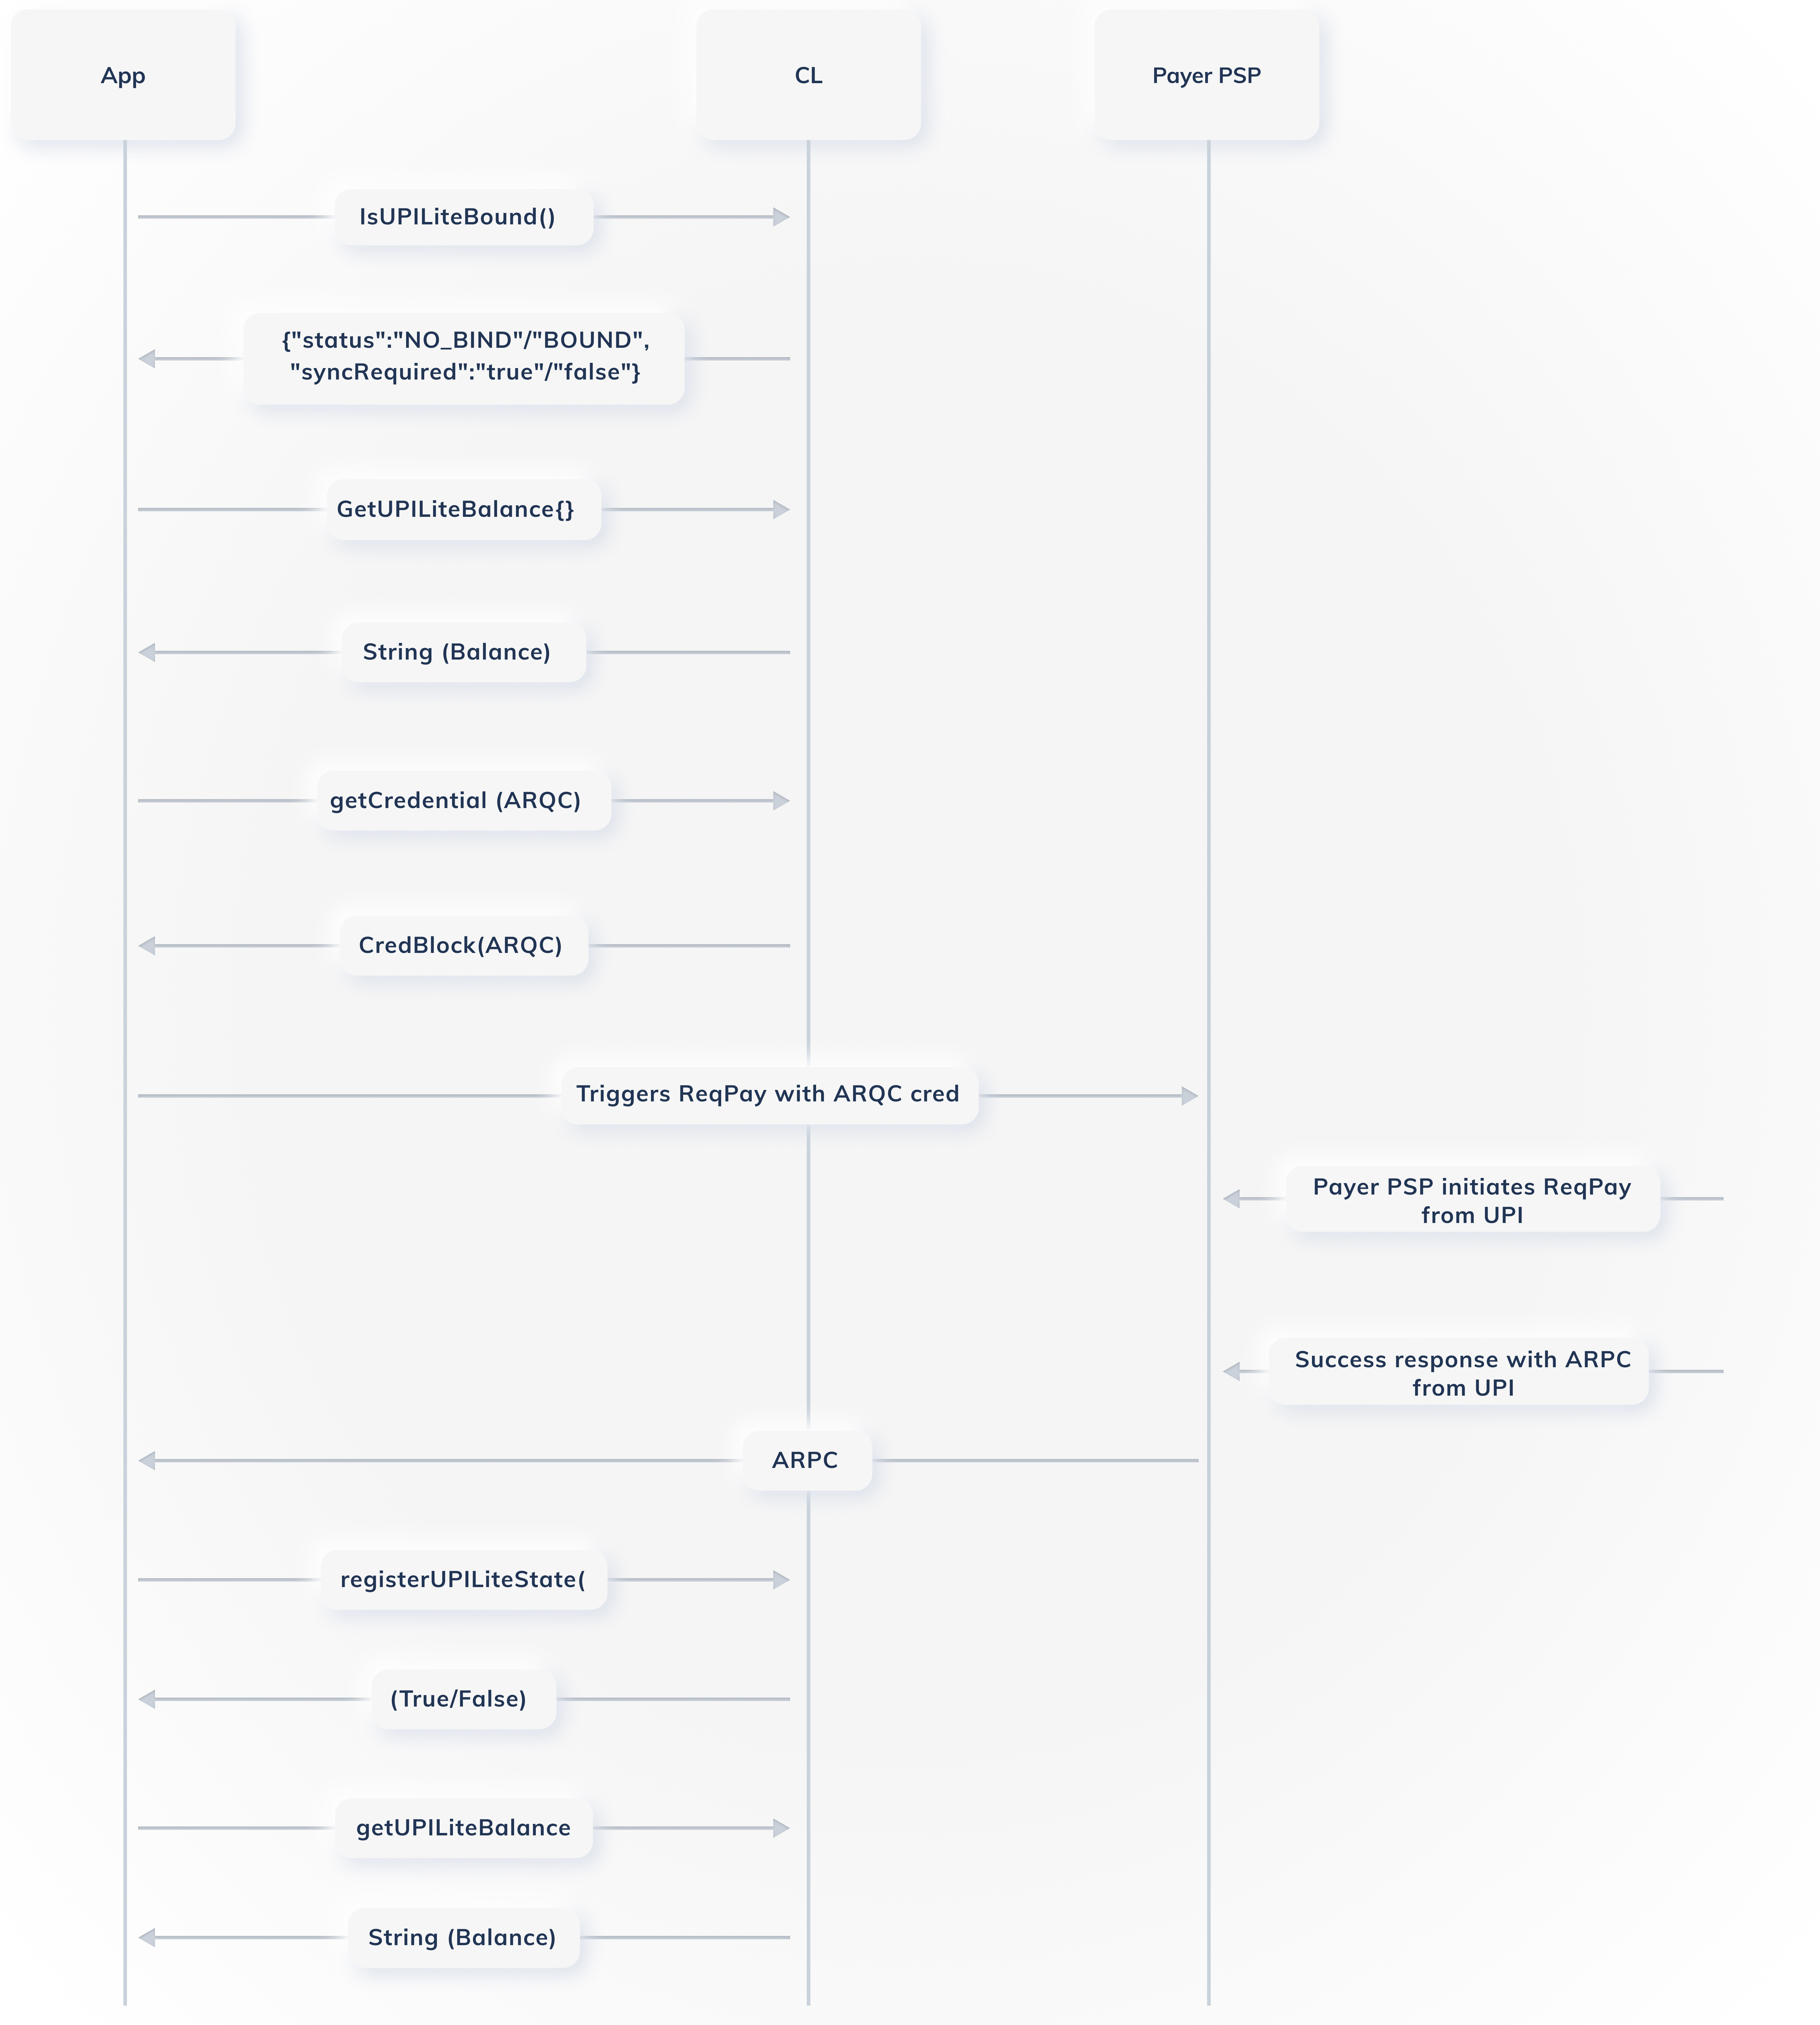
Disabling UPI Lite Service with Non-Zero Balance
Disabling UPI Lite Service with Non-Zero Balance
If the user disables UPI Lite with a remaining balance, the amount is credited back to their linked bank account before deactivation.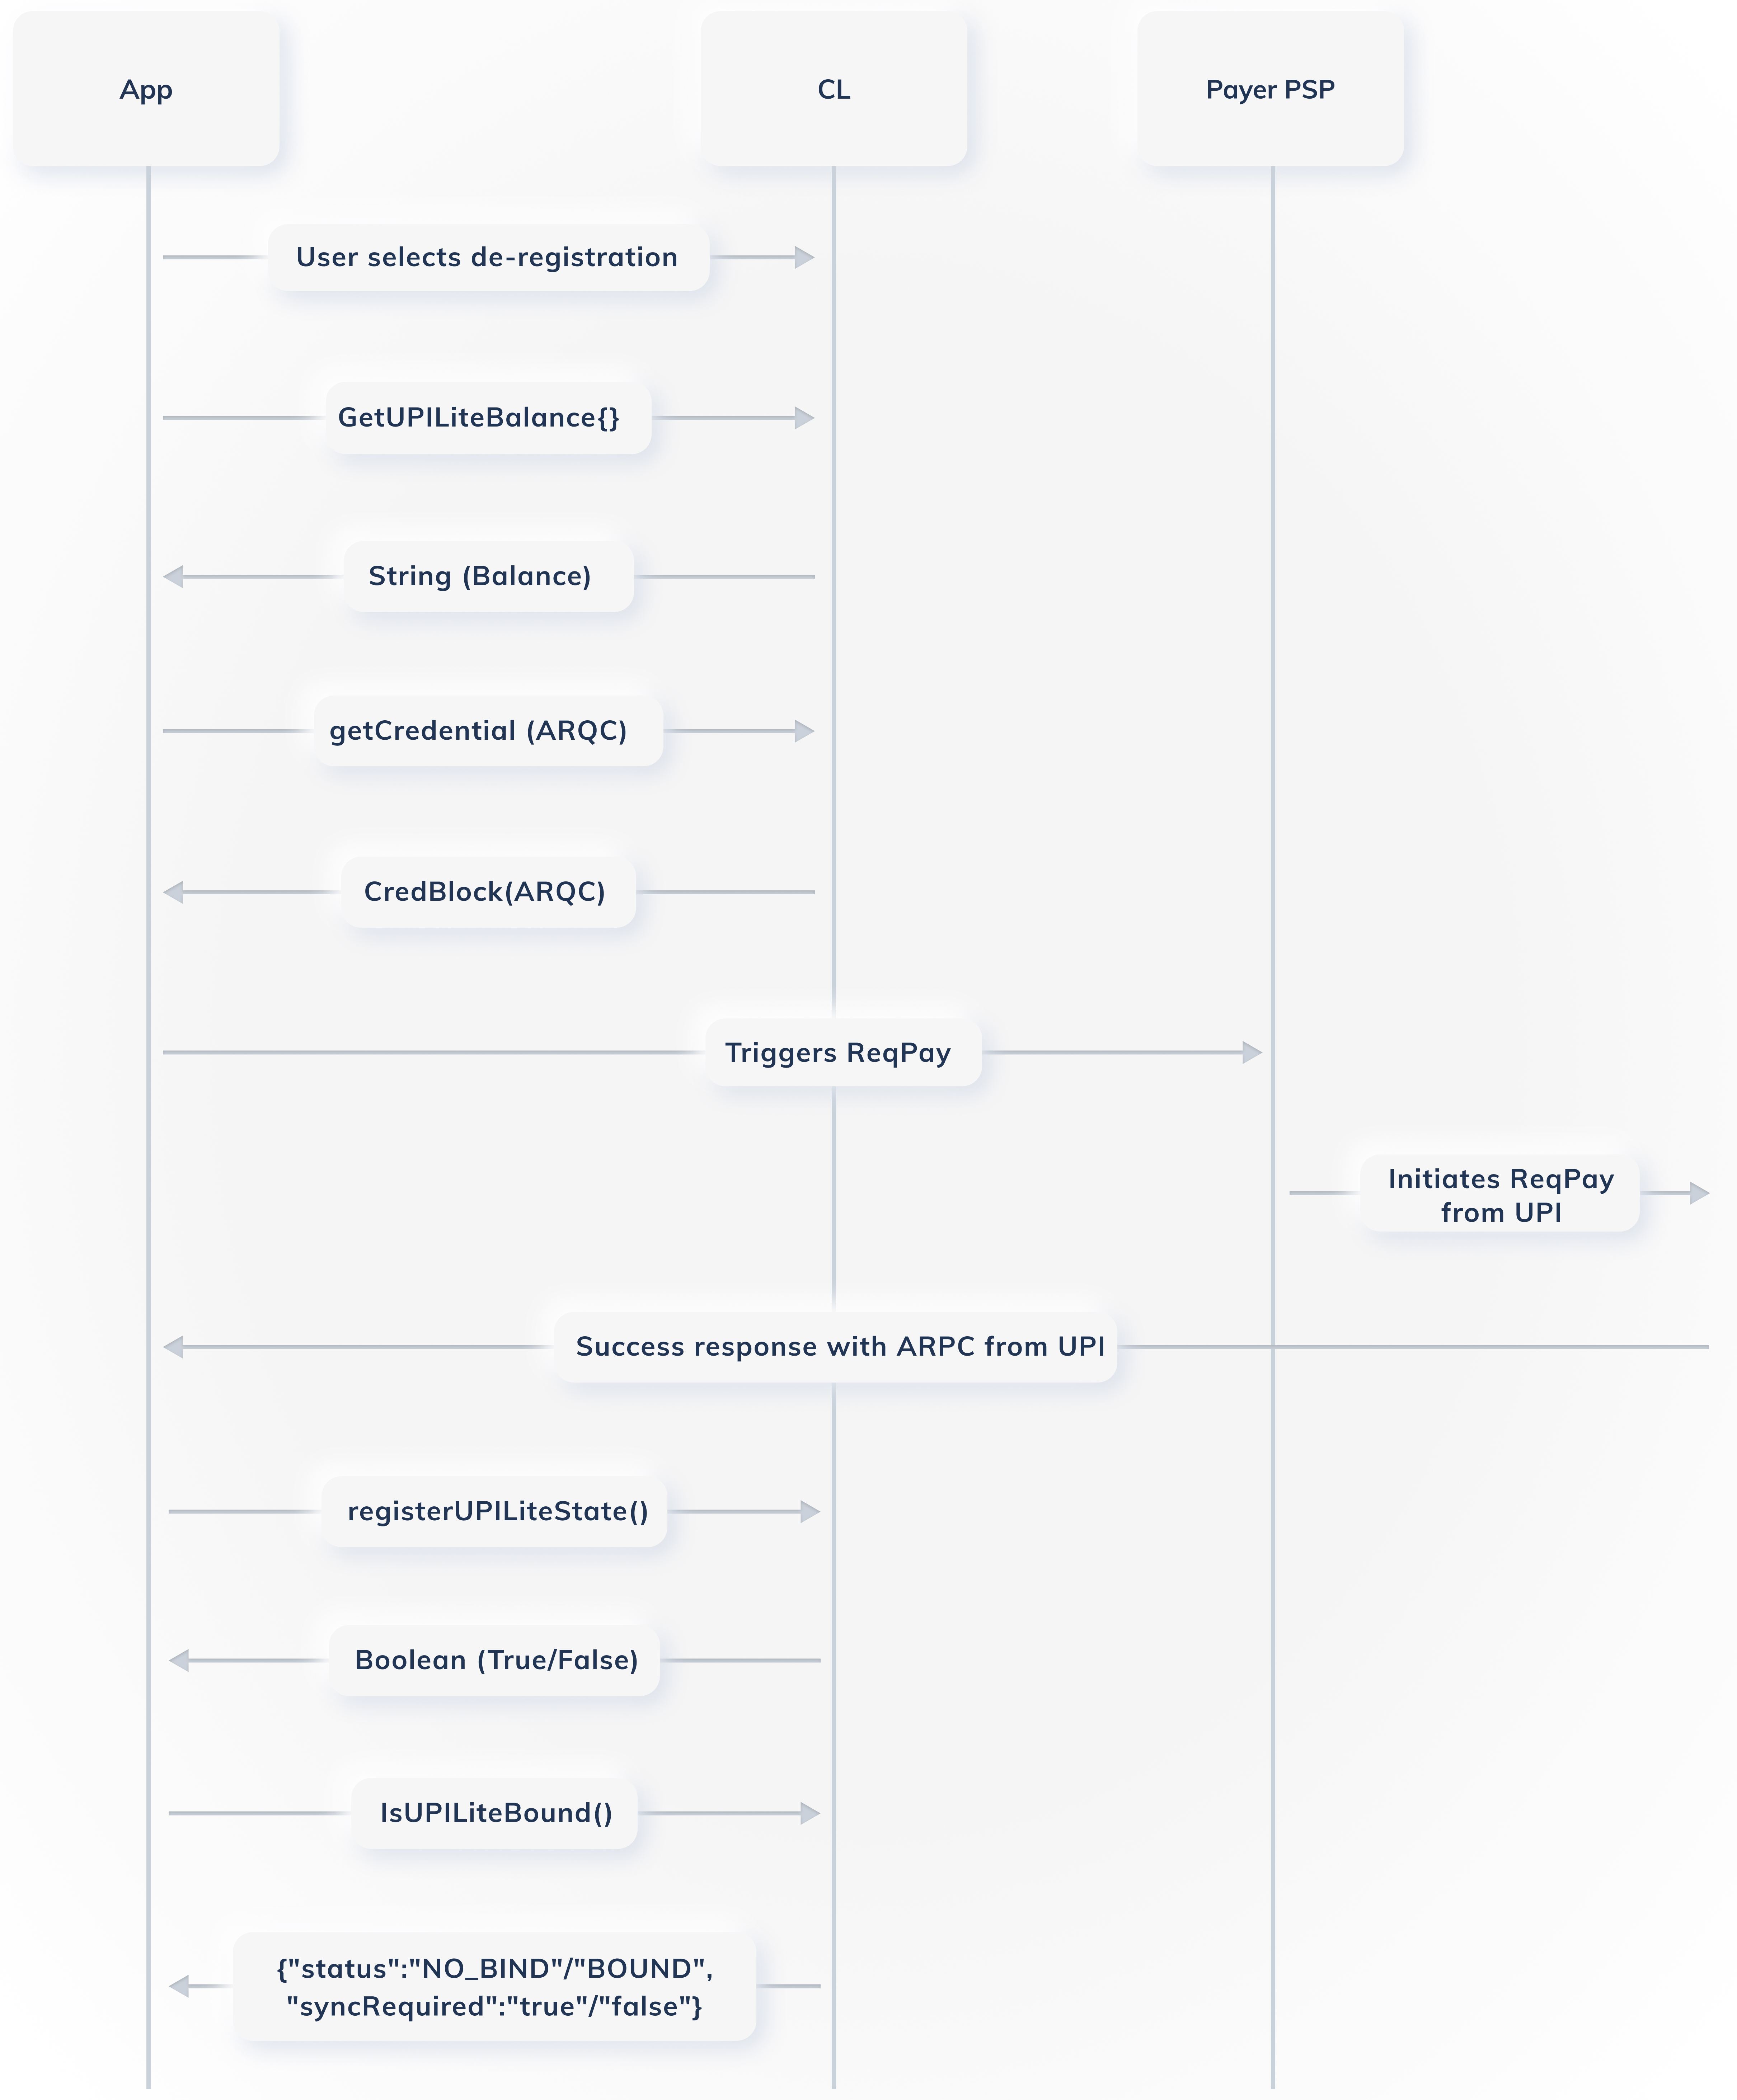
Global UPI
Global UPI
Enable international UPI payments, making cross-border transactions smooth and hassle-free.
2. Follow Go-live Checklist
Consider the following steps before taking your integration live.Switch Test API Keys With Live API Keys
Switch Test API Keys With Live API Keys
After confirming if your integration is working successfully, you can take the integration live by switching the Test Mode API Keys with the Live Mode Keys.
Subscribe to Webhooks
Subscribe to Webhooks
Set up Razorpay Webhooks to configure and receive notifications when a specific event occurs. When one of these events is triggered, we send an HTTP POST payload in JSON to the webhook’s configured URL.