

Available in🇮🇳 India
Employees State Insurance (ESI) is a government mandated health insurance for employees. It is mandatory for organisations with more than 20 employees, whose monthly salary is lower than ₹21,000. RazorpayX Payroll now supports end-to-end automation for multi-location ESIC compliance, eliminating the need for manual handling or dependency on external CA partners.
What is Multi-Location ESIC?
Organisations with employees spread across multiple states or locations are required by ESIC to:- Register each office location under a separate sub-code.
- Maintain distinct login credentials for each location.
- Generate location-specific contribution files.
- Process payments separately for each sub-code.
- Automated, state-wise contribution file generation.
- Location based employee registration and payment processing.
- You can register each office location under a separate sub-code.
- Streamlined operations with smart batch processing.
Setting Up Multi-Location ESIC
Step 1: Enable ESIC Payment Feature
Step 1: Enable ESIC Payment Feature
- Navigate to Settings > Compliance Setup > ESIC Payment Settings.
- Enable the ESIC payment setting.
- A note will appear: “To enable payment processing for multiple locations, please configure your office locations and ESIC details in the Company Details section and enter credentials for these office locations.”
Step 2: Enable ESIC Feature Flag
Step 2: Enable ESIC Feature Flag
Before using multi-location ESIC, you need to get the feature flag enabled for your organisation.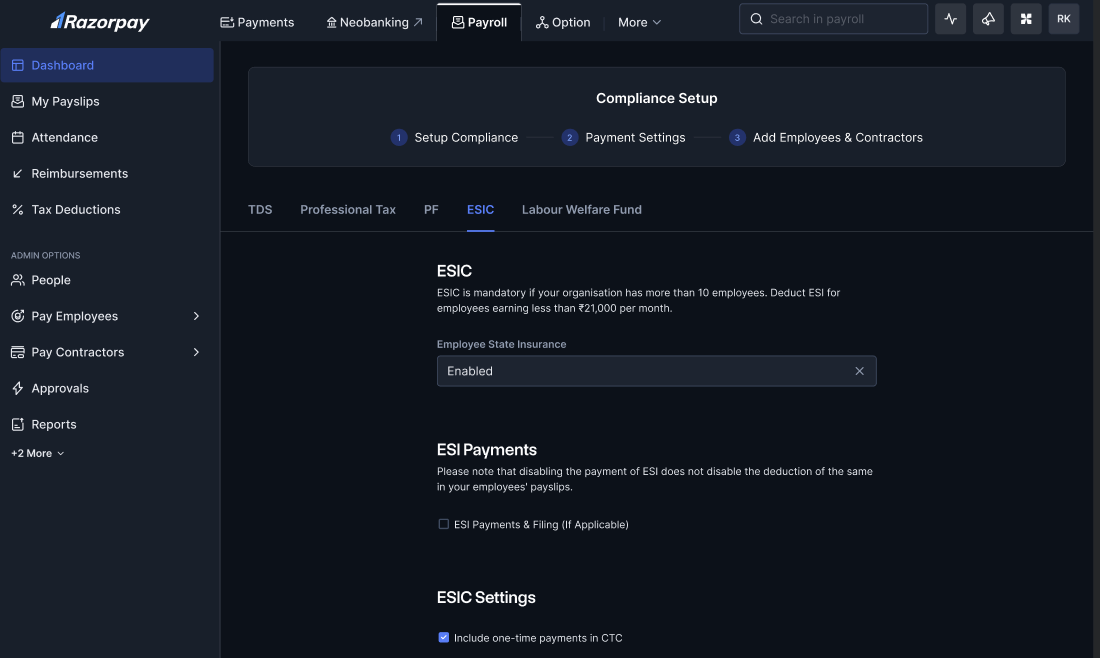 Contact Payroll Support for assistance.
Contact Payroll Support for assistance.Step 3: Configure Office Locations
Step 3: Configure Office Locations
- Go to the Company Details tab.
- Navigate to the office location section.

- Add each office location with the following details:
- Office Location Name(mandatory)
- Office State
- Office Pincode
- ESIC Sub-code
- Nearest ESIC Hospital/Dispensary
Step 4: Set Up ESIC Credentials
Step 4: Set Up ESIC Credentials
- After adding your office locations, navigate to External Credentials.
- You’ll see a table with columns: Office Location, Sub-code, Username, Password.
- For each office location:
- Select the office location from the dropdown.
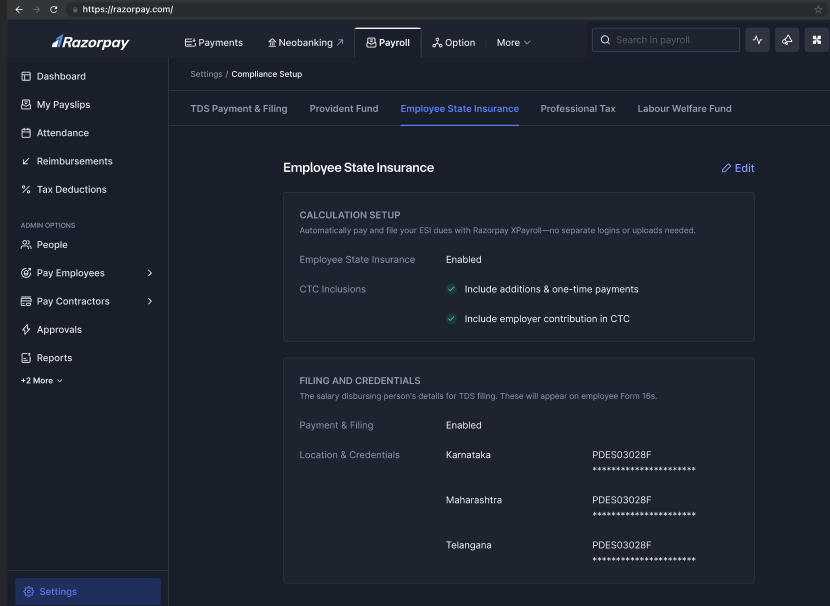
- The ESIC sub-code will be auto-filled based on your selection.
- Enter the username and password for that specific location.
Employee Office Location Assignment
For multi-location ESIC to work correctly, each eligible employee must be assigned to the appropriate office location.- For New Employees
- For Existing Employees
When adding a new employee:
- Office location is a mandatory field in the new onboarding flow. Be very careful while adding your location as you cannot change or delete it afterwards.
- Select the appropriate office location for the employee.
- Based on the selected location, automation will:
- Use the corresponding ESIC sub-code and credentials.
- Register the employee in the correct ESIC portal.
- Update the employee profile with the registration details.
ESIC Registration Process
The system automatically handles employee registration based on their assigned office location: Based on the screenshots, here’s the refined documentation for the ESIC registration process:- For Employees Without IP Number
- For Employees With Existing IP Number
When an employee doesn’t have an existing ESIC IP number:
- Navigate to People → Select the employee → ESI Registration.
- Select No when asked “Does [Employee Name] have a ESIC IP Number?”
- Fill in all required information:
- Bank account details and proof (cancelled cheque/passbook)
- Personal details (DOJ, mobile, photo, PAN)
- Address information (present and permanent)
- Nominee details
- Dispensary selection
- Family member details (if applicable)
- Click Request ESIC Addition.
- Retrieves the matching credentials for that sub-code/office location.
- Logs into the ESIC portal using those credentials.
- Registers the employee under that organisation.
- Retrieves the IP number and updates the employee record.
Contribution File Generation
Once multi-location ESIC is configured, contribution files are automatically generated for each location:- The system calculates ESIC contributions as usual.
- Employees are segregated based on their office location.
- Separate contribution files with their contribution details are generated for each sub-code/office location.
- Files are formatted according to government specifications for direct upload.
Payment Processing
When multi-location ESIC is enabled, the payment automation process works as follows:- System identifies that multi-location is enabled.
- Processes payments one sub-code/office location at a time:
- Selects a sub-code.
- Fetches all employees tagged to that location.
- Retrieves the credentials for that sub-code/office location.
- Logs in and processes the payment.
- Repeats the process for all configured sub-codes/office locations.
- Updates the dashboard with payment status for each location.
FAQs
Do I need to pay different contribution rates for different locations?
Do I need to pay different contribution rates for different locations?
No. Since ESIC is governed by a central authority, deduction amounts remain the same regardless of the sub-code.
Can I add new office locations after enabling multi-location ESIC?
Can I add new office locations after enabling multi-location ESIC?
Yes. You can add new office locations at any time through the Company Details section.
How do I handle employee transfers between locations?
How do I handle employee transfers between locations?
Update the employee’s office location in their profile. The system will automatically use the correct sub-code for future compliance activities.
Is there a limit to how many office locations I can configure?
Is there a limit to how many office locations I can configure?
No. The system supports an unlimited number of office locations and sub-codes.