

Available in🇮🇳 India
Follow the steps given below to integrate credit card payment with your Shopify store directly on the checkout page using Razorpay Direct - Credit Card plugin.
1. Build Integration
Install and configure the Razorpay Direct - Credit Card plugin.
2. Test Integration
Test the integration by making a test payment.
3. Go-Live Checklist
Check the go-live checklist.
- Create a Razorpay account.
- Create a Shopify account.
- Understand the payment flow process.
1. Build Integration
Install the plugin
Install the plugin
- Install Razorpay Direct - Credit Card from the Shopify app store.
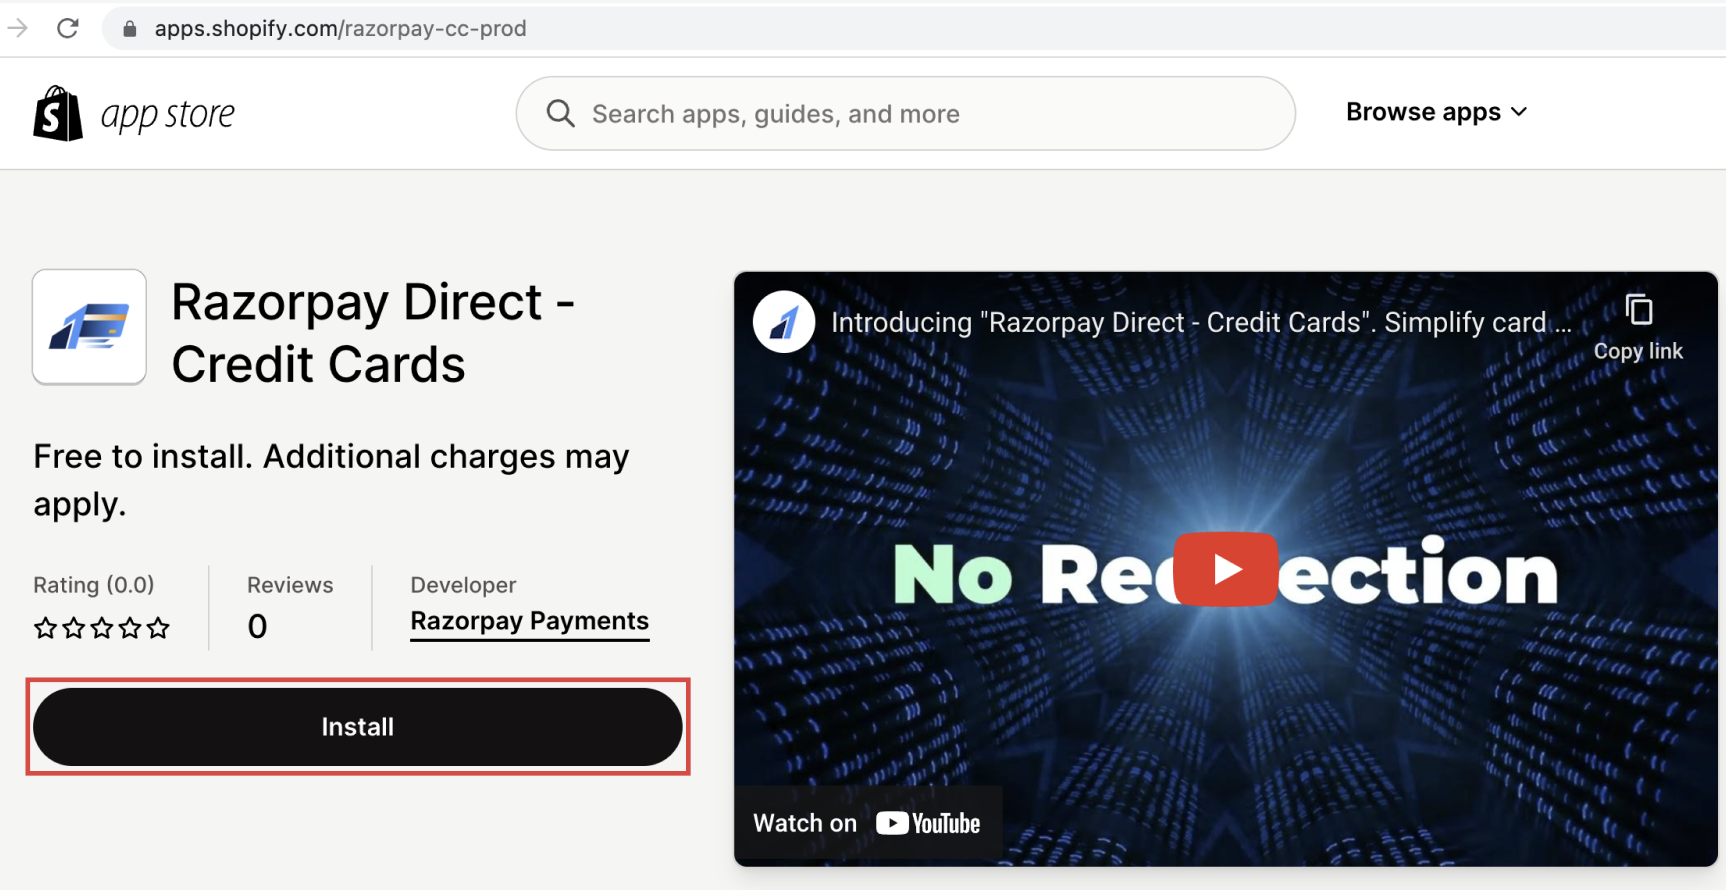
Handy TipsIf you have multiple stores, select the store for which you want to install the Razorpay Direct - Credit Card.
-
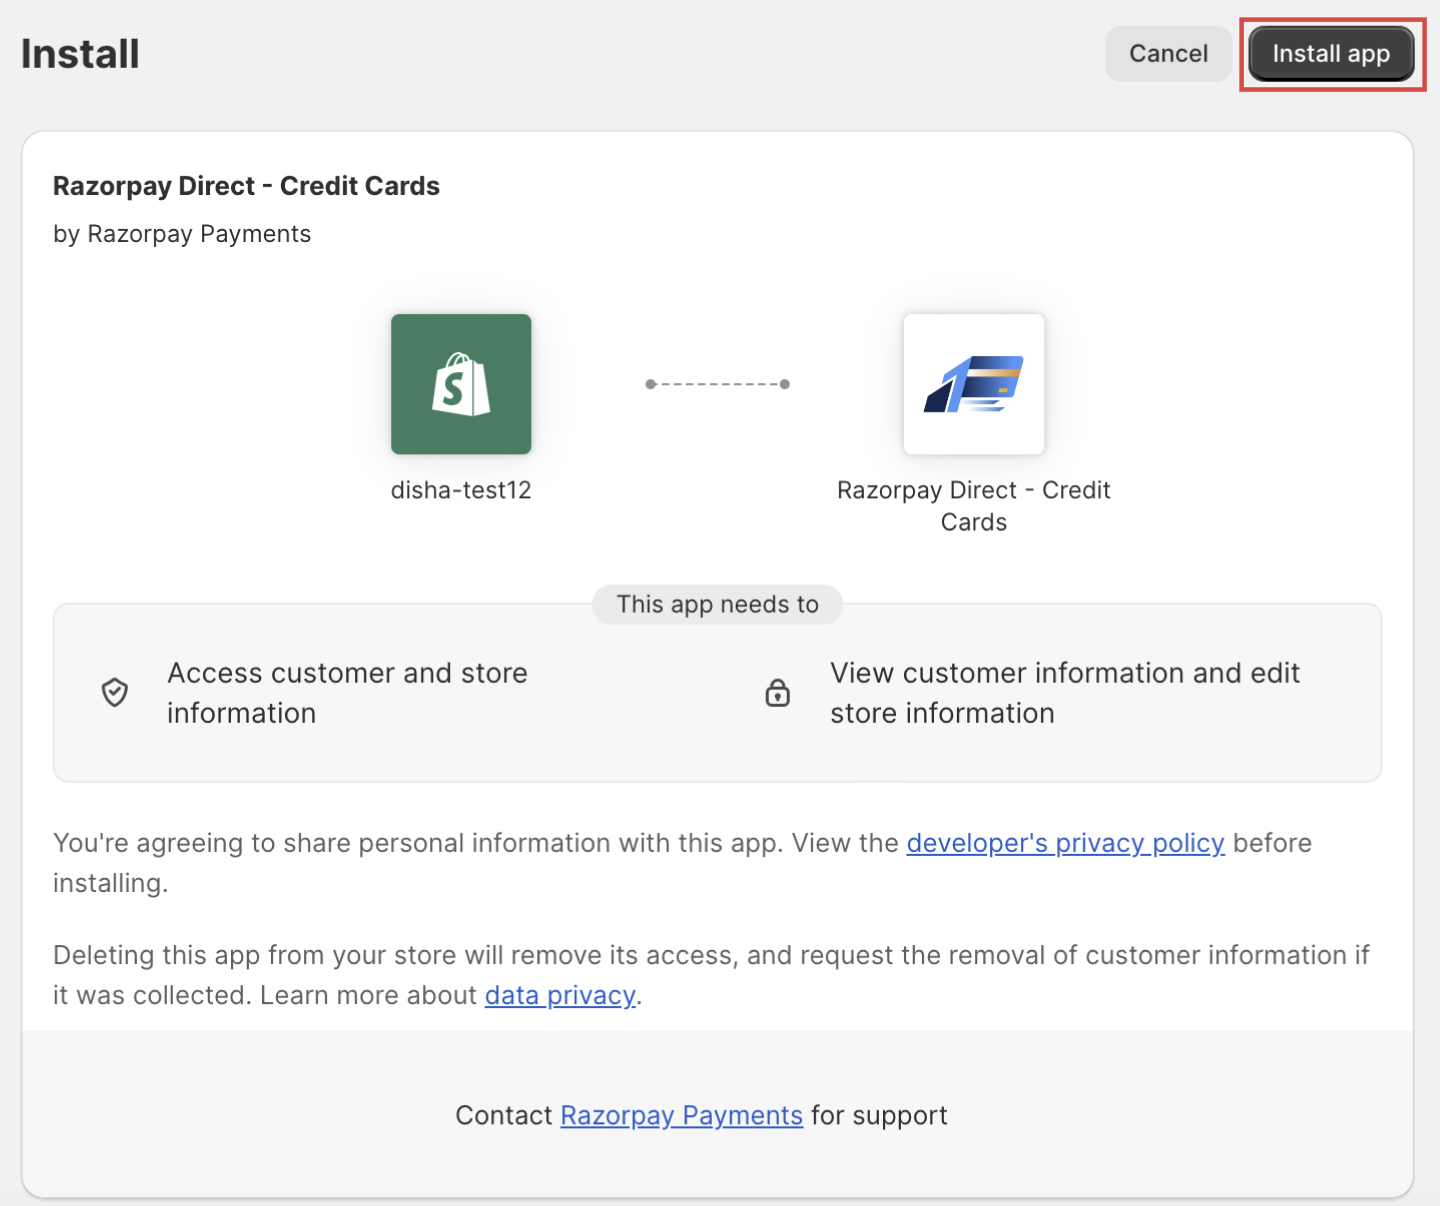
You will be redirected to the Shopify home screen. Click Install app.
-
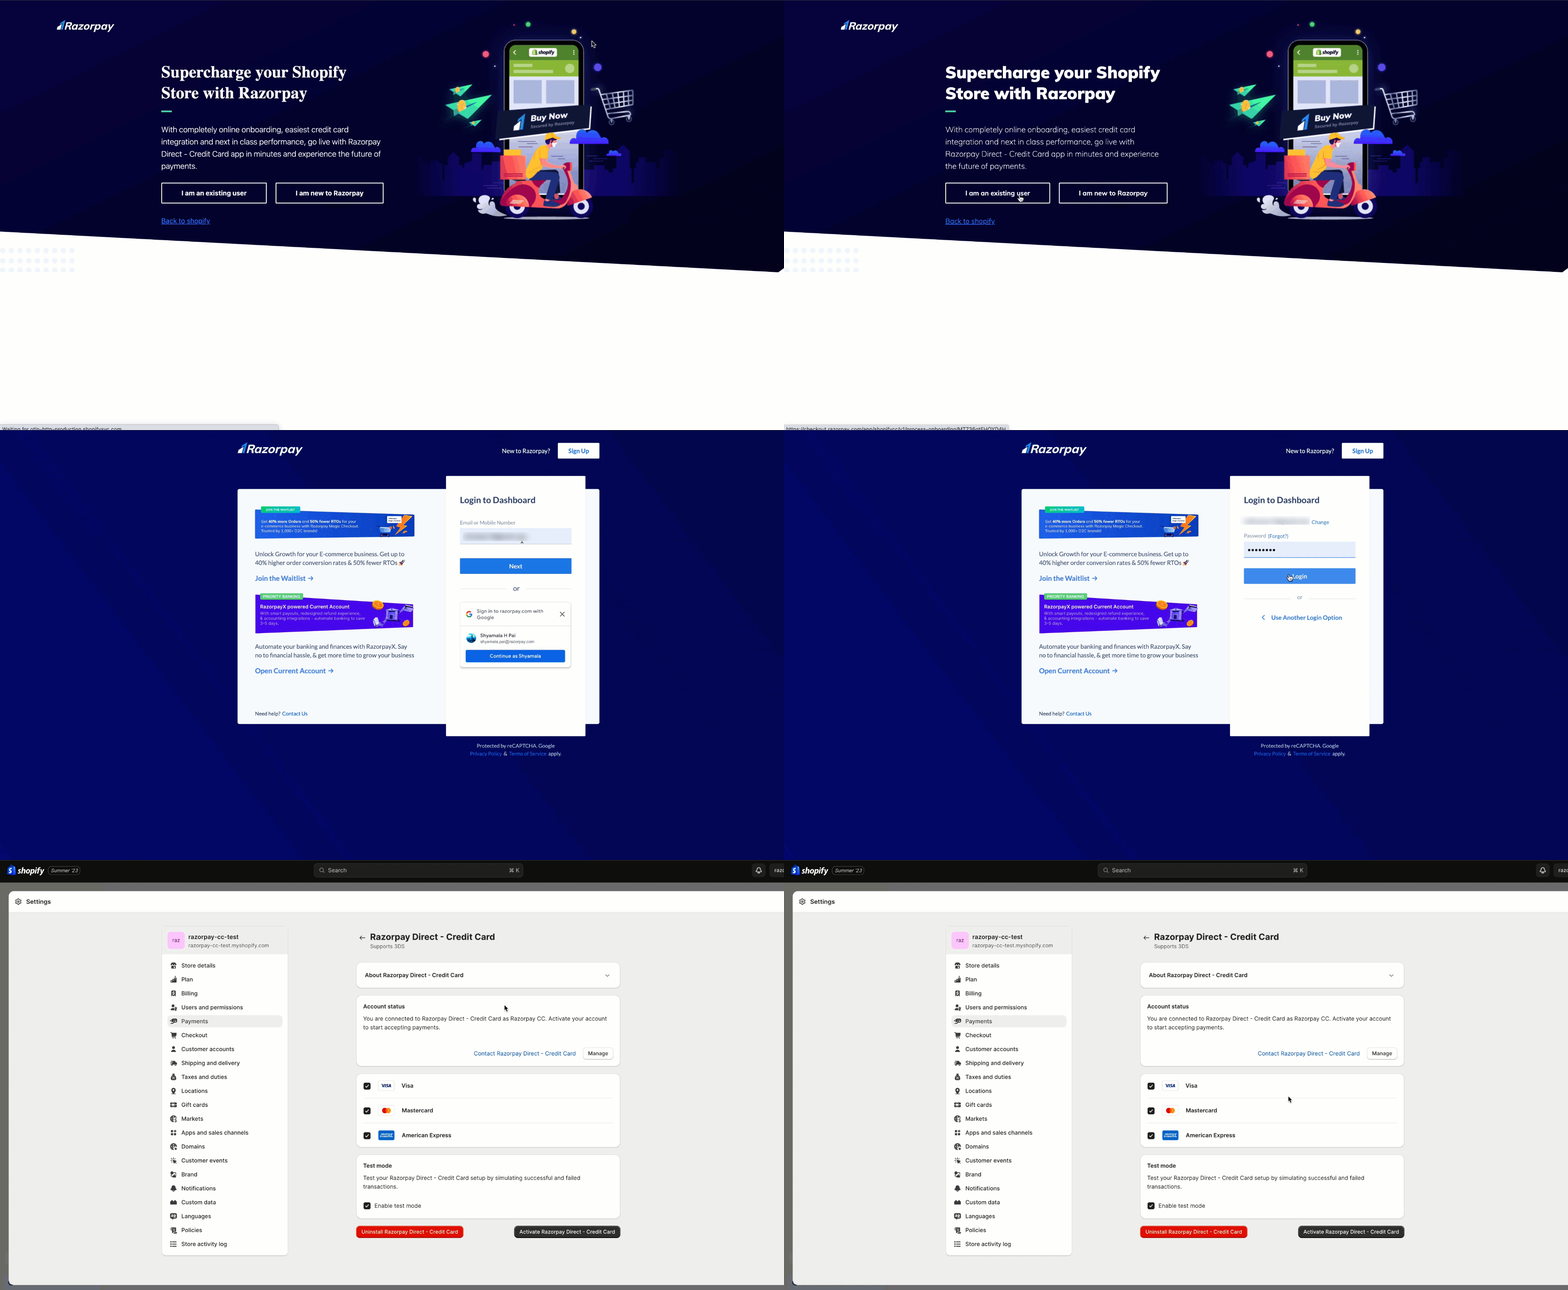
You will be redirected to a landing page. Click I am an existing user and log in to your Razorpay account.
Handy Tips
- Ensure you log in with owner credentials to connect Razorpay with Shopify successfully.
- If you are a new Razorpay user, click I am new to Razorpay and set up an account.
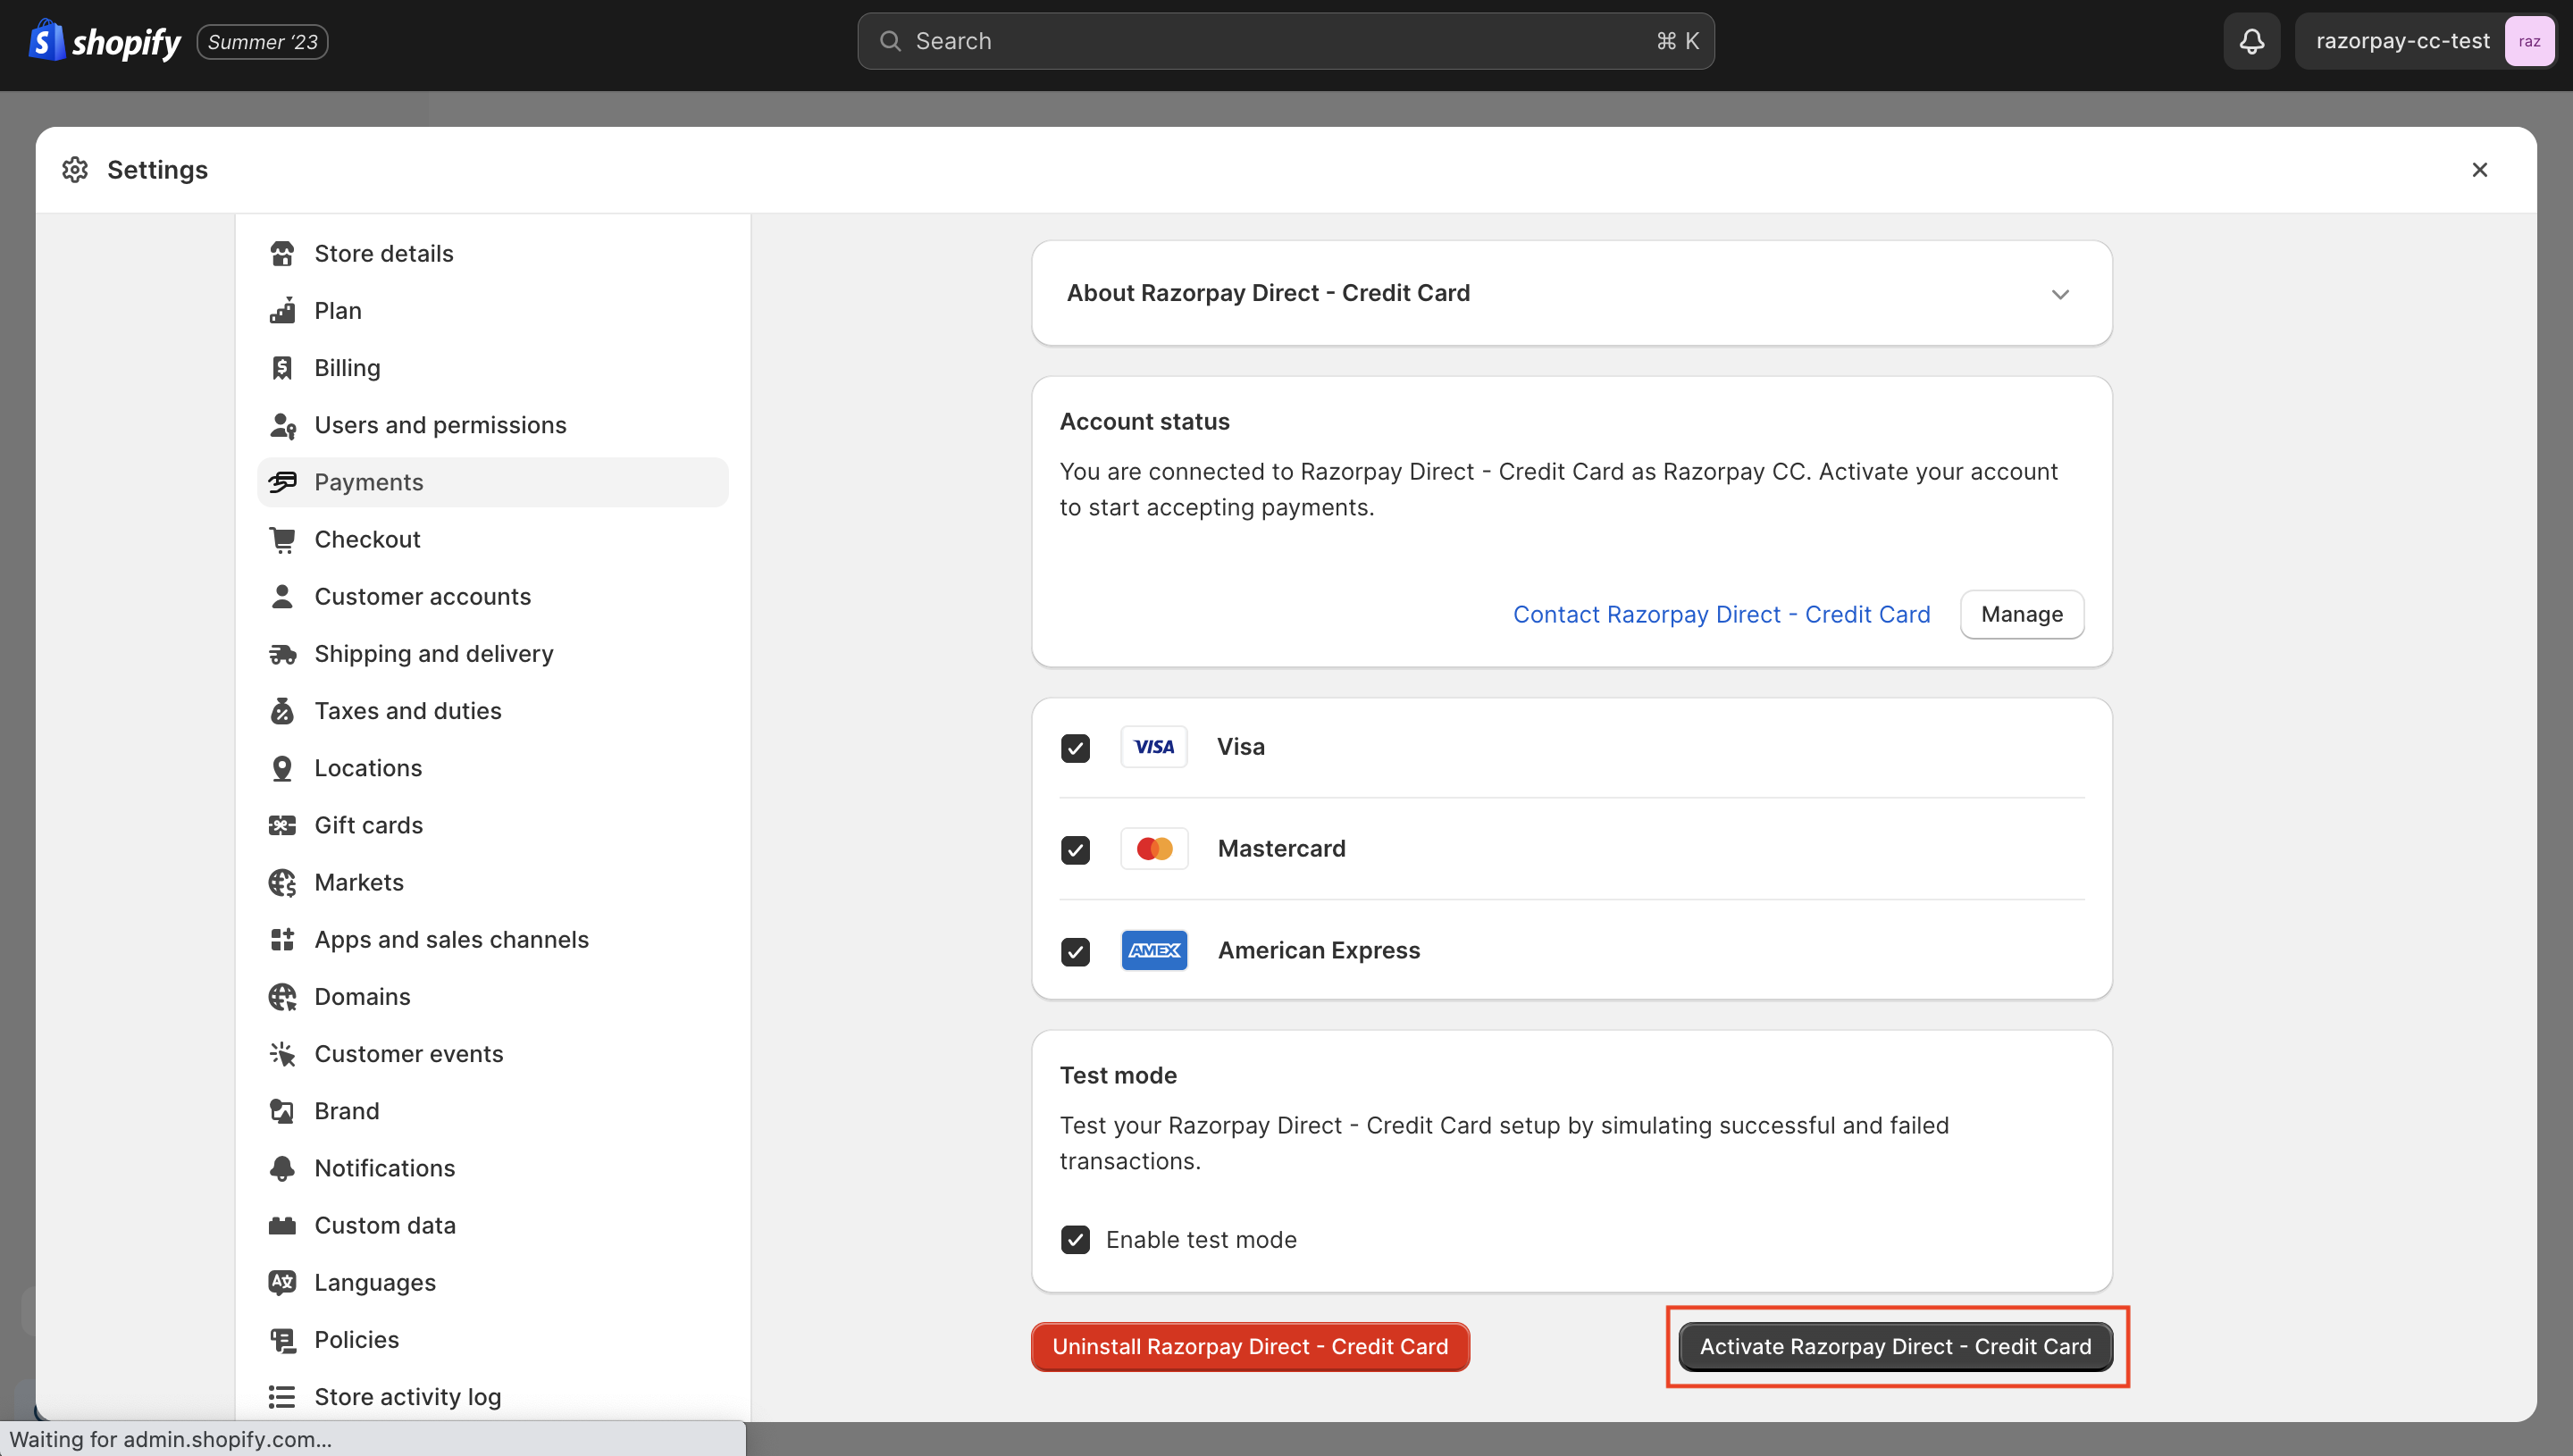
- Click Activate Razorpay Direct - Credit Card on the activation screen on your Shopify Dashboard.
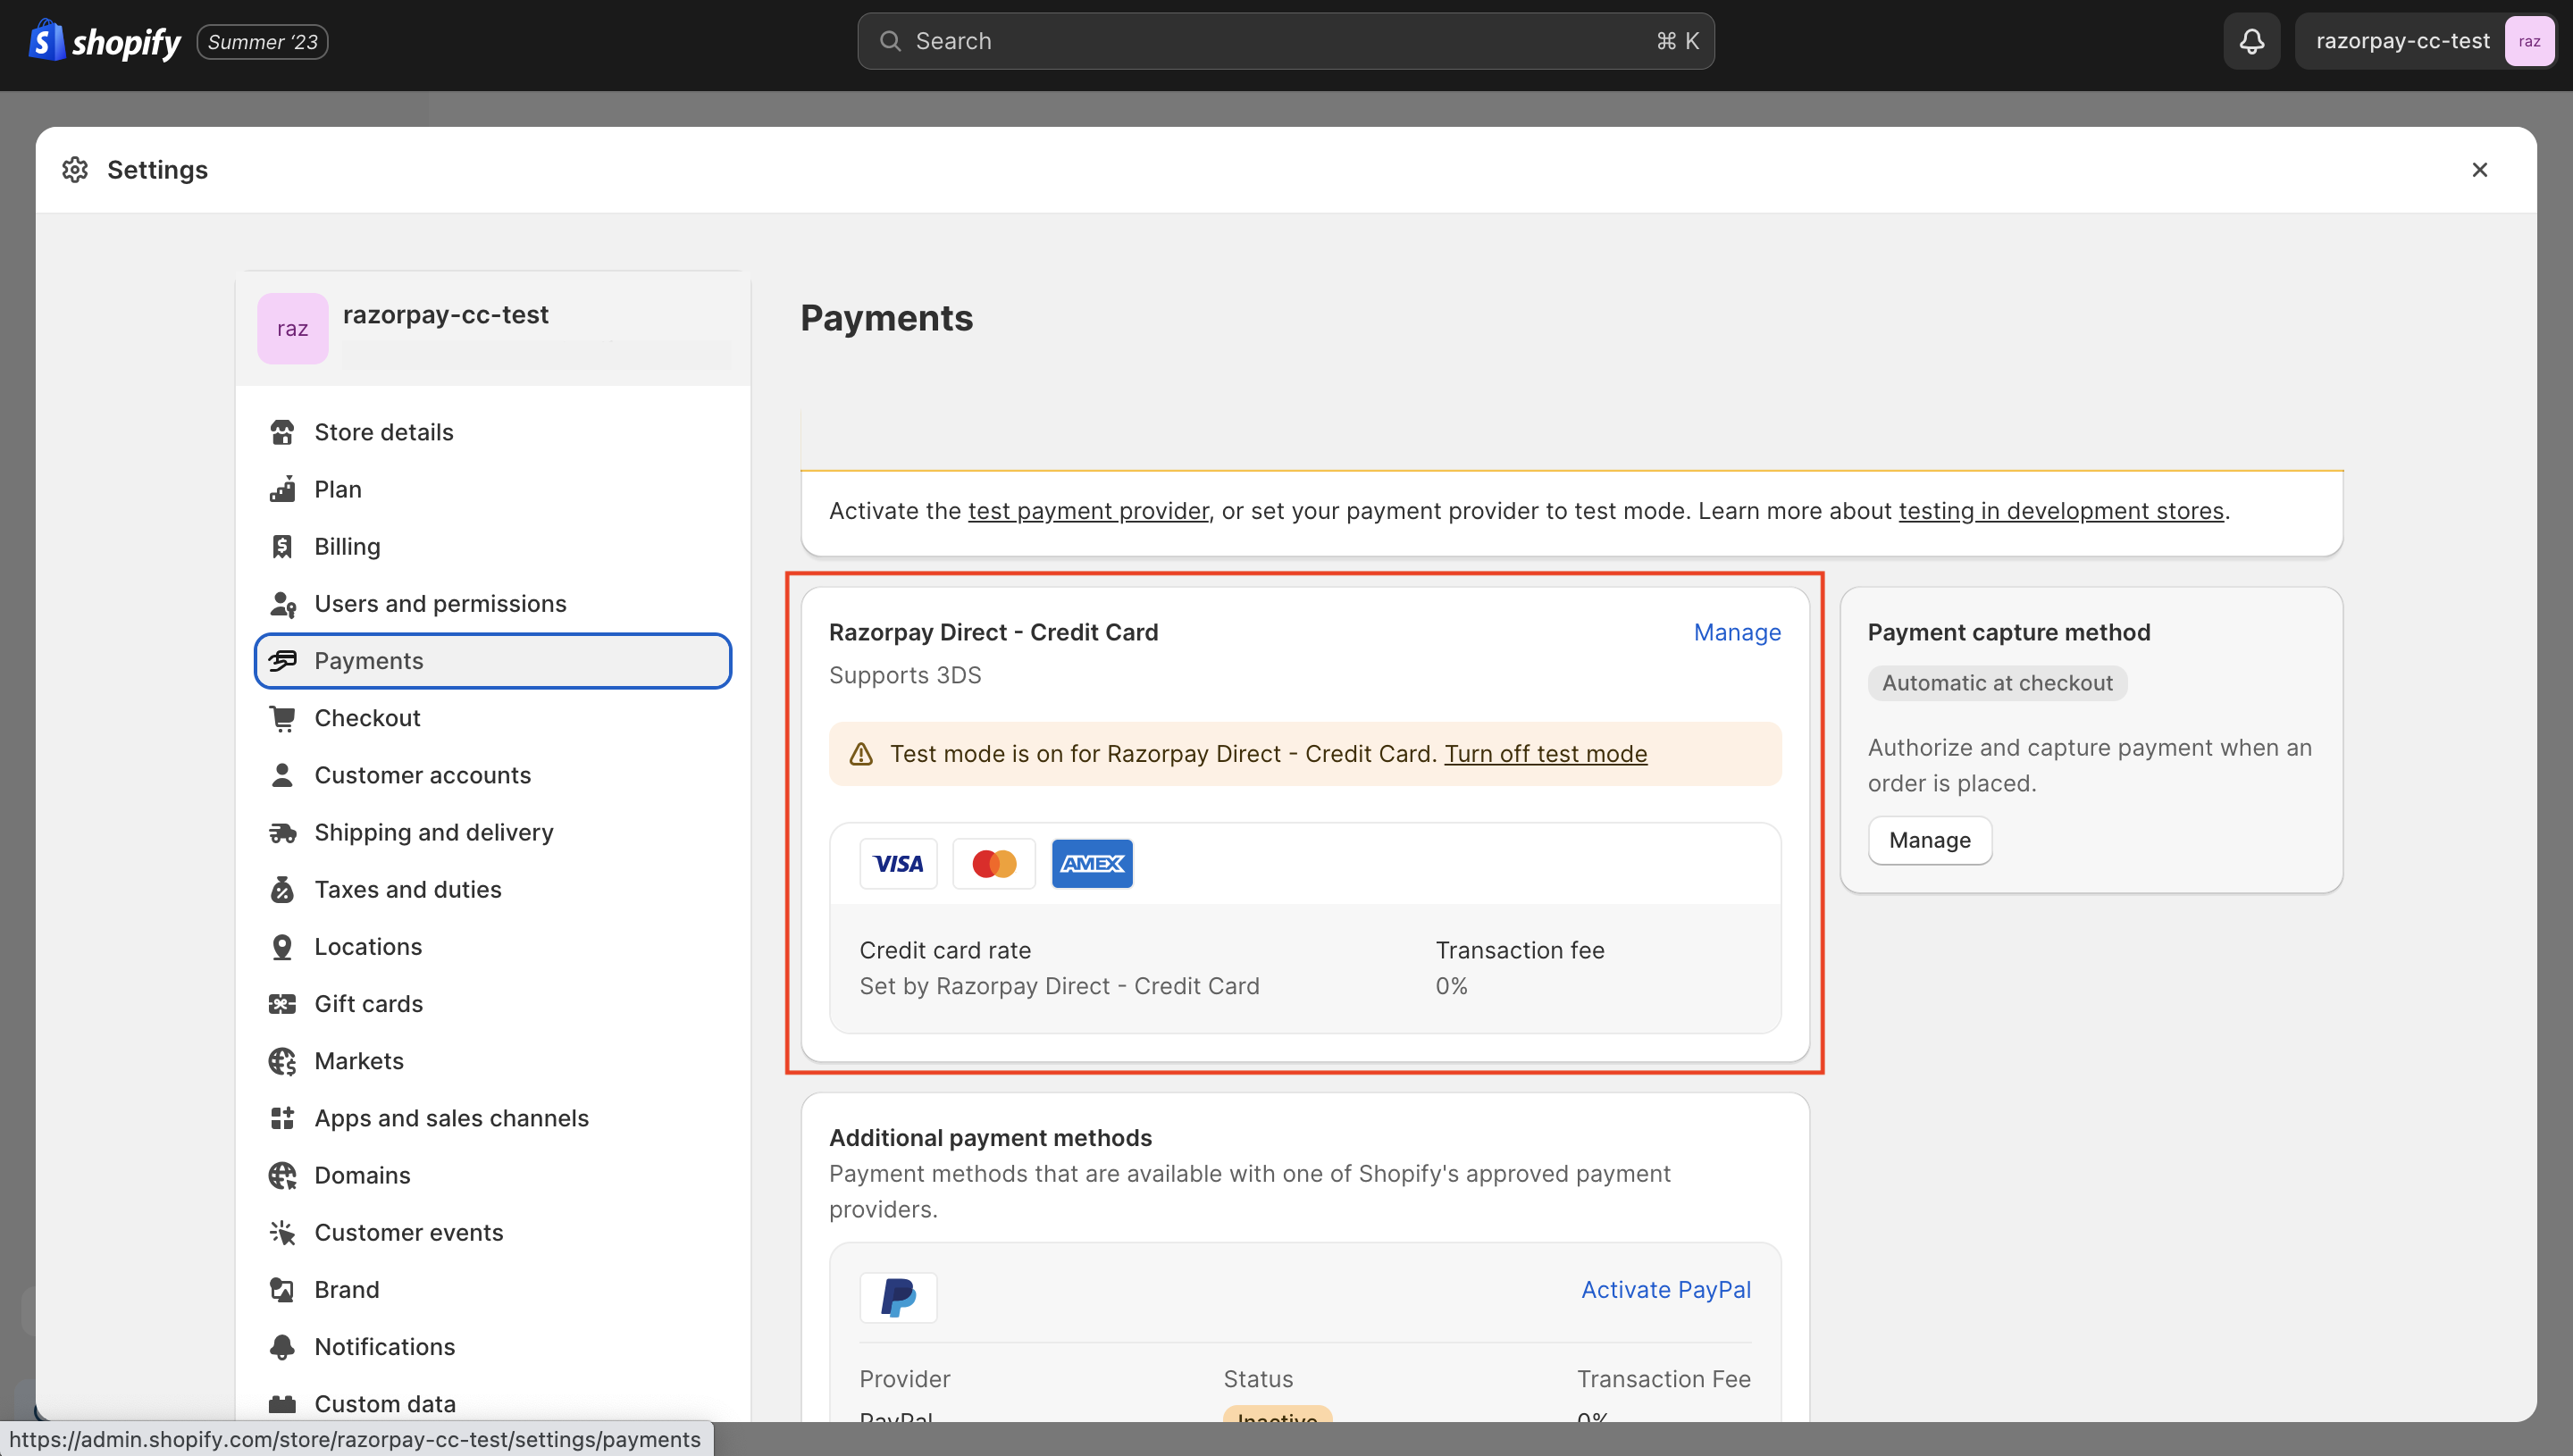
Handy Tips
- Webhooks is auto-configured. You need to verify if webhooks are enabled on your Dashboard.
- The
order.paid,payment.authorized,refund.processedandrefund.failedevents are auto-configured. You do not have to configure it on the Dashboard.
2. Test Integration
After the integration is complete, you need to ensure that the integration is working as expected. You can start accepting actual payments from your customers once the test mode transaction is successful.Test Transaction in Test Mode
Test Transaction in Test Mode
Follow the steps given below to test a transaction in test mode:
- Log in to your Shopify store.
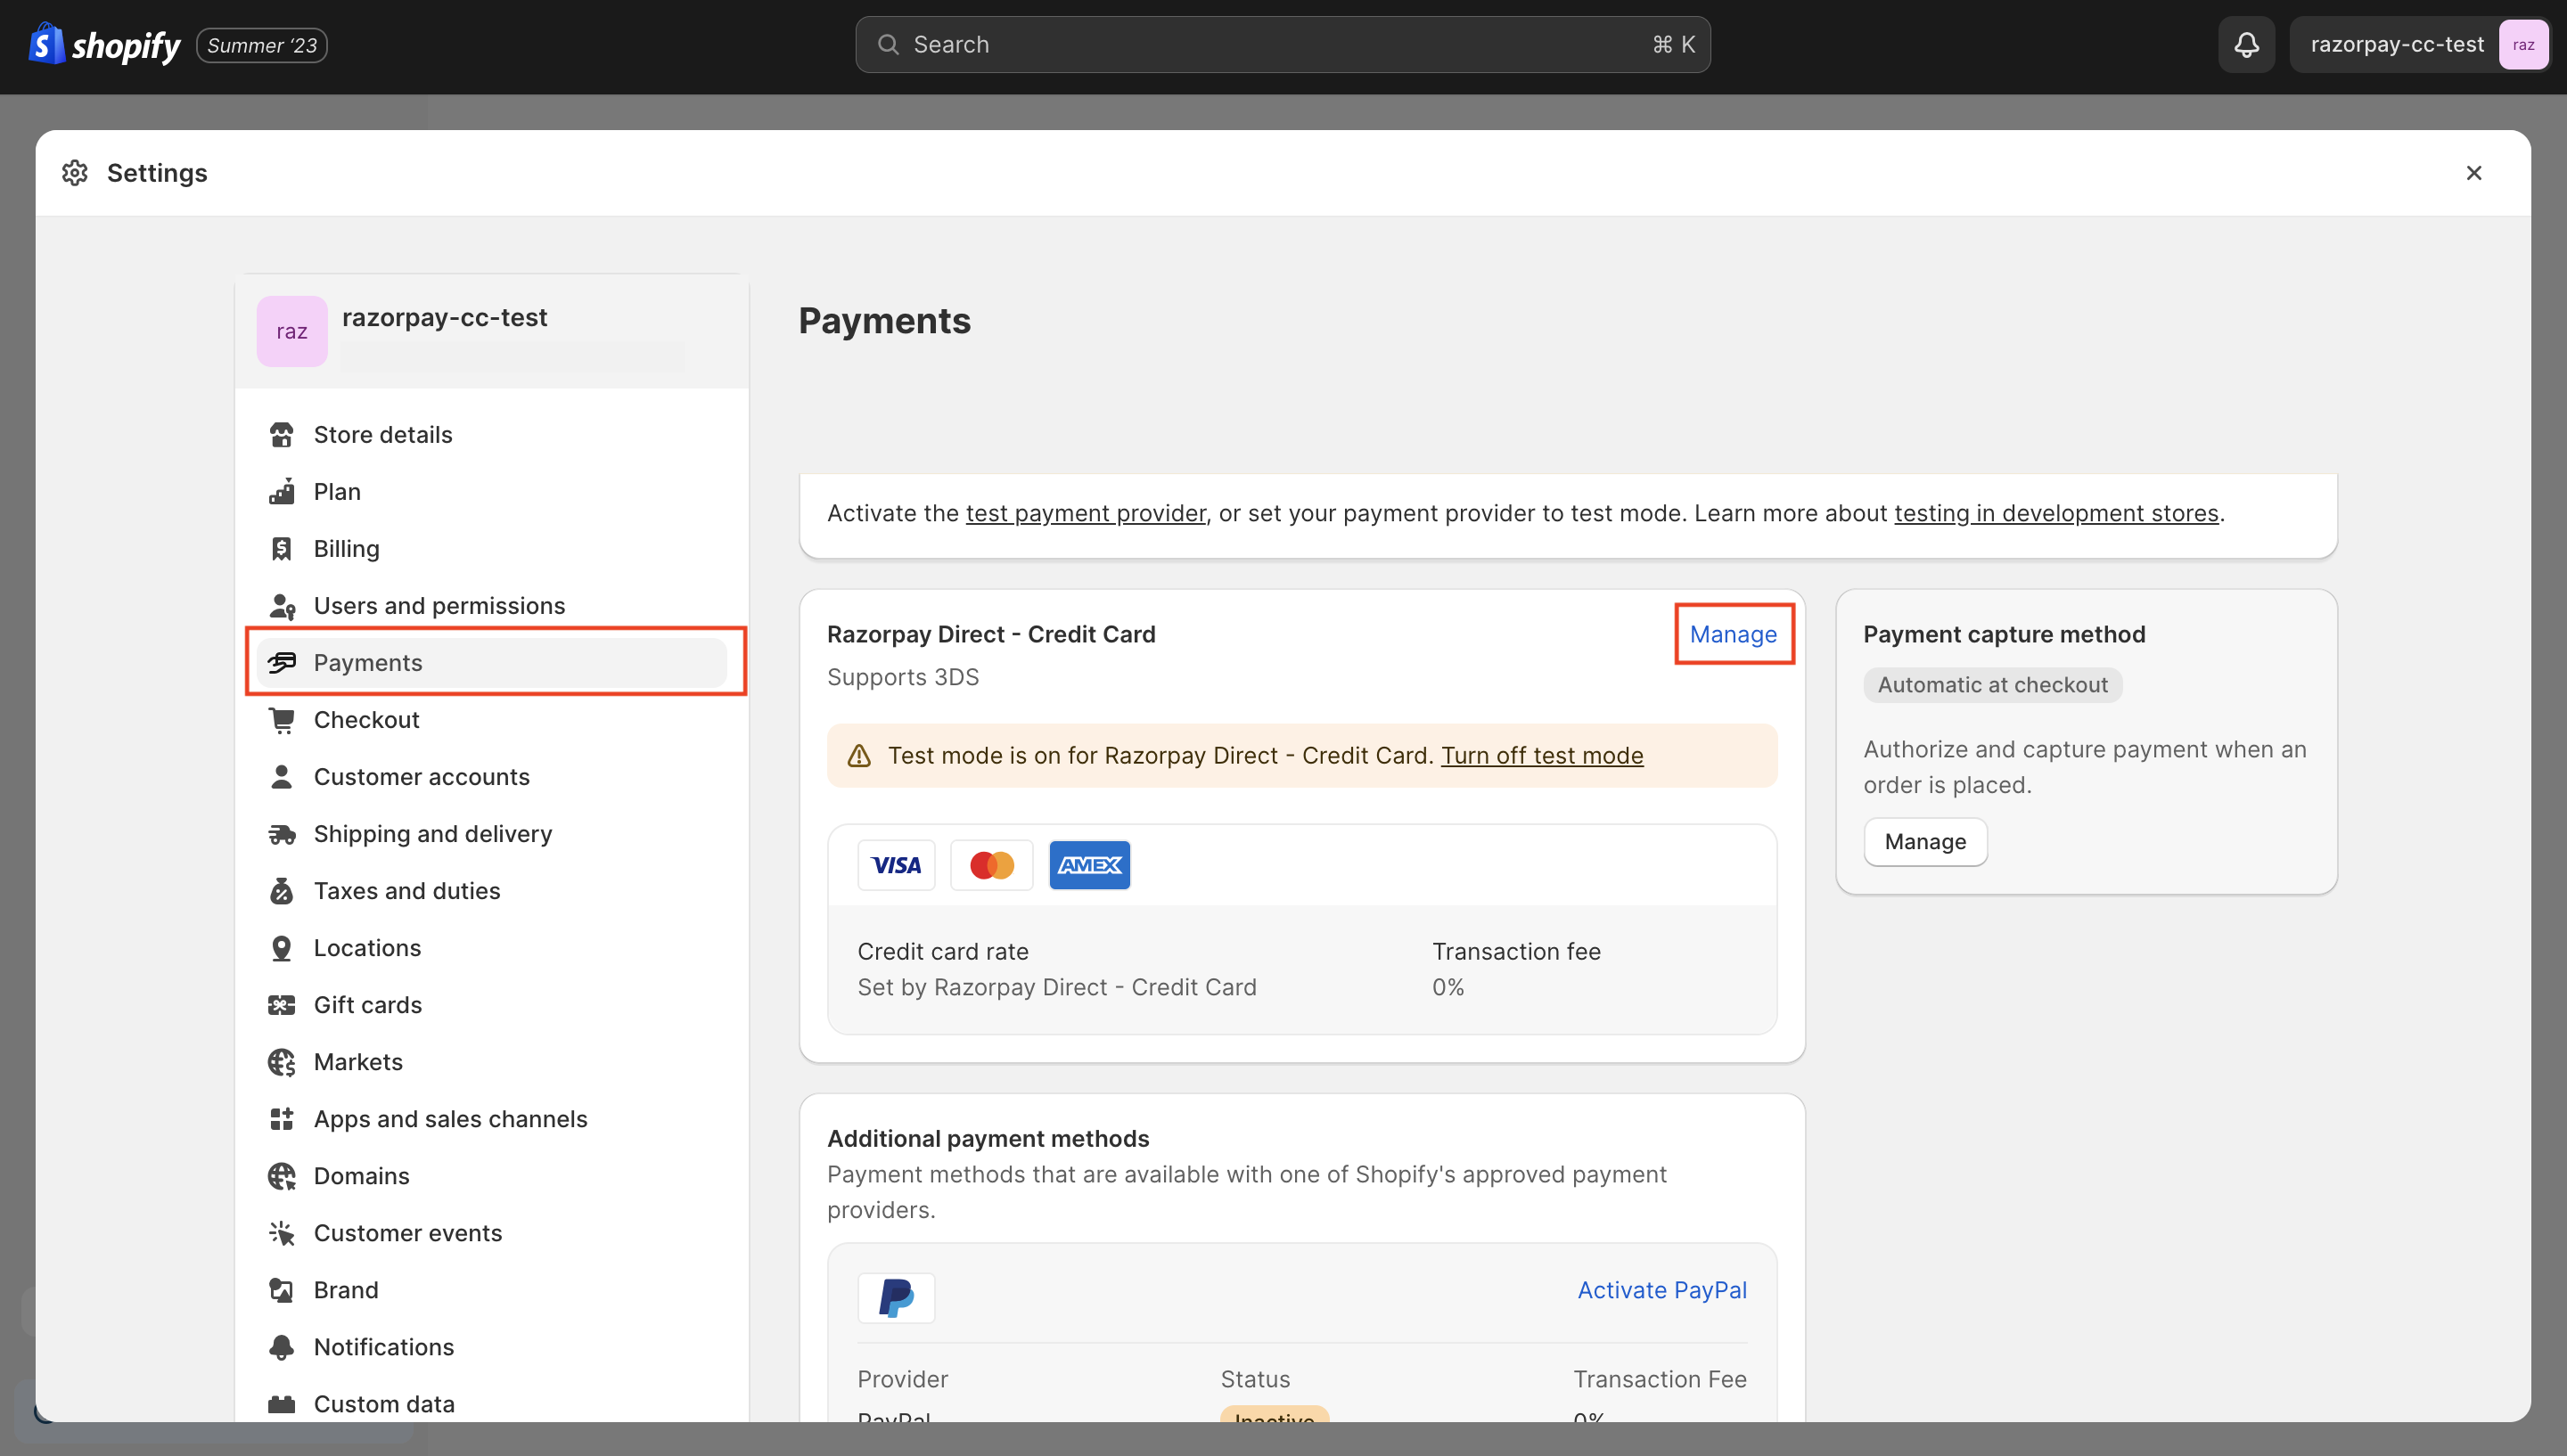
- Navigate to Settings → Payments.
- Click Manage on the Razorpay Direct - Credit Card app.
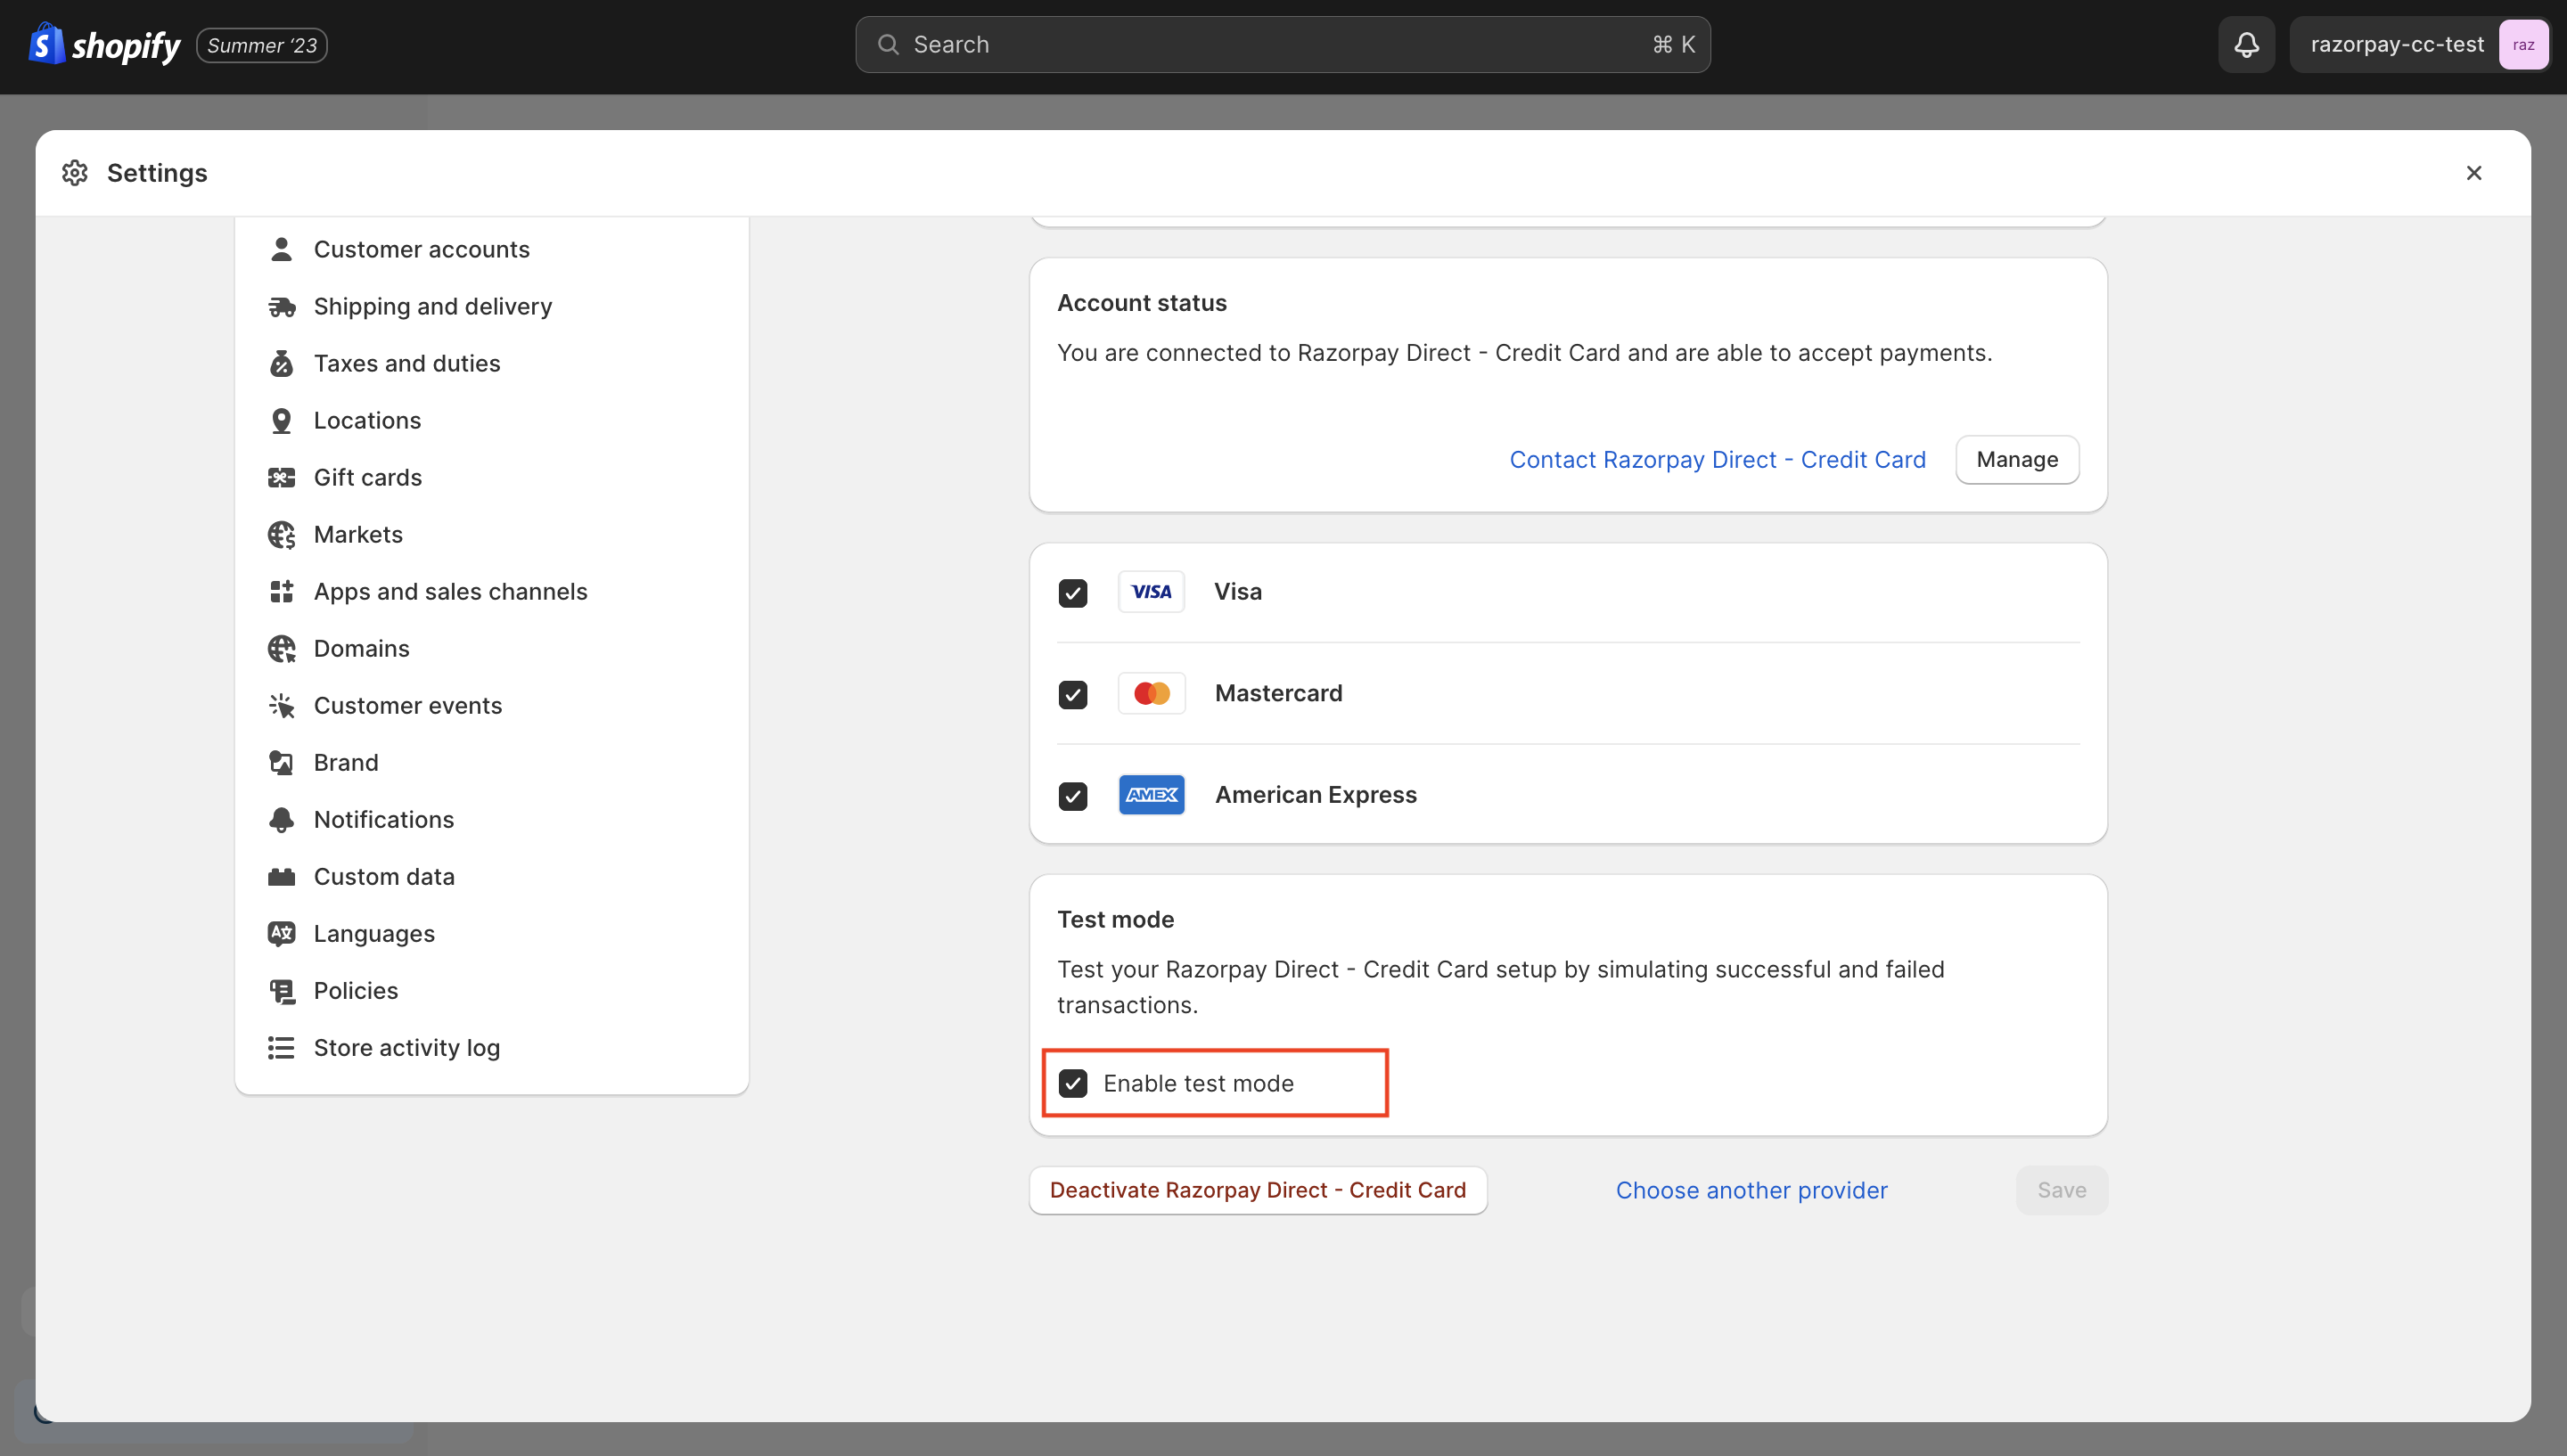
- At the bottom of the page, select the Enable test mode check box and click Save.
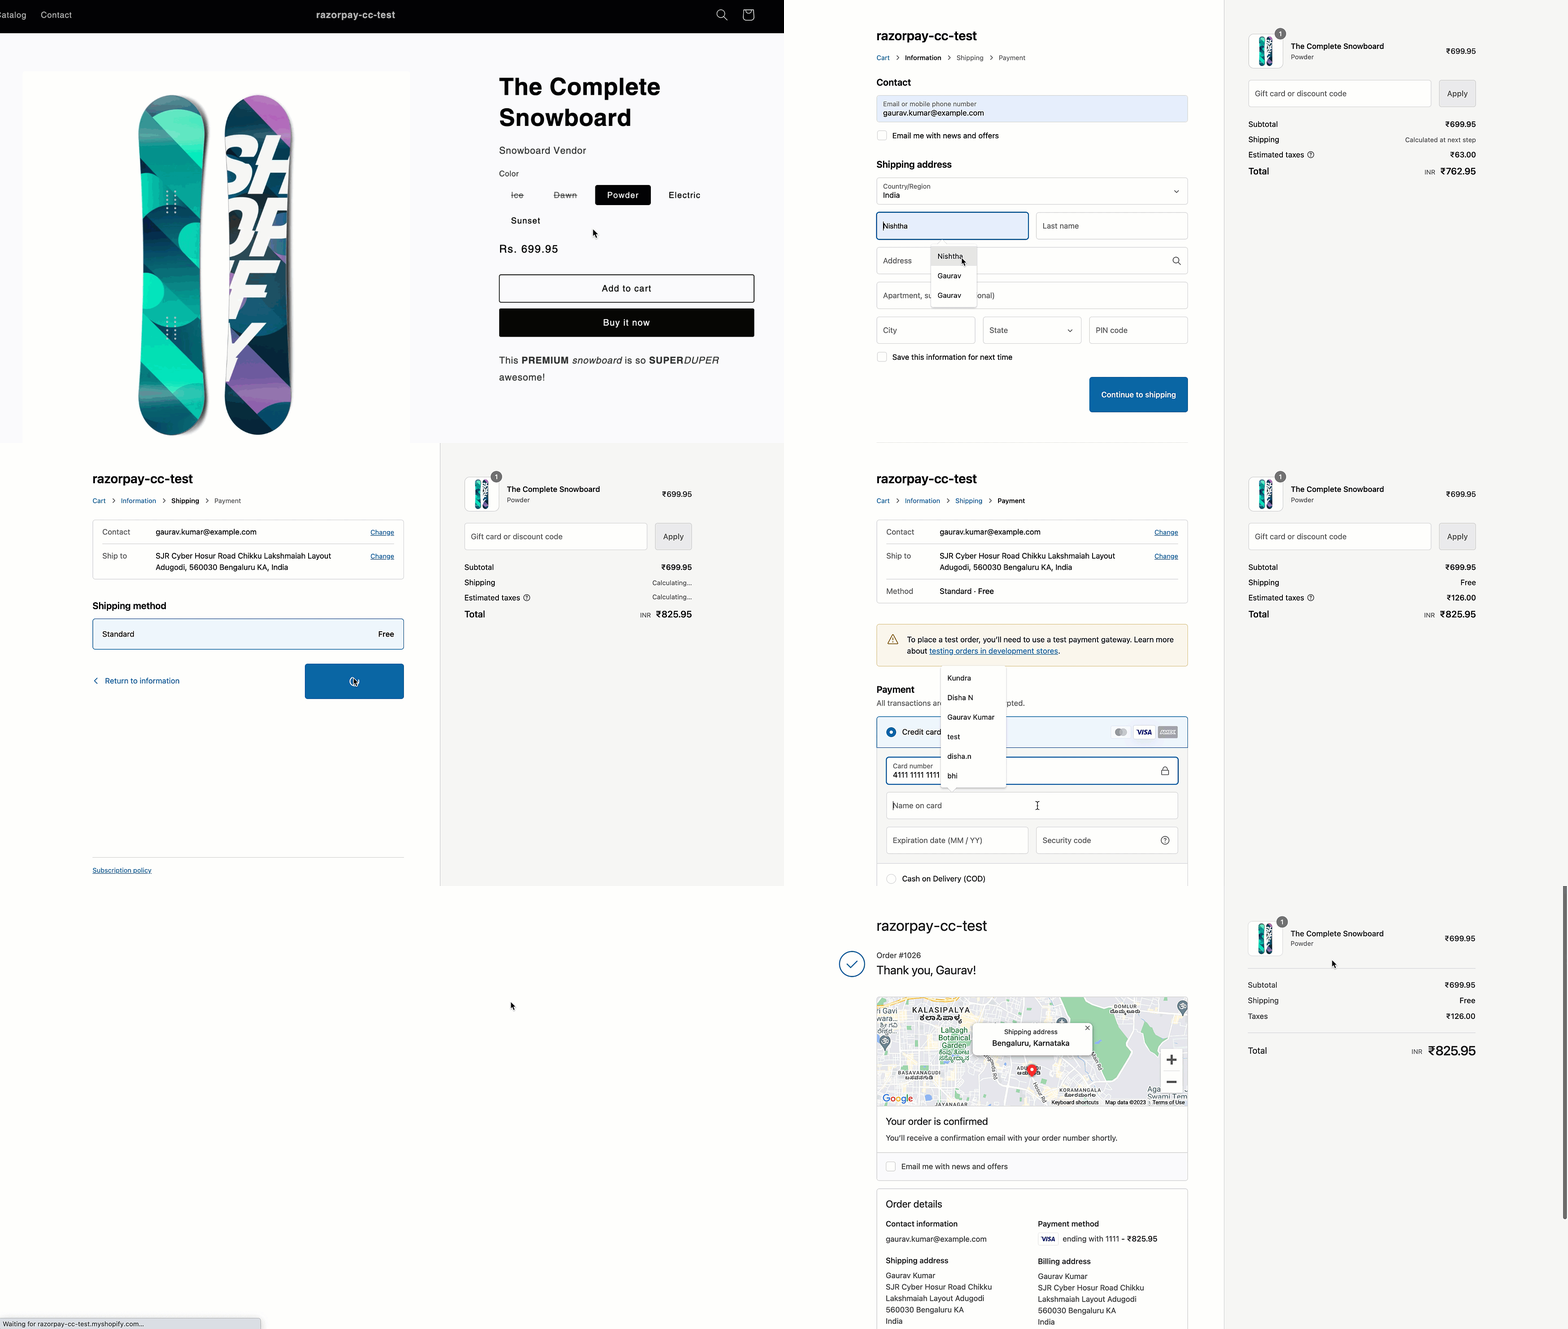
- On your Shopify store, add an item to your cart and click Buy it now.
- Fill in your contact and shipping details and click Continue to shipping.
- Select the Shipping method and click Continue to payment.
- Select Credit card and enter the card details.
- Click Pay now and complete the order.
Verify Payment Status
Verify Payment Status
You can track the payment status from the Razorpay Dashboard or poll our APIs.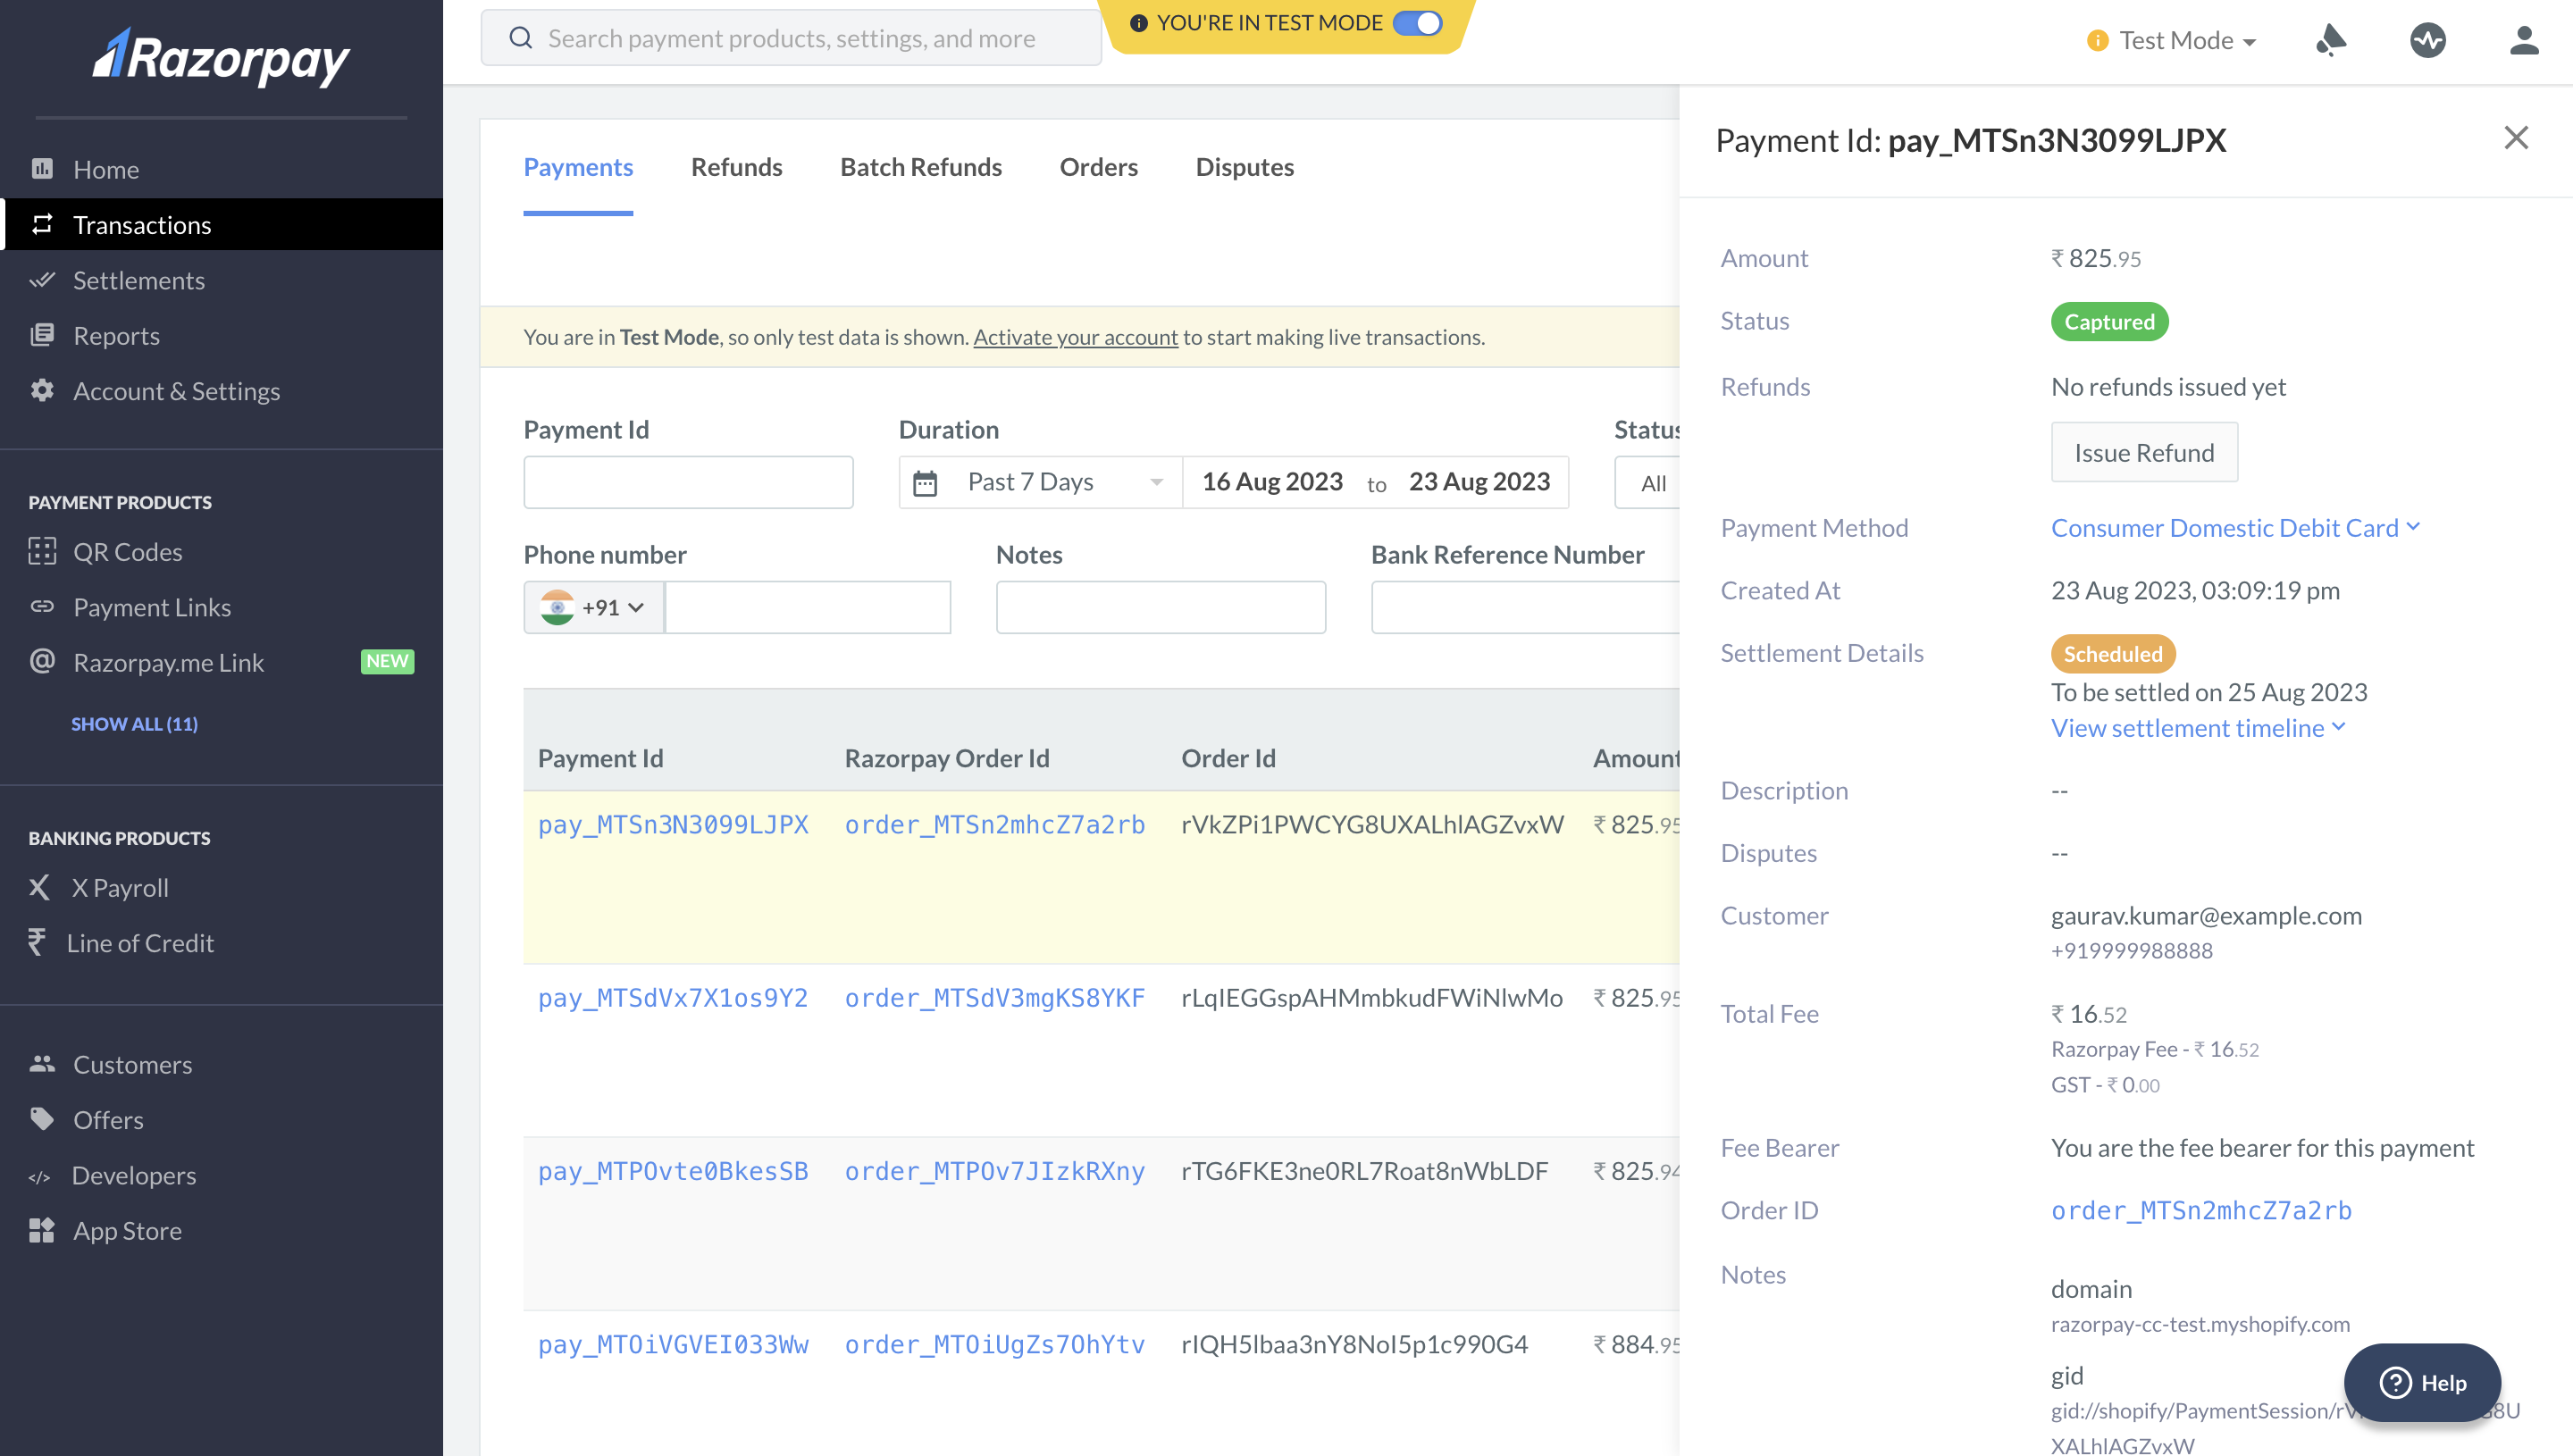
- Verify Payment Status From Dashboard
- Poll APIs
- Log in to the Dashboard and navigate to Transactions → Payments.
- Check if a
payment_IDhas been generated and note the status. In case of a successful payment, the status is marked ascaptured.
3. Go-live Checklist
Follow these steps before taking the integration live:Switch from Test Mode to Live Mode
Switch from Test Mode to Live Mode
You can perform an end-to-end simulation of funds flow in the Test Mode. Once confident that the installation and integration is working as expected, switch to the Live Mode and start accepting payments from customers.To switch from Test Mode to Live Mode:
- Log in to your Shopify store.
- Navigate to Settings → Payments.
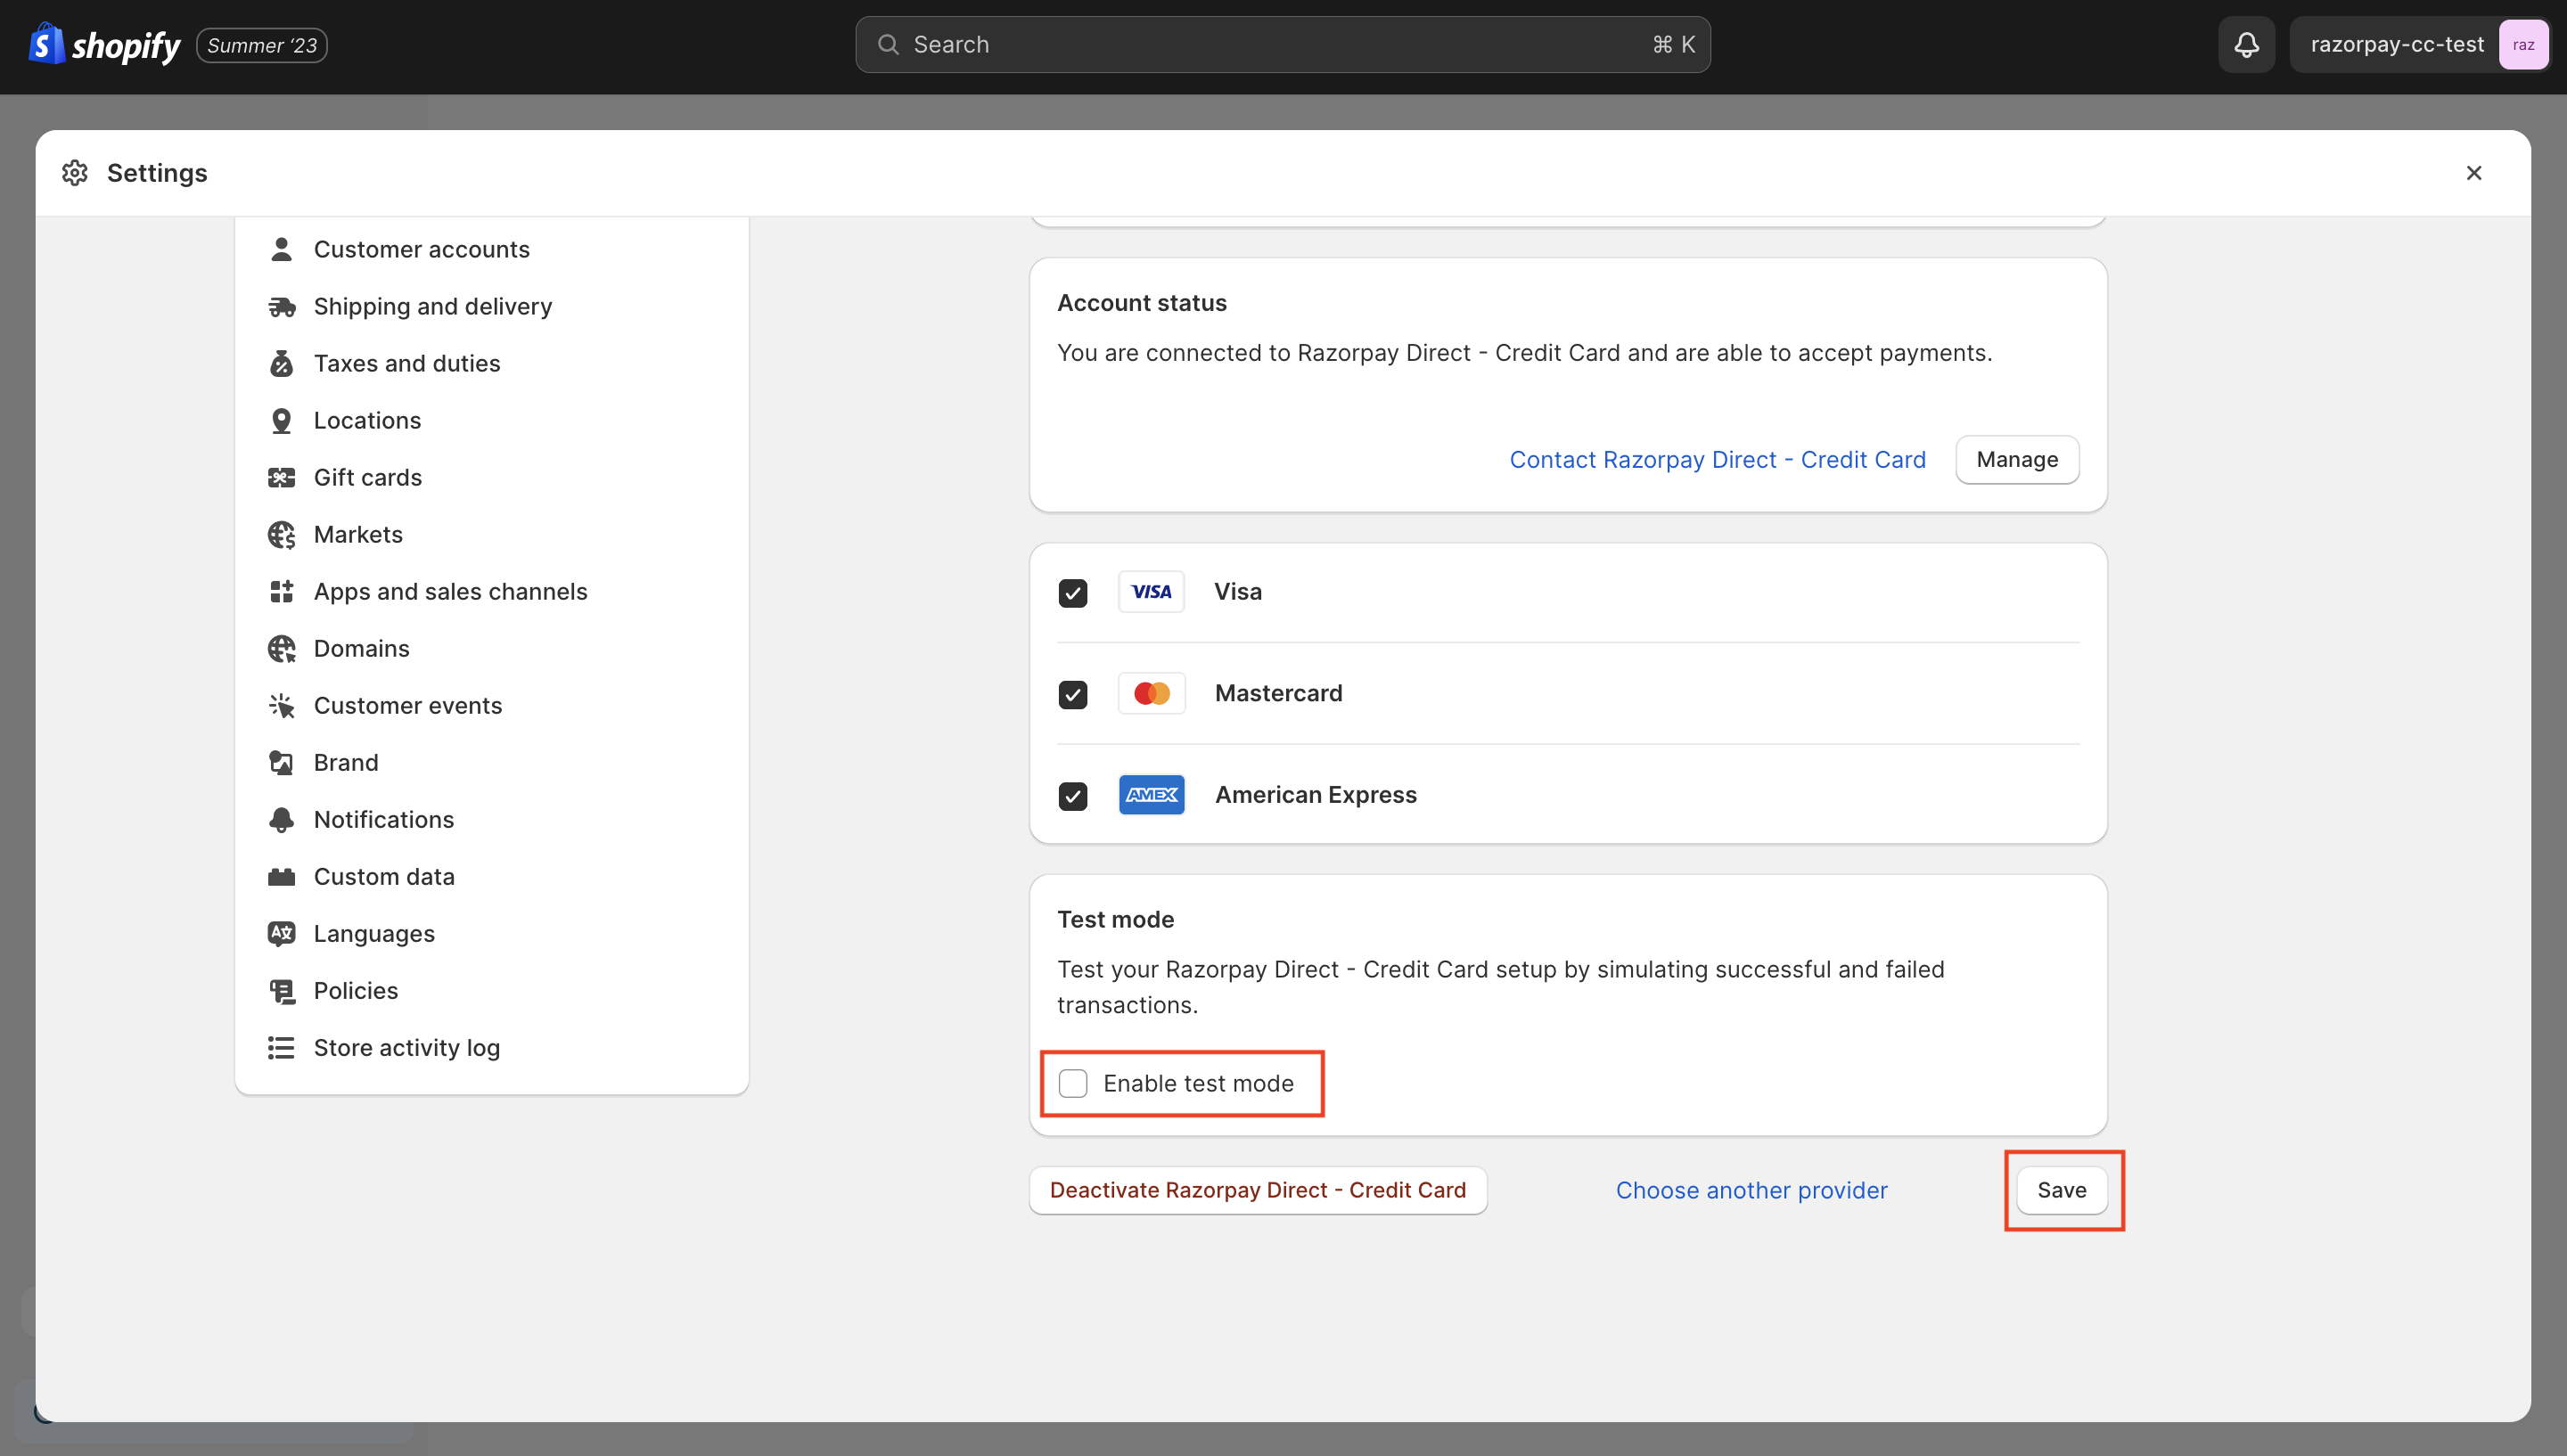
- On the Supported payment methods section, click Manage on the Razorpay Direct - Credit Card app.
- At the bottom of the page, clear the Enable test mode check box and click Save.
Refunds
Initiate Refunds
To initiate refunds using Shopify store:- Log in to the Shopify account.
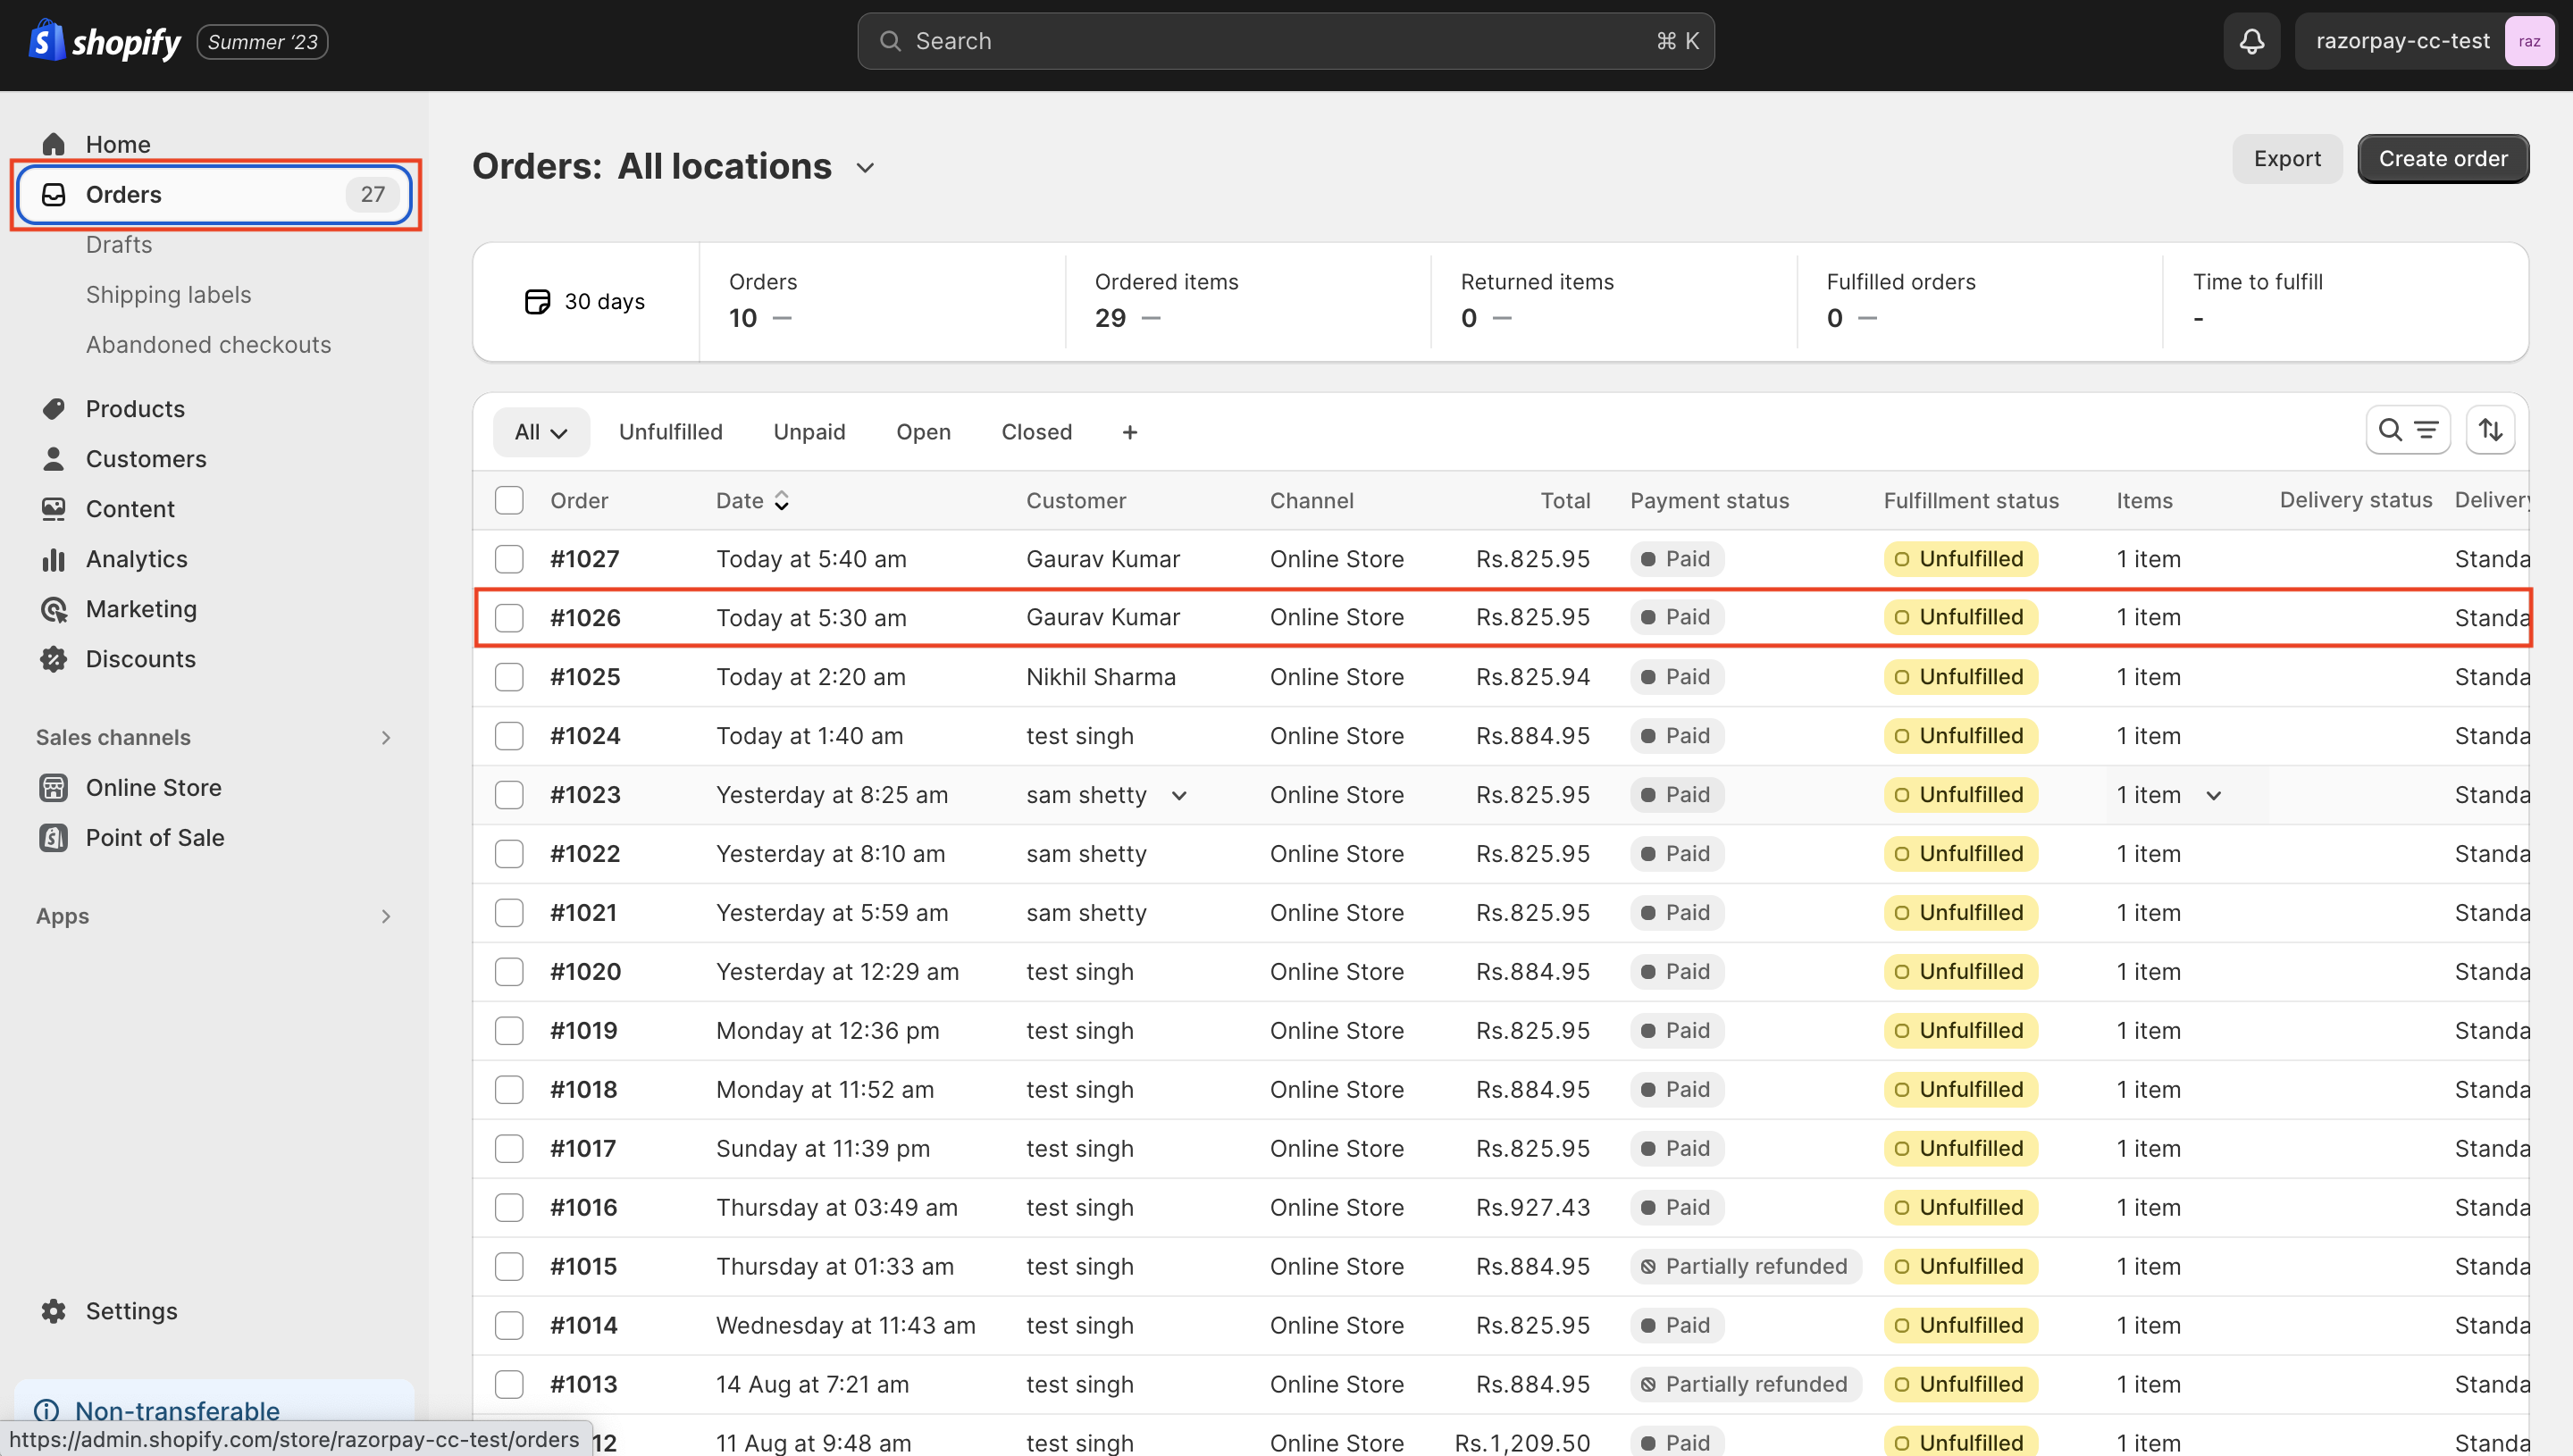
- After a payment is completed, navigate to Orders.
- Select the order you want to initiate a refund.
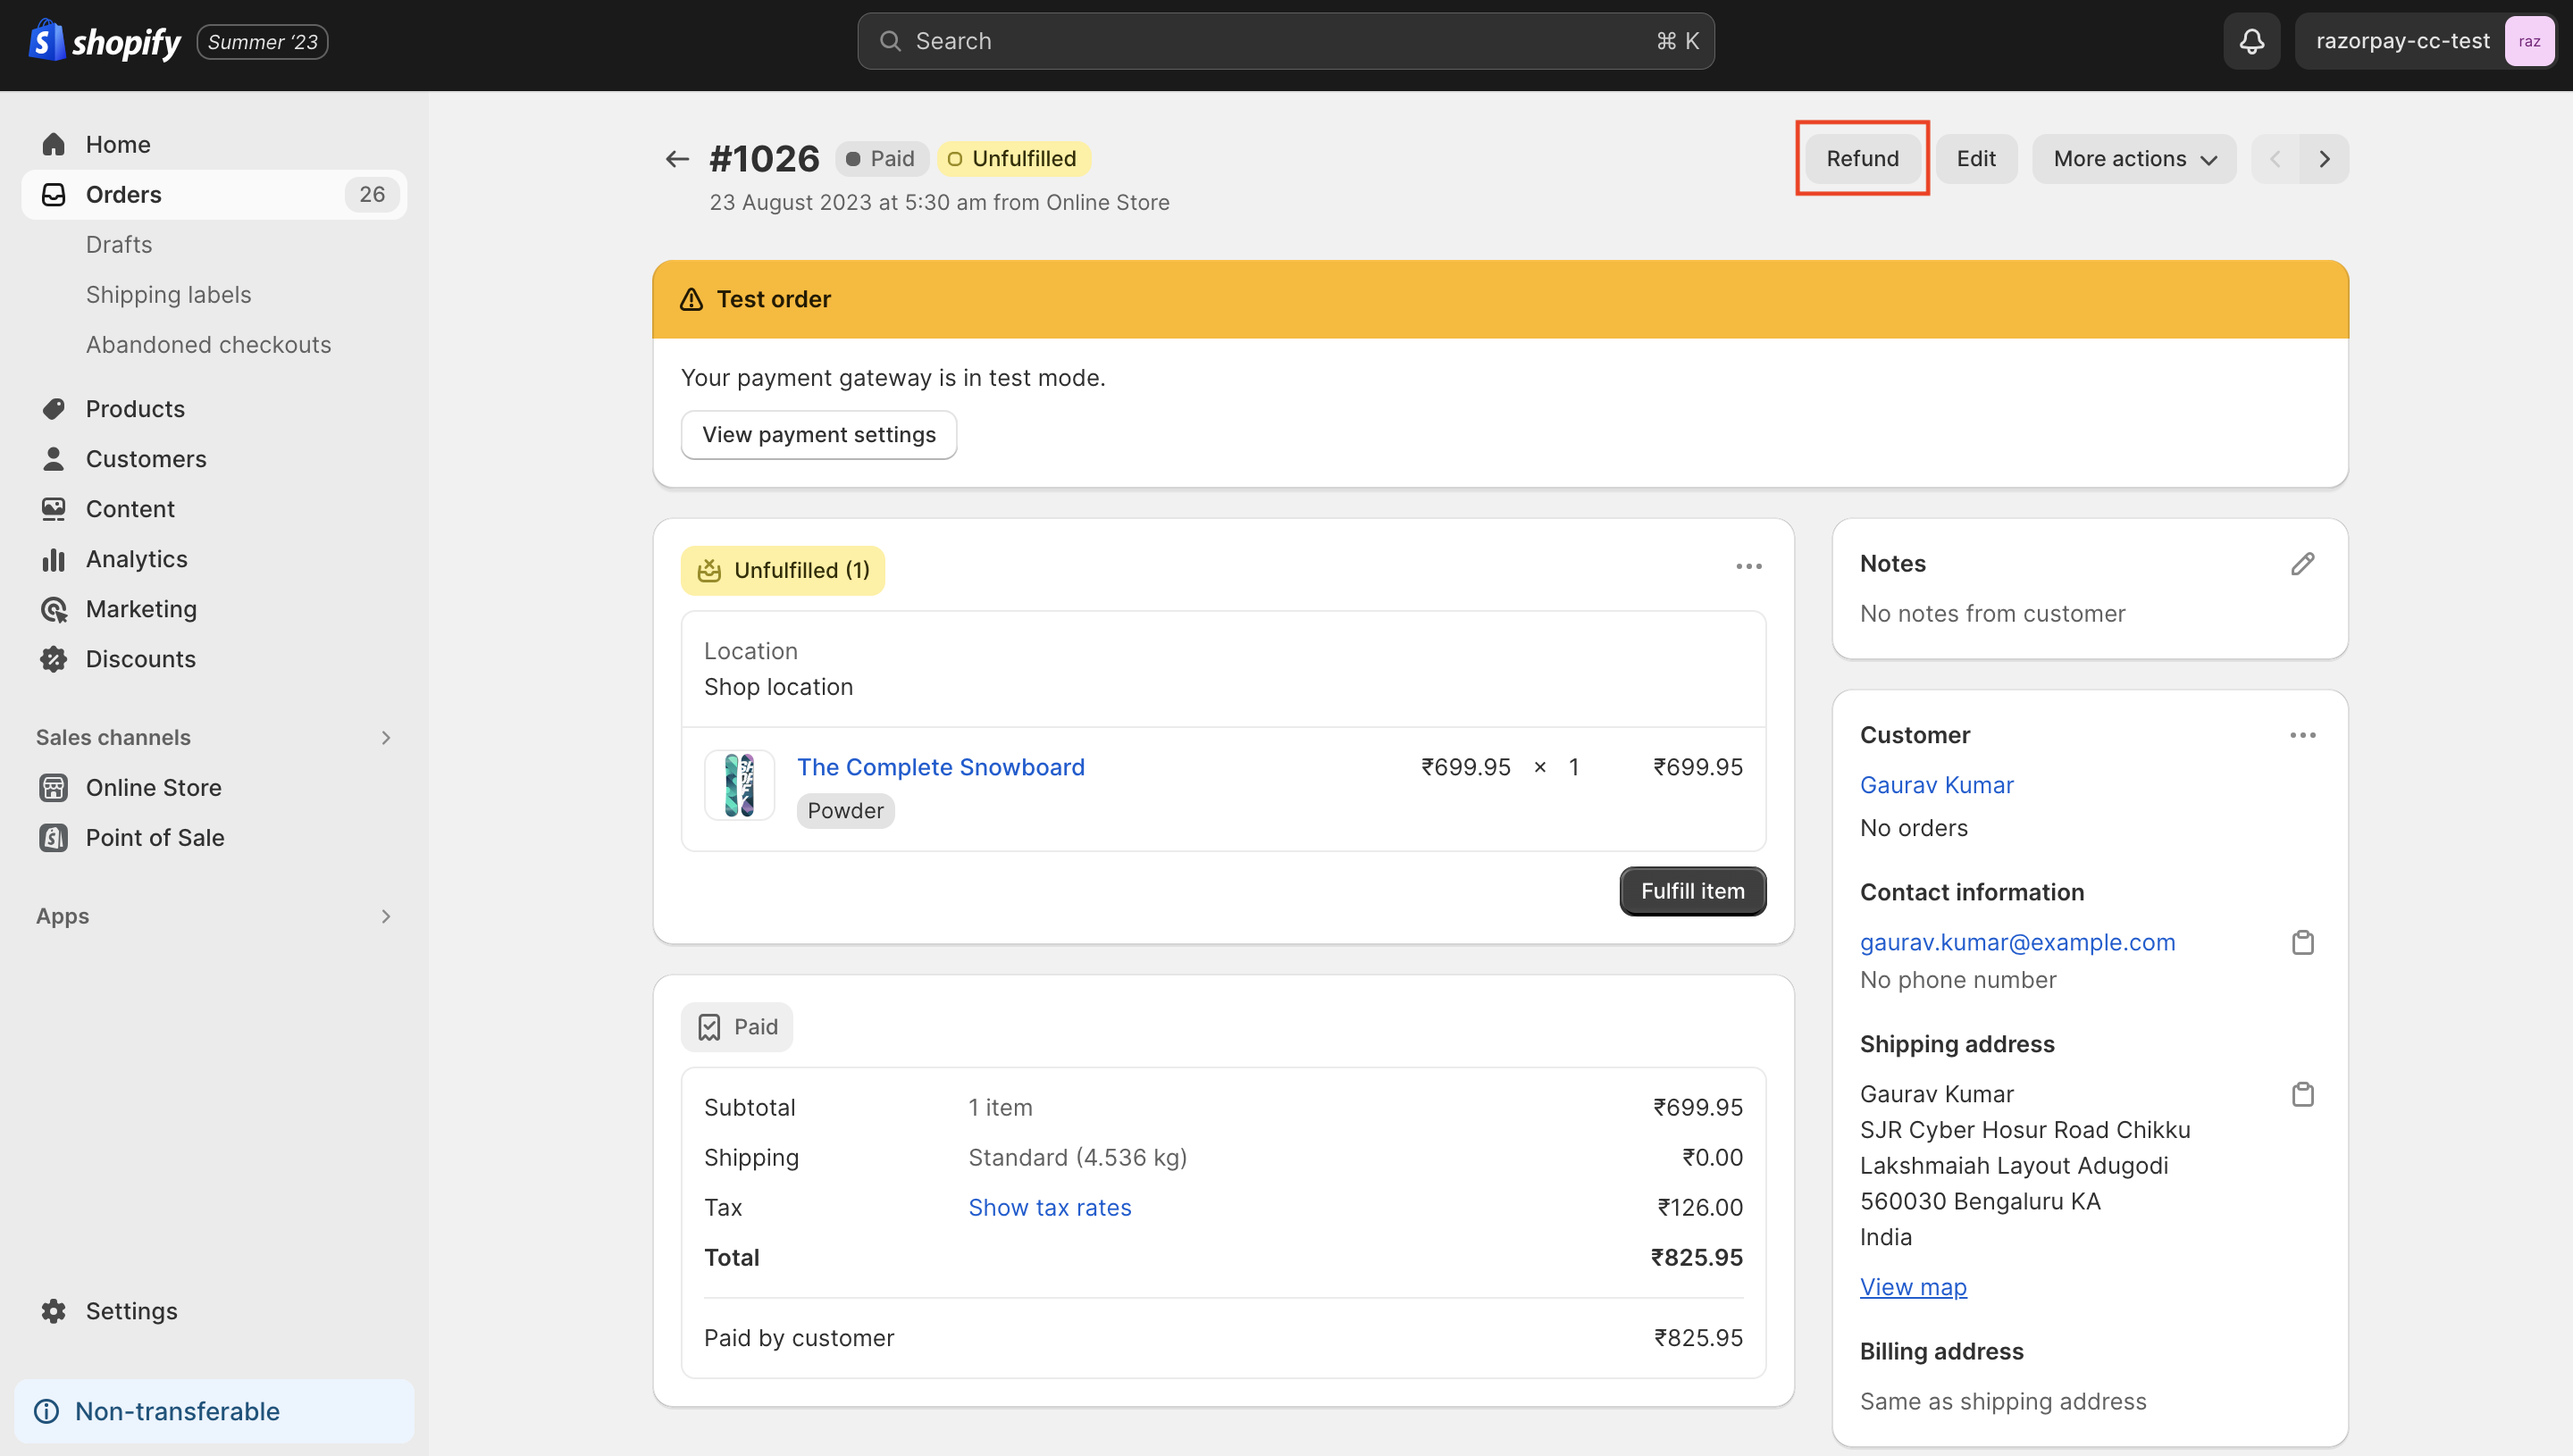
- Click Refund.
- Select the quantity of the item and click Refund.
- You can either issue a full refund or a partial refund.
- For a full refund, enter the entire payment amount.
- For a partial refund, enter a value lesser than the payment amount.

- You can verify the refund status from the Dashboard. Navigate to Transactions → Refunds and check if a Refund Id is generated for the relevant Payment Id.
