

Available in🇮🇳 India
Follow these steps to integrate with the Outward Remittance LRS Flow APIs.
1.1 Fetch Forex Rates1.2 Create an Order
1.3 Collect Documents
1.4 Create a Payment
1.5 Handle Payment Success and Error Events
1.6 Verify Payment Signature
1.7 Verify Payment Status
1.1 Fetch Forex Rates
Use the following API to fetch the real-time conversion rate Razorpay will charge to facilitate the transaction. This includes additional charges within the LRS flow.GET /forex_charges
Query Parameters
Query Parameters
amount mandatory
: integer The amount which needs to be converted in currency subunits. For example, for an amount of ₹295.00, enter 29500.base_currency mandatory
: string Currency ISO code for the given amount. The default length is 3 characters. Refer to the list of supported currencies.conversion_currency mandatory
: string ISO code for the currency to which the given amount should be converted, specified in currency subunits. If left blank, the conversion amount is provided for all supported currencies as a list. Otherwise, provides the conversion amount only for the requested currency. Refer to the list of supported currencies.Response Parameters
Response Parameters
amount
: string The amount which needs to be converted in currency subunits.base_currency
: string Currency ISO code for the given amount.converted_amount
: string Converted amount in the requested currency.conversion_currency
: string ISO code for the currency to which the given amount should be converted, specified in currency subunits.expiry_time
: integer Unix timestamp at which the conversion rate will expire.fee
: integer Fee charged by the bank.type
: string Type of identity information collected. Possible value is bank.amount
: string The amount which needs to be converted in currency subunits.taxes
: integer Taxes collected for the remittance.type
: string Type of identity information collected. Possible value is tcs.amount
: string The amount which needs to be converted in currency subunits.Error Response Parameters
Error Response Parameters
1.2 Create an Order
Create an order using the following API and send additional information such as customer details, identity and bank account details.Prerequisites
- The Bank Account of the Payer/Remitter is mandatory as TPV (Third Party Validation) needs to be done.
- You are required to provided the PAN details of the payer (PAN number of the payer from whose bank account the amount will be debited).
- Debit Card TPV is mandatory.
- Partial payments are not permitted.
POST /orders
Request Parameters
Request Parameters
amount mandatory
: integer The amount for which the order is created, in currency subunits. For example, for an amount of ₹295, enter 29500. Payment can only be made for this amount against the Order.currency mandatory
: string ISO code for the currency in which you want to accept the payment. The default length is 3 characters. Refer to the list of supported currencies.receipt optional
: string Receipt number that corresponds to this order, set for your internal reference. Can have a maximum length of 40 characters and has to be unique.customer_details mandatory
: json_object Contains the customer details of the order. name mandatory
: string Customer’s name. Alphanumeric, with period (.), apostrophe (’) and parentheses allowed. The name must be between 3-50 characters in length. For example, Gaurav Kumar.contact mandatory
: string The customer’s phone number. A maximum length of 15 characters including country code. For example, +919876543210.email mandatory
: string The customer’s email address. A maximum length of 64 characters. For example, gaurav.kumar@example.com.identity mandatory
: array Collect identity-related information from the customer.type mandatory
: string Type of identity information collected. Possible value is tax_id.id mandatory
: string Unique identifier of the identity type. For example, for tax_id, the id is PAN Number, say, AVOJB1111K.bank_account
: json_object Details of the bank account to be passed in the request. Required if the method is emandate.account_number mandatory
: string Bank account number used to initiate the payment.ifsc mandatory
: string IFSC of the bank used to initiate the payment.name mandatory
: string Name associated with the bank account used to initiate the payment.notes optional
: json object Key-value pair used to store additional information about the entity. Holds 15 key-value pairs, 256 characters (maximum) each. For example, "note_key": "Beam me up Scotty”.Response Parameters
Response Parameters
amount
: integer The amount for which the order was created, in currency subunits. For example, for an amount of ₹295, enter 29500.amount_due
: integer The amount pending against the order.amount_paid
: integer The amount paid against the order.attempts
: integer The number of payment attempts, successful and failed, that have been made against this order.created_at
: integer Indicates the Unix timestamp when this order was created.currency
: string ISO code for the currency in which you want to accept the payment. The default length is 3 characters.entity
: string Name of the entity. Here, it is order.id
: string The unique identifier of the order.notes
: object Key-value pair used to store additional information about the entity. Holds 15 key-value pairs, 256 characters (maximum) each. For example, "note_key": "Beam me up Scotty”.offer_id
: string The unique identifier of the offer. For example, offer_JHD834hjbxzhd38d.receipt
: string Receipt number that corresponds to this order. Can have a maximum length of 40 characters and has to be unique.status
: string The status of the order. Possible values:created: When you create an order, it is in thecreatedstate. It stays in this state till a payment is attempted on it.attempted: An order changes to theattemptedstate following the first payment attempt and remains in this state until at least one payment is successfully processed and captured.paid: After the successful capture of the payment, the order moves to thepaidstate. No further payment requests are permitted once the order moves to this state.
The order stays in thepaidstate even if the payment associated with the order is refunded.
Error Response Parameters
Error Response Parameters
1.3 Collect Documents
Collect the necessary documents in the LRS flow to facilitate the processing and settlement of payments by our AD Partner Bank.POST /order/:id/documents
Request Parameters
Request Parameters
document_type mandatory
: string Type of document corresponding to the flow of LRS, that is Education or Travel. For example, it is admission_letter when the student’s admission letter is uploaded. Possible values:admission_letterpassport_frontpassport_backloan_sanction_letterbooking_invoice
purpose mandatory
: string The reason you are uploading this document. Possible values:lrs_educationlrs_travel
Response Parameters
Response Parameters
id
: string The unique identifier of the document.entity
: string Name of the entity. Here, it is document.purpose
: string The reason you are uploading this document. Here, it is lrs_education. Possible values:lrs_educationlrs_travel
size
: integer Indicates the size of the document in bytes.mime_type
: string Indicates the nature and format in which the document is uploaded. Possible values include:image/jpgimage/jpegimage/pngapplication/pdf
created_at
: integer Unix timestamp at which the document was uploaded.Error Response Parameters
Error Response Parameters
1.4 Create a Payment
Create a payment using the S2S JSON Payments API. In this sample, a payment is created with thenetbanking payment method.
POST /payments/create/json
Request Parameters
Request Parameters
amount mandatory
: integer Payment amount in the smallest currency sub-unit. For example, if the amount to be charged is ₹299, then pass 29900 in this field.currency mandatory
: string Currency code for the currency in which you want to accept the payment. For example, INR. Refer to the list of supported currencies. Length must be of 3 characters.email mandatory
: string Email address of the customer. Maximum length supported is 40 characters.contact mandatory
: string Phone number of the customer. For example, 9000090000.order_id mandatory
: string Unique identifier of the Order.Know more about Orders API.
ip optional
: string Customer’s IP address.method mandatory
: string Name of the payment method. Possible values are:cardnetbankingupi
notes optional
: object Key-value pair that can be used to store additional information about the entity. Maximum 15 key-value pairs, 256 characters (maximum) each. For example, "note_key": "Beam me up Scotty”.payment_reason optional
: string The reason you are making this payment. For example, Tuition Fee.Response Parameters
Response Parameters
If the payment request is valid, the response contains the following fields.
razorpay_payment_id
: string Unique identifier of the payment. Present for all responses.next
: array A list of action objects available to you to continue the payment process. Present when the payment requires further processing.action
: string An indication of the next step available to you to continue the payment process. The value here is redirect. Use this URL to redirect customer to the bank page.url
: string URL to be used for the action indicated.1.5 Handle Payment Success and Error Events
Once the payment is completed by the customer, aPOST request is made to the callback_url provided in the payment request. The data contained in this request will depend on whether the payment was a success or a failure.
Success Callback
If the payment made by the customer is successful, the following fields are sent:razorpay_payment_idrazorpay_order_idrazorpay_signature
Callback Example
Failure Callback
If the payment has failed, the callback will contain details of the error. Refer to Errors for details.1.6 Verify Payment Signature
Signature verification is a mandatory step to ensure that the callback is sent by Razorpay. Therazorpay_signature contained in the callback can be regenerated by your system and verified as follows.
Create a string for hashing by combining the “razorpay_payment_id” from the callback and the Order id generated in the initial step, separated by a |. Proceed to hash this string using SHA256 alongside your API Secret.
Signature
Generate Signature on your Server
Sample code
Sample code
1.7 Verify Payment Status
Handy TipsOn the Razorpay Dashboard, ensure that the payment status is
captured. Refer to the payment capture settings page to know how to capture payments automatically.You can track the payment status in three ways:
You can track the payment status in three ways:
- Verify Status from Dashboard
- Subscribe to Webhook Events
- Poll APIs
To verify the payment status from the Razorpay Dashboard: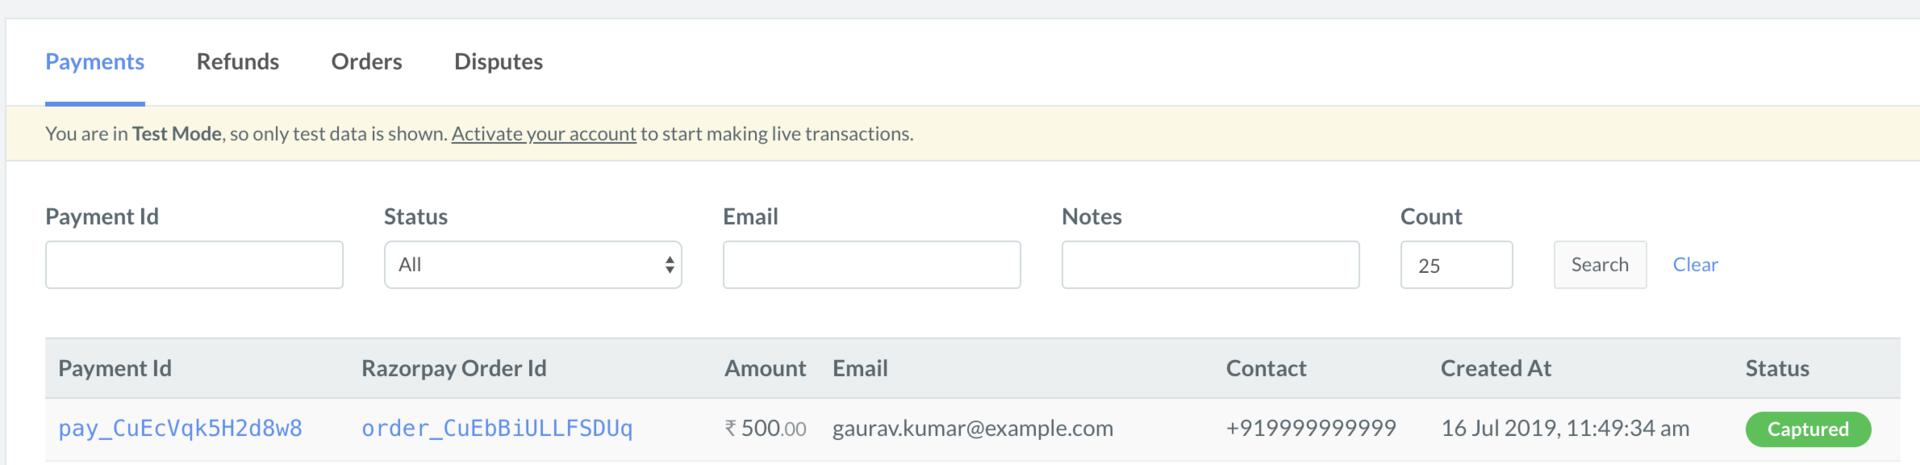
- Log in to the Razorpay Dashboard and navigate to Transactions → Payments.
- Check if a Payment Id has been generated and note the status. In case of a successful payment, the status is marked as Captured.