Available in🇮🇳 India
If you are an NGO using Payment Pages to accept donations, you can share payment receipts with 80G details to your customers via email once they make the payment.
Set Up Payment Receipt
Payment Receipts can be generated and shared using Automated Rececipts or Manual Receipts. Watch this video on how to configure 80G-enabled Payment Receipts.- Automated Receipt
- Manual Receipt
You can automatically share the payment receipt with customers via email and SMS. An auto-generated reference number is added by Razorpay.To configure automated Payment Page receipts: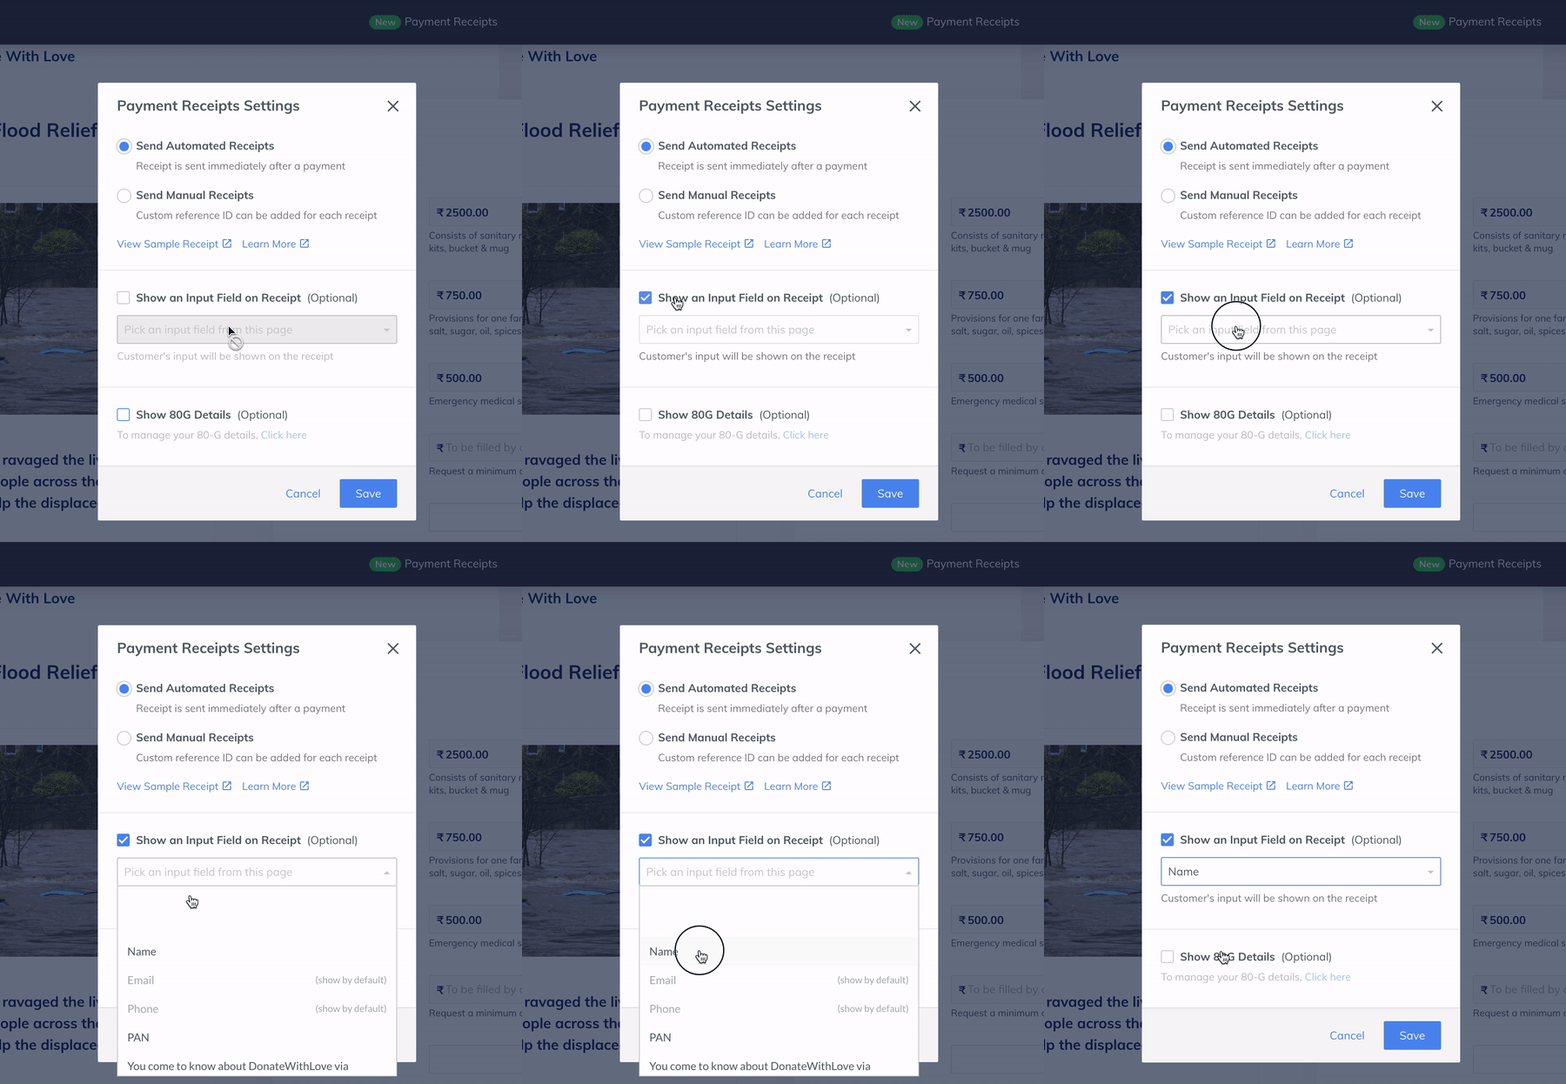
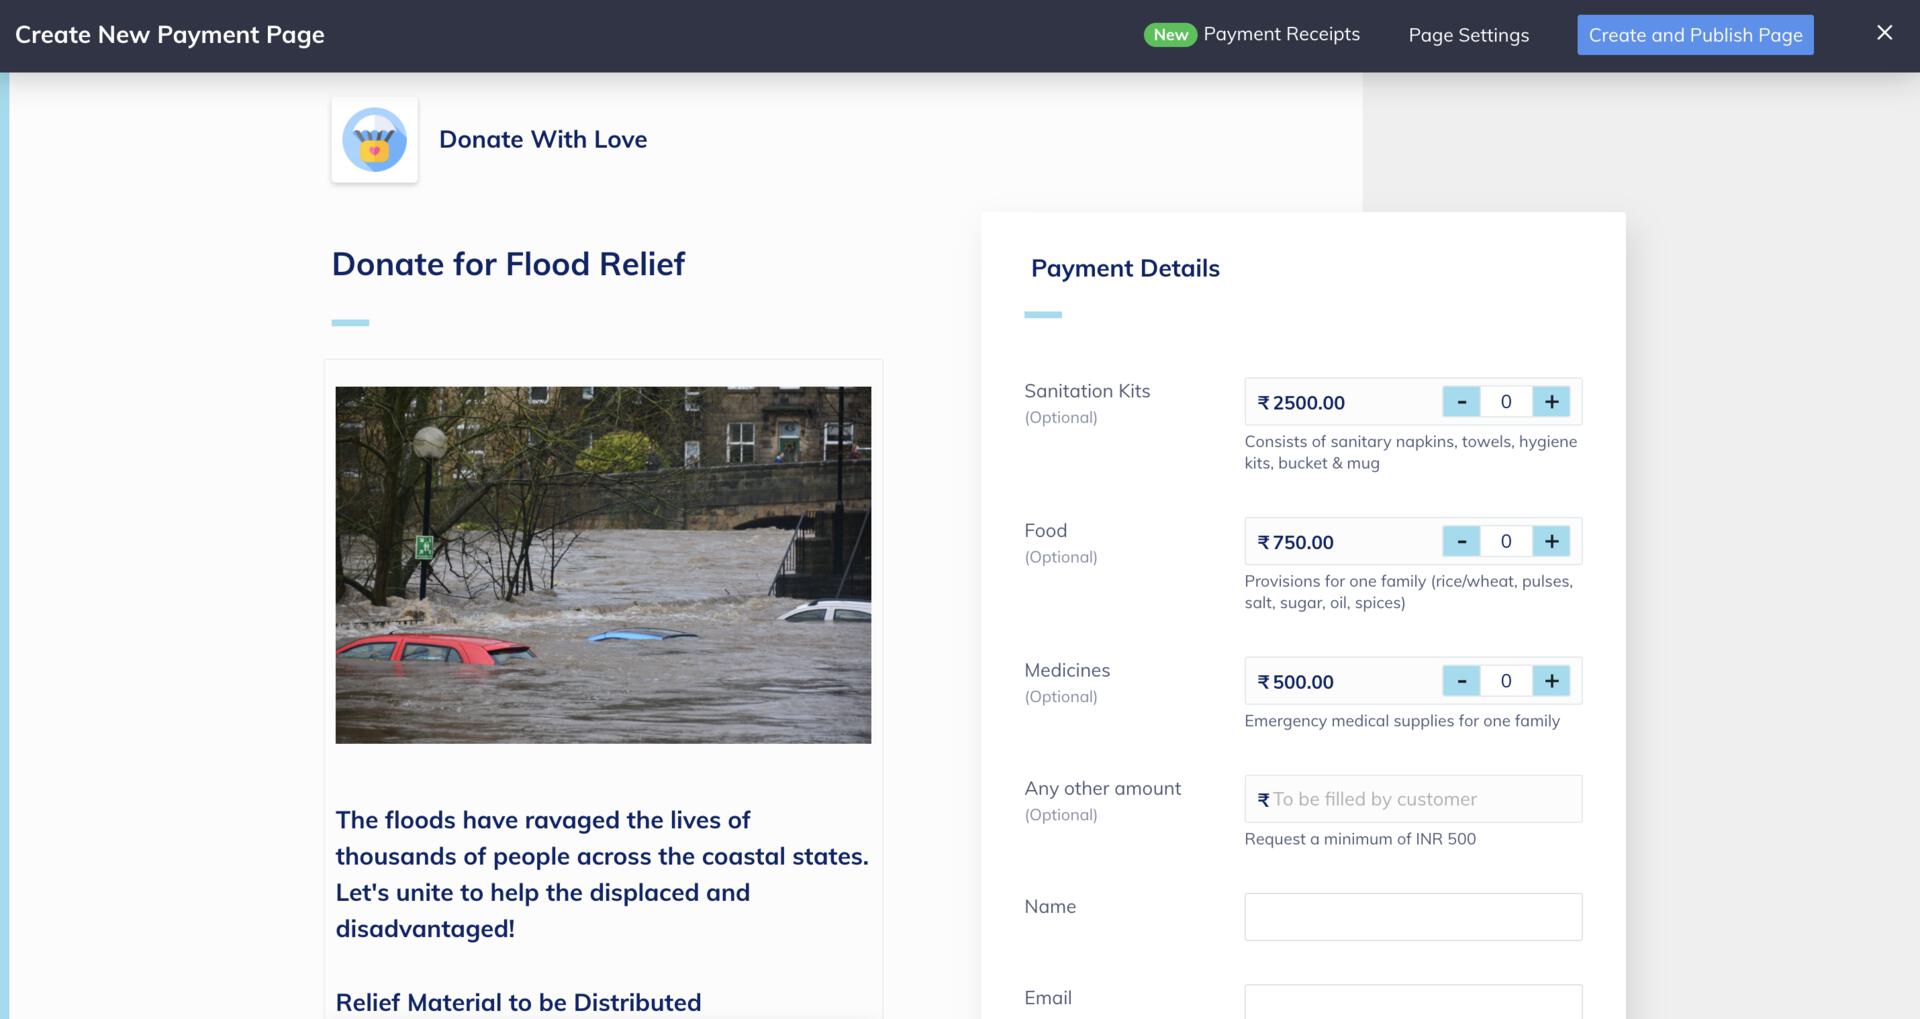
- While creating or editing the Payment Page, select Payment Receipts from the top menu ribbon.
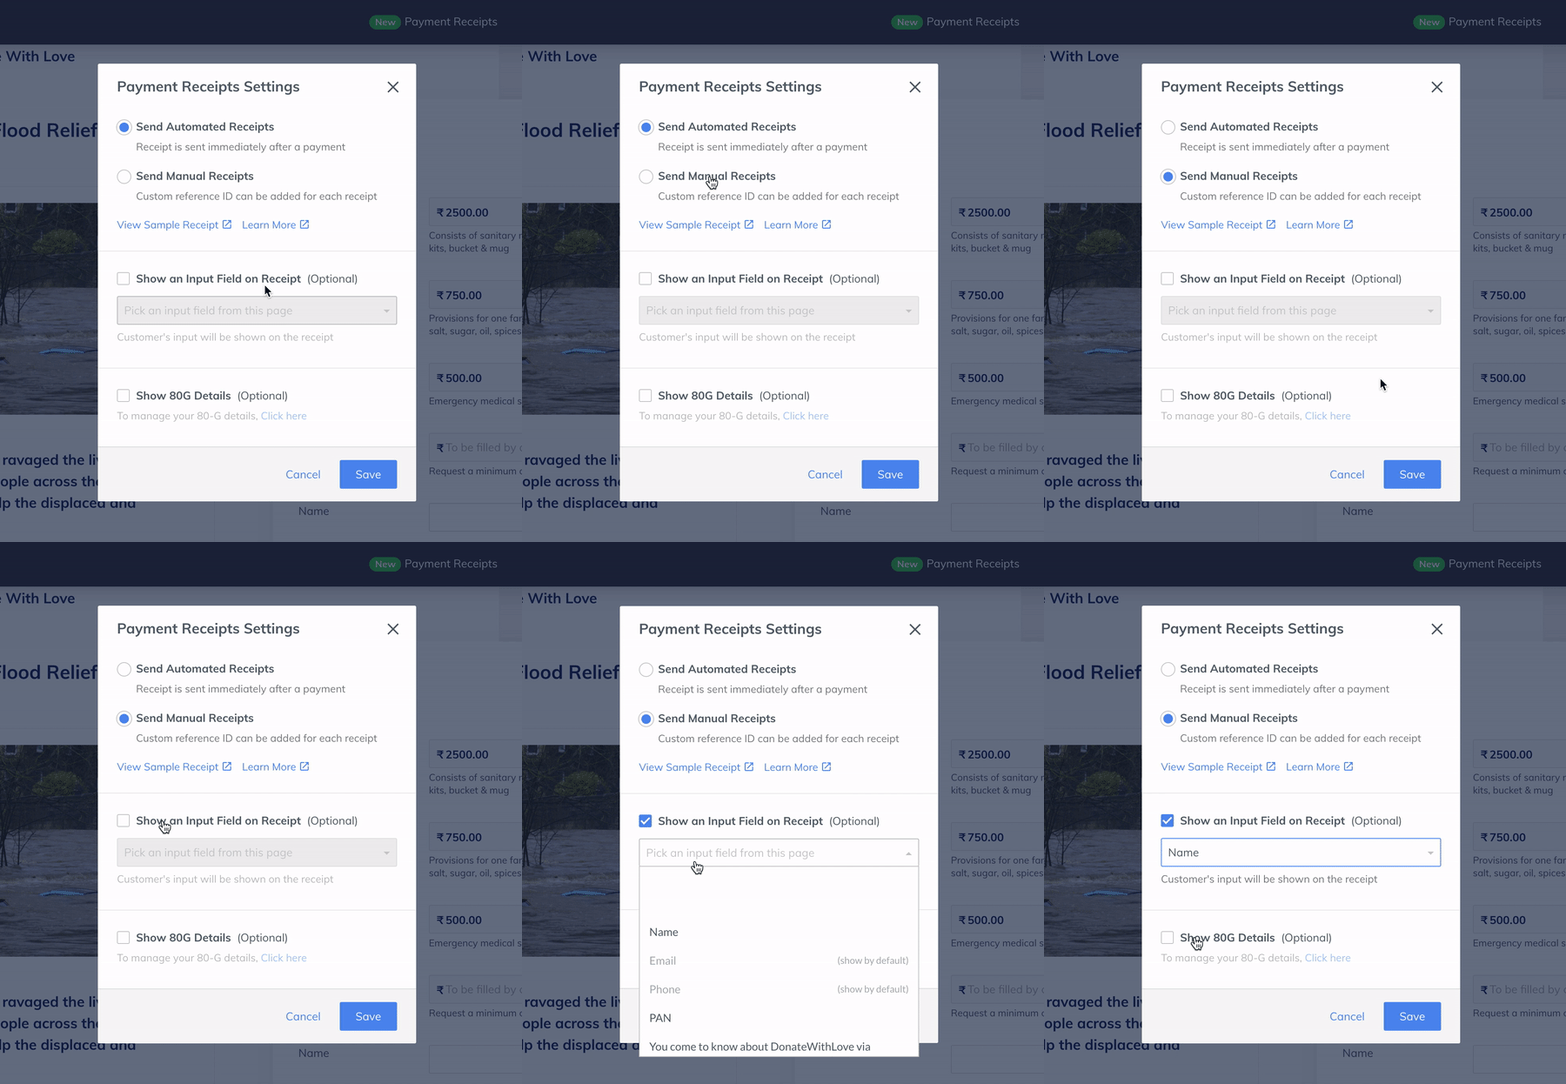
- On the Payment Receipts Settings pop-up page, select Send Automated Receipts.
- To show an input field such as
Name,Addressand its associated value on the receipt:- Enable the Show an Input Field on Receipt option.
- In the drop-down list, select one of the custom input fields such as
Name,AddressorLandmark, used on the Payment Page. For example, if you selectedName, the patron’s nameGaurav Kumarwill appear on the payment receipt.
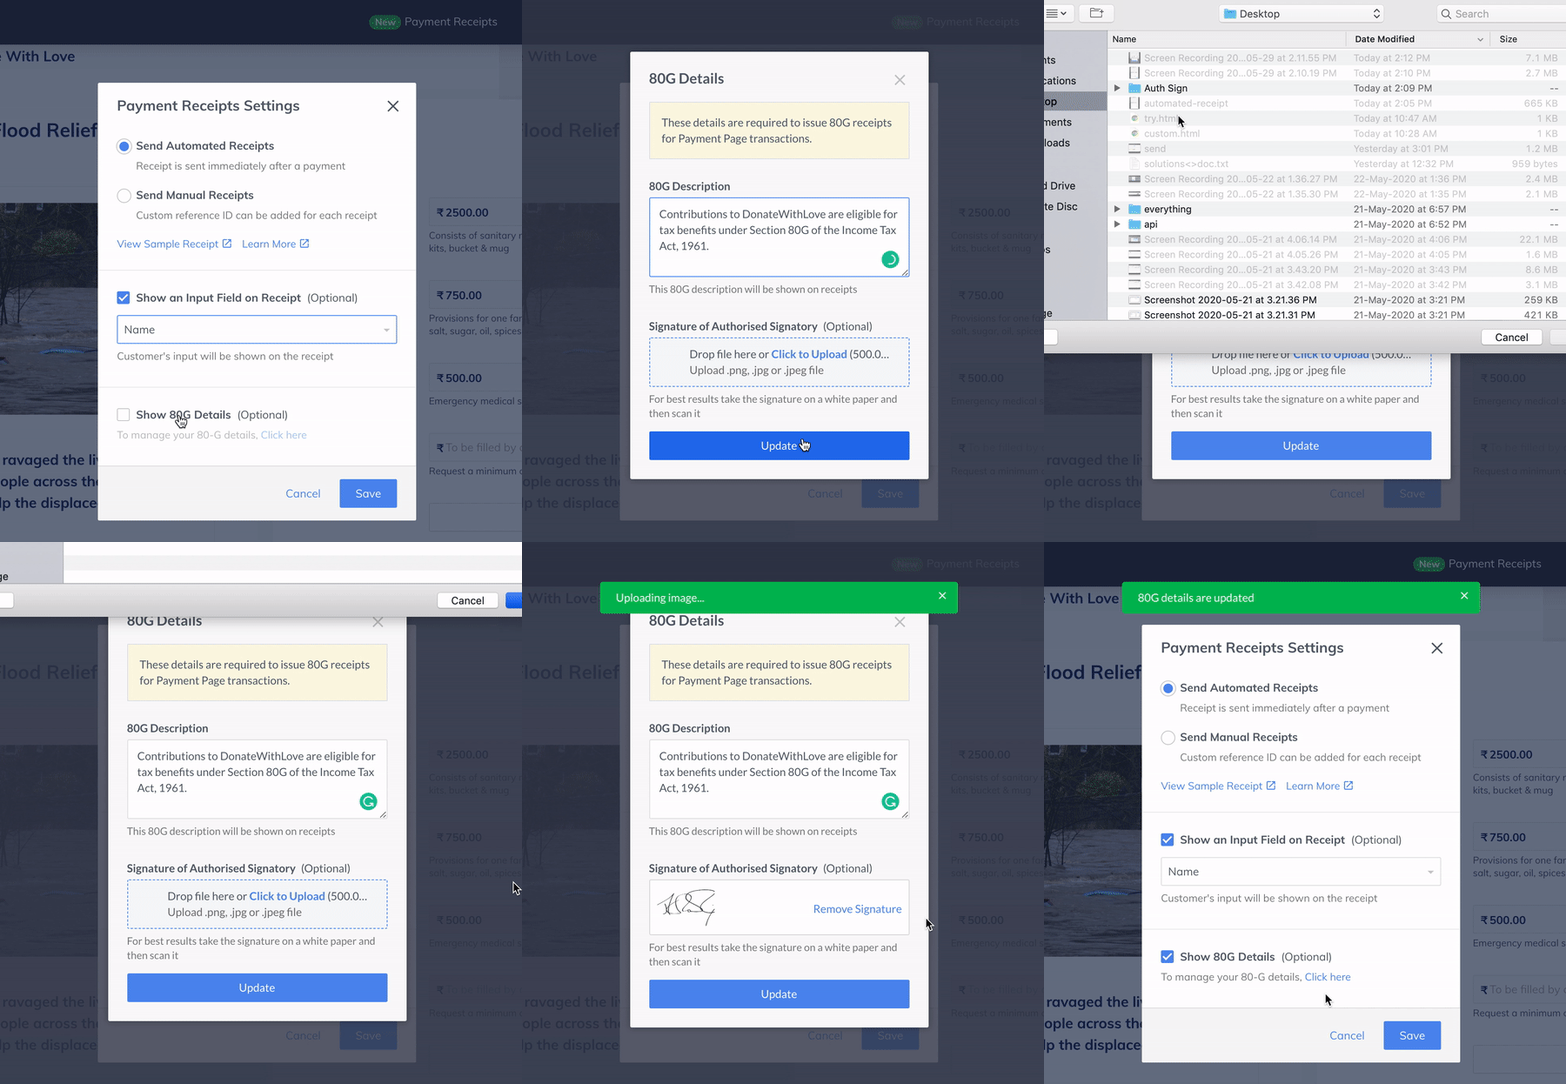
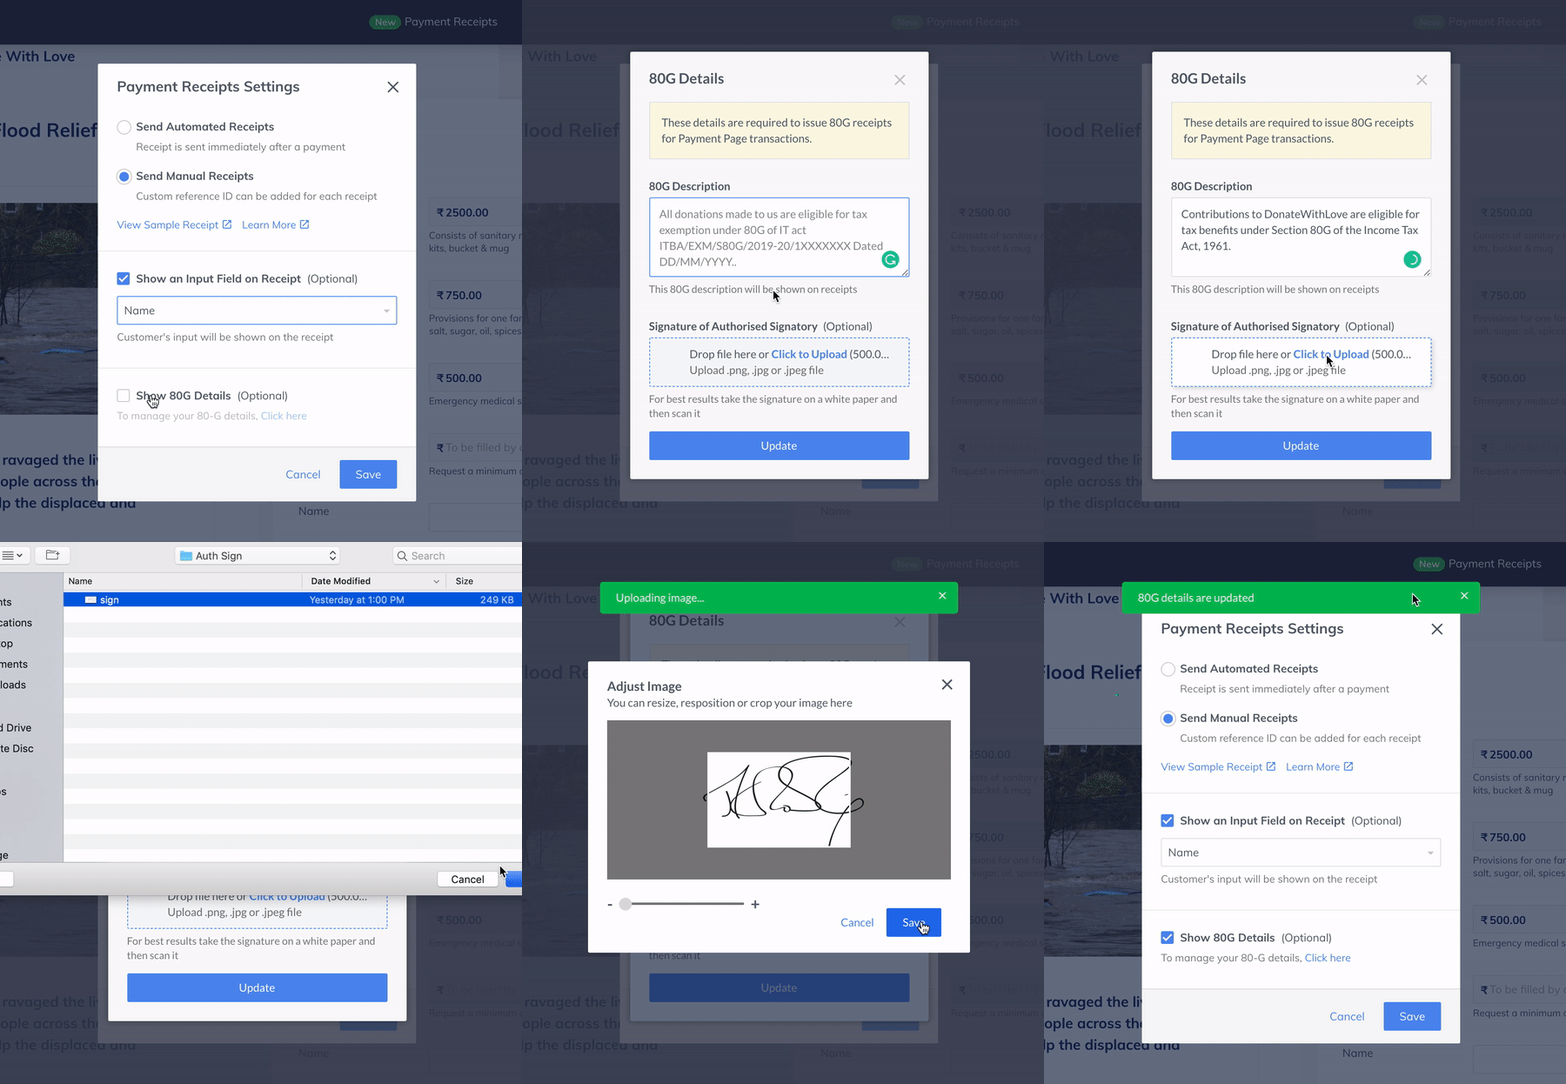
- To issue receipts with 80G details, enable the Show 80G Details option.
- Use the Click here link to add relevant 80-G text to be displayed in the payment receipt. This opens the Manage 80-G pop-up page where you can add a description and upload the signature of the authorised signatory.
- Enter the description. For example:
Donation eligible for exemption under 80-G under IT Act 1861 .. with ID DIT(E)/2009-2010/W-110/15XX dated 24.09.2009 - Upload an image of the Signature of Authorized Signatory field and click Save.
- Enter the description. For example:
- Click Save.


Resend and Download Payment Receipt
Resend and Download Payment Receipt
To resend the receipt to a customer:
- Navigate to the page’s Transactions Details screen. All the payments made using the Payment Page are listed here.
- Click on the Payment id to view the payment details.
- In the Payment Receipt field, click the Send button. This will resend the receipt to the customer.
Email Notification to Customers
Email Notification to Customers
After your customers complete the payment using the Payment Page, the payment receipt is sent to them via email as a PDF attachment. The details entered by the customer on the Payment Page appear on the email body as shown below: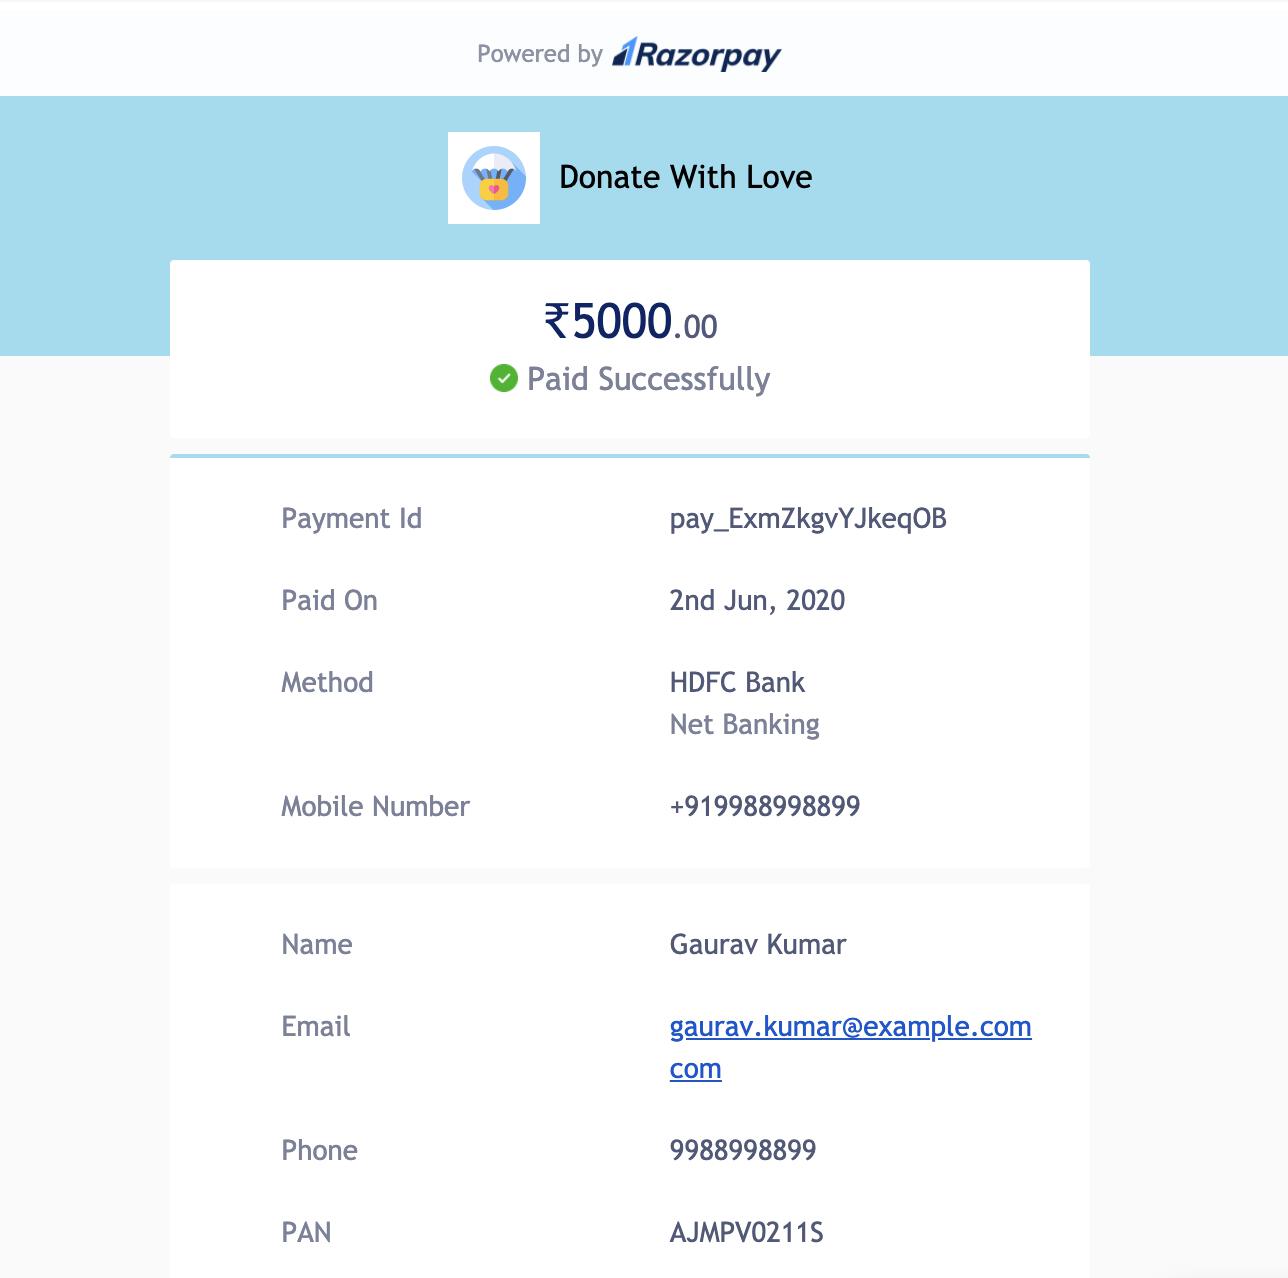
PDF Receipt to Customers
PDF Receipt to Customers
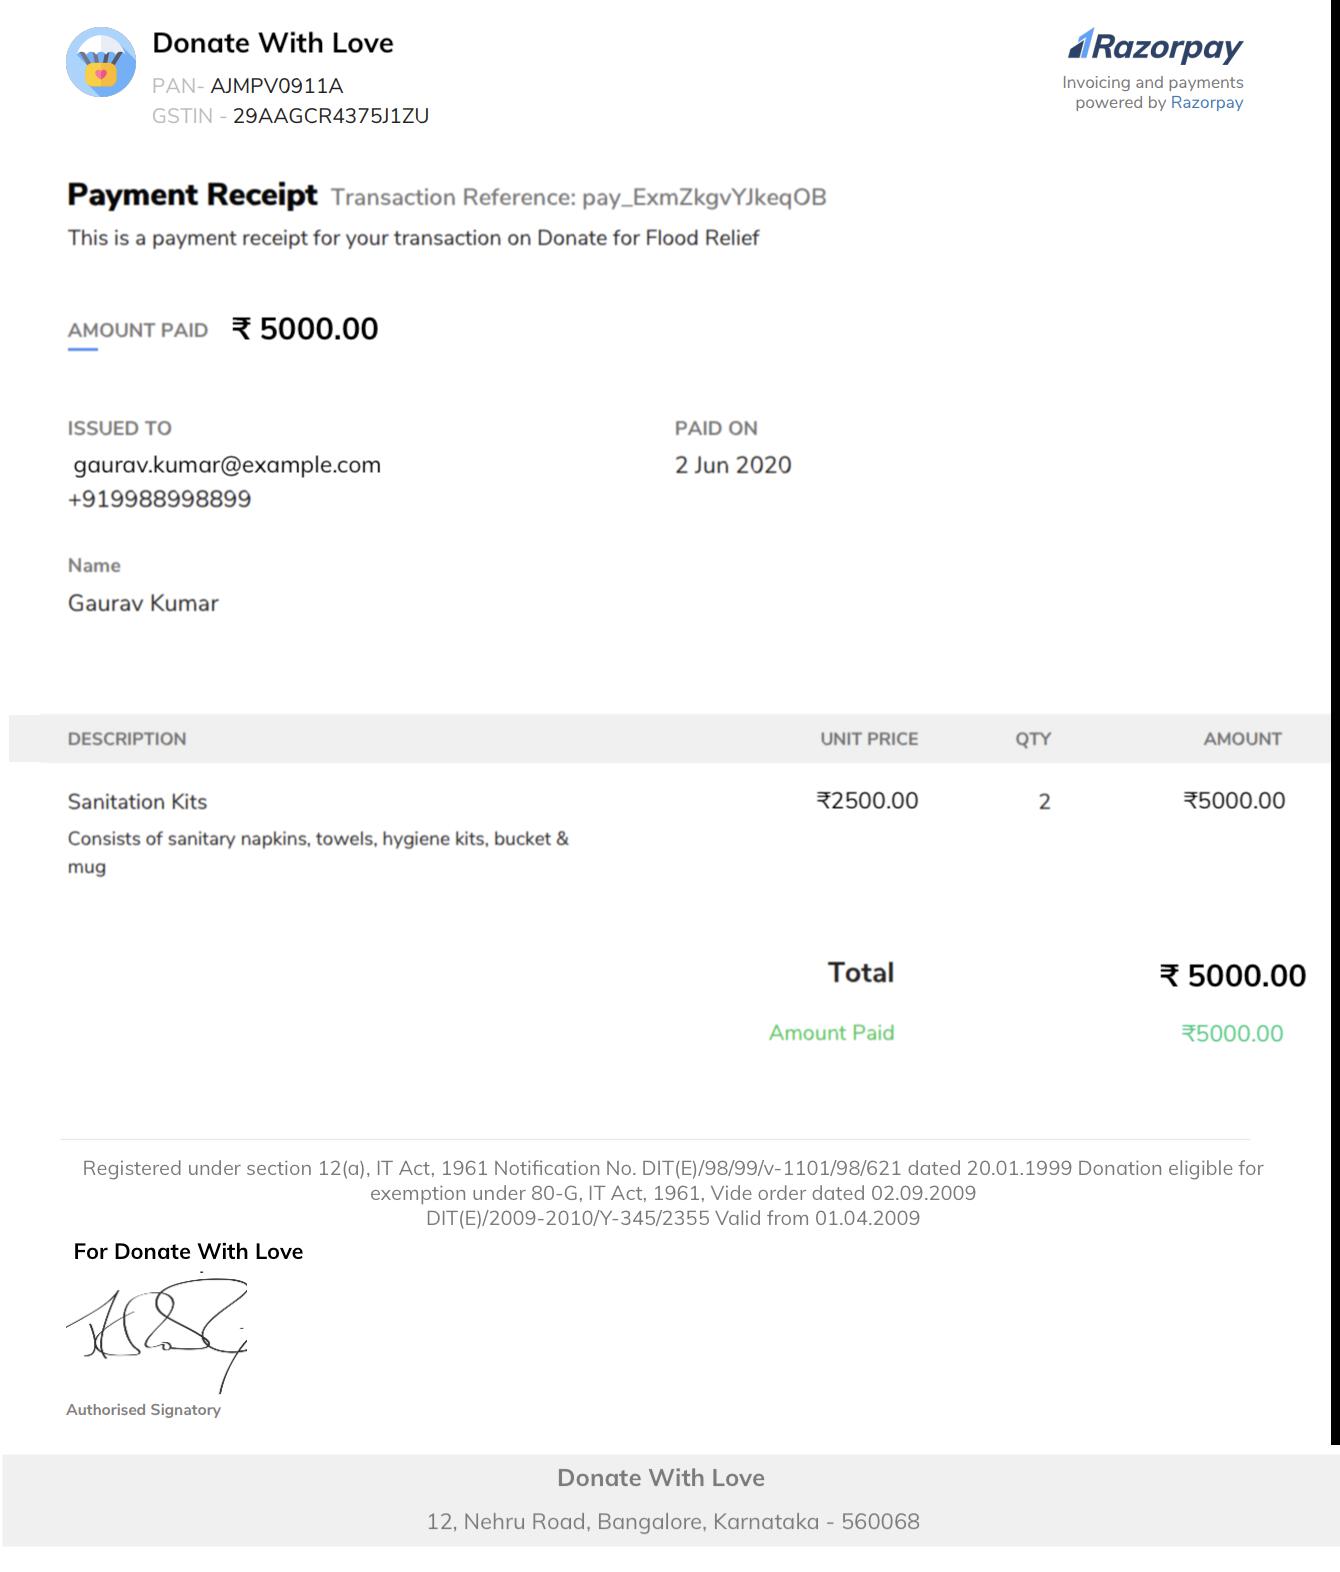
Here is a sample PDF of the payment receipt.