

Available in🇮🇳 India
Multi Branch management enables you to set up multiple branches of your business under one RazorpayX account so that you can seamlessly manage:
- Initiation of POs, GRNs and invoices for various branches.
- Payment of invoices issued to respective branches.
- Syncing respective branch related GST details to your accounting tool.
Handy Tips
- You can configure the respective branches to have the same or different GSTINs.
- It is mandatory to create at least one branch if the multi branch management functionality is enabled for your RazorpayX account.
Create New Branch
You can create multiple branches and manage them from your RazorpayX account. To create a branch:- Log in to the RazorpayX Dashboard.
- Navigate to the profile icon → My Accounts & Settings → Branches.
- Click + New Branch.
- Enter the details and click Save.
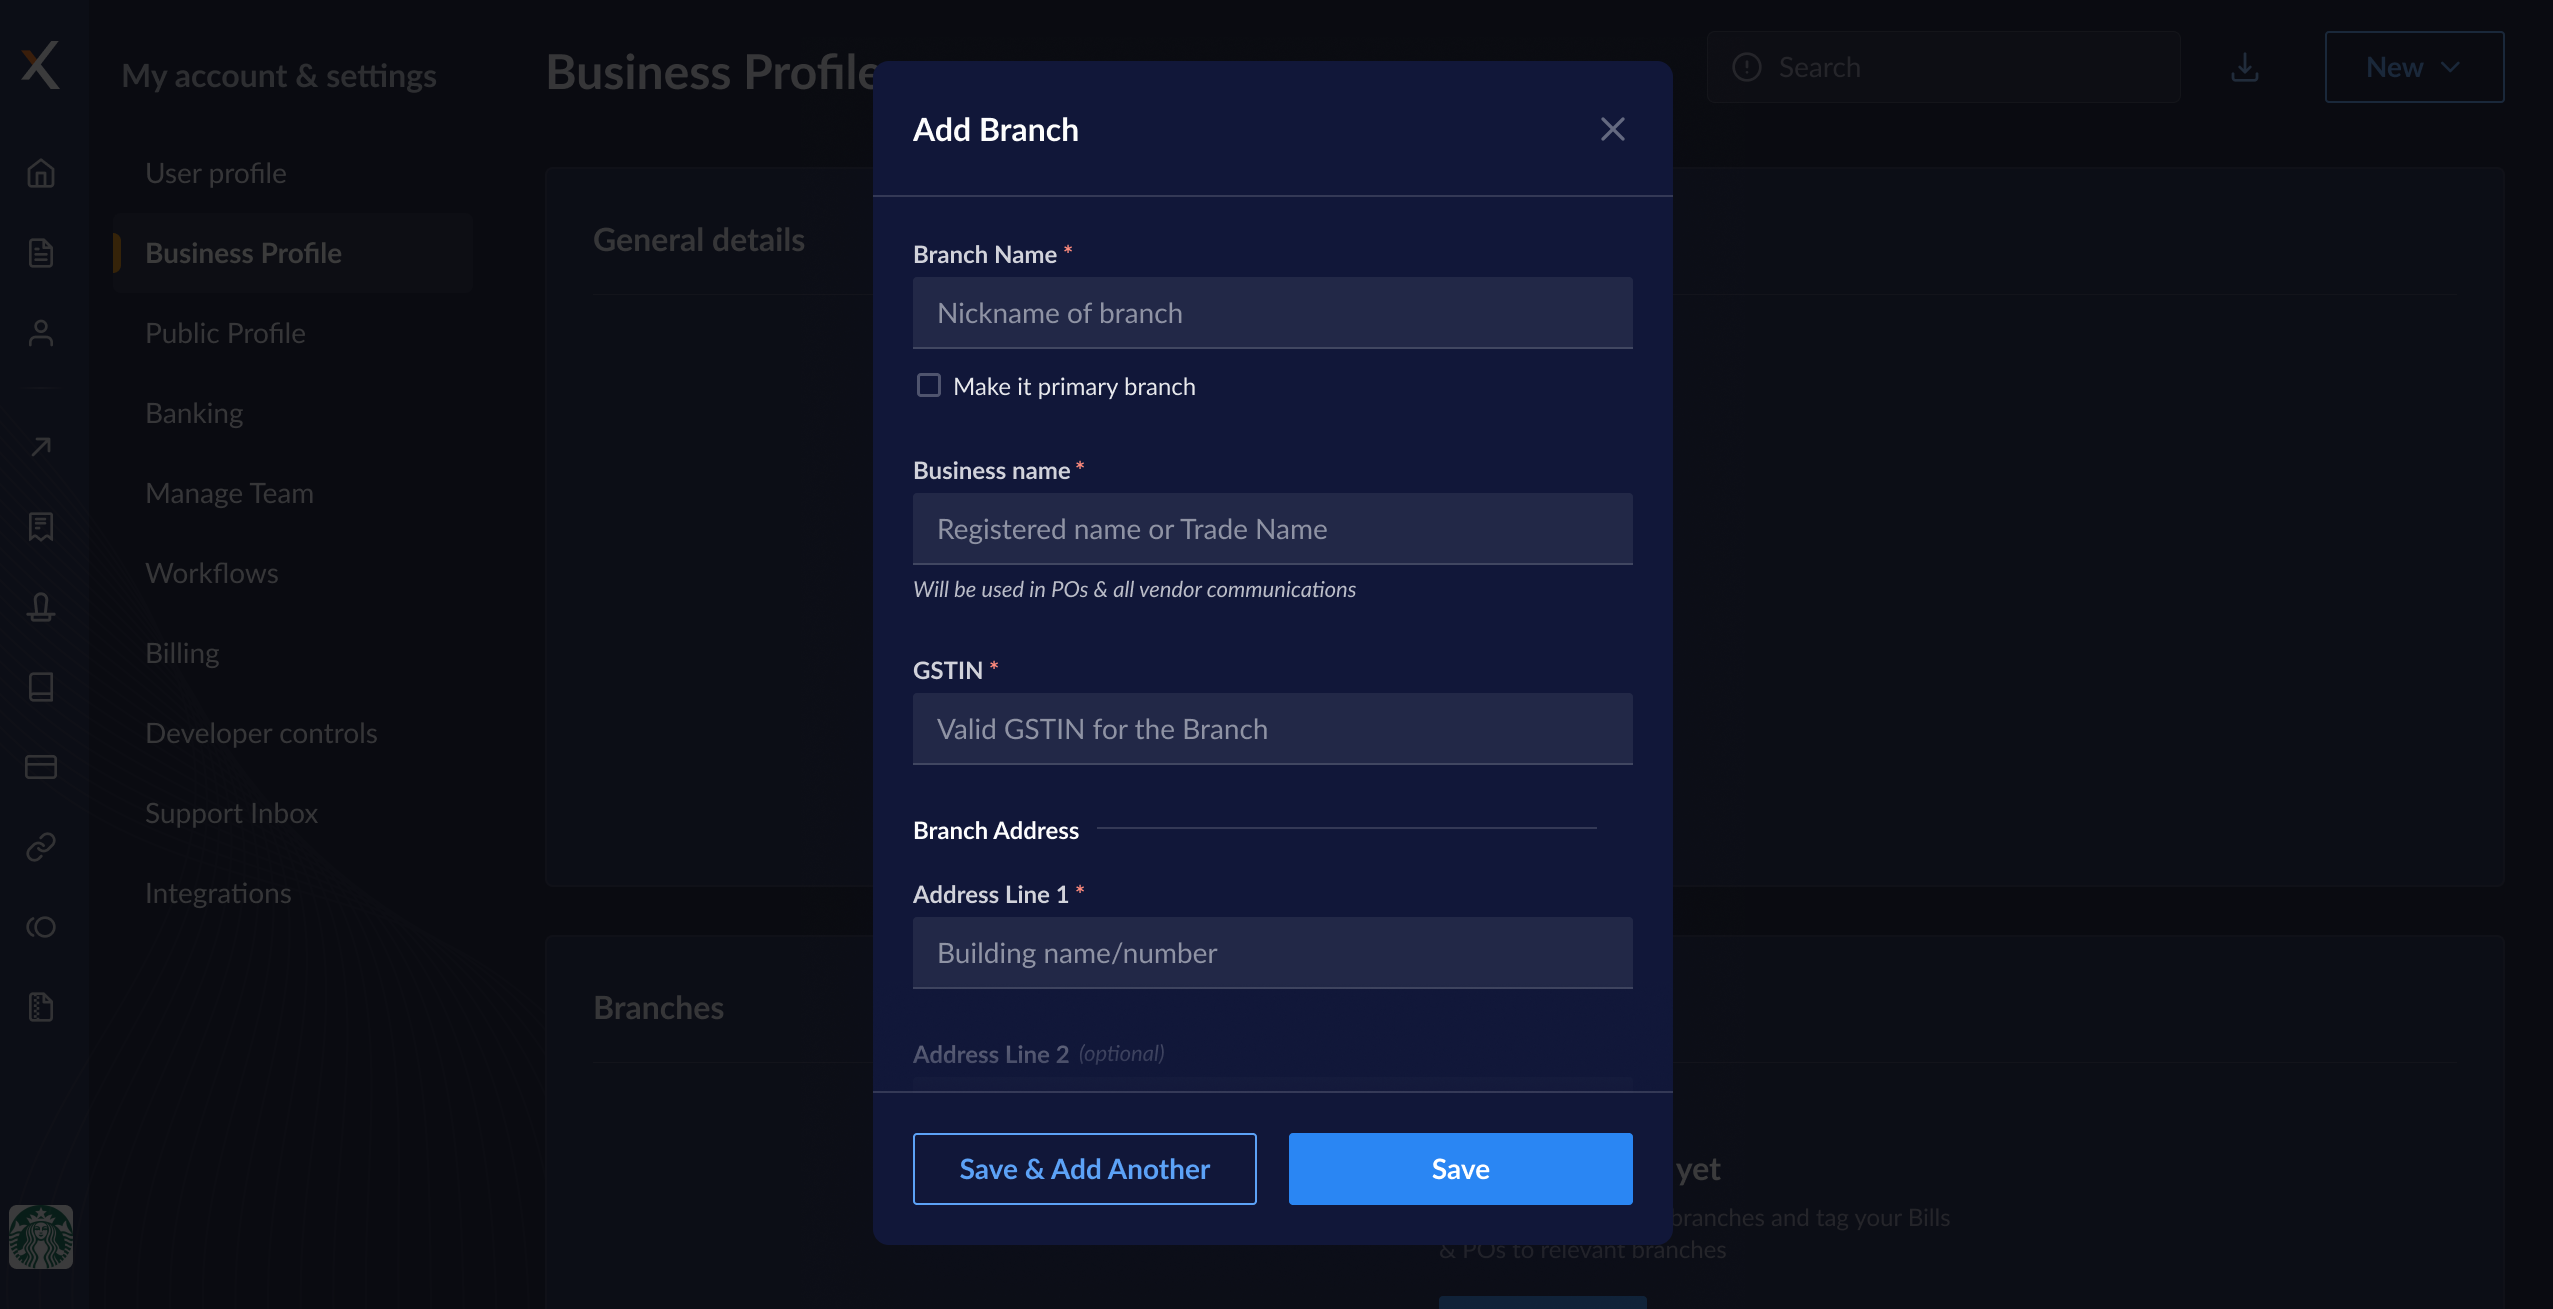
- You can mark any one of your branches as the primary branch, if a majority of your invoices and POs are billed to that branch. This will automatically add the billing address on your POs and invoices. You can change your primary branch anytime by marking any other branch as the primary branch, if required.
Edit Branch
To edit a branch:- Log in to the RazorpayX Dashboard.
- Navigate to the profile icon → My Accounts & Settings → Branches.
- Hover over the branch you want to edit, click ⋮ and Edit.
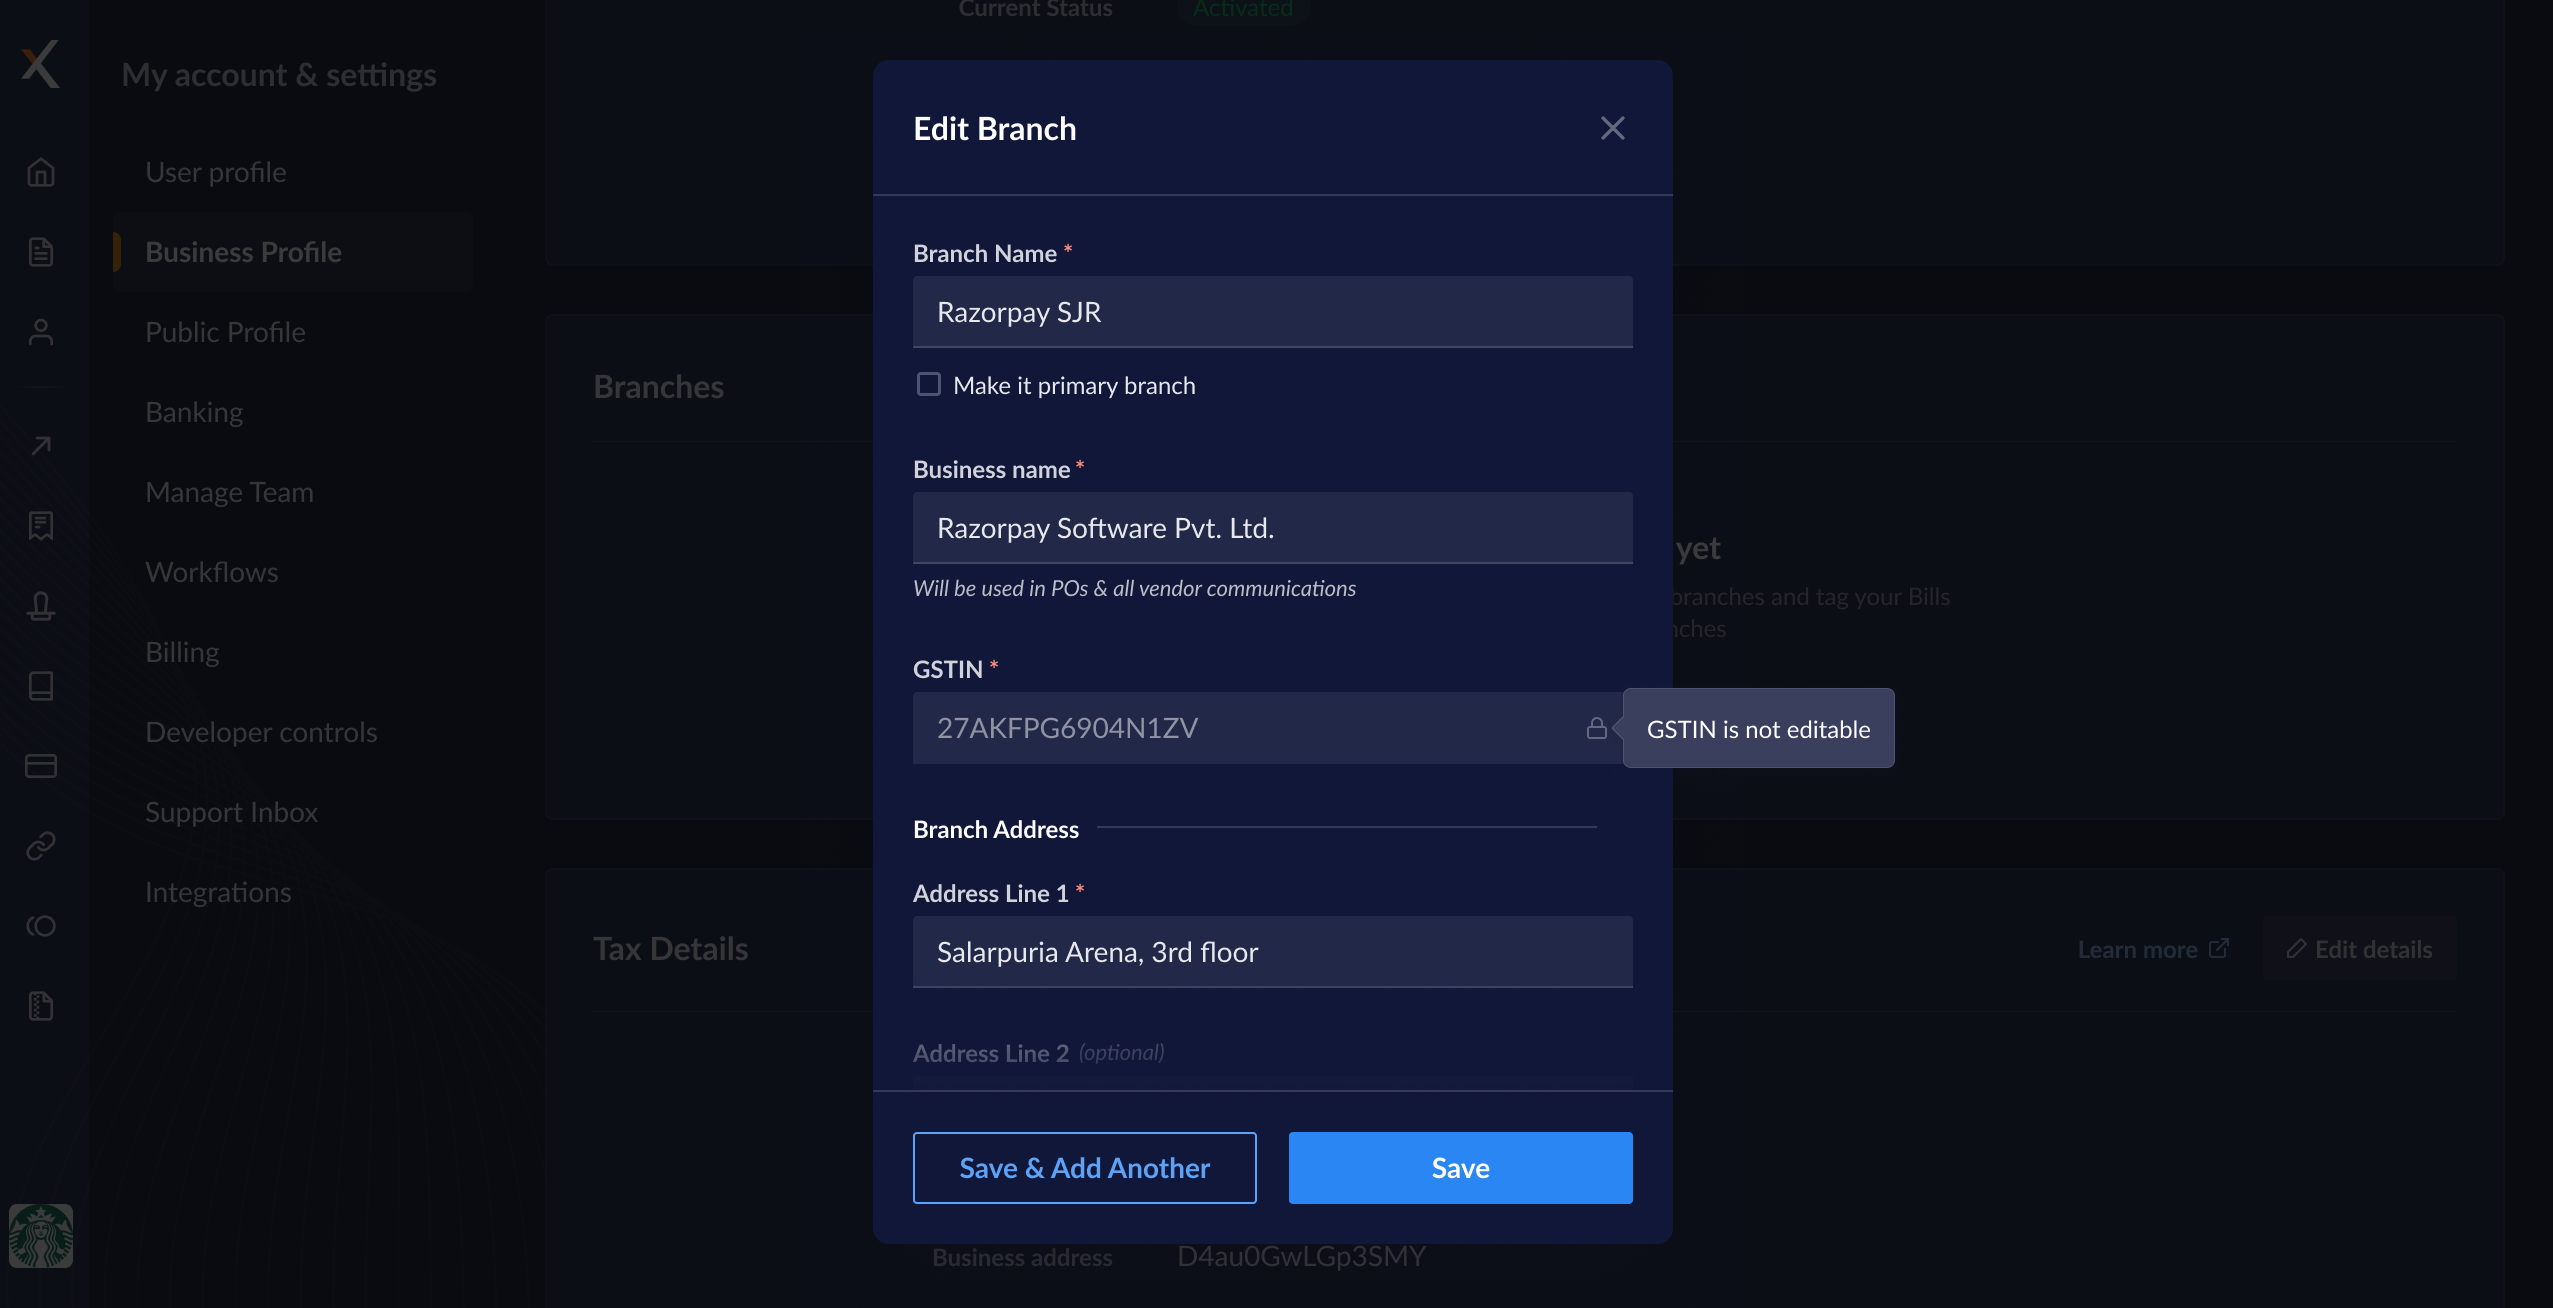
- Edit the Business Nickname, Name or Address. You cannot edit the GSTIN. Click Save.
- Click Save Changes on the pop-up window.
draft state and POs in created state are updated with the changes made to the linked branch.
Mark Branch Inactive
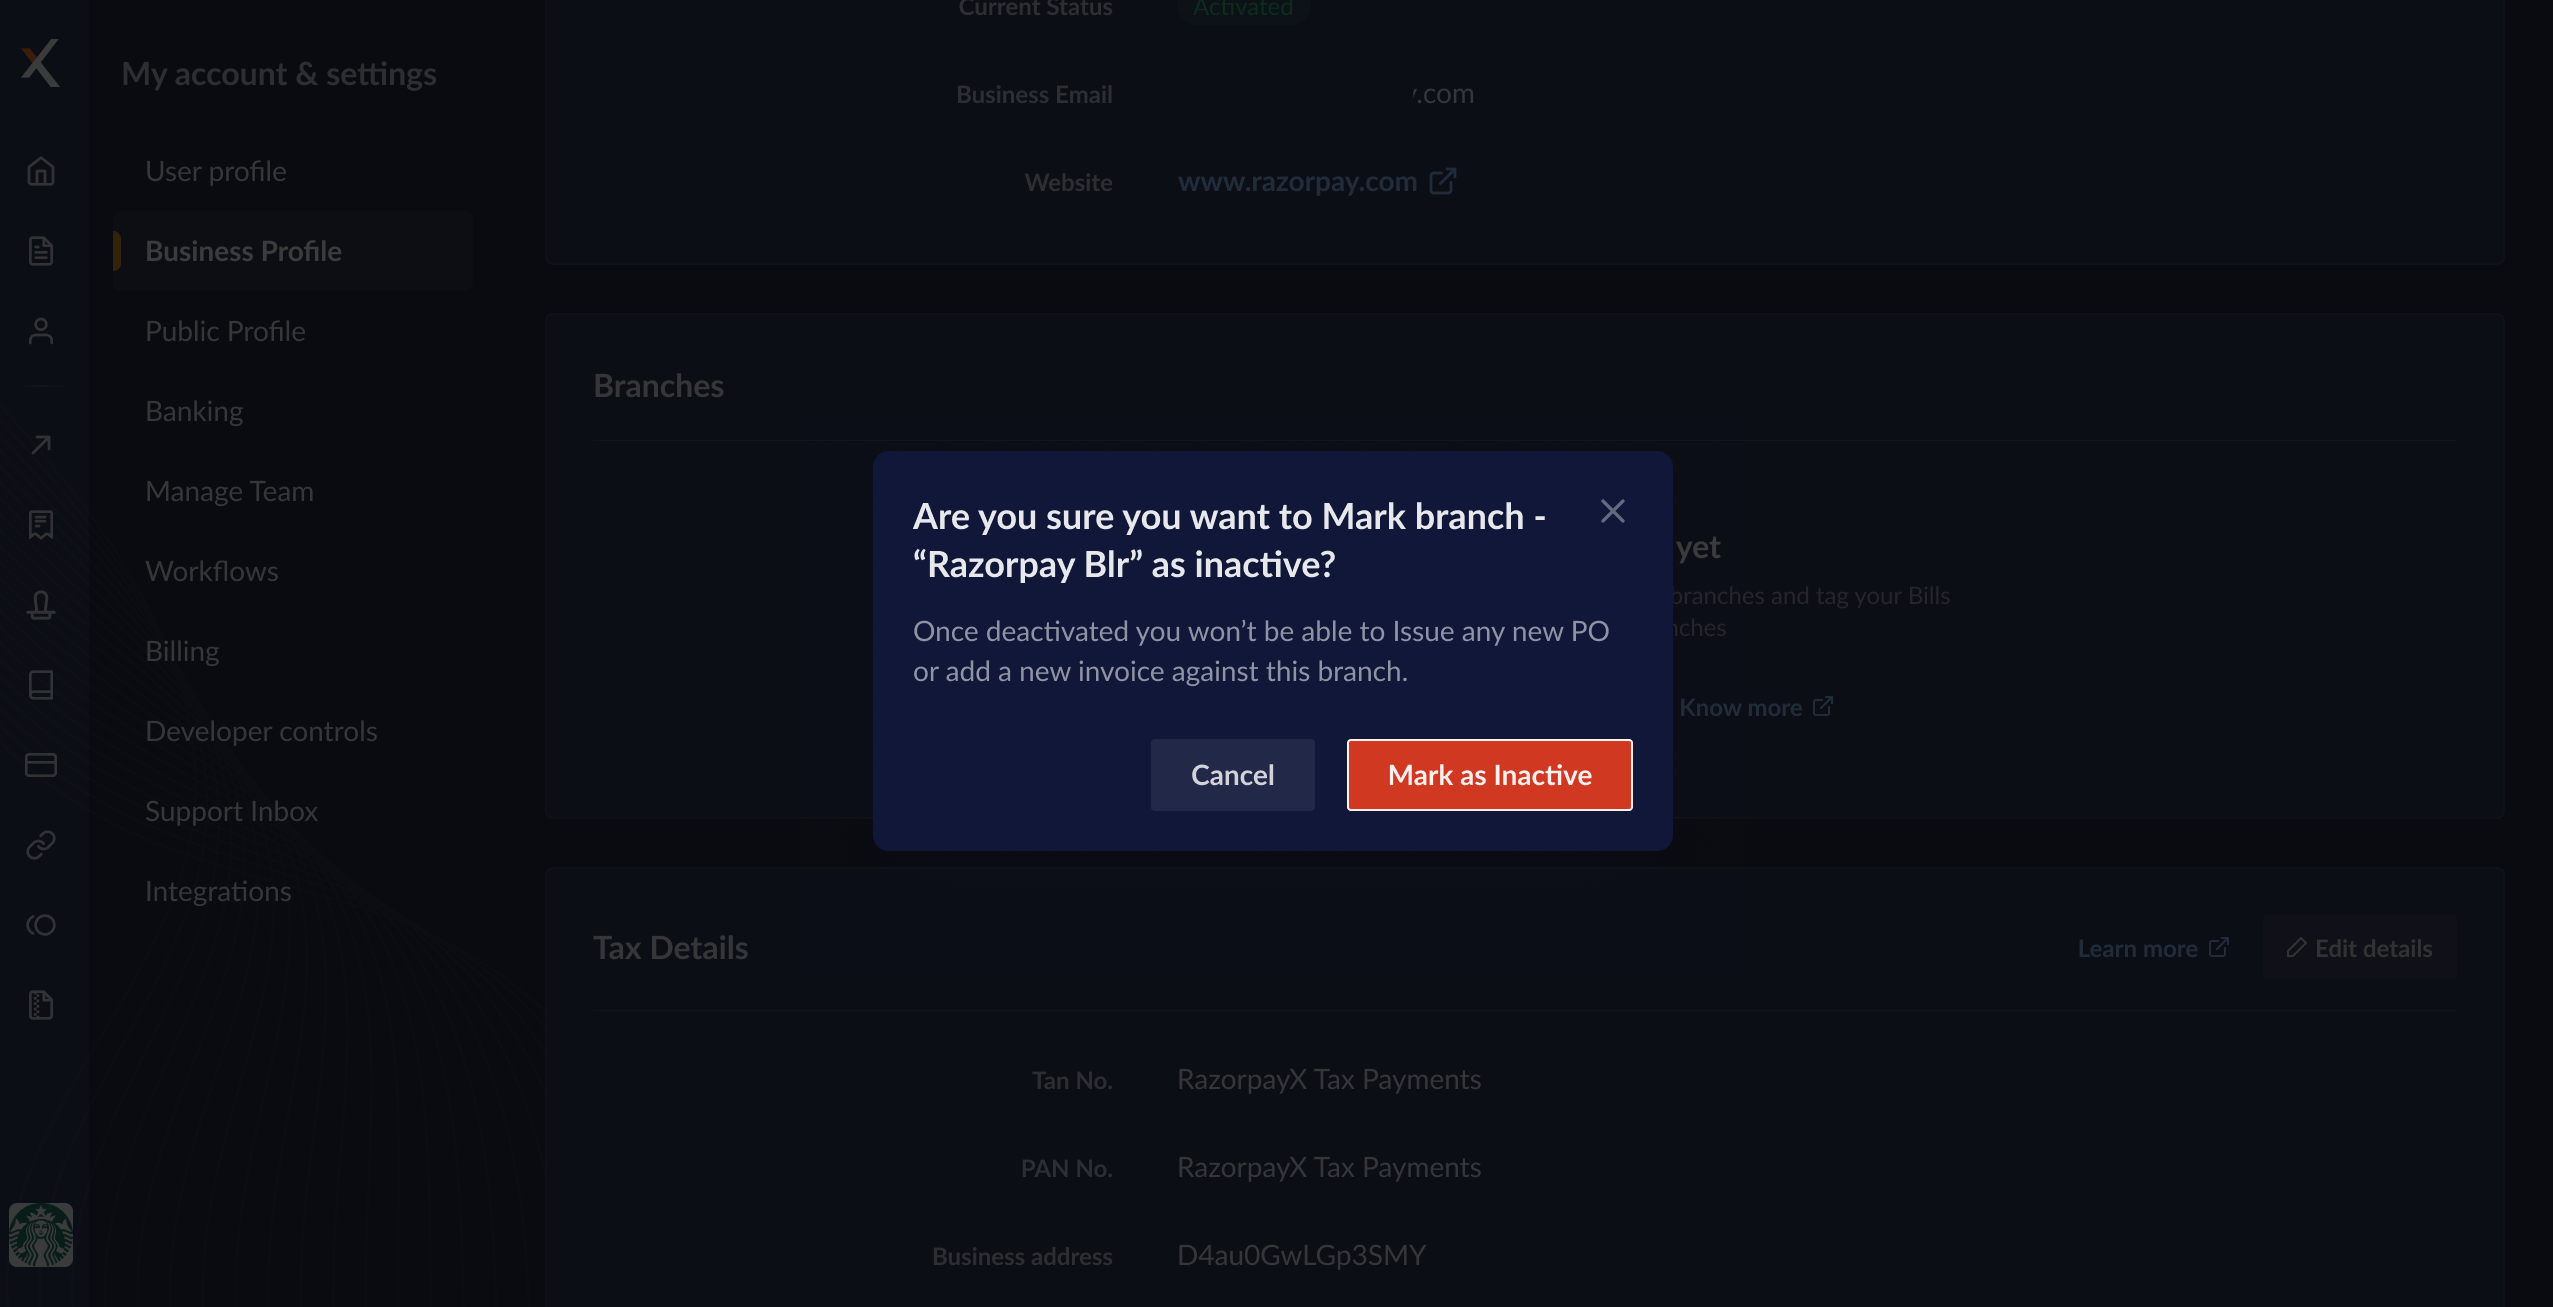
You can deactivate a branch if it is no longer required. This action is irreversible. To mark a branch inactive:- Log in to the RazorpayX Dashboard.
- Navigate to the profile icon → My Accounts & Settings → Branches.
- Hover over the branch you want to deactivate, click ⋮ and Mark as Inactive.
- Click Mark as Inactive.
Auto-fill Branch Details on Invoice or PO
You can select branches for your Invoices and POs on the Invoice Details tab and PO Details tab respectively, through the Bill to field. By default, the invoice/PO is auto-filled with the details of your primary branch. Click Change to update the Bill to field for your invoice/PO from your list of branches.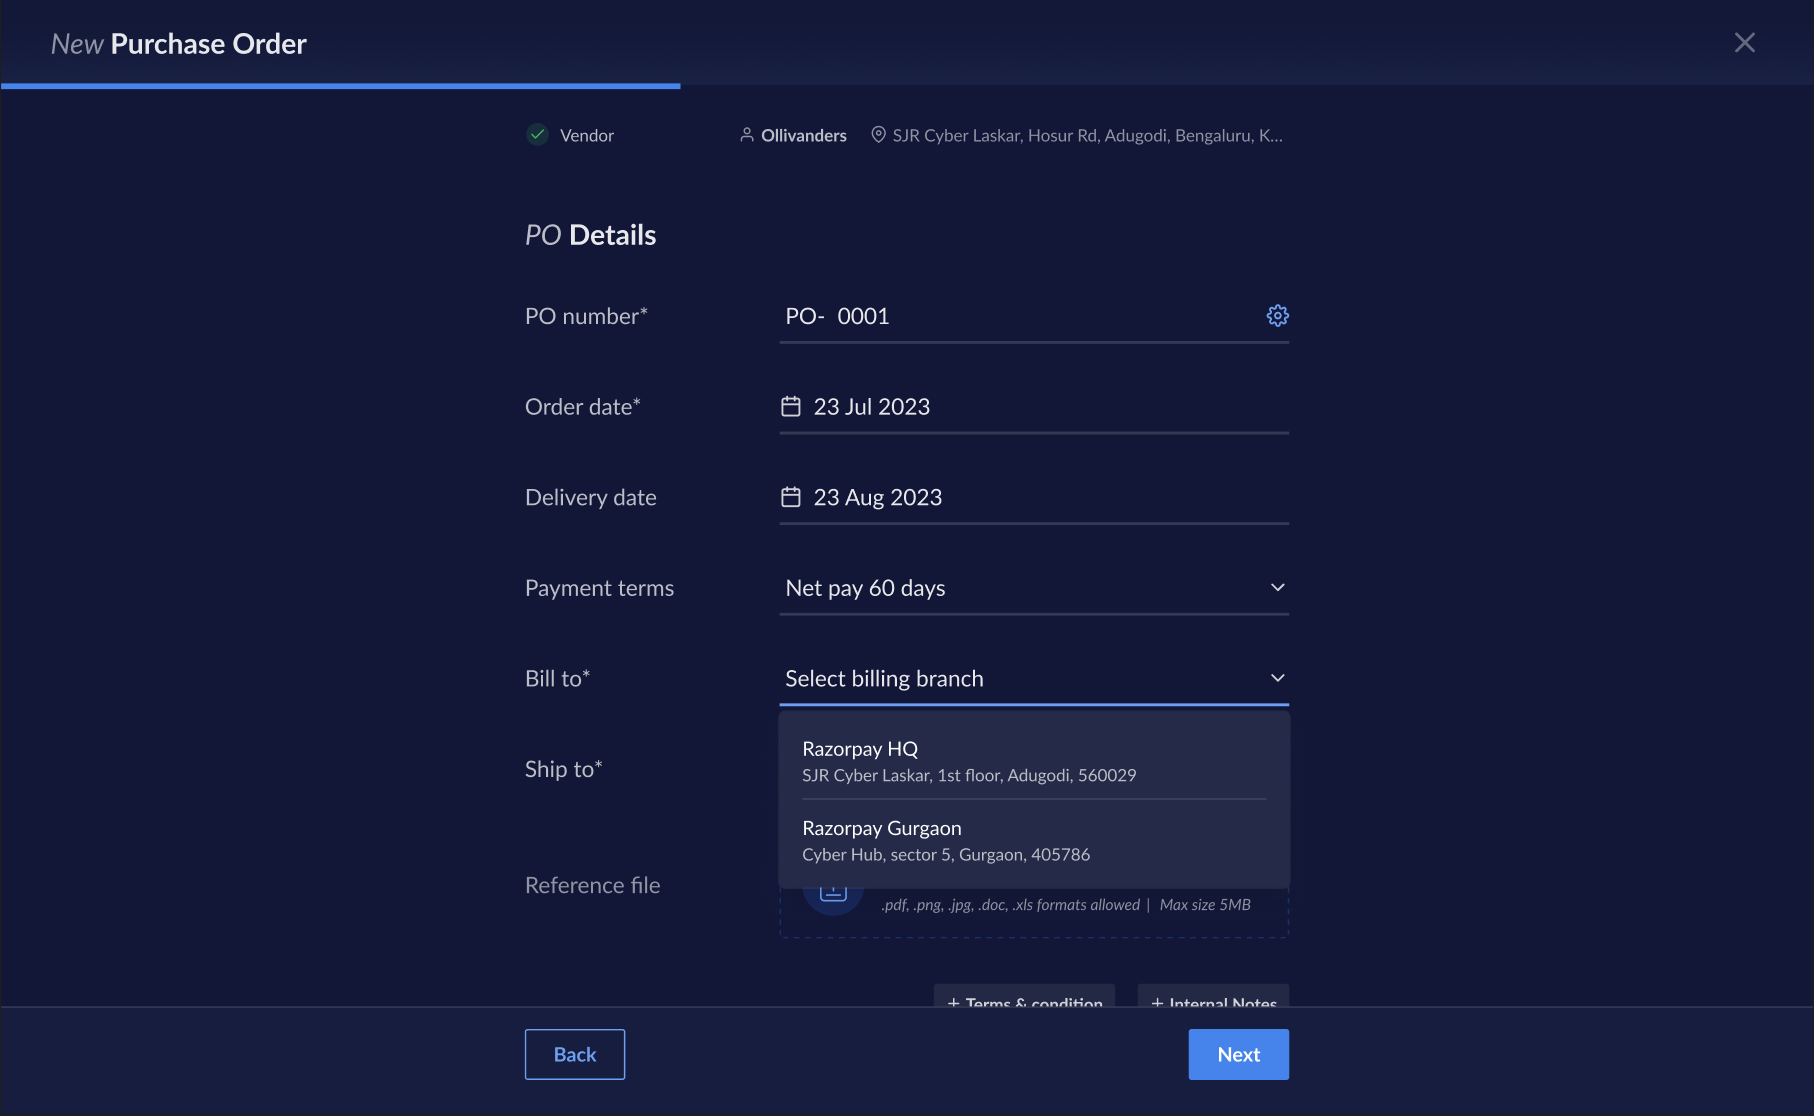
Handy TipsTo change a PO linked invoice’s branch, you must change the branch linked to the PO of that invoice. This is because invoices are linked to POs and you can only update the POs’ branch on RazorpayX.
Sync GST data to your Tally Ledgers
You can sync your respective GST data from RazorpayX to your Tally ledgers at branch level. To configure the sync:- Log in to the RazorpayX Dashboard.
- Navigate to the profile icon → My Accounts & Settings → Integrations.
- Click Edit Configuration → Mappings → GST.
- Choose the branch for which you want to configure the Tally ledger mapping.
- Select Ledger for all required GST types that you want to configure and select the ledger that you want to map.
- Click Save changes.